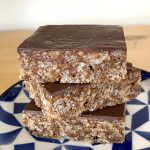
Mars Bar Rice Krispy Cakes
Mars Bars, Rice Krispies & melted chocolate come together to form one quick & easy, no-bake treat
Servings 20 slices
Equipment
- 26x21cm baking tin
- 1 wooden spoon with a flat edge (see Note 1)
Ingredients
- 8 x 39.4g Mars Bars
- 45 g golden syrup
- 75 g unsalted butter, cubed
- 150 g Rice Krispies
To decorate (optional):
- 180 g milk chocolate
Instructions
- Line the tin with baking paper and set aside.
- Chop Mars Bars into small chunks. Place in a large saucepan, along with the golden syrup and butter, over a low heat.
- Stir frequently until both Mars Bars and butter are completely melted.
- Remove from heat and, working quickly, mix in the Rice Krispies until completely combined. The mixture will be very stiff, so this stage requires a bit of elbow grease.
- Once the Rice Krispies are fully incorporated, tip the mixture into the lined tin. Using a metal spoon, press the mixture firmly into the tin (see Note 2 for tips). Set aside while you prepare the chocolate for decoration, if using.
To decorate:
- Melt the chocolate (see Note 3).
- Once melted, pour the chocolate on top of the Rice Krispy layer and spread out to form an even layer. Leave the Rice Krispy cakes at room temperature to for about 40 minutes, they will be ready when the chocolate has set completely (though they will still need this time to cool down and firm up even if you do not use the chocolate decoration).
- Once set, remove from the tin and use a large knife to cut into rectangles. The bars can be served immediately, or they can be kept in airtight container for about a week.
Notes
- A flat-edged wooden spoon is essential for this recipe. You'll need it to ensure you can scrape all of the Mars Bar mixture off the bottom of the pan when mixing in the Rice Krispies. Once the Rice Krispies are in, the mixture becomes very stiff and a rubber spatula will be too weak to handle it, so you'll want to stick to a stronger, wooden utensil.
- You need to press the mixture into the tin very firmly at this stage. If you don't, the bars will be difficult to cut neatly, will be more prone to falling apart/crumbling and the chocolate decoration will sink into the gaps and look a bit messy. Use a metal spoon and spread the mixture into an even layer, then press very firmly, placing your index finger on the head of the spoon for extra control/pressure, all over. Once the mixture is relatively packed in, still pressing on the spoon head, rub the utensil back and forth over the surface to really press the mixture together. This will make such a huge difference!
- For this recipe, you do not need to temper the chocolate- just melt it. I prefer melting chocolate in the microwave. Place it in a heatproof bowl and microwave on low power in 1 minute bursts, stirring between each burst, until completely melted.