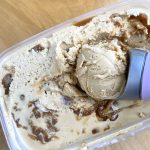
Salted Caramel Ice Cream
A homemade ice cream, featuring the perfect combination of sweet (but not too sweet!) & salty- ideal for summer sundaes or served alongside warm winter desserts.
Servings 8 big scoops
Equipment
- ice cream maker
Ingredients
For the salted caramel sauce:
- 90 g golden caster sugar (see Note 1)
- 35 g unsalted butter
- 60 ml double cream
- 1/4 tsp flaky sea salt
For the ice cream:
- 240 ml double cream
- 300 ml milk
- 50 g caster sugar
- 3 egg yolks
Instructions
- The day before you want to churn your ice cream, place the bowl of your ice cream maker into the freezer.
For the salted caramel sauce:
- Put the sugar into a large, heavy-bottomed saucepan. Cook over medium heat, swirling the pan every now and then, until sugar has just melted and is a deep, golden colour (see Note 1).
- Remove the saucepan from the heat and add the butter. Whisk vigorously until butter is melted and fully incorporated, then return to the heat.
- Add cream to the pan in a slow, steady stream, while whisking constantly. Once all cream is incorporated, stop whisking and allow to bubble, undisturbed, for 1 minute.
- Remove caramel sauce from the heat and stir in the salt. Allow caramel to cool slightly, then transfer 2 tbsp of the sauce to a heatproof container, cover and place in the fridge for later. Keep rest to use in ice cream base.
For the ice cream:
- Place the double cream, milk and remaining caramel sauce into a medium saucepan. Place over low heat, stirring frequently, until caramel has melted into milk/cream and the whole mixture reaches just below a boil.
- While the cream mixture is heating, place the sugar and egg yolks into a large, heatproof bowl. Using an electric whisk, beat until the mixture is thick, pale and fluffy (the 'ribbon' stage).
- When the cream mixture has reached just below a boil, with the mixer on, add it in a steady stream to the egg mixture. Mix until incorporated, then pour through a heatproof, fine mesh sieve back into the saucepan.
- Return the saucepan to a medium-low heat. Stir the custard with a heatproof spatula as it heats up, until it becomes thick and glossy- about 8-10 minutes. Pour the custard into a heatproof container, cover the surface with clingfilm and allow to cool to room temperature before placing into the fridge to chill for at least 3 hours, preferably overnight.
- When the custard is thoroughly cold, churn it according to your ice cream maker's instructions. Using the KitchenAid attachment, this takes around 15-20 minutes.
- While the ice cream is churning, gently heat the reserved caramel sauce. I did this in the microwave (about 1 minute on the lowest setting), but you can do it in a saucepan if you prefer. Stir the sauce well to ensure it is smooth and evenly melted.
- When your ice cream has finished churning, transfer it to a freezer-proof container. Smooth out the ice cream, then drizzle the warmed caramel sauce evenly over the top. Place into the freezer to firm up for at least 3 hours before consuming. The ice cream will keep in the freezer for 3 months.
Notes
- The type of caster sugar you use will make a difference! I find that golden caster sugar gives the caramel a lovely, deep flavour, but you have to be more careful with it- it will turn golden much quicker, so take it off the heat and add the butter as soon as all the sugar has melted. If you're using white caster sugar, you'll have a little bit more leeway and more control over the colour of your caramel- it will require a bit more time over the heat after it has melted to turn a deep, golden colour.