

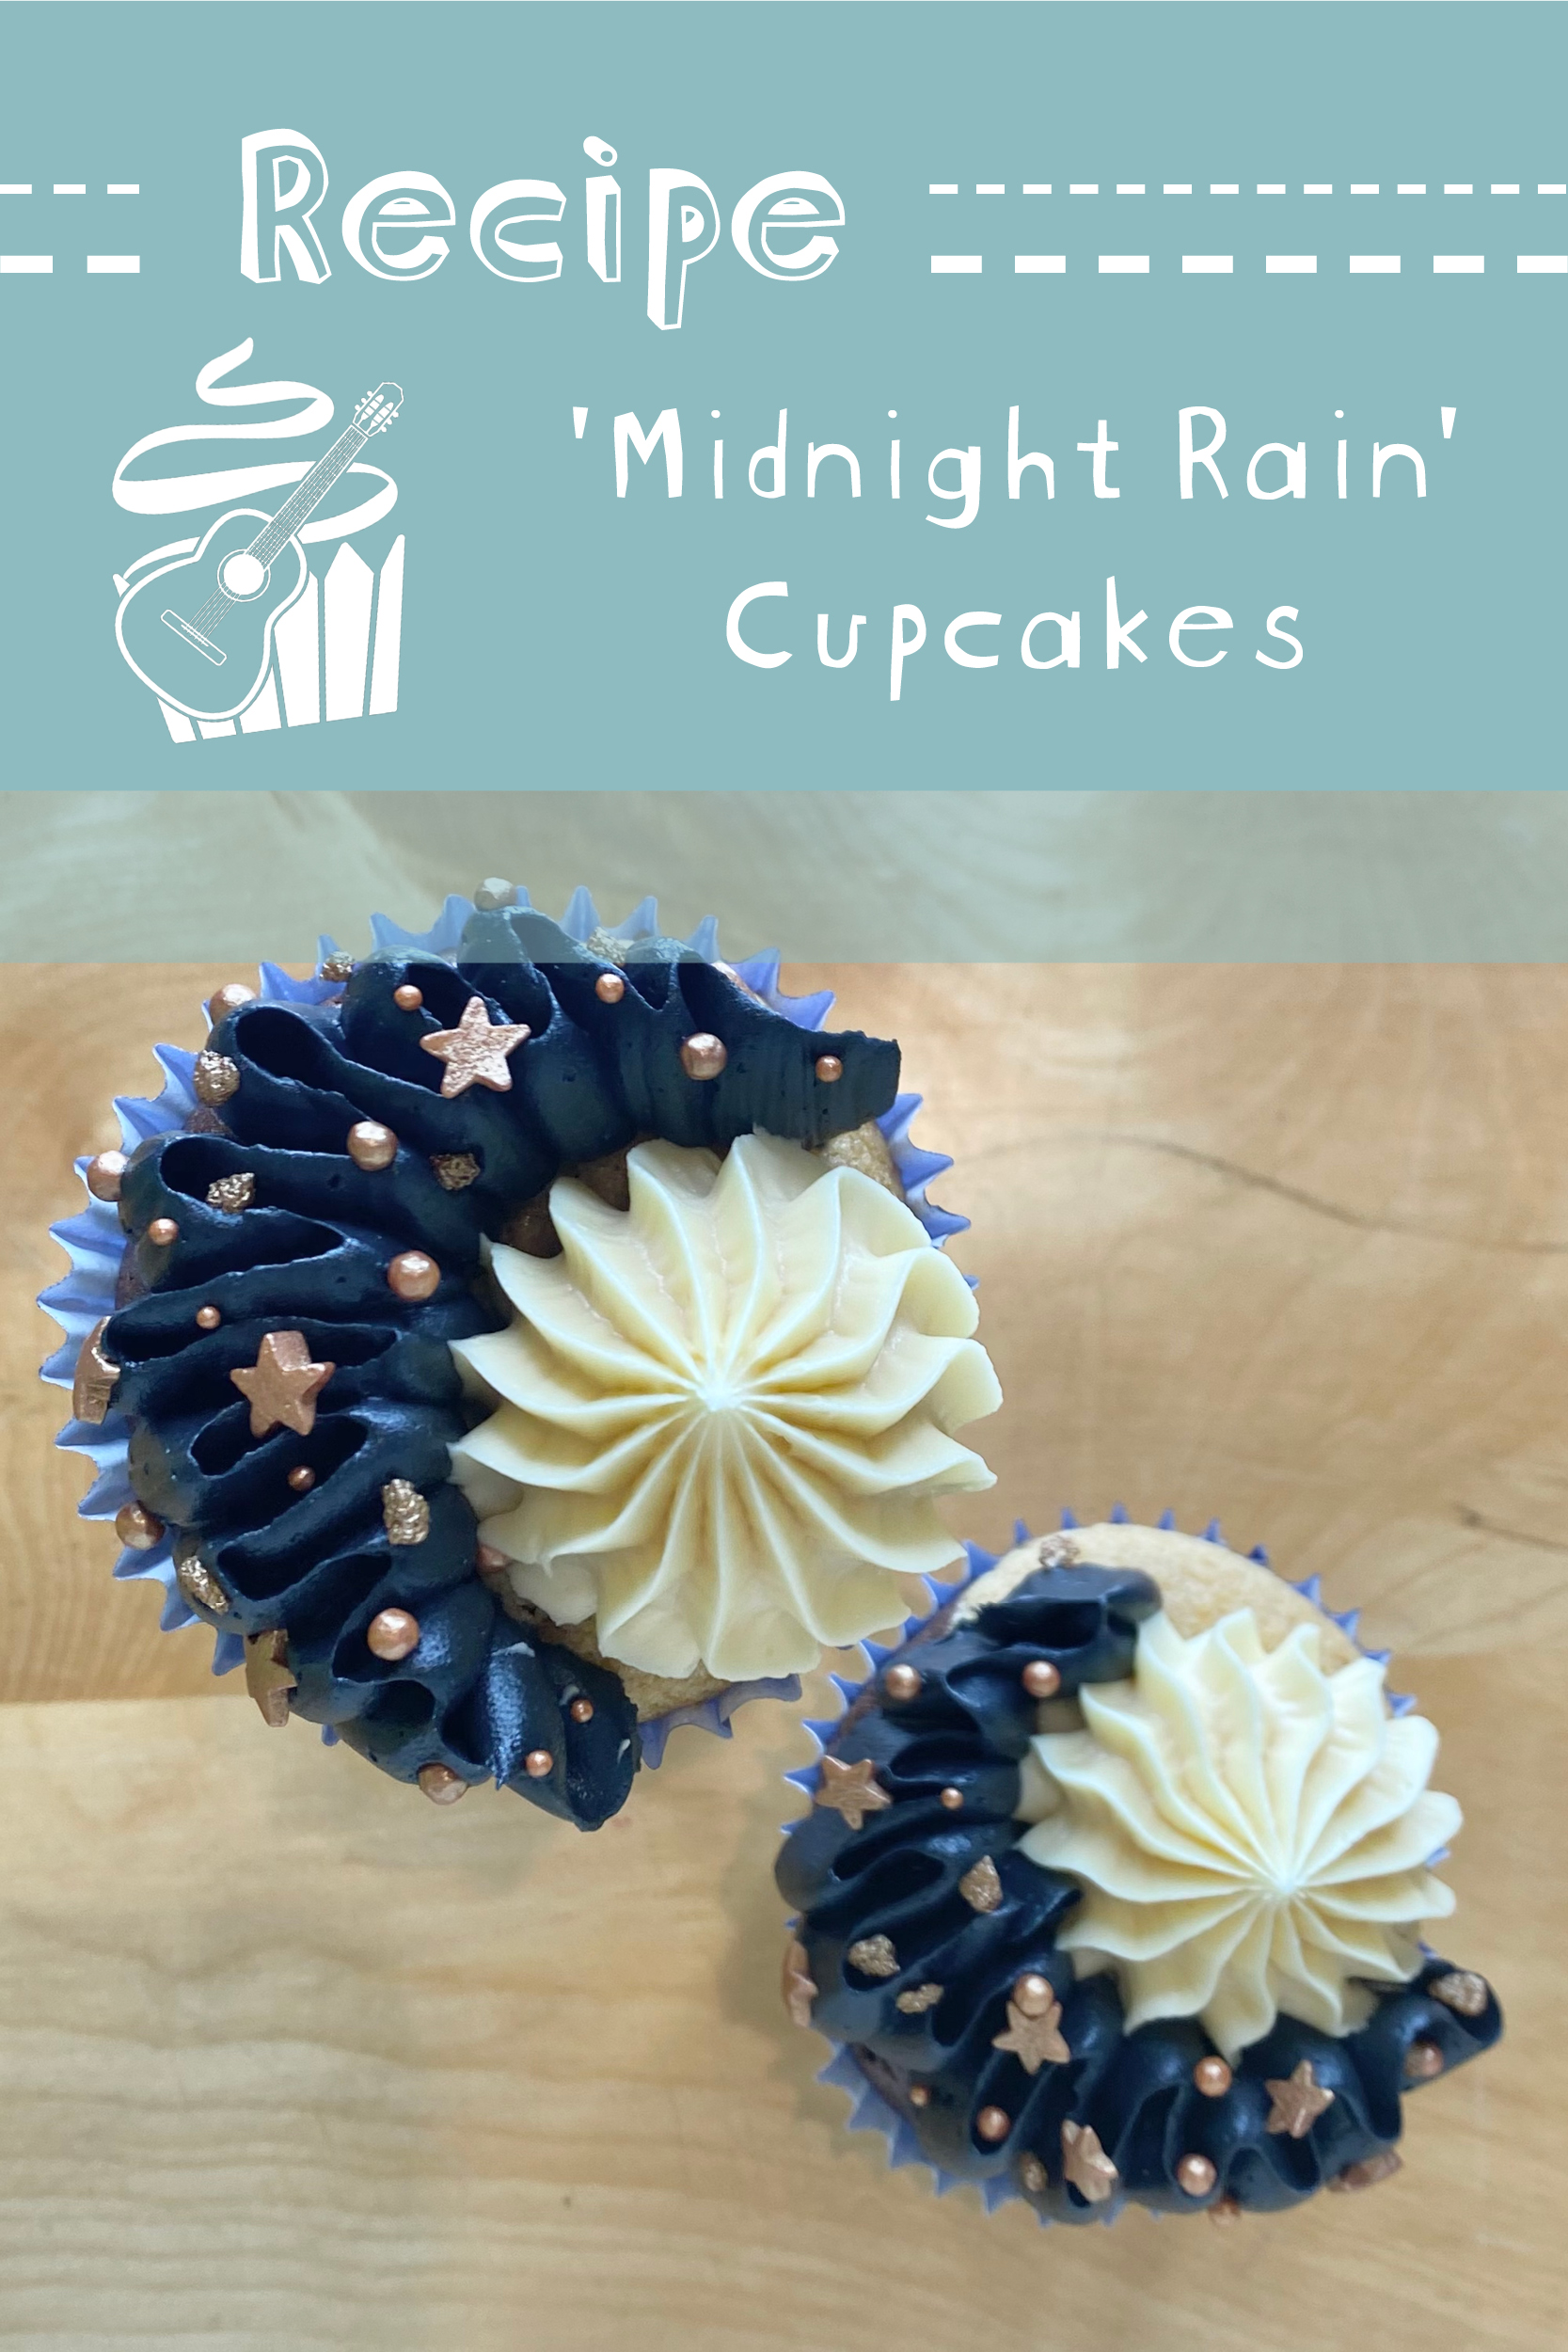
After a little hiatus, I’m back with another instalment of my Taylor Swift Cupcakes series, where I am baking my way through the album Midnights and creating a cupcake for each song! We’ve already tackled the first 5 tracks on the album (you can find those posts here), so today’s post is all about Track 6: Midnight Rain. This one took a lot of figuring out/developing, but I’m so excited to share the finished product with you!
Table of Contents
- The Midnight Rain Cupcake: Explained
- Making the Mud Cupcakes
- Caramelised White Chocolate
- Chocolate Peppermint Buttercream
- Making the Peppermint Buttercream Base
- Dividing the Buttercream
- Decorating the Cupcakes
- Recipe
The Midnight Rain Cupcake: Explained
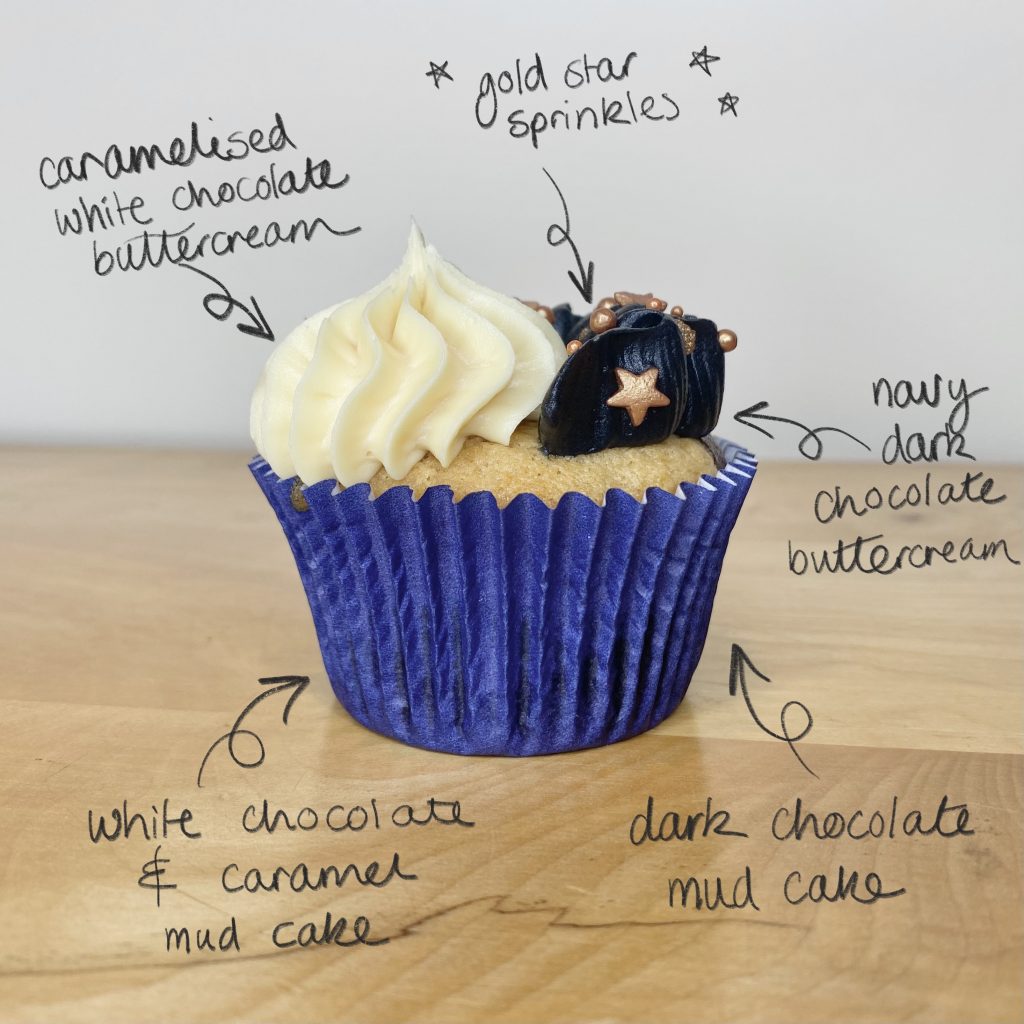
The Midnight Rain Cupcake is comprised of 5 main elements:
- Chocolate mud cake
- White chocolate and caramel mud cake
- Dark chocolate and peppermint buttercream
- Caramelised white chocolate and peppermint buttercream
- Gold sprinkles
As I mentioned, developing this cupcake took me a super long time. Midnight Rain has such a specific aesthetic that I really wanted to capture in my cupcake, but just couldn’t figure out how. I tried SO many ideas, from chocolate suns/moons to two-tone icing- I even gave edible raindrops a whirl, but nothing was giving me the right vibe. After many, many attempts and redesigns and trial batches, I finally landed on a cupcake that not only tastes great, but also captures that iconic, Midnight Rain look/feel, from the decoration right down to the cakes themselves.
One of the most famous lyrics from the song is the first line of the chorus: ‘He was sunshine, I was midnight rain‘. I desperately wanted this cupcake to reflect that line and have a real sense of duality and contrast about it. The song also contains a reference to ‘peppermint candy’, so I also wanted to incorporate that flavour into the bake. My favourite peppermint-y, holiday treat is Peppermint Bark, which, by nature, includes a sharp contrast between the milk/dark (that one’s up to personal preference!) and white chocolate, so I thought it would serve as a perfect inspiration for these cupcakes.
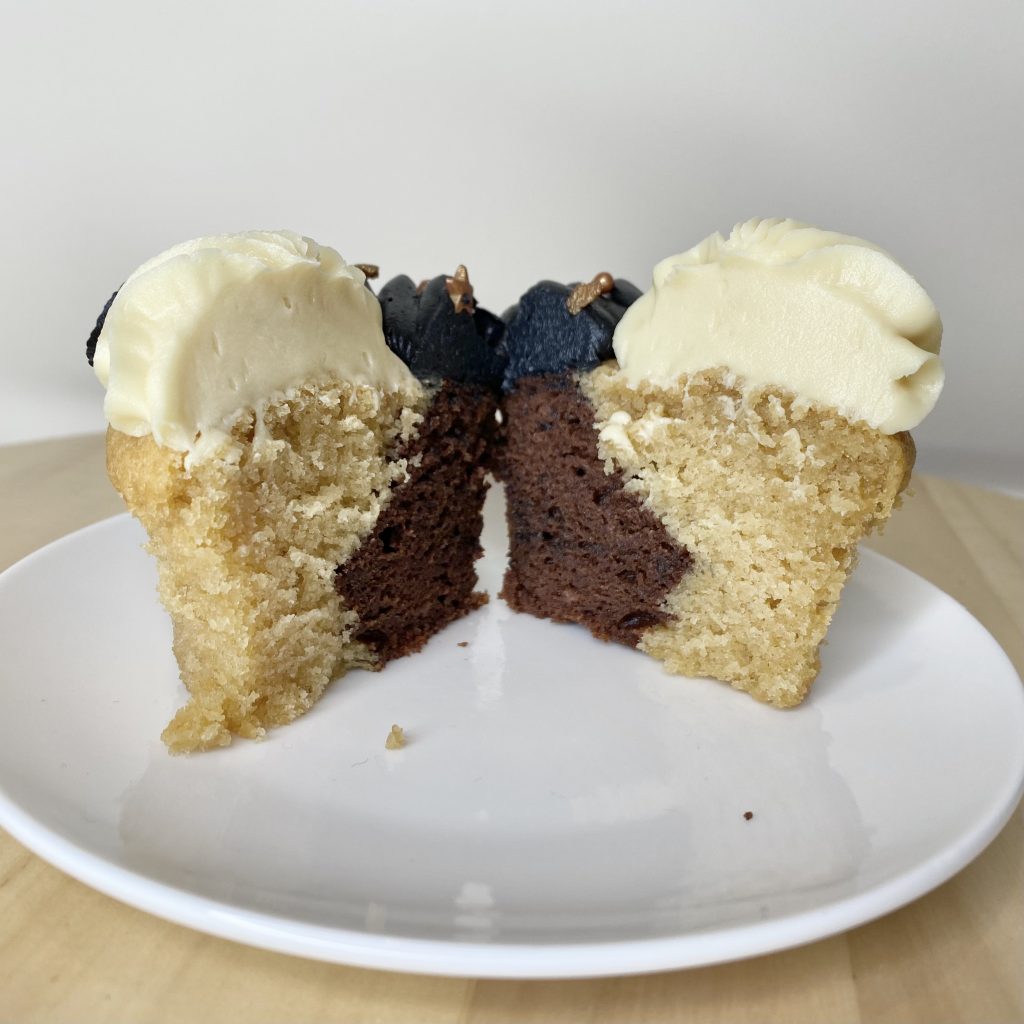
I decided to do a half-and-half cupcake, with one half made from a regular chocolate mud cake batter, and the other half from a white chocolate mud cake batter. I had my heart SET on using mud cakes for this recipe, because it just felt so fitting, I mean, mud is literally caused by rain, right? Mud cakes were something I’d heard about, but never actually made myself. They’re essentially dense, moist chocolate cakes that are often used for celebration cakes, because they are sturdy enough to withhold the added weight of additional tiers and moist enough to make in advance. After a bit of research, it seems that mud cakes originated in Mississippi, where they were topped with marshmallows (to resemble the rocky banks of the Mississippi River), then made their way over to the other side of the pond, where the Australians did away with the marshmallows and really ran with the idea of a super moist, dense and chocolatey cake. The history is a little patchy, but I’m all for a delicious chocolate cake recipe. However, developing the recipes for the mud cake batter took me SO LONG! It was definitely the trickiest part of these cupcakes for me, but after many attempts, I think I’ve finally cracked it (thank GOODNESS).
For the icing, I used both dark chocolate and white chocolate buttercream, which I flavoured with peppermint, to really bring the whole peppermint bark theme together. The only problem with this was the colours. As I mentioned, Midnight Rain, has a super defined aesthetic- if you look it up on Pinterest, you’ll be flooded with half-yellow/gold, half-navy blue artwork. As suspicious as I am of the idea of making my food navy, I felt it kind of had to be done for this cupcake. I opted to colour the dark chocolate buttercream navy, in an attempt to limit the amount of food colouring I needed. Admittedly, in some lights, the icing looks more black than navy, and I had to use a lot more food colouring than I would have liked, but I did my best! For the ‘sunshine’ side, I wanted my white chocolate buttercream to be just a little bit more golden. It occurred to me that I could just use caramelised white chocolate, which would give my buttercream a naturally deeper tint (and cut down on the food colouring). It’s not anything crazy, but it is noticeable (and, honestly, even more tasty than regular white chocolate buttercream!).
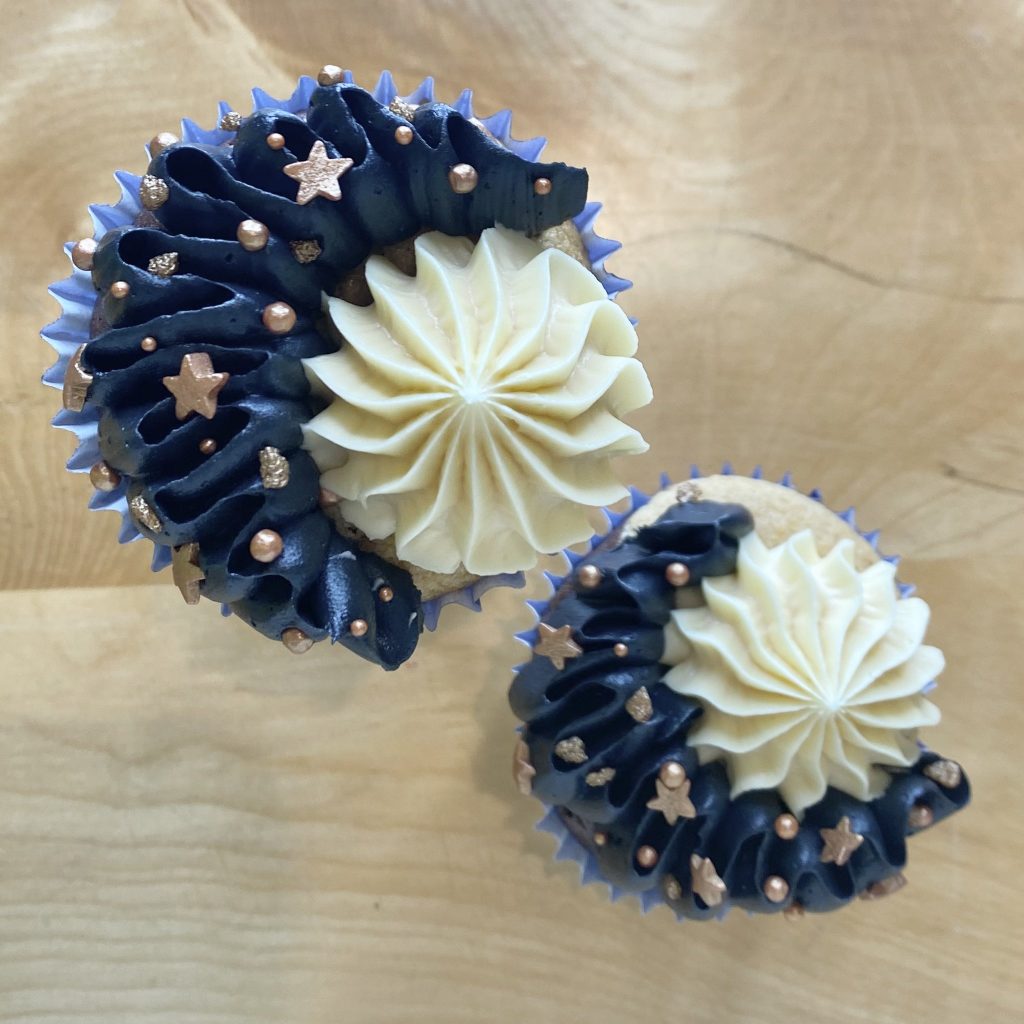
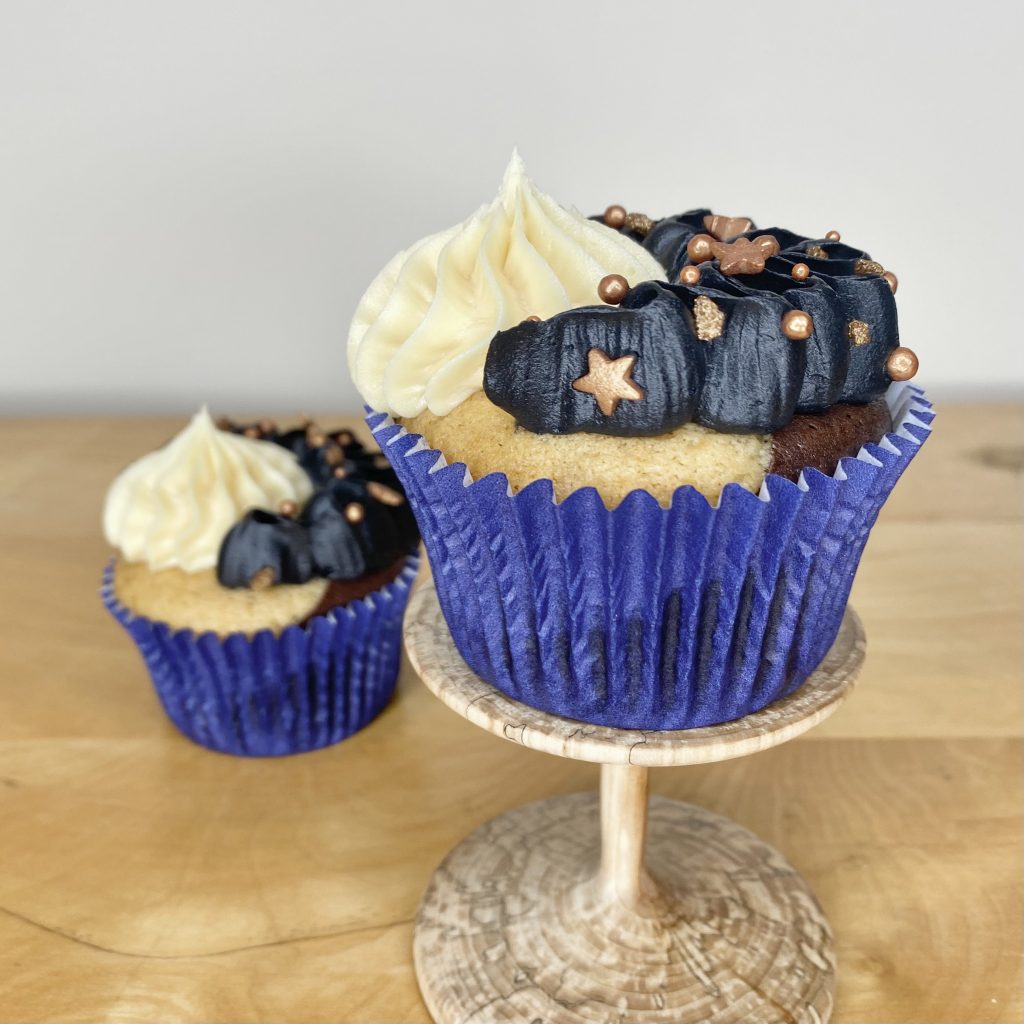
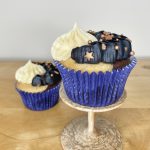
I went back and forth on how to decorate the cupcakes- initially, I planned to do a two-tone swirl, but I wasn’t loving how the two buttercreams were melding together as I piped. In the end, I decided to use two decorative piping tips to create a pretty dollop of the white chocolate buttercream (to resemble the sun) and a ribbon of the navy buttercream, going back and forth in a crescent shape around that sun (to resemble the moon). I finished it off with some golden star sprinkles on the crescent shape, to really drive home the whole celestial, midnight vibe. Honestly, I’m SO happy with how it turned out! This style of icing, with the use of different colour buttercreams, each piped with a different decorative piping tip, is really on trend at the moment, so it was fun to try it out myself.
Once I’d decided on using caramelised white chocolate in the buttercream, I began to consider introducing that same caramel-y taste and colour into the white chocolate cake batter as well. With a little bit of research and some fiddling around with my hard-earned mud cake recipe, I managed to develop an equally moist, almost sticky toffee pudding-esque recipe for a white chocolate and caramel mud cake. It’s kind of my magnum opus.
Phwoof. That was a lot of waffling. Essentially, these are just peppermint bark-inspired mud cupcakes, with some added caramel flavour, for good measure. Both the cake and the icing is two-toned to emphasise the whole sunshine/midnight contrast from the song. As always, if you don’t particularly care about making your cupcake super Swift-y, you can decorate these cupcakes in whatever way you would like, which will make them a lot easier to make (and a lot less navy).
Making the Mud Cupcakes
As I mentioned before, I was desperate to use mud cakes for this recipe and it was absolutely only because I thought it was an iconic idea. However, every single mud cake I tried to make ended up drier than a typical sponge cake, which seemed completely contradictory to me. After many (many) attempts, I finally developed a super moist, super chocolatey mud cake recipe. A few more attempts later and I had a super moist white chocolate and caramel mud cake recipe as well, so I was ready to go.
Mud Cakes and Moisture 101
Here’s what I did to keep these cakes SUPER moist and delicious:
- Used half-butter, half-oil:
While butter gives cakes great flavour, oil keeps them much moister. By using both, you get the best of both worlds!
- Used half-caster sugar, half-brown sugar:
Brown sugar is another ingredient that helps to make cakes moist, so I’ve included it (in some form) in both of the recipes. However, you need to use a some caster sugar in order to give your cakes some structure- I found that 50/50 was the best ratio!
- Added sour cream
A lot of cake batters will include a thicker dairy product like yoghurt, buttermilk or sour cream to help provide extra moisture to the finished cake. I found that neither buttermilk nor yoghurt did enough for these cakes- you really need the extra moisture provided by the higher fat content of the sour cream to make these cupcakes super moist and delicious.
- Baked the cupcakes at a lower temperature
These cupcakes are baked at 160°C, which is quite low, especially for cupcakes! The reason for this is that a lower, slower bake is more conducive to a moist and tender finished product. You also want to ensure that you do not over-bake these cakes, or they will dry out- bake the cupcakes just until they feel firm to the touch and spring back ever so slightly.
Tips for Making the Two Batters Simultaneously
For these cupcakes, the two mud cake batters are added to the cupcake liners simultaneously and baked together for that half-and-half look. Because of this, it’s important to make the batters at the same time, because cake batters have a tendency to get tough if they are left sitting too long before baking. This can seem a little overwhelming, but, if you follow the steps below, you’ll be absolutely fine!
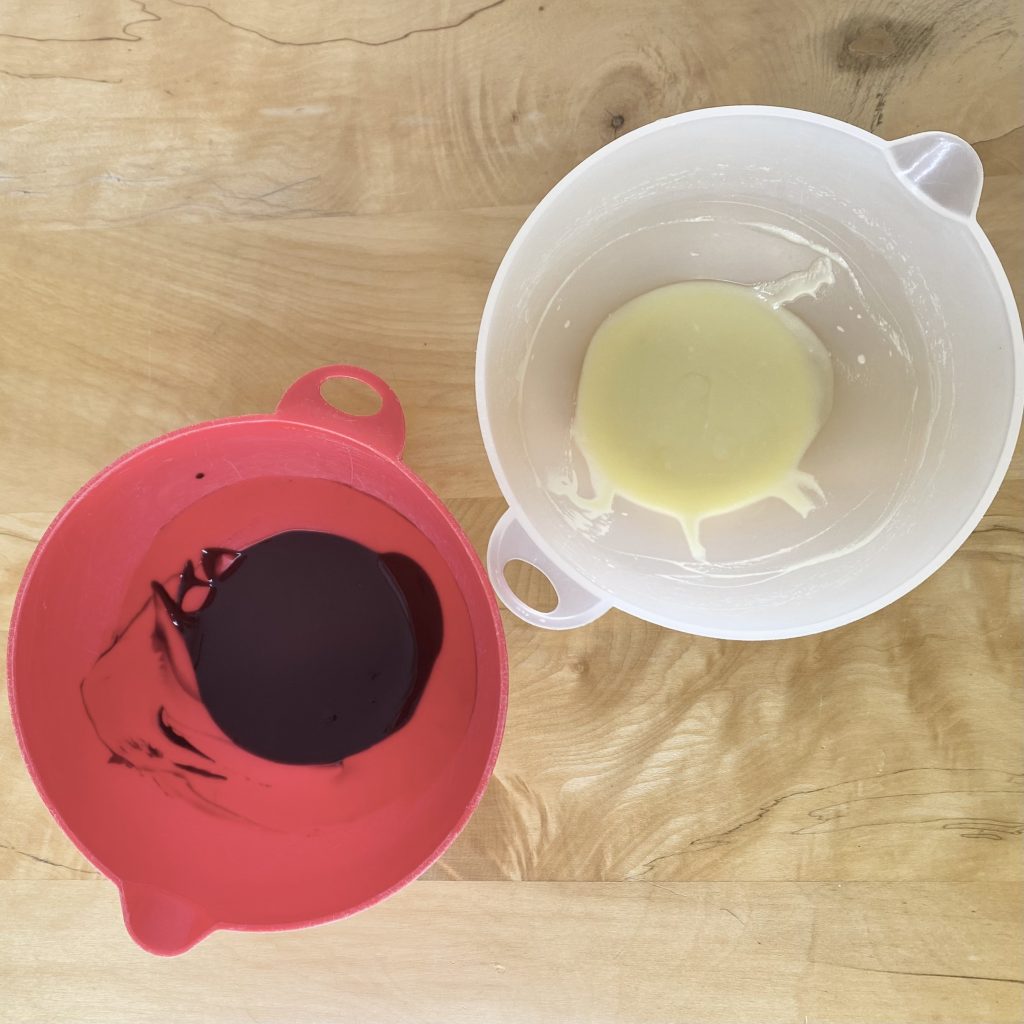
- Melt the chocolate/butter mixtures together one after the other, then allow to cool.
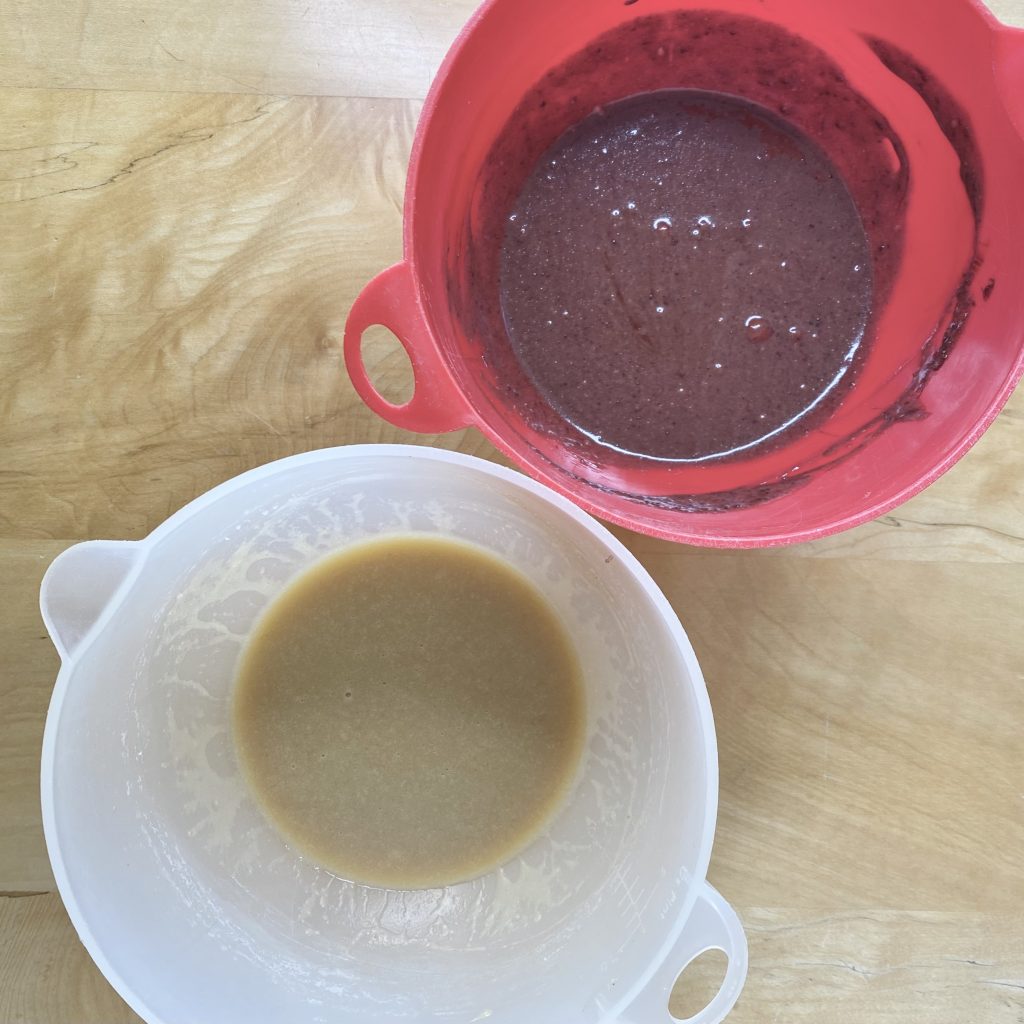
Both batters start off by melting the chocolate and butter together, in two separate bowls (one for the white chocolate + butter mixture, one for the dark chocolate + butter mixture). I do this in the microwave, one at a time, in 1-minute bursts (on the lowest setting), stirring in between until melted and cohesive. You could also do this over a bain-marie, if you prefer. Because the mixtures need to cool a little before the next step anyway, you can do one after the other without a problem- just remember to use a different spoon/spatula for each batter, to avoid cross-contamination! Once both mixtures are melted and smooth, set the bowls aside to cool.
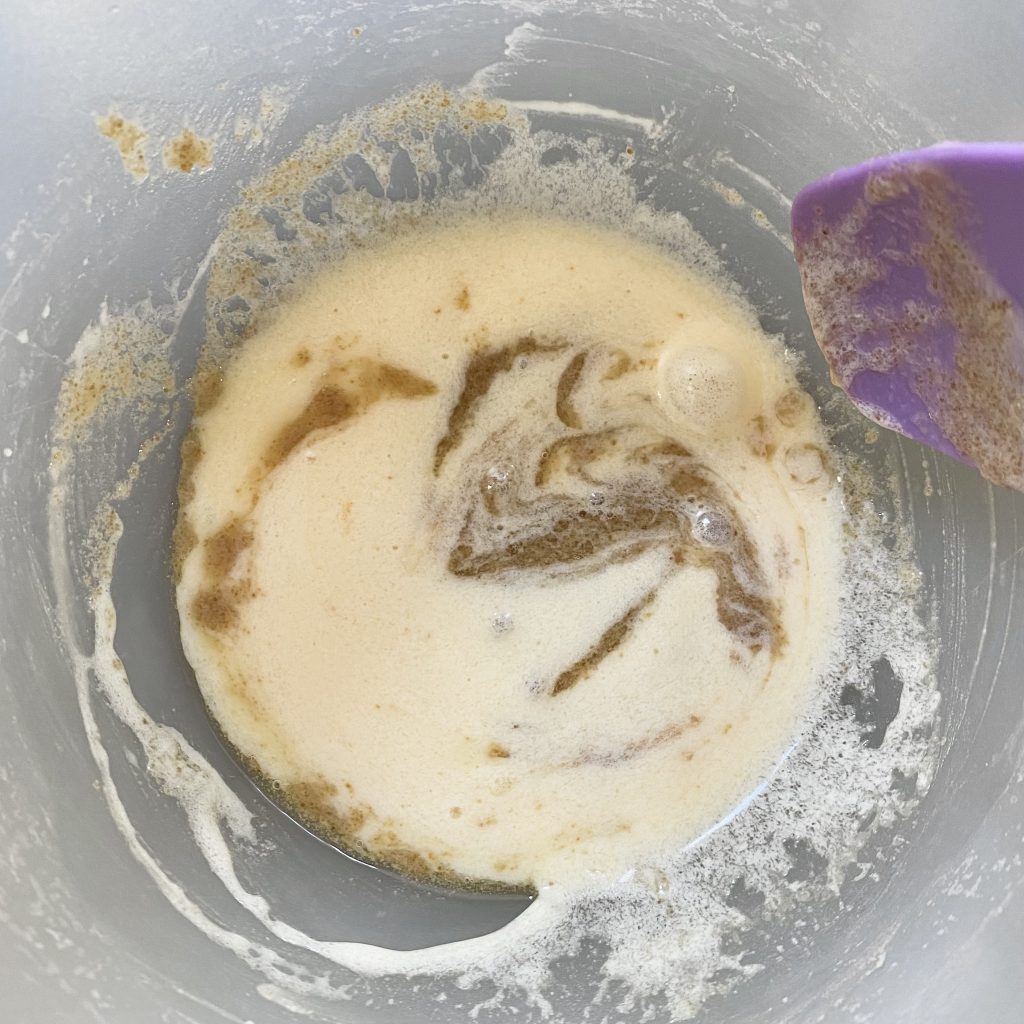
- While the mixtures are cooling, measure out your wet ingredients.
Because both batters contain the same wet ingredients (bar one- more on that later), you can measure them all together. Whisk together the oil, milk, eggs, sour cream and vanilla, until completely combined, then set aside. When it’s time to add them to the batters, you just need to add half of your wet ingredient mixture to one bowl, half to the other. I like to mix my wet ingredients together in a jug, to make that step even easier.
- Add the sugars to each bowl.
To the dark chocolate mixture, add caster sugar and light brown soft sugar. To the white chocolate mixture, add caster sugar and dark brown soft sugar (the dark brown sugar is what gives the white chocolate mud cake its caramel-y flavour!). Because white chocolate has a higher proportion of sugar in it already, we add less sugar to that mixture at this stage than we do to the dark chocolate mixture, so everything balances out!
- Add the wet ingredients.
Now it’s time to add half of the wet ingredients to the white chocolate mixture, and half to the dark. I find it easiest to pour a little in to each bowl to start with and mix it well to loosen the mixture, then add the rest. If you’re worried about dividing it equally, weigh your wet ingredient mixture first, then divide the value by 2 and add that amount to each bowl.
- Add the coffee to the dark chocolate mixture.
The coffee (instant granules dissolved in water) is the only wet ingredient that needs to be added separately, because it is only needed in the dark chocolate batter. The coffee helps to bring out the flavour of the dark chocolate, but will overpower the flavour of the white chocolate, so you only want to add it to the dark chocolate batter. Add the coffee to the dark chocolate bowl and mix well to incorporate.
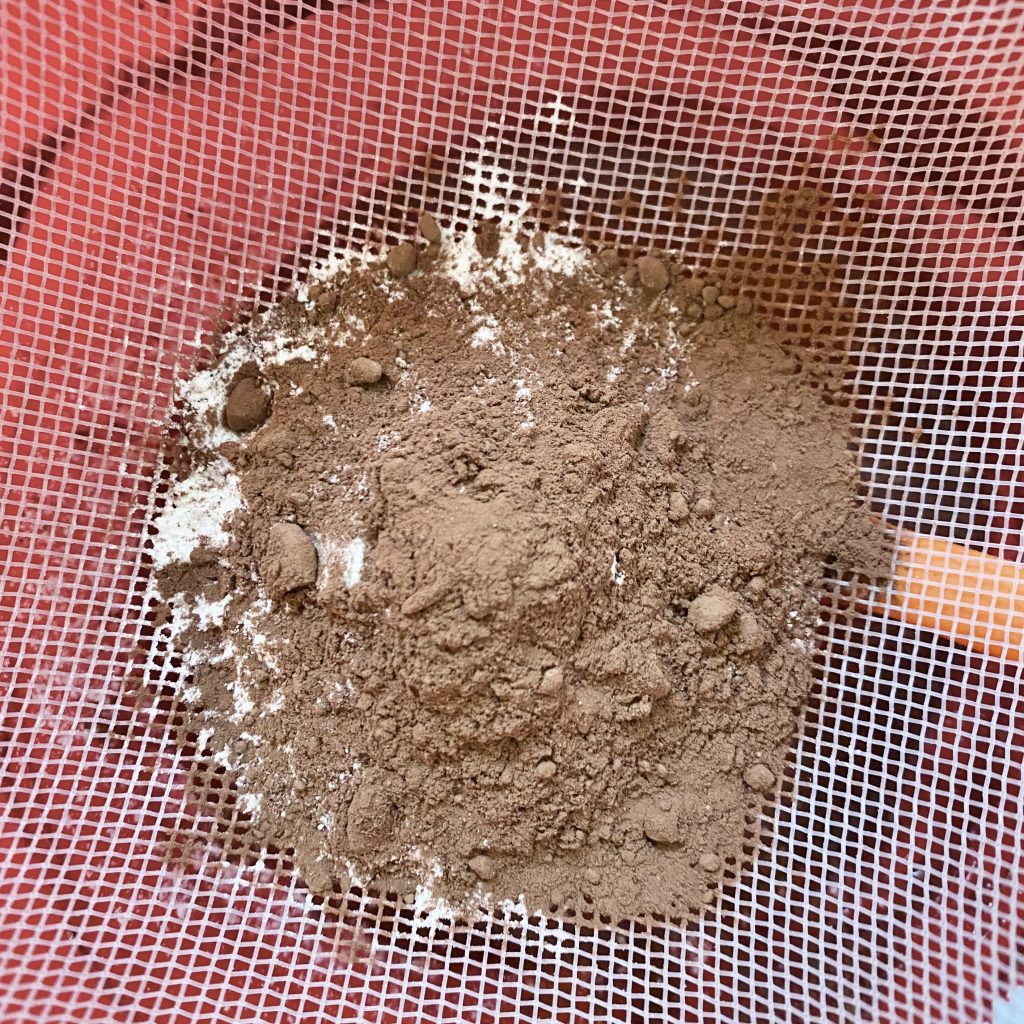
- Sift in the dry ingredients.
To the white chocolate batter, just sift in the self-raising flour and the salt. To the dark chocolate batter, sift in the self-raising flour, salt AND cocoa powder (for even more chocolate flavour).
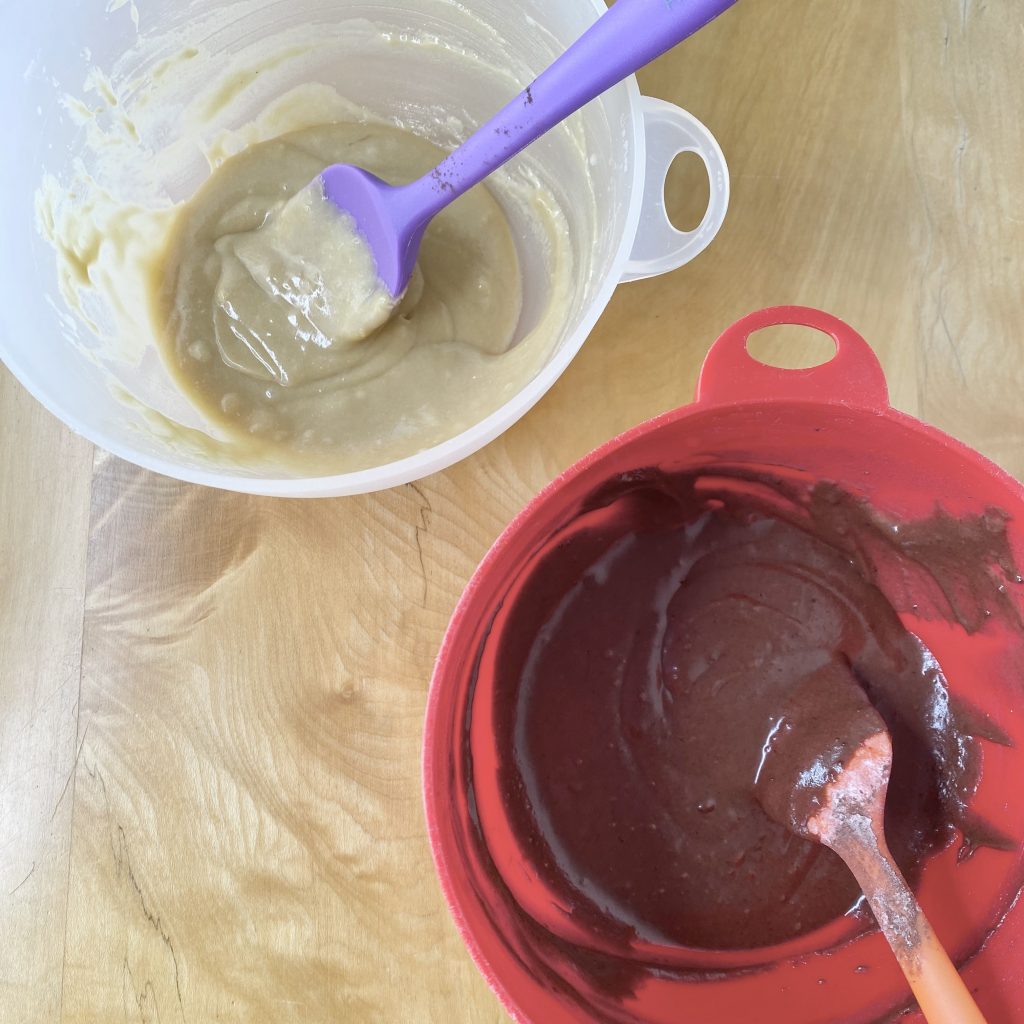
Mix until just incorporated, then both batters are ready to go into the cases and be baked!
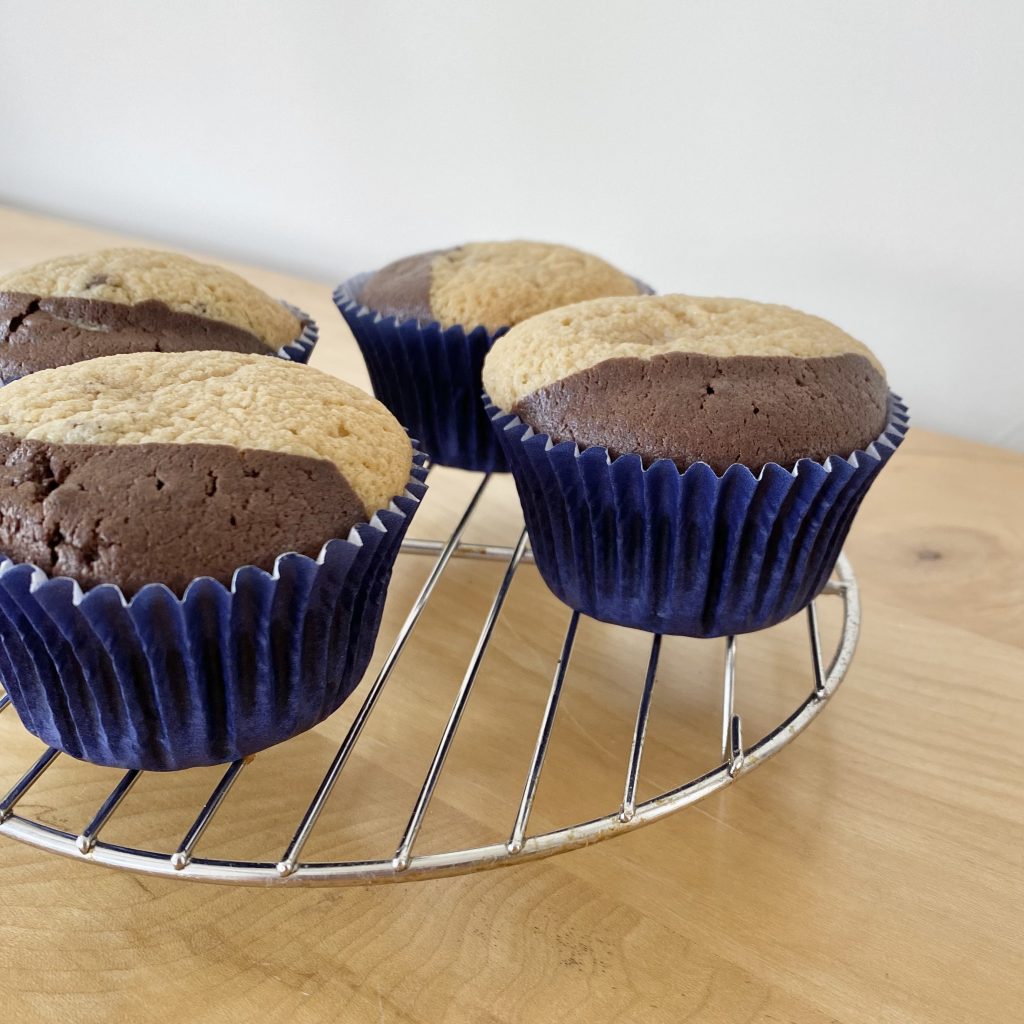
Adding Both Batters to the Cupcake Cases
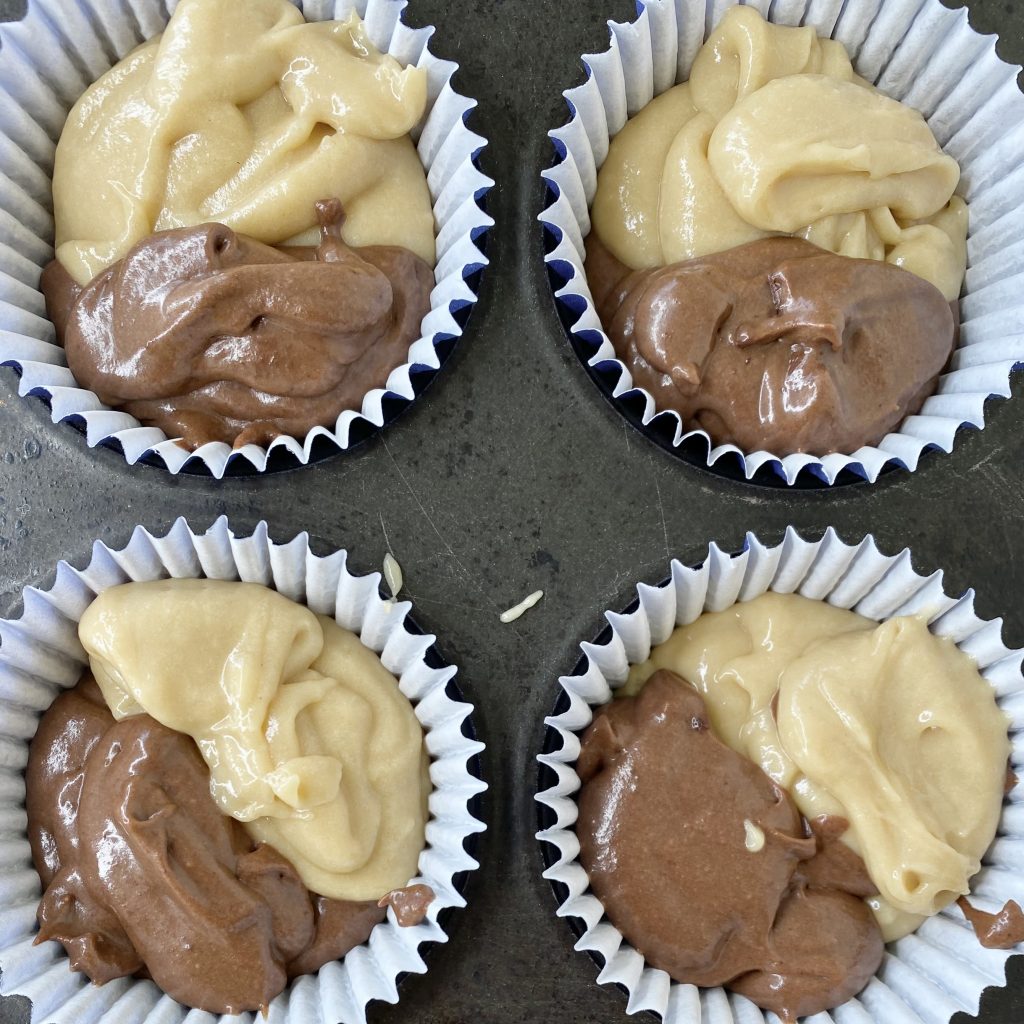
For these two-tone cupcakes, you want to keep each batter to one side of each case. The easiest way to do this is to add both batters simultaneously, so they push up against each other and form a natural barrier. The batter isn’t super liquid, but it’s also not crazy thick, so an easy way to do this is to transfer each batter to a jug and ‘pour’ the batters into the cases. I say ‘pour’, because the batter is thicker than a typical pouring batter would be (it needs to be, to prevent the batters from merging too much!), but it will still come out of a spout- if that makes sense? If you prefer, you could also just take a spoonful of each batter and tip them into the cases at the same time- it’s just a little more finicky!
Fill each case about 3/4 of the way full- these mud cakes don’t rise quite as much as normal cupcakes, so you can afford to fill them a little higher than you normally would!
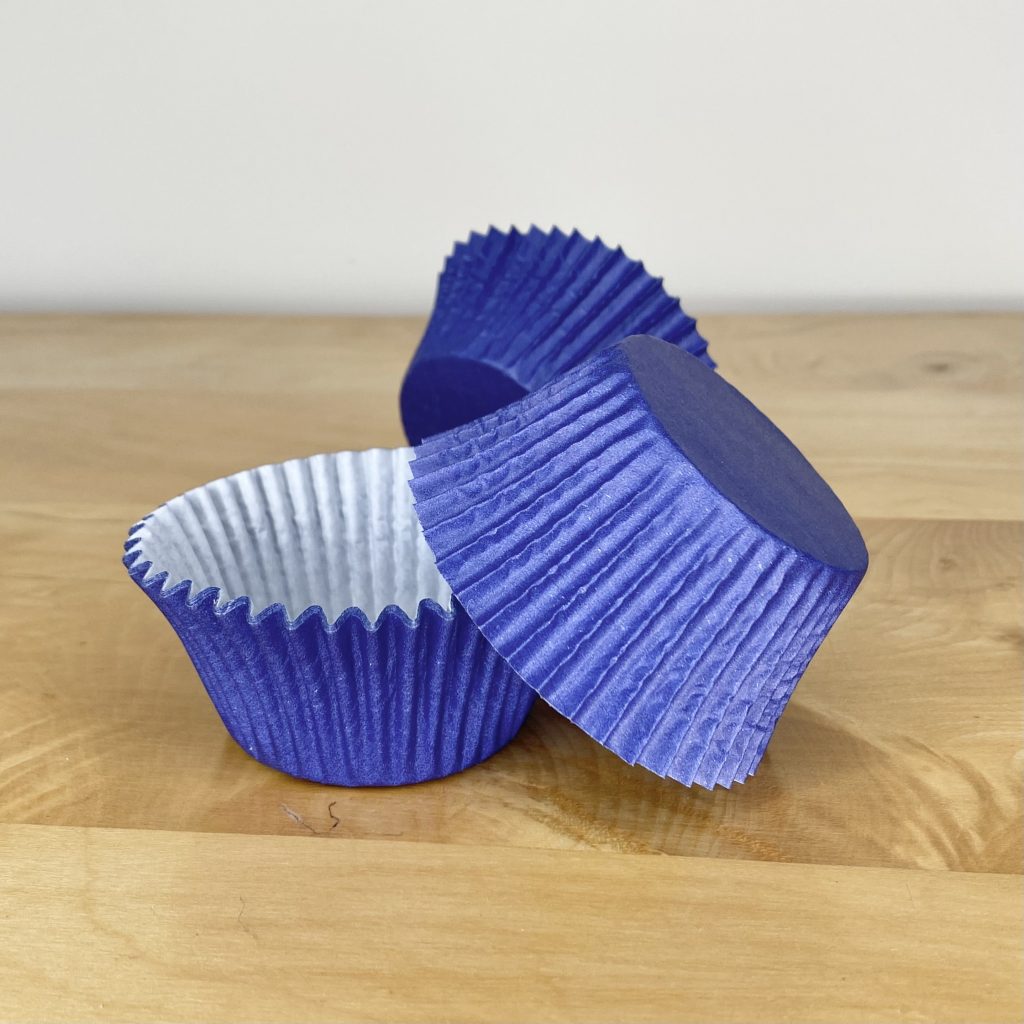
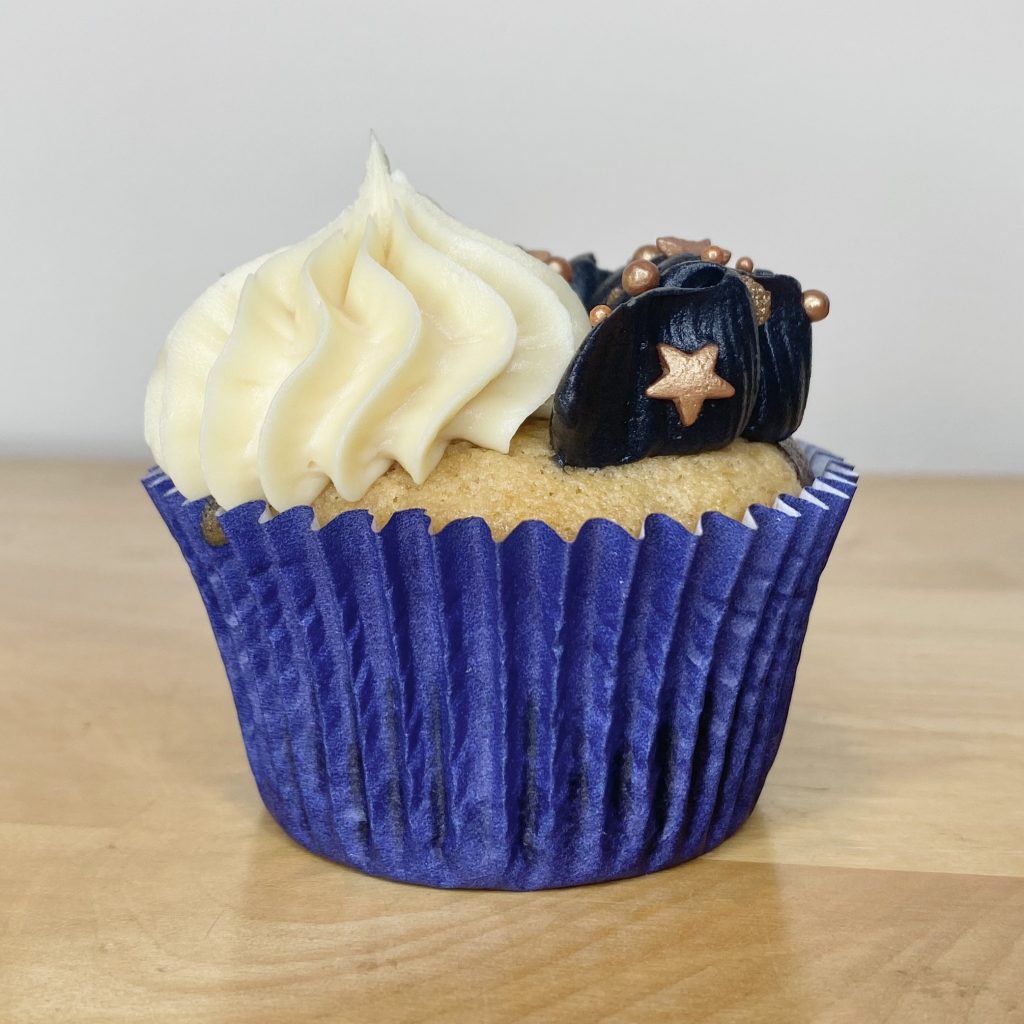
As always, I like to match my cupcake cases to my theme, so I used these navy blue cases from The Cake Decorating Co. for these Midnight Rain Cupcakes!
Baking the Cupcakes
As I mentioned, mud cakes are best baked low and slow. For that reason, you want to bake these cupcakes at 160°C (conventional oven) for 25-30 minutes, until just done. Don’t over-bake the cakes, or you might lose some moisture! Wait until the cupcakes just about spring back, then remove them from the oven.
As always, I like to remove my cupcakes from the tin as soon as they come out of the oven, to prevent the bottoms from becoming greasy. Do watch your fingers though, because both the cupcakes and the tray will be very hot!
Caramelised White Chocolate
Before you can make the buttercream, you’ll need to caramelise some white chocolate. This is super easy to do, but it can take a little while, so you’ll need to be a bit patient- I swear, it will be worth it! Caramelised white chocolate has a much deeper, more complex flavour than regular white chocolate- the caramelisation process helps to temper some of the sickly sweetness of the white chocolate, so you can just enjoy the flavour.
I caramelised my white chocolate in the microwave, but there are plenty of tutorials online for doing it in the oven as well, if you prefer. In this post, I’ll be walking you through the microwave method.
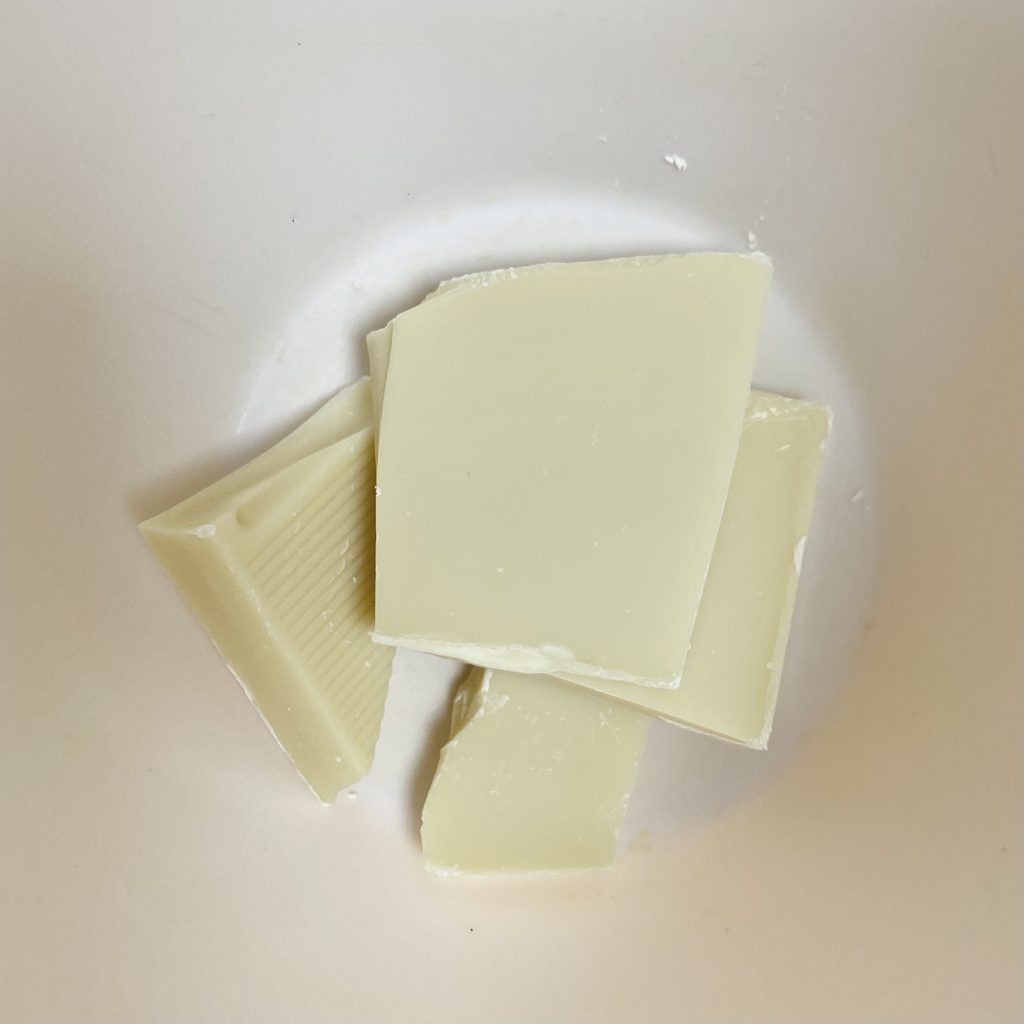
To start with, you need to melt the chocolate. Break or chop it up into pieces, then place the chocolate into a microwaveable bowl. Microwave on the lowest setting in 1-minute bursts, stirring in between each burst, until completely melted.
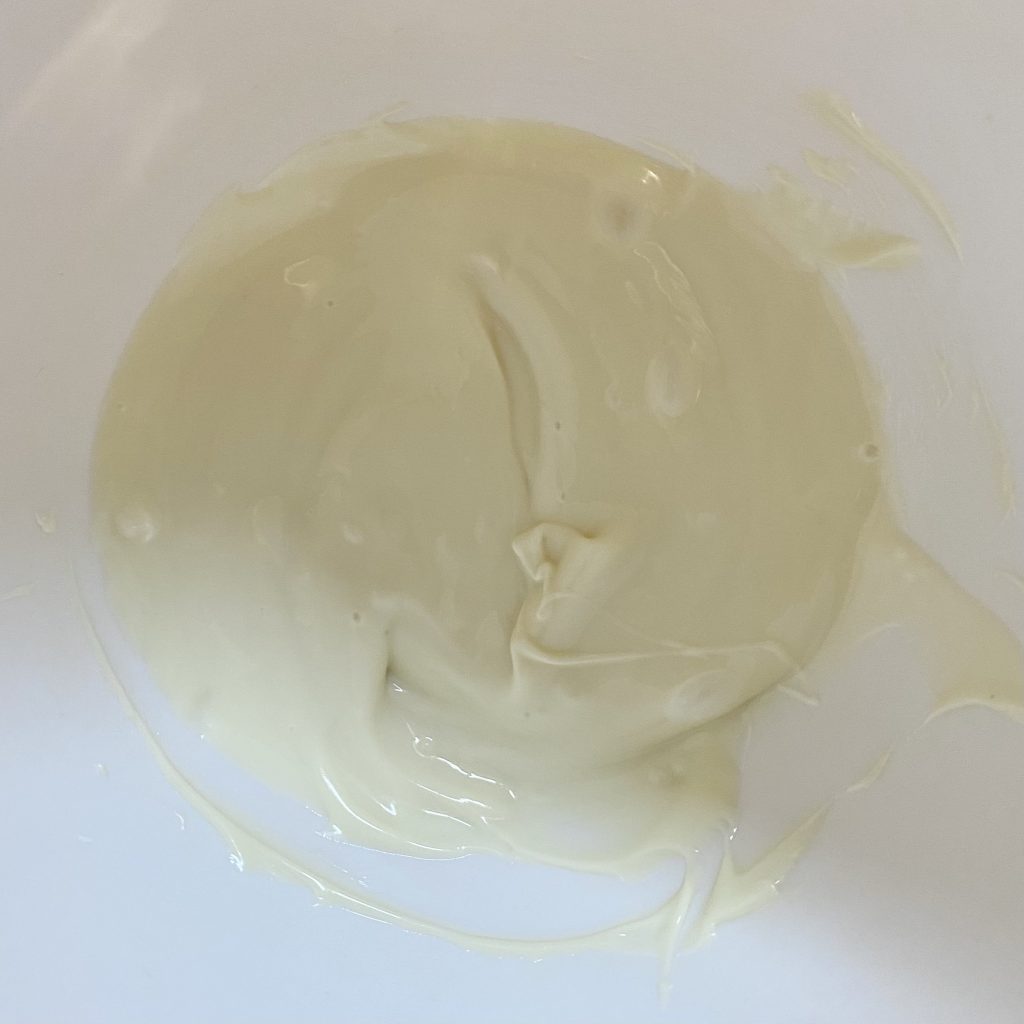
Now, to caramelise the chocolate. Essentially, all you need to do is microwave the melted chocolate on high, in 15 second bursts at a time, stirring in between each burst. I never melt chocolate on high because it can burn so easily, but, because the bursts are so short for this, you don’t need to worry about the high heat. In fact, doing this on a lower heat will just make it even more tedious, so be brave and stick to high!
This process takes… a while. I must admit, I was getting pretty bored by the end, but, having tasted the finished product, I would absolutely do it again! At first, the chocolate won’t seem like it’s doing anything, but eventually it will start to thicken up. Don’t worry- this is supposed to happen! Any clumps/thicker parts will melt back into the chocolate as you stir in between each burst, so just keep stirring and heating, stirring and heating.
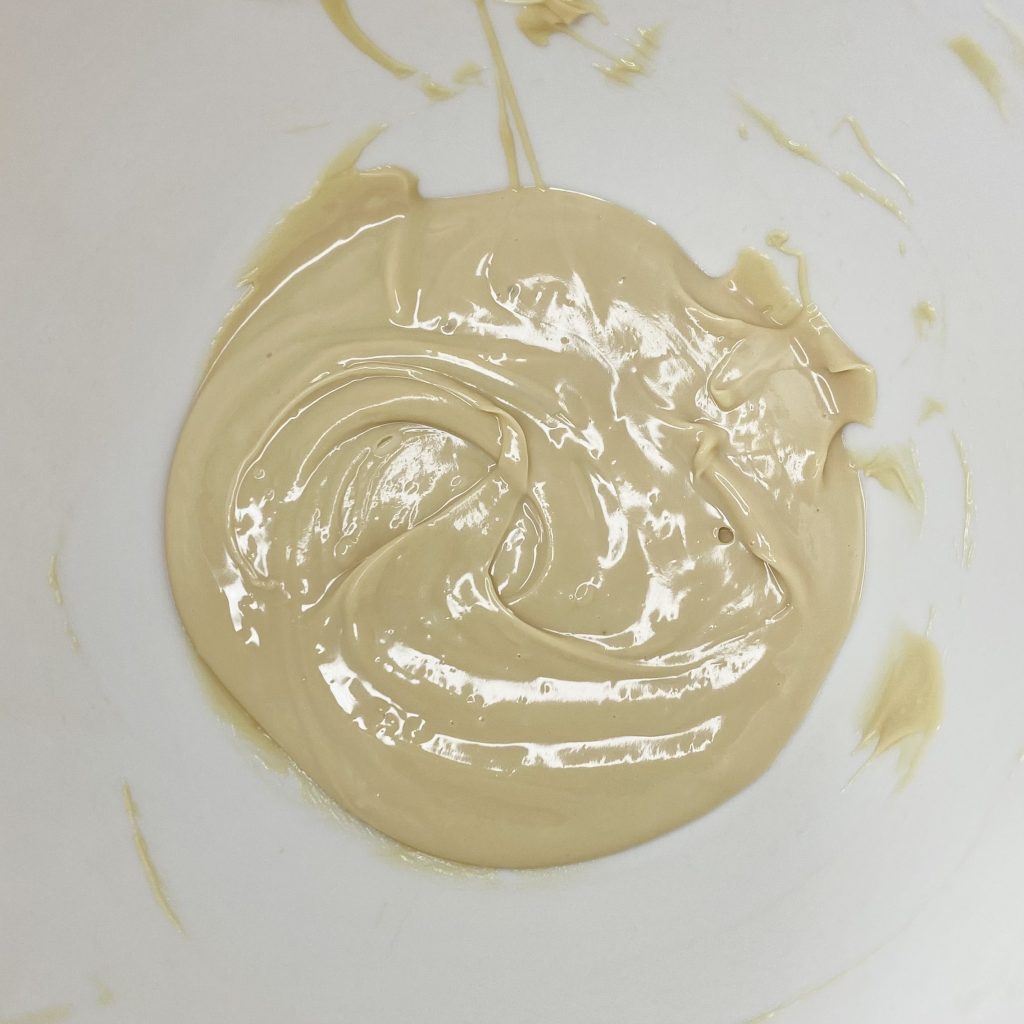
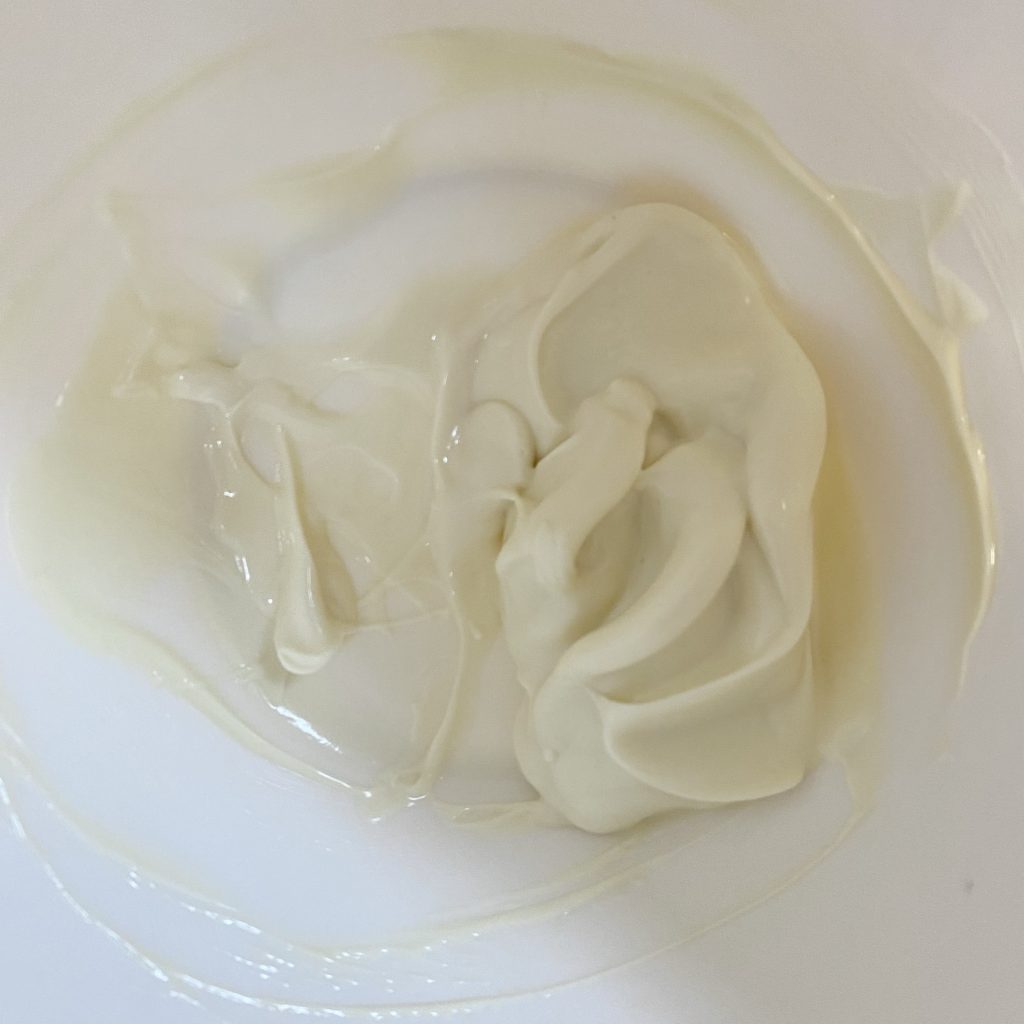
Eventually, you’ll start to notice the colour of the chocolate changing. It will go from the original pale, creamy colour to a light caramel shade. Keep going until the chocolate is a nice, deep caramel shade (or until you absolutely cannot be bothered with it anymore). Honestly, I could have taken my chocolate even further and achieved a deeper shade, but I was getting super tired at this point, so I just went with what I had… Once you’re happy with the level of caramelisation, set the chocolate aside to cool for a while before you make the buttercream.
One note here: this stuff gets HOT. I mean, you’d think it would be obvious given the fact that it’s literally called caramelised white chocolate, but I was still shocked by just how hot it was when I got a little bit on my finger. Keep your fingers well away until the chocolate has had a while (at least 20-30 minutes) to cool down!
Chocolate Peppermint Buttercream
For the icing, I made one big batch of peppermint buttercream. I then transferred about 1/3 of the buttercream to a separate bowl, before adding melted dark chocolate and navy food colouring to the larger amount and caramelised white chocolate to the smaller amount.
Melted Chocolate and Buttercream 101
Making buttercream with melted chocolate is super easy, but there are a couple of things you need to remember:
- Use a higher proportion of butter than your typical buttercream recipe.
Because chocolate sets solid at room temperature, you’ll end up with a super dense and hard, fudge-like consistency if you add it to a standard buttercream recipe. To account for this, you need to use a higher proportion of butter than usual, which will help to even out the consistency. In fact, the chocolate you use will also have an effect on this: dark chocolate contains cocoa solids, while white chocolate does not (and instead contains a higher proportion of cocoa butter). This means that dark chocolate will firm up the buttercream even more than white chocolate. The quantities I have listed below reflect all of this- I add less dark chocolate than white chocolate to the buttercream base, so you’ll end up with super silky, super tasty chocolate buttercream!
- Make sure the melted chocolate has cooled down before you add it to the buttercream base.
This is particularly important for the caramelised white chocolate, because it starts out so hot and therefore needs longer to cool down. If the chocolate is still warm, it will melt the butter in your buttercream, which might lead to the icing becoming soupy, or even separating. If this happens, it’s not the end of the world- just put the whole thing into the fridge, giving it a stir every 5 minutes or so, until it comes back to a cohesive, pipeable consistency.
Making the Peppermint Buttercream Base
As I mentioned, this buttercream base contains a much higher proportion of butter than my usual American buttercream recipe, to account for the addition of melted chocolate later. Don’t worry, then, if you taste this and feel overwhelmed by butteriness- it’s supposed to be that way!
American-style buttercream is one of the easiest icings to make- start by whipping the softened butter with an electric mixer until it is soft and pale. I use a hand mixer, but you could use a stand mixer, if you prefer. Then, mix in the sifted icing sugar, followed by the milk, and beat again until light and fluffy. That’s it!
To get the peppermint flavour into this icing, I used peppermint extract. Add a few drops to the buttercream, then give it a taste to see if the flavour is to your liking. Peppermint extract is very strong, so you only need a very small amount. Start slow- you can always add more, but you can’t take it out if it starts tasting a bit too toothpaste-y!
Dividing the Buttercream

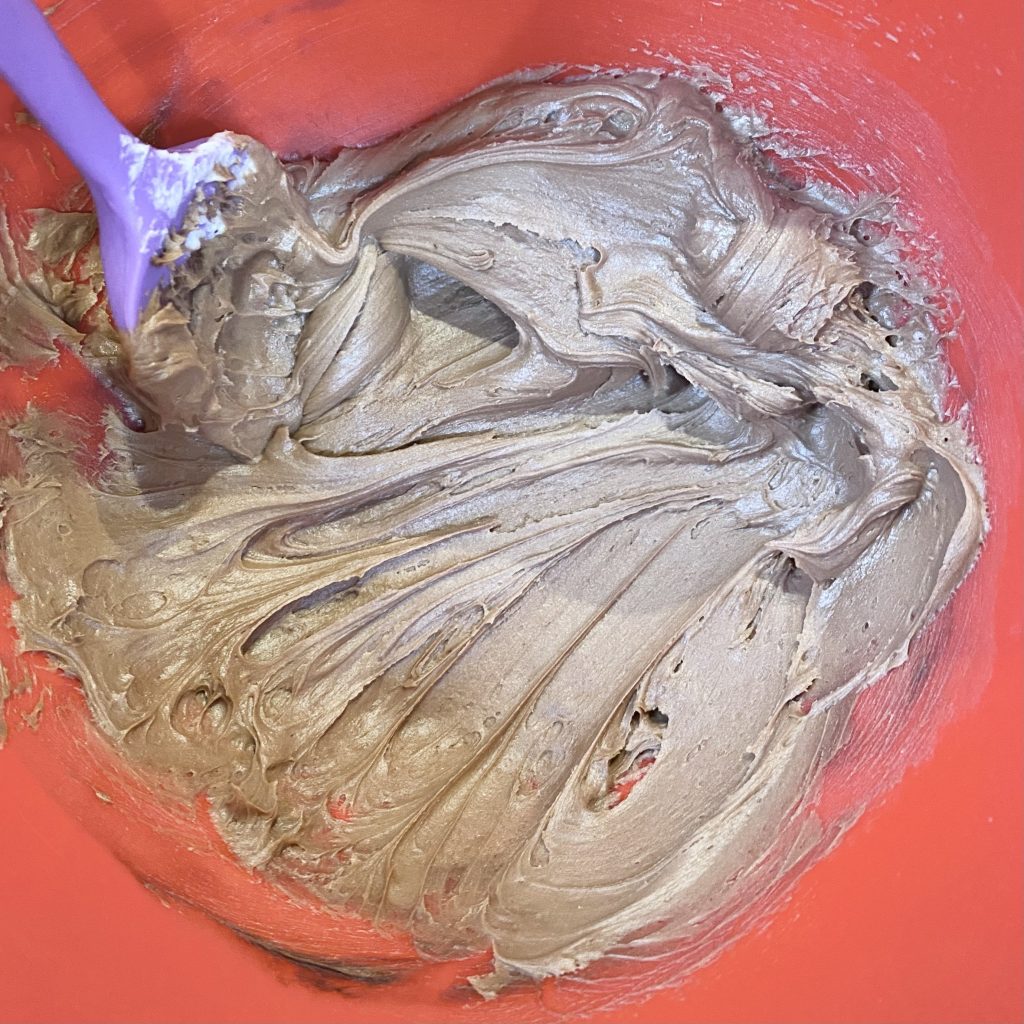
Once you have your peppermint buttercream base, it’s time to divide it up, ready for the melted chocolate. Because of the way we will be decorating the cakes, you need more dark chocolate buttercream than white chocolate. Take about 1/3 of the buttercream base and transfer it to another bowl- this will be for your white chocolate buttercream. Add the cooled, caramelised white chocolate to the bowl and mix well until completely combined. To the other bowl, add melted and cooled dark chocolate (I do this in the microwave, in 1-minute bursts, on low), and mix well to combine.
The next step is optional, but I wanted to colour my dark chocolate buttercream so that it was more reminiscent of the Midnight Rain aesthetic I was going for. I used the Colour Mill oil-based food colouring in the shade Navy, but, honestly, the finished buttercream ended up looking more black, probably because of the cocoa powder. No matter, it was still very much giving night sky vibes, so I was happy! One thing to note though: I did have to use quite a bit of food colouring to achieve this shade. If you’re not comfortable using so much colouring, you can either omit it completely, or add a small amount of cocoa powder (you could even use black cocoa, if you have it), dissolved in hot water, to your buttercream first. This will make the buttercream darker naturally, so you will need less colouring.
Decorating the Cupcakes
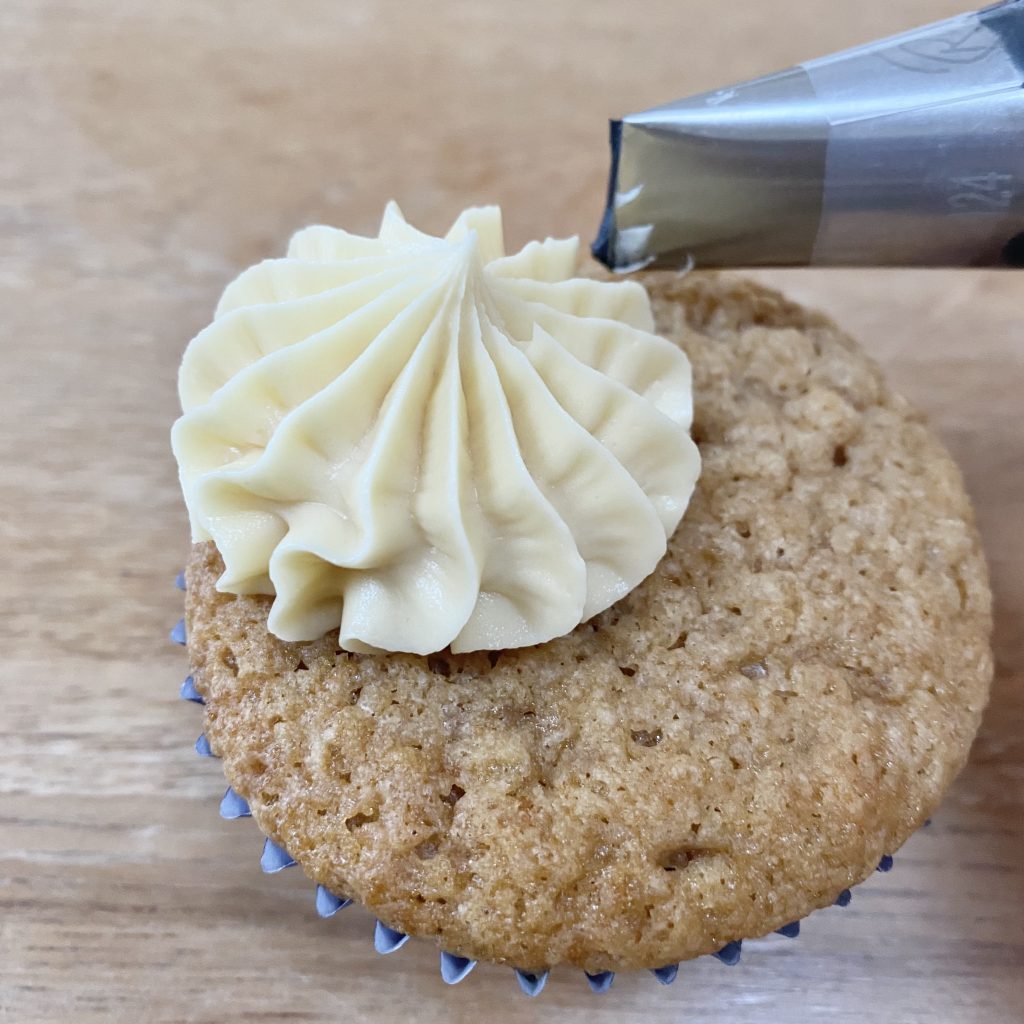
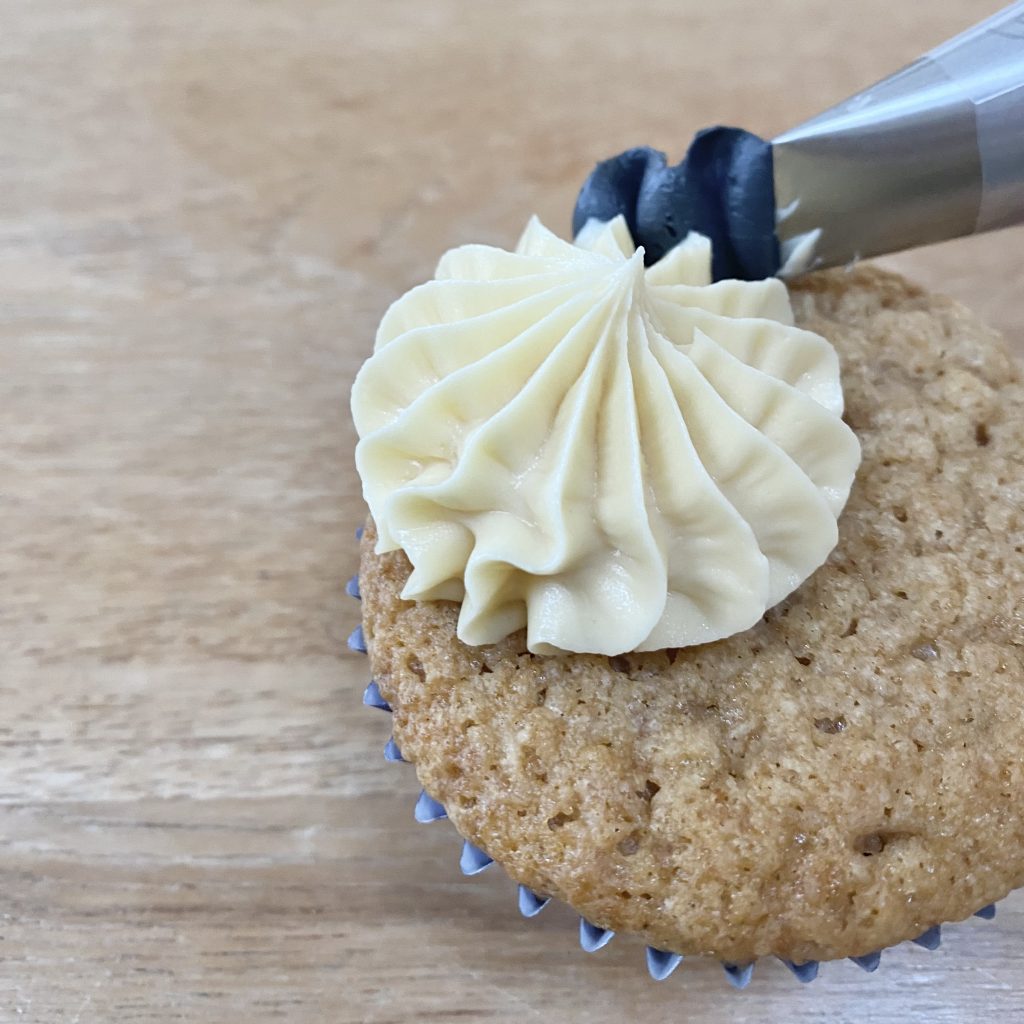
With both buttercreams made, it was time to pipe it onto the cupcakes. I placed the white chocolate buttercream into a piping bag, fitted with a large open star tip, and put the navy buttercream into a piping bag, fitted with a large petal tip.
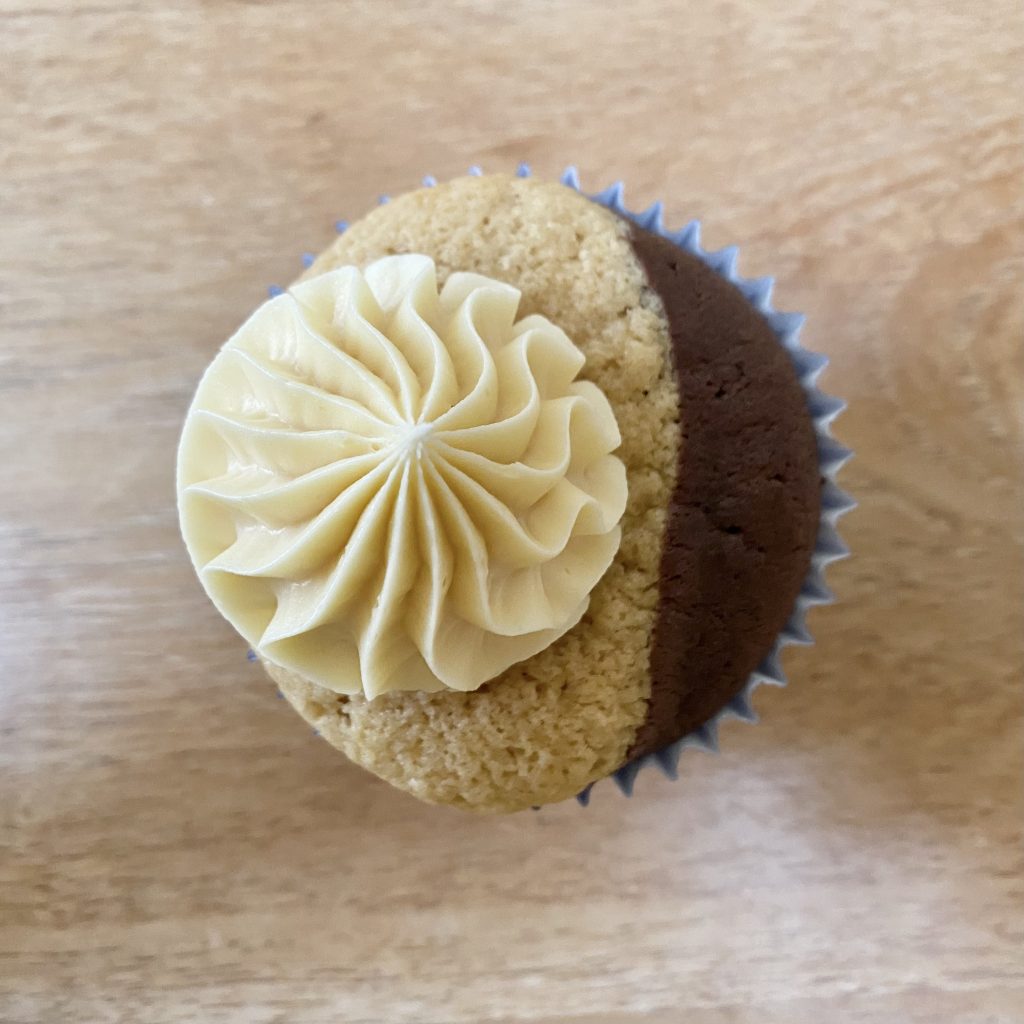
I started by piping a dollop of white chocolate buttercream to one side of the cake. Keep it round, so that it ends up kind of resembling the sun- the decorative piping tip will make the dollop look a little more fancy. For aesthetic reasons, I opted to pipe the white chocolate buttercream on the side with the white chocolate cake, but I think the cupcakes would be even tastier if I had switched the orientation of the buttercream around- that way, the more bitter cake would have the sweeter icing and vice versa. It’s up to you, though!
Then, I switched over to the navy buttercream with the petal piping tip. Hold the piping bag perpendicular to the surface of the cake, with the thicker end of the petal shape nearest to the cake and the thinner end pointing up in the air.
Keep the bag in this position the whole time you are piping, so that you achieve upright ribbons. The aim is to pipe one continuous ribbon, back and forth, and form a crescent shape around that sun ‘dollop’ we just created. Start at one end, applying gentle pressure, then work back and forth, increasing the width of the ruffles as you approach the middle of the crescent. Once you’ve reached the centre, gradually decrease the width of the ruffles, working your way around the sun to finish off the moon shape.
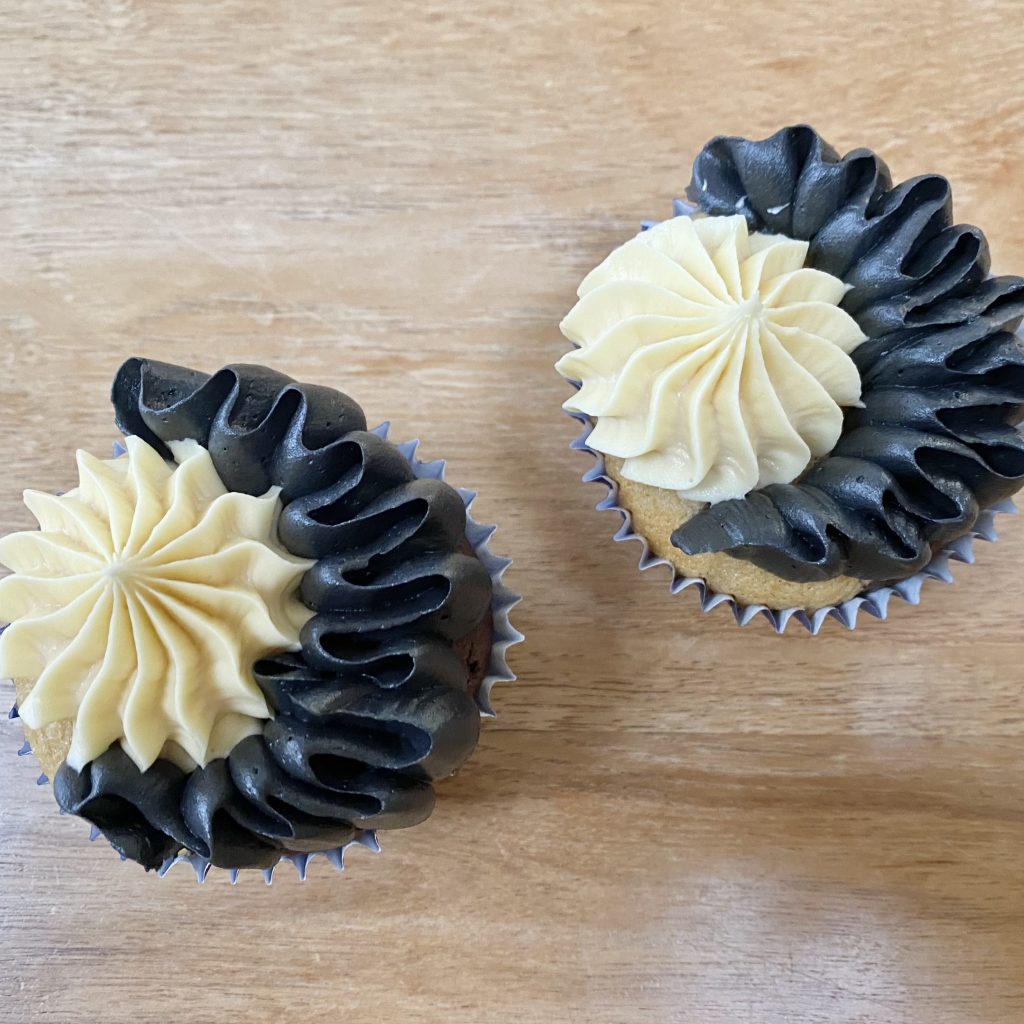
And there you have it! A sun and moon, in buttercream form.
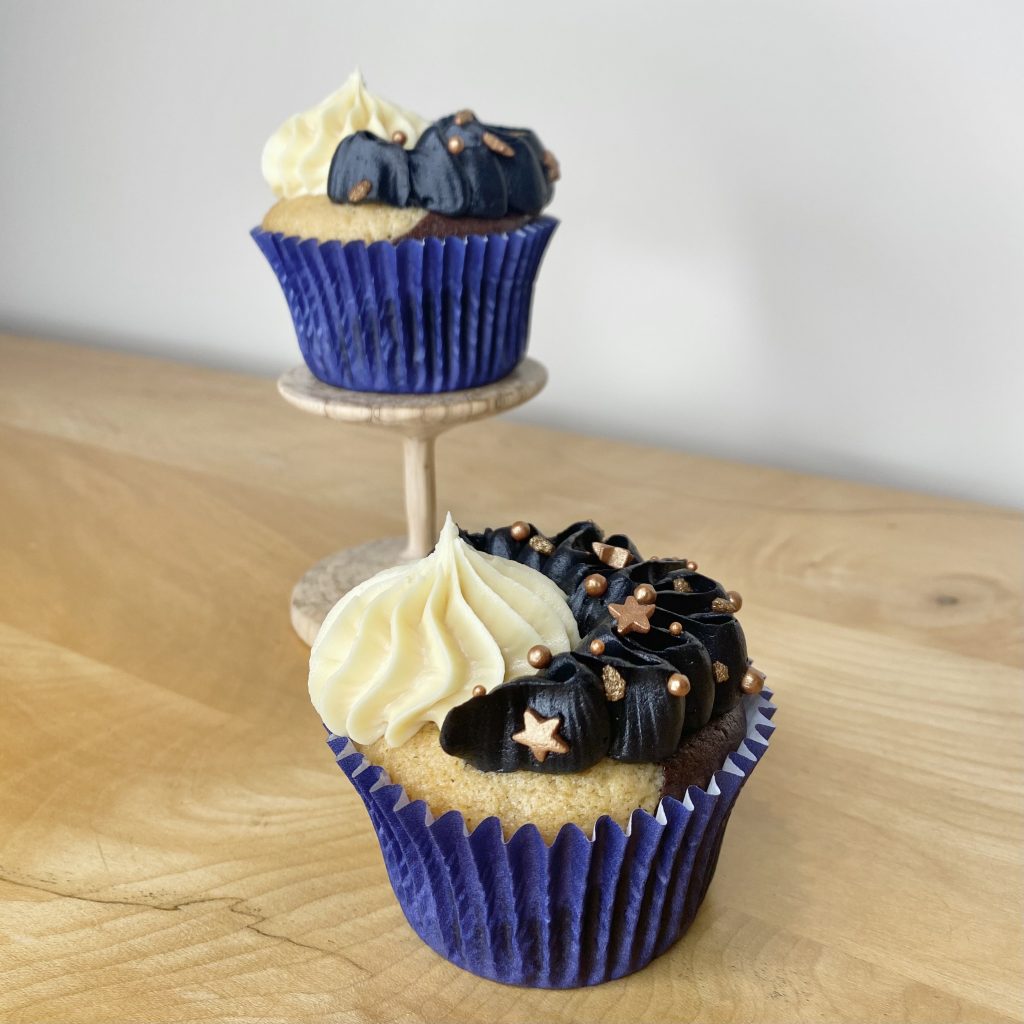
To finish off the cakes, I opted to scatter some gold star sprinkles over the navy moon buttercream, just to really heighten the whole midnight vibe. I got these sprinkles from Waitrose, but you can use whatever you have/can find!
And that’s it! My Midnight Rain, peppermint bark-inspired cupcakes. I hope you’ve enjoyed reading about this process- let me know if you give this recipe a try!
Gemma
Recipe
‘Midnight Rain’ Cupcakes
Equipment
- 12 navy blue cupcake cases (see Note 1).
- 2 piping bags
- 1 large open star piping tip
- 1 large petal tip
Ingredients
For the mud cake batters:
- 75 g dark chocolate, roughly chopped.
- 75 g white chocolate, roughly chopped.
- 90 g unsalted butter, split into 2x45g portions.
- 50 g caster sugar, split into 1x30g and 1x20g portions.
- 30 g light brown soft sugar
- 20 g dark brown soft sugar
- 90 g sunflower oil (or other flavourless oil).
- 75 ml milk
- 3 eggs
- 100 ml sour cream
- 1/4 tsp vanilla extract
- 1/4 tsp instant coffee granules, dissolved in 3 tbsp hot water.
- 190 g self-raising flour, split into 1x90g and 1x100g portions.
- 10 g cocoa powder
- fine sea salt
For the peppermint buttercreams:
- 70 g white chocolate, roughly chopped.
- 30 g dark chocolate, roughly chopped.
- 290 g unsalted butter, softened.
- 320 g icing sugar, sifted.
- 3 tbsp milk
- peppermint extract
- navy food colouring (see Note 2).
To decorate:
- golden star sprinkles (see Note 3).
Instructions
Make and bake both mud cake batters:
- Preheat the oven to 160°C (conventional oven). Line a 12-hole cupcake tin with navy cupcake cases and set aside.
- Place the dark chocolate and one of the 45g portions of butter into a medium-sized microwaveable bowl. Melt in the microwave on the lowest setting, in 1-minute bursts, stirring between each burst, until smooth. Repeat this process with the white chocolate and the remaining 45g of butter, in a separate bowl. Set both bowls aside to cool slightly.
- Once cooled, add the 30g portion of caster sugar and all of the light brown soft sugar to the dark chocolate mixture. Stir well to combine. Add the remaining 20g portion of caster sugar and all of the dark brown soft sugar to the white chocolate mixture. Stir well to combine.
- In a large jug, whisk together the oil, milk, eggs, sour cream and vanilla extract. Add half of this mixture to each bowl and mix well to combine (see Note 4).
- Add the coffee, dissolved in the hot water, to the dark chocolate mixture and mix to combine.
- Sift the 90g portion of self-raising flour into the dark chocolate mixture, along with the cocoa powder and a pinch of salt. Then, sift the remaining 100g of self-raising flour and another pinch of salt into the white chocolate mixture. Stir both mixtures separately, until the dry ingredients are just incorporated.
- Transfer each batter to a separate jug, then pour both batters simultaneously into each cupcake case, to give the half-and-half effect. Fill each case about 3/4 of the way full, then bake in the preheated oven for 25-30 minutes, until they just about spring back when touched.
- Once baked, remove the cupcakes from the tin immediately, to prevent the cases from becoming greasy. Place onto a wire rack and set aside to cool completely before decorating.
Make the peppermint buttercreams:
- Start by caramelising the white chocolate. Place the chocolate into a microwaveable bowl, then melt in the microwave on low heat, in 1-minute bursts, stirring between each burst, until smooth.
- Once melted, start caramelising the chocolate. Place the chocolate back into the microwave on high heat, in 15-second bursts, stirring between each burst, until the chocolate has turned a deep, golden colour. This will take a little while, so be patient.
- Once you are happy with the level of caramelisation, set the chocolate aside to cool. It will be very hot! While it is cooling, melt the dark chocolate in a separate bowl and set aside to cool as well.
- Once both chocolates have cooled to room temperature, make the peppermint buttercream. Place the softened butter into a large bowl and beat with an electric mixer until pale and soft. Mix in the icing sugar, followed by the milk, then beat again until light and fluffy.
- Add a few drops of peppermint extract to the buttercream and mix well to combine. Taste and add more extract, if desired.
- Add 1/3 of the buttercream to the cooled, caramelised white chocolate and mix until completely combined. Add the remaining buttercream to the melted dark chocolate and mix until completely combined. Add navy food colouring to the dark chocolate buttercream until your desired shade is achieved (see Note 2).
Decorate the cupcakes:
- Transfer the white chocolate buttercream to a piping bag fitted with a large, open star tip. Transfer the dark chocolate buttercream to a piping bag fitted with a large petal tip.
- Pipe a large, circular dollop of white chocolate buttercream, to one side on the surface of a cooled cupcake. Switch to the dark chocolate buttercream and, holding the bag so that the thicker end of the petal tip sits against the surface of the cupcake, pipe a ribbon back and forth, forming a crescent shape around the white chocolate dollop. Repeat this process for the remaining cupcakes.
- To finish, scatter a few golden sprinkles onto the navy buttercream crescents.
- Store the cupcakes in an airtight container, at room temperature. Stored like this, they will keep for 3-4 days.
Notes
- Navy cupcake cases: I used these.
- Food colouring: I used the Colour Mill Oil-Based Food Colouring in the shade Navy. However, I had a couple of problems with this: my icing ended up more black than navy (probably because of the dark chocolate) and I had to use quite a lot of food colouring. Feel free to use a different shade of blue colouring, add some dissolved cocoa powder to the icing base to make it even darker (so you need less colouring) or omit the colouring altogether.
- Golden star sprinkles: I used these sprinkles from Waitrose.
- Dividing wet ingredients: If you are worried about dividing the wet ingredients evenly, weigh the mixture, then divide that value by 2. Simply add this amount to each bowl for a perfect division. I find it easiest to mix a small amount of the wet ingredients into each bowl first, to loosen the mixtures, then add in the rest.

Fabulous
Thank you so much!