
Recently, I’ve been trying to master the Bundt. I had tried (and failed) so many times previously that I had kind of given up, but I’ve entered 2024 with a new sense of Bundt-motivation. I want to become a Bundt expert. A Bundt guru. A Bundt queen, if you will.
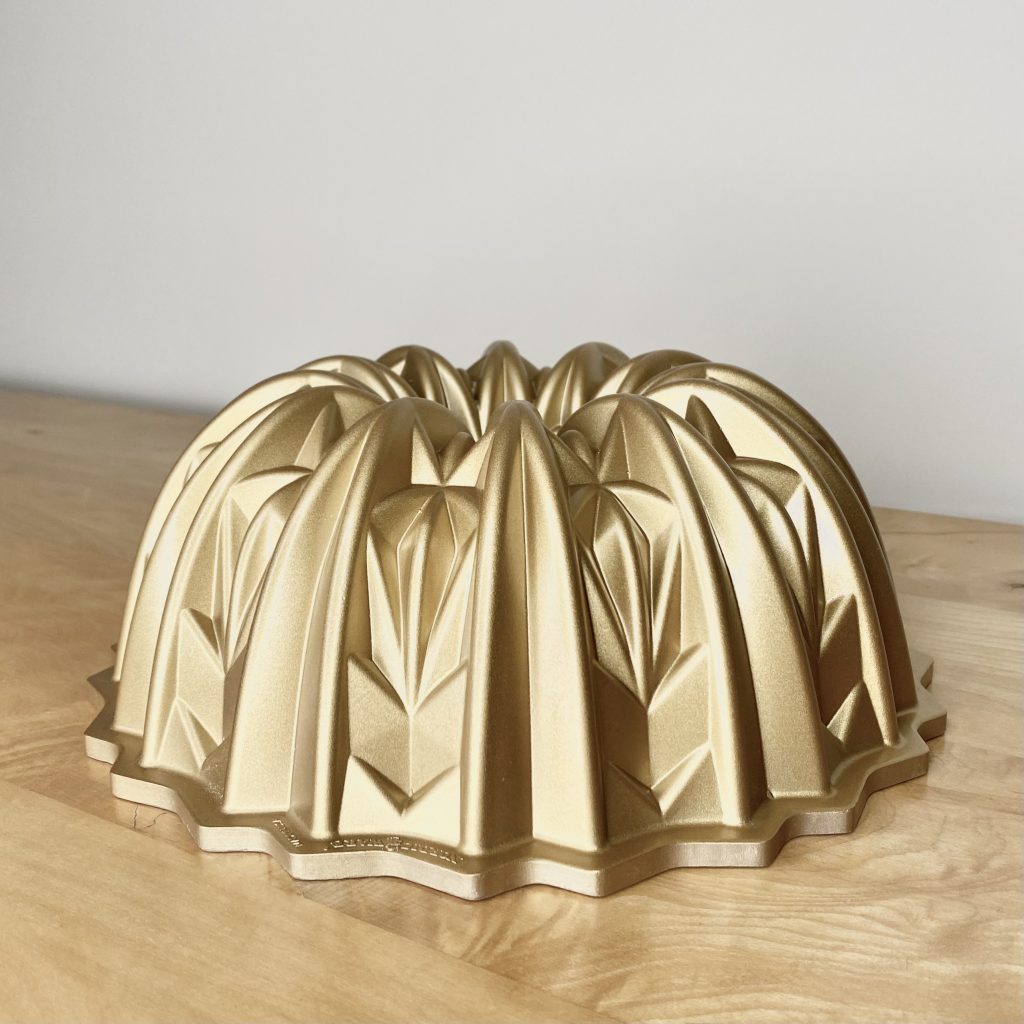
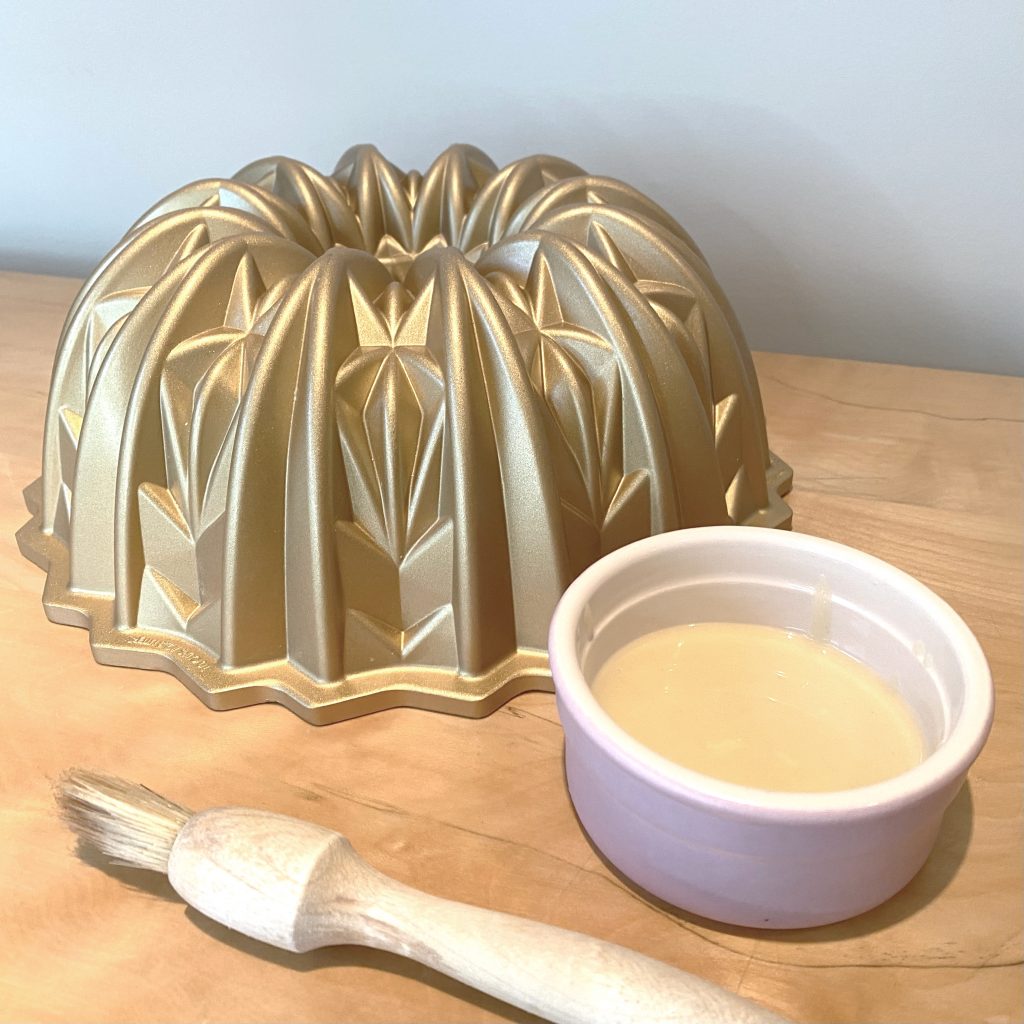
For Christmas, my brother and his fiancée gifted me this BEAUTIFUL Nordic Ware Bundt tin (wow, dreams really do come true- I mentioned how much I wanted a Nordic Ware Bundt in my 2023 Baking Gift Guide!). It’s incredible, but it’s also… very detailed (as many bundt tins are). I must confess, I was worried about getting the Bundt cakes out of this tin after baking them- there are just so many nooks and crannies for themto stick in! With normal tins, greasing them with butter and lining them with baking paper has always been my go-to, but this just isn’t possible with Bundt tins.
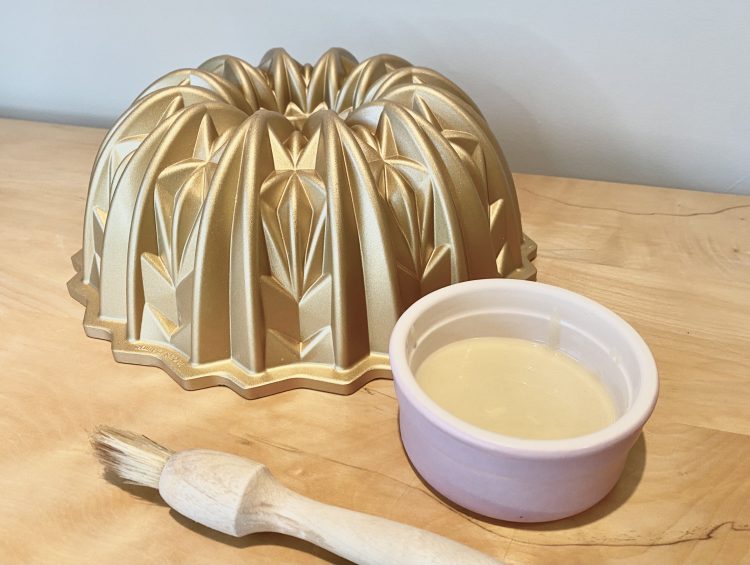
After a couple of… questionable… attempts (more on that in a sec), I finally tried making my own ‘cake release’. This is essentially an edible mixture that you paint onto the inside of the tin before filling it with the cake batter, which prevents the cake from sticking to the tin. It is life-changing for Bundt-making. Admittedly, you could use it for any cake/tin, but I’m particularly thrilled with it in a Bundt context. Today, I’m sharing the recipe with you, so you never have to worry about Bundt-related disasters occurring in your kitchen. What can I say? I intend to be a Bundt queen of the people.
Table of Contents
- Super Scientific Evidence for the Use of DIY Cake Release (AKA Photographic Evidence of My Own Bundt Disasters)
- When to Use DIY Cake Release
- Ingredients
- How to Make DIY Cake Release
- How to Use DIY Cake Release
- Making DIY Cake Release In Advance
- Recipe
Super Scientific Evidence for the Use of DIY Cake Release (AKA Photographic Evidence of My Own Bundt Disasters)
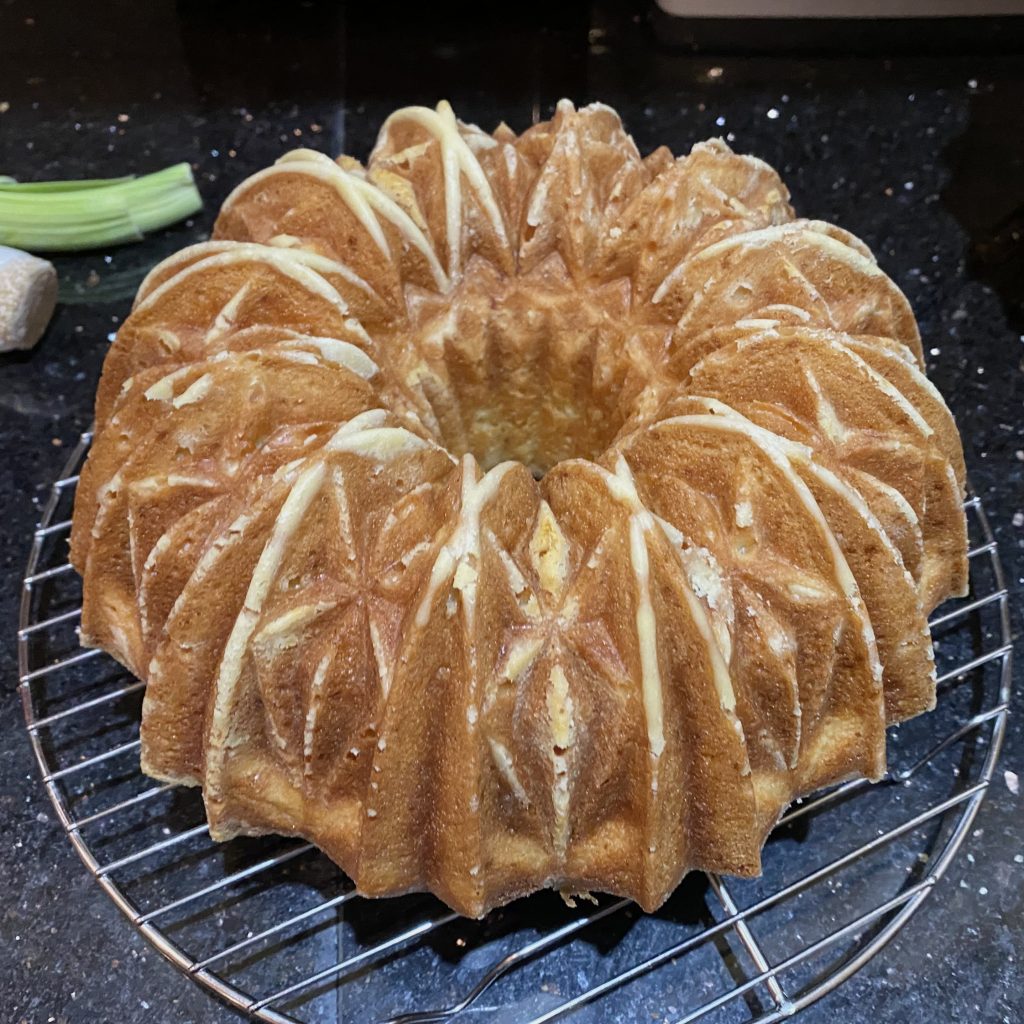
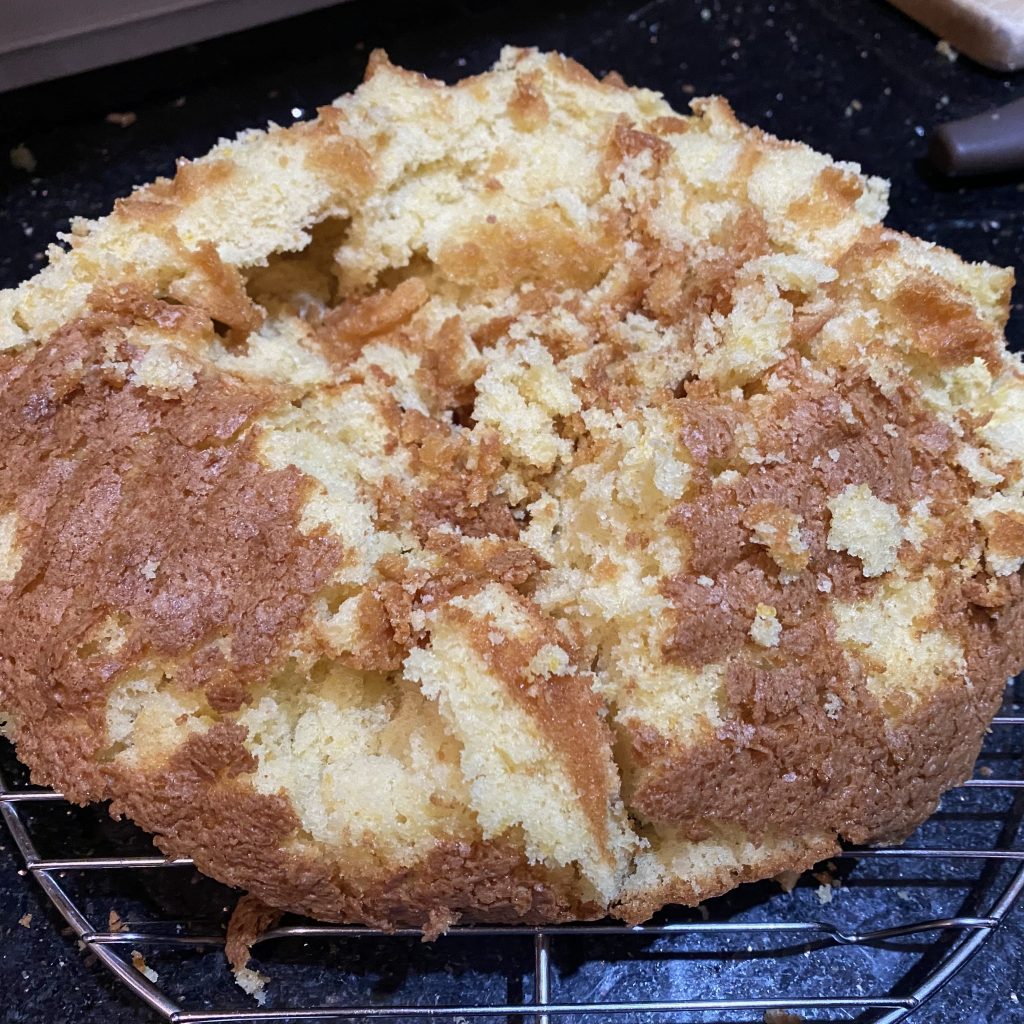
For my first Bundt attempt, I brushed the whole tin with melted butter, then dusted it with plain flour. I mean- this worked. The cake came out super easily, in one piece, with minimal stress. However, because this tin is so detailed, it was really hard to dust the flour evenly over the surface- a lot of the flour ending up clumping together with the butter in the grooves of the tin. As you can see from the photo, where this happened, I ended up with patches of… roux??… baked onto the cake. You can brush it off (to an extent), but you do lose some of the definition of the tin. Overall, this technique just wasn’t what I was looking for.
Incredibly, things actually got worse after that. For my next attempt, I tried to combat my flour problem by not using any flour at all. I brushed the whole tin with sunflower oil (I would have used melted butter, but this particular cake was a butter-less sponge, and I was hoping I could keep it dairy-free). Please, don’t do this. It absolutely did NOT work. I mean, you can see that from the photo. This is what I ended up with…
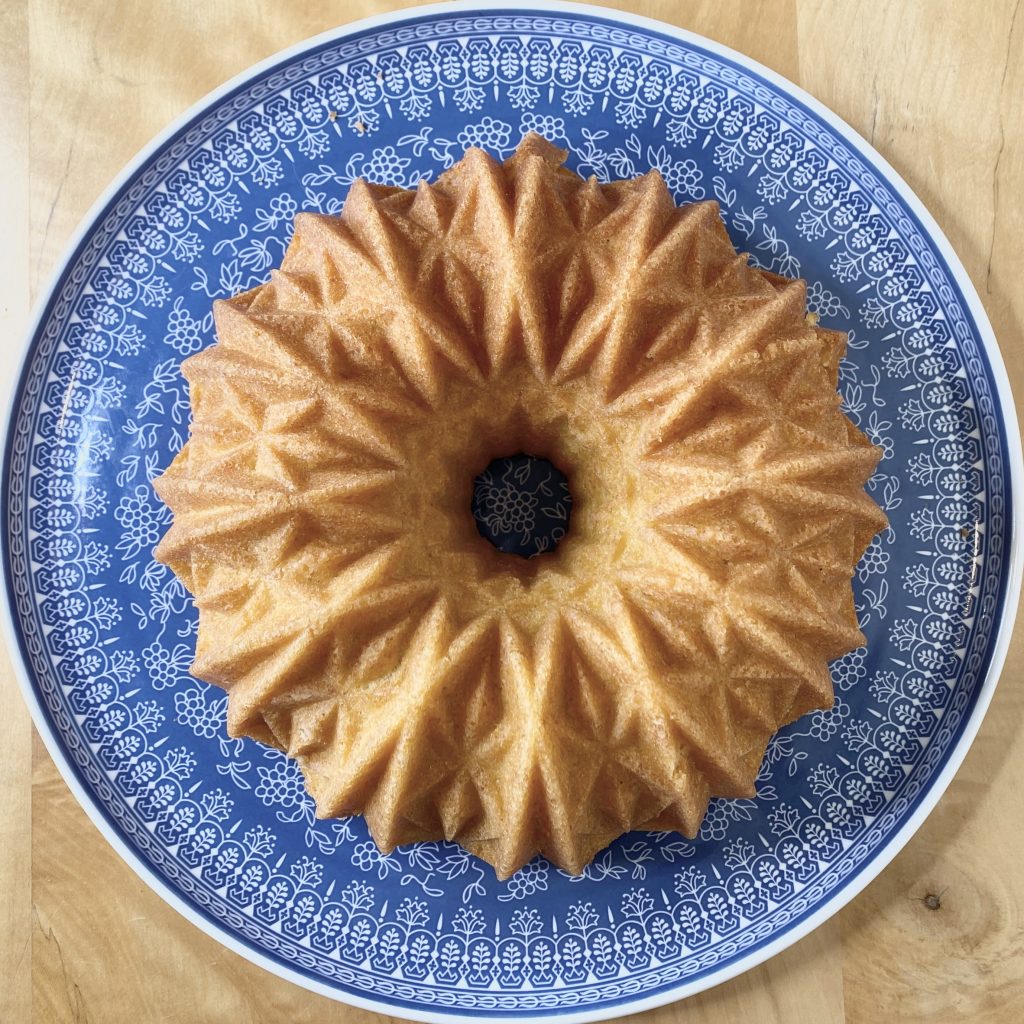
Long story short, I desperately needed a different, more successful method of greasing this Bundt tin. Enter, this DIY Cake Release. You can mix it up super quickly and easily, then you just paint it onto the tin (making sure to cover every inch of it with a thin layer), pour in the batter, bake it off and your Bundt will come out perfectly. No floury sections, no sticking and, as an added bonus, the whole cake will be super evenly caramelised and pretty (which is ideal for a Bundt cake like this).
When to Use DIY Cake Release
This DIY Cake Release can be used for any size/shape of cake tin- as I mentioned, I find it particularly helpful for Bundt tins, but you can use it for anything.
One note, though: I wouldn’t recommend using this DIY Cake Release if you’re making a chocolate/other dark-coloured cake, because it is naturally pale, so it will affect the colour of the caramelisation on the outside of any cakes like that. I have seen some people substituting the flour with cocoa powder to make a DIY Chocolate Cake Release, but I am yet to try that myself.
Ingredients
To make this DIY Cake Release, you only need 3 ingredients:
- Unsalted butter
You don’t necessarily want this cake release to taste of anything, so don’t bother using salted butter.
If you want to make this DIY Cake Release dairy-free/vegan, I’ve seen a lot of people using shortening instead of butter, which apparently works just as well (though, admittedly, I’ve never tried it myself).
- Plain flour
Don’t use self-raising flour for this, because the cake release is just to prevent the cake from sticking- it doesn’t need to rise!
- Vegetable oil
Any clear, flavourless oil will work here. I use sunflower oil, but you could use something like groundnut oil if you prefer (just remember not to serve a cake made with this to anyone with a nut allergy, if you do).
In terms of quantities, the amount of each ingredient you will need depends on how much cake release you want to make, but the general rule is that you need equal parts butter, flour and oil (i.e. a 1:1:1 ratio). For example, for a 10-cup Bundt tin like mine, I find I need about 1 1/2 tbsp of cake release, which I make using 1/2 tbsp butter (about 7g), 1/2 tbsp of plain flour and 1/2 tbsp of sunflower oil.
How to Make DIY Cake Release
This recipe (I mean, it barely even warrants the term) could not be easier. It’s basically just 3 steps:
- Melt the butter:
A lot of the recipes I came across used room temperature butter, but, honestly, melting the butter makes it so easy to mix together with the flour, so I do that. It adds an extra step, but it also decreases the elbow grease required, so I’m taking that as a win. You don’t even need to melt it fully (in fact, it’s probably better if it’s not too hot)- just get it so it’s soft enough that you can easily mix everything in.
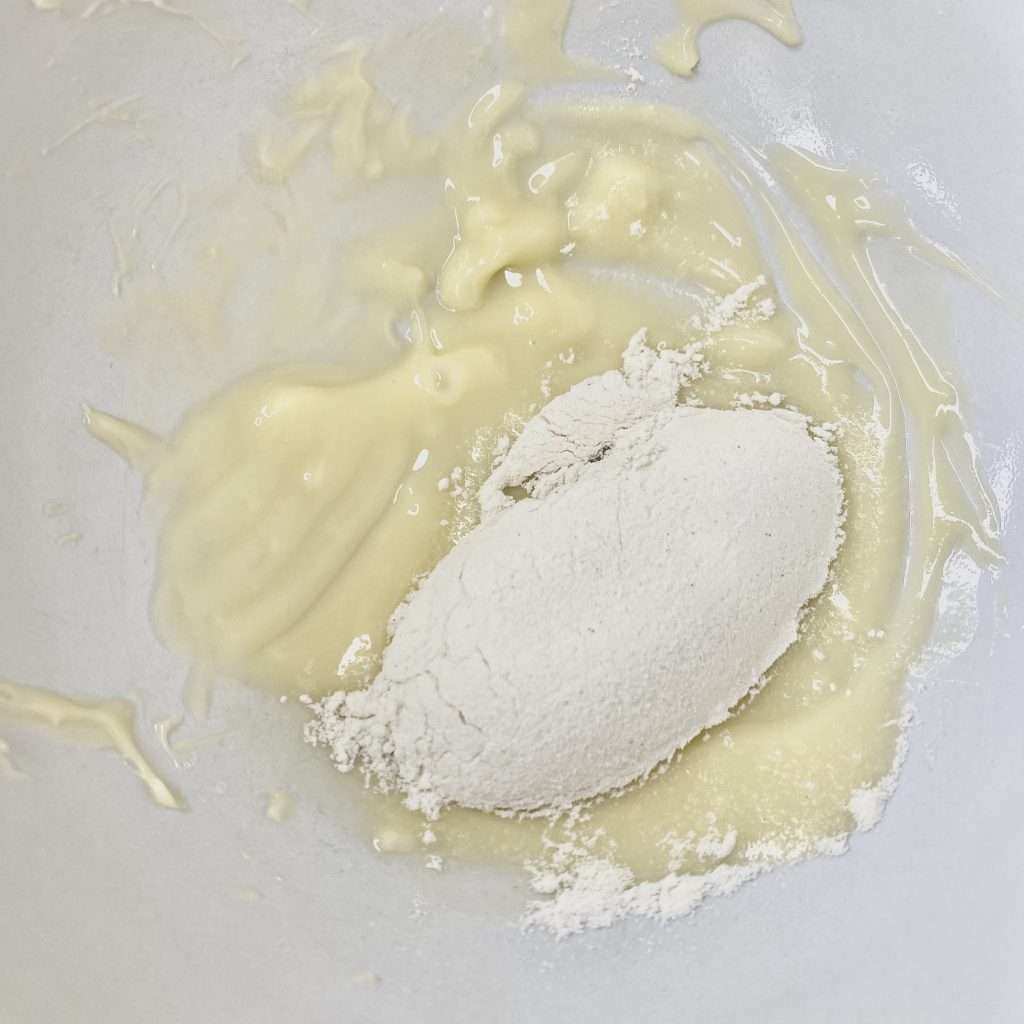
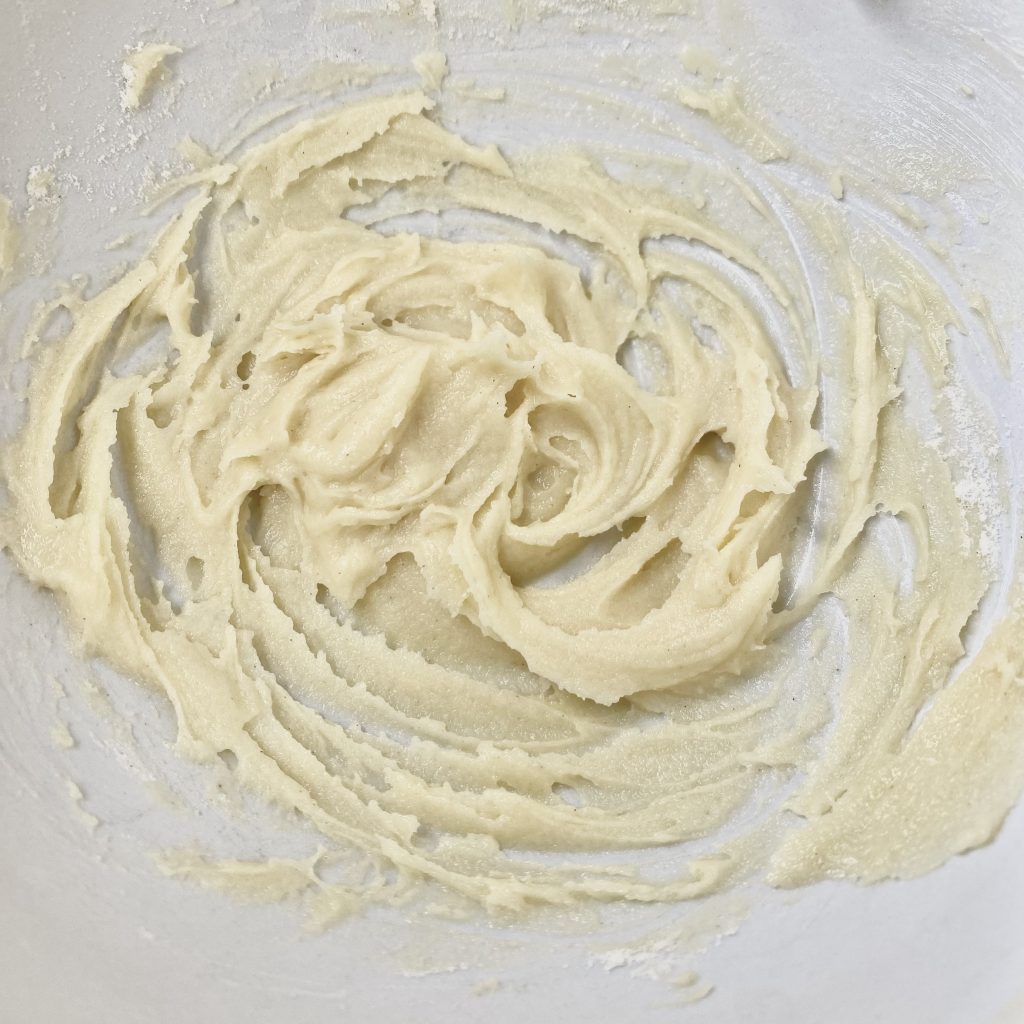
- Mix in the flour:
Mix the flour into the butter until no lumps remain. Any lumps at this stage might mean that you end up with little floury bits on the outside of your finished cake, which is exactly what we are trying to avoid!
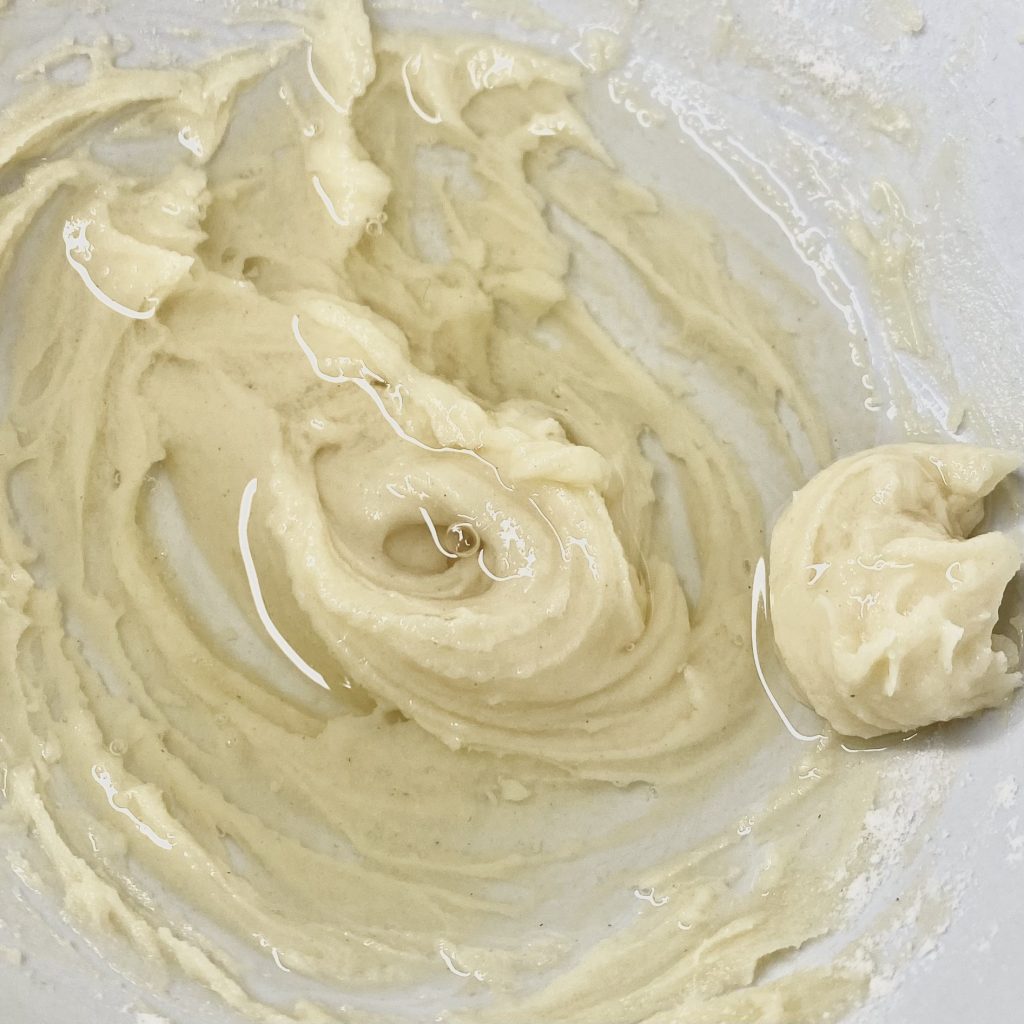
- Stir in the oil.
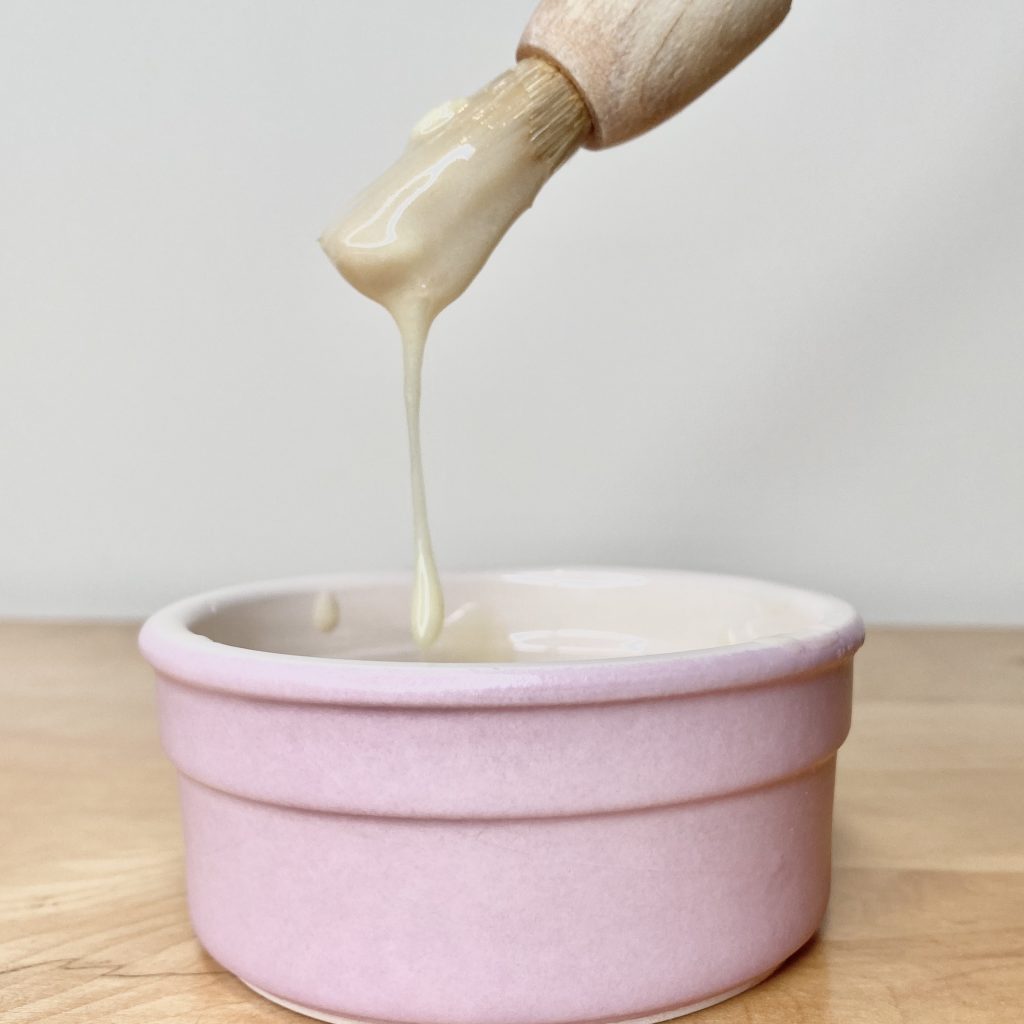
You want to add the oil at the end, once the flour and butter are combined, for the best results. Once you’ve added the oil, just keep stirring until you have a smooth, cohesive ‘goop’ (I’m so sorry- there’s really no good way to describe this stuff).
And that’s… literally it.
How to Use DIY Cake Release
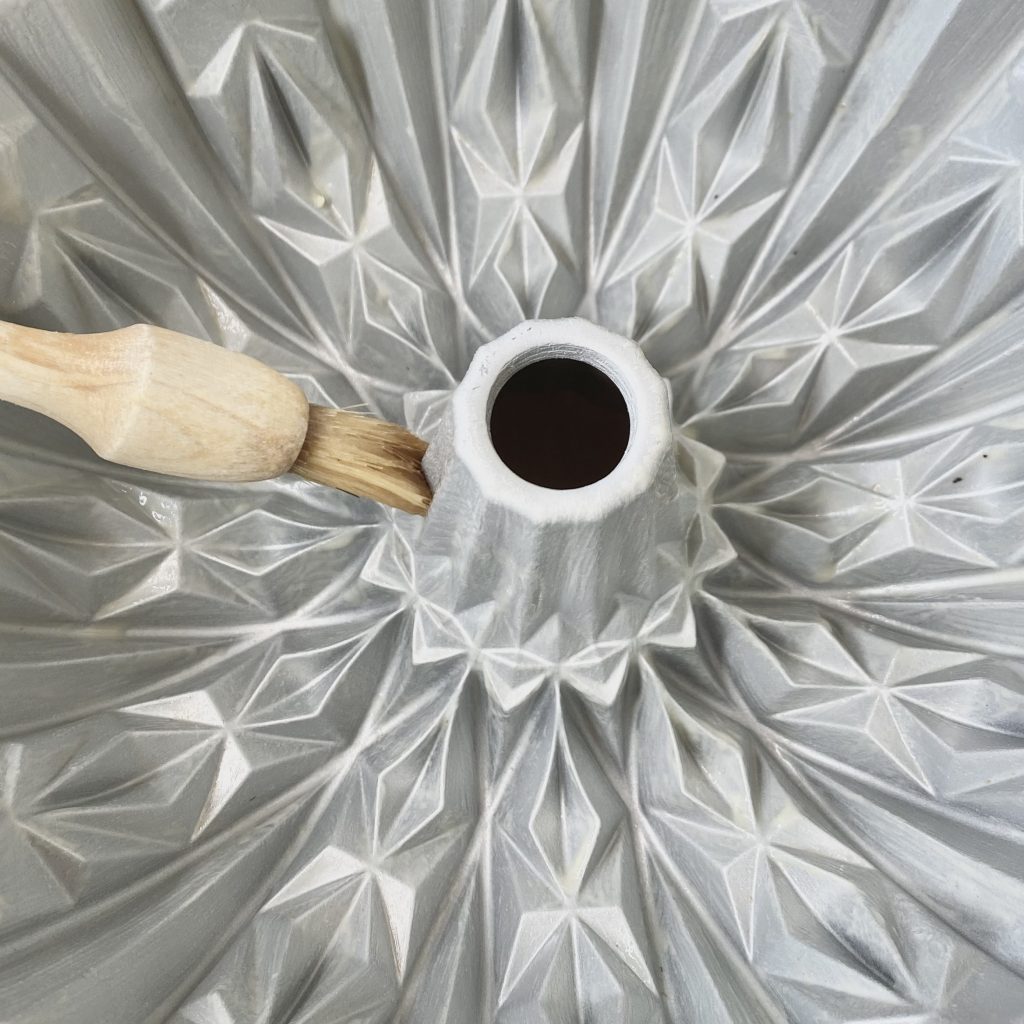
Once you have prepared your cake release, you just need to paint a thin layer of it all over the inside of your tin, using a pastry brush. Make sure that every inch of it is covered, otherwise your cake might stick in some places!

For baking with Bundt tins, it’s still important to be very careful when removing the Bundt from the tin, even with the cake release. I like to let the Bundt cool in the tin for about 5 mins, then use my (clean!) fingers to gently pry the edges of the cake away from the tin- do be careful, though, because it will obviously still be very hot. You can see in the photo above that the cake will already be pulling away slightly, because of the cake release, but you just want to loosen it a little more. Then, place a wire rack on top of the tin, and flip the whole lot over. Tap the tin and the rack together on the work surface firmly a couple of times, to help loosen the cake, then carefully lift off the Bundt tin to reveal your Bundt cake! If the cake still hasn’t come out, give it a few more taps on the work surface and try again.
Making DIY Cake Release In Advance
If you know you’ll be making a lot of cakes over a certain period, you can make a big batch of this DIY Cake Release and store it in the fridge. Kept in an airtight container, it should keep for at least a month. When you’re ready to use it, take out a small amount and warm it ever so slightly in the microwave (and give it a stir!) to bring it back to its original consistency, then you can go ahead and use it as normal.
If you use shortening instead of butter, you don’t need to keep it in the fridge- it will be shelf-stable and keep for longer.
Recipe

DIY Cake Release
Ingredients
- 1/2 tbsp unsalted butter (about 7g).
- 1/2 tbsp plain flour
- 1/2 tbsp vegetable oil (see Note 1).
Instructions
- Melt the butter in the microwave.
- Stir the flour into the melted butter, mixing well until no lumps remain.
- Add the oil to the flour/butter mixture and mix well, until you have a smooth 'goop'.
To use the cake release:
- Use a pastry brush to paint a thin layer of cake release all over the inside of the cake tin, making sure to cover every surface. Once covered, fill the tin with your chosen cake batter and bake as usual.
Notes
- Any clear, flavourless oil will work here- I use sunflower oil, but groundnut oil would also work (just be careful not to give a cake made with this to anyone with a nut allergy, if you do use groundnut oil).

I don’t think I’ve ever made a Bundt cake but I’m bookmarking this easy release for my other cakes. Thanks Gemma
I hope you find it useful! I’ve been loving using it for my cakes.
Thank you!
You’re so welcome! I love this DIY Cake Release— such a game changer for my bakes!