
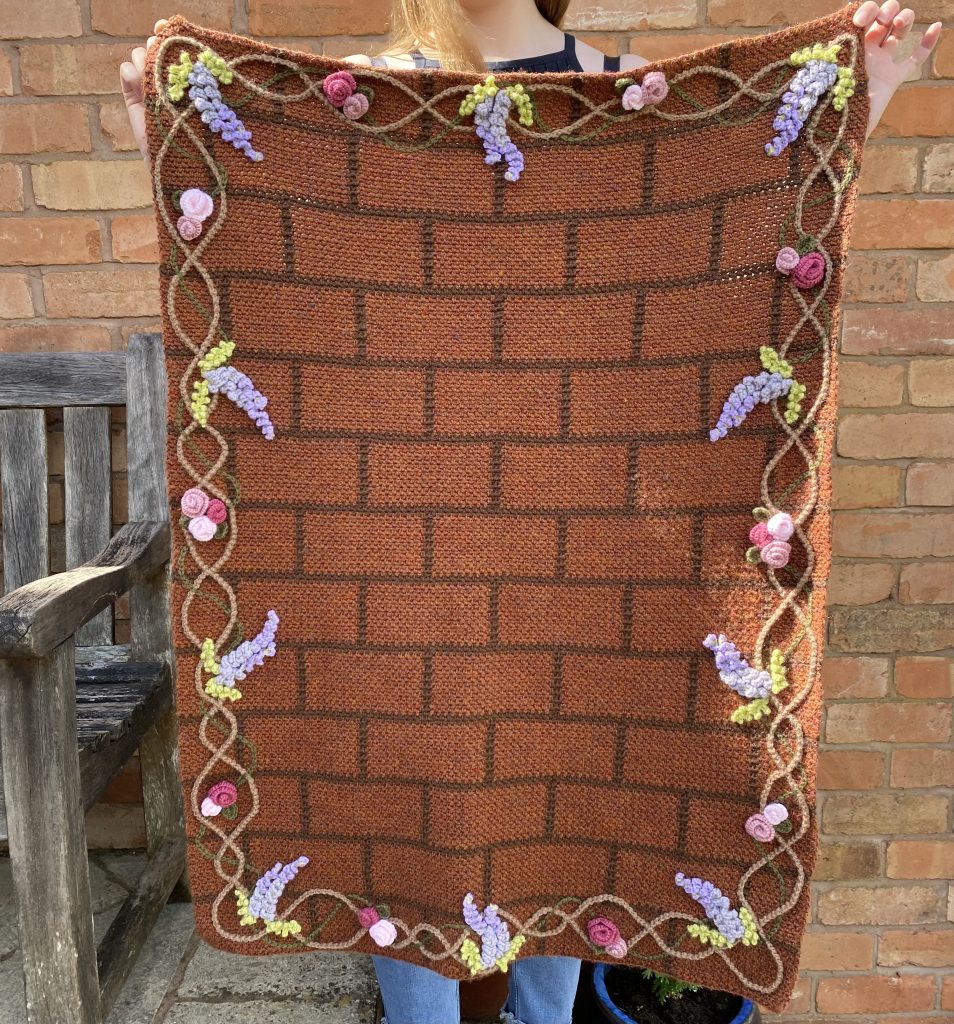
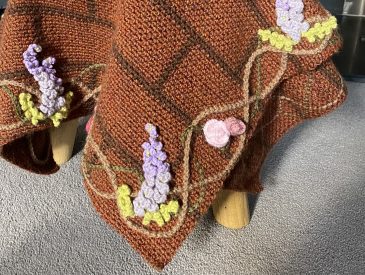
Last week, I revealed a new crochet pattern: my Bridgerton House Baby Blanket. Inspired by the iconic house from the Netflix series, this project has been my baby for 2 WHOLE years, so I’m very excited to finally be sharing it with you. As I mentioned in the introductory post, I’m releasing this pattern in weekly instalments- today’s post is the first of them! In this post, you’ll find all the information you need to make the basic, brick blanket.
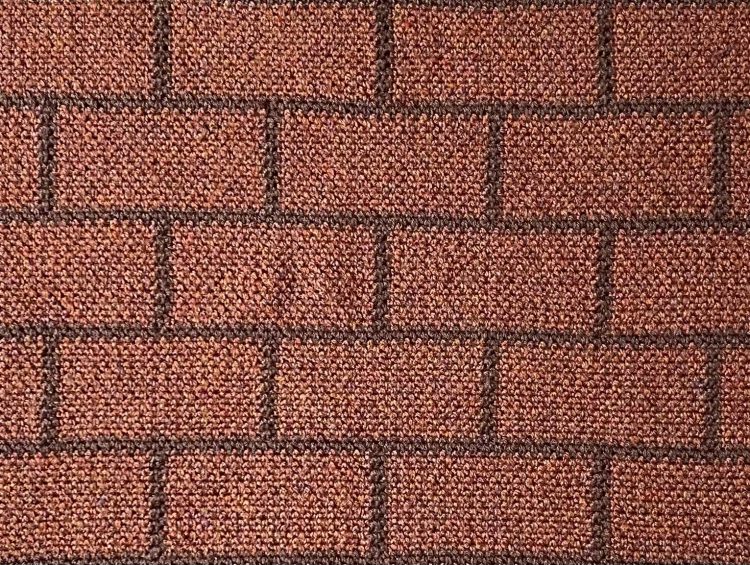
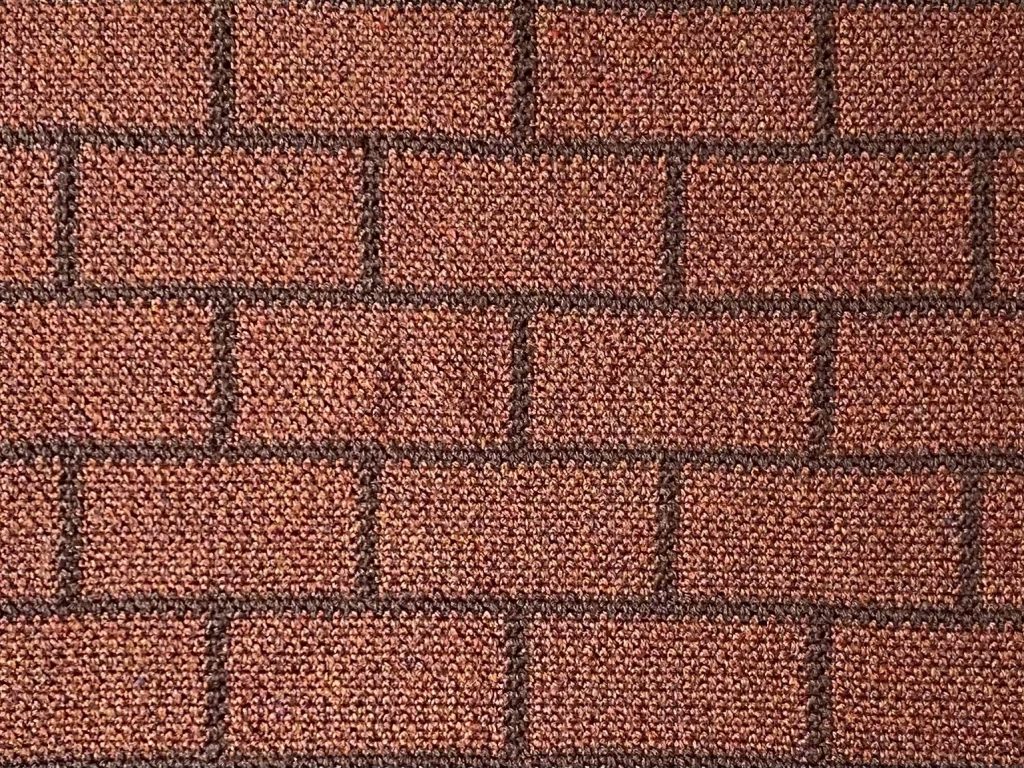
The brick blanket is predominantly worked in linen stitch– a squidgy, easy-to-work stitch that gives the blanket a lovely texture, feel and professional look. The blanket also utilises some colourwork (using yarn bobbins) to achieve a ‘bricks and mortar’ effect-. This post contains a full tutorial for all of the techniques and stitches used in the pattern, so please do not worry if you haven’t done some of the techniques before- it’ll just be a fun challenge!
Once you get the hang of it, the pattern itself is quite straightforward and nicely repetitive (even though the written pattern, I admit, might look a little daunting!). I have also included a photo tutorial to help demonstrate some of the techniques and to help you visualise the slightly trickier elements of the pattern, in the interest of making this pattern as beginner-friendly as possible!
Table of Contents
- Linen Stitch: The Basics
- Using Yarn Bobbins
- Materials & Tools
- Pattern Notes
- Abbreviations
- Written Pattern
- Photo Tutorial
Linen Stitch: The Basics
Linen Stitch, or Moss Stitch, is a simple crochet stitch made using a combination of two basic elements: double crochet and chains. Rows are worked in the following pattern: (Ch 1, skip the next stitch, dc in the next stitch), where, after the first ‘setup’ row, the dc stitches are worked into the ch spaces from the row below. The result is a fabric that is slightly denser than standard double crochet and has a fine, even texture.
I love linen stitch, but it can sometimes be a little bit tricky to maintain a consistent tension when working in it. Luckily, with this blanket, the vertical mortar lines (which are worked in plain double crochet, not linen stitch), act as ‘pillars’ which help to keep the linen stitch bricks even. If you’ve had trouble with linen stitch before, this would be a great project to give it another go!
Using Yarn Bobbins
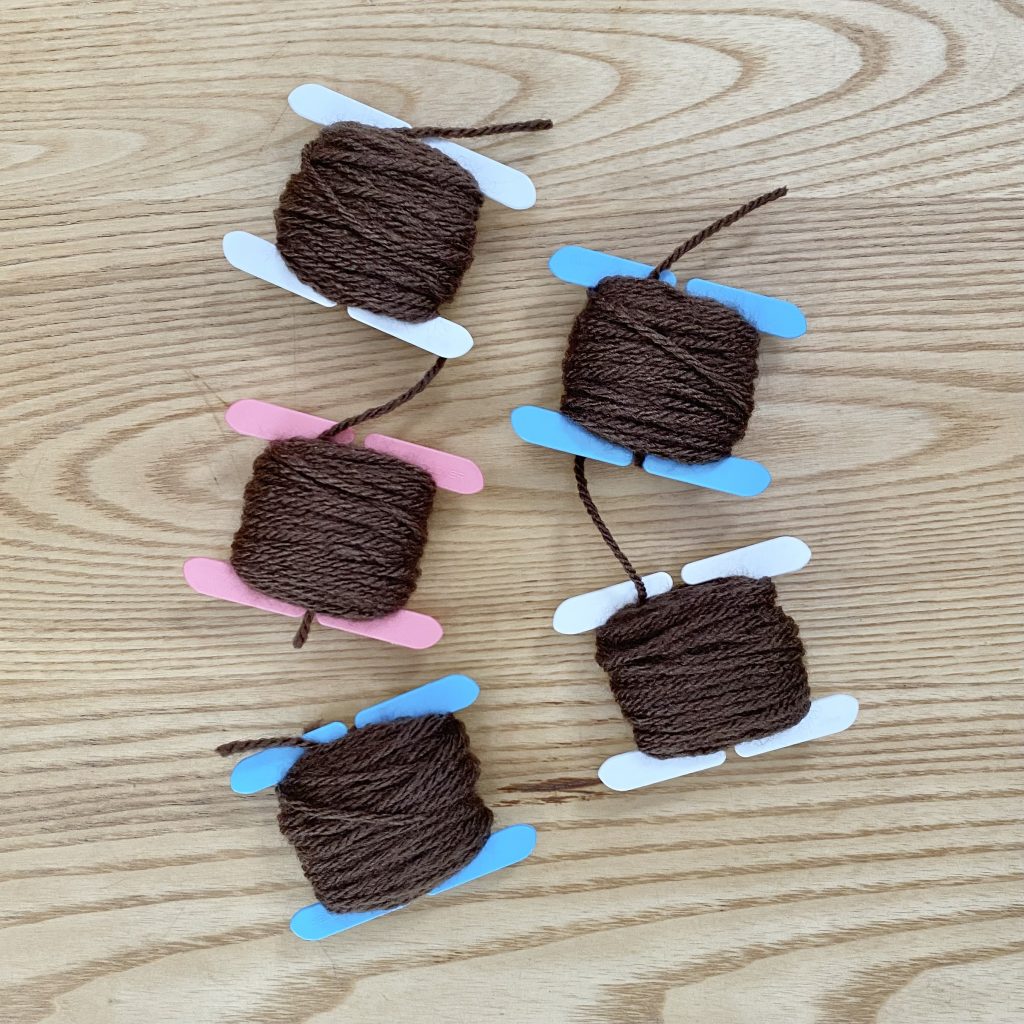
Yarn bobbins are essentially flat ‘spools’, onto which small amounts of yarn can be wound, to make the colourwork process easier. For this blanket, there are times when you need 5 working threads of Walnut yarn at once, so yarn bobbins are a necessity (unless you fancy buying 5 balls of yarn, which I wouldn’t recommend because a) it would be expensive and probably wasteful, b) you’re much more likely to get into a tangle and c) your project will be super heavy and difficult to manoeuvre while you work on it!). There’s a slight learning curve when it comes to working with yarn bobbins, but once you’ve got the hang of it, it will make your life so much easier!
There’s a couple of things you need to keep in mind when you’re using the yarn bobbins for this pattern:
- Don’t overload the bobbins.
This is a general rule for yarn bobbins! It can be tempting to wind as much yarn as possible onto each bobbin, to minimise the number of ends you’ll have to sew in later. However, overloading yarn bobbins can lead to tangles and distorted fabric (because of the added weight). I found that winding about 3g of yarn onto each bobbin was perfect- it was enough that I wasn’t constantly having to refill them, but not so much that I ran into problems.
- Once you’ve worked with the yarn from the bobbin and re-joined the brick colour, always move the bobbin to the front of your work.
Keeping a consistent bobbin placement routine will make your work look super neat, and keeping the bobbins at the front of the work makes it easier to crochet the next row. Trust me!
Materials & Tools
I listed all of the materials and tools you need to make the complete Bridgerton House Baby Blanket in the previous post, but, if you would just like to make the brick blanket (sans floral embellishments), you’ll need the following equipment:
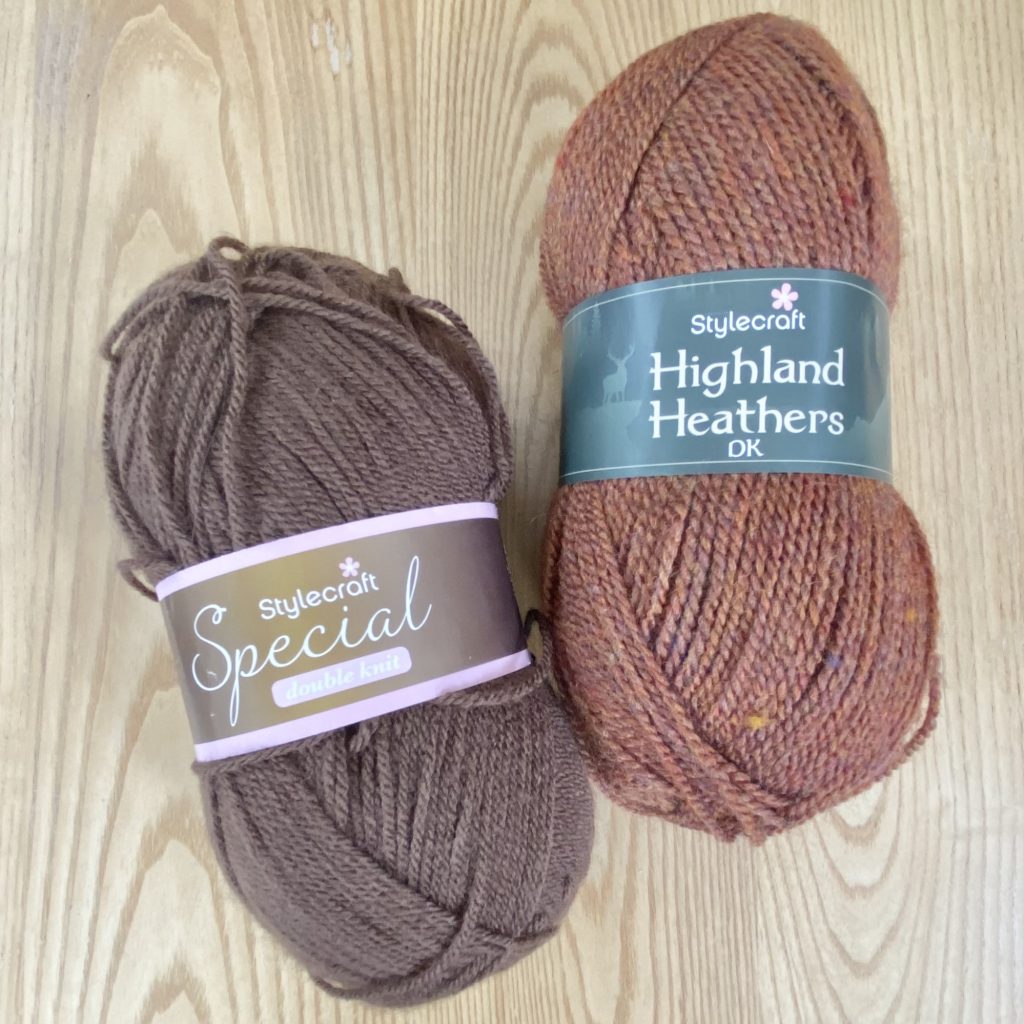
- 4 x 100g balls Stylecraft Highland Heathers DK in Marmalade.
- 1 x 100g ball Stylecraft Special DK in Walnut.
- 4.00 mm crochet hook.
- 3.50 mm crochet hook (for the starting chain only).
- 5 yarn bobbins.
- Darning needle.
- Scissors.
Pattern Notes
- This pattern uses UK crochet terminology.
- Gauge: Each full-sized, linen-stitch brick should measure approx. 13 x 6cm. Worked at the this gauge, the finished blanket will measure approximately 90 x 65cm.
- The blanket is worked back and forth, using a combination of linen stitch (for the bricks and horizontal mortar lines) and double crochet (for the vertical mortar lines). As a general rule of thumb, a dc should be worked before each vertical mortar line and a ch should be worked after each vertical mortar line. Use this rule as a handy checkpoint to keep yourself on track!
- Colourwork techniques are used to create the vertical mortar lines, for which yarn bobbins are used. You will need 5 bobbins, each wound with about 3g of Walnut yarn, for the mortar. Keep the main ball of Walnut to hand for rewinding the bobbins and crocheting the longer, horizontal mortar lines.
- A 3.5mm hook is used only for the initial starting chain, to ensure a neat edge. The rest of the blanket is worked using a 4mm hook.
Abbreviations
- MC = Main colour: Stylecraft Highland Heathers DK in Marmalade.
- CC = Contrast colour: Stylecraft Special DK in Walnut.
- ch = Chain: yarn over and pull through.
- dc = UK double crochet: insert hook into stitch, yarn over and pull through. You will now have two loops on your hook. Yarn over and pull through both loops.
- ss = Slip stitch: yarn over and pull through loop on hook.
Written Pattern
Using MC and 3.5mm hook, ch 178.
Row 1: Change to 4mm hook. Dc in 2nd chain from hook. (Ch 1, skip one stitch, dc in next stitch) 16 times. Join a CC yarn bobbin. Dc in next 2 chains using CC yarn, making sure to crochet over the MC yarn. Rejoin MC yarn. Bring CC yarn bobbin to the front of the work, then continue with MC yarn. (Ch 1, skip one stitch, dc in next stitch) 17 times with MC yarn. *Join new CC yarn bobbin, dc 2 with CC, working over MC yarn. Rejoin MC yarn, bring bobbin to front of work, then (Ch 1, skip one stitch, dc in next stitch) 17 times* to end.
Rows 2-16: Ch 1, turn and dc in next ch space. (Ch 1, skip one stitch, dc in ch space) 16 times. *Rejoin CC yarn from row below, dc 2 with CC, working over MC yarn. Rejoin MC yarn, bring bobbin to front of work, then (Ch 1, skip one stitch, dc in ch space) 17 times* to end.
Cut MC and all CC bobbins, leaving ends to darn in later. Attach main ball of CC.
Rows 17-18: *Ch 1, skip one stitch, dc in ch space* to end.
Cut CC, join MC.
**Rows 19-34: Ch 1, turn and dc in next ch space. (Ch 1, skip one stitch, dc in ch space) 7 times, then *Join CC bobbin, dc 2 with CC, working over MC yarn. Rejoin MC yarn, bring bobbin to front of work, then (Ch 1, skip one stitch, dc in ch space) 17 times* 4 times. Join CC bobbin, dc 2 with CC, working over MC yarn. Rejoin MC yarn, bring bobbin to front of work, then (Ch 1, skip one stitch, dc in ch space) 8 times.
Cut MC and all CC bobbins, leaving ends to darn in later. Attach main ball of CC.
Rows 35-36: *Ch 1, skip one stitch, dc in ch space* to end.
Cut CC, join MC.
Rows 37-52: Ch 1, turn and dc in next ch space. (Ch 1, skip one stitch, dc in ch space) 16 times. *Join CC bobbin, dc 2 with CC, working over MC yarn. Rejoin MC yarn, bring bobbin to front of work, then (Ch 1, skip one stitch, dc in ch space) 17 times* to end.***
Repeat from ** to *** 5 more times, working the last 2 rows of the blanket as follows:
Rows 231-232: Ch 1, turn and dc in next ch space. (Ch 1, skip one stitch, dc in ch space) 16 times. *Join CC bobbin, (ss in first stitch, dc in next) with CC, working over MC yarn. Join MC yarn, bring bobbin to front of work, then (Ch 1, skip one stitch, dc in ch space) 17 times* to end.***
Cut all yarns and darn in all ends. Steam gently before adding surface crochet details and appliqué embellishments.
Photo Tutorial
This photo tutorial is designed to be used in conjunction with the written pattern above. Hopefully, it will help to illustrate some of the techniques and help you to visualise the brick pattern (which will make the pattern feel much more intuitive!).
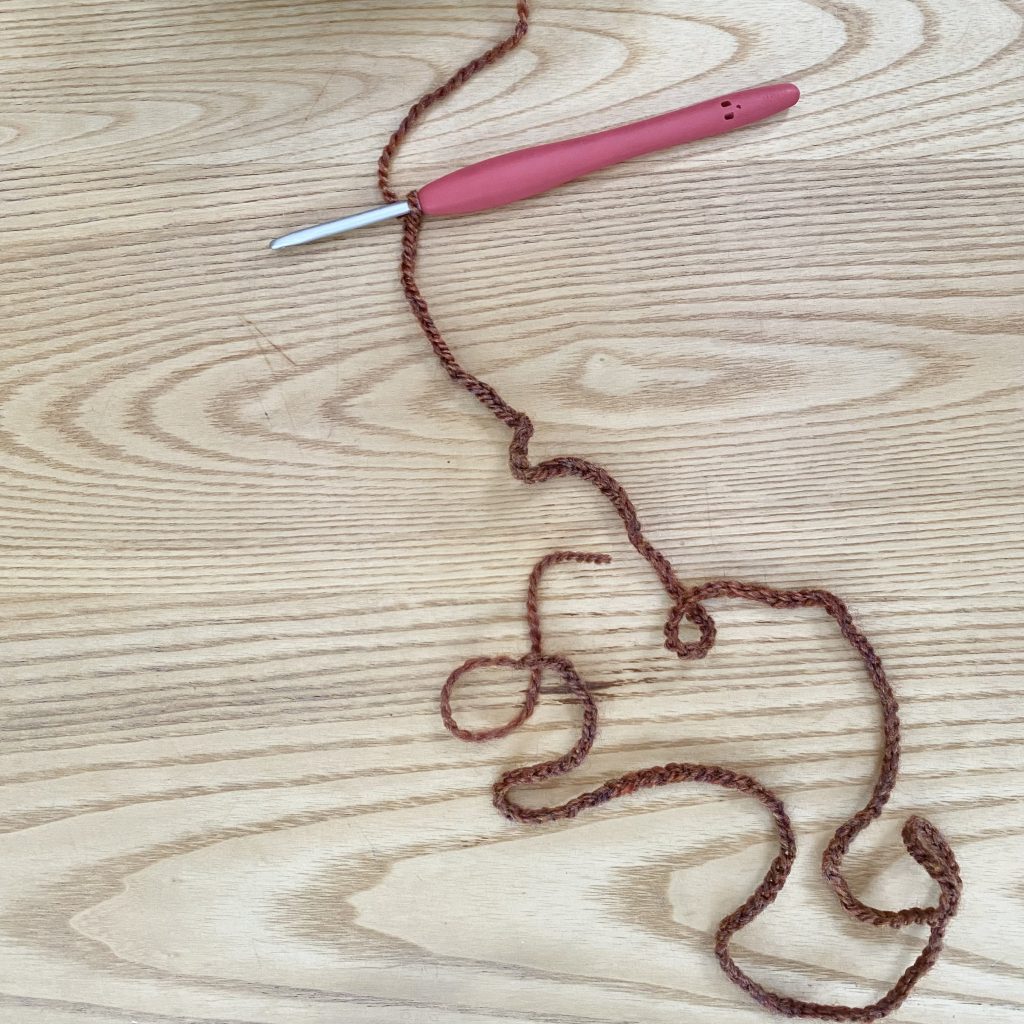
First, you need to make the starting chain. Using a 3.5mm hook and the Marmalade yarn, ch 178. Using a slightly smaller hook for the starting chain will help to keep the bottom edge of the blanket neat and uniform (typically, I use a larger hook to form my starting chains, but, when working in linen stitch, I like to use a smaller hook).

Switch to a 4mm hook and work 1 dc into the 2nd chain from the hook. This counts as one (ch 1, dc) in the linen stitch pattern repeat.
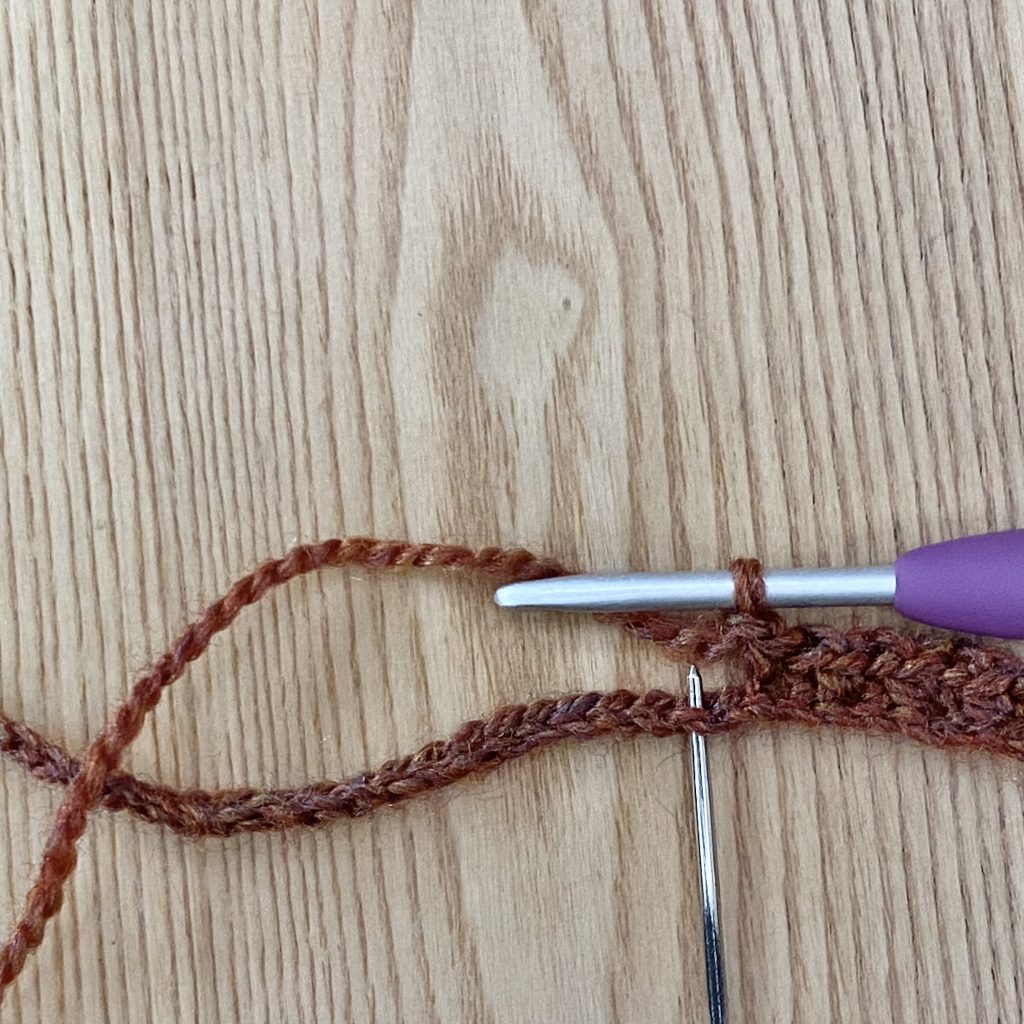
*Ch 1, skip next stitch, dc into next stitch* 16 times. Alongside the initial (ch 1, dc), that gives a total of 17 times, which equals one brick. All of the full-sized bricks throughout this pattern are made up of 17 repeats (or 34 stitches), like this.

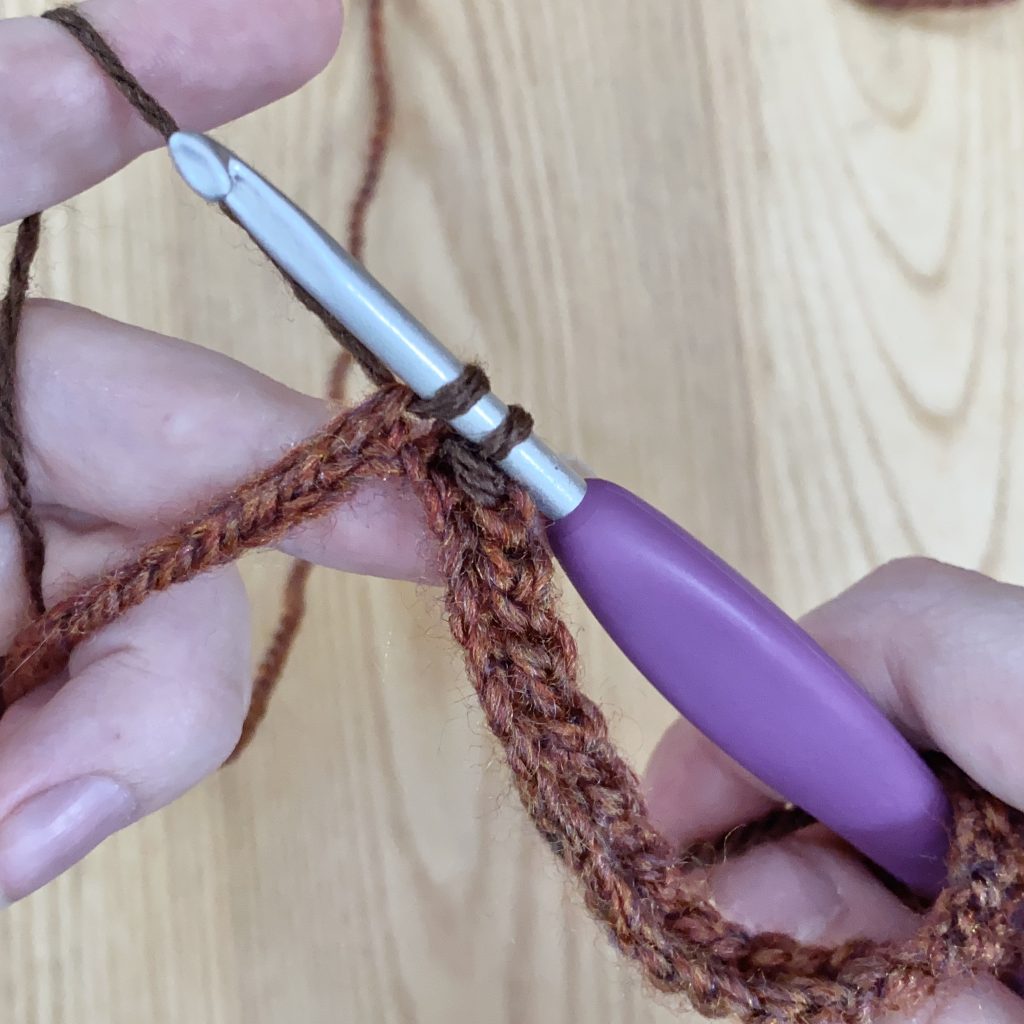
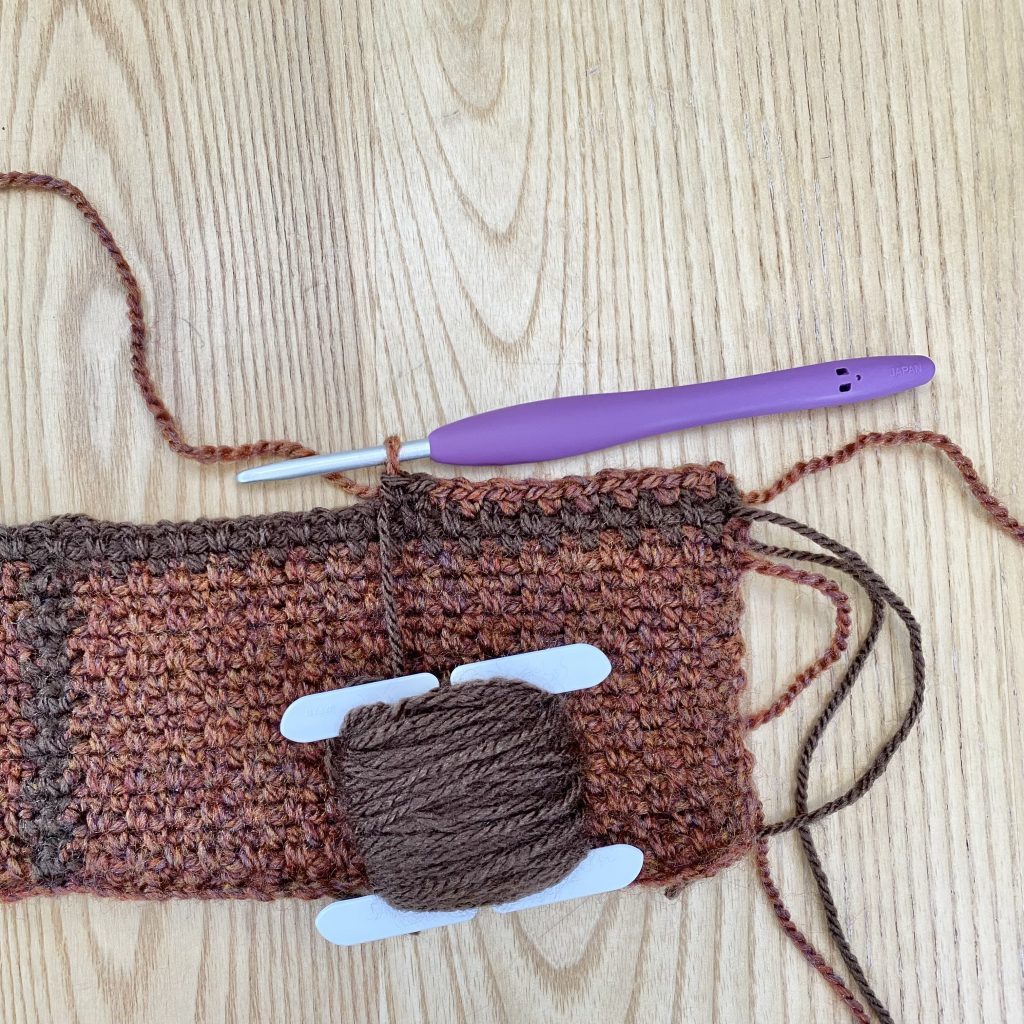
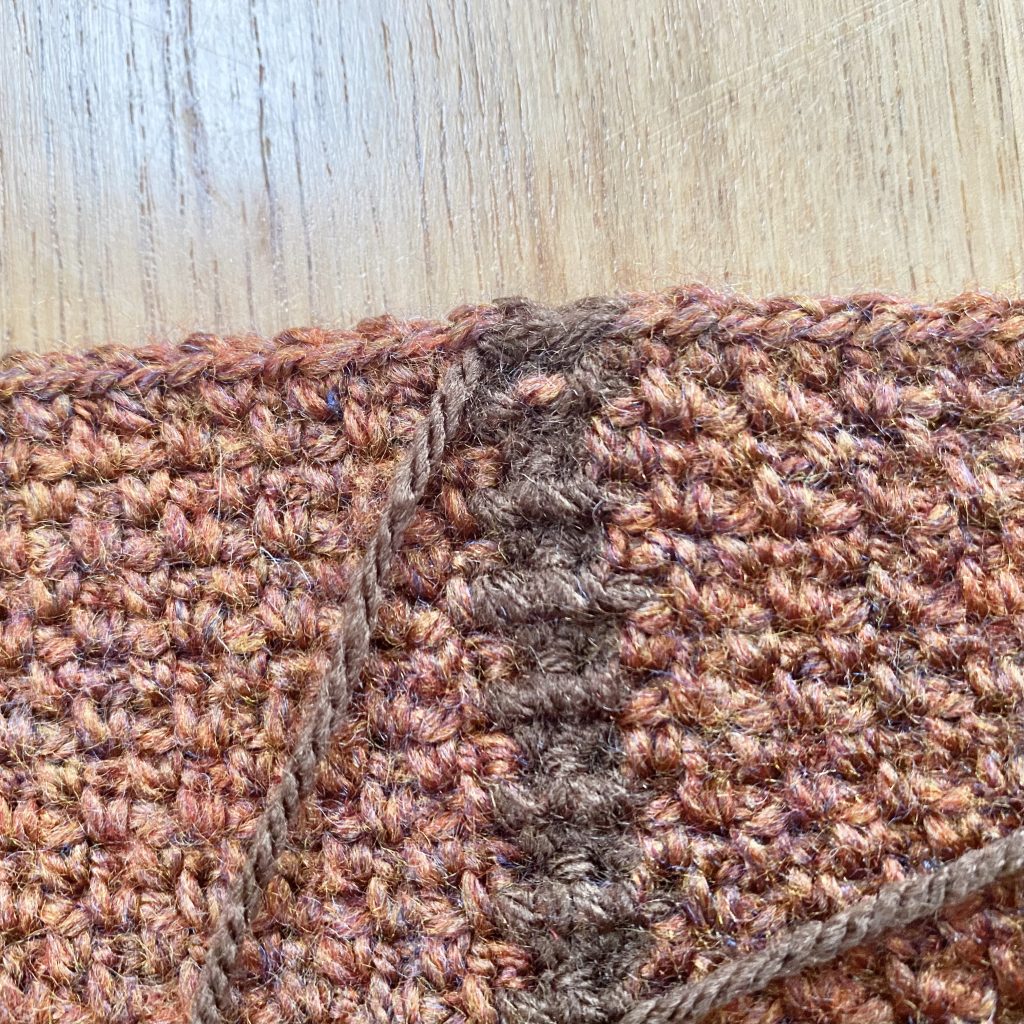
When you get to the final stitch in the first brick, pull through Walnut yarn (from a yarn bobbin), instead of Marmalade, to join the new colour. This makes for a neat colour change.
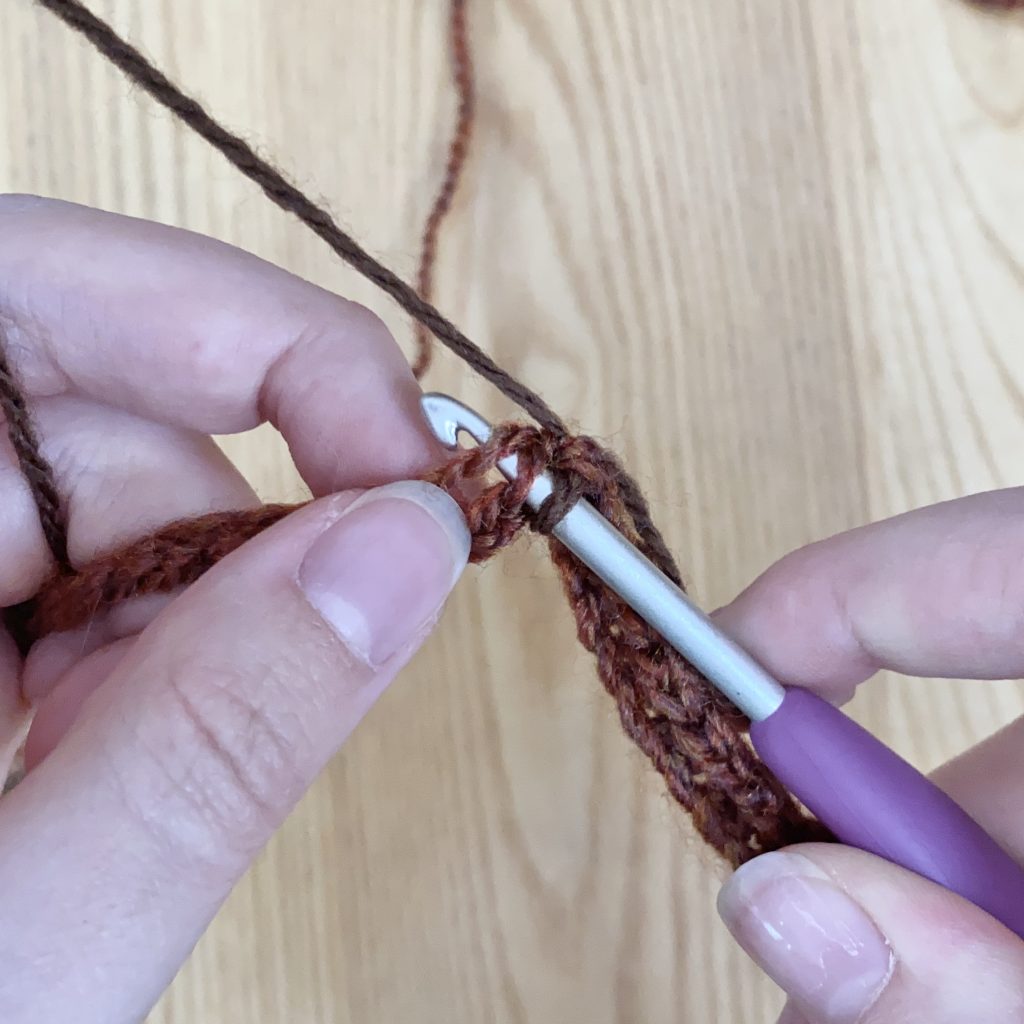
Using Walnut yarn, dc into the next 2 stitches, making sure to carry the Marmalade yarn. To do this, lie the Marmalade yarn along the top of the work and crochet over it with the Walnut yarn. This will conceal the Marmalade yarn, while ensuring it is in the right position to be picked back up for the next brick. Remember that the vertical mortar stripes are not worked in linen stitch- they are worked in standard dc.
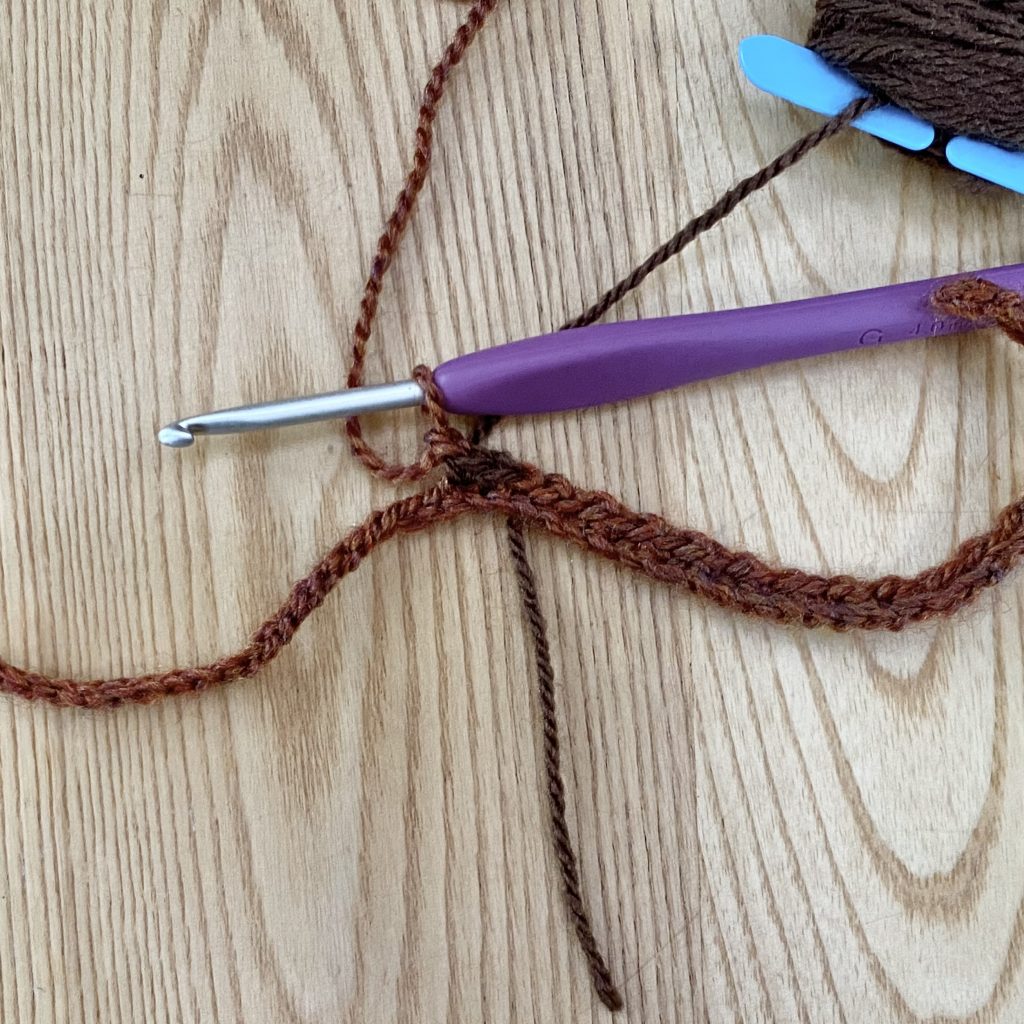
Pull the Marmalade yarn through at the end of the 2nd dc, to rejoin the brick colour. Don’t forget to bring the Walnut yarn bobbin to the front of the work at this point- this will make the next row easier to crochet and doing this every time will make the blanket look super neat and consistent.
Set up another linen stitch brick. *Ch 1, skip next stitch, dc into next stitch* 17 times.
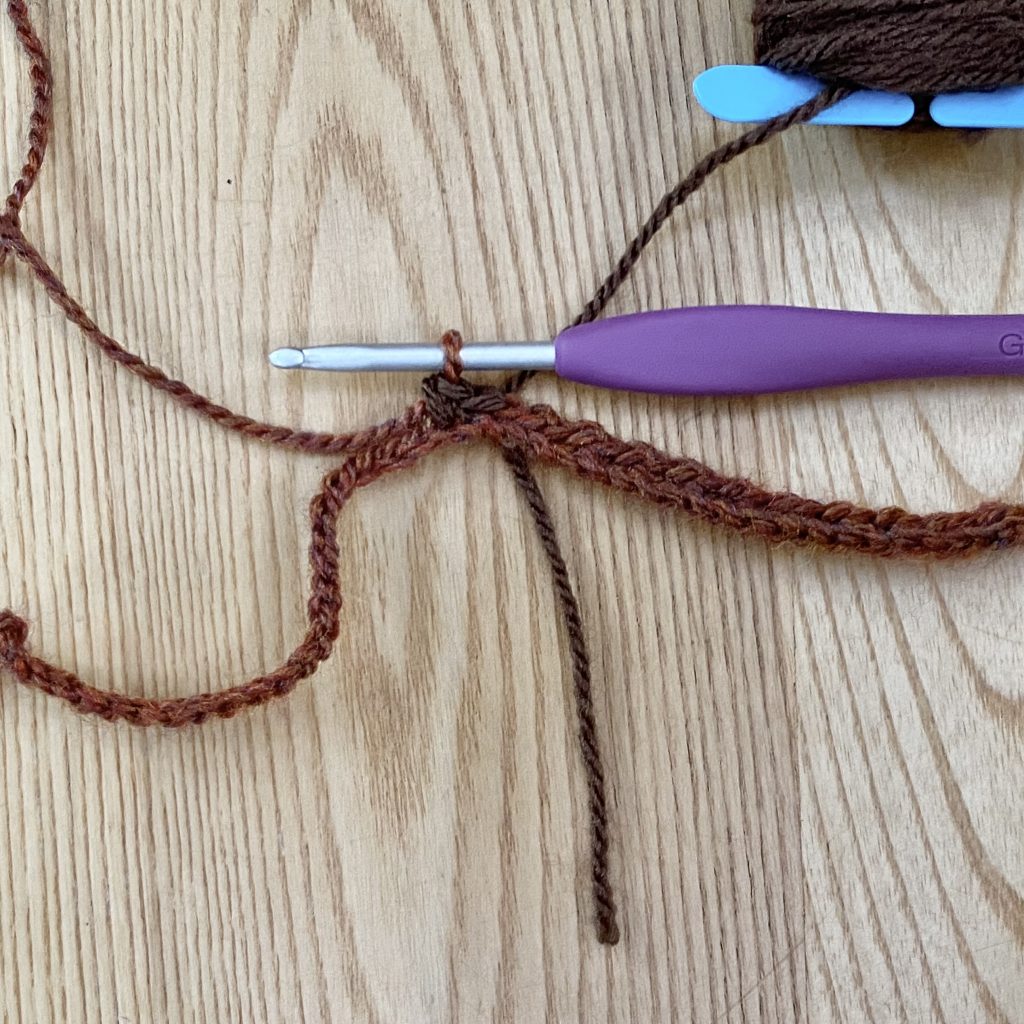
Make the vertical mortar line as before. Join another bobbin of Walnut yarn in the final dc of the previous brick and dc in the next 2 stitches, carrying the Marmalade yarn so that you can seamlessly rejoin it for the next brick.
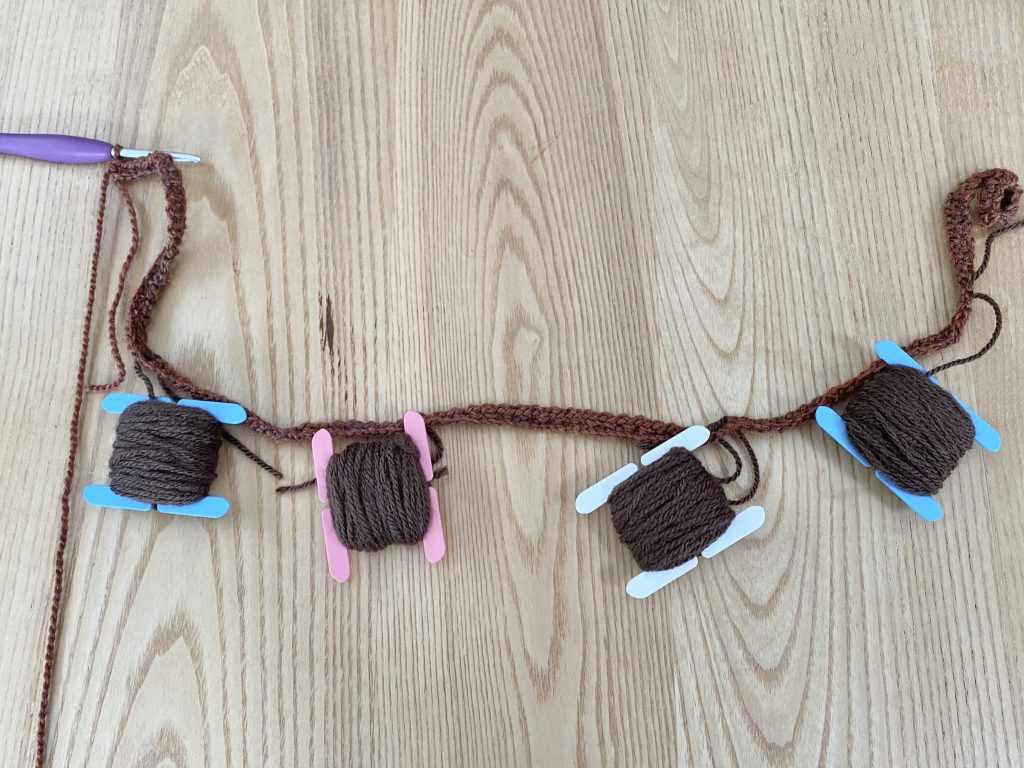
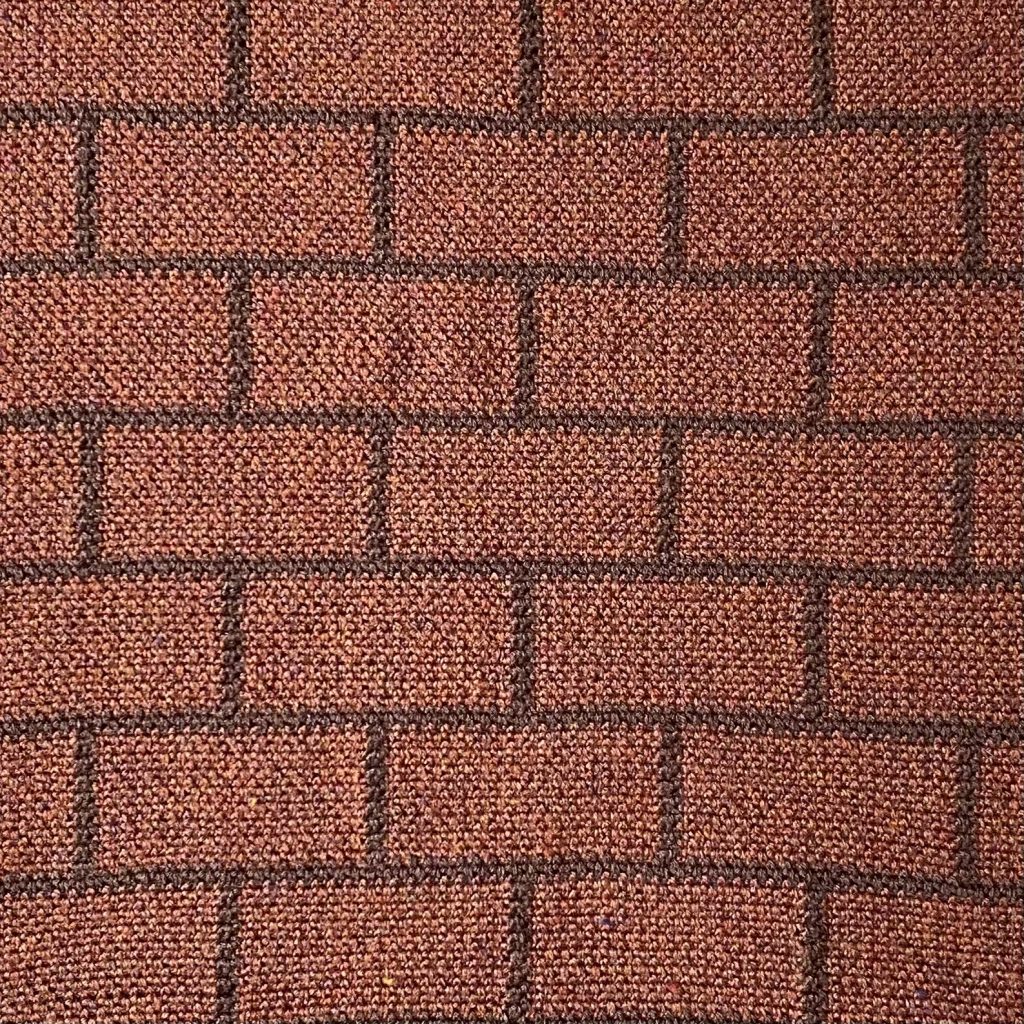
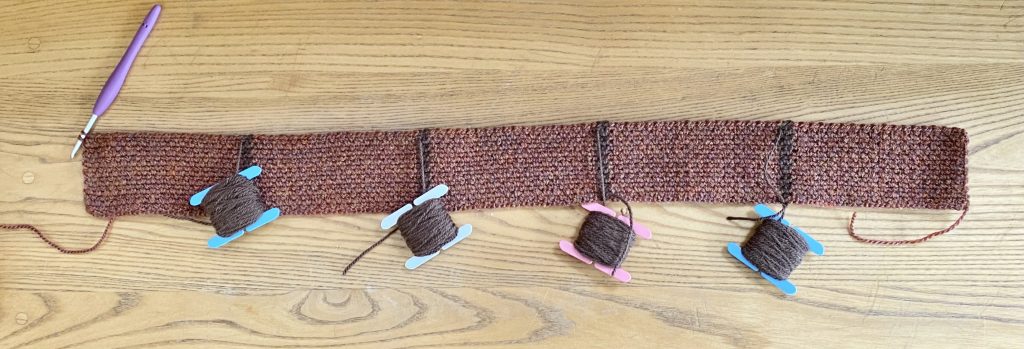
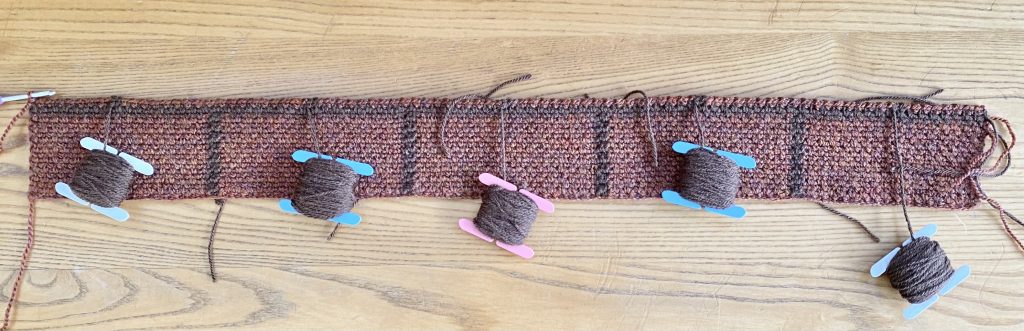
Repeat the brick + mortar pattern to the end of the row. You should end up with 5 full-sized ‘bricks’, separated by 4 vertical mortar lines.
Continue in the 5-brick pattern for 15 more rows. Ch 1, turn and dc in next ch space. (Ch 1, skip one stitch, dc in ch space) 16 times. *Rejoin Walnut yarn from row below, dc 2, working over Marmalade yarn. Rejoin Marmalade yarn, bring bobbin to front of work, then (Ch 1, skip one stitch, dc in ch space) 17 times* to end.
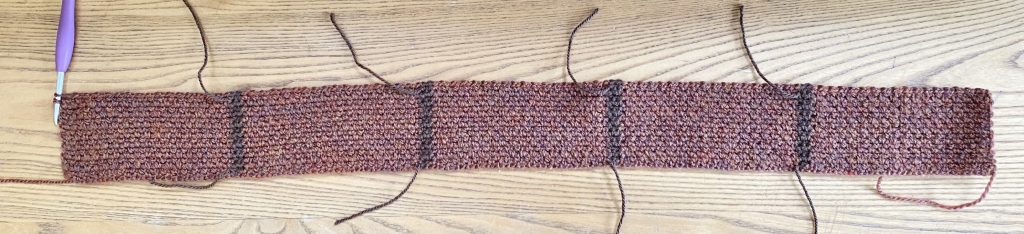
Once the first brick row is finished, cut all the working yarns, leaving the ends to sew in later. That includes the Marmalade yarn and all 4 Walnut strands! You can either sew the ends in as you go along, or be like me and leave them all to sew in in one (hellish) sitting. The choice is yours.
Join the main ball of Walnut yarn and work in linen stitch for 2 rows. *Ch 1, skip next stitch, dc into next stitch* to the end of the row. Turn and repeat. This will act as the first horizontal mortar stripe.

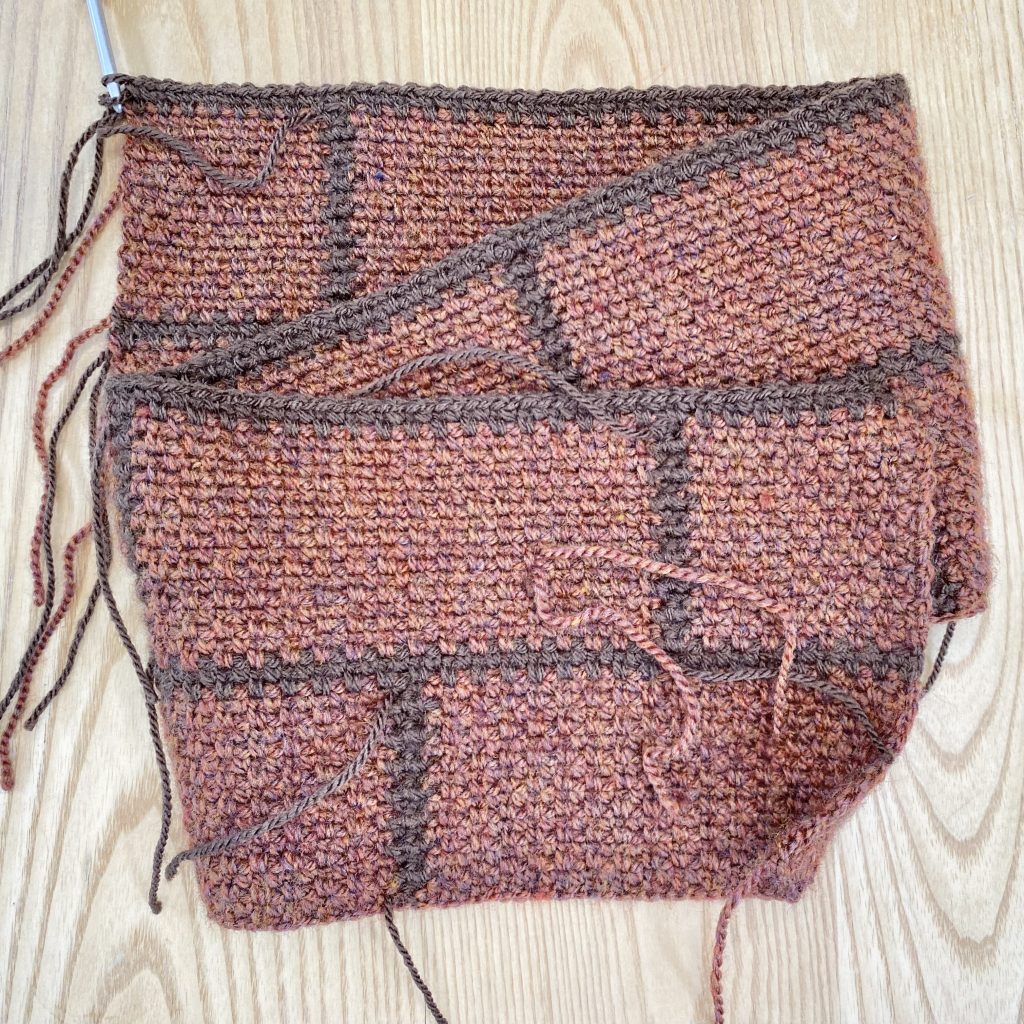
Start setting up the first offset brick row. For the next row of bricks, you’ll be working in the following pattern: 1 half brick, 4 whole bricks, 1 half brick. To make the first brick, Ch 1, turn and dc in next ch space, then (Ch 1, skip one stitch, dc in ch space) 7 times (this gives an 8-repeat brick, which is just under half as wide as the regular, 17-repeat brick).
Add the first vertical mortar line after the half brick. Do this in exactly the same way as you did in the regular brick row, joining one of the Walnut bobbins for the colour change.
Finish the offset brick row. Work 4 regular, 17-repeat bricks, with mortar in between, then finish off the row with another 8-repeat brick. You should have 2 half bricks, 4 whole bricks and 5 vertical mortar stripes.

Complete 15 more rows in the offset brick pattern. Ch 1, turn and dc in next ch space. (Ch 1, skip one stitch, dc in ch space) 7 times, then *Join CC bobbin, dc 2 with CC, working over MC yarn. Rejoin MC yarn, bring bobbin to front of work, then (Ch 1, skip one stitch, dc in ch space) 17 times* 4 times. Join CC bobbin, dc 2 with CC, working over MC yarn. Rejoin MC yarn, bring bobbin to front of work, then (Ch 1, skip one stitch, dc in ch space) 8 times.
Cut all the working yarns, join the main ball of Walnut yarn and work in linen stitch for 2 rows. *Ch 1, skip next stitch, dc into next stitch* to the end of the row. Turn and repeat. This will act as the second horizontal mortar stripe, made in exactly the same way as the first.
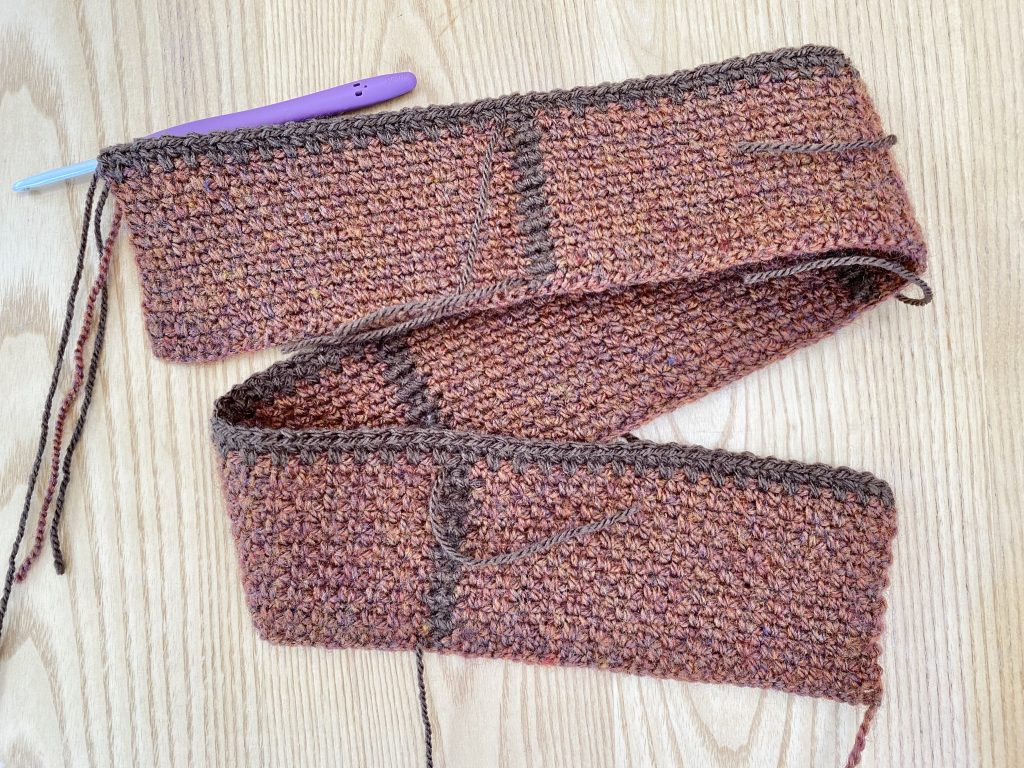
Work in pattern, alternating between the regular, 5-brick pattern and the offset brick pattern, until you have 13 rows of bricks in total. Each row of bricks is 16 rows of crochet deep. You should begin and end with a row of the regular, 5-brick pattern. Pause before completing the final 2 rows of the blanket.
Work the final 2 rows of the blanket. When crocheting the vertical mortar stripes on the final 2 rows, instead of working 2 dc as usual, ss into the first stitch, then dc into the second. Do this for each vertical mortar stripe, on both rows. This will give you a straighter edge along the top of your blanket.
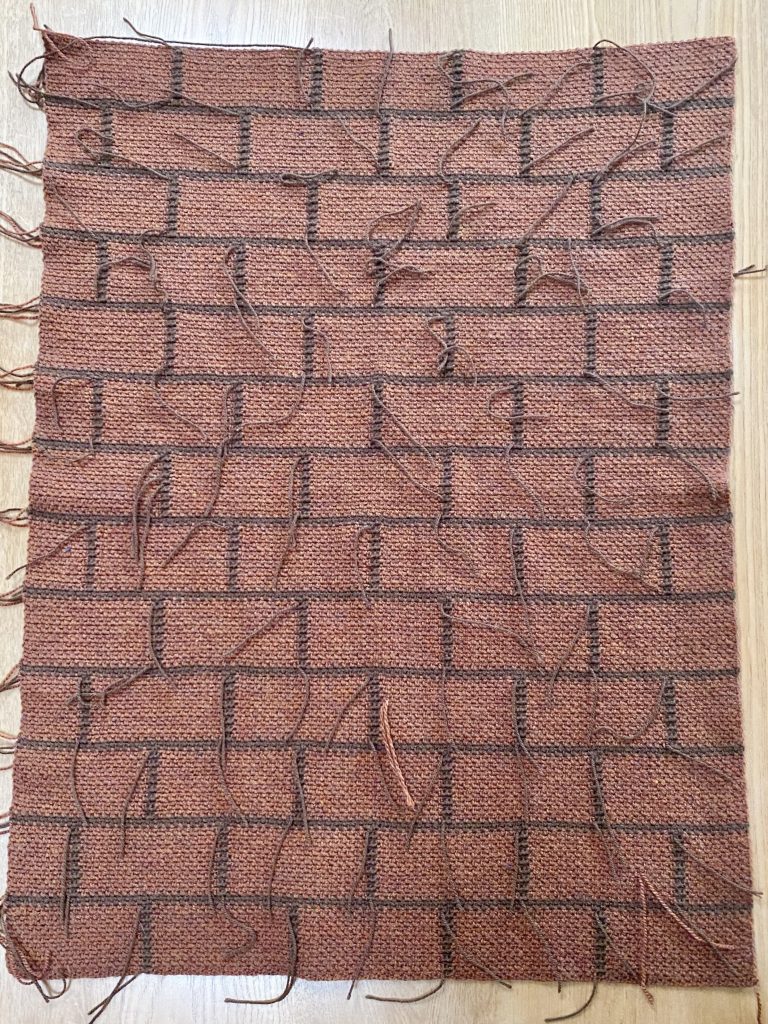
Cut all working yarns and weave in any ends. Give the blanket a gentle steam to help it lie flat before attaching any embellishments/decorations. Because the yarn I’ve used is acrylic, it won’t ‘block’ the same way a natural fibre was, but it will loosen out ever so slightly with gentle steaming. Just be careful not to over-steam the blanket, or you might end up with a too-floppy blanket (which, unfortunately, there’s no way back from!).
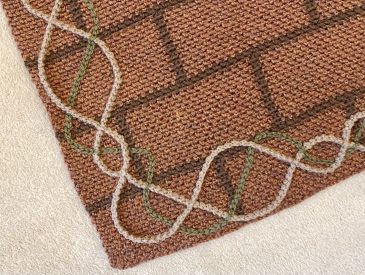
Once you’ve done all that, you’ll be left with a lovely, brick-pattern blanket that you can decorate however you like- whether that’s in the same, Bridgerton style as mine, or something different entirely!
I hope you’ve enjoyed this tutorial- I’m not super experienced at writing crochet patterns, so please do let me know if you run into any problems with this and I will do my best to help you out! I’ll see you next time for Part 3!
Gemma
xxx

Hi when will the 3rd part be released? X
Hi Rebecca, the third part will be coming out this weekend! x
Awesome looking forward to it. I started the first part the other day when my wool came. It’s so beautiful you have done amazing work x
Ah how exciting- I hope it goes well!! Thank you so much, I’m so glad you like it. Also… I’ve just released Part 3! You can find it here x