*Ahem*
HAPPY BRIDGERTON SEASON 3 (PART 1) RELEASE DAY!!!!!!
Phew, now that’s out the way- it’s time to celebrate! Bridgerton Watch Party Week may be over, but, evidently, my thoughts of the show never end. This post is the first in another Bridgerton-inspired series, which will be coming out in weekly instalments (interspersed with other, non-Bridgerton posts, though- so please don’t be put off if Bridgerton isn’t really your thing!). Over the next 5 weeks, I’ll be sharing my new, original (and free!) crochet pattern, inspired by Bridgerton. This is my…
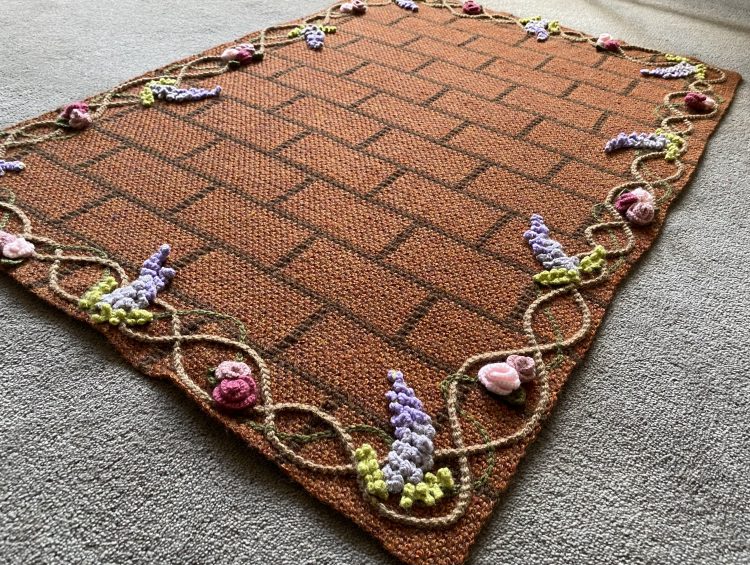
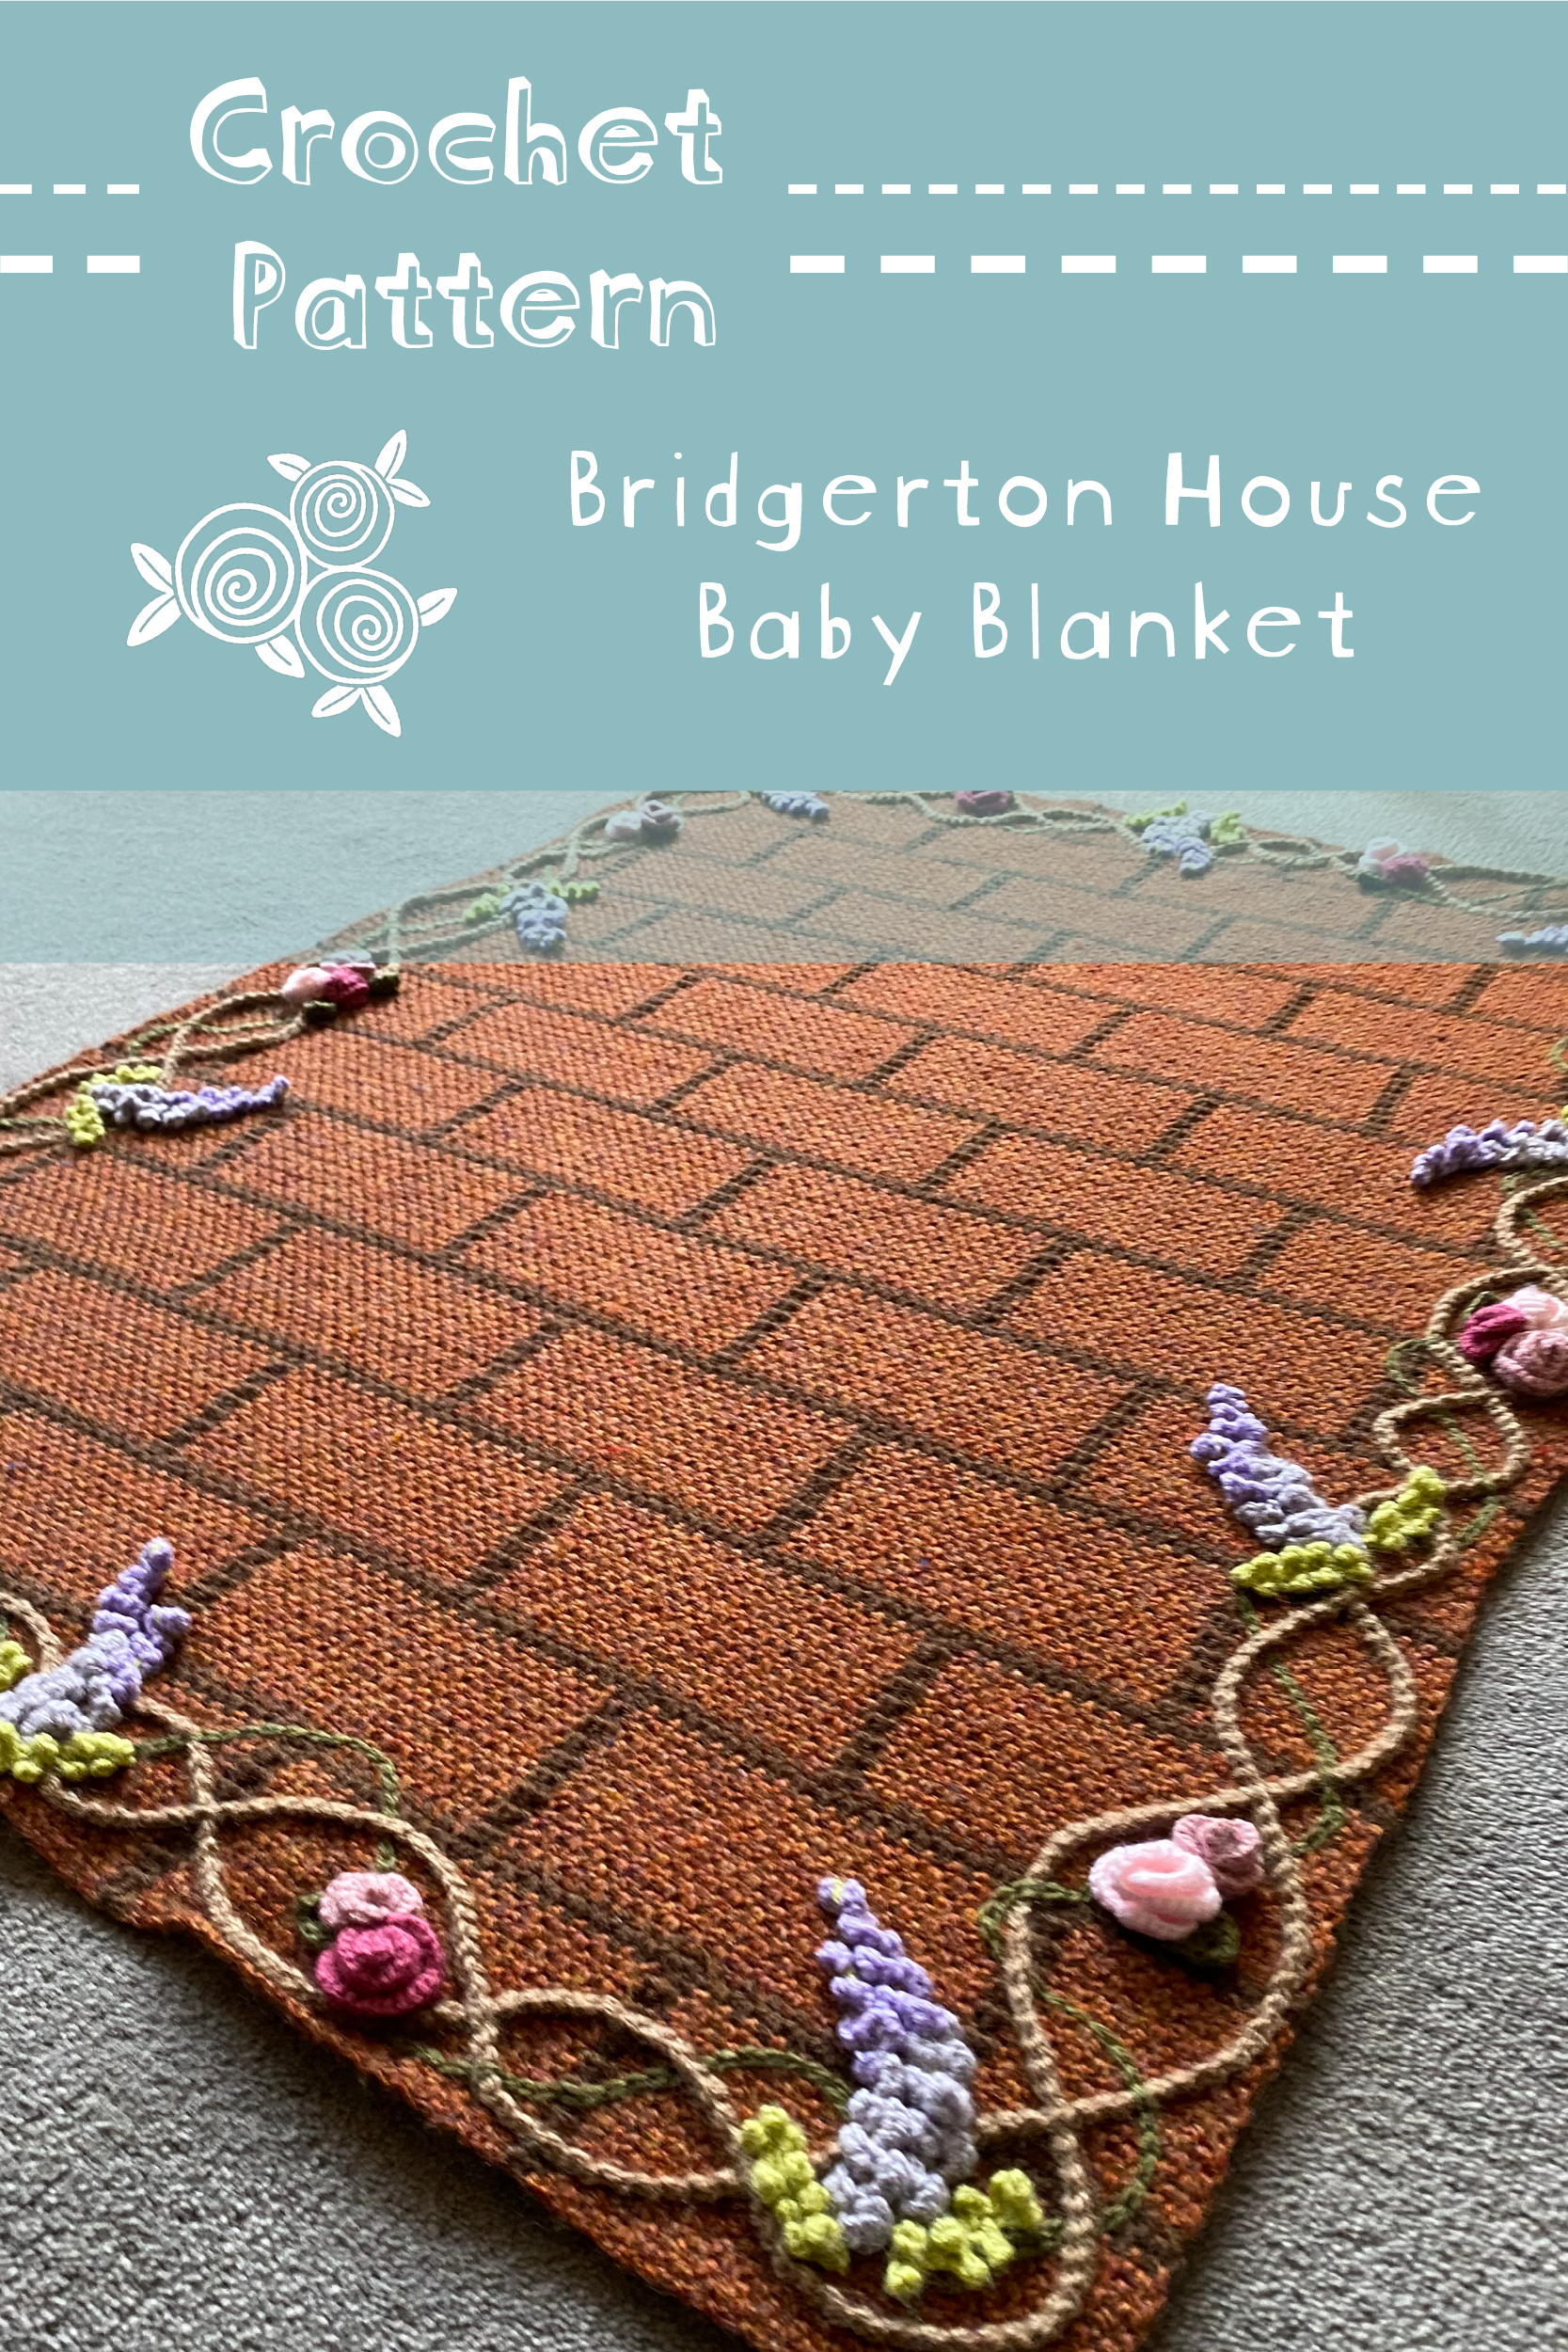
🌸🧱BRIDGERTON HOUSE BABY BLANKET🧱🌸
This pattern has been 2 whole years in the making (yep, you read that right. Can you tell I’m somewhat of a perfectionist?). One of the things I love most about Bridgerton is the aesthetic- the effort and thought that goes into the costuming, the settings and the symbolism just makes my heart so happy. This pattern is a direct consequence of that love- it’s me, letting myself be inspired by something that genuinely brings me joy and creating something I’m truly, truly proud of. I can’t wait to share it with you.
In this post, I’ll be introducing you to the blanket and giving you a little bit of backstory on the design process, as well as a roadmap for how the rollout of this pattern will look. I’ve decided to split the pattern up into several posts, to ensure that I can give all of the elements enough attention and consideration (without overwhelming everyone with an insanely long post). Once all of the parts are out, I’ll release the pattern on Ravelry, so that you can save it/link your own projects to it more easily!
Also: this blanket is actually a super versatile pattern- even if you’re not a die-hard Bridgerton fan like me, you can still use the basic brick blanket pattern as a basis for all manner of projects and baby blankets. The possibilities are endless!
Let’s get into it, shall we?
Table of Contents
- Inspiration
- The Design Process
- Trialling Techniques
- Putting It All Together
- Master Material List
- Pattern Release Roadmap
Inspiration
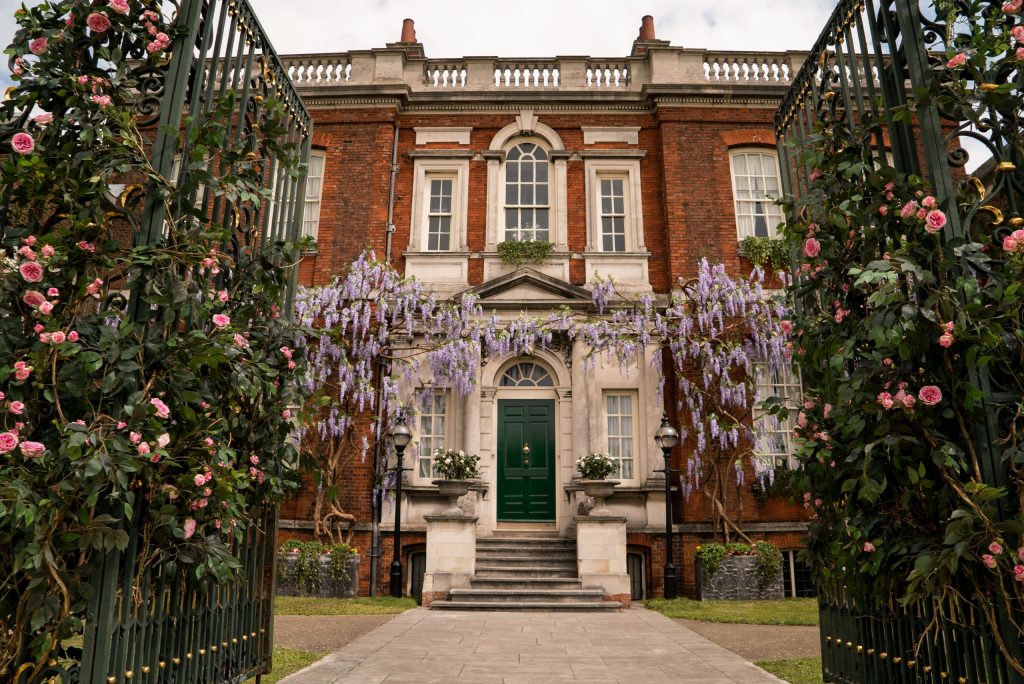
As I’m sure you can tell from the name, this blanket is inspired by Bridgerton House, one of the buildings in the show and, unsurprisingly, the home of the titular family. Its deep, red brick stands out among the other, more neutral, stone buildings of the ‘ton’, and purple wisteria runs along the facade. The front courtyard is surrounded by a wrought iron fence, which is decorated with rose bushes that add little splashes of pink, here and there. The building itself is actually Ranger’s House, in London- though, in real life (sadly), the wisteria and roses are nowhere to be seen.
For the blanket, I opted to include three of the most iconic elements of the house: the red bricks, the purple wisteria and the pink roses. One of the most interesting things about Bridgerton is how it blends the regency and modern eras, so I really wanted the blanket to reflect that dichotomy- to seem ornate and opulent, but also simple and elegant- almost minimal.
The Design Process
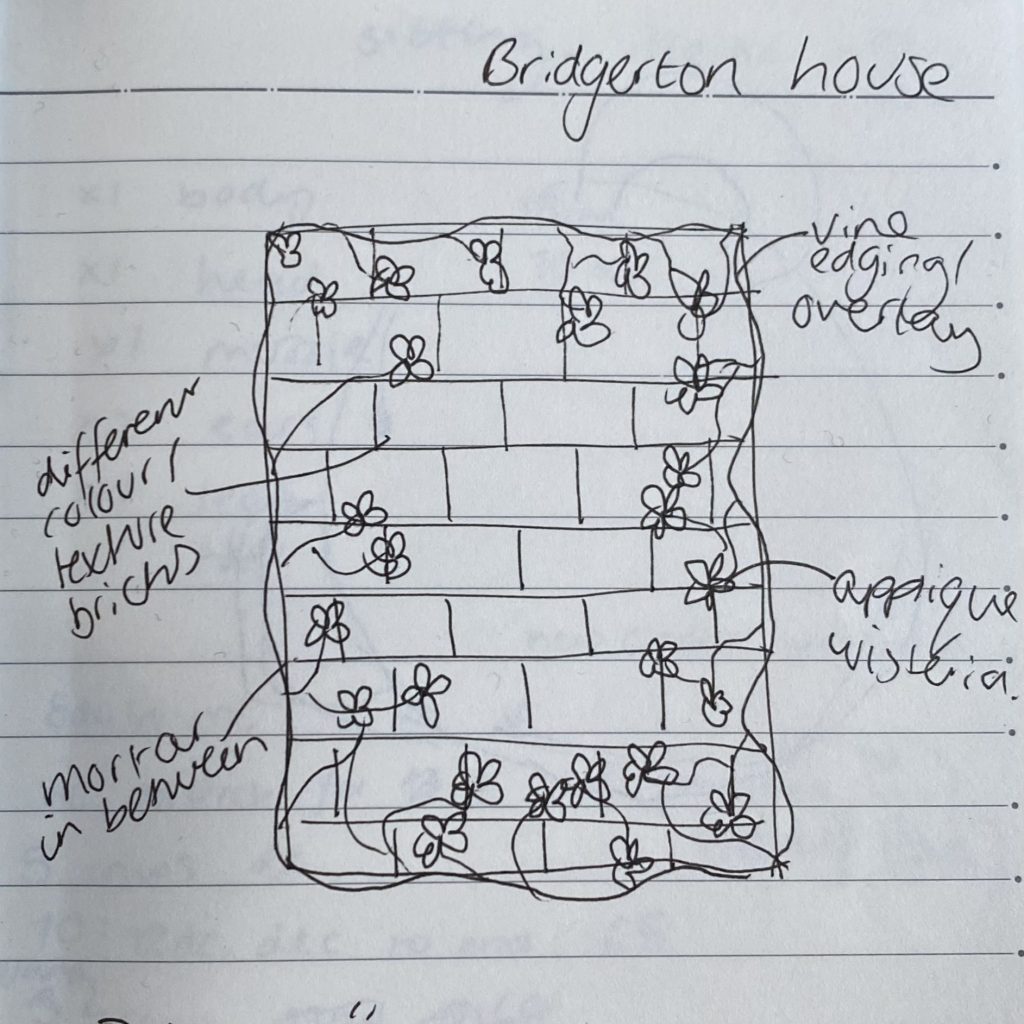
I first started dreaming about this blanket when I was struggling through some withdrawal symptoms after finishing Season 2. I have a little book where I jot down little notes or sketches of ideas I have for crochet projects and I drew this (super precise and accurate) sketch in the throes of my Bridgerton-induced fever:
I spent a bit of time muddling around with the general concept- trying out different arrangements, designs and elements that I could try to incorporate, until I had a clearer idea of what I really wanted to achieve with this blanket. I then created a slightly more detailed sketch on Procreate, which is an iPad drawing app:
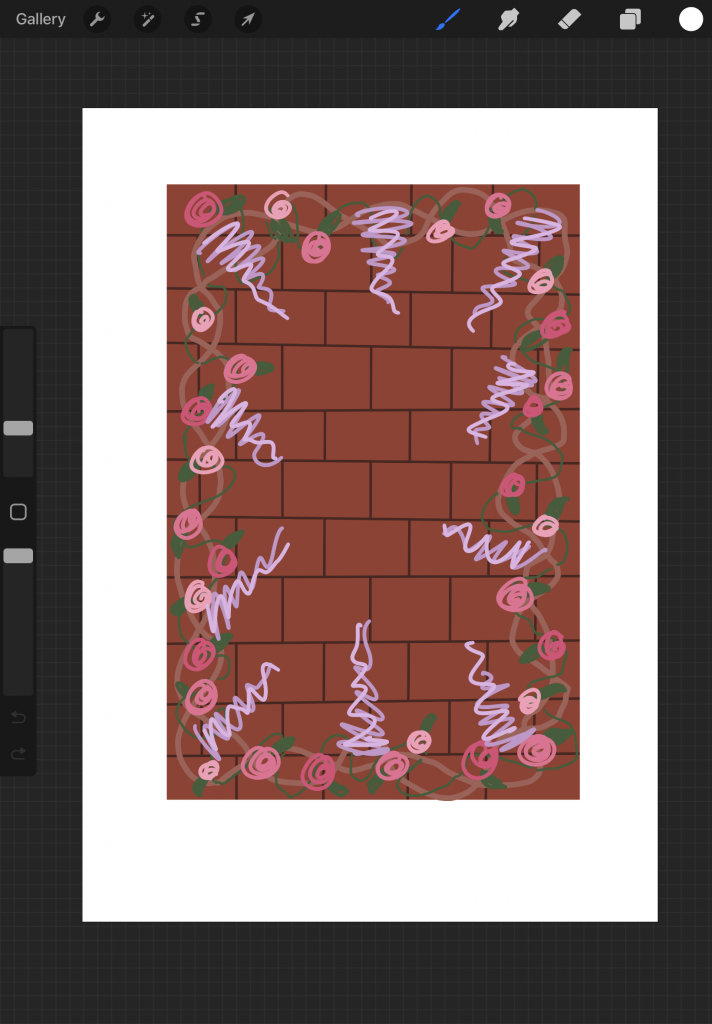
I ended up with this design, which I think really encompassed everything I had hoped to achieve- the blanket itself is fairly simple and minimal, but the flowers and twisting branches add that sense of over-the-top, floral opulence.
Sketching my design like this also meant that I could easily try out different arrangements of the elements- I wanted the wisteria to be pointing downwards (because, you know, gravity), but I also wanted it to go right around the perimeter of the blanket. By fiddling around with my sketch on Procreate, I could try out different options super easily, until I finally came to this half-and-half design, where the top half of the blanket is always pointing downwards. I did end up deviating from the design ever so slightly, here and there, by adding wisteria leaves and positioning the roses in clusters, but, otherwise, I stayed pretty true to my original idea!
Trialling Techniques
Ah, finally. We come to the bit of this project that took me the longest (most of the 2 years, to be exact). Trialling the techniques to work out the pattern for this blanket- to turn my sketch into a reality!
The Brick Blanket
I decided pretty early on that I would create the brick blanket first, then crochet some wisteria and rose embellishments separately to appliqué onto that blanket. Truthfully, I expected the flowers to be the trickiest part of this, but, no, no- it was the bricks!
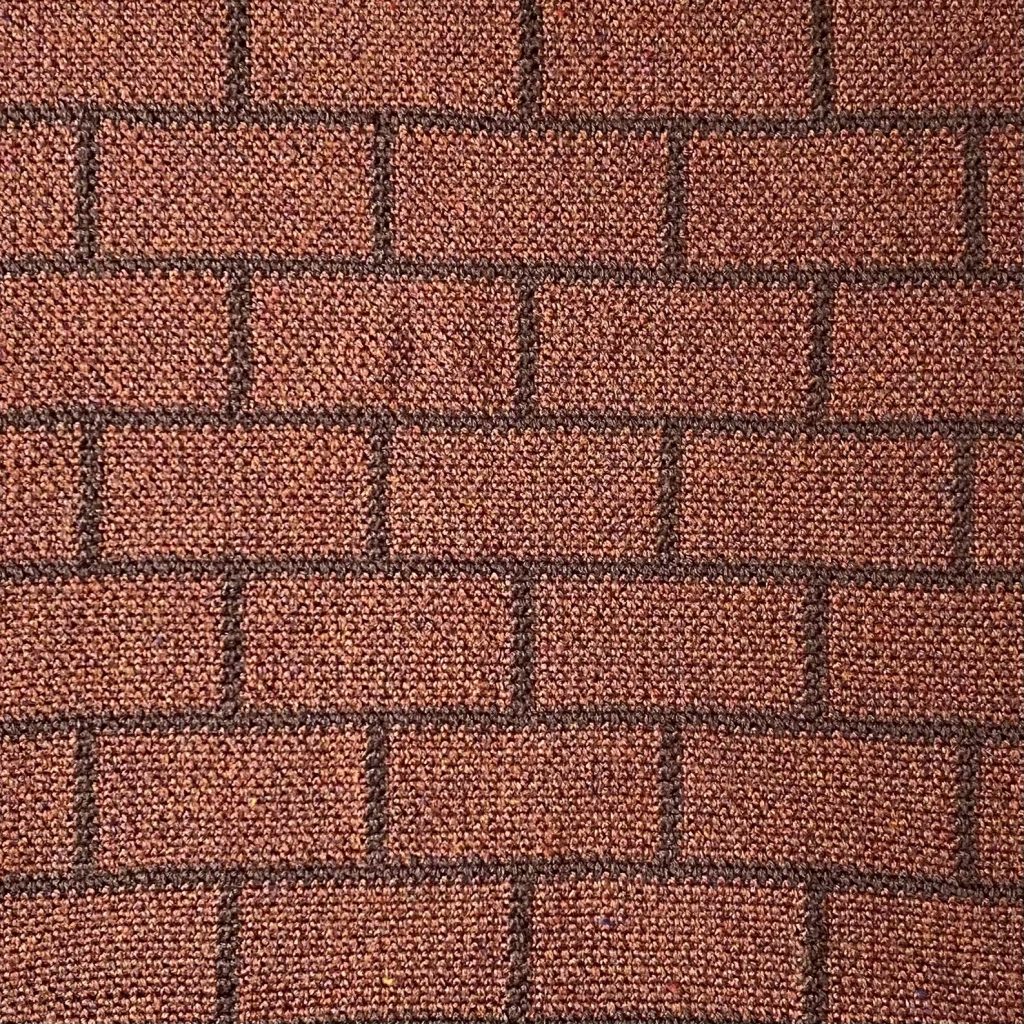
I started by deciding on what stitch to use for the bricks. I wanted something that had a little bit of texture (because bricks are not perfectly smooth), but also something that looked professional and neat. After a lot of sampling, I settled on using linen stitch (sometimes called moss stitch), which produces a lovely texture and feel- it’s soft, squishy and looks really neat. It’s also super easy to work up, so you can really get into a mindless, crochet rhythm (my favourite thing).
Initially, I had planned to make the bricks separately and crochet them together with a darker yarn (acting as the ‘mortar’) but, ultimately, I just wasn’t happy with the end result. I desperately wanted to leave the edges of the blanket as they were, without a border, for a more minimal, modern vibe, but the edges weren’t smooth enough for that. I tried so many things to get around this, but it just wasn’t working for me, so I had to go back to the drawing board. Eventually, I worked out a way, using colourwork techniques, to make the whole blanket in one piece, bricks and mortar together, which gave perfectly straight, neat sides. It was so perfect (and so much easier), I almost couldn’t believe I hadn’t thought of it in the first place! Not only does this method make for much neater edges, it also drastically reduces the amount of sewing required for this blanket (which is a huge win, by my standards!).
The Flowers
As I mentioned, I was pretty sure that developing the patterns for the flowers would be a tricky undertaking. Truthfully, it was a challenge, but, after the whole brick saga, it honestly felt pretty straightforward! After (quite a lot) of samples and lots of trialling different hook sizes and petal numbers and colour combinations, I ended up with two different sizes of both the wisteria fronds and the roses. Admittedly, the wisteria isn’t anywhere near anatomically correct (my apologies to all of the botanists and wisteria-worshippers out there), but I think it still gives a pretty good impression of it!
I did also want to include some greenery here and there, so I moved on to trying to create some leaves for each of my flowers. Again, this took a bit of trial and error- the rose leaves were pretty straight forward, but the wisteria leaves took a bit more work. In the end, I worked out a way to crochet the whole wisteria flower, leaves and all, as one piece, which makes sewing the blanket together that little bit easier (a big win)! The rose leaves, on the other hand, did have to be made separately, but I suppose you can’t win them all.
The Vines
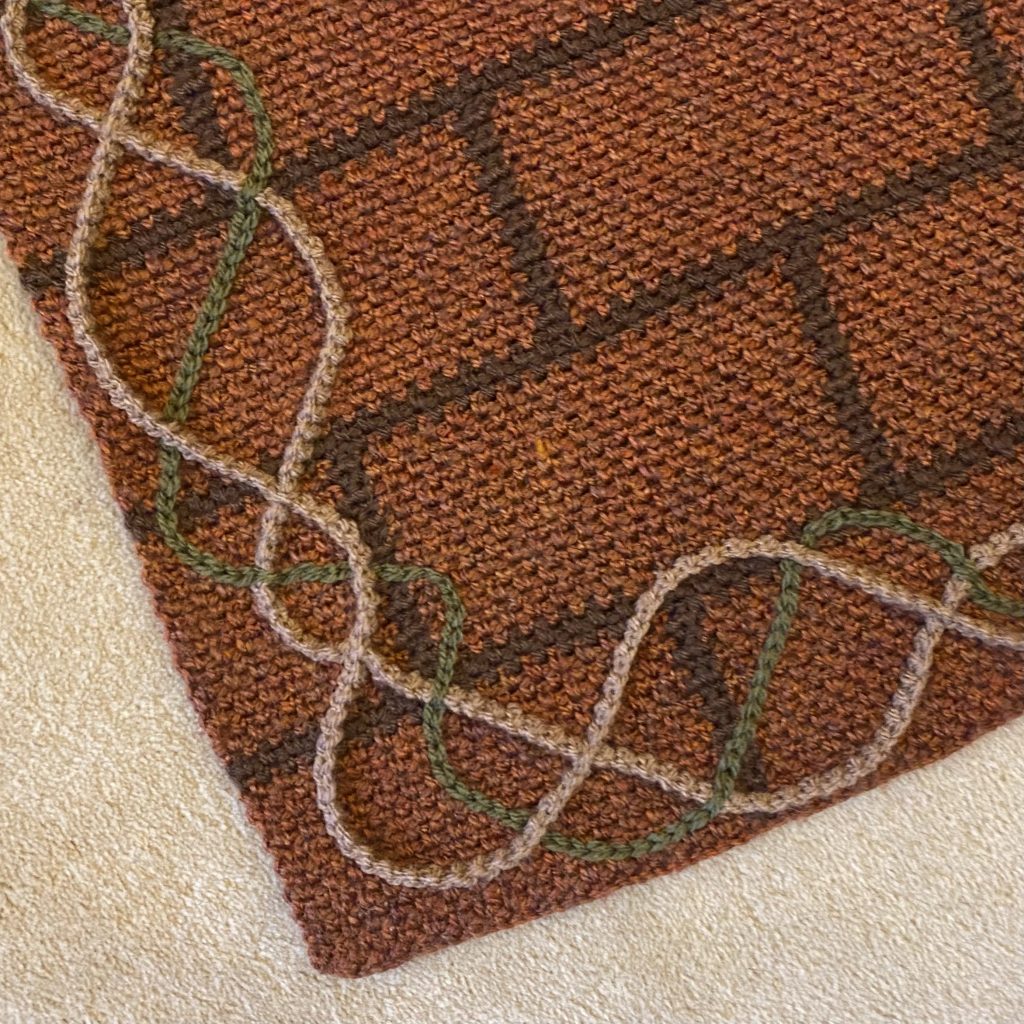
Another thing I had to figure out was how to make the vines (is it accurate to call these vines? Or is that just for grapes? Gah- my plant knowledge is severely lacking)- I wanted to include both the woody, twisty, branches of the wisteria plants and the green stems of the roses weaving all around the perimeter of the blanket . After some research (and more testing), I opted to use a technique called surface crochet for this. This is a great technique that produces a similar result to the embroidery technique ‘chain stitch’, but you can use yarn straight from the ball, instead of having to cut a certain length (and recut, when you inevitably either run out or get into a major tangle).
To add even more dimension, I opted to crochet into the surface crochet for my wisteria branches. This allowed me to make the branches thicker, providing some differentiation between the two ‘vines’, and to add some texture to the branches, to make them a little bit more realistic (though I do, of course, use that term very loosely).
Putting It All Together
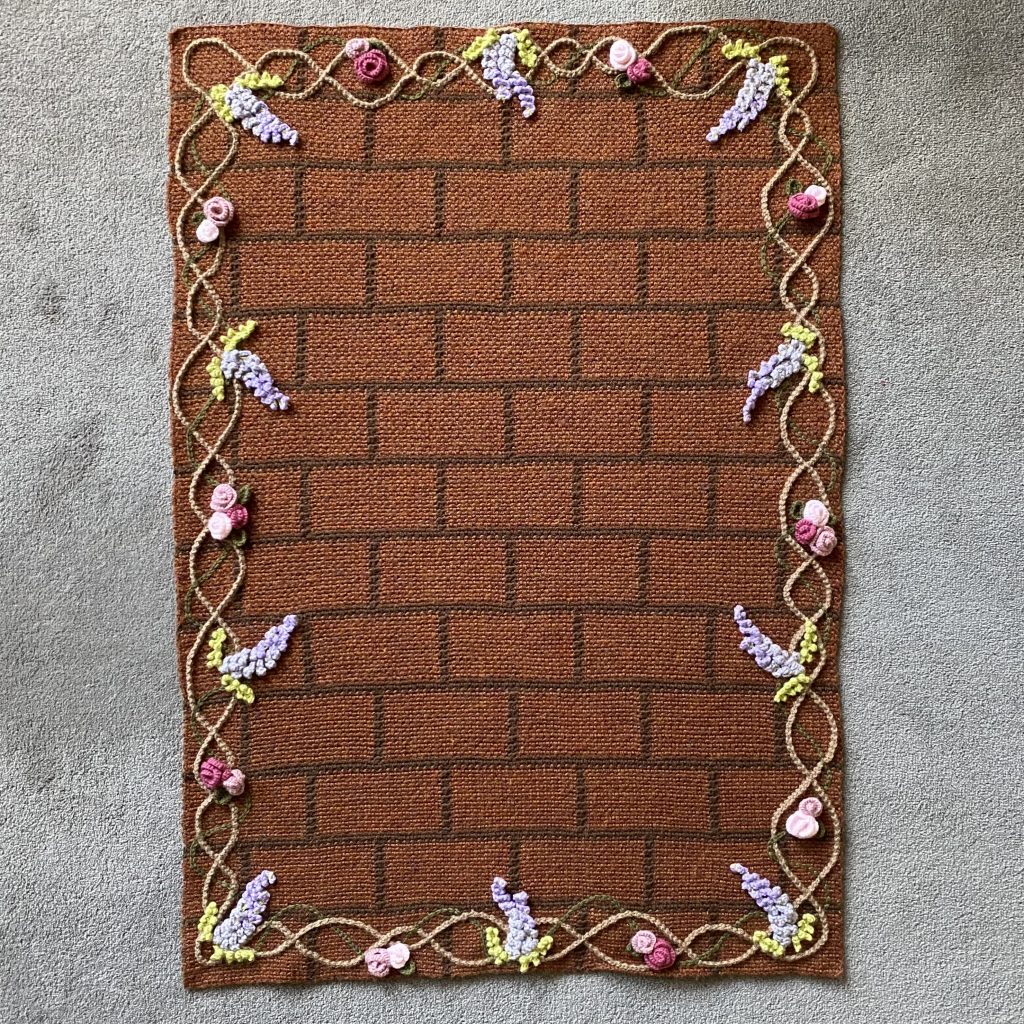
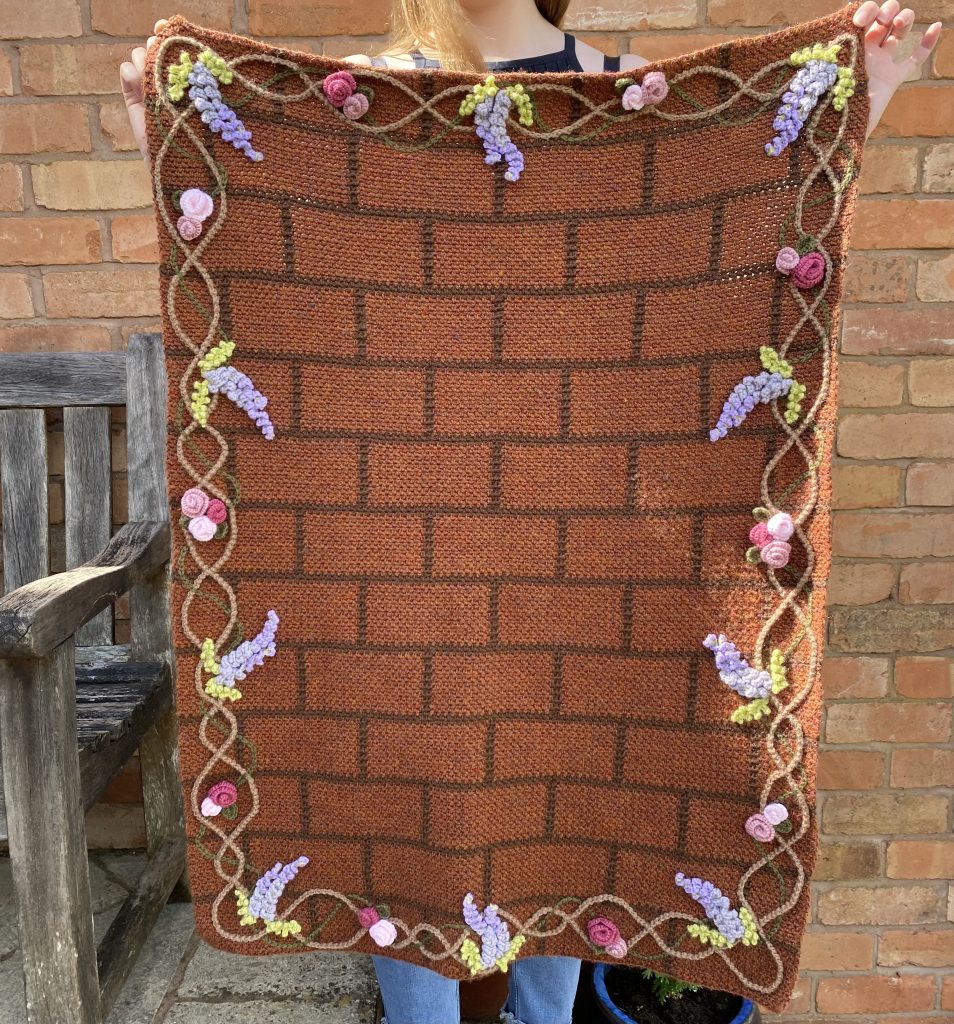
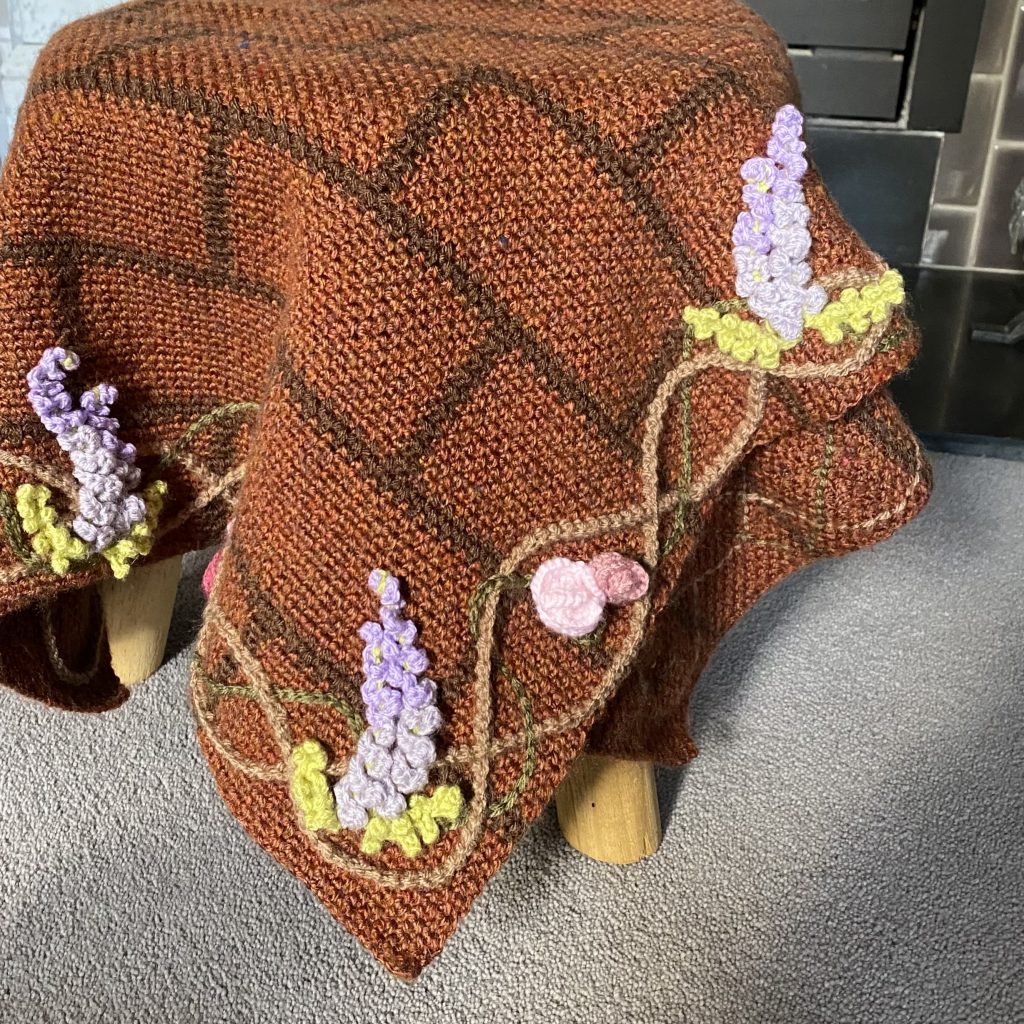
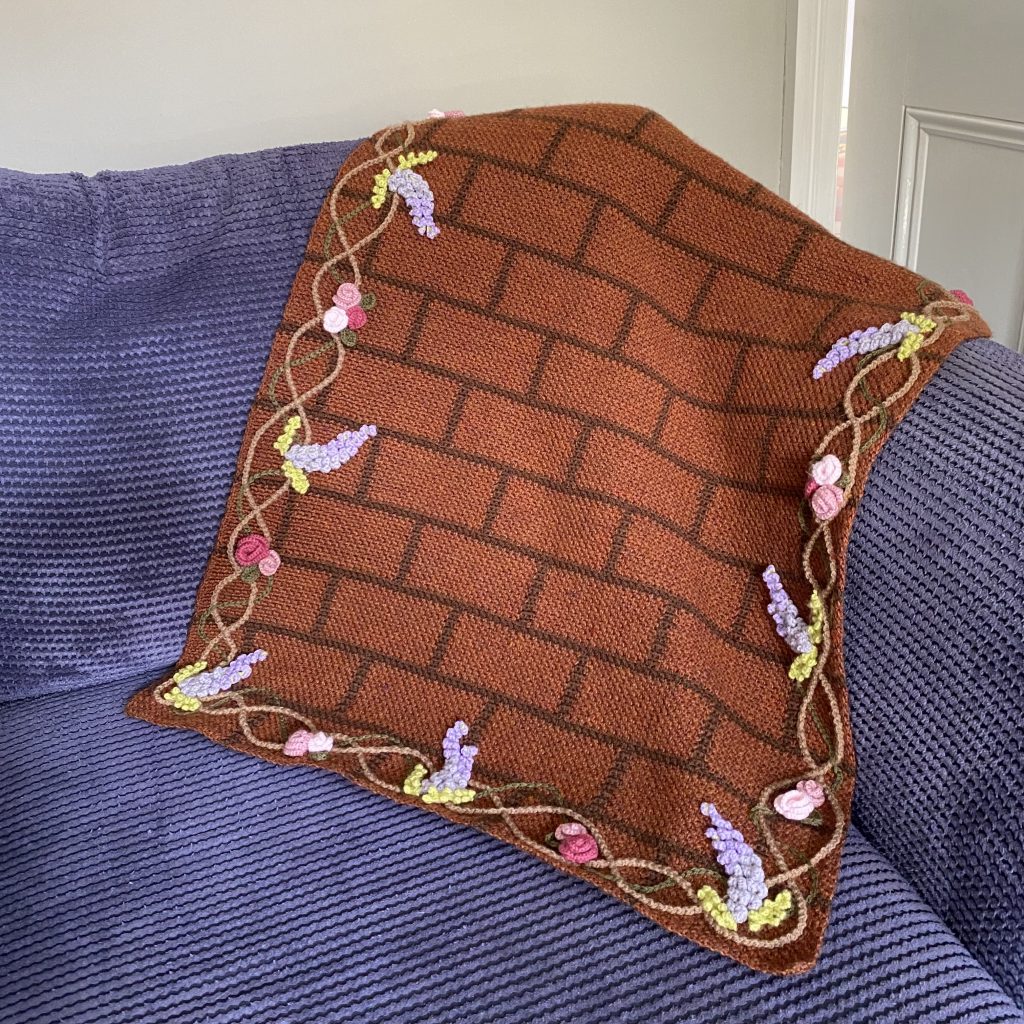
After months of testing, trialling and researching, I was finally ready to make my blanket. It came out… perfectly. As in, I was kind of amazed at how similar it looks to my design- I’m SO proud of it! Usually with crafting, you’ll have an idea in your head of how something will look and it will turn out completely different- not bad, just different. This blanket looks exactly like the design I had in my head and I’m still kind of baffled by that. Honestly though, for 2 years of work, it probably should, so I won’t complain.
All in all, the final blanket measures approximately 90cm x 65cm. I designed it as a baby blanket, but you could use it as a lap blanket, or perhaps even a wall hanging (if that’s your vibe), instead.
Master Material List
While I will include a list of everything you need to make each stage of the Bridgerton House Blanket in their individual posts, I wanted to include a master post of materials and notions here as well.
To make this blanket, you will need:
- 4x100g balls Stylecraft Highland Heathers DK in the shade Marmalade.
- 1x100g ball of Stylecraft Special DK in the shade Walnut.
- Small amounts of Stylecraft Special DK in the shades: Khaki, Mocha, Pale Rose, Parma Violet, Pistachio, Powder Pink, Raspberry and Wisteria.*
- Crochet hooks (2.0mm, 2.5mm, 3.0mm, 3.5mm, 4.0mm, 5.0mm).**
- 5x yarn bobbins.
- Darning needle.
- Scissors.
For this blanket, I’ve used Stylecraft yarn. Stylecraft is always my (acrylic) yarn of choice- it’s so soft and easy to work with, plus it comes in a great range of colours! You can use a different DK weight yarn, if you prefer, though, for all of the embellishments. I would recommend using the Stylecraft Highland Heathers (specifically in the shade Marmalade) for the main blanket though, because it is the perfect brick-red shade and quite a unique yarn!
* In the interest of being as informative as possible, I did actually work out exactly how much of each of each colour you’ll need for this project, so you can work out if any scraps you may have lying around are large enough. If you are a little under the listed quantities, I would recommend seeing how far you can get with what you have, before buying another ball. Because each element is so small, you don’t need to worry about dye lots/changing colours, so you can always buy more yarn later on, if needed!
| Shade | Used for: | Approximate amount needed: |
|---|---|---|
| Khaki (1027) | Rose leaves & ‘vines’ | 25g |
| Mocha (1064) | Wisteria vines | 30g |
| Pale Rose (1080) | Roses (4 large, 4 small) | 20g |
| Parma Violet (1724) | Wisteria petals | 15g |
| Pistachio (1822) | Wisteria stems + leaves | 25g |
| Powder Pink (1843) | Roses (4 large, 3 small) | 15g |
| Raspberry (1023) | Roses (4 large, 3 small) | 15g |
| Wisteria (1432) | Wisteria petals | 15g |
** I can only apologise for the ridiculous number of different hook sizes- a number of the elements require multiple different sizes in order to come together properly, so it just kind of happened. I have this set of crochet hooks, which includes every hook size needed for this project. The hooks themselves are really good quality (and ergonomic!), so it’s a great option for this project (or just, you know, in general).
Pattern Release Roadmap
Finally, then, after 2 whole years, this pattern is ready to be shared! As I mentioned, I’ll be releasing it in weekly instalments. I’ll be coming back to this ‘master post’ as each instalments is released, to link in the new posts and make it super easy for you to find all of the sections). Without further ado, though, here’s the roadmap (along with some little sneak peaks of what each post will encompass), so that you can stay in the loop:
Linen stitch, main blanket pattern & colourwork using yarn bobbins.
Surface crochet, working into surface crochet & interlacing surface crochet paths.
Making large and small roses, working with a fine hook & making rose leaves.
Crocheting a spiral of petals around a central chain & making attached leaves.
Positioning, sewing on the elements & child safety tips.
And that’s it! As I mentioned, once all 5 instalments have been released, I will be creating a pattern page for this project on Ravelry, so that you can save it for later, or link your own projects to it.
UPDATE:

This pattern is now on Ravelry! You can find it here.
I hope you’re as excited as I am for the next 5 weeks- I’ll see you back here soon!
Gemma
xxx