Macarons have a reputation for being finicky. I mean, it is an entirely fair reputation- compared to cupcakes and biscuits, macarons require quite a bit of extra time and care. However, with a little practice, you can make your own macarons at home, for a fraction of the cost of the ones you can buy in shops. In fact, macarons are one of my favourite things to make, mainly because they are one of my favourite things to eat. I am sure there will be many more macaron posts on this blog in the future, but, seeing as this is my first one, I’ll do a deep dive into all the tips and tricks I have picked up over my macaron-making journey. While I made these macarons to celebrate the Coronation of King Charles III (yes, this post is indeed a little belated- my only excuse is that I was too distracted admiring Princess Charlotte’s Alexander McQueen dress to type it up!), the shells themselves are actually very basic and are sandwiched together with an (also) very basic ganache filling. I’ll go into detail on the decoration, which put the coronation into these coronation macarons, afterwards, but the relative simplicity of the macarons themselves means we can really do a deep dive into the process, helping you to achieve perfect macarons at home, right from the get-go.
Let’s start by talking about what macarons are, because there is often a lot of confusion on the topic! This post is all about macarons, not macaroons. The extra ‘o’ makes a big difference- a macaron is an almond sandwich cookie, that is, 2 macaron ‘shells’ sandwiched together with some sort of filling (ganache, buttercream, cream etc.), while a macaroon is a single cookie flavoured with coconut. Macarons have smooth tops and little raised ‘feet’, while macaroons are much more uneven in texture because of the added coconut and don’t have feet at all.
Just to further complicate matters, there are multiple different types of macaron. The most common are French macarons and Italian macarons. I swear by Italian macarons- they require a few more steps, but I find that I am able to achieve successful shells much more easily (in fact, I am yet to make a successful batch of French macarons…). There are 2 main differences to the two types. Firstly, French macarons are made with French meringue, that is, dry sugar is added to egg whites and whipped to stiff peaks, while Italian macarons are made, shockingly enough, with Italian meringue, which uses a sugar syrup instead of dry sugar. Secondly, with French macarons, the almonds and icing sugar are added dry to the meringue, while, with Italian macarons, the almonds and icing sugar are mixed with half of the egg white to form a paste, which I think makes it easier to incorporate the almonds and sugar smoothly into the meringue. That’s about it! As I said, I am yet to have any success making French macarons (and, believe me, that is not for lack of trying), so this recipe is for Italian macarons.
Right, now that we’ve got the basics covered, we can look at how to achieve perfect macarons at home, every time. I learnt how to make macarons from this video, from the Cupcake Jemma YouTube channel (which is also, incidentally, why this recipe uses a fan oven- this is standard for all of the recipes on that channel). It’s a really helpful video, so definitely check it out if you’re new to macaron-making. I have scaled the original recipe down because I found the full-sized batch a little overwhelming- it was much more difficult for me to produce successful macarons when I made the full amount in one go. Using the half-batch that I give the measurements for here, I have more control over my macaronage and all of the batter fits into a standard piping bag, so I don’t have to refill part way through the piping process. The amounts given in this post will give 14-16 macarons, each about 4cm in diameter.

Tips and Tricks for Perfect Macarons:
- Use a stand mixer with a metal bowl to whip the egg whites. A metal bowl will help your whites whip up to their full potential, but it will also conduct heat, unlike a glass or ceramic bowl. Because you’ll be using the temperature of the bowl to identify when the meringue is ready, a metal bowl is preferable.
- Make sure both your bowl and the whisk attachment for your mixer are completely clean. Any traces of fat/residue will prevent your egg whites from whipping up. Wipe out both the whisk attachment and the bowl with some white wine vinegar to ensure there are no traces of grease.
- Use a digital scale. Macarons require very specific measurements of ingredients- mechanical scales are not accurate enough for them!
- Weigh your egg whites. All baking is sensitive to ratios, but macarons are especially so. This recipe calls for 72g of egg whites, separated into two equal portions of 36g each. I find that this is about 2 eggs’ worth- if you measure the white as you separate the egg, using a bowl set on a digital scale, you can measure it exactly. If you get a bit too much, I find it easiest to use a fork to remove a little white at a time.
- Sieve, blitz, sieve, blitz, sieve. I know this feels very extra- it is, but macarons are a very extra cookie. The finer you can get your dry ingredients (i.e. the ground almonds and icing sugar), the smoother the tops of your macaron shells and the more professional they will look! Large pieces of almond/icing sugar will also interfere with your macaronage process, which will affect the success of your shells. However, don’t be tempted to process the dry ingredients too much- the almonds will start to release their oils if processed for too long, which will ruin your macarons. I find 2 sets of 10 pulses is the perfect amount.
- Use a metal utensil to mix the dry ingredients with the egg white. This paste gets thick– a rubber spatula won’t have enough strength! The sharp edge of a metal spoon will also help you to ensure the mixture is fully combined.
- If you plan to colour your macarons, add more food colouring than you think you need. For the most even colour, it’s best to add the food colouring to the almond/sugar/egg white paste. Make this a much deeper colour than you are aiming for, because it will become severely lighter once you have incorporated the pale meringue mixture, and lighter still (on the exterior of the shells, at least) as the macarons bake in the oven.
- Use an accurate (digital) sugar thermometer. You need to bring the sugar syrup up to 118°C, which is a very specific (but very necessary!) value- having to eyeball this will make your job so much harder and the success of your macarons so much less certain.
- Start whipping the remaining egg whites when the sugar syrup reaches about 114°C. This will give the whites just enough time to foam up before the sugar syrup reaches the correct temperature.
- Pour the sugar syrup into the egg whites down the side of the bowl, with the mixer on. If you pour too close to the whisk, you’ll end up with spun sugar all around your bowl! Pour in a single, steady stream in one spot- you’ll lose a little sugar as it sets on the side of the bowl, but there will be much less wastage than with the alternative.
- Whip the meringue on full speed until the bowl is no longer hot. The best way to tell if your meringue is ready is to check its temperature. Touch the outside of the bowl after about 5 minutes of whisking- when it is ready, it should be room temperature (just don’t touch it for a minute or two after putting in the sugar syrup- it will be very hot!).
- Vigorously mix 1/3 of the meringue into the almond/sugar/egg mixture. Don’t worry at this stage about folding, just get it well combined. The point here is to loosen the mixture, ready for the macaronage stage.
- Be firm, but gentle, during the macaronage stage. Macaronage is the term given to the final mixing stage of the macaron-making process, and it is notoriously finicky. You’ll find people who tell you to do a certain number of mixes- I don’t love this method because everyone has a different technique/level of force! Fold the meringue in firmly (you can switch to a spatula at this stage, because the mixture will be much less thick), using a figure of eight motion, to ensure the mixture is cohesive, but be mindful of the air in the egg whites at the same time. When the mixture is ready, you should be able to draw a ribbon with your spatula. Leave the mixture to stand for 30 seconds, and that ribbon should have levelled itself out into the rest of the mixture.
- Use a medium round piping nozzle to pipe the macarons. Too small, or too big, and it will be difficult to get neat macarons.
- Use a macaron template. Making identical macaron shells is one of the biggest challenges of making macarons at home- using a template as a guide can make the process much easier. To make a template, take a sheet of A3 paper, and draw circles at intervals across the whole sheet- I like my macarons to be about 4cm in diameter, but you can change this, just be aware that making smaller/larger shells will affect the number of macarons this recipe makes. Place this template under the baking paper on your baking tray and pipe into the circle guides. You can then carefully slide out the template before baking and reuse it later on.
- Hold the piping back vertically when piping the macarons. Apply gentle pressure, then stop applying that pressure and make a small circular ‘flick’ to finish off the macaron (don’t worry if you get a little peak though, they will usually flatten out themselves during the next stages, but you can also flatten them with your finger, sparingly dipped in water, if need be).
- Tap the tray firmly on the work surface a few times after piping. Air bubbles are a macaron’s worst enemy. Tapping the tray on the work surface after piping will bring those bubbles to the surface. You can then use a cocktail stick, skewer or sharp knife to pop the bubbles, allowing the macaron batter to fall back on itself as you do, giving you perfectly smooth shells.
- Don’t skimp on the resting time. Macarons need to rest at room temperature for about 30-40 minutes to form a skin. That skin is what ultimately leads to the macarons developing their iconic ‘feet’. Macarons will form a skin more quickly on hot, dry days, but will take much longer on humid, rainy or cold days. If you can, it’s best to make macarons on warm, dry days, but, obviously, that isn’t always possible. I have had success making macarons from this recipe on rainy days, but they did take a lot longer to form a skin. You’ll know the macarons are ready to bake when you can lightly touch the surface without any batter sticking to your finger.
- Bake one tray of macarons at a time. This recipe calls for a fan oven, which usually means you can bake more than one tray of tasty treats at a time. Alas, macarons are high-maintenance and, any time I have tried to do this, the lower tray always seems to bake unevenly, erupt into tiny almond-y volcanoes or crack along the top. Save yourself the inevitable distress and allow for an extra 11 minutes to bake that second tray.
- If you have time, make the ganache filling the day before the macarons. While you can keep the macarons unfilled in an airtight container for about a week, they are best on the day you make them. The ganache, however, will be at the perfect consistency for filling after a night in the fridge (though, if you don’t mind a slightly messier macaron-eating experience, you can absolutely go ahead and use the ganache after a few hours). Make the ganache the day before, and you’ll get to experience the macarons at their very best as soon as the shells have cooled!
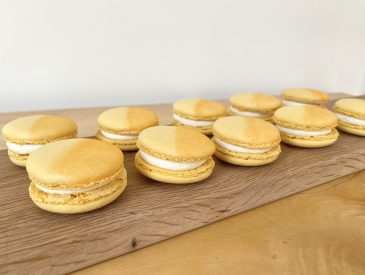
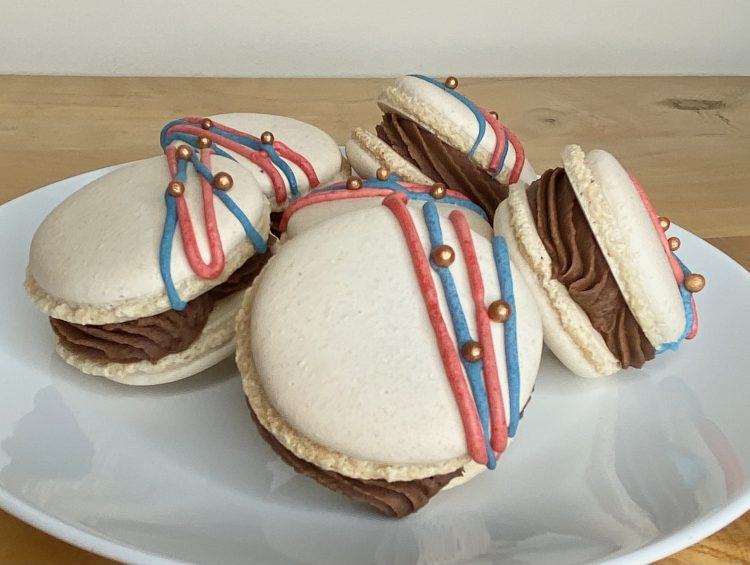
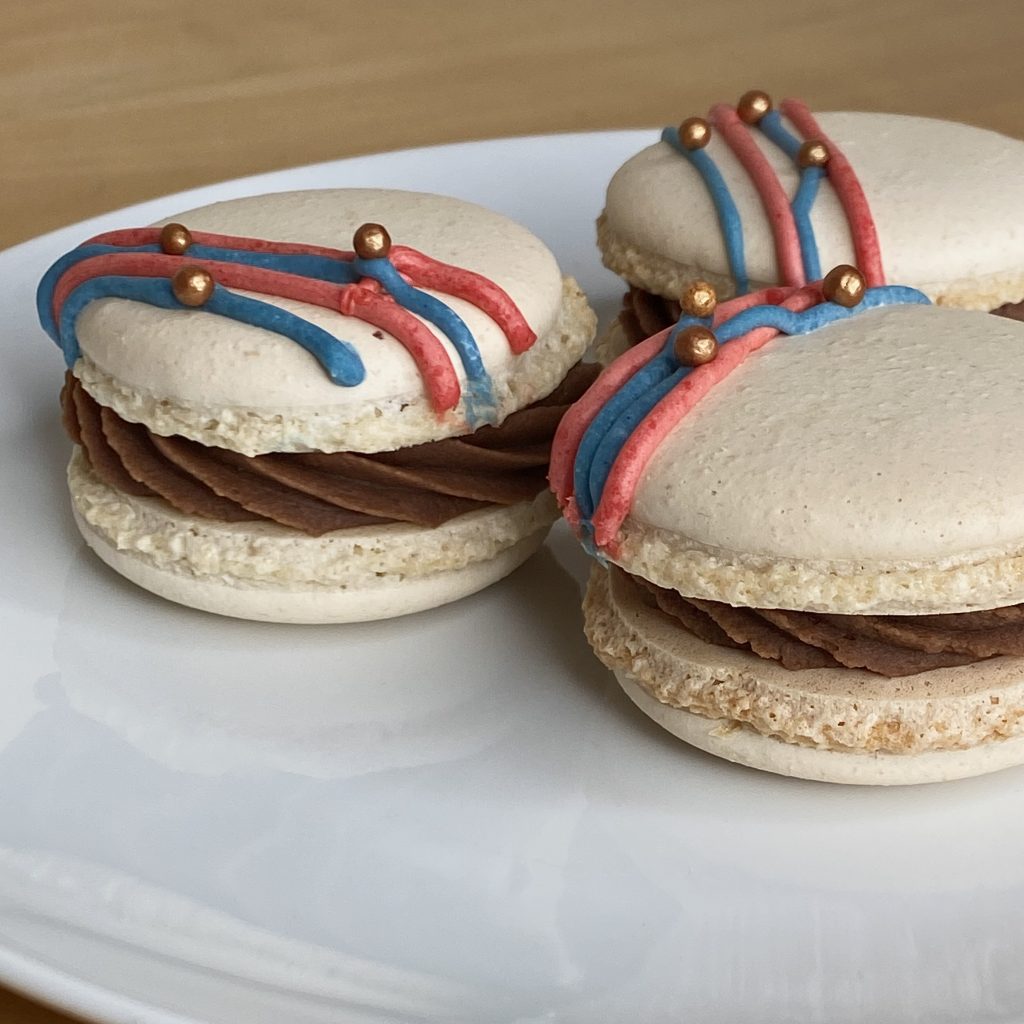
Now that you know all of my hard-earned tips and tricks for perfect Italian macarons, let’s talk a bit more about these special coronation macarons. As I said, the macaron shells themselves are super basic- no colouring, no flavouring- just plain macarons. The filling is also very basic, it’s just a milk chocolate ganache made using a 1:1 ratio of cream to chocolate (I know macarons can have many different fillings, but I just can’t bring myself to deviate from my beloved chocolate ganache…). What makes these macarons different is the decoration on the shells- and it’s pretty easy to do! It’s just melted white chocolate, coloured and drizzled onto half of the shells using a couple of piping bags fitted with very fine nozzles. You don’t even have to temper the chocolate- it’s such a small amount that it will set up at room temperature just fine. Just be sure to use an oil-based food colouring to colour it- a liquid one will make the chocolate seize. Before the chocolate drizzles set, I added a few gold sprinkles on top, just for an extra bit of fun. And that was it! Once the chocolate sets, you can sandwich one decorated shell with one undecorated shell, and you’ll be left with fun and fancy-looking macarons.
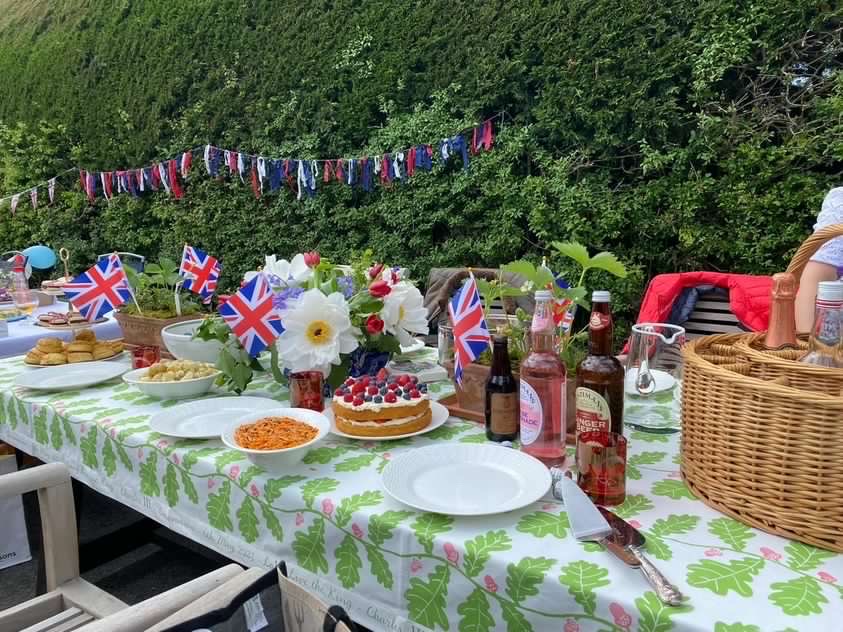
These coronation macarons were made for my brother’s friend Phoebe, who took them to her local street party and sent me this photo- doesn’t it look so pretty?
I hope you like the macarons! Let me know in the comments if you give them a try, but I’d also love to hear where you stand on the French v Italian macaron debate! Have you managed to succeed with French macarons?
Gemma
xxx

Coronation Macarons
Equipment
- 4 piping bags
- 1 medium round piping nozzle
- 2 very fine round piping nozzles
- 1 open star piping nozzle
- 2 baking trays
- Food processor
- Stand mixer (with metal bowl and whisk attachment)
Ingredients
For the chocolate ganache:
- 180 g milk chocolate
- 180 ml double cream
For the macaron shells:
- 95 g ground almonds
- 103 g icing sugar
- 72 g egg whites (divided into 2 separate bowls of 36g each)
- 95 g caster sugar
To decorate
- 40 g white chocolate
- oil-based food colouring (red and blue)
- gold sprinkles
Instructions
For the chocolate ganache:
- Place the chocolate and cream into a microwave safe bowl. Melt on low for 1 minute at a time, stirring in between each burst, until chocolate has melted completely and ganache is smooth. Cover with clingfilm and place into the fridge to firm up for at least a few hours, preferably overnight.
For the macaron shells:
- Line 2 baking trays with baking paper and place a template underneath baking paper, if using. Fit a piping bag with a medium round nozzle and set aside.
- Place the ground almonds and icing sugar into a food processor. Pulse 10 times, then sift into a large bowl, discarding any large lumps that do not go through the sieve. Repeat this process once more.
- Add one of the 36g portions of egg white to the almond/sugar mixture. Mix well to make a paste, then set aside.
- Place the remaining 36g of egg white into the clean metal bowl of a stand mixer, fitted with the whisk attachment. Set aside.
- Place the caster sugar into a small saucepan with 30ml of water. Place over a medium heat and start to bring to a boil. Do not stir- swirl gently if necessary.
- When the sugar syrup has reached 114°C, turn stand mixer to high speed and begin to whip egg whites to soft peaks.
- When the sugar syrup has reached 118°C and the egg whites have reached soft peaks, with mixer still on high, pour the sugar syrup down the side of the bowl in a slow, steady stream. Once all of the syrup has been added, turn the mixer up to full speed and beat for 5 minutes, until stiff peaks are reached. Meringue will be ready when the bowl comes to room temperature.
- When the meringue is ready, add 1/3 of it to the almond paste. Mix vigorously to combine fully and loosen the thick paste.
- Add the rest of the meringue and fold, using a figure of eight motion, until mixture is cohesive and comes off the spatula in ribbons- if you leave those ribbons for 30 seconds, they should level themselves out into the rest of the mixture.
- Place the macaron mixture into the piping bag. Holding the bag vertical to the baking tray, pipe macarons about 4cm in diameter, leaving plenty of space between each one.
- Once macarons are piped, lift the whole tray up, and drop down on the work surface a few times to raise any air bubbles to the surface. Use a sharp knife/cocktail stick to burst any bubbles, letting the mixture fall back onto itself.
- Set the macarons aside at room temperature to form a skin- on a relatively dry day, this should take about 30-40 minutes, but can take less time on drier, warmer days and more time on cold, humid days. Check on the macarons every 10-15 minutes or so, if unsure. The macarons will be ready when you can gently touch the surface without any batter coming off on your finger.
- When the macarons are almost ready, preheat the oven to 165°C fan. Bake the macarons in the centre of the oven, one tray at a time, for 11 minutes. To check if they are done, place a finger on top of the shells and wiggle gently. When done, the tops of the macarons should not wobble. Remove from the oven and allow to cool completely on the tray.
To decorate:
- Melt the white chocolate (I do this in the microwave- see Note 1). Separate into two bowls. Colour one bowl blue and the other bowl red (see Note 2).
- Fill 2 piping bags, fitted with very fine round piping nozzles, with the two shades of chocolate. Pipe drizzles of each colour onto half of the macaron shells. Add a few gold sprinkles to each, before the chocolate sets, if desired.
- Set the macarons aside at room temperature to set until completely solid, about 1 hour.
To assemble:
- Place the firm ganache into a piping bag, fitted with an open star tip.
- Pipe small rosettes into the centre of the flat side of each undecorated macaron half (do not go too close to the edge- when you 'sandwich' the macarons, the filling will be pressed out towards the edges). Place a decorated macaron half on top and gently press the two halves together. Macarons can be eaten immediately, or, once filled, kept in the fridge for a few days. You can also wait to fill the macarons- just keep the shells at room temperature in an airtight container and keep the ganache in the fridge (just be aware that the longer the ganache is in the fridge, the firmer it will become, making it more difficult to pipe/spread).
Notes
- For such a small quantity of white chocolate, I melt it in the microwave on the lowest setting in 30 second bursts, stirring well between each.
- Adding a lot of food colouring may affect the consistency of your white chocolate, making it thick and ‘paste-like’. This happened with my red chocolate, which required a lot of colouring, but not my blue, which required less colouring to get the desired shade. Don’t worry- the chocolate will still set solid, it will just take longer to do so.