Happy Halloween!!!
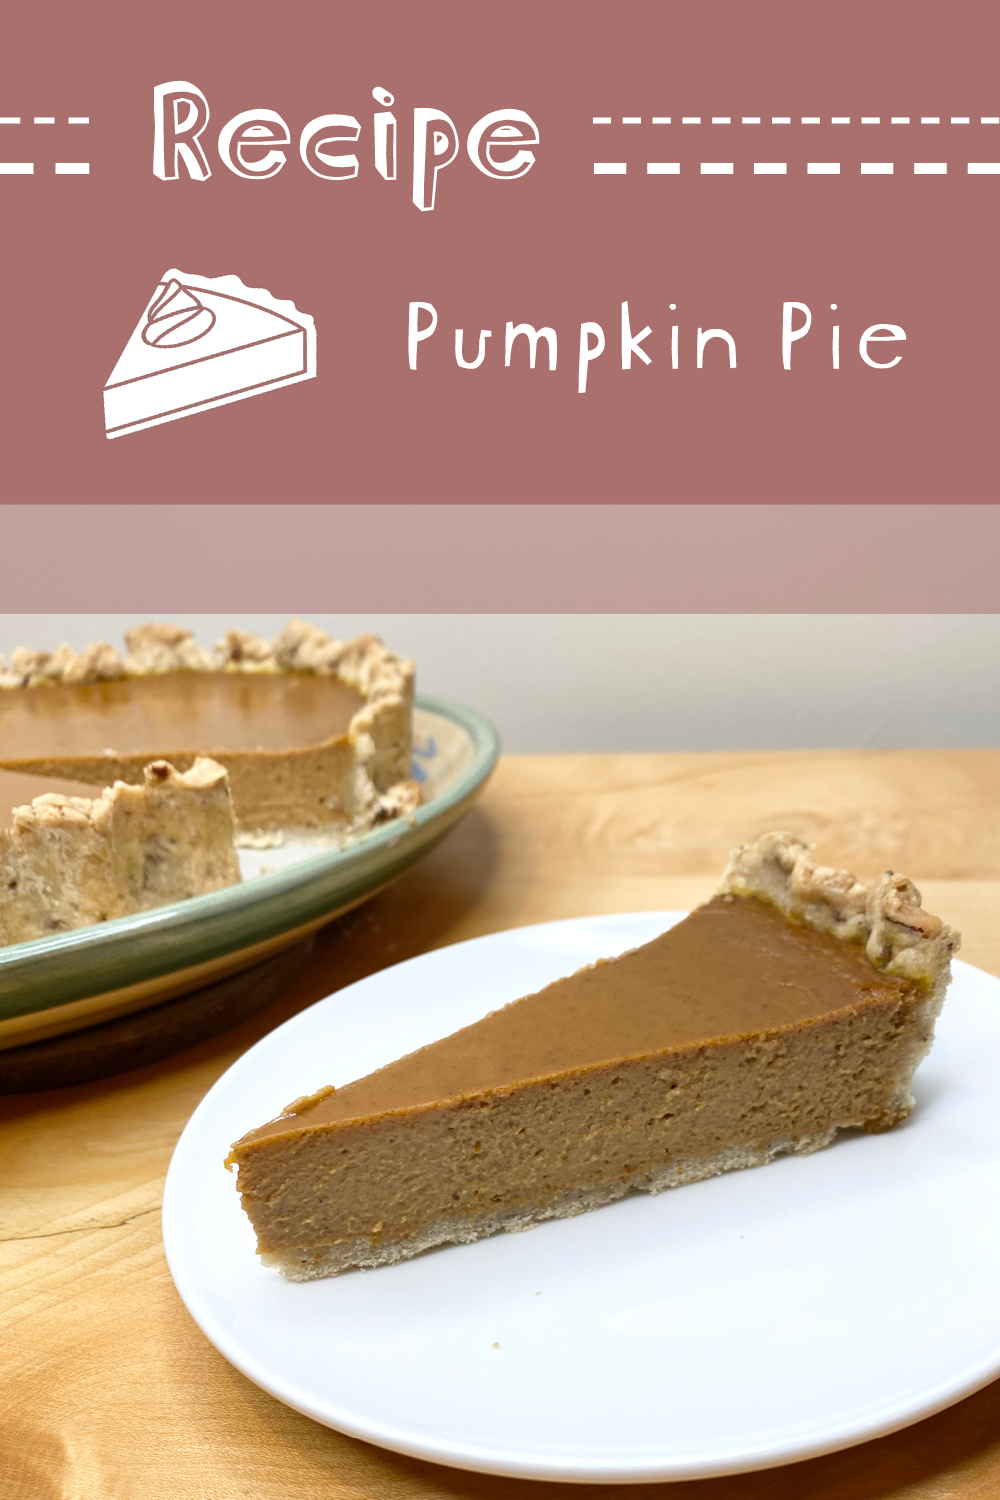
To mark the end of Spooky Season, I thought I would share a recipe for the most autumnal, innately Halloween-y (even though in the US I feel it’s probably more Thanksgiving-y, but I digress) treat: Pumpkin Pie. This sweet treat was always a staple in my house growing up, so it’s a really nostalgic dessert for me. Also, it’s super tasty, so there’s that too!
We’ve always used the same recipe for pumpkin pie, namely, the recipe from Delia Smith’s How To Cook: Book One. However, as seems to be the case with all family recipes, we (read: my dad, who usually makes this- and who helped me make the one pictured!) have adapted, altered, changed (and sometimes changed back) the ingredients & method quite a bit, over time. This recipe is the result of all that tweaking (ironically, it’s not even that different- what can I say, Delia knows best).
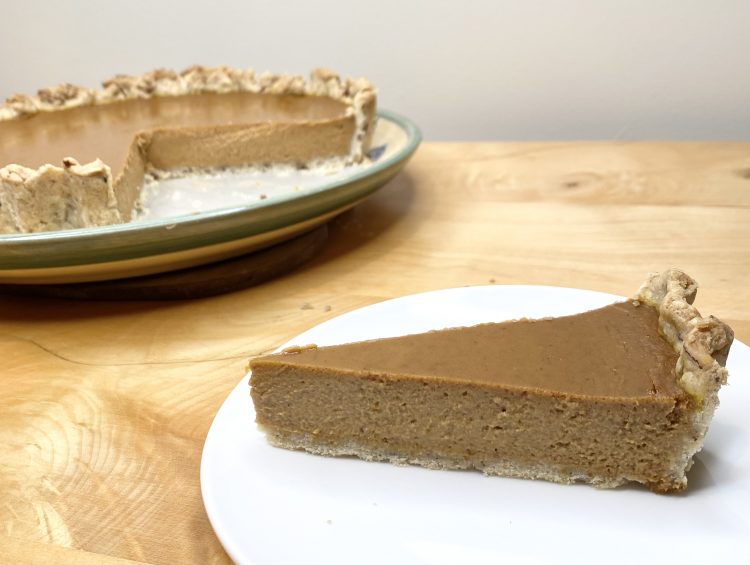
This pumpkin pie has a slightly sweet and super nutty pastry, which you can make super quickly in the food processor! The pastry shell is then filled with a silky-smooth, spiced pumpkin custard. It can be served warm or chilled, so it’s easy to make ahead. As a bonus, it is pretty easy to make (especially for a pie!), so it makes for a great, stress-free dessert option for this time of year.
Table of Contents
- Ingredients
- Equipment
- Making the Pastry
- Baking the Pastry Case
- Making the Pumpkin Filling
- Baking the Pie
- Recipe
Ingredients
This pie is made up of two elements: the nutty pastry and the rich pumpkin filling. You start by making the pastry, then you make the filling as the pastry bakes (we LOVE a time-saving recipe here!).
For the pastry, you will need:
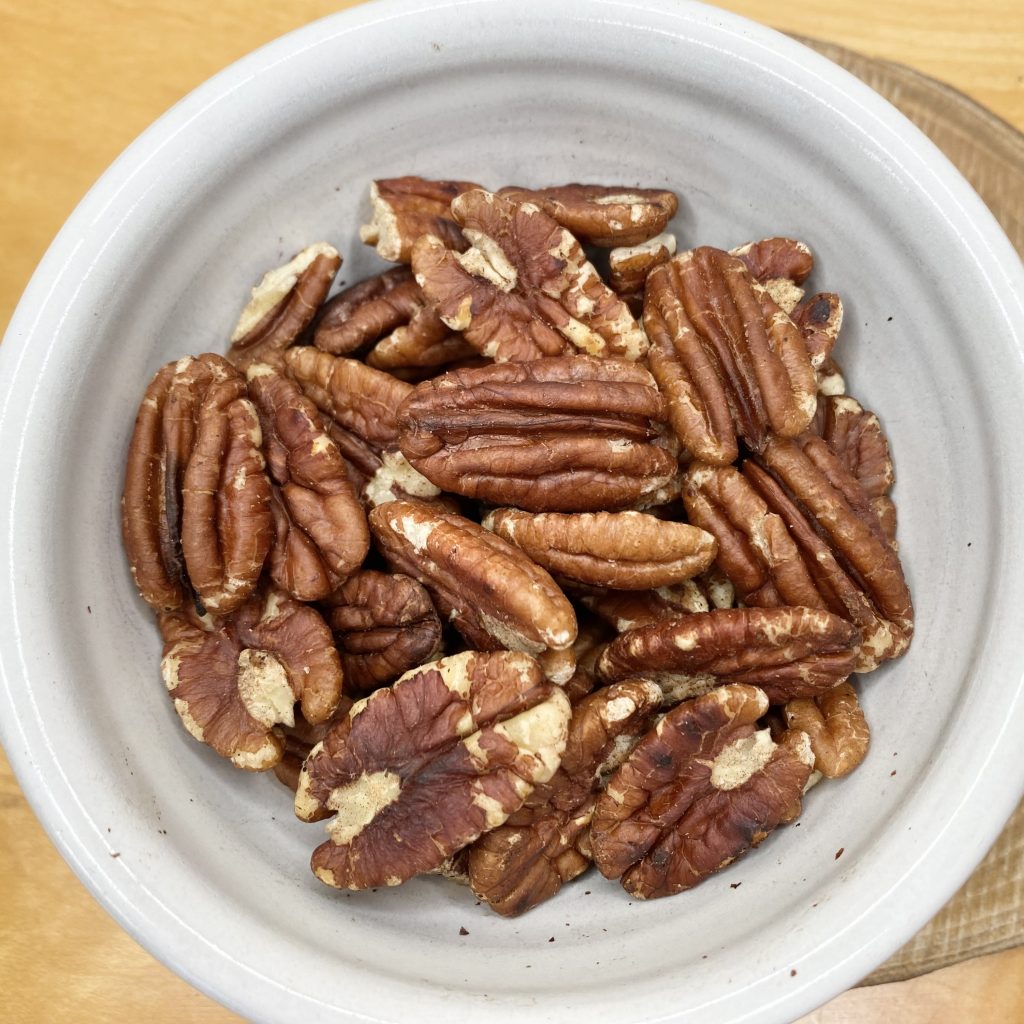
- Pecans
A slightly unusual addition, but mixing finely chopped, toasted pecans into the pastry really elevates this pie. Not only does it give the pie a lovely, warm and nutty flavour, but it also adds another texture to the pie. I like to toast the pecans on the hob, in a dry pan over a medium heat, but you can toast them in the oven if you prefer.
- Plain flour
Don’t use self-raising flour here, or your pastry will puff up and not be crisp and flaky.
- Icing sugar
It’s only a small amount of icing sugar, but you just need the slightest hint of sweetness in the pastry, to complement the filling.
- Salt
Just a pinch, to bring out the other flavours.
- Unsalted butter
You want the butter to be very cold when you make this pastry, so that the finished pastry case is super flaky and delicious! Keep it in the fridge right until you are ready to use it, to ensure it stays as cold as possible. You’ll also want to cut it into cubes, to help incorporate it into the dry ingredients more easily.
- Egg yolk
The egg yolk adds richness to the pastry. You will need a small amount of egg white later, to seal the pastry case, so you can save the white from this egg (you’ll need another yolk later on though, so you’ll have one leftover white whatever you do- you can use it straightaway in another recipe or freeze it for another day).
- Cold water
Like the butter, it’s important that the water is very cold to ensure you get the best pastry possible.
For the pumpkin filling, you will need:
- Eggs
For the filling, you’ll need 2 whole eggs, plus an extra yolk. Use the extra white in another recipe, or freeze it for another day.
- Double cream
The cream works together with the eggs to create a silky-smooth, thick custard. If you’re in the US, use heavy cream.
- Soft dark brown sugar
Using dark brown sugar lends a deep, treacle-y flavour and colour to the filling, which really complements the pumpkin flavour.
- Maple syrup
The original recipe called for molasses, but we prefer this pie made with maple syrup. The molasses can make everything a little bitter, while maple syrup adds a gentle, smoky sweetness that goes perfectly with the other flavours.
- Spices
A variety of spices go into the filling to really give this pie that classic ‘pumpkin pie’ flavour. We use ground cinnamon, nutmeg (which is always better when freshly grated, if possible!), allspice, cloves and ginger, which are all very traditional pumpkin pie spices.
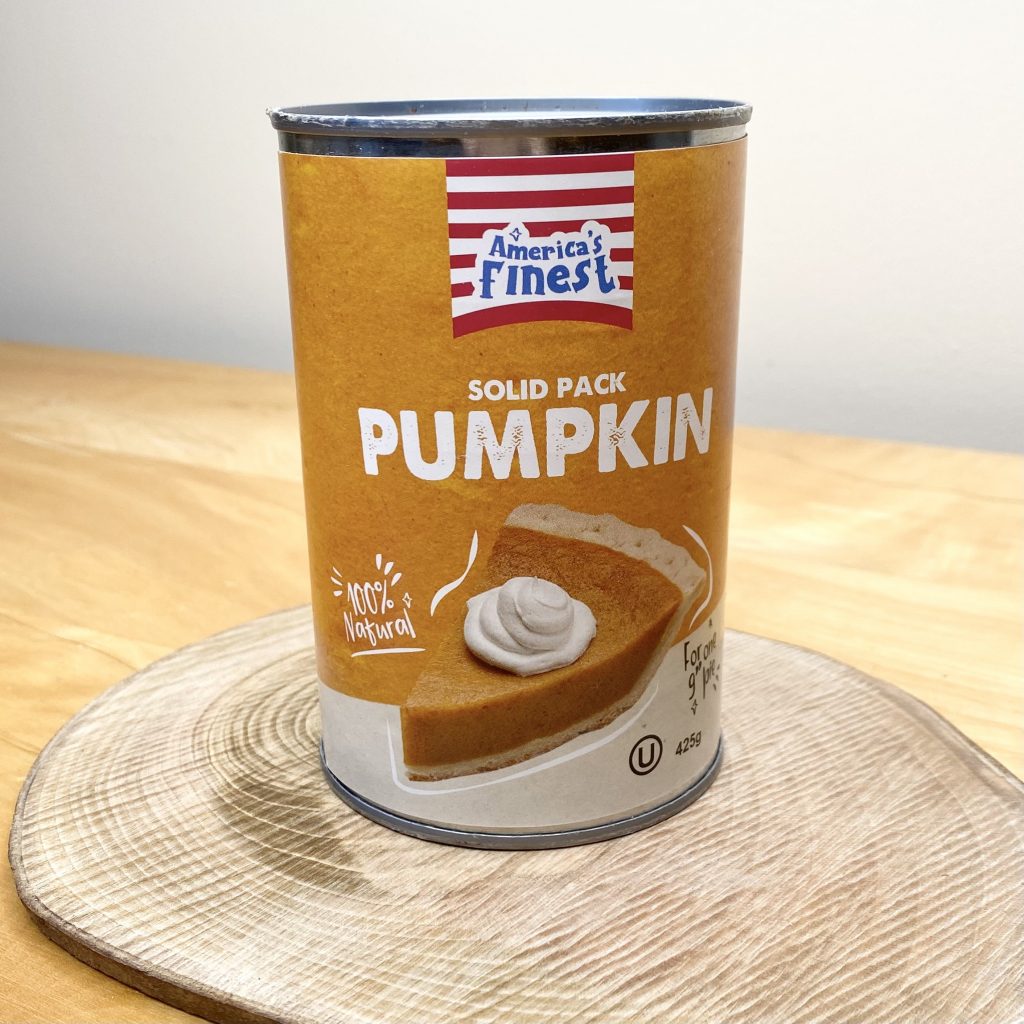
- Canned pumpkin
In the original recipe, Delia (very impressively) roasts and purées her own pumpkin. I have very vivid memories of my dad spending a looooong time pushing roasted pumpkin chunks through a sieve and, honestly, I think we unanimously decided that it just wasn’t worth it. If you have a pumpkin you want to use, and you don’t mind the excessive elbow grease required, then, by all means, go for it! But, if, like us, you prefer your pumpkin pie to be a bit less labour-intensive, canned pumpkin makes for a super smooth filling with much less effort on your part. I’d call that a win.
Equipment
Aside from the standard baking equipment you probably already have in your kitchen, you will need a couple of (slightly more) specialist equipment for this recipe.
- 9 inch (23cm) fluted tart tin, with a removable base
We’ve always made this in a fluted tart tin, but that’s kind of optional- you could have a pie with straight sides if you wanted! Having a removable base makes it SO much easier to get the pie out of the tin, so I would definitely recommend that. I believe that in the US, pumpkin pies are usually made and served in pie dishes, which would mean you don’t need to worry about removing the baked pie from the dish. I’ve never tried baking this recipe in a pie dish, but I don’t see any reason why it wouldn’t work!
- Food processor
I like to use a food processor to a) finely chop the pecans and b) make the pastry. Strictly speaking, using the processor isn’t wholly necessary- you could chop the pecans finely by hand, using a large, sharp knife, and you could make the pastry by hand, rubbing the butter into the dry ingredients with your fingertips and mixing the pastry together with a blunt knife. However, using a food processor really speeds up the process (and is a lot less messy!).
I recommend fitting the processor with a metal blade to chop the nuts, then a plastic blade to make the pastry (the plastic blade helps to prevent you from overworking the pastry, which is the reason many people worry about making pastry in a food processor. Overworking pastry can make for a tough pastry case after baking, but this particular pastry recipe is pretty hard-wearing, so I wouldn’t worry too much!).
Making the Pastry
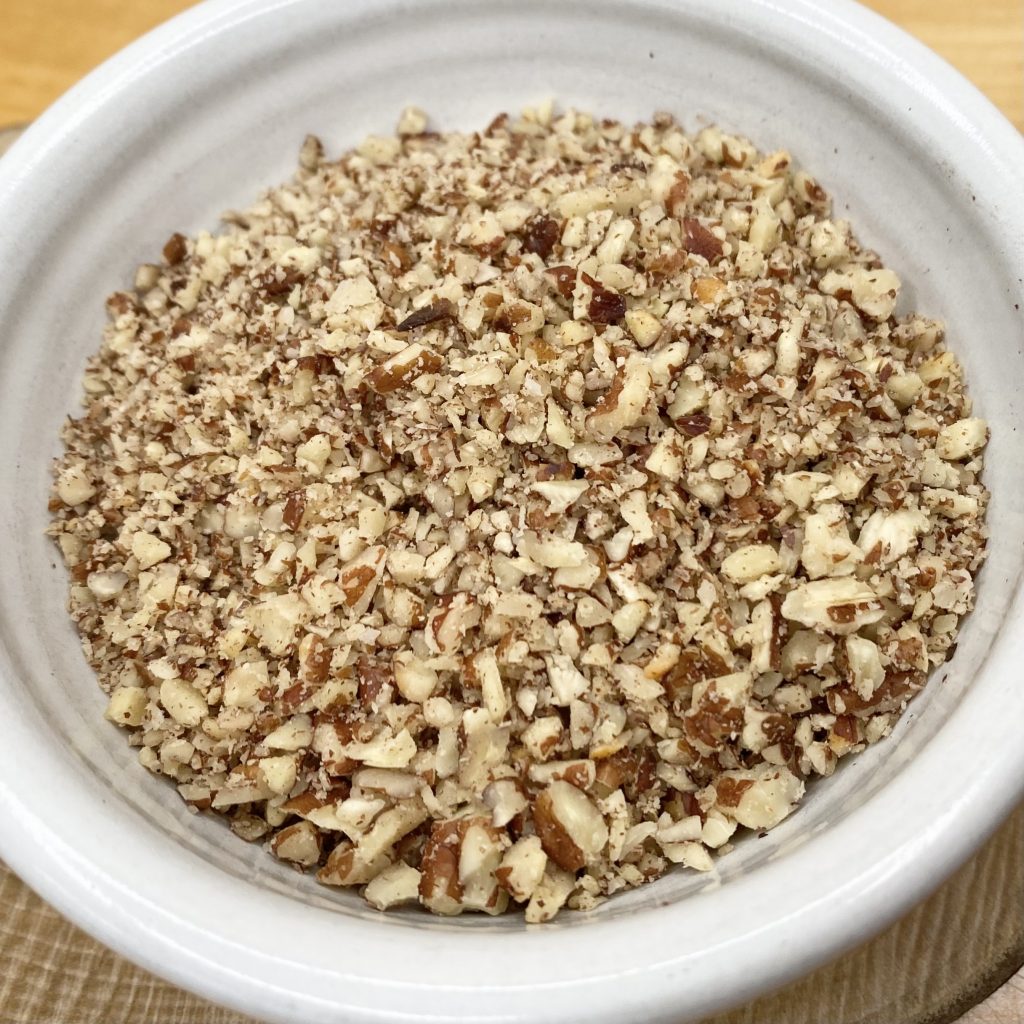
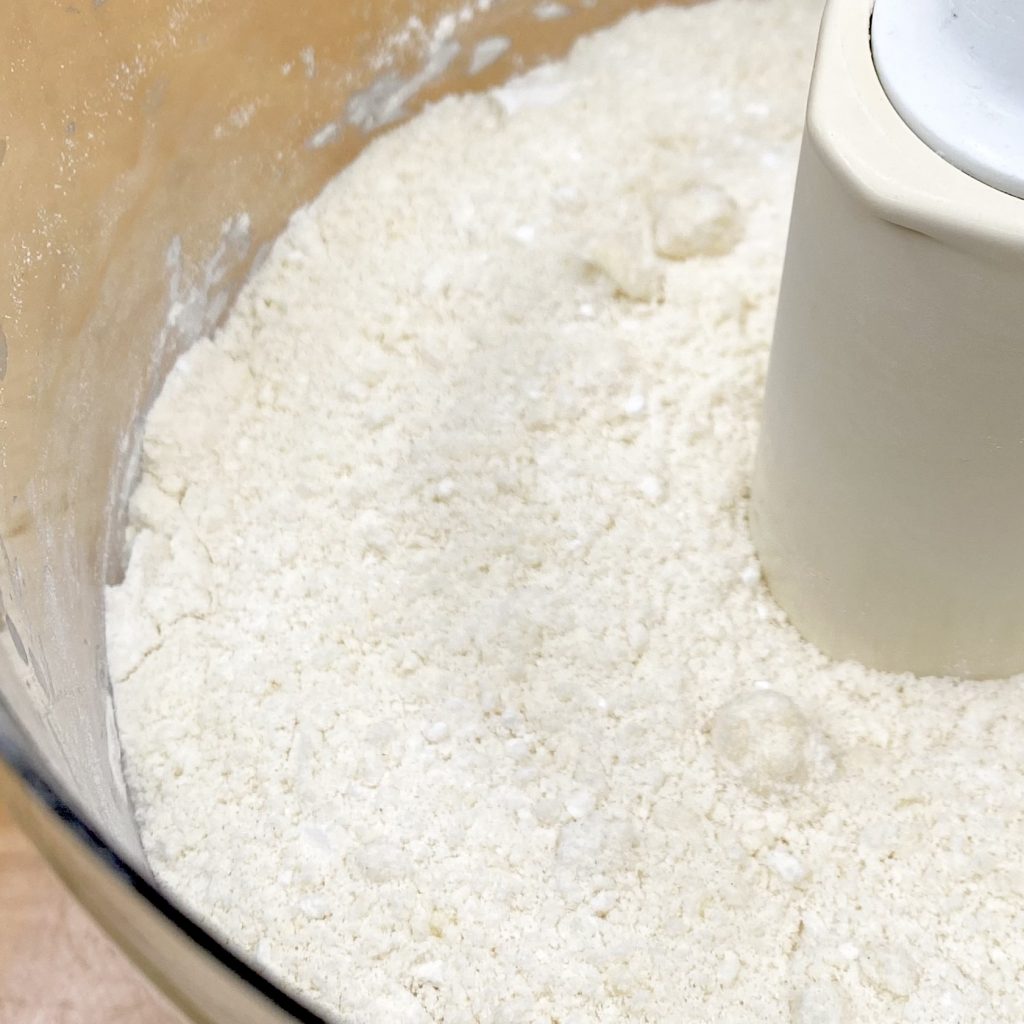
Before you start making the pastry, you need to chop the pecans. They need to be very finely chopped (hence why it is so much easier to use the food processor!), otherwise they will prevent you from rolling out the pastry thinly enough. However, make sure you don’t go too far when processing them, or they will release their oils and end up as pecan butter- not what you’re looking for! Aim for a fine rubble, like this:
Once you have your pecan rubble, remove it from the processor and set aside. Switch the metal processor blade out for a plastic one (to prevent overworking the pastry). Then, sift together the flour, icing sugar and salt and add the dry ingredients to the processor, along with the cold, cubed butter.
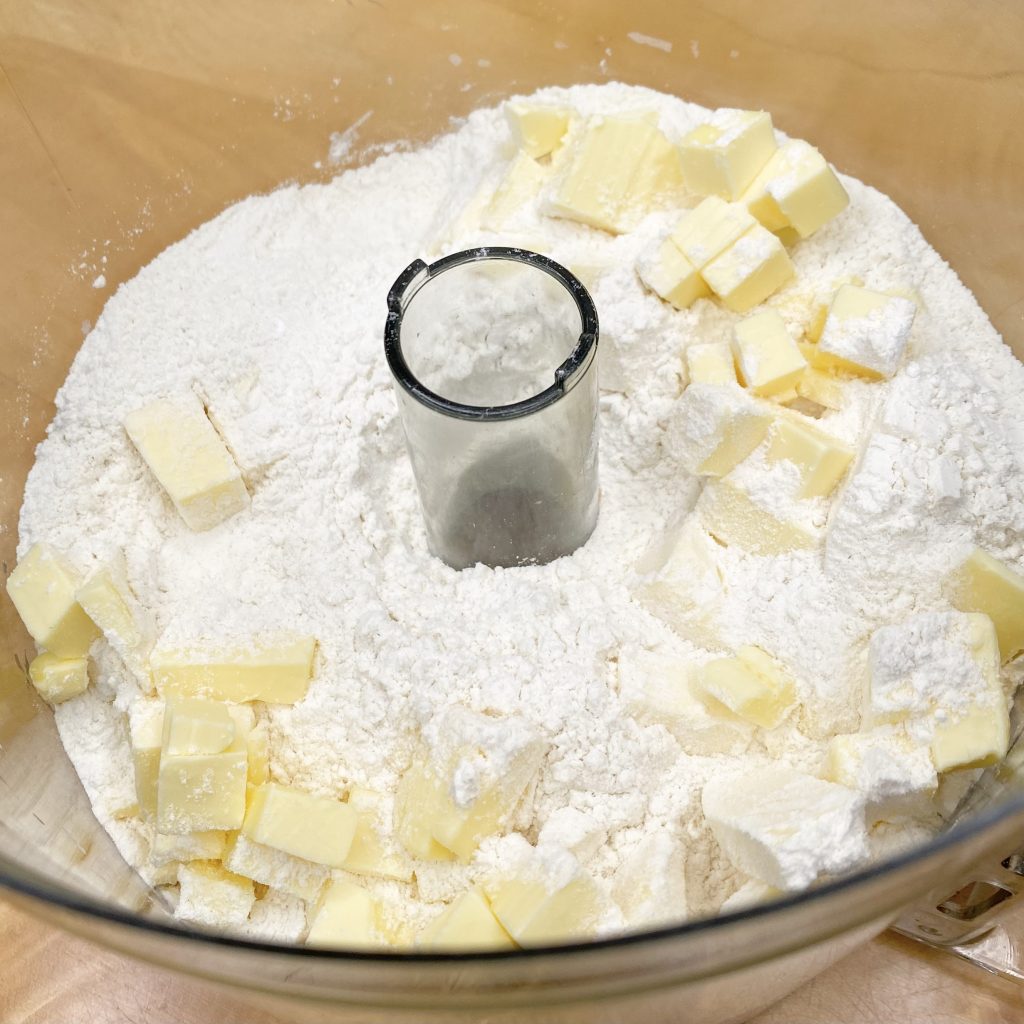
Pulse until the mixture resembles fine breadcrumbs. If you prefer/do not have a food processor, you can do this by hand in a large bowl- just rub the butter into the dry ingredients using your fingertips.
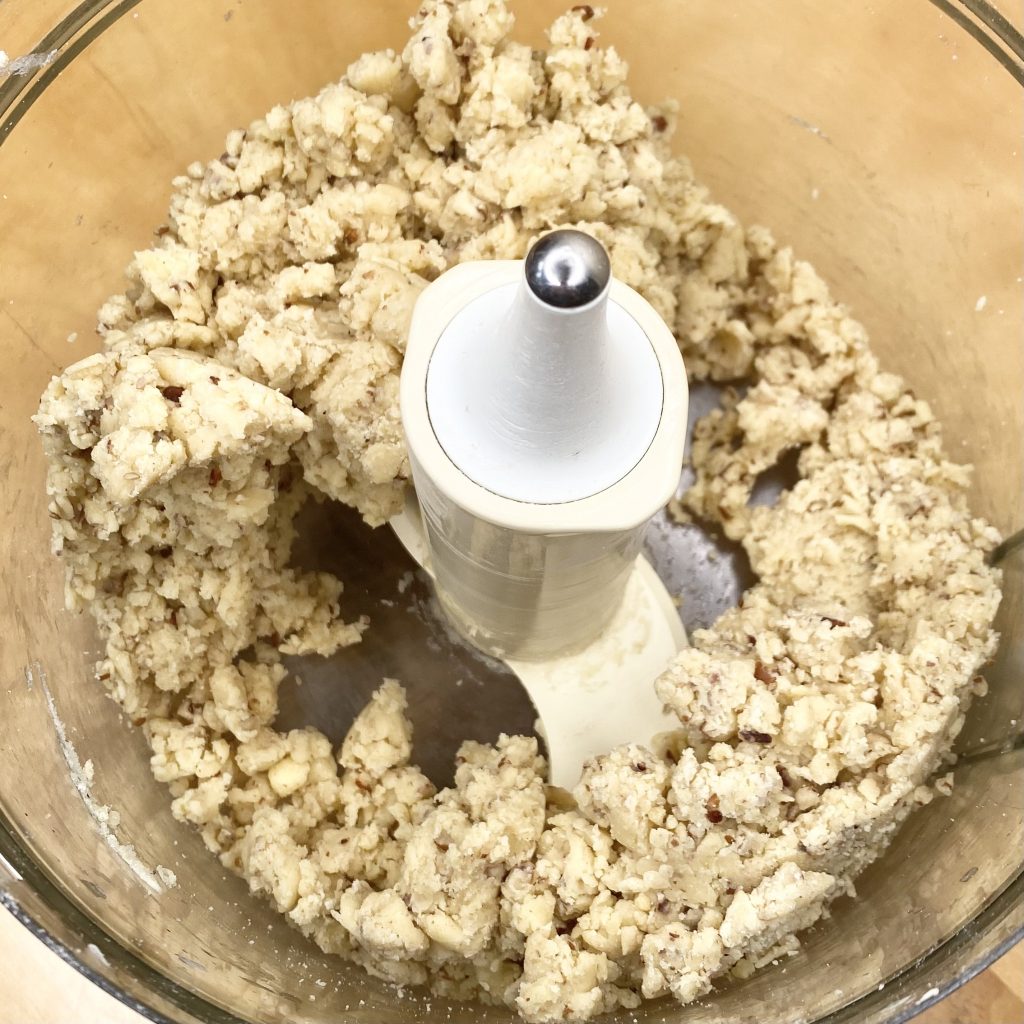
Now, you can add the finely chopped pecans, egg yolk (reserve the white for later) and cold water. Pulse until the pastry comes together into a slightly crumbly dough (you may need to add a little more cold water- just to bring it together, until it resembles the photo below).
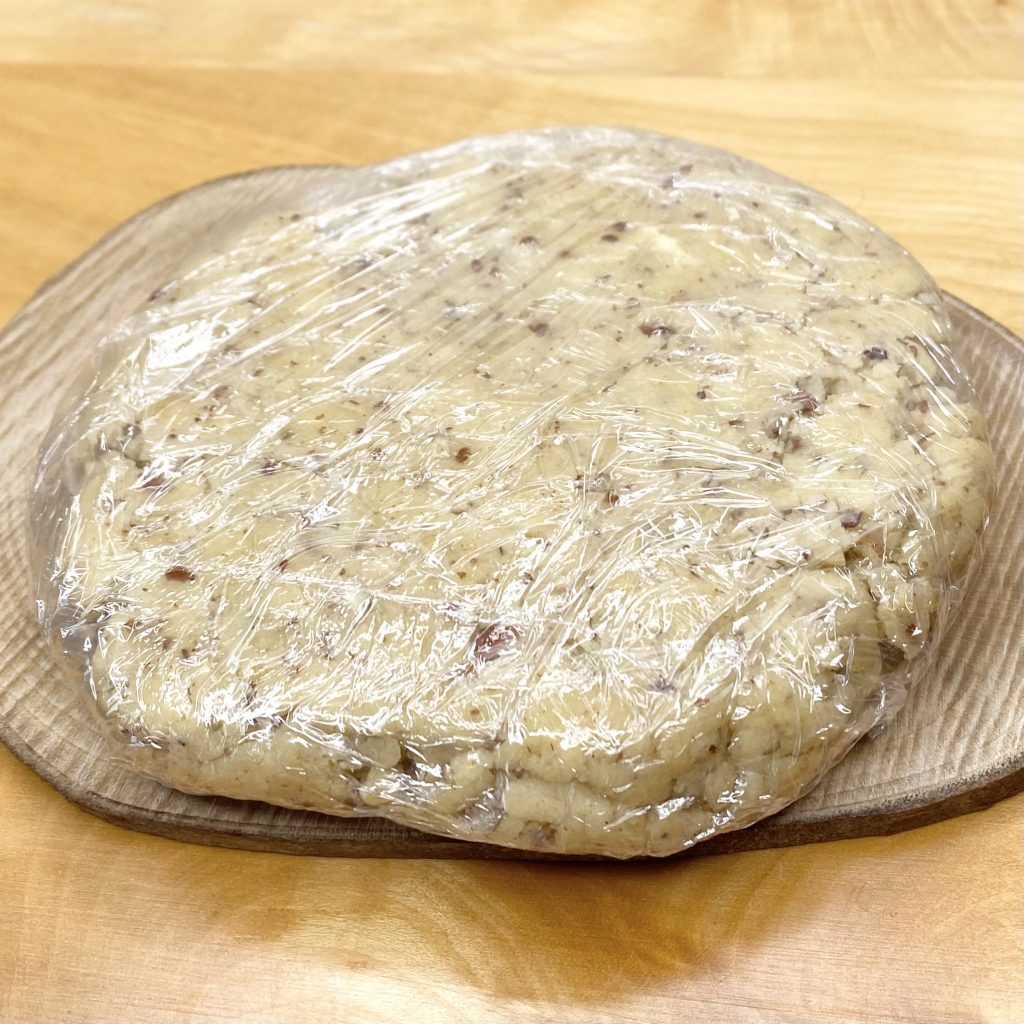
Remove the pastry from the processor and shape it into a flat disk. Wrap the pastry disk tightly in clingfilm, then place it into the fridge to rest for 30 minutes. This will make it easier to work with later, while also helping to prevent it from shrinking too much during baking.
Baking the Pastry Case
Once the pastry has rested, preheat the oven to 180°C (conventional oven). Unwrap the pastry and place it onto a lightly floured surface. Roll it out into a circle about 30cm in diameter- it might be a little crumbly, but that’s okay- it’s a very forgiving pastry that you can patch up later if needed!
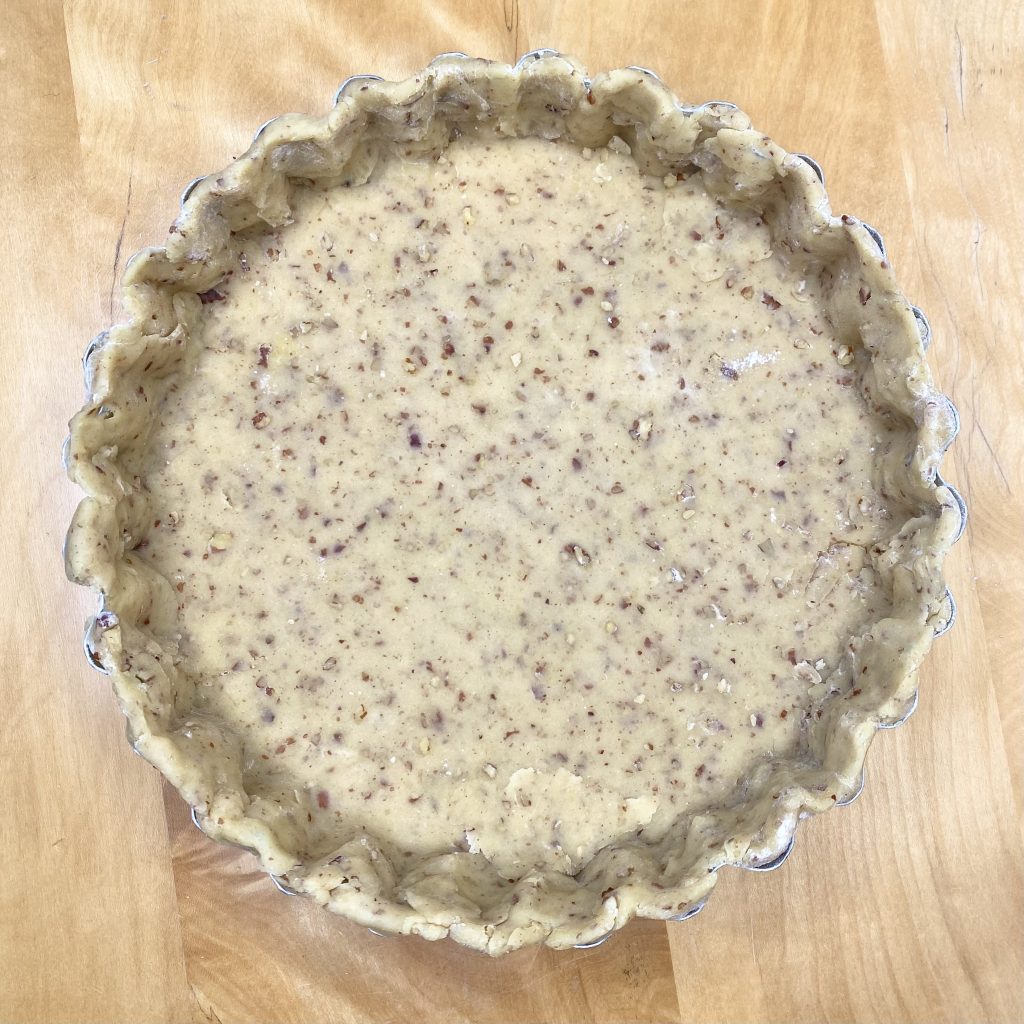
Carefully transfer your pastry circle to your fluted tart tin (lightly grease the tin beforehand to help get the pie out later) and press it into the base and sides- patching any gaps as needed. You’re looking for an even layer of pastry all over the base and sides, with a little extra sitting just above the top of the tart tin, to account for any shrinkage.
Prick the pastry all over with a fork (try not to go all the way through to the bottom of the tin- just prick the surface), then brush lightly with the reserved egg white. Bake in the centre of the preheated oven for 20-25 minutes, until the pastry is golden.
If you notice that the pastry is puffing up during the baking process, just remove it from the oven, give it a few extra pricks to release the air, then return it to the oven for the remaining time.
Making the Pumpkin Filling
While the pastry case is baking, you can make the pumpkin custard filling. Place the eggs and extra egg yolk into a large bowl and whisk to combine, before setting aside.
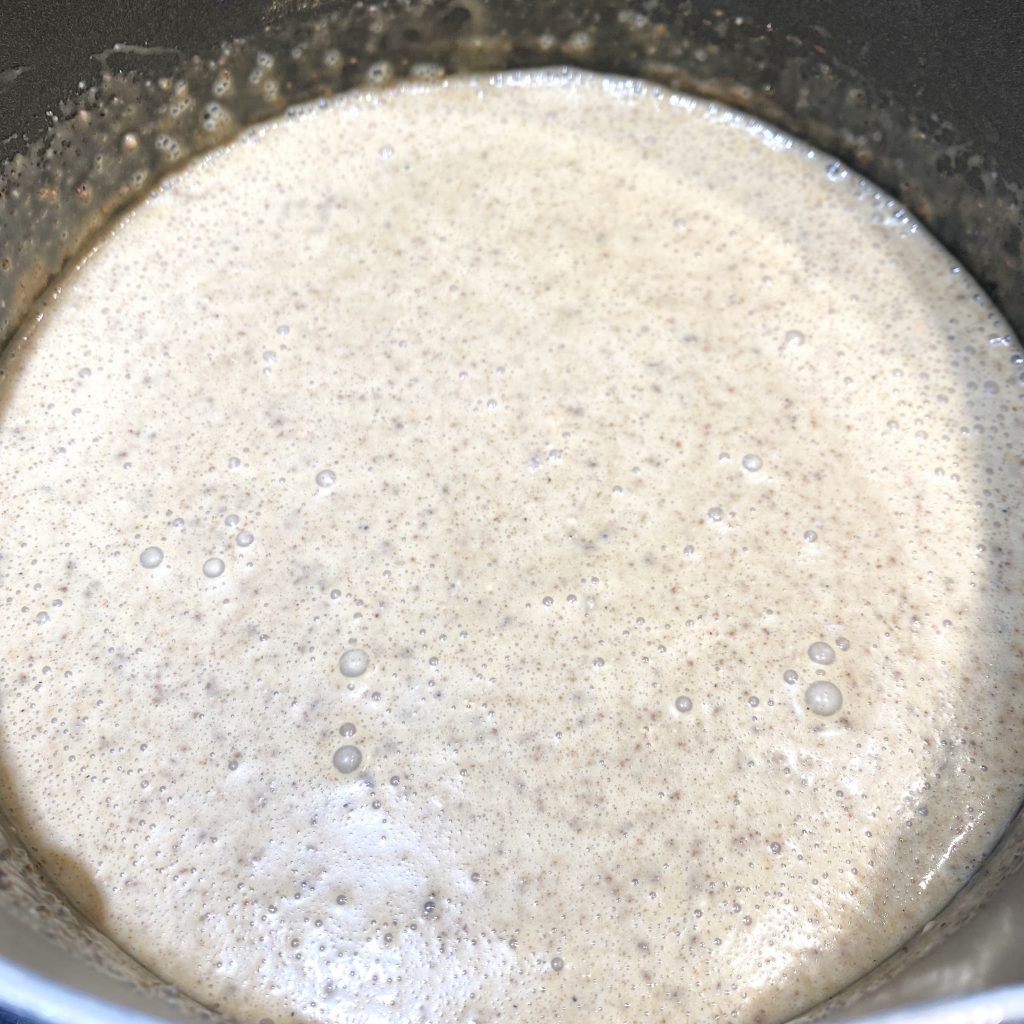
Put the cream, sugar, maple syrup and all of the spices into a medium-sized saucepan over medium heat. Allow it to warm, whisking gently, until the sugar has melted and the mixture has come to just below a simmer.
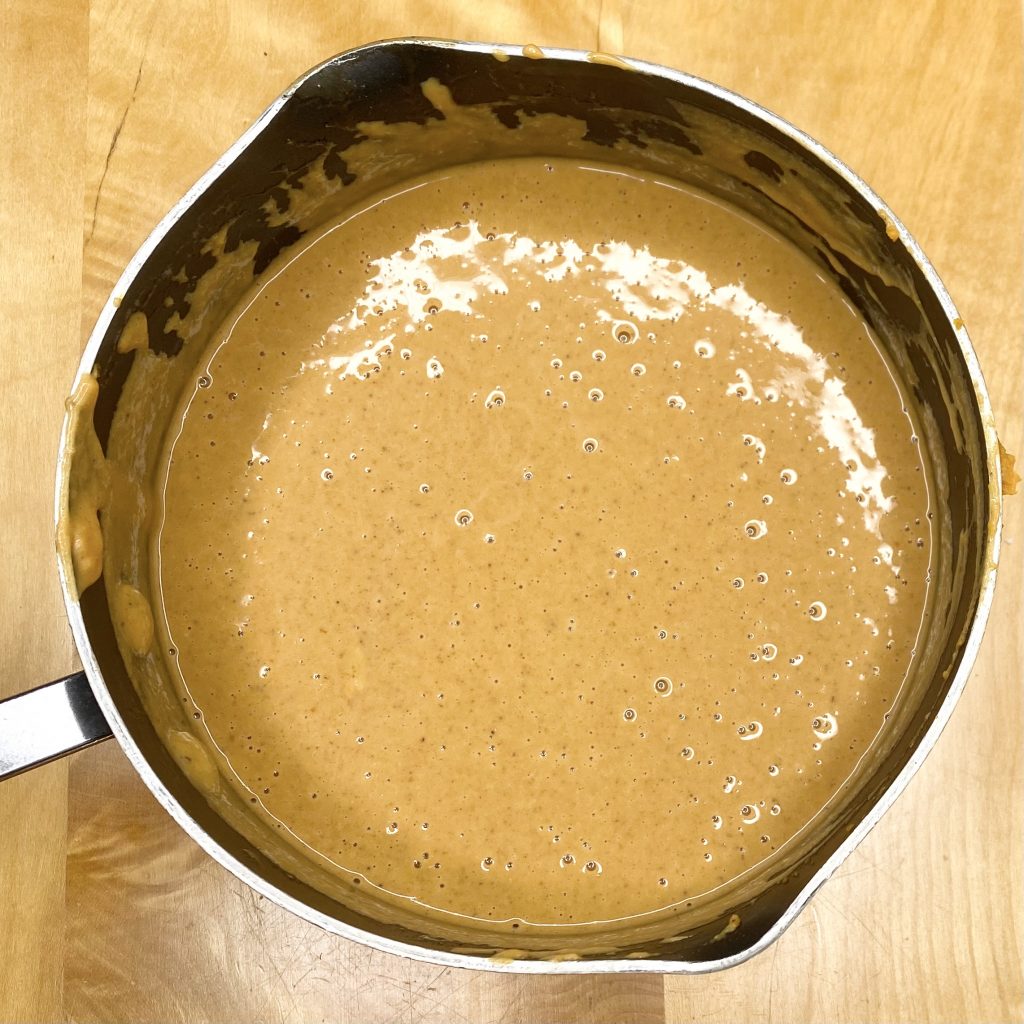
Remove the pan from the heat and add to the beaten eggs in a slow, steady stream, whisking constantly to prevent the eggs from scrambling. Add the canned pumpkin and mix well, until you have a thick, smooth custard.
Baking the Pie
Once you have your filling made and pastry case baked, you can add the filling to the case. I find it is easiest to add the filling while the case is still in the oven- just pull the shelf the case is on halfway out using one (oven-gloved!) hand, then pour in the filling with the other hand. This way, you won’t spill any filling trying to get the pie from your countertop to the oven, which could lead to, at best, a mess and, at worst, a soggy bottom! Paul Hollywood would be QUaKinG!
Bake the filled pie at the same temperature as the pastry case (180°C) for 35-40 minutes, until the filling has puffed slightly around the edges, but is still slightly wobbly in the centre.
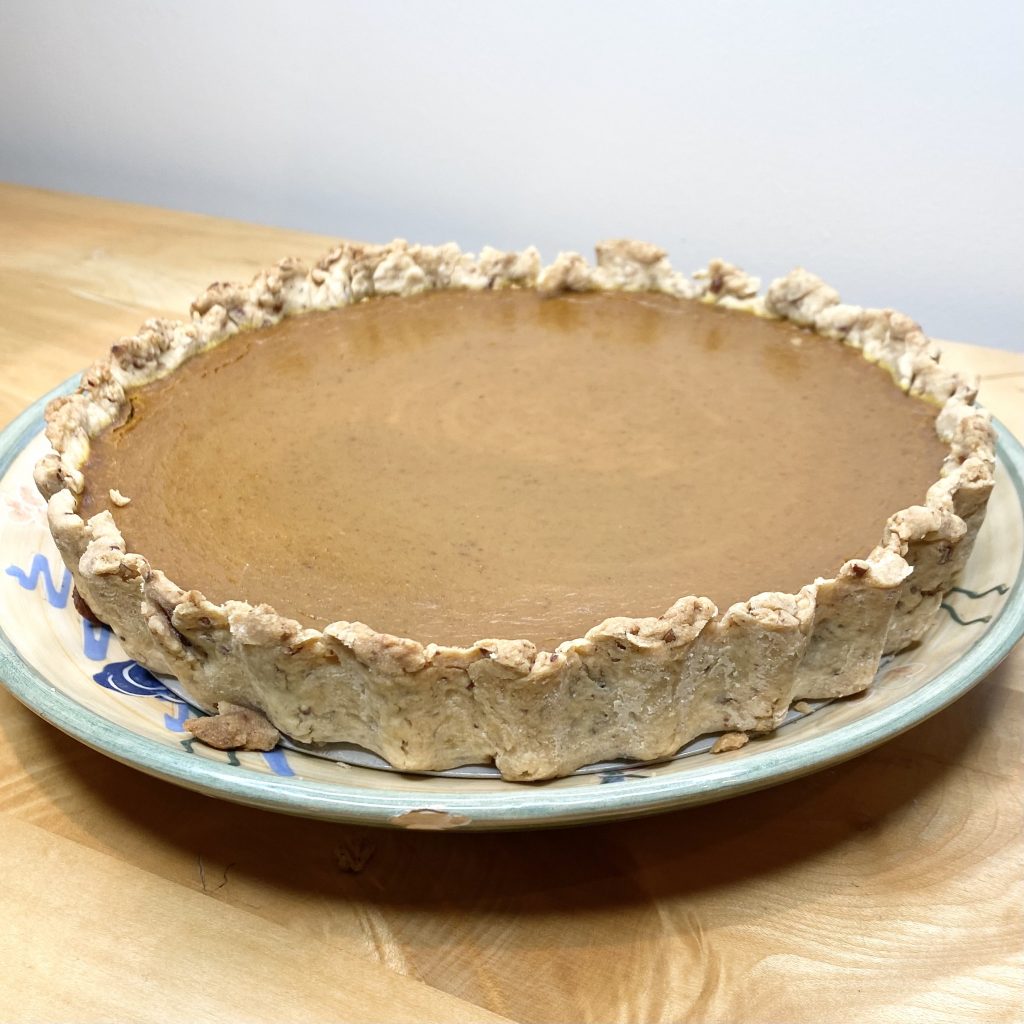
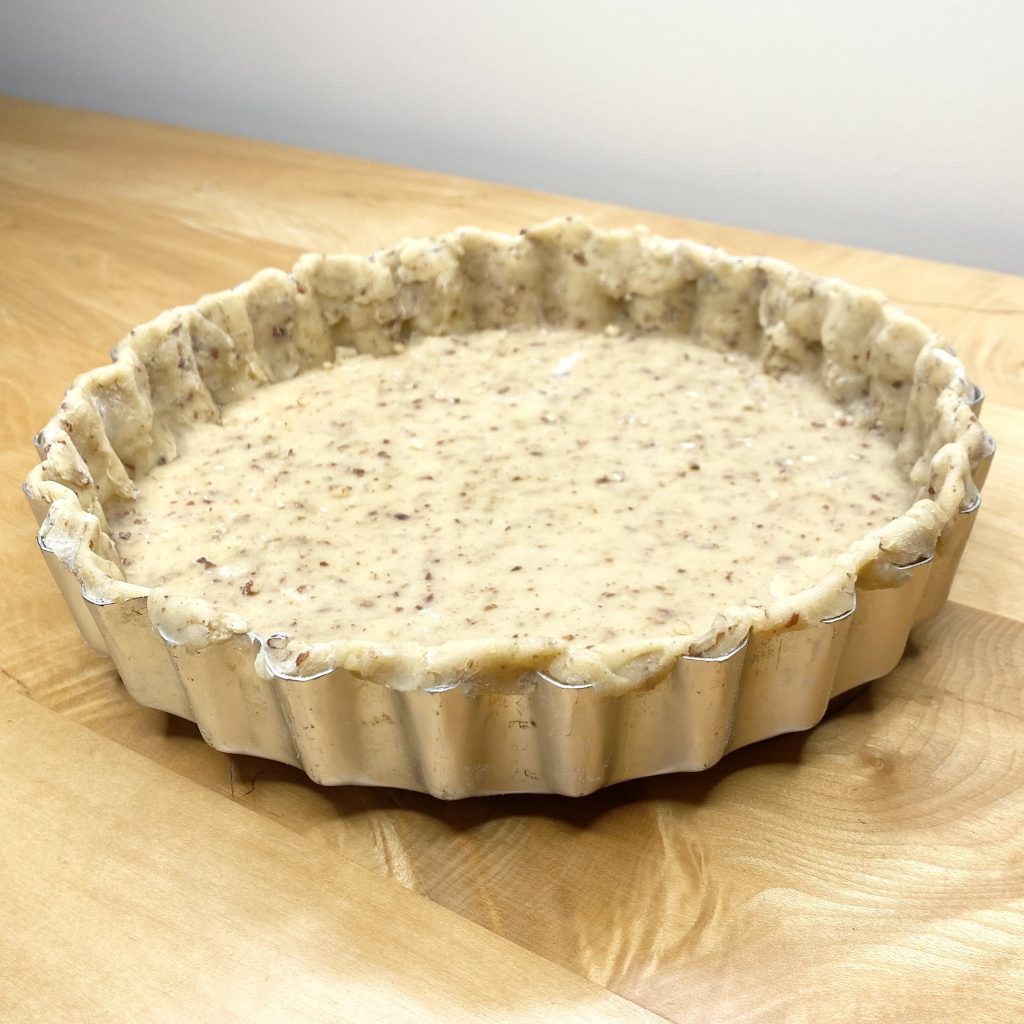
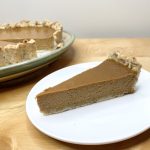
Allow the pie to cool slightly in the tin, before carefully removing it, then transfer to a serving plate. The pie can be eaten warm, but is equally delicious when served chilled- just store it in the fridge until you are ready to eat it.
Admittedly, as pies go, this one is a little rustic, but that’s mainly because of the pecans in the pastry. The added nuts are a real game-changer in terms of taste and texture, but they do make the pie a little less neat and perfect-looking. I kind of like that homemade, rough-and-ready kind of look, though- particularly this time of year! Besides, it tastes so good, it could look like a complete mess and I would still make it over and over again!
Recipe
Pumpkin Pie
Equipment
- 1 23cm diameter fluted tart tin, with a removable base, lightly greased with butter.
Ingredients
For the pastry:
- 40 g pecans, toasted (see Note 1).
- 175 g plain flour, plus extra for dusting
- 10 g icing sugar
- pinch of salt
- 75 g unsalted butter, cold from the fridge and cubed.
- 1 tbsp cold water
- 1 egg yolk (reserve the white).
For the filling:
- 2 eggs + 1 yolk
- 275 ml double cream
- 75 g soft dark brown sugar
- 1 tbsp maple syrup
- 1 tsp ground cinnamon
- 1/2 tsp nutmeg, freshly grated
- 1/2 tsp ground allspice
- 1/2 tsp ground cloves
- 1/2 tsp ground ginger
- 1 x 425g can canned pumpkin
Instructions
Make the pastry case:
- Place the toasted pecans into a food processor, fitted with a metal blade, and pulse until they are very fine- be careful not to go too far, or they will release their oils.
- Sift together the flour, icing sugar and salt. Remove the pecans from the processor, switch the metal blade with a plastic one (see Note 2) and tip in the sifted dry ingredients. Add the cubed butter, then pulse until the mixture resembles fine breadcrumbs.
- Add the pecans back to the processor, along with the water and the egg yolk. Pulse until the pastry comes together into a slightly crumbly dough (you may need to add a little more water to achieve this).
- Take the pastry out of the processor and form it into a flat disk. Wrap the disk tightly in clingfilm and place in the fridge to rest for at least 30 minutes.
- Preheat the oven to 180°C. When the pastry has finished resting, unwrap it and place it onto a lightly floured surface. Roll the pastry into a circle about 30cm in diameter. The pastry will be a little crumbly- don't worry, you can patch it later. Transfer the pastry circle to your greased tin and press it firmly into the base and sides, patching any gaps, so that you have an even layer of pastry all over the base and sides. Make sure that the pastry sits a little above the rim of the tin all the way around, to account for any shrinkage. Prick the base of the pastry all over with a fork, then brush it lightly with the reserved egg white. Place the tin on the middle shelf of the preheated oven and bake for 20-25 minutes, until golden.
Make the pumpkin filling:
- While the pastry case is baking, make the filling. Place the eggs and extra yolk into a large bowl and whisk to combine. Set aside.
- Put the cream, sugar, maple syrup and all of the spices into a medium-sized saucepan. Place the pan over medium heat and allow to warm, whisking gently to combine, until the sugar has melted and the mixture is just below a simmer.
- Remove the hot cream mixture from the heat and pour into the eggs, in a slow and steady stream, whisking constantly. Add the pumpkin and whisk well until you have a smooth custard.
- When the pastry case is ready, you can fill it with the pumpkin mixture. Pull the oven shelf, with the pastry case still on it, half out, so that you can pour the filling directly into the case, before pushing the shelf all the way back in and baking the pie for 35-40 minutes, until the filling has puffed a little around the edges, but is slightly wobbly in the centre. Remove from the oven and allow to cool on a wire rack. Once cool, place in the fridge to chill, before serving, though you can also eat it warm, if you can't wait!
Notes
- I like to toast the pecans in a dry skillet over a medium-high heat on the hob- this takes just a few minutes. Alternatively, you can toast them for about 8 minutes at the same temperature that the pie bakes at (180°C).
- I find that using a plastic blade in the food processor helps to make the pastry less tough. You will want to use a metal blade to chop the nuts, though, because the plastic blade will not be strong enough to break them up.