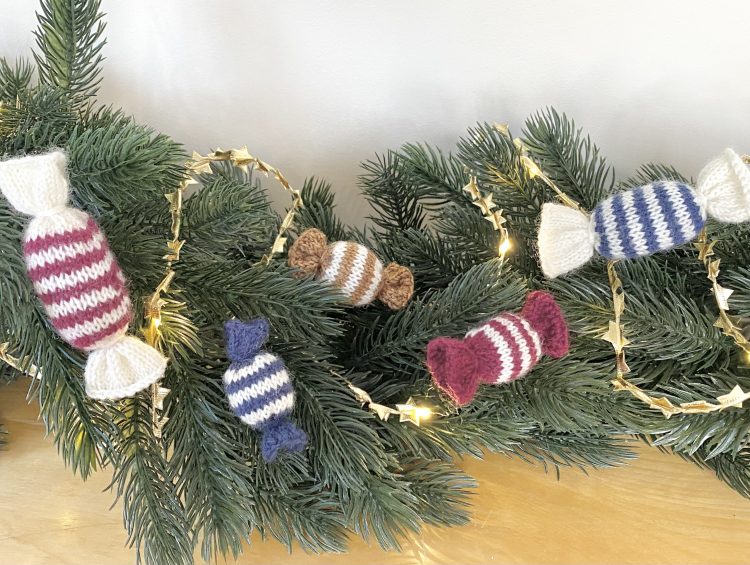
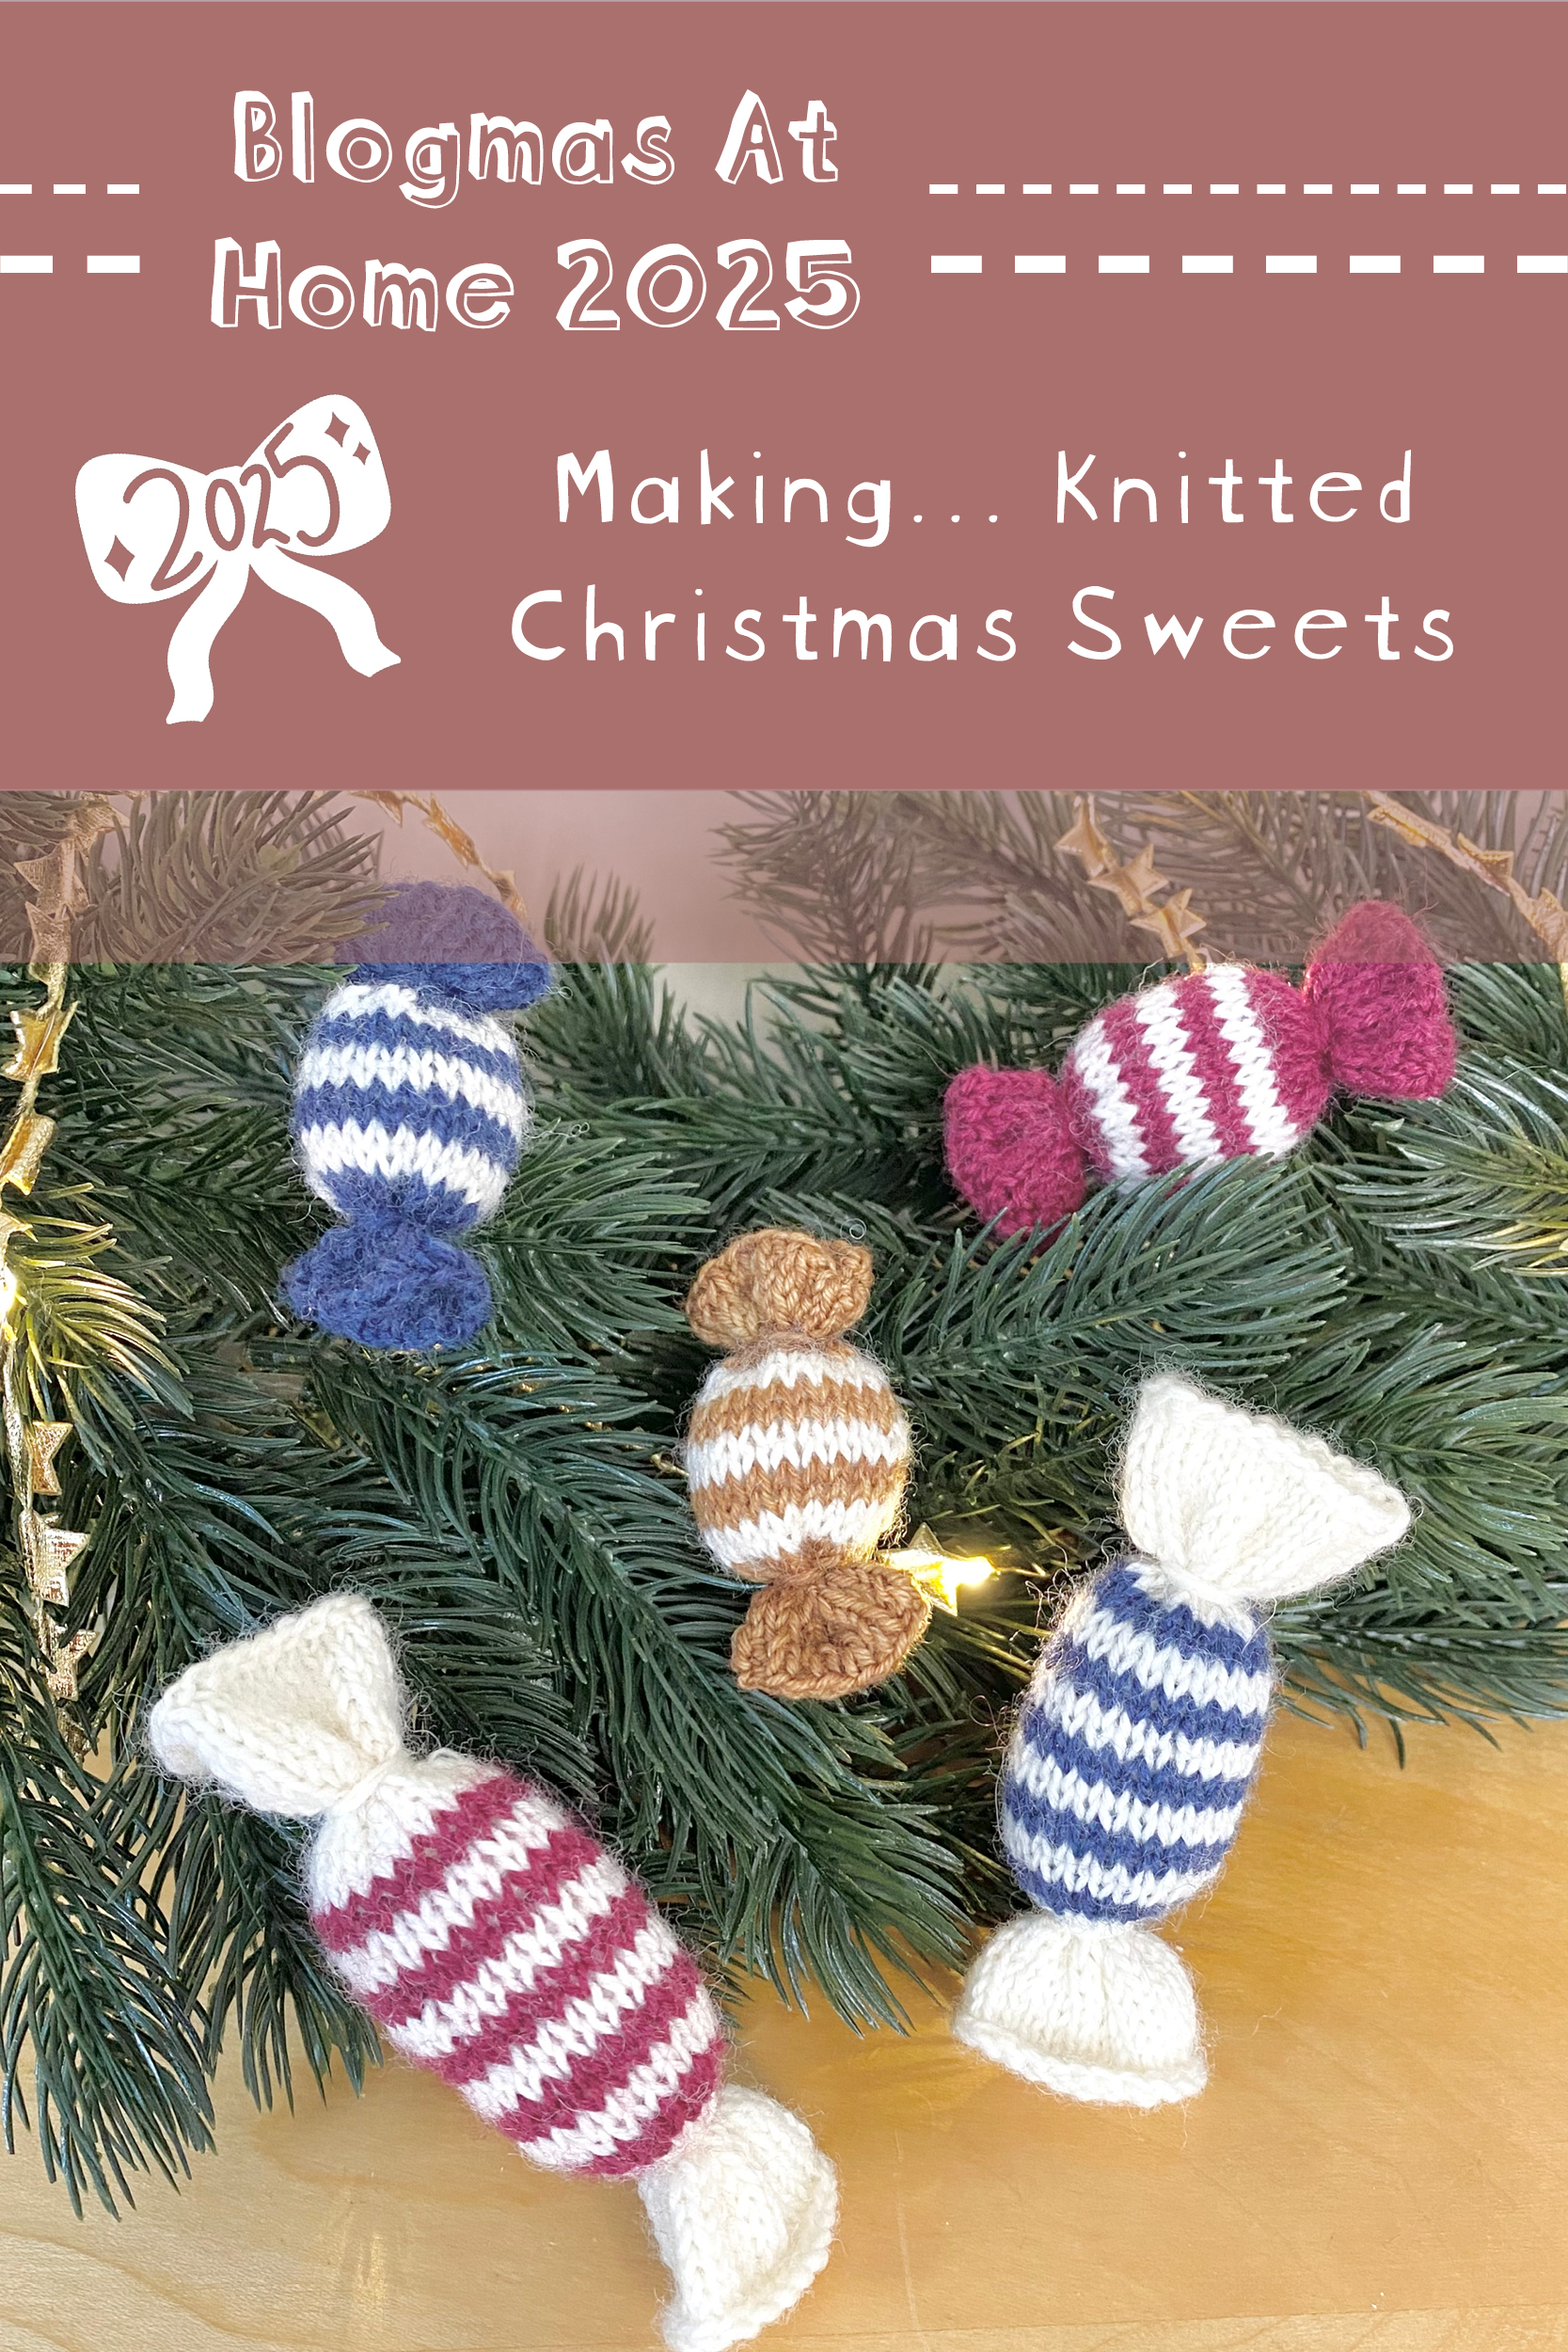
Welcome to Day 10 of Blogmas At Home 2025! 🎄🎀✨
Last Christmas (I gave you my heart)(no, just kidding), Petite Knit released a free knitting pattern for a Christmas Caramel, a stuffed ornament that looks like a little wrapped candy. I fell in love but, alas, I had too many other projects on the go to make one last year, so I set the pattern aside for this year.
Serendipitously, while I was making my Christmas Caramels this year, DROPS released a pattern for a Holiday Confection as part of their Christmas Calendar, which I always love following along with this time of year. This pattern makes a very similar, though slightly smaller and rounder, stuffed candy ornament.
So, naturally, I made two candies following the instructions from each pattern to compare them (you know, for science).
In this post, as always with my 'Making a...' series, I'll be chatting about my experience following these patterns, as well as detailing any changes/adaptations I made. If you want to make your own Christmas Caramels, you can find the free pattern on Petite Knit's Ravelry page, here. If you want to make your own Holiday Confections, you can find the free pattern on the DROPS Design Ravelry page, here.
Table of Contents
Materials
To make these knitted sweets, I used the following materials:
- 2.5mm circular needles.
Both patterns call for 3.0mm needles. This makes sense with the Christmas Caramels, because they use a worsted weight yarn, but is slightly surprising with the Holiday Confections, which use a fingering weight yarn (and a particularly fine one at that: DROPS Flora). I used a fingering weight yarn for my sweets (more on that below) and I think it’s always better to have a tighter gauge whenever you’re working on a project that will be stuffed, so I used a 2.5mm needle for all of my candies.
- Fingering-weight yarn (I used DROPS Fabel in the shades Off White 100, Blue 107 and Ruby Red 113, plus a scrap of a gold yarn with unknown origins).
Are you sick of seeing these colours yet? They’ve kind of become my unofficial Christmas 2025 colour palette and… I’m not mad about it!
- Stuffing.
- Darning needle.
- Scissors.
Christmas Caramels vs Holiday Confections
While these patterns are very similar to one another, they are not identical and they do produce quite different candies.
Here are the key differences between the two patterns:
| Christmas Caramels | Holiday Confections | |
| Size | Larger | Smaller |
| Shape | Long | Round |
| Initial stitch count | 24 | 24 |
| Shaping method | k2tog, (k1, yo) | k3tog, kfbf |
| Edges | Plain | 1×1 rib |
| Design | Striped only | 6 variations (mainly stripes) |
| Design Symmetry | No | No |
Let’s go through these one by one!
Size
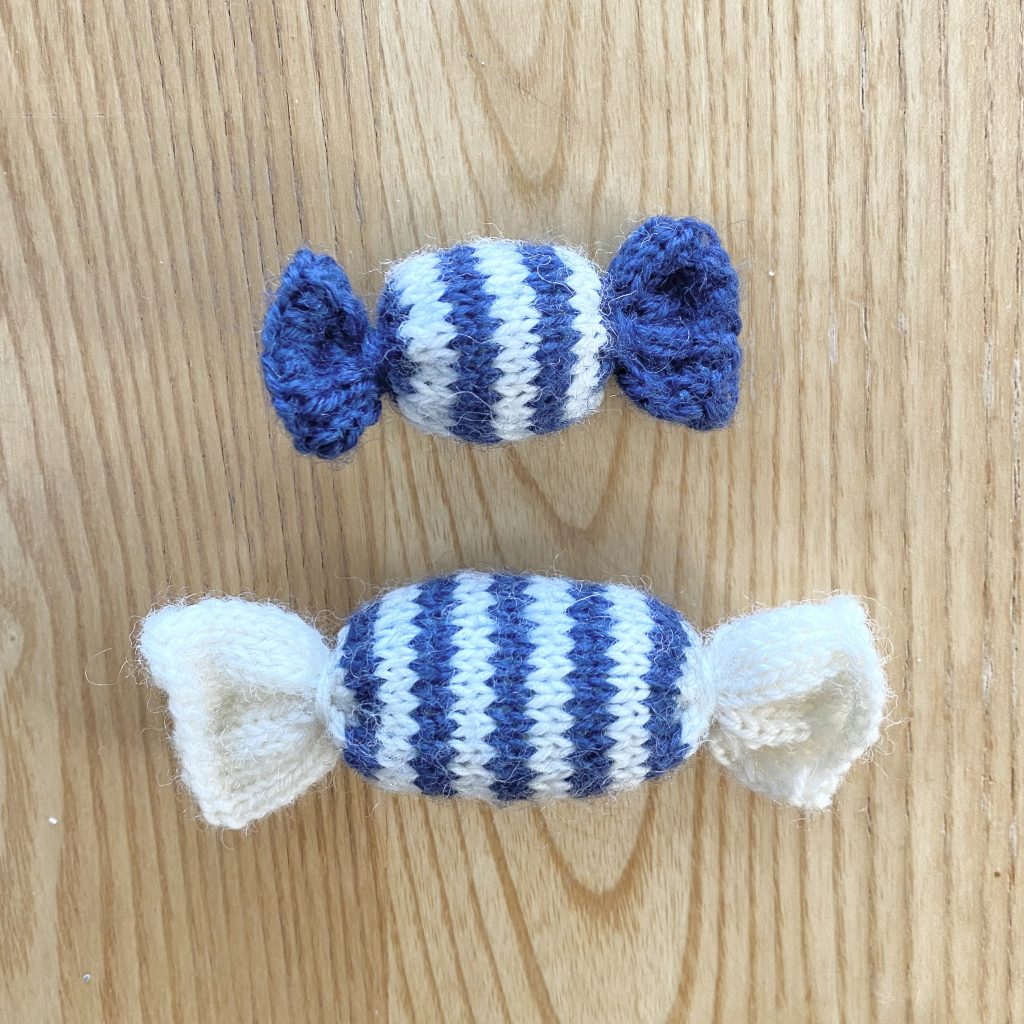
The Christmas Caramels are significantly larger than the Holiday Confections. This is achieved simply by knitting more rows (as the starting stitch counts of each pattern are the same).
Shape
The Christmas Caramels have a longer, more oblong-esque shape, while the Holiday Confections have a rounder shape. Again, this is caused by the number of rows: working fewer rows produces a rounder shape, while working more rows produces a longer, more rectangular shape.
Initial Stitch Count
Both patterns start and end with the same stitch count: 24 sts.
Shaping Method
The shaping method used is one of the most significant differences between the two patterns: I think the Christmas Caramel version is easier to work (and work with, when stuffing/ finishing), but the Holiday Confection version gives a slightly more defined shape.
Edges
The first and last row of the Christmas Caramel is worked plain, while the first and last row of the Holiday Confection is worked in 1×1 rib. I was surprised by the addition of the rib row at first, but it a) stops the ends of the sweet from curling and b) somehow makes the ends look even more gathered and realistic, so I’m team 1×1 rib all the way!
Design
The Holiday Confection pattern has a greater variety of design variations than the Christmas Caramel but, admittedly, 4 out of the 6 of the designs are just slight variations on a horizontal stripe. I made all my sweets using the 2-row stripe pattern, for continuity.
Design Symmetry
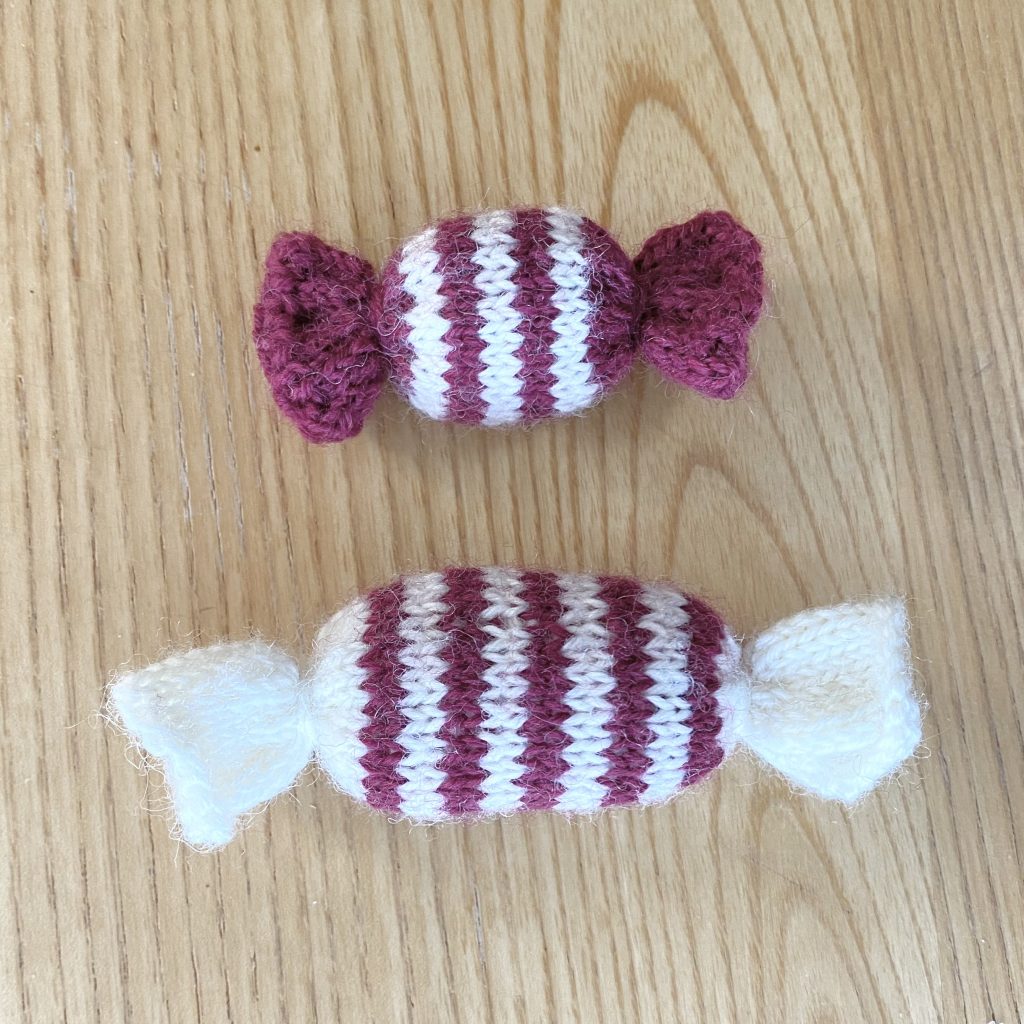
The main problem I encountered with both of these patterns was the (potentially unintentional?) asymmetry of the stripe pattern!
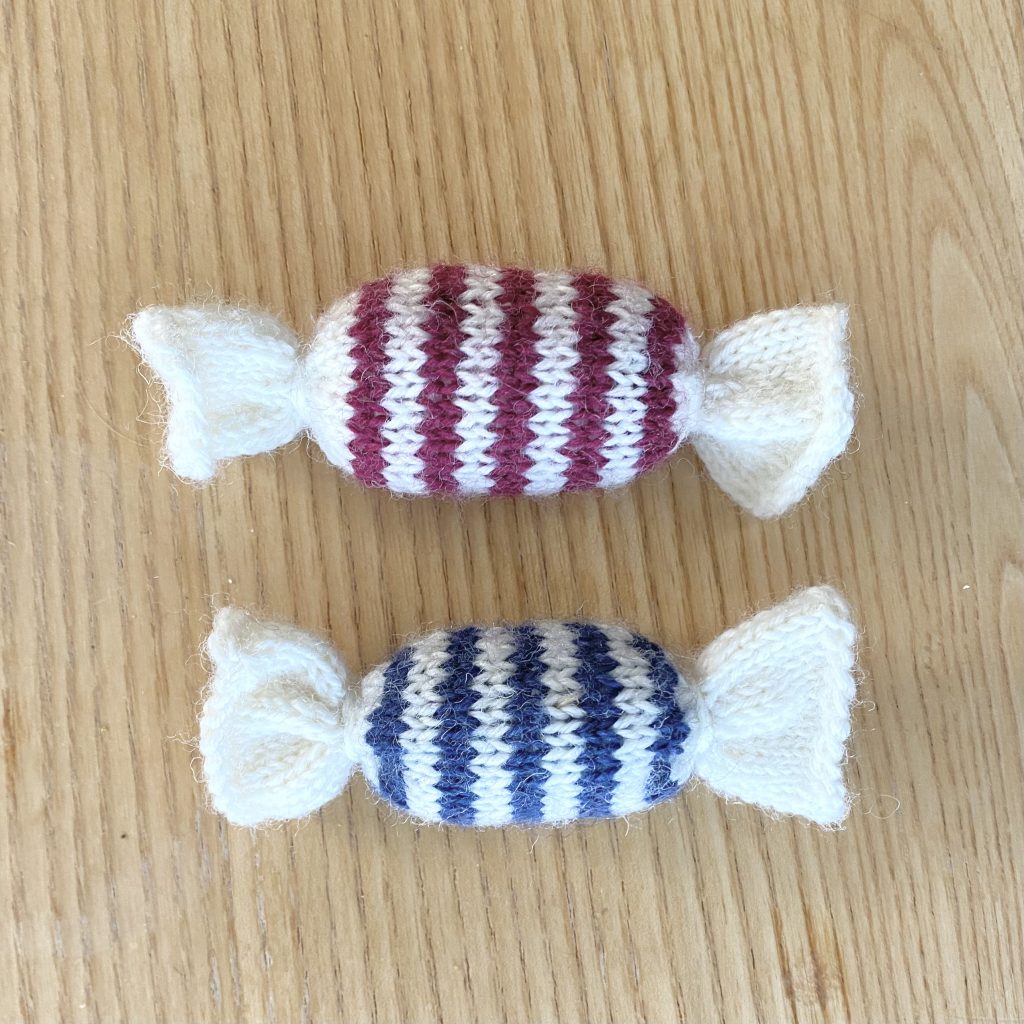

As written, the main colour sections at the start and end of the body piece are different sizes (a natural consequence of the way the shaping is worked in both patterns), which drives me slightly crazy. In the photos above, the red sweets are worked according to the pattern and have this problem (the far left end of the Christmas Caramel (left) and the far right end of the Holiday Confection (right)).
On my second attempt at each pattern, I made a a slight adjustment to rectify this:
For both patterns, on the striped, body section, always START with two rows of the contrast colour and END with two rows of the main colour.
To achieve this, I made both of my second attempt sweets 2 rows shorter than the pattern suggests (these are the blue sweets in the above photos!). I’m much happier with them this way!
The Pick ‘n’ Mix Sweet
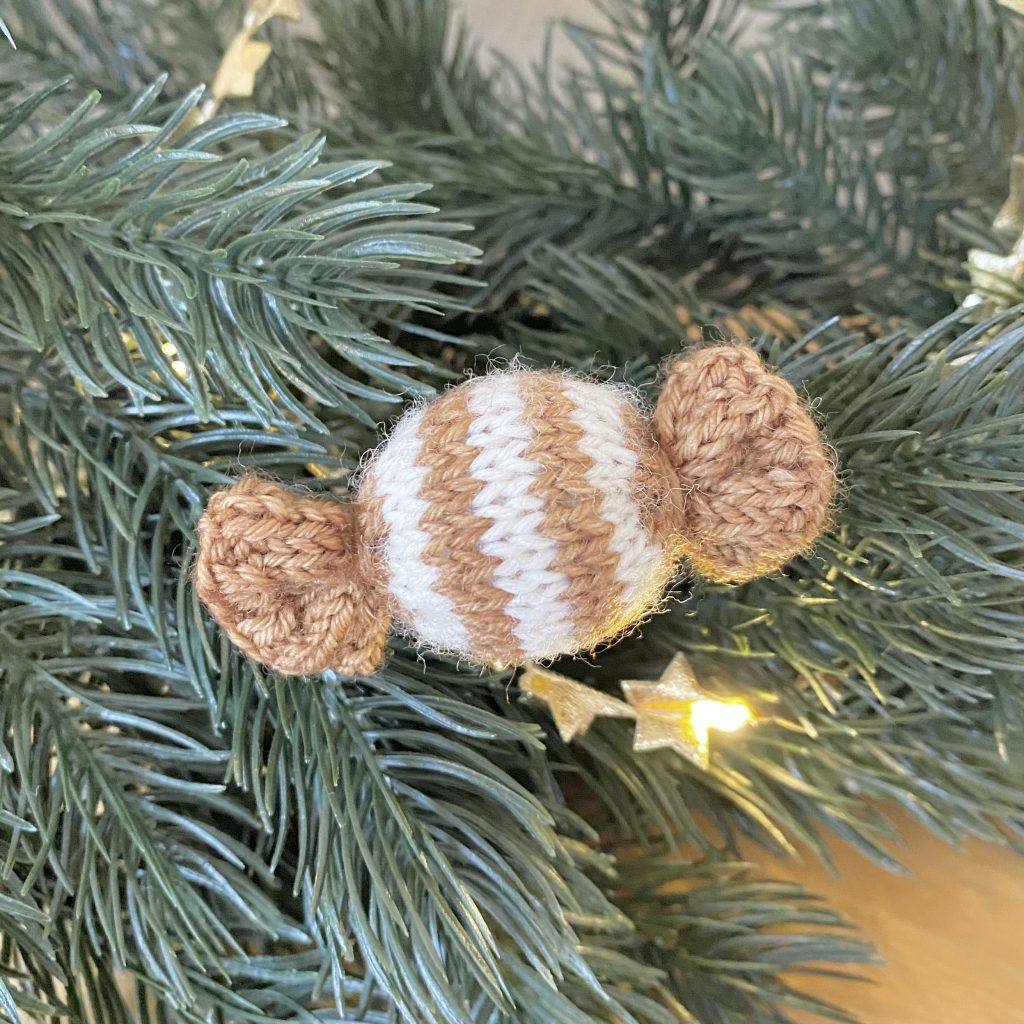
After making 4 sweets of various pattern origins, colours and alterations, I decided to combine my favourite features of each pattern and make my ultimate, knitted ‘pick ‘n’ mix’ sweet. Here’s what I did:
- Used 2.5mm needles (magic loop method) and fingering weight yarn (omit extra glitter yarn).
- Followed DROPS pattern for BONBON-2 from cast on to Round 4, leaving long tail for later.
- Worked 3 closure rounds as per Petite Knit pattern.
- Worked 12 plain rounds of 2-round stripes, starting with contrast colour and ending with main colour.
- Worked 3 closure rounds as per Petite Knit pattern.
- Followed DROPS pattern for BONBON-2 from Round 27 to cast off, leaving long tail for later.
- Tied off contrast yarn ends inside the sweet.
- Used tail ends of cast on/off to tie off each end of the sweet. I wove in the end until I reached the closure rounds, then wove the end in and out of the holes created by the yarn overs. I pulled the yarn tight to gather the fabric in, then wrapped the yarn around the outside 3 times to cinch it in even more. I then secured the end by threading it up underneath the yarn wraps and darning it in on the inside of the work.
Final Thoughts
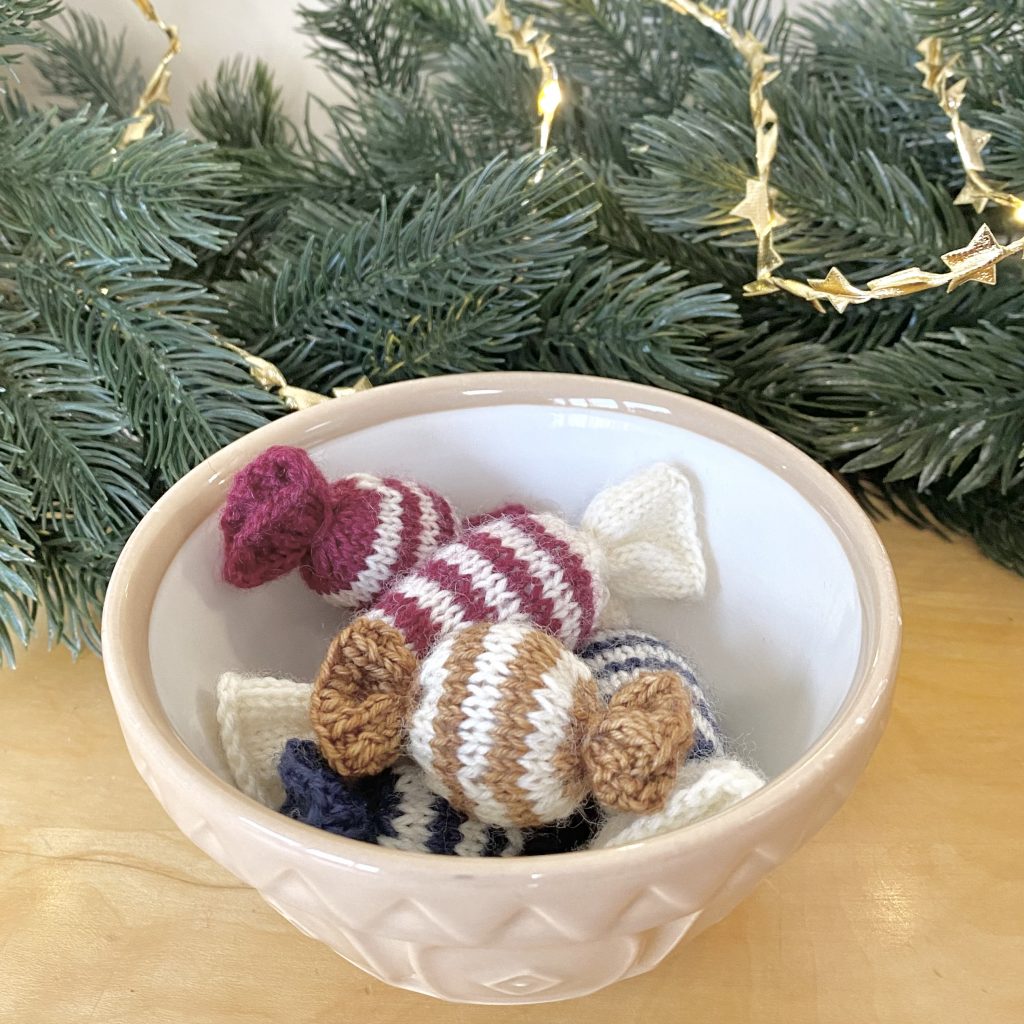
And that was my (super scientific) process of knitting up some little sweet decorations! I’m so happy with my finished ‘pick ‘n’ mix’ pattern— I’ve obviously opted to go for the slightly rounder shape, but I could definitely knit more rows for the body to make it more of an oblong shape if I ever needed to.
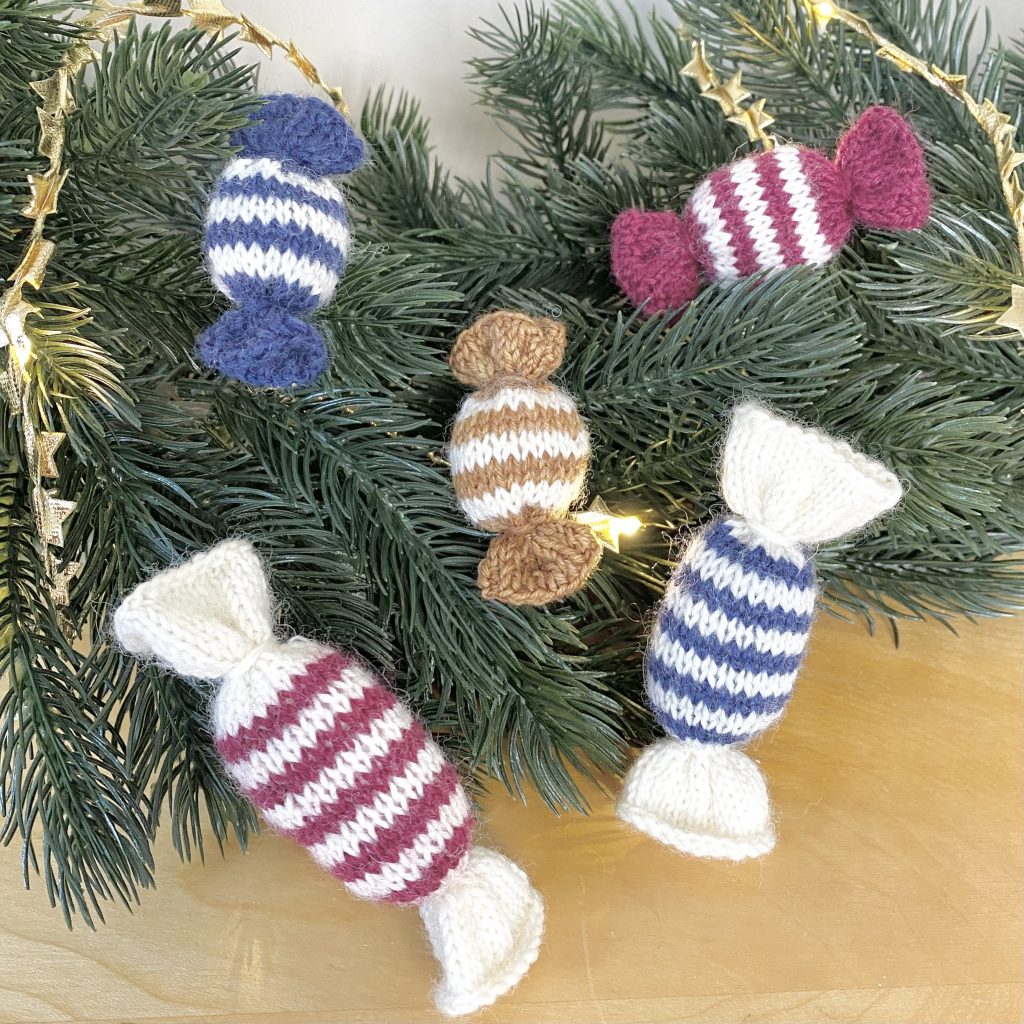
I think these little candies look so cute just dotted around the place, but you could also attach a loop of yarn or thread and they’d make adorable little Christmas tree ornaments too! I feel like there are a lot of creative possibilities for these… maybe I need to cut myself off from making them now, lest I end up surrounded by sweets that I cannot even eat…?
If you're interested...

You can find the free Christmas Caramel pattern on Ravelry here.

You can find the free Holiday Confection pattern on Ravelry here.

You can find my Christmas Sweets project page on Ravelry here.
Gemma
xxx