

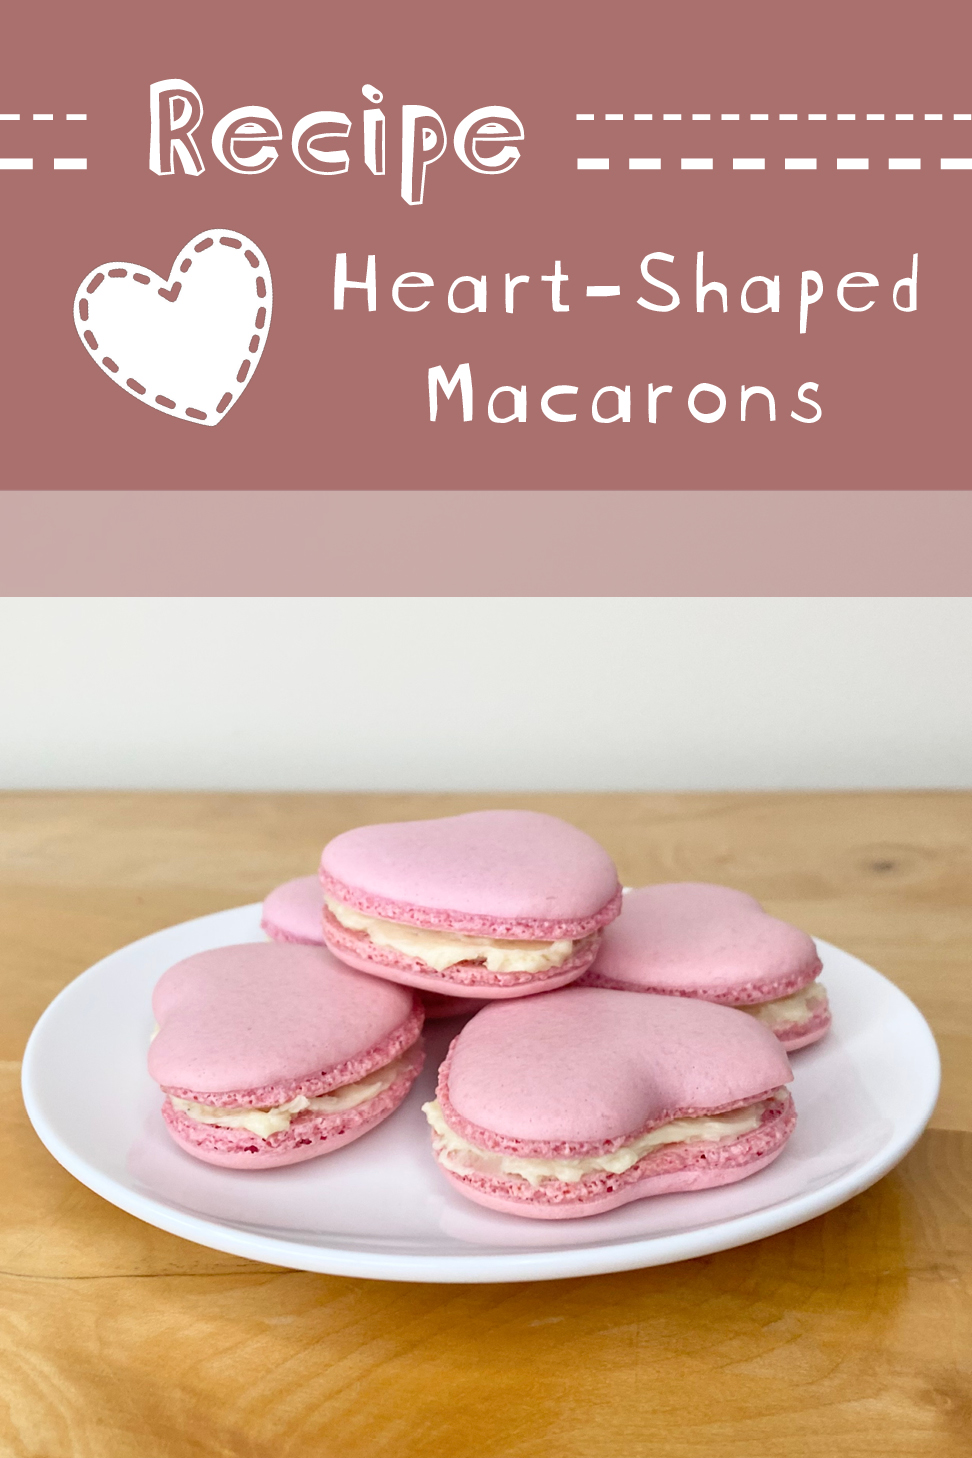
The 14th of February is fast approaching and, whether you’ll be celebrating Valentine’s, Galentine’s, or just getting through another wintery Wednesday, these pink, heart-shaped macarons with a vanilla cream filling are the perfect treat to make your day super-sweet!
I’ve done a couple of posts about macarons on the blog, so I won’t be doing a deep-dive into macaron-making today. Instead, I’ll be focusing on the things that make these macarons extra special, that is, the pink, heart-shaped shells and the tasty vanilla filling. For a more in-depth tutorial for the macaron batter itself, check out this post.
Table of Contents
- Making Pink Macaron Shells
- Piping Heart-Shaped Macarons
- Making Vanilla Cream Filling
- Assembling the Macarons
- Recipe
Making Pink Macaron Shells
For a very, very long time, I was unable to master the seemingly simple task of making tinted macaron shells. I won’t lie, it bothered me- I have been stifled. I even started using coloured chocolate to decorate my macarons instead (see my Wimbledon-themed tennis ball macarons). I thought I had accepted that colouring macaron shells was a step too far for me. Still, though, I railed against the injustice: how come everyone else seemed to be perfectly capable of colouring their macarons?! What was I doing wrong? All of my macarons came out looking either the right shape and annoyingly beige, or the right colour and monstrously-formed. But the ideas that relied on coloured shells kept coming, and I kept wishing and hoping and dreaming and trying.
I am SO pleased to announce, that after many, many failed attempts, I have finally figured out how to colour macaron shells. Here’s what I’ve learned…
Choosing the Right Food Colouring
The food colouring that you use matters.
In so many ways! Most importantly, you need to use a water-based, gel food colouring that can withstand being baked. I know, I know, how specific. Nonetheless, each of these individual characteristics is super important. Here’s why:
- Macarons are a meringue-based bake, so adding anything oily is a BIG no-no. I mean, you are supposed to wipe down your bowl and whisk with vinegar to remove any traces of fat before making meringues- oil is, quite literally, the enemy. For that reason, you need to use a water-based food colouring, not an oil-based one.
- Macarons are very finicky- you don’t want to add too much of anything outside of the base ingredients, or it will affect the finished bake. Because of this, you need to use a concentrated gel colouring– you’ll never achieve the right colour AND texture if you use a liquid colouring.
- Obviously, macarons need to be baked, so it’s important that your food colouring can withstand the heat. Some food colourings (I’m looking at you, Wilton) tend to discolour in the oven, which will leave you with murky, beige shells. Not the vibe.
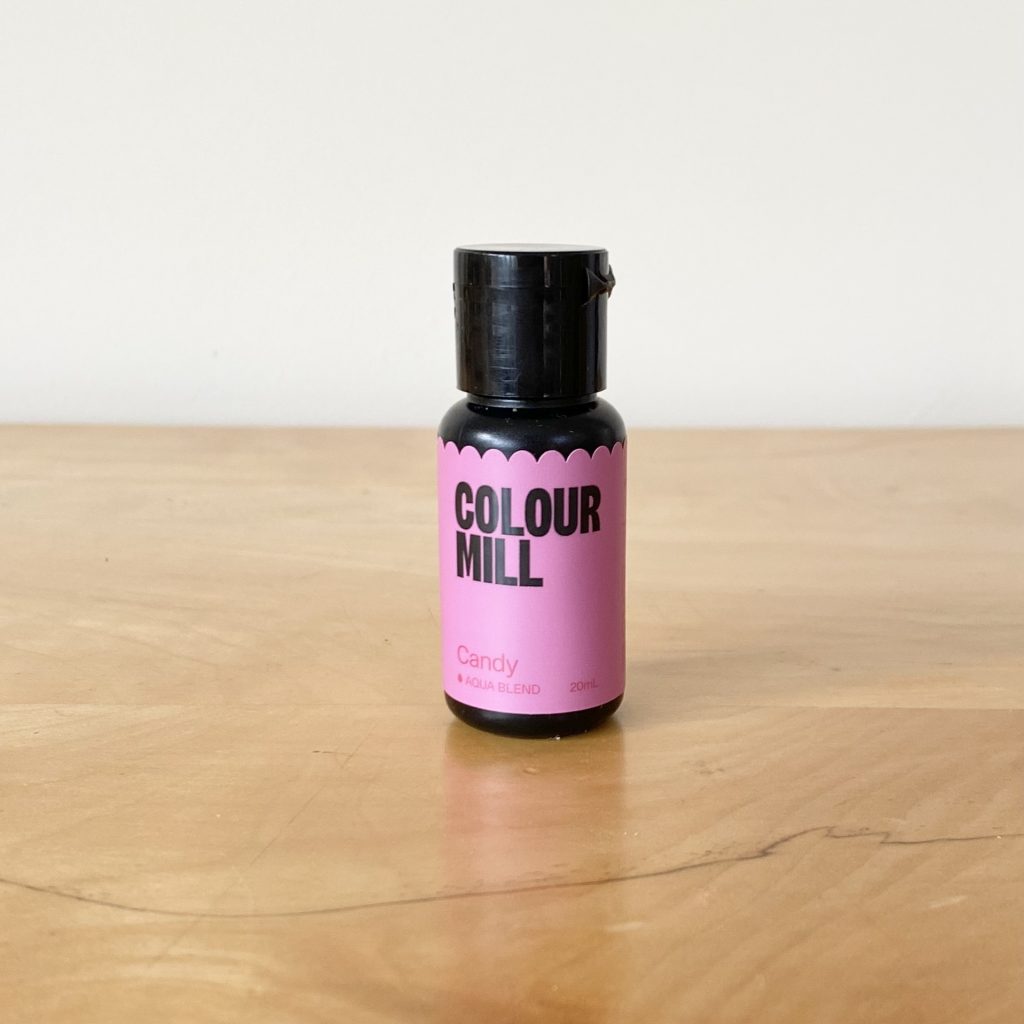
Listen, I tried a lot of food colourings. I’ve seen a lot of people in the US having great success with Americolor gel colourings, but those aren’t widely available in the UK, so I had to keep searching. Enter: Colour Mill‘s (relatively new) Aqua Blend colourings: these water-based, gel food dyes are specifically formulated for things like macarons and royal icings. I’m a big fan of the original Colour Mill formula, so I had high hopes for these and they did NOT disappoint. I got the perfect colour, with the perfect texture. Colour Mill, you saved my life and I will never, ever forget it. Big love.
Choosing the Right Shade
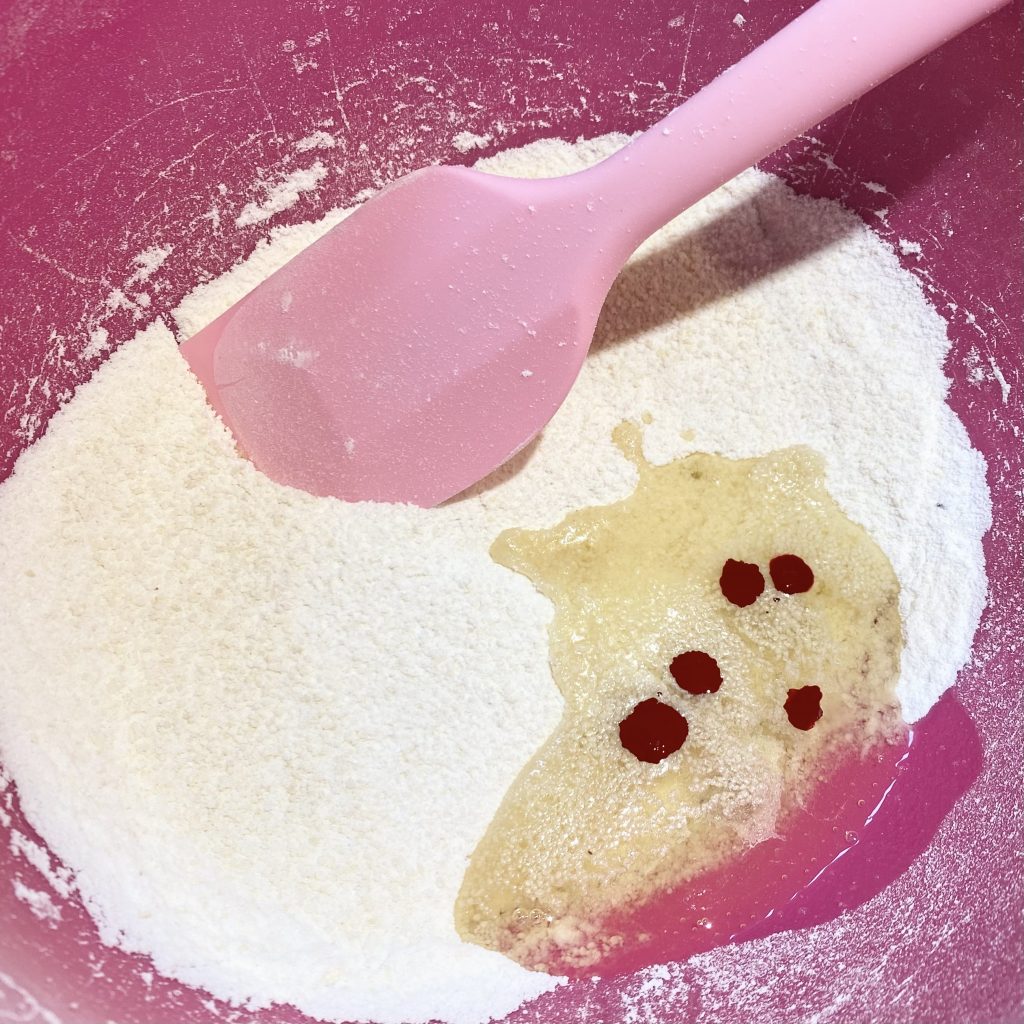
Once you have the right food colouring formula, you need to pick the shade. My advice is to use 3-5 drops of a much more intense colour than your desired shade- this way, you limit the amount of colouring you need to use, making it less likely that your macaron batter will be affected. For example, to achieve these baby pink macaron shells, I used 5 drops of the shade Candy which is a much more intense, vivid pink colouring.
Colouring the Macarons
To colour macarons, I like to mix the colouring into the egg white/almond/icing sugar paste at the beginning. I find that this makes it easier to incorporate all of the colour evenly later on. Just remember that the meringue is white, so it will significantly lighten the overall shade once mixed together. Make the mixture darker at first, then the pale meringue will bring it down to a nice pastel shade, like below!
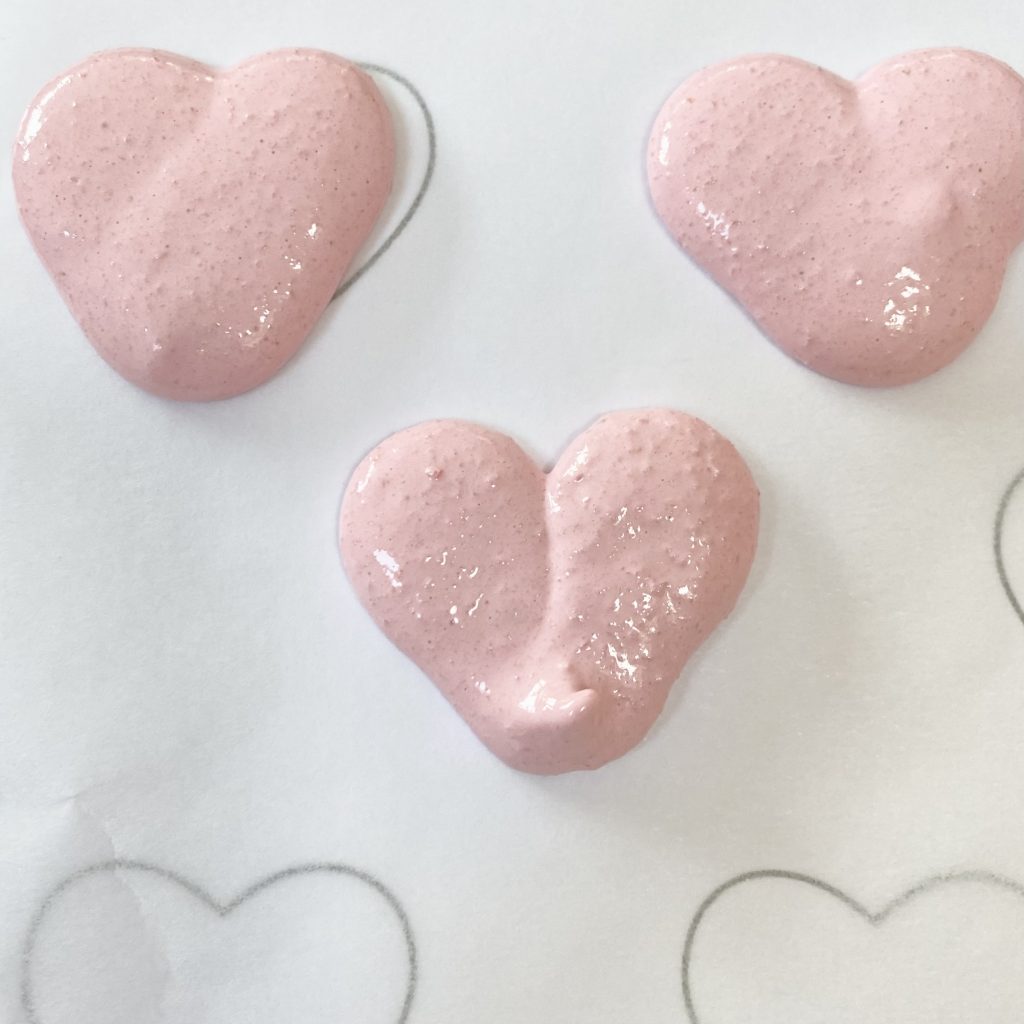
Baking the Coloured Macarons
As good as the Colour Mill food colouring is, you do still have to be a little more careful when baking coloured shells, because any hint of browning will affect the finished shade. Just make sure to keep an eye on the macarons and take them out as soon as they are set- if you gently touch the top of a shell with your finger and wiggle it a little bit, it shouldn’t wobble on its ‘foot’.

I found that my first tray baked up perfectly, with no browning at all, but my second tray, which I baked immediately after the first, in the same oven, on the same shelf, discoloured ever so slightly and were crispier in texture. I’m no oven-expert, but I’m thinking that means the temperature wasn’t super consistent? It’s something I’ll have to keep an eye on, but it does show how specific you need to be when it comes to making macarons!
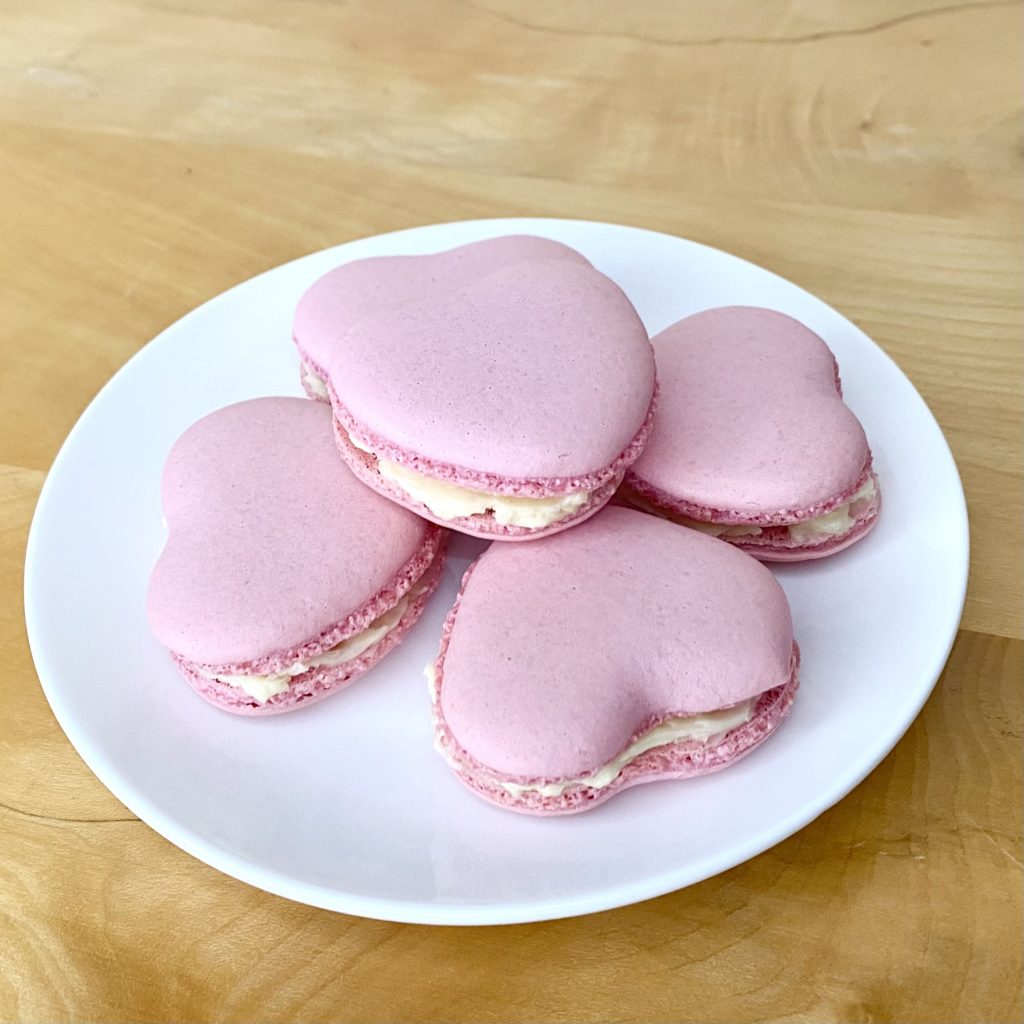
Piping Heart-Shaped Macarons
Look, my heart-shaped macarons are by no means perfect. But also, they are recognisably heart-shaped, so I’m thinking that’s a win. Anyway, a macaron’s a macaron- I don’t think anyone will be complaining!
Using a Template
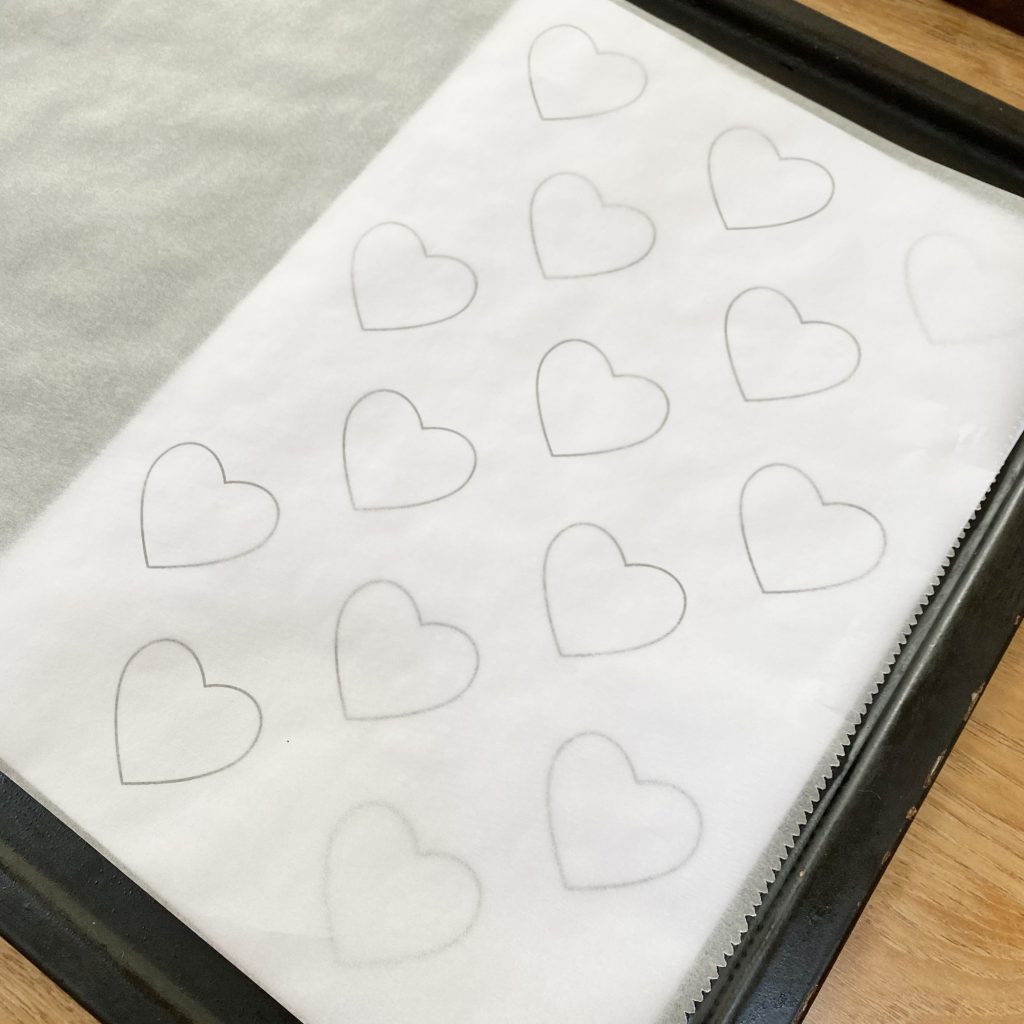
Firstly, it’s really helpful to have a template for your macarons. This just gives you a guideline that you can essentially ‘fill in’ and ensures all of your macarons will be a similar size. You can download the template I created for my macarons below.
The template above is an A4 sheet, so you can print out as many as you need (though I tend to just reuse mine). To use it, just place the template underneath the baking paper on your tray. Pipe out your macarons, then remove the template before baking. That’s it! Easy, right?
Piping the Hearts
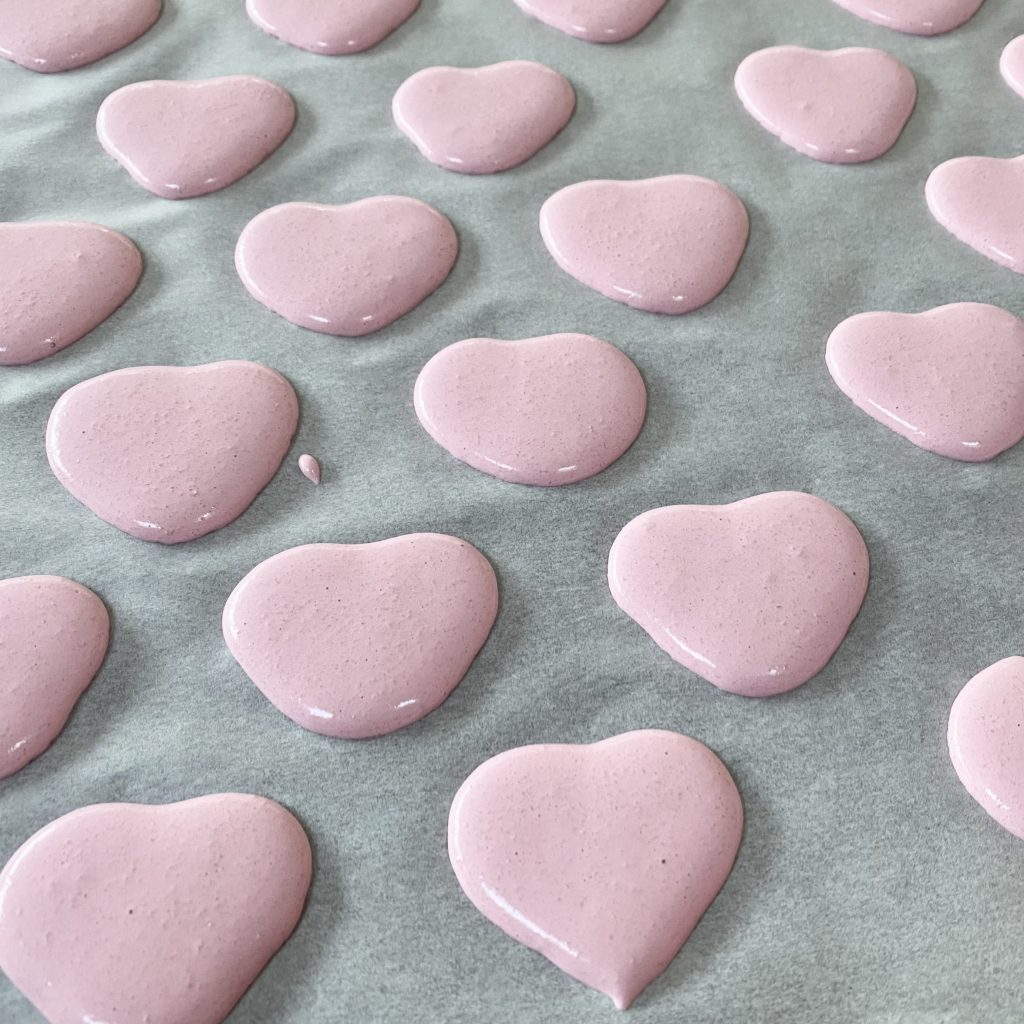
To pipe the macaron batter into heart shapes, you want to use a small(ish), round nozzle (the one I used was about 6mm in diameter). This just gives you a little bit more control and helps to define the thinner parts of the heart a little more.
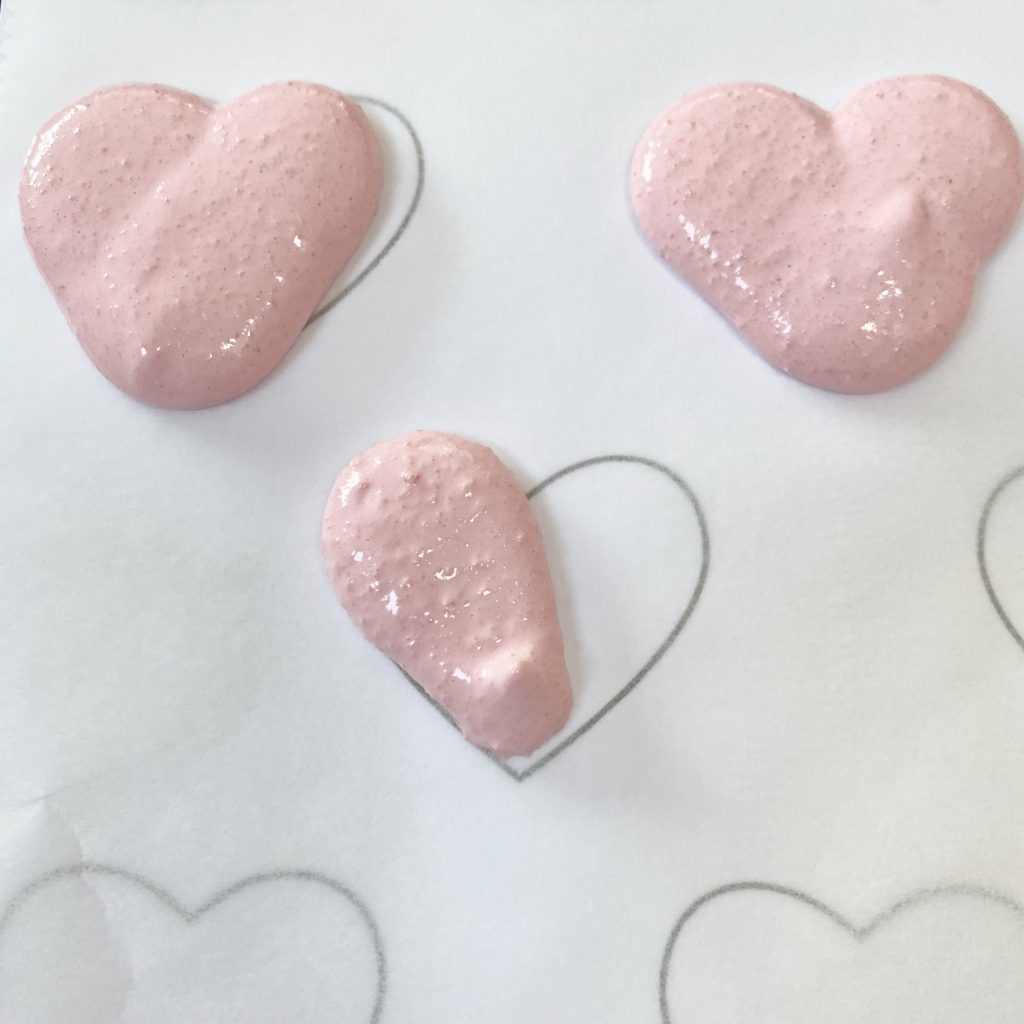
Essentially, what you’re going to do is pipe two ‘baby’ macarons in each of the two curves of the heart, but drag the piping tip down to the bottom of the shape before finishing each side off. So, holding the bag vertically to the tray as always, you’ll apply pressure at the top, then drag it down towards the centre, keeping the bag vertical and easing up on the pressure a little as you go to make the ‘point’.
Then, repeat the same process for the other side and you’ll have a little heart. While the batter is still wet, you can always use a cocktail stick to fix the shape up a bit, if you want. Once you’ve piped the whole tray, give it a good tap on the work surface to bring any air bubbles to the surface, pop any remaining bubbles with a cocktail stick, then set the heart-shaped macarons aside to form a skin before baking, just like you would with normal macarons.
One note here: I noticed that, when making these heart-shaped macarons, the batter seems to stretch a lot further and, so, this recipe makes way more macarons (24 compared to 16!). I think this is because the macarons are piped more thinly, as a result of the shaping. Honestly, though, I’m not complaining- it just means more macarons for me! It is something to take note of, however.
Making Vanilla Cream Filling
For Christmas last year, my dad got me the Ladurée macaron recipe book and, let me tell you, I was very excited about it! I usually fill my macarons with a milk chocolate ganache because it is just so tasty, but I really wanted to broaden my filling horizons a little bit, so I decided to have a look through the book. I decided to try out Vanilla Cream filling (p.34-5) for these heart-shaped macarons, because I thought it would look pretty inside the pink shells.
I have to admit, I was worried about this. I knew it could end up being really sweet. It… absolutely was. I tasted it by itself and, honestly, it was even too sweet for me, with my sweetest-of-all-sweet-teeth. It appeared that my concerns were justified. However, once you sandwich it into the macaron, some sort of crazy magic happens and it ends up being… delicious? I can’t figure it out, because I’ve never thought of macaron shells as overly un-sweet, but somehow it just all balances out and works. Admittedly, if you don’t like vanilla you probably won’t love this filling, but if you do? Yep, can confirm: it’s good.
Ingredients
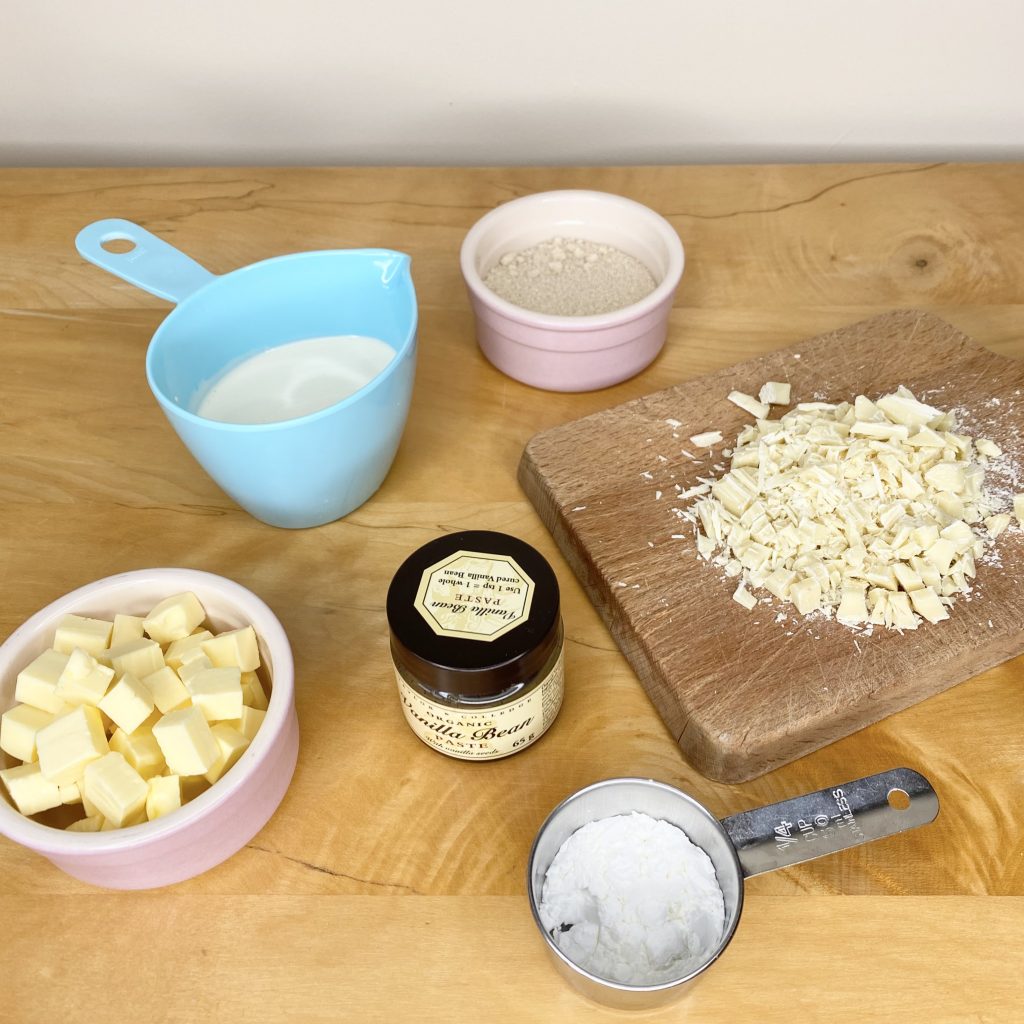
- Double cream
As always, use heavy cream if you live in the US.
- Cornflour
You essentially start this filling by making an eggless custard, so the cornflour is needed to thicken it.
- Vanilla bean paste
The original recipe calls for a proper vanilla bean pod, but I wanted to try using vanilla bean paste instead for a couple of reasons. Firstly, the paste is very good value for money, so it’s a slightly cheaper alternative than using a pod. Secondly, I scaled down the recipe, so I figured it was just easier to use the paste than half a pod…
One thing with vanilla bean paste, though: it’s a lot more intense than it thinks it is! On the little container of the paste, it says that one bean is equivalent to 1 tbsp of paste. I mean… maybe? But using 1 tbsp of paste is going to knock you sideways in a way that an infusion of a single vanilla bean will not. For reference, I used 1/4 tsp of the paste in place of 1/2 a vanilla bean and it was plenty vanilla-y.
- Caster sugar
You could probably use granulated sugar, but it’s easiest to use caster sugar because it dissolves more quickly.
- White chocolate
Use a good-quality white chocolate, because you only need a little bit and it will make your filling taste even better. For this recipe, the chocolate needs to be finely chopped, so make sure you do that beforehand.
- Unsalted butter
This needs to be at room temperature, so that it incorporates into the other ingredients evenly. You’ll also want to dice it into small cubes, so that you can add it to the mixture a little at a time.
- Salt
This was not in the original recipe, but, as I mentioned, this filling is super sweet, so I think adding a little salt just helps to balance things out a bit.
Method

Start by mixing 2 tbsp of the cream into the cornflour in a large bowl. It will be quite a stiff paste, but it will loosen out later. Set that aside.

Place the rest of the cream into a small saucepan, along with the vanilla bean paste and the caster sugar, over low heat. Gently bring to just below a simmer- you should see small bubbles appear around the edge of the pan.
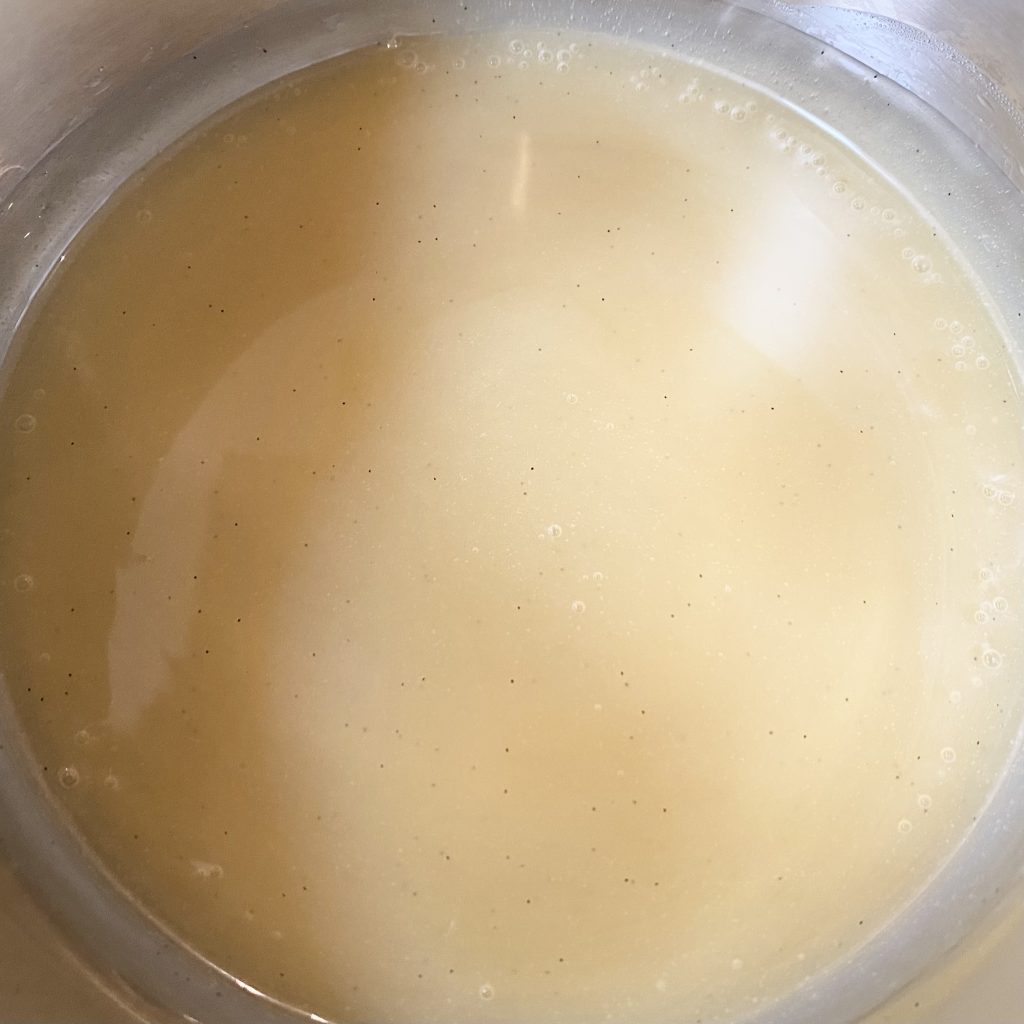
Add the hot cream into the cornflour mixture, a little at a time, whisking vigorously until you have a smooth custard. Return the mixture to the saucepan and cook over low heat, whisking continuously, until the custard thickens slightly and is just about to come to a simmer.
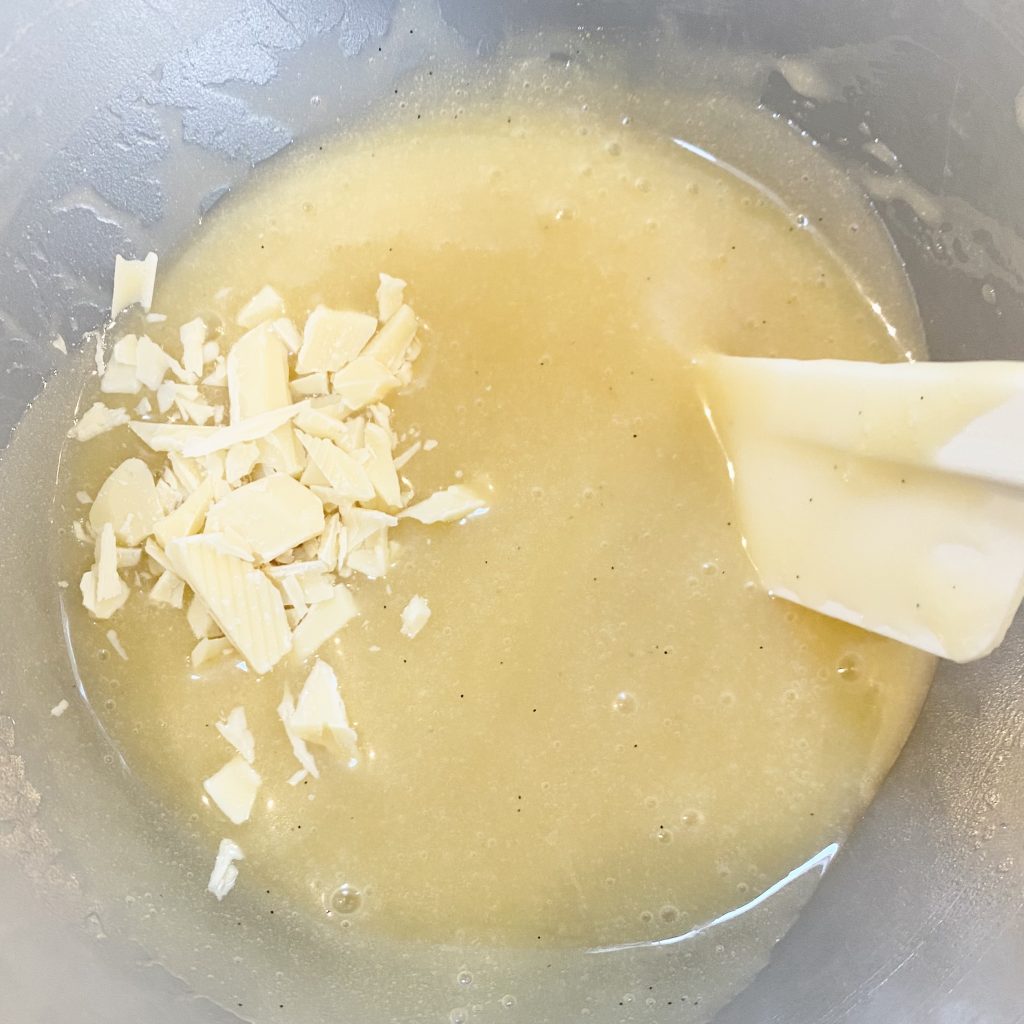
Remove the custard from the heat and pour into a small bowl. Add a small amount of the chopped white chocolate and stir, using a spatula, until it has melted into the custard. Add a little more chocolate, stir until melted, and repeat this process until all of the chocolate has been added.
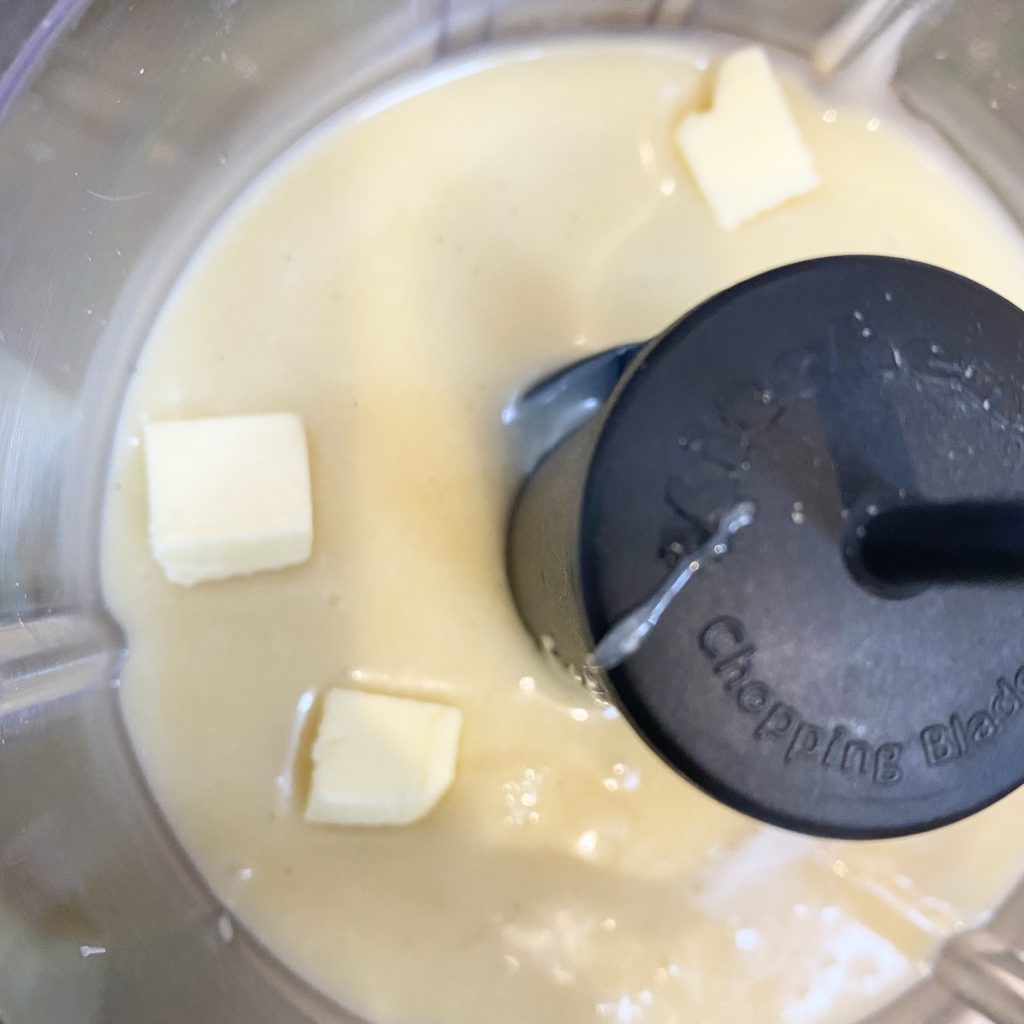
At this point, transfer the mixture to a food processor (I used a mini one, because this isn’t a huge quantity, but you could use a standard-sized one, if you prefer). Add a few cubes of the room temperature butter and process until the butter has been fully incorporated. Add a few more cubes, then blitz again. Repeat this process until all of the butter has been added and the mixture is smooth and thick.
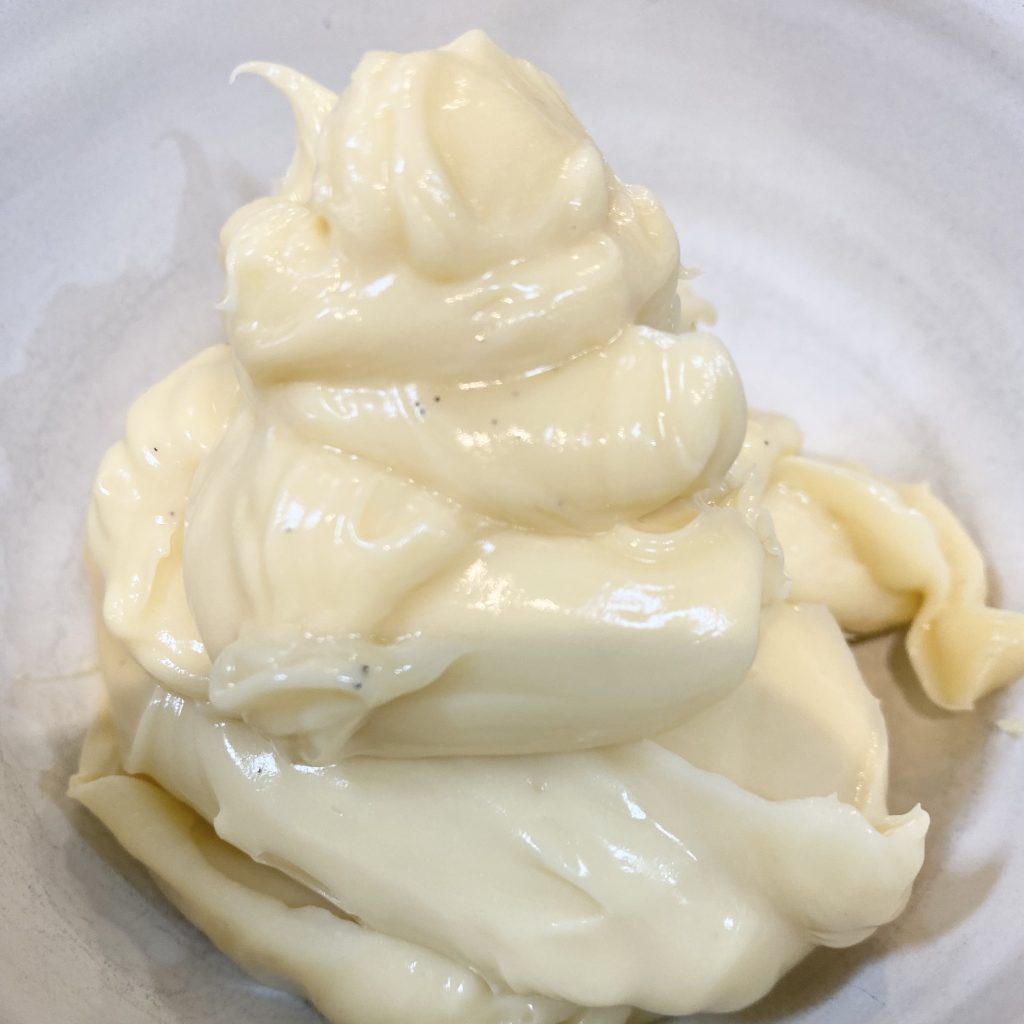
Transfer the filling to a bowl and cover with clingfilm, making sure to press it directly onto the surface so that the filling doesn’t form a skin. The original recipe then says to place the mixture into the fridge to firm up, for about 2 hours. I did this, but as you’ll see, it got super stiff- I’m wondering if I would have been better off just filling the macarons at this point? Or perhaps chilling it for less time?
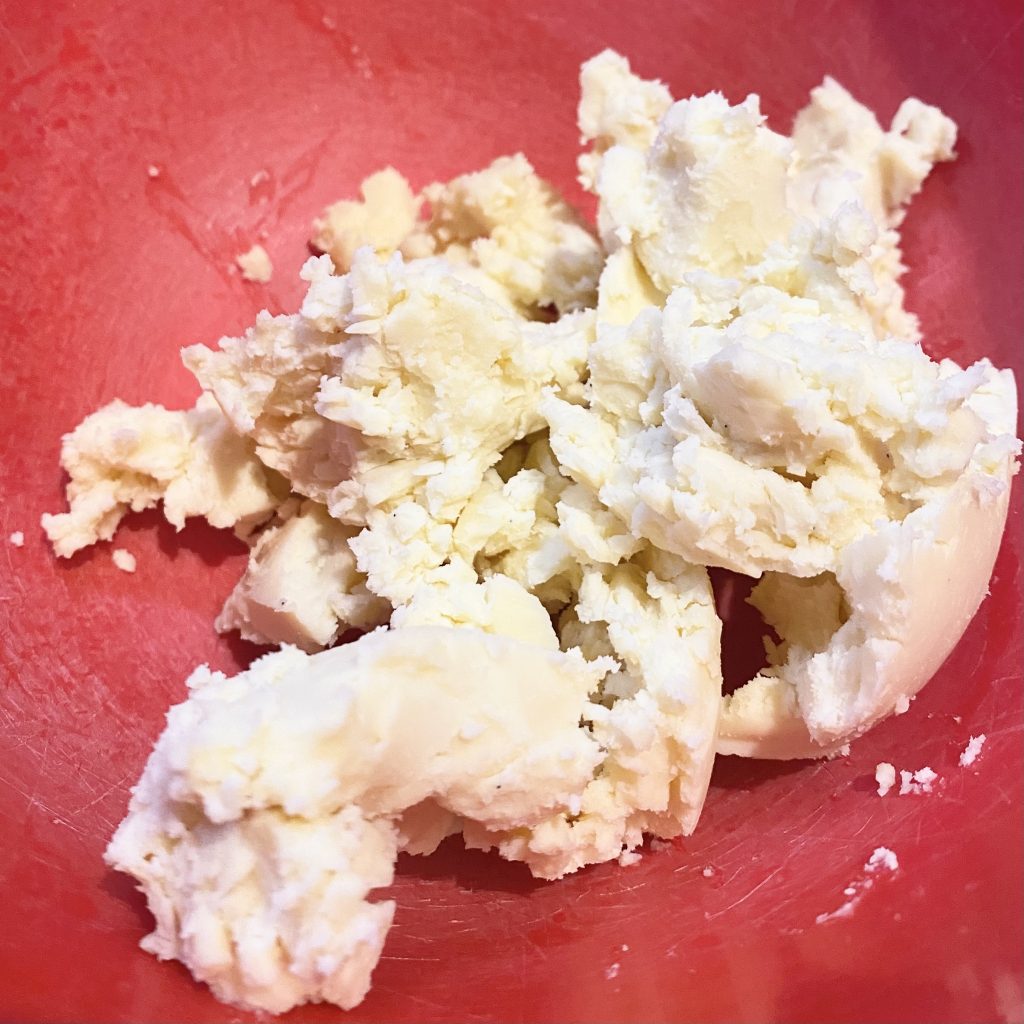
Nevertheless, here is my filling after 2 hours in the fridge. I mean, that’s not spreadable in any way, shape or form, let alone pipeable!
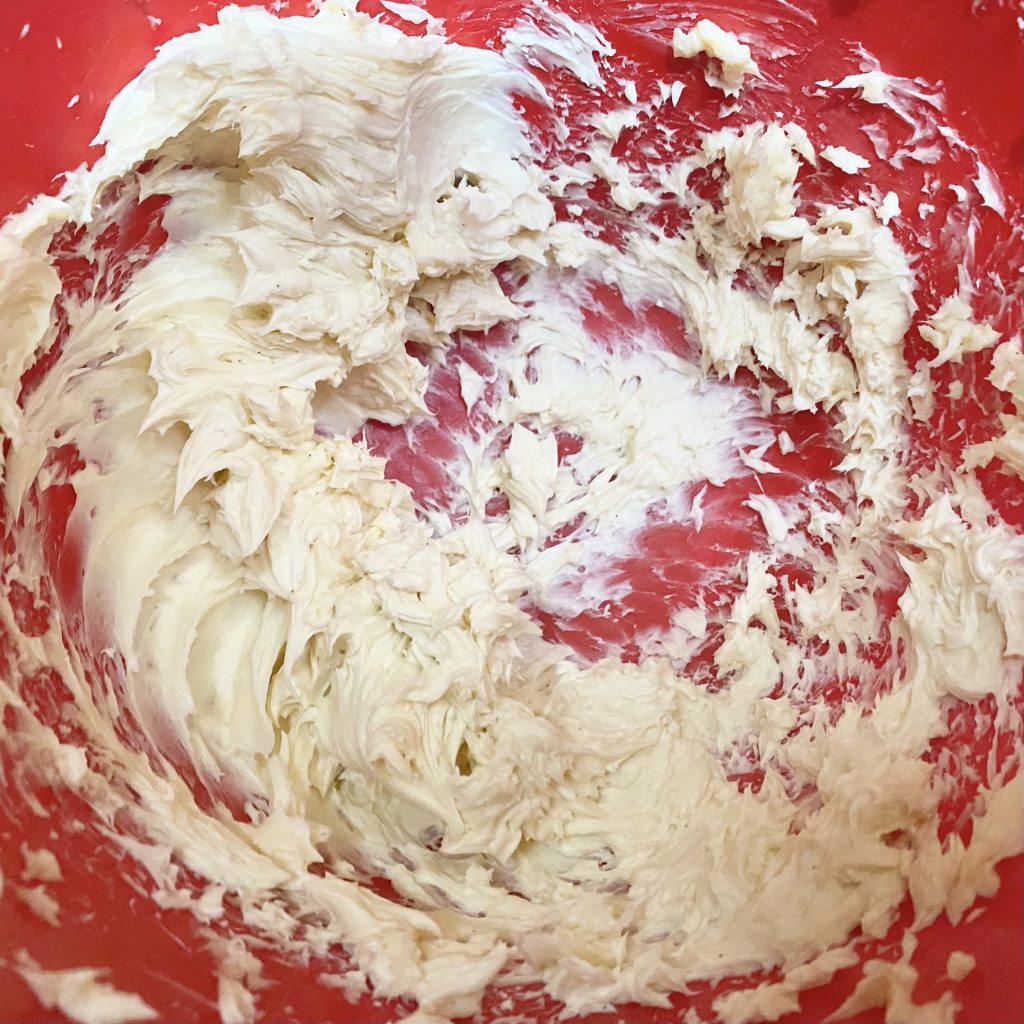
To bring it back to a more workable consistency, I transferred the filling to a heatproof bowl and microwaved it, on the lowest setting, in a couple of 10 second bursts until it had softened ever so slightly. At that point, I used an electric hand mixer to whip it, much like I would whip butter when making a buttercream, until it was soft and smooth and fluffy. This worked perfectly, and I think that whipping it actually prevented it from setting quite so solid when I put the filled macarons back in the fridge, so I would definitely do it again.
Assembling the Macarons
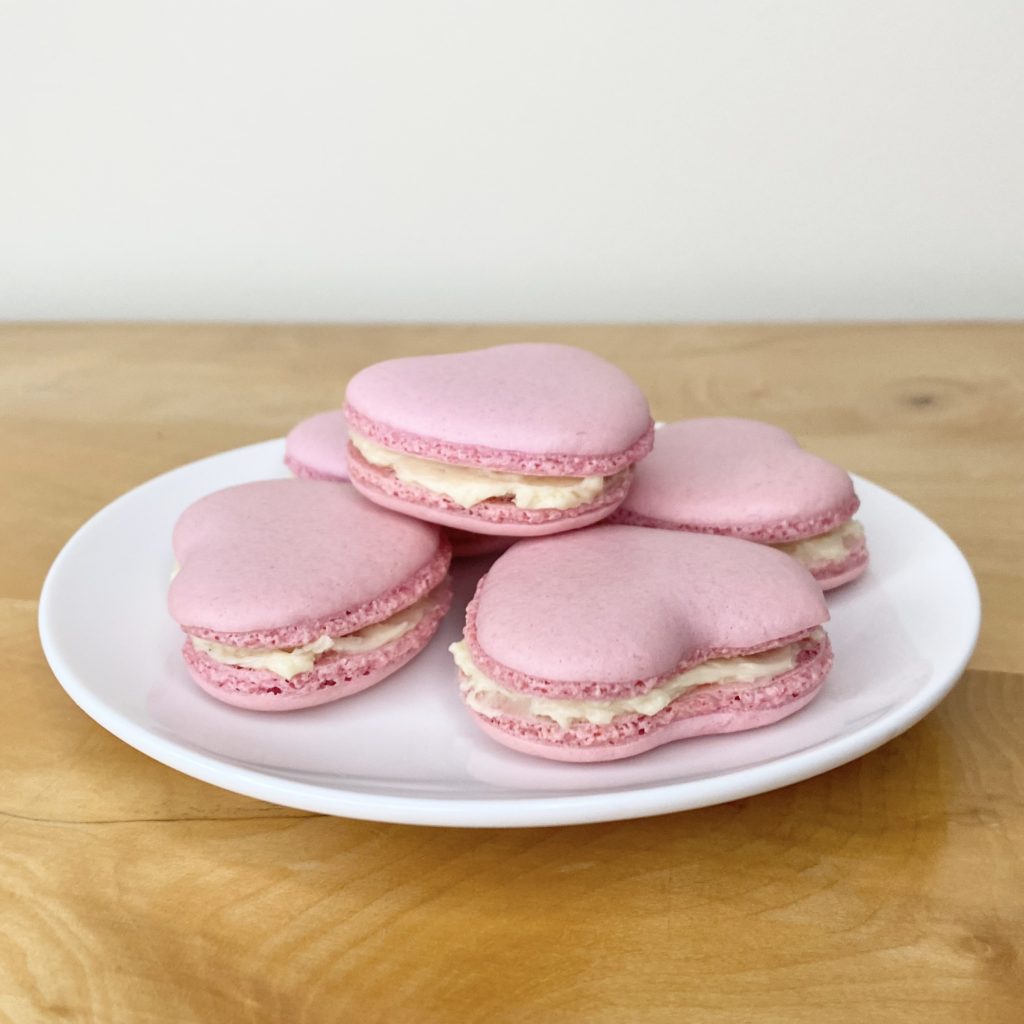
When you make the filling, it won’t look like there’s much of it, but there’s plenty to fill one batch of these heart-shaped macarons. Because it is very sweet, you don’t need very much of it- just a nice, even, relatively thin layer! You could pipe it, but I just spread it onto the shells with the back of a teaspoon because I was feeling lazy and I think it still looks really pretty.
Once assembled, you’ll need to store the macarons in an airtight container in the fridge, where they will keep for about 3-5 days.
Recipe
Heart-Shaped Macarons
Ingredients
For the vanilla cream filling:
- 110 ml double cream
- 2 1/4 tsp corn flour
- 1/4 tsp vanilla bean paste
- 50 g caster sugar
- 50 g white chocolate, finely chopped.
- 55 g unsalted butter, diced and at room temperature.
For the macaron shells:
- 95 g ground almonds
- 103 g icing sugar
- 72 g egg whites, split into two equal portions (2x36g).
- 95 g caster sugar
- 30 ml water
- pink gel food colouring (see Note 1).
Instructions
Make the vanilla cream filling:
- Whisk the cornflour and 2 tbsp of the cream together in a medium bowl. Set aside.
- Place the remaining cream, vanilla bean paste and caster sugar into a small saucepan over low heat. Stirring every now and then, gently bring to just below a simmer.
- Pour the hot cream into the cornflour mixture, a little at a time, whisking continuously, until all of the cream has been added and the mixture is smooth.
- Return the mixture to the saucepan and place over low heat, whisking continuously, until custard thickens slightly and reaches just below a simmer again.
- Pour the custard back into the bowl, then add a small amount of the chopped white chocolate. Stir, using a spatula, until the chocolate has melted into the custard. Repeat this process until all of the chocolate has been incorporated.
- Transfer the mixture to a food processor and add a few cubes of the room temperature butter. Process until the butter is fully incorporated into the custard mixture, then repeat this process until all of the butter has been incorporated. The mixture should be thick, pale and fluffy at this point.
- Transfer the mixture to a bowl, cover with clingfilm, making sure to press the clingfilm directly onto the surface of the filling to prevent it from forming a skin, then place into the fridge to chill for at least 2 hours.
Make the macaron shells:
- Line 2 baking trays with baking paper. Fit a piping bag with a small(ish), round nozzle (mine was 6mm in diameter) and set aside.
- Place the ground almonds and icing sugar into a food processor. Pulse 10 times, then sift into a large bowl, discarding any large lumps. Repeat this process once more, so that you are left with a very fine powder.
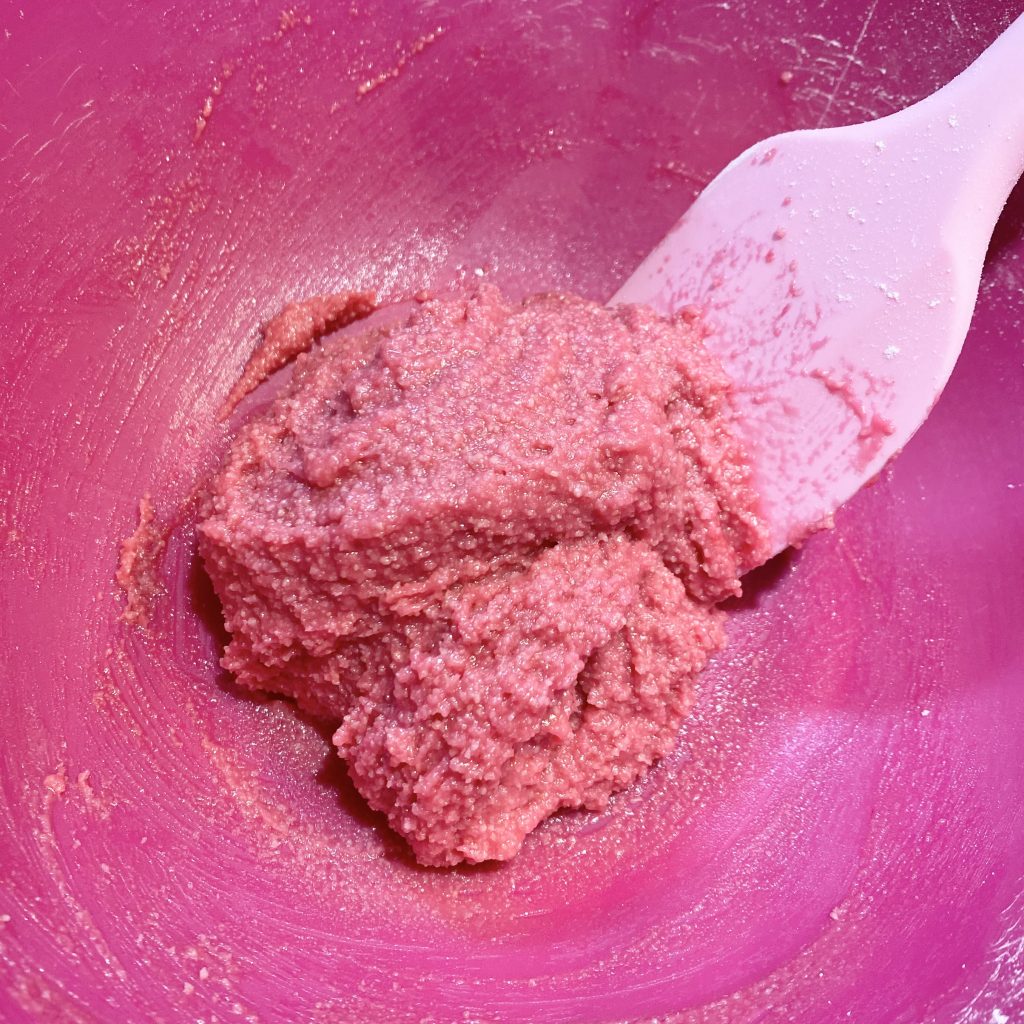
- Add one of the 36g portions of egg white to the almond/icing sugar mixture, along with 3-5 drops of pink food colouring. Mix well to form a paste with an even, deep pink colour, then set aside.
- Place the remaining 36g of egg white into the clean (see Note 2), metal bowl of a stand mixer, fitted with the whisk attachment. Leave aside while you make the sugar syrup.
- Place the caster sugar into a small saucepan with the 30ml of water. Place over a medium heat and bring to a boil. Do not stir- swirl gently if necessary. Allow the syrup to continue bubbling, while monitoring the temperature with a digital sugar thermometer.
- When the syrup has reached 114°C, turn the stand mixer to high speed and begin to whip the egg whites to soft peaks. Keep the syrup over the heat.
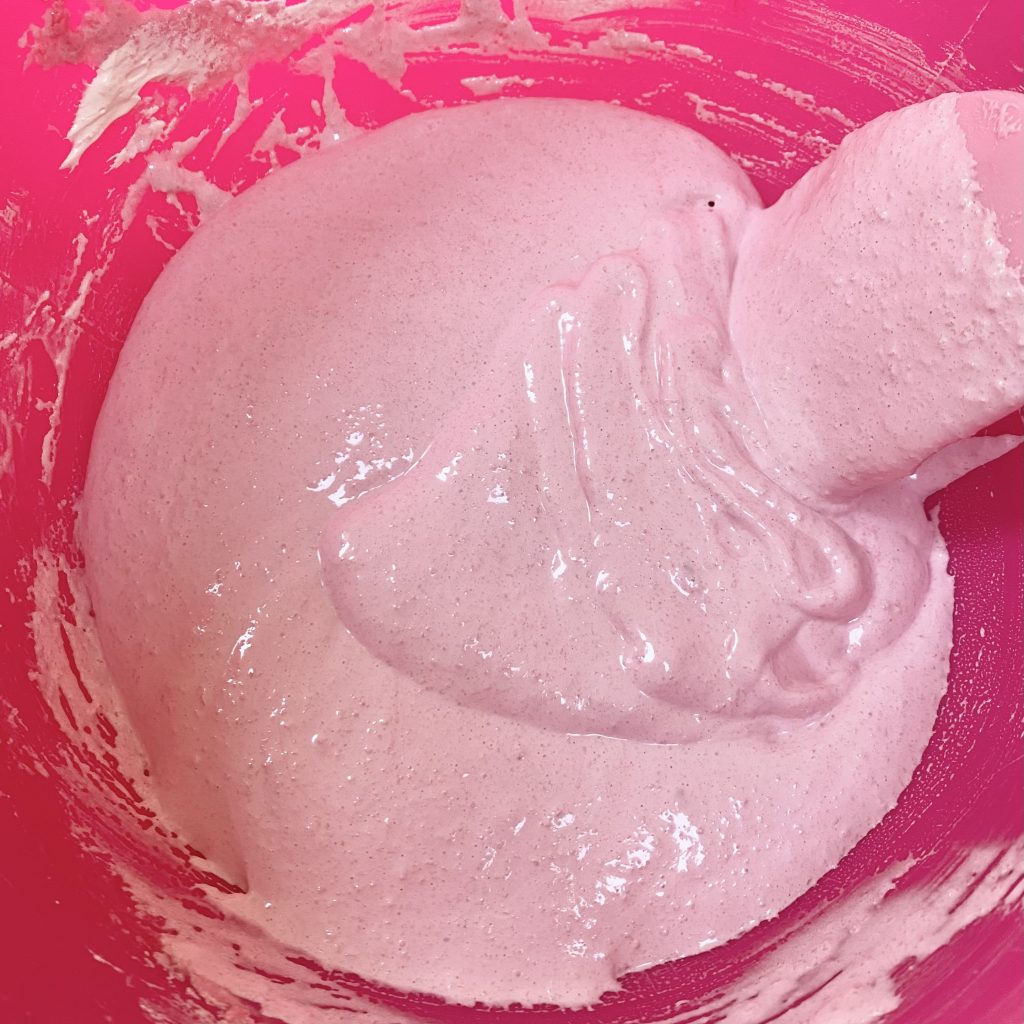
- Once the sugar syrup reaches 118°C, the egg whites should have reached soft peaks. With the mixer still running on high speed, carefully pour the syrup down the side of the bowl in a slow, steady stream. Once all of the syrup has been added, turn the mixer up to full speed and beat for 5 minutes, or until stiff peaks are achieved and the metal bowl has come to room temperature.
- When the meringue is ready, add 1/3 of it to the pink almond mixture. Mix vigorously to combine the two mixtures and loosen the thick paste.
- Add the rest of the meringue and fold it in, using a figure of eight motion, until the mixture is cohesive and comes off the spatula in ribbons- if you leave those ribbons for 30 seconds they should level themselves out into the rest of the mixture.
- Transfer the macaron batter to the prepared piping bag. Holding the bag vertically to the baking tray, pipe heart shapes with the batter (see Note 3).
- Once the macarons are piped, lift the whole tray and drop it down onto the work surface a few times to bring any air bubbles to the surface. Use a sharp knife/cocktail stick to burst any remaining bubbles, letting the mixture fall back on itself.
- Set the macarons aside at room temperature to form a skin- on a relatively dry day, this should take about 30-40 minutes, but can take less time on drier, warmer days and more time on cold, humid days. Check on the macarons every 10-15 minutes or so, if unsure. The macarons will be ready when you can gently touch their surfaces without any batter coming off on your finger.
- When the macarons are almost ready, preheat the oven to 165°C fan. When the macarons are ready and the oven is hot, bake the macarons in the centre of the oven, one tray at a time, for 11 minutes. To check if they are done, place a finger on top of the shells and wiggle gently. When done, the tops of the macarons should not wobble. Remove from the oven and allow to cool completely on the tray.
To assemble the macarons:
- Once the macaron shells have cooled completely, check the consistency of the filling. If it is too solid, warm it very gently in the microwave, until it softens slightly, then use an electric hand whisk to beat the filling, until it is smooth, fluffy and spreadable/pipeable.
- Pair the macarons up, trying to match them in terms of size/shape. Pipe/spread a small amount of vanilla cream filling onto the underside of half of the shells, then sandwich the corresponding half on top.
- Store the assembled macarons in an airtight container in the fridge. Kept like this, the macarons will keep for 3-5 days.
Notes
- The type of colouring you use is very important. You need to use a water-based, concentrated gel food colouring that can withstand baking. For these macarons, I used 5 drops of Colour Mill‘s Aqua Blend in the shade Candy.
- To clean the bowl and the whisk for meringue, rub a small amount of white wine vinegar over both using a piece of kitchen roll. This will remove any traces of fat/residue that might prevent your meringue from whipping up properly.
- For more detailed instructions on how to pipe heart-shaped macarons, and to find the template I created for this purpose, please go to the ‘Piping the Hearts’ section in the post above.


Those look delicious
Thank you! I must admit, I’ve definitely eaten a lot of them- they’re just too hard to resist!