
As I’m sure you know by now, this year, I’m participating in the Year of Gnomes 2025. This is a knitalong created by Imagined Landscapes (aka Sarah Schira), where you knit a gnome every month for, well, a year!
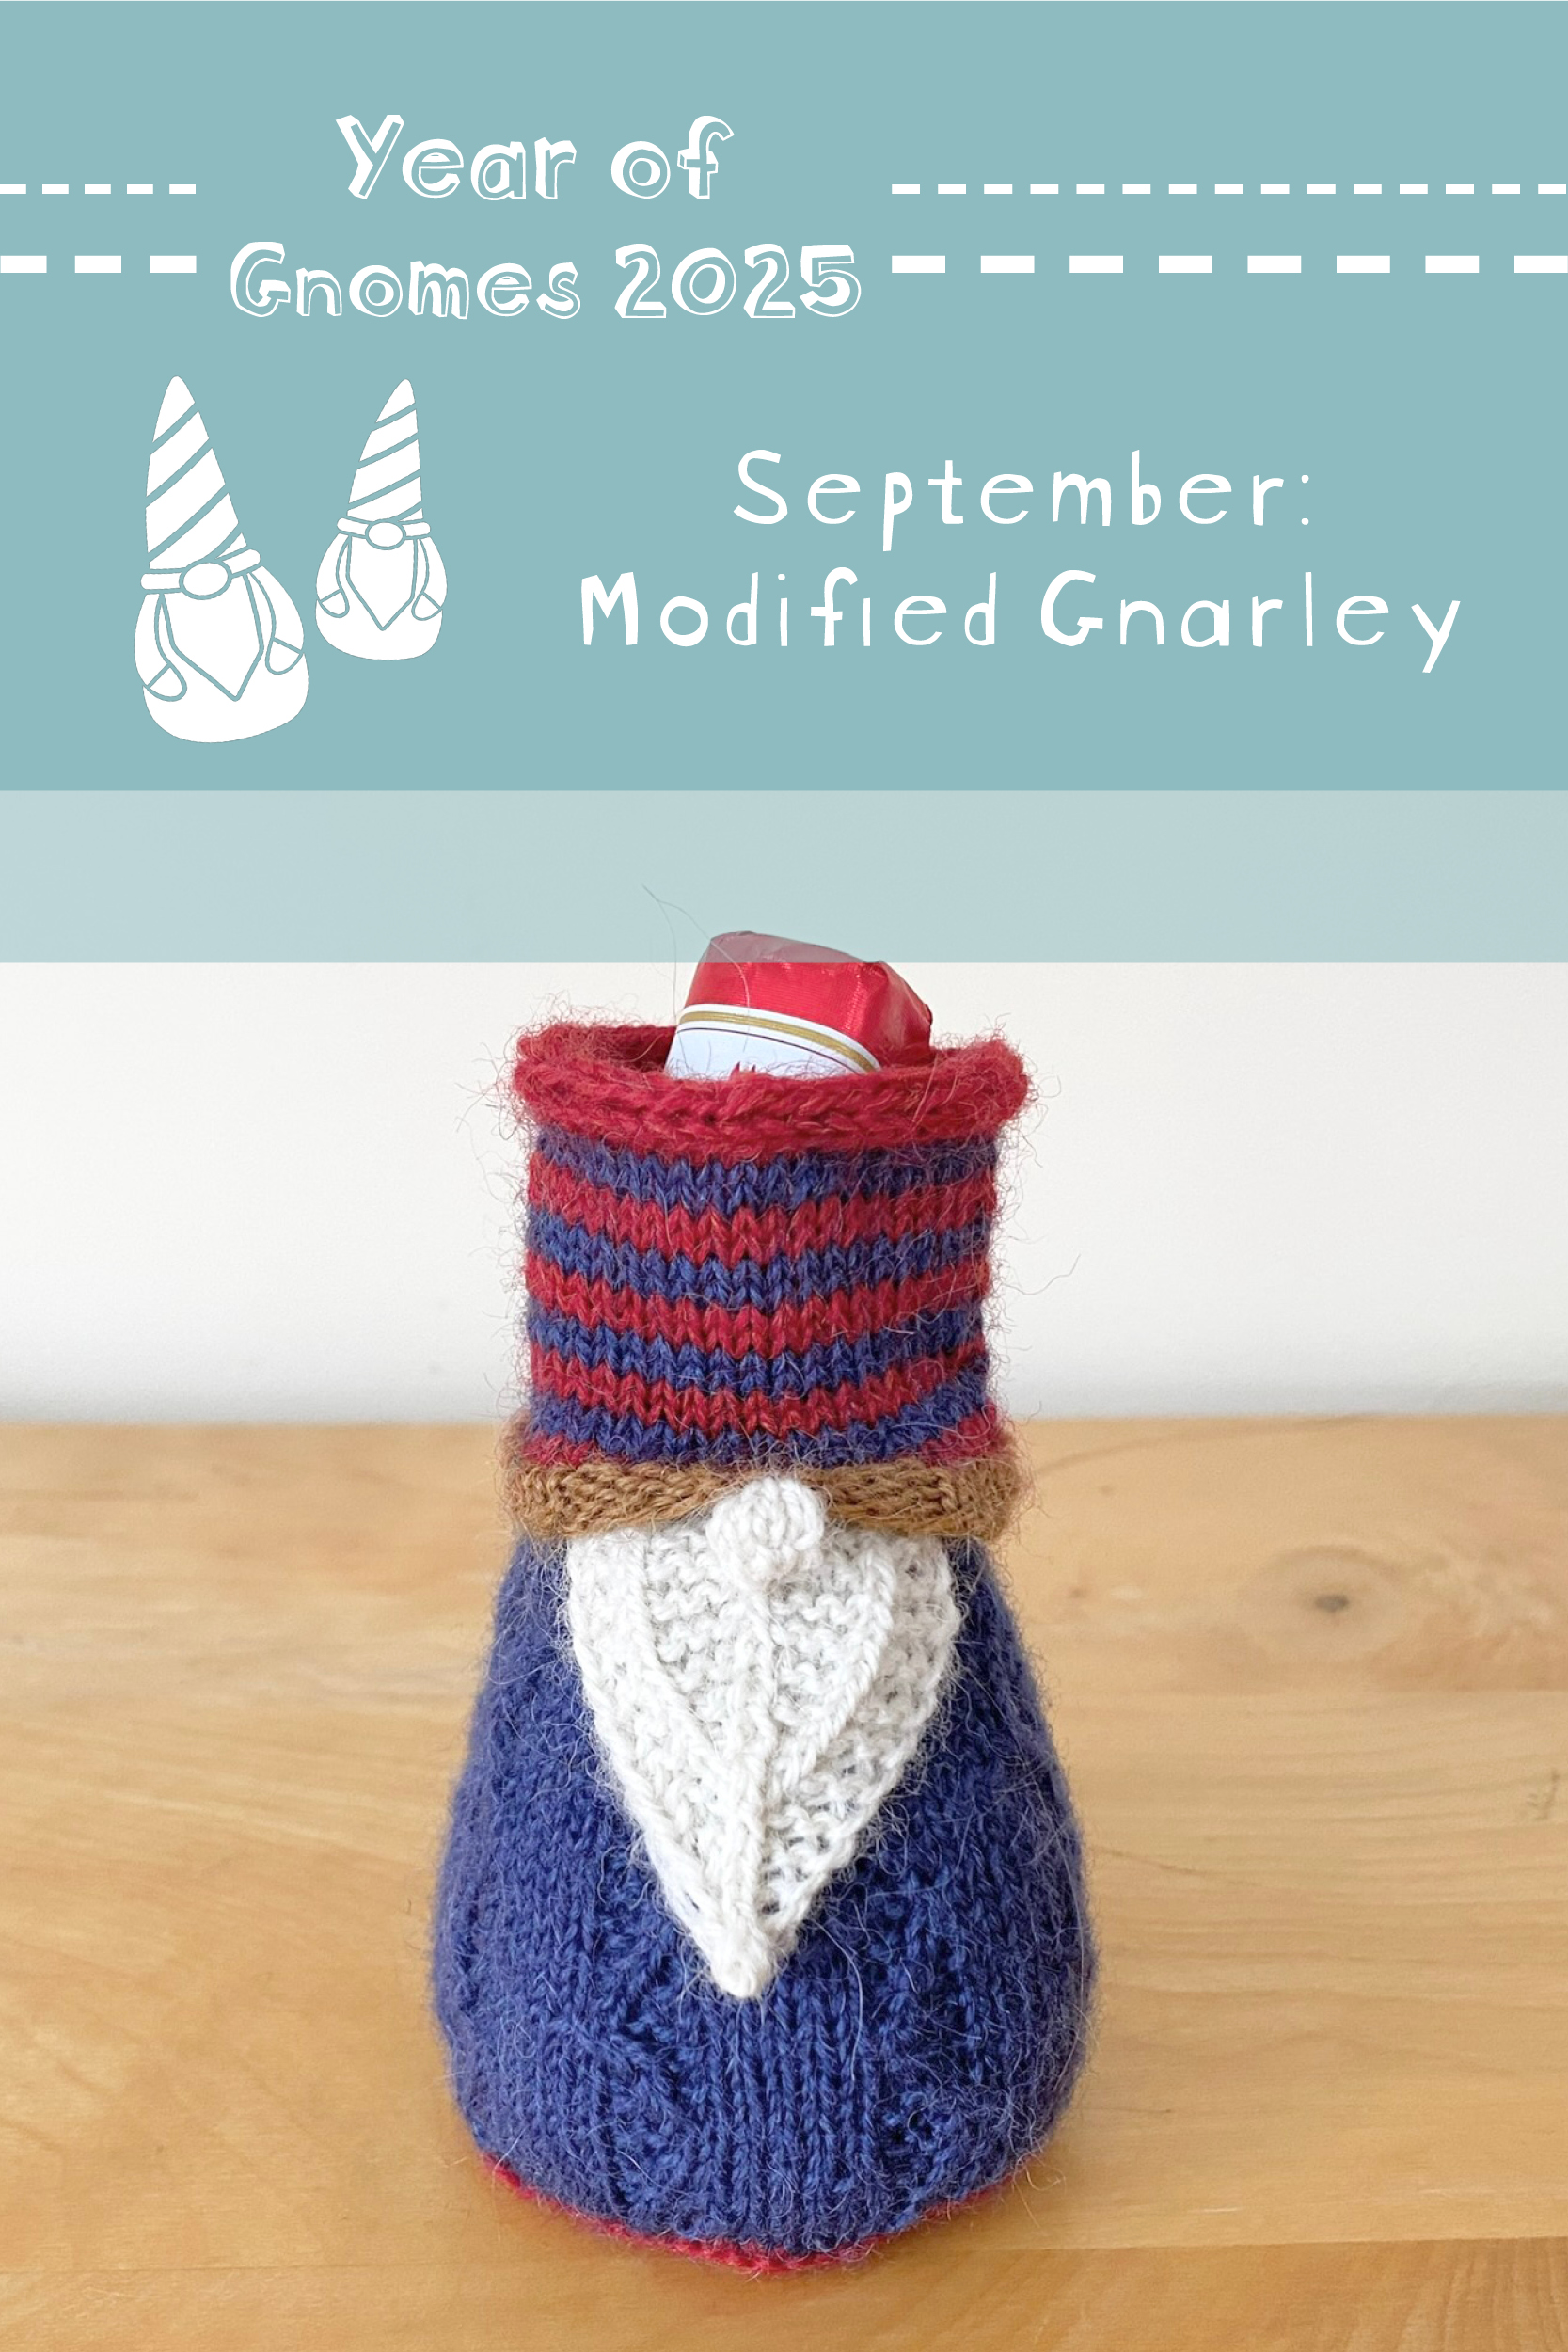
I’m a little behind in sharing my gnomes, so today’s post is all about my September gnome: if you missed the previous eight gnomes in this series, you can find them all here.
The prompt for September was ‘Mod Along’: the suggestion was that you adapt an existing gnome pattern, mix and match different gnome elements, or just embrace random gnome chaos in general to make something new and exciting! Because of this, today’s Year of Gnomes post will be a little different…
Table of Contents
- Introducing: The Gniederegger Gnomes Project
- The Yarn
- September’s Gnome: The First (Official) Gniederegger Gnome Prototype
- Changes/Adaptations for Future Gniederegger Gnomes
- Prototype #1 as part of my Year of Gnomes
- The Future of the Gniederegger Gnome Project
Introducing: The Gniederegger Gnomes Project
Okay, so sometimes (read: every 5 minutes) I have these crazy, ridiculous ideas for projects. 99% of them get left in the graveyard of my Notes app, but every now and then, there’s one that I just can’t forget about. The Gniederegger Gnomes Project fits into the latter category.

Let me take you wayyyyy back to my Gnew Baby project, where I made a trio of gnomes for my cousin, his fiancée and their new baby (because, of course, right?). When I was trialling patterns for the baby gnome (a.k.a. Mini Gnarley), I made a 75% size Gnarley with a striped hat and… it was one of the cutest things I’ve EVER seen.
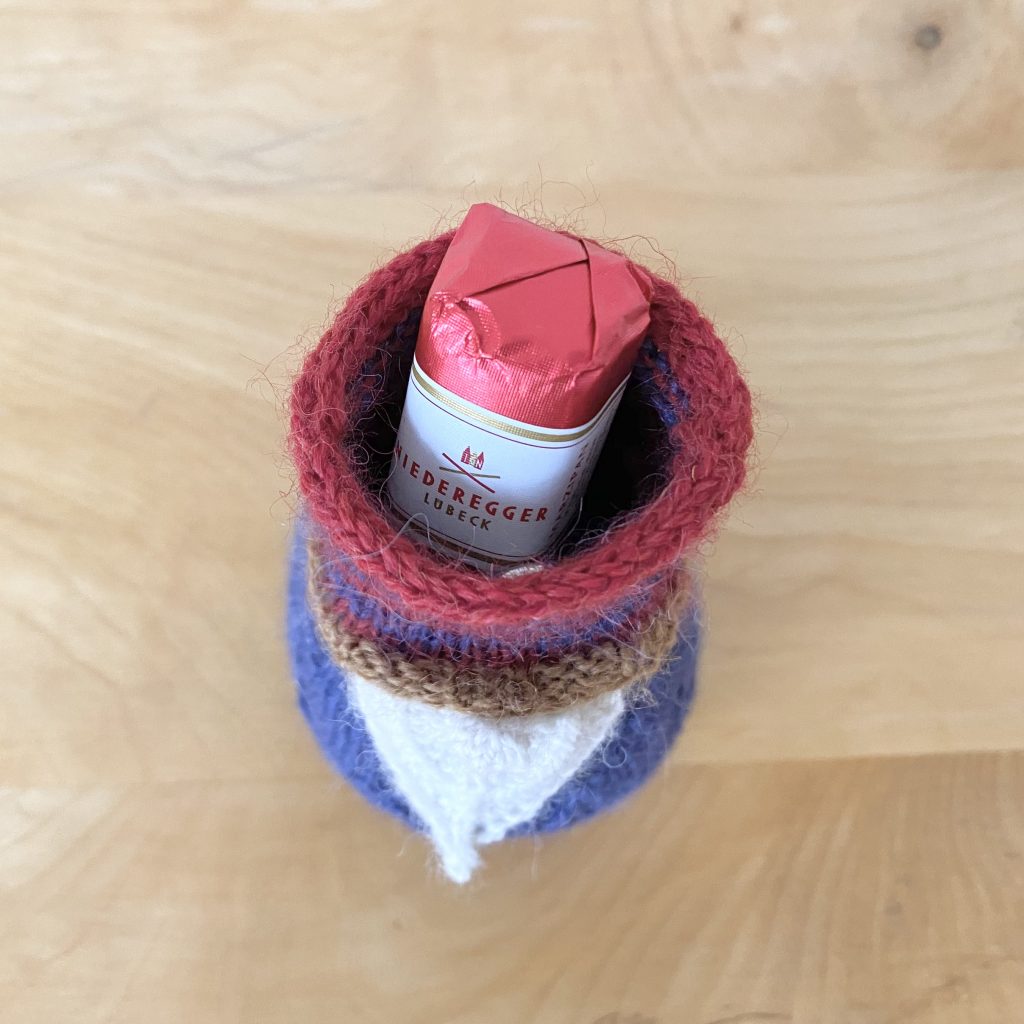
It occurred to me that, if left unstuffed, 75% Gnarley‘s hat was the perfect size to hold a small, sweet treat (I tend to think in crafts and sweet treats, so this was pretty on brand for me). From there, I realised that if I made 24 x 75% Gnarleys with unstuffed hats, I’d have the CUTEST advent calendar. From there, I realised the only real sweet treat that could possibly be used for this project was one of my favourites: a mini Niederegger Marzipan Loaf.
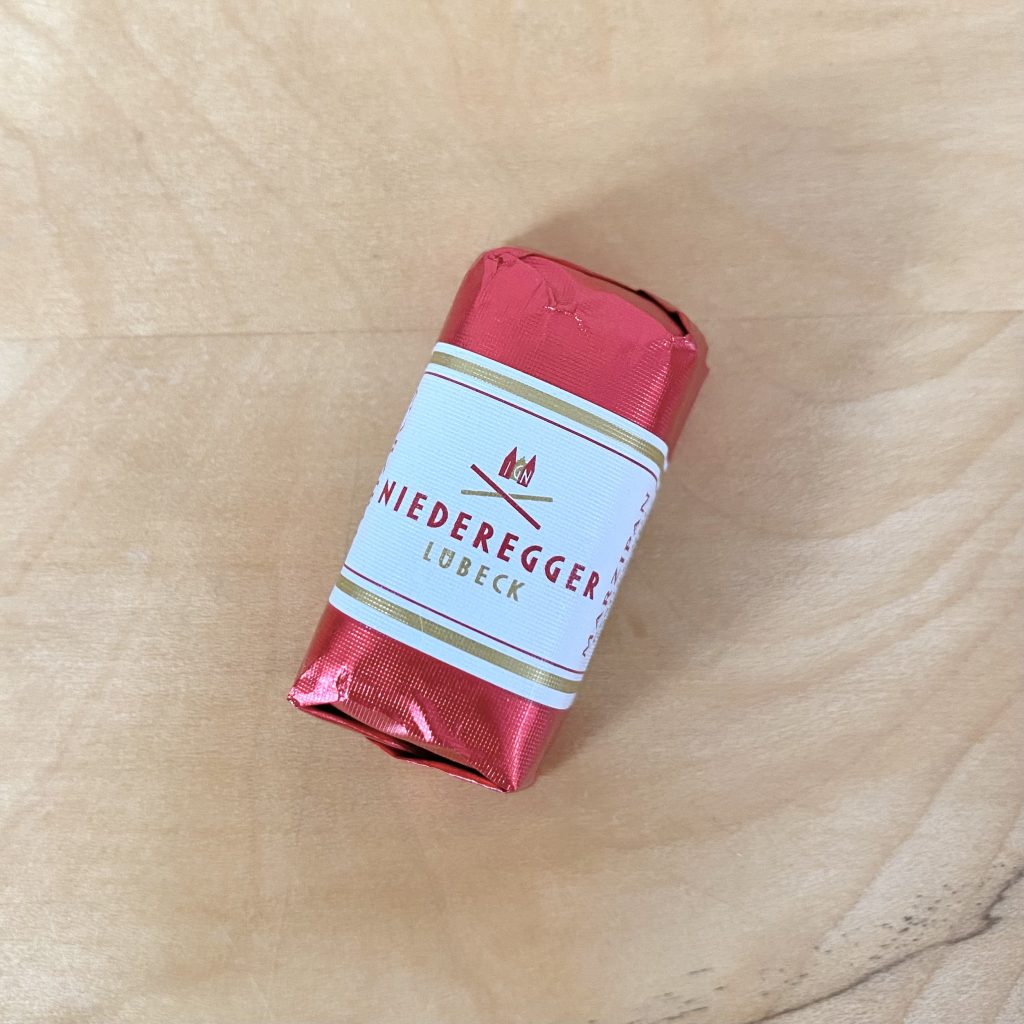
Thus, my Gniederegger Gnome, advent calendar project was born: 24, mini Gnarley gnomes with open hats, perfect for housing a single marzipan loaf, one for each day of advent. The plan is to use the same colour palette for each gnome, but mess around with the placement (more on that in a sec!). I’d also like to switch up the beard styles to add a bit of whimsy and intrigue: Schira has so many different beard patterns, it would be great to incorporate lots of them!
The Yarn
I decided to use one of my favourite Christmas films, Klaus (remember my December bullet journal setup from a couple of years ago?), as the colour inspiration for this project: I absolutely love the folk-y, festive but not too festive colour palette of the Sami people in the film. I decided to use that same colour palette for my Gniederegger Gnomes, so I ended up with 4 colours:
- Red
- Navy
- Gold
- White
The red and the navy will be the main colours for the gnomes’ hats & bodies, the white will be for the noses & beards and the gold will be an accent colour: I’m thinking of using it in one, small area on each gnome, for a pop of fun and festivity!
With my colour palette decided, I started looking into yarns. I needed a fingering weight yarn for this project, and I wanted to use one made with natural fibres (just to really roll with the whole more-sustainable advent calendar alternative). Finally, I didn’t want anything too expensive, because I feel like I’ll need quite a bit of yarn to make 24 gnomes, especially when working with 4 different colours!
In the end, I settled on DROPS Flora, a 65% wool/35% alpaca blend. I chose the colours Red (18), Indigo (10), Caramel (25) and Off White (01).
September’s Gnome: The First (Official) Gniederegger Gnome Prototype
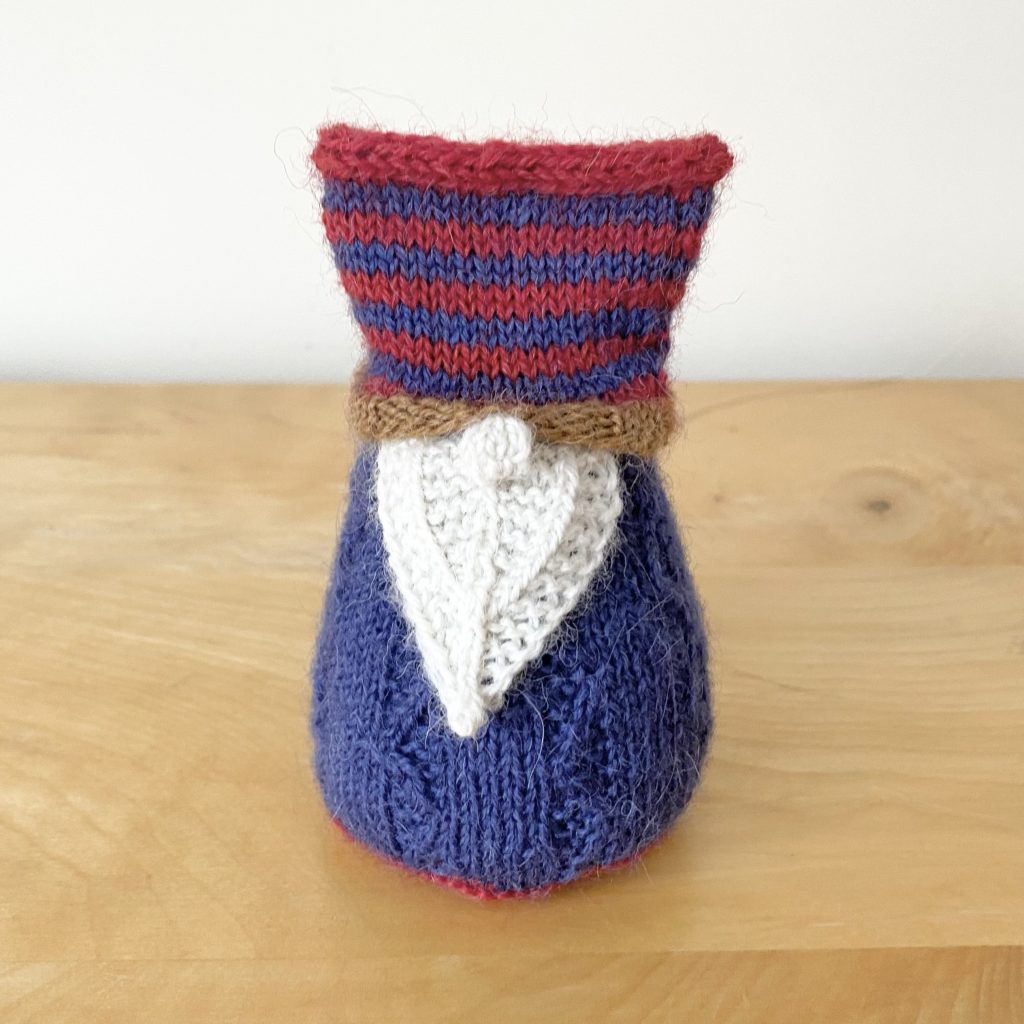
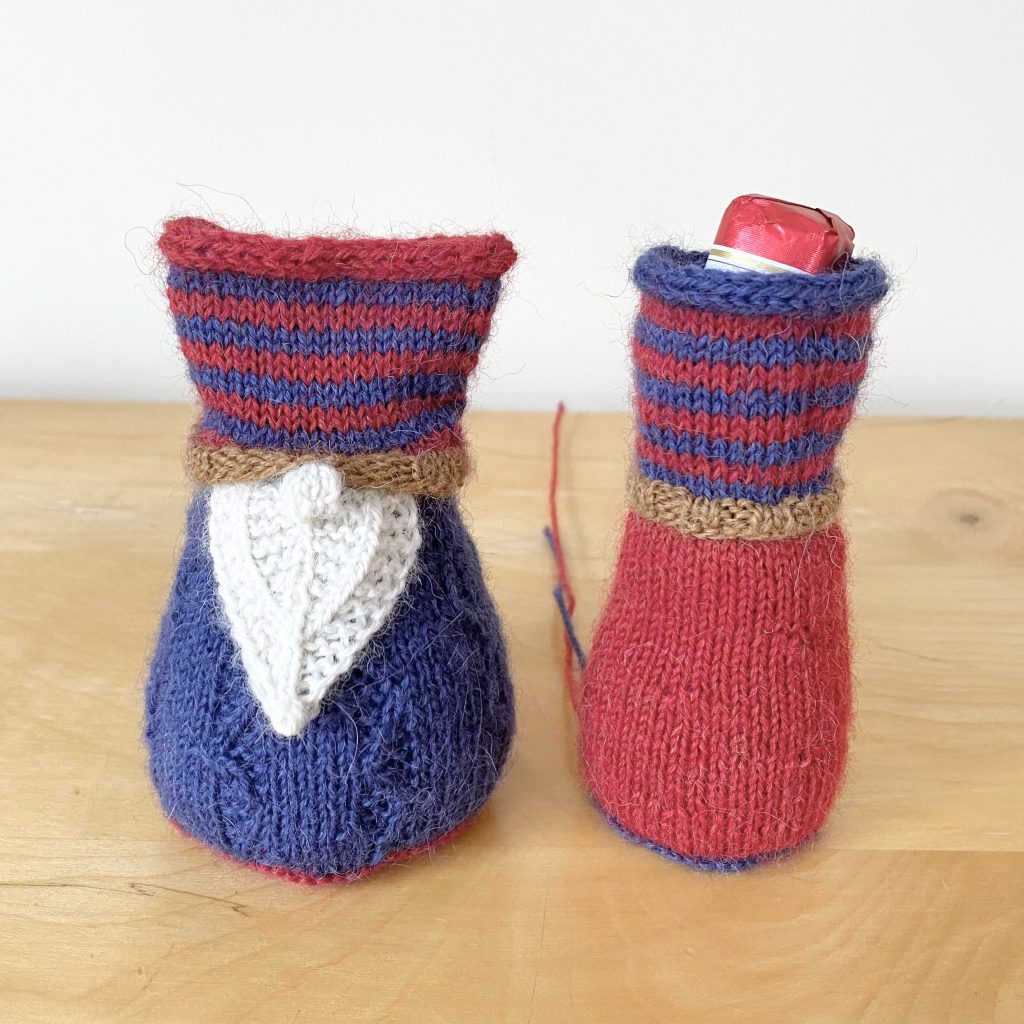
Finally, onto my September gnome for the Year of Gnomes! This gnome doesn’t have a name, but he is the first official prototype for this project, so I guess that’s something. The charts/instructions referenced here are all from the ‘Gnarley‘ pattern in Schira’s book, ‘The Gnomes of Grimblewood‘.
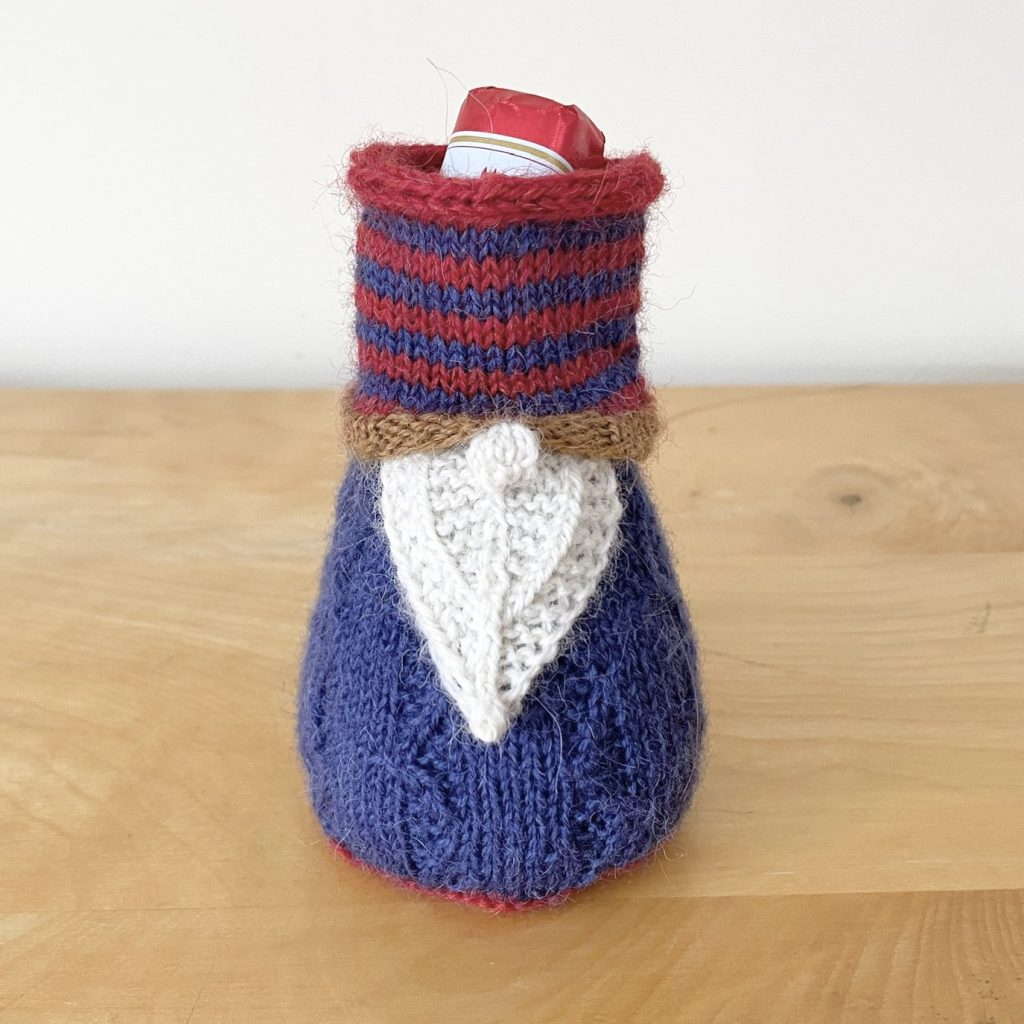
To keep the hat open, there needs to be a solid ‘shelf’ at the base of the hat. This keeps the stuffing in the body and leaves the hat free to be filled with marzipan!. I tried a few different methods for this, but found that the majority of them tended to suck the gnome in too much, making it look very skinny and… slightly deformed?
In the end, I found that knitting the hat and body as two separate pieces was the best method: you start the body with a pinhole cast-on (6 sts) and knit a flat circle (which ends up being the ‘shelf’ in question), as follows:
R1: (kfb around) – 12 sts
R2: (k1, kfb) around – 18 sts
R3: (k2, kfb) around – 24 sts
R4: (k3, kfb) around – 30 sts
R5: (k4, kfb) around – 36 sts
R6: (k5, kfb) around – 42 sts
R7: (k6, kfb) around – 48 sts
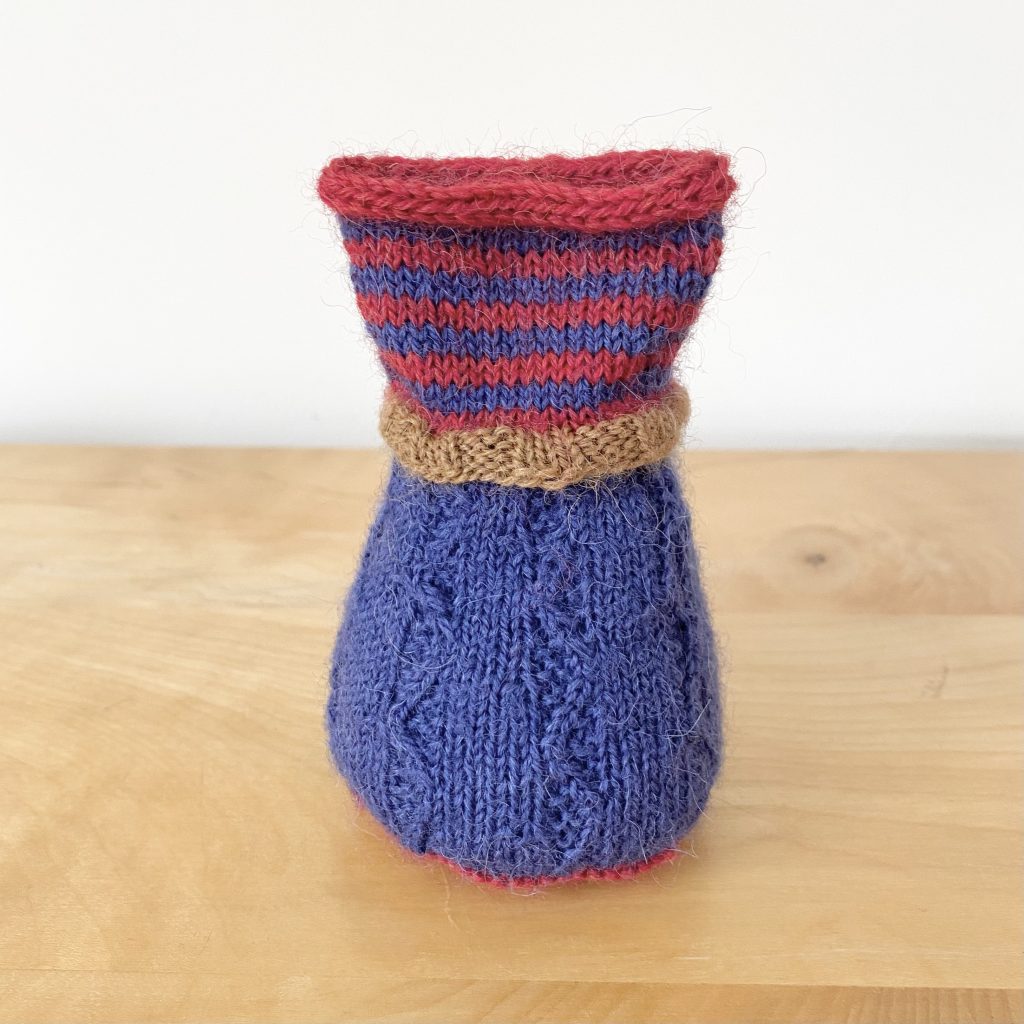
Then, you work a purl round, followed by a knit round (to make a nice, clean edge) before jumping back into the body instructions (working from the start of Chart 2 onwards). I used navy for the body, then switched to red from the first row after finishing Chart 4 onwards, so that the base is a different colour, which I think adds a bit of extra fun!). I also added a circle of cardboard to the top of the body before stuffing it, to ensure the ‘shelf’ stays flat, even and the right diameter. With that, the body was done!

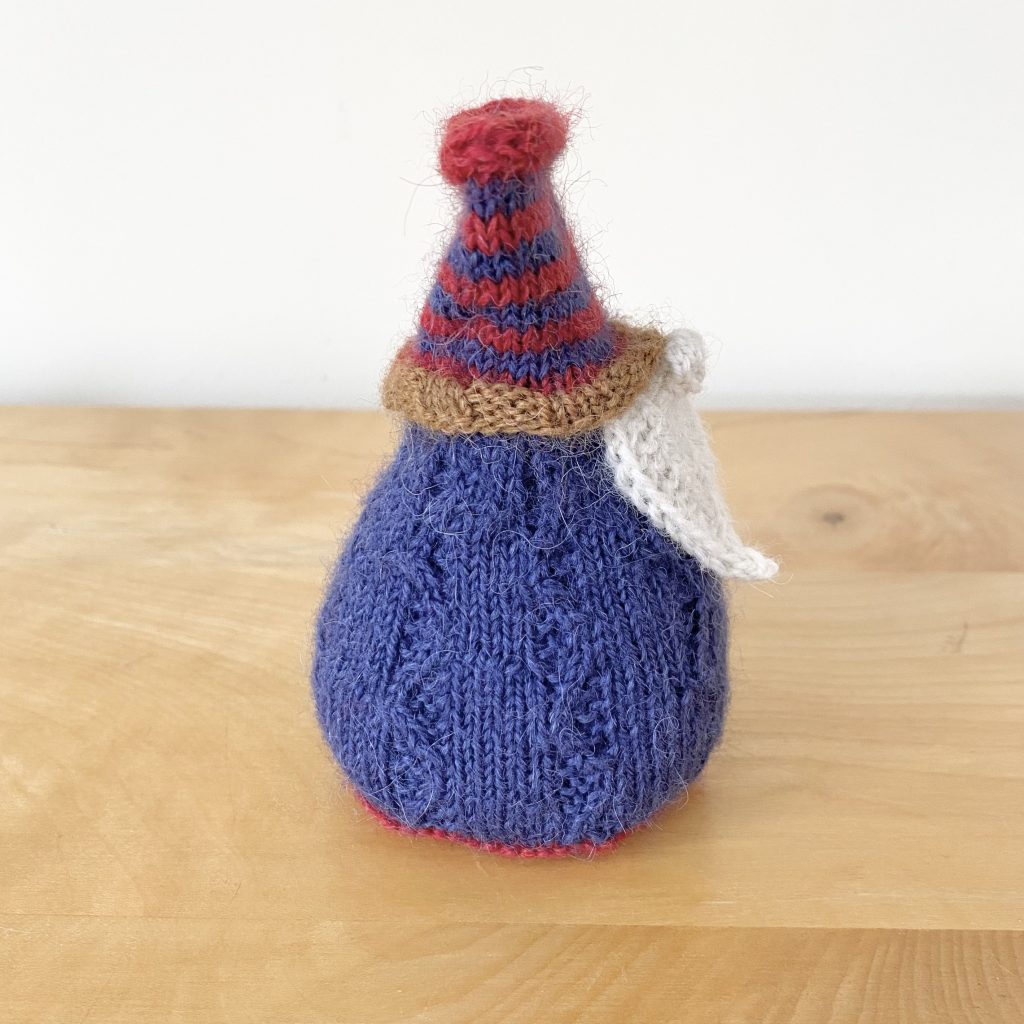
I knitted the hat as instructed, using a slightly smaller stitch count than the one in the pattern (42 sts). I knitted the hat in 2 row-stripes, alternating between red and navy. I used the gold shade for the brim of the hat. Instead of using a three-needle bind-off to finish off the hat, I used a 3-stitch i-cord bind-off. This makes a super neat, clean edge, even when the hat is left open (as it is here).
Once the body is made, stuffed and finished off, the hat is sewn onto the purl round of the body, right around the brim, along the stitch line on the hat that is marked with a stitch marker earlier on in the pattern instructions. This, along with the cardboard circle at the top of the body, prevents too much ‘sucking in’ and keeps the gnome looking nice and proportional, while also helping with the advent calendar function!
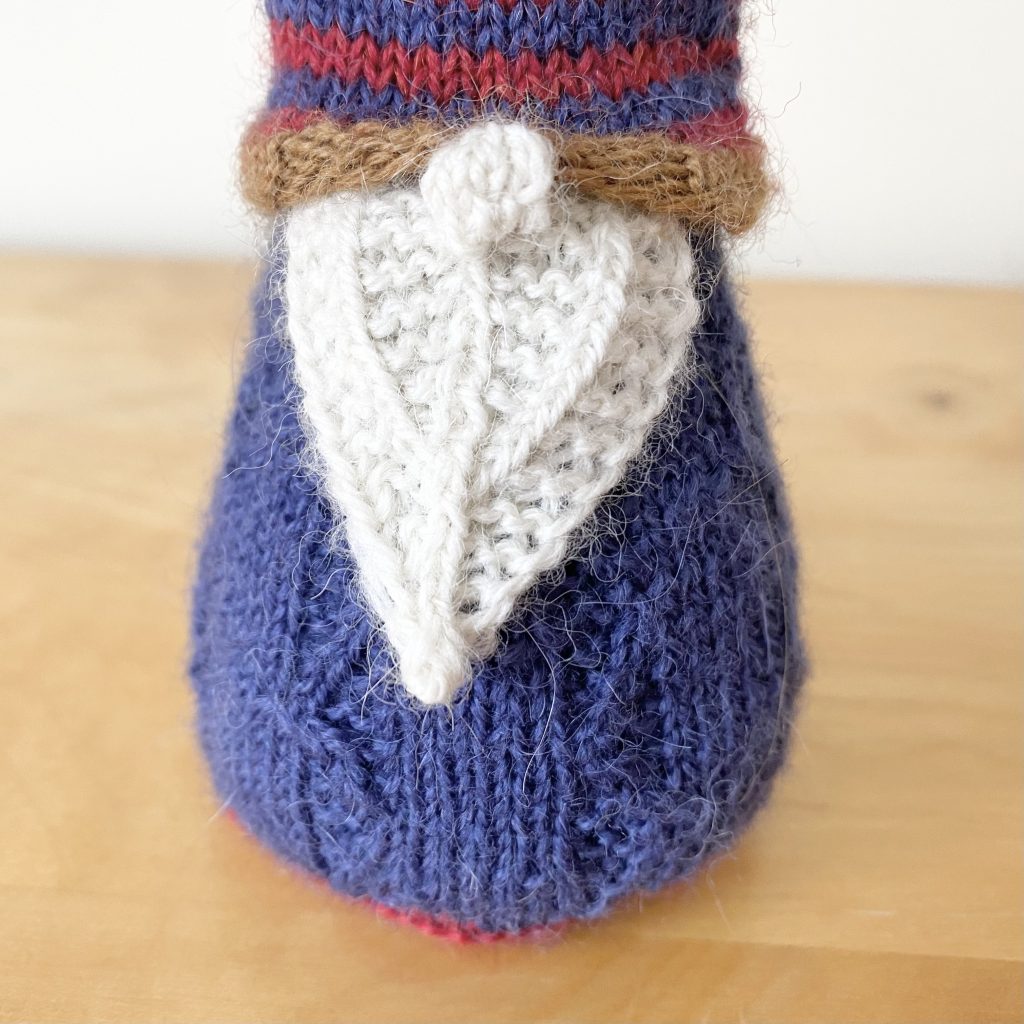
For this prototype, I made the beard from Here We Gnome Again, which is one of my all-time favourites of Schira’s beard patterns (and, handily, happens to have a built-in nose!). It’s a pretty small beard, so I didn’t have to scale it down, but other beards will definitely require a bit of reconfiguring! I did forget to size up my needle before knitting the beard, so mine is even smaller than it should be, but that is easily remedied in future iterations.
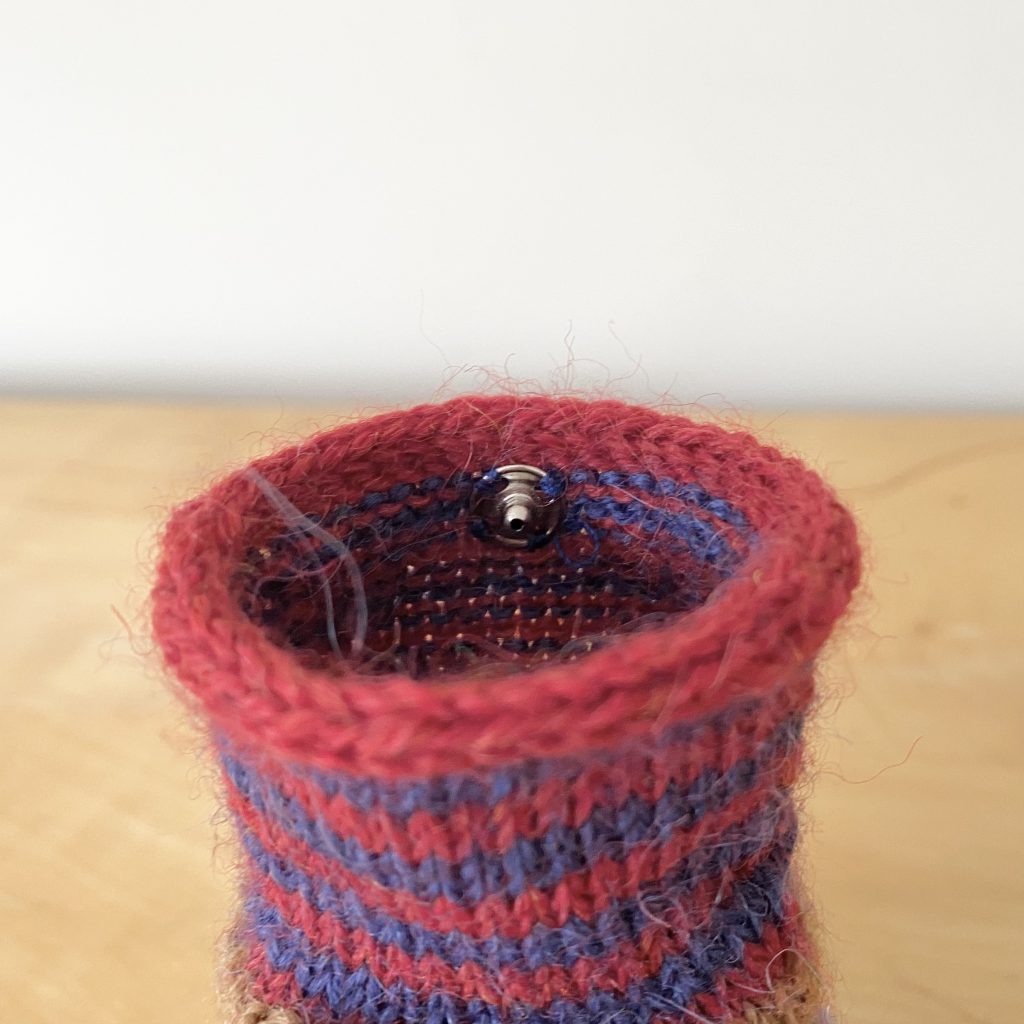
To finish off the gnome, I used some navy sewing thread to attach a metal snap fastening to the top of the hat, positioning it in the middle, just below the i-cord bind-off. This means that the hat can be ‘closed’ and ‘opened’: when open, it can be filled with a marzipan loaf and, when closed, it has a more authentic, gnome-y shape.
Changes/Adaptations for Future Gniederegger Gnomes
The first time I tried to replicate the original pattern that I used for my 75% Gnarley, it just didn’t quite work out: I made a few changes that had a significant (negative) impact that really scared me off (most notably, omitting the zig-zag rib pattern, which made the gnome super skinny and deformed— an unpleasant vibe that was only exaggerated by the fact I had not yet solved my shelf conundrum!). For this prototype, then, I went a little too far the other way, so my gnome ended up the right height, but a little too pear-shaped and wide for my liking (nothing against curvy gnomes— just not what I was going for here!).

Naturally, I think my initial pattern (sans ill-advised changes) was the best, so I think my next trial will combine that original pattern with everything I’ve learned about inserting that inner shelf.
So, here’s what I plan to do for Prototype #2 (and, hopefully, if all goes well, the 24 official Gniederegger Gnomes!):
- Try working charts 1-3 instead of 2-4 for a slightly slimmer shape.
- Stick two layers of cardboard together at the top of body to keep the shelf extra firm (my cardboard did end up bending a little when I stuffed the body).
- Add another few rounds at the top of body (so maybe, just before starting the chart work: 1 round of k all, 1 round of p all, 1 round of k all, then sew hat onto the purl row here (i.e. not the initial purl row marking the edge of the shelf) to keep the shape better).
- Make the hat slightly taller: perhaps add another 2-row stripe?
- Secure cardboard in place at the top of the hat, maybe by sewing some long stitches underneath it, right across the diameter? I really want the cardboard to sit perfectly within the initial purl round to keep everything neat and even.
- Leave a long end at the start of the hat for sewing it onto body.
- Use the right-sized needle for beard!
Prototype #1 as part of my Year of Gnomes
Despite being part of something bigger, Prototype #1 is still my September gnome for my 2025 Year of Gnomes, so here’s how he fits in with the rest of the gnome crew…
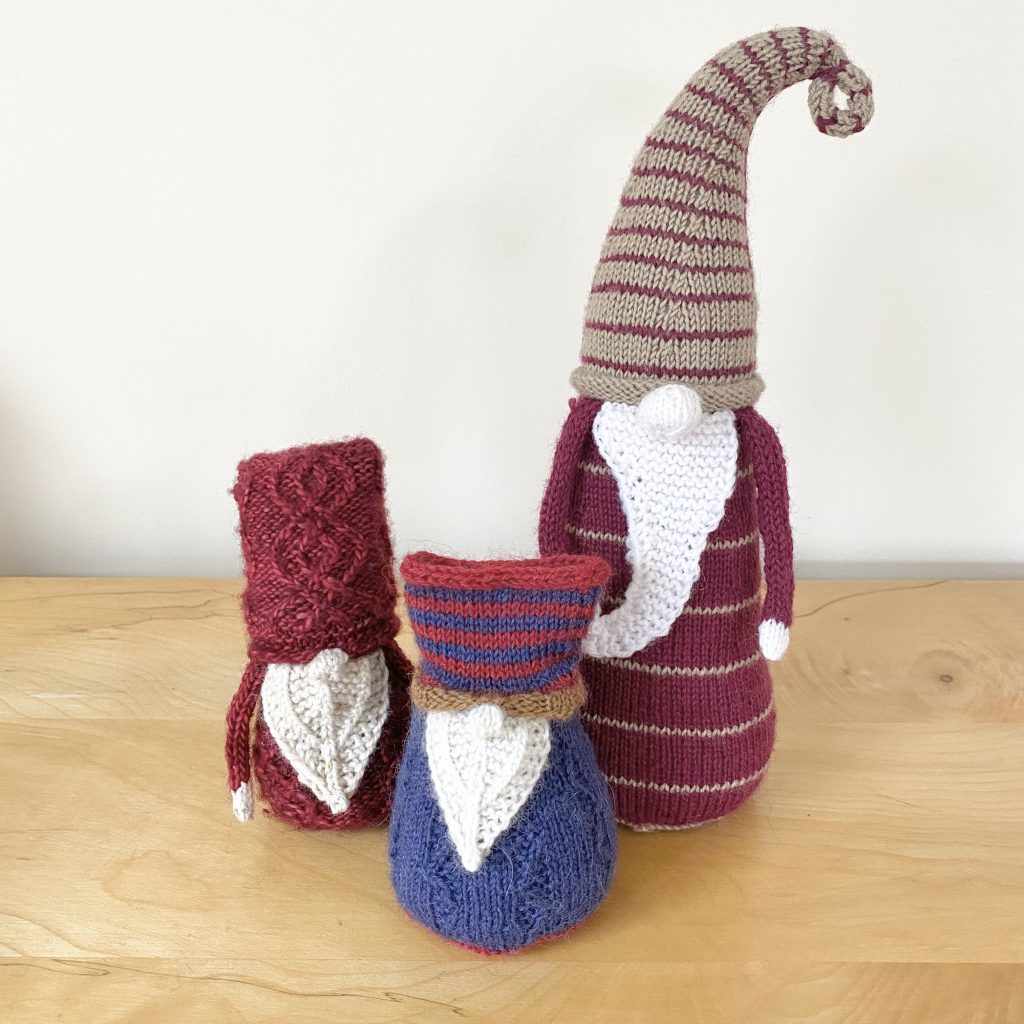
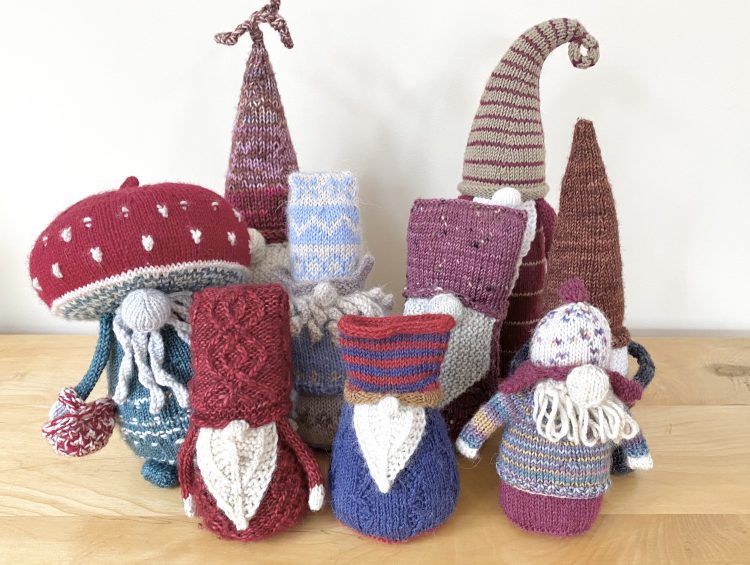
Obviously, Prototype #1 has a pretty festive vibe, just like Gneville (left) and Gnolan (right). In general, gnomes feel inherently festive to me, so I love making them in Christmassy colour palettes!
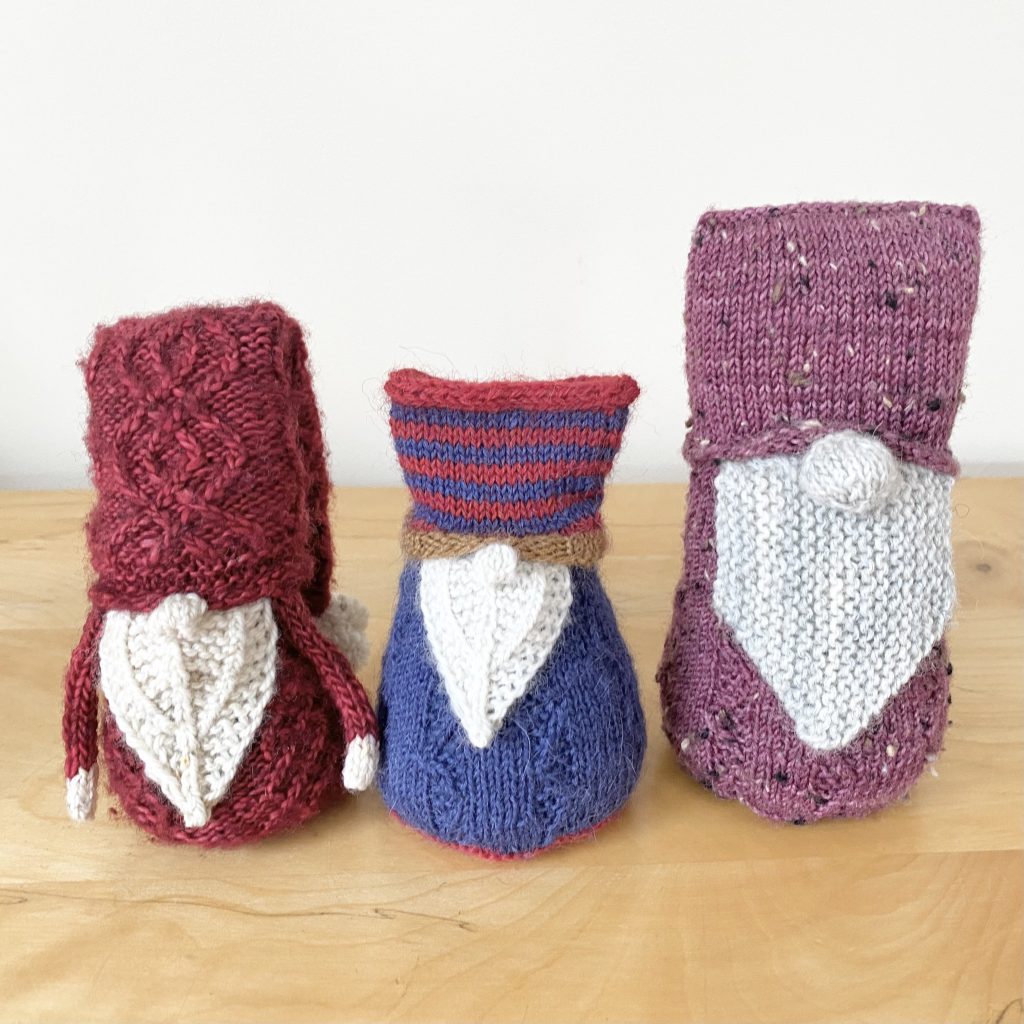
Sizewise, Prototype #1 is most similar to Gneville (so, not very big!). For reference, the gnome on the right is a full-size, fingering weight Gnarley, so you can see how much smaller the prototype is.
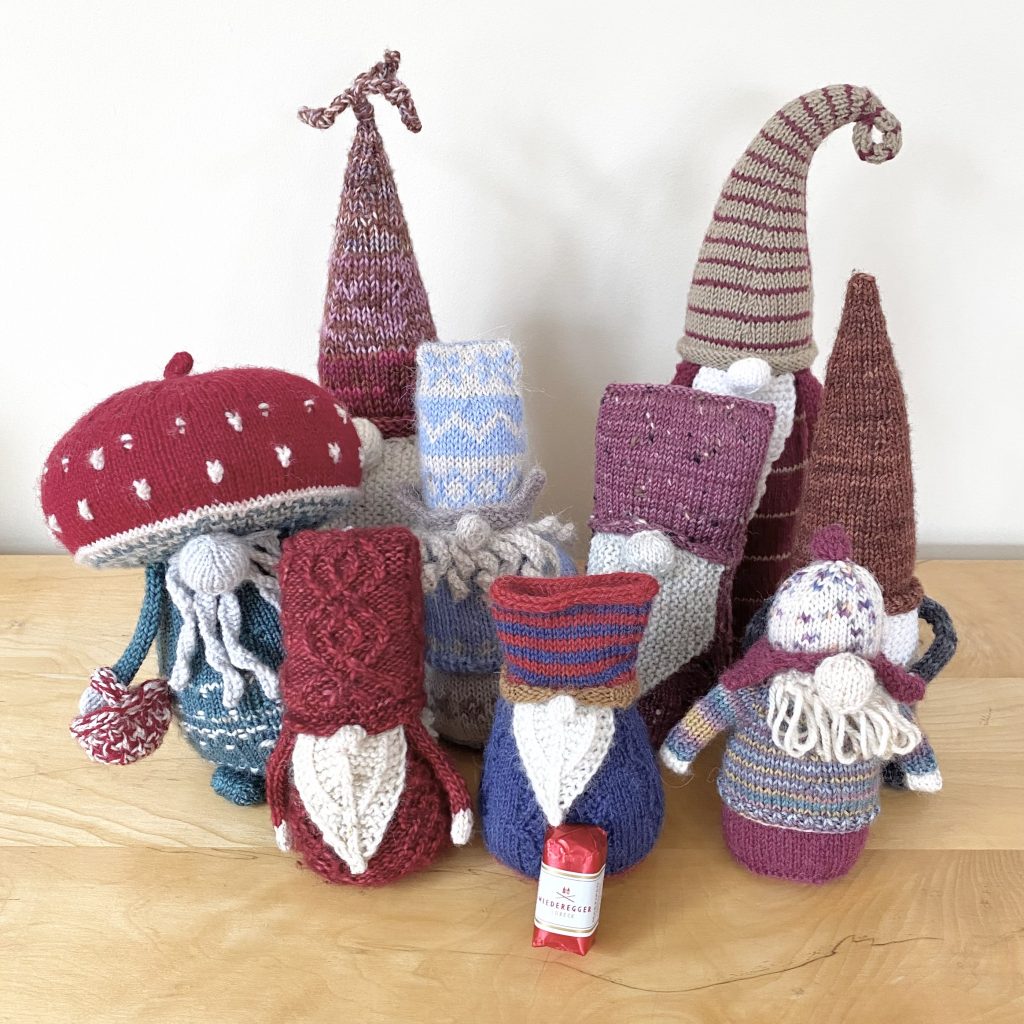
Anddddd here’s the whole crew (plus a lil’ marzipan, for good measure) together!
The Future of the Gniederegger Gnome Project
Let’s be real, making 24 gnomes is no small undertaking and I want this to be a project that I can enjoy, rather than one I’m trying to ‘get done’. At the moment, I’m leaning towards not participating in the Year of Gnomes next year (if there is one) and instead getting my gnome-y fix by working on my own, year-long gnome project: my Gniederegger Gnomes. 24 mini gnomes over the course of a year doesn’t sound too unmanageable and I think, this way, I’ll be able to enjoy the process a lot more!
Long story short, stay tuned for more Gniederegger Gnomes!
I hope you’ve enjoyed this post! I know it’s a little different to my other Year of Gnomes posts, but I’m super excited about this project and I can’t wait to work on it some more next year!
Gemma
xxx


