I have a confession: I’ve been in a little bit of a bullet journal slump recently. The past couple of months have been pretty hectic and, in all of the chaos, my bullet journal has fallen completely by the wayside. It’s a shame, because I LOVED my February and March themes, but I just didn’t get to use them as much as I would have liked. It’s okay though- these things happen! I’ve had plenty of slumps before and, if I’ve learned anything, it’s that they’re only temporary. I know I’ll get back into the rhythm of things eventually- it just takes time!
In the interest of getting back into my bullet journalling zone, I wanted to keep my setup for this month super minimal, with a focus on functionality over design. When life is complicated enough to interfere with my bullet journalling, I always figure that my bullet journal itself needs to be the opposite- simple. This month’s theme, therefore, is a little different to my usual style- for April, I’ve opted for a minimal, monochromatic bullet journal setup. Typically, I opt for more elaborate, decorative themes, but I had neither the time nor the headspace for that this month. I’m hoping that this simple setup will be exactly the push I need to get back into my bullet journalling rhythm!
Table of Contents
- Equipment
- Cover Page + Monthly Calendar
- Blog Planning + Daily Sunshine
- Weeklies
- April Review
- Final Thoughts
Equipment

For this setup, I used a ruler and my Sakura Pigma Micron pens (yep, you read that right- that’s it!). I used the 5 fineliners from this pack, which includes the following sizes: 01 (0.25mm), 05 (0.45mm), 08 (0.50mm), 10 (0.60mm) and 12 (0.70mm).
I have always used Muji pens for my bullet journalling, but I’ve heard great things about these Sakura pens, so I wanted to give them a go. I figured this setup would be perfect for trying them out and, I have to say, I really liked them. I only had a couple of issues with smudging/ghosting, and all of those were caused by my own impatience, rather than the pens themselves.
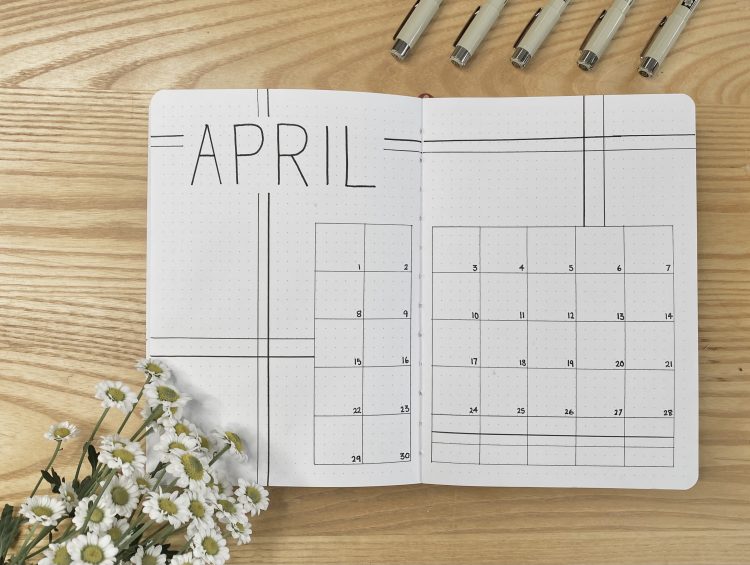
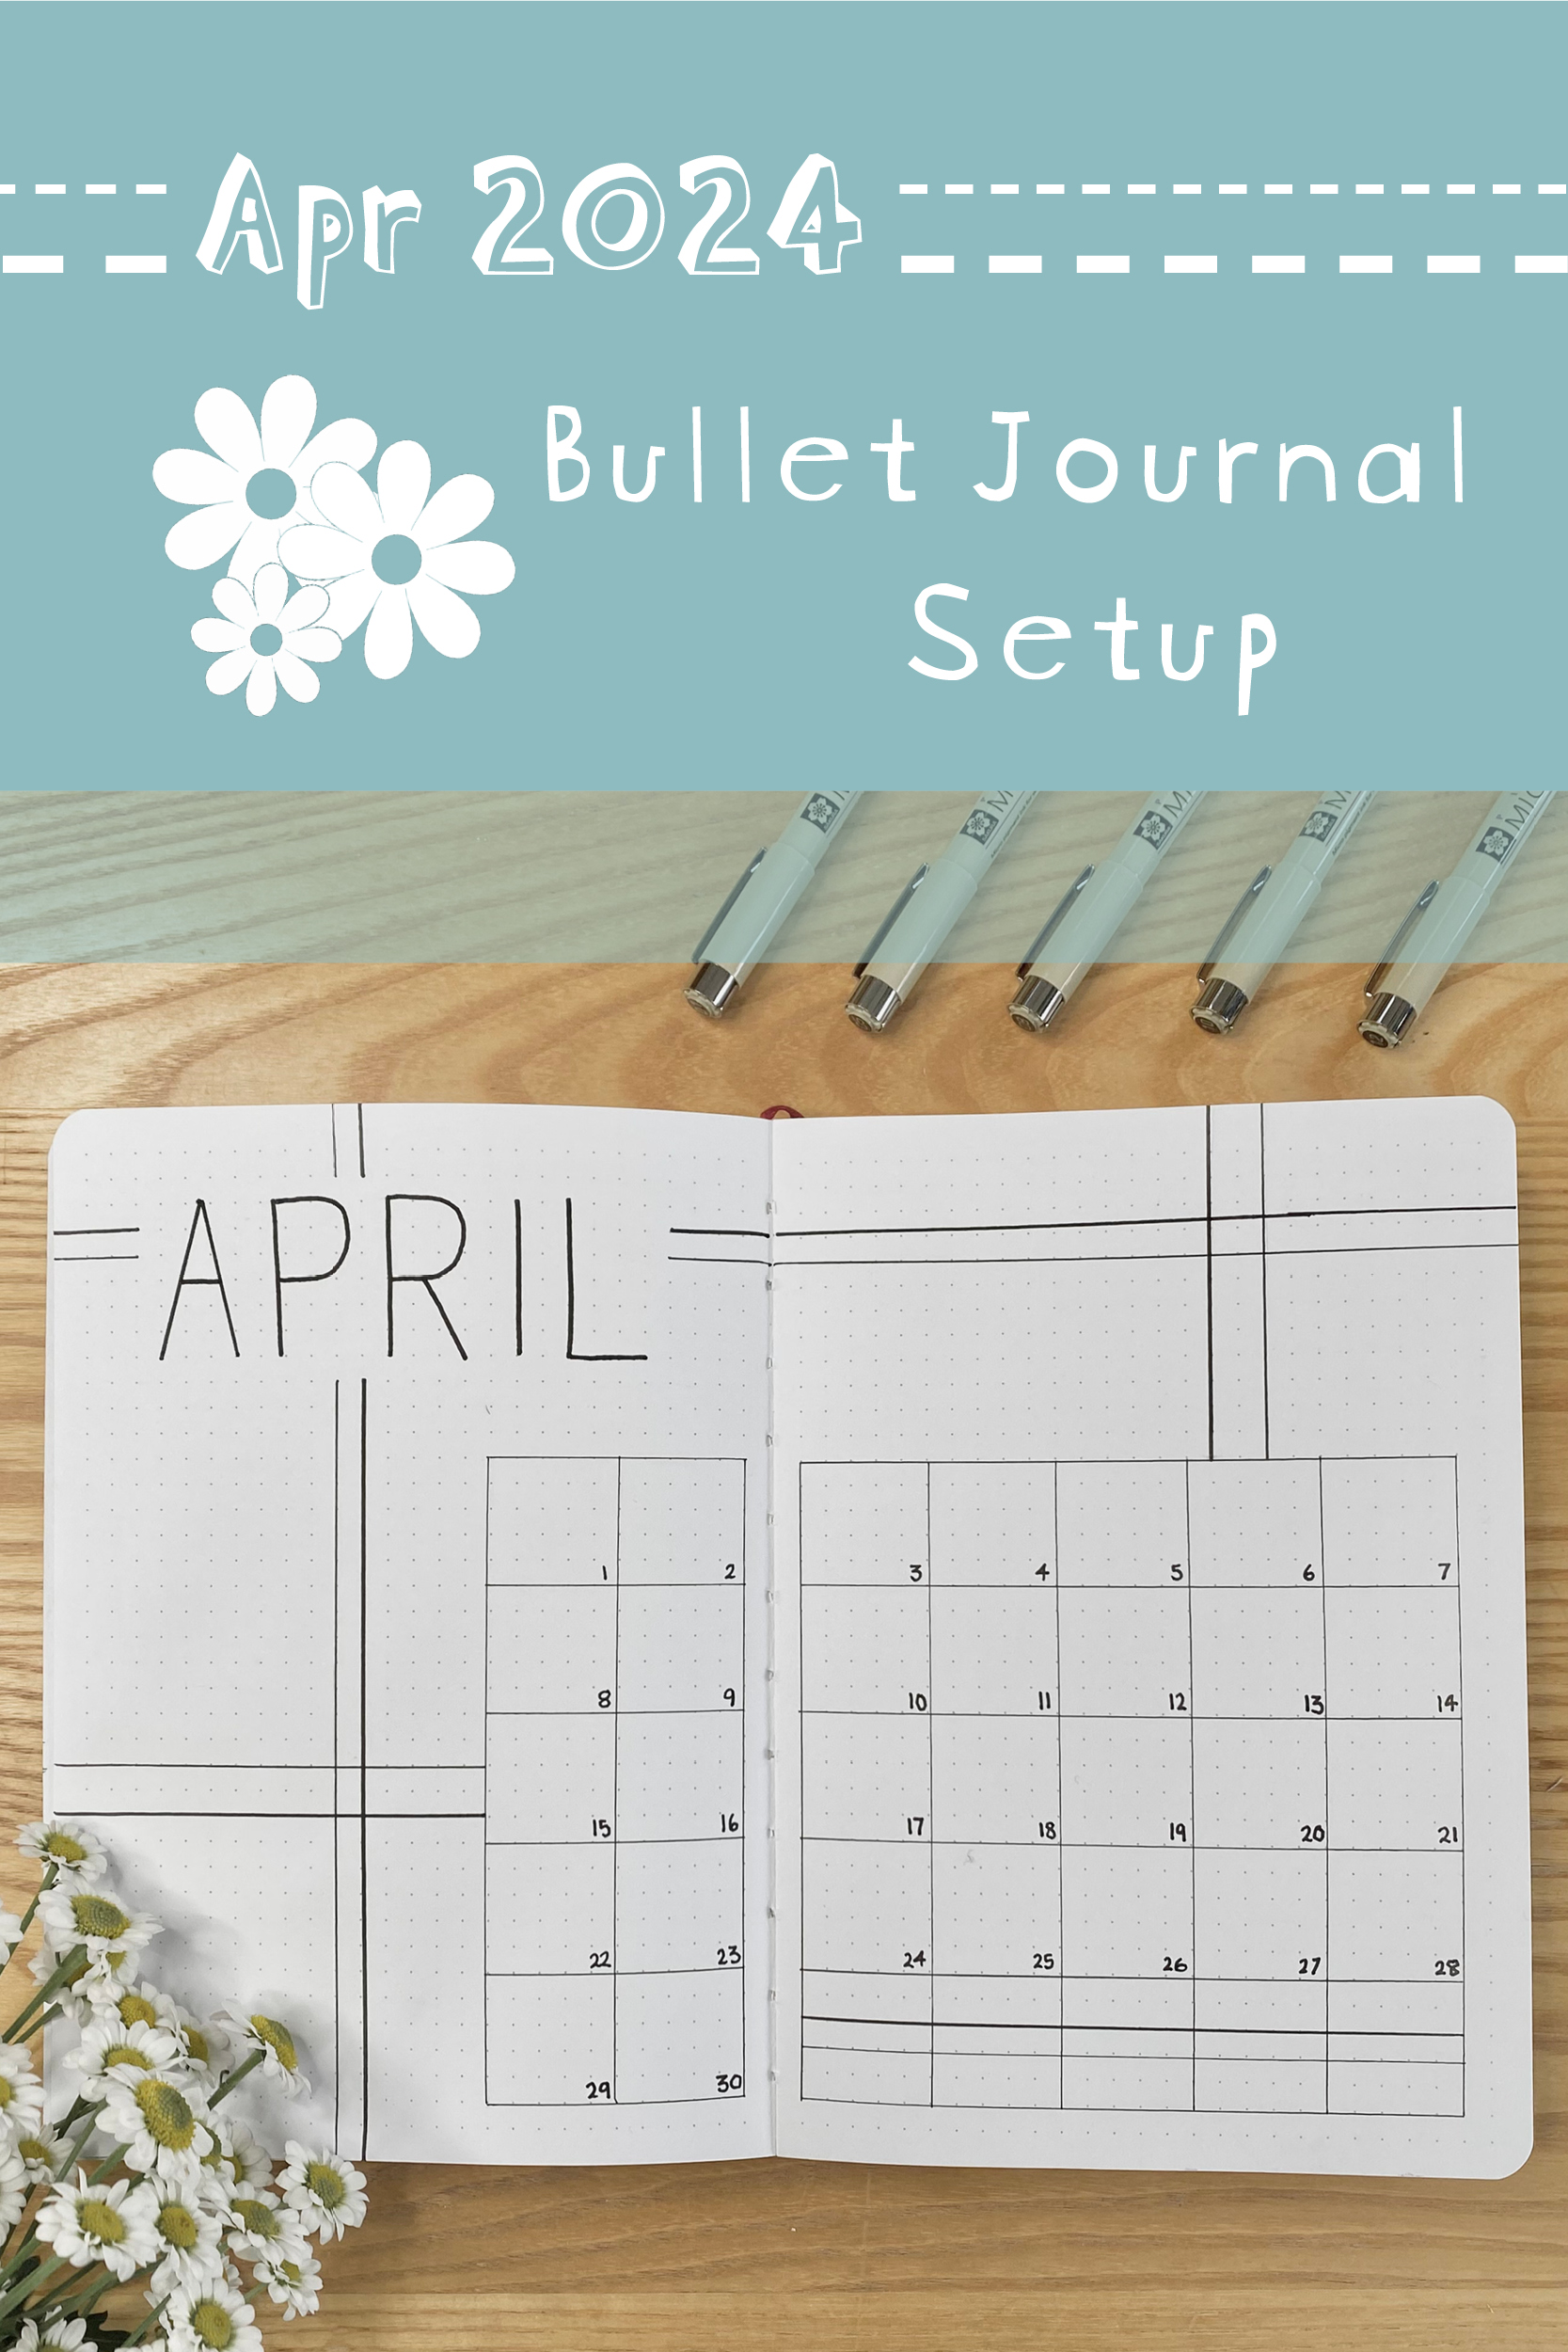
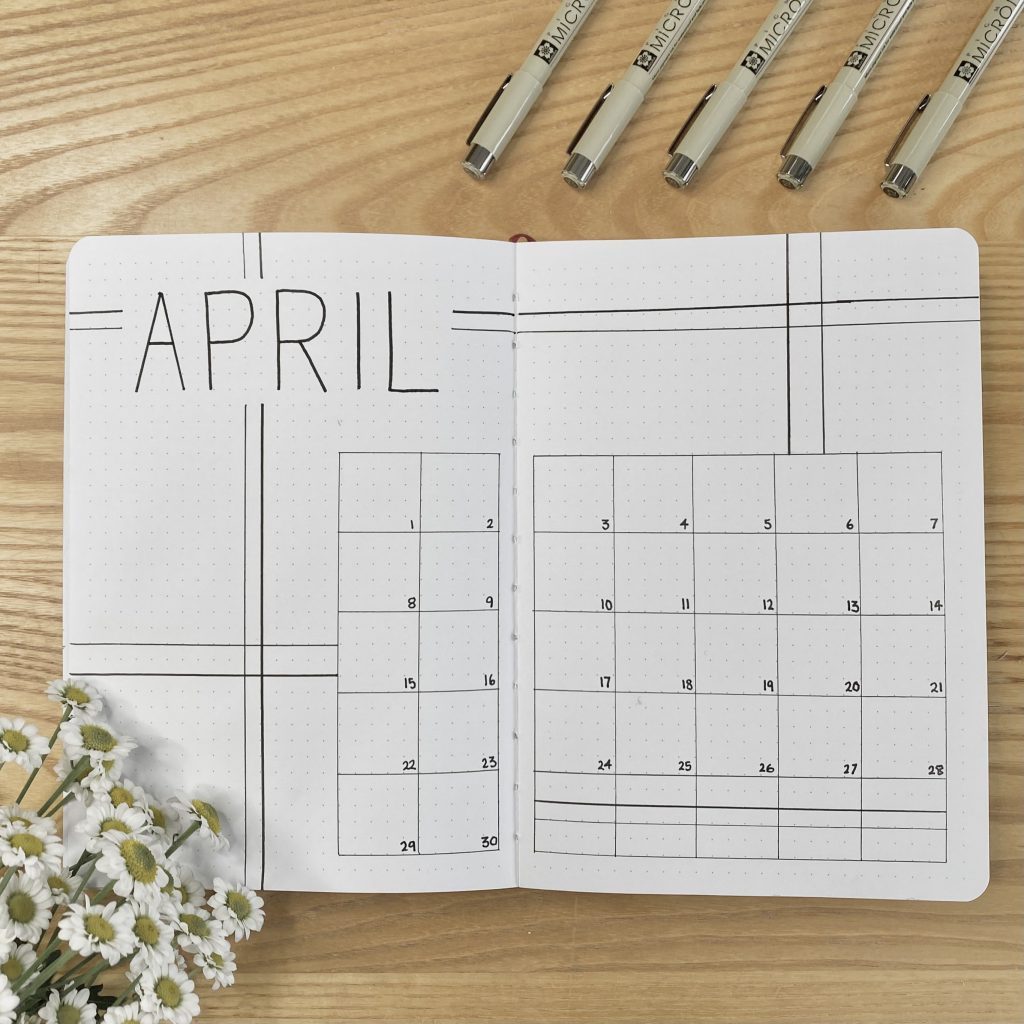
Cover Page + Monthly Calendar

In an attempt to reduce the number of spreads I had to set up this month, I opted to combine my Cover Page and Monthly Calendar. I drew a simple, 5×7 grid in the bottom right using the 01 pen, then used the 12 pen and a simple, block capital font for the ‘April’ heading in the top left. I added the dates to the calendar using the 05 pen.
To decorate this page (and the rest of the setup), I drew an assortment of lines, switching up the thicknesses by using the different Sakura pens.
Blog Planning + Daily Sunshine
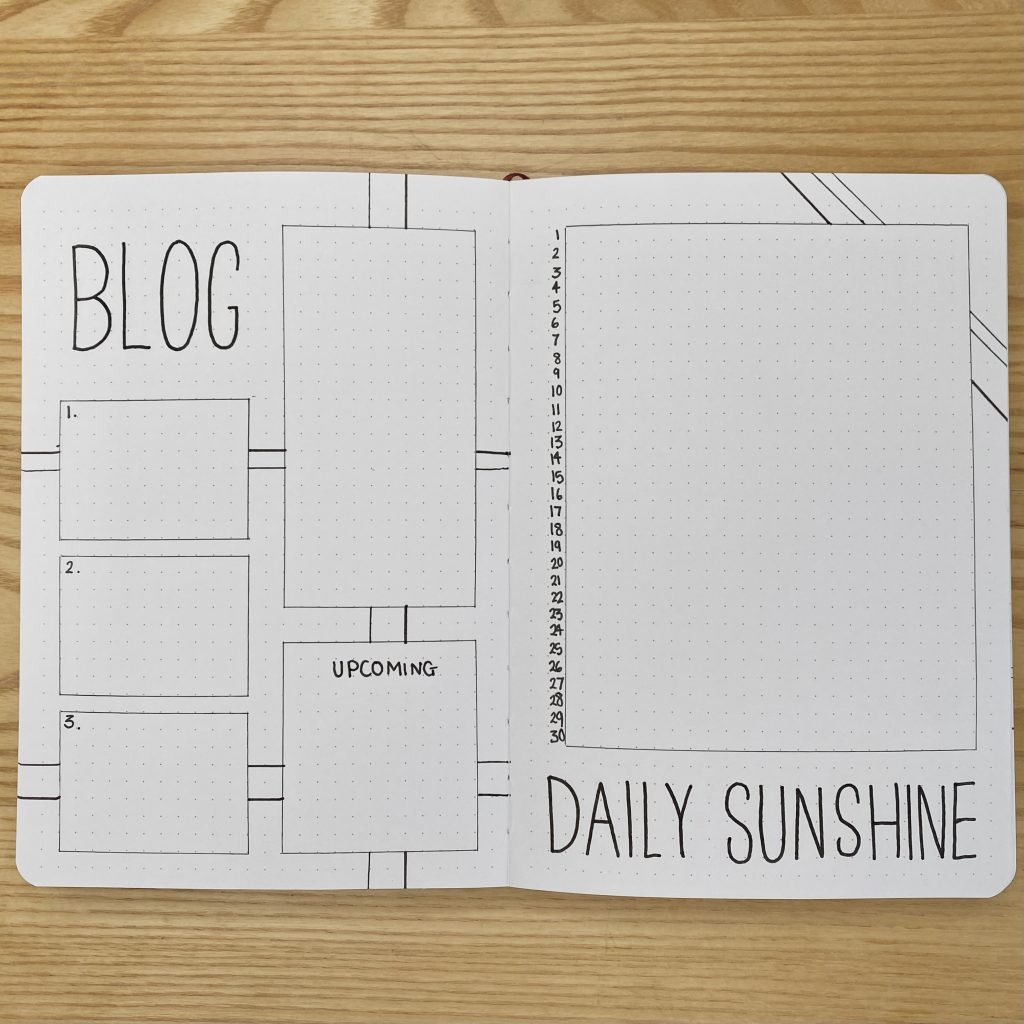
As always, I’ve included a section in this setup for planning my blog posts. I drew the header in the top left, again using the 12 pen, then drew the individual boxes using the 01 pen. Down the left-hand side, I have spaces for any notes on individual posts. On the right-hand side, I have a space for upcoming projects next month (to help me try and get ahead a little!), plus a bigger section for a super secret special project that I’m hoping to pull off towards the end of this month- stay tuned!
Next to that Blog Planning spread, I have my Daily Sunshine page. This is a spread that I include in every monthly bullet journal setup that I create- essentially, it is just a space to write down one good/positive thing that happened every day. I drew a large box, using my 01 pen, to house all of my happy notes, then wrote the dates down the left-hand side, using my 05 pen. Also… let’s ignore the rogue diagonal lines on this spread… I don’t know what came over me, but they are not the vibe 🙁 .
Weeklies
While I typically like to use a variety of layouts for my weekly spreads in any given month, I just didn’t have the brainpower to dream up 5 different orientations for my weeklies this time around, so I only used one (and a half, I guess, because the 5th weekly, by necessity, had to be a little different). I also didn’t include my customary tabs this month, because, honestly, it just felt like so much effort. So that I don’t bore you to death, I’ve just included a photo of one weekly spread here, but rest assured that weeks 1-3 are exactly the same.

I opted to put my daily section s down the centre of the page- 4 on the left and 3 on the right (with the remaining space at the bottom used for any events that are coming up the week after- aptly subtitled ‘NW’ for ‘next week’). I used my 10 pen to write out the initials of the days of the week, along with the date, then used my 01 pen to section them off horizontally. I then used that same 01 pen to make one box on the left-hand side, for any notes, and one on the right, for my task list. Because I wasn’t using tabs, I numbered each weekly spread so that I can navigate through my journal more easily. This particularly weekly was for the fourth week in April, so I used my 12 pen to draw the outline of a big number 4 in the top left-hand corner, before filling it in for a super bold look.
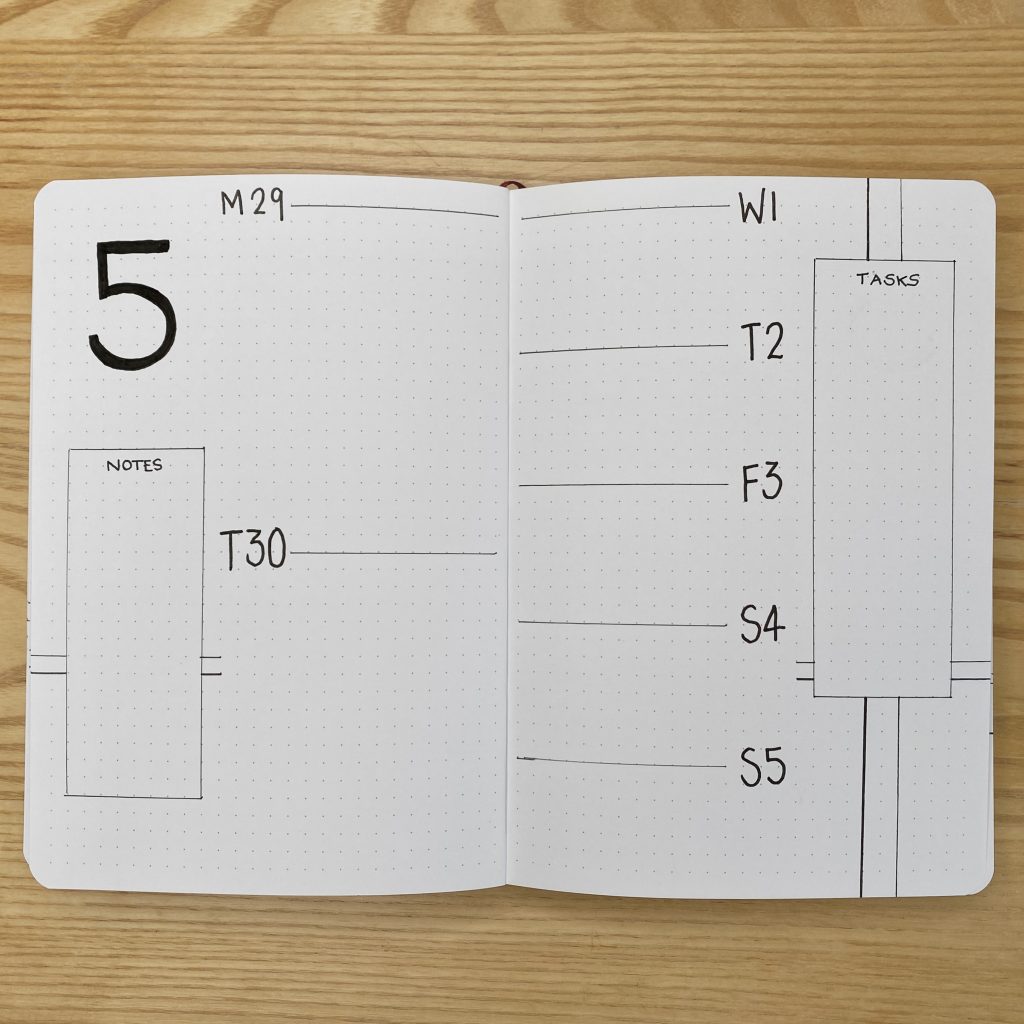
Because the final weekly only contains two days of April (the rest of the week is taken up by 1st-5th May), I had to change my layout a little bit for the 5th weekly. I opted to split the left-hand daily section into two for the April days, then split the right-hand section into 5 for the May days. I kept the rest of the layout the same.
April Review
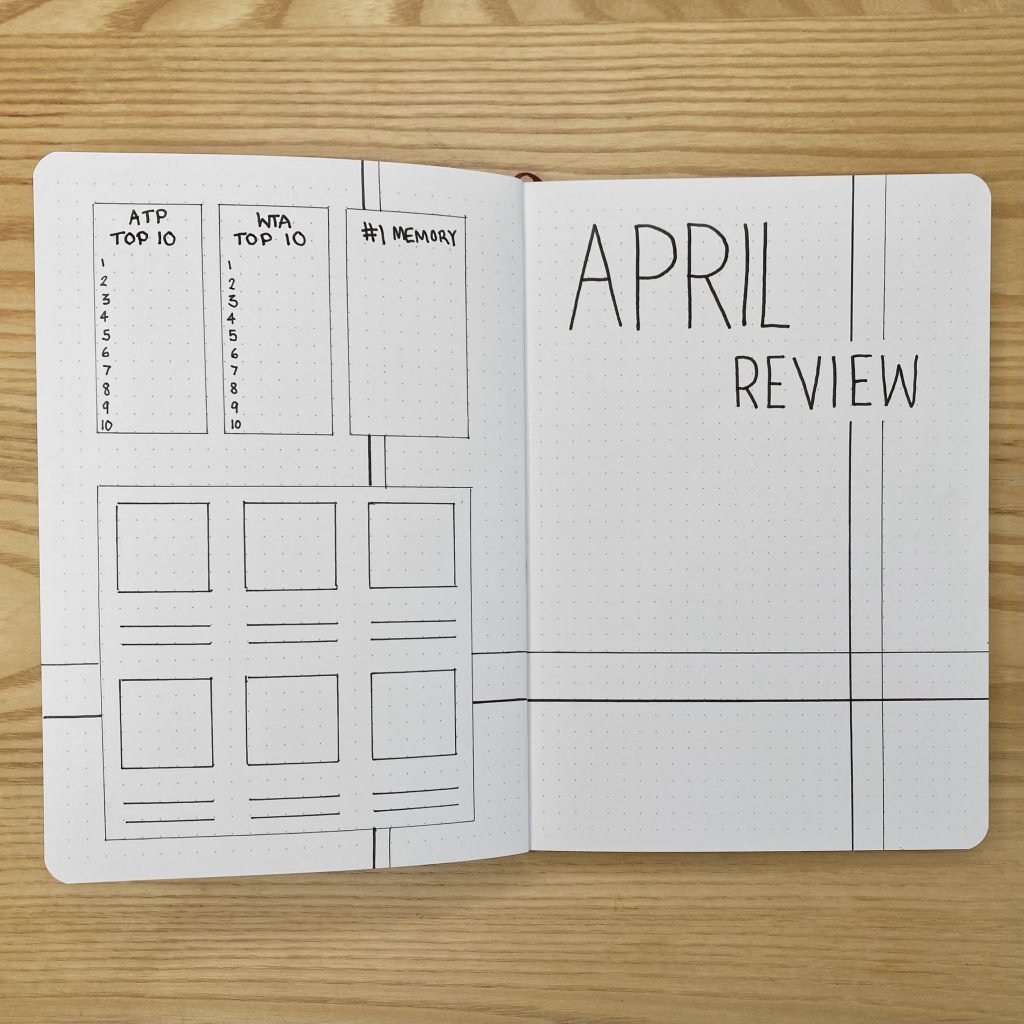
Like with my other spreads in this setup, I kept my April Review super simple- I just wrote the heading in block capitals along the top-right (using my 12 pen for the word ‘April’ and my 10 pen for the word ‘review’). I kept the boxes on the left-hand page the same as I have for the past few months- along the top, I have spaces to note down my favourite memory from the month, as well as the ATP & WTA Top 10, then, below that, I have a space to write down 6 of my favourite songs in April. As always, I like to include space for a polaroid on the right-hand page. In the interest of keeping things simple, I opted to forgo my usual ‘frame’ and just decorate the page beneath with the lining style that I have used throughout the setup, on top of which I will stick the polaroid at the end of the month.
Final Thoughts
I think this setup will be exactly what I need this month- just something simple and lowkey to help me stay organised and slowly ease myself back into bullet journalling. This isn’t my usual style, and, I just admit, it doesn’t bring me quite as much joy as my typical bullet journal themes, but it’s functional and it’s clear, so I’m happy. Also, it was insanely quick to set up, which is always a plus!
I hope you’ve enjoyed reading about my April 2024 Bullet Journal Setup! Hopefully I’ll get back into the swing of things in time for next month, so I can get back to creating the overly elaborate, crazy setups of my HEART.
Gemma
xxx