It’s time for the 4th instalment of my Bridgerton House Baby Blanket pattern! This week, I’m showing you how to make the crochet roses & leaves that will be sewn onto the blanket later on. If you missed the first 3 parts of this series, you can find them here:
- Bridgerton House Baby Blanket #1: Introduction
- Bridgerton House Baby Blanket #2: Making the Brick Blanket
- Bridgerton House Baby Blanket #3: Adding the Surface Crochet Vines
Table of Contents
- Crochet Roses: The Basics
- Making the Large Roses
- Making the Small Roses
- Winding the Roses
- Making the Rose Leaves
- Written Pattern
- Final Thoughts
Crochet Roses: The Basics
Each rose is crocheted as one piece, which is then rolled up and sewn together to create the flower shape. The roses are crocheted on a very small hook (2mm). This helps to give the roses more structure and creates a neater finish. If you find using a small hook with DK weight yarn to be too much of a struggle (it can be a bit hard on your fingers!), you can absolutely use a larger hook- just be aware that your roses will be larger in size and less rigid.
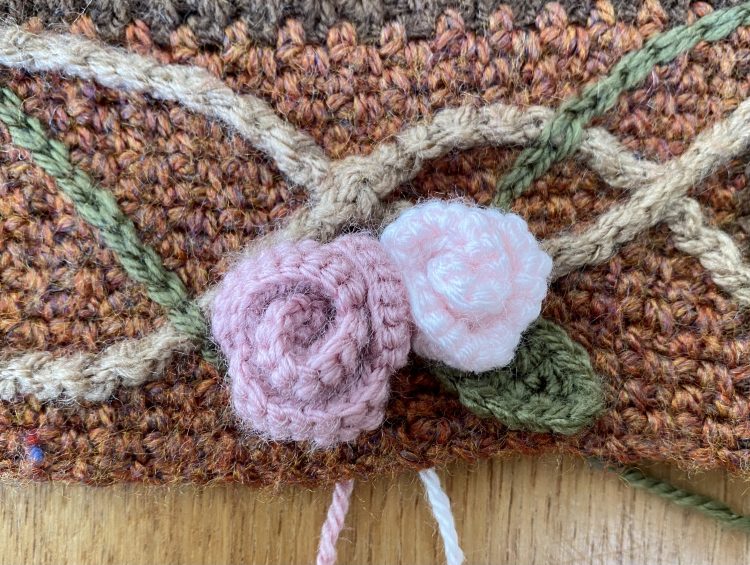
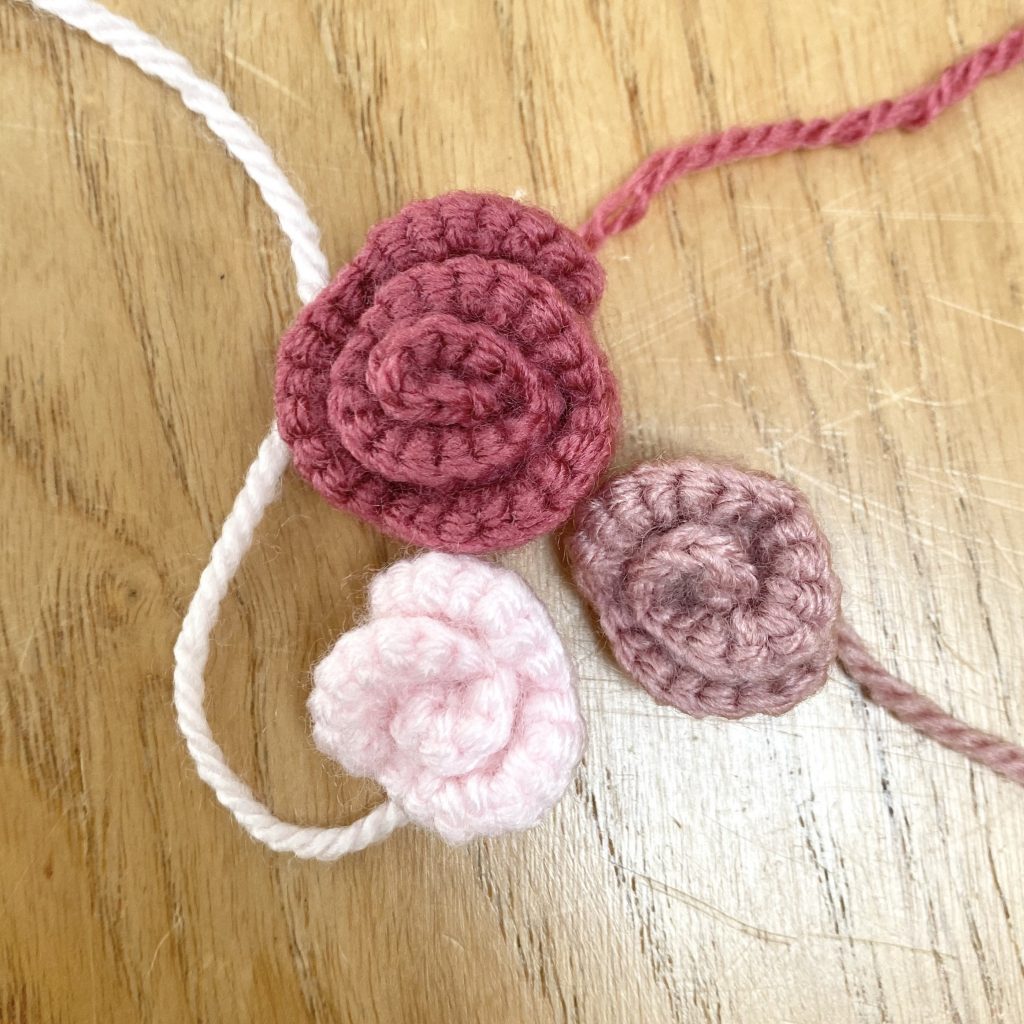
For this blanket, you will need to make 2 different sizes of rose: large and small, using 3 different shades of pink. This provides dimension and reflects the roses seen in the show, where the centre of each flower is a darker shade that gradually lightens to the pale pink outer petals. To keep things simple, I’ve opted to use a few different shades to make multiple, plain-coloured roses, rather than incorporate the gradient into each individual rose.
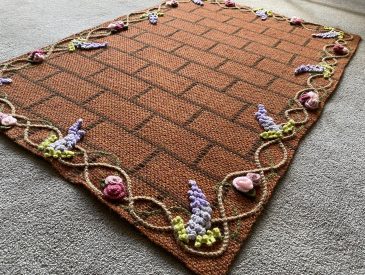
The roses are arranged in clusters around the perimeter of the blanket. For the most part, the clusters are formed of 1 large + 1 small rose, though, in the centre of each long side of the blanket, there is one larger cluster consisting of 1 small + 2 large roses. For my blanket, I made the following number of roses in each shade of pink, but you can, of course, change this to suit your yarn/preference:
- Pale Pink (Stylecraft Special DK in Powder Pink): 4 large, 3 small.
- Mid Pink (Stylecraft Special DK in Pale Rose): 4 large, 4 small.
- Dark Pink (Stylecraft Special DK in Raspberry): 4 large, 3 small.
To help integrate the appliqué roses into the background, rose leaves are crocheted separately and sewn onto the blanket alongside the rose clusters. Each cluster is adorned with one rose leaf, except for the larger, 3-rose clusters, which have 2 leaves. The leaves are crocheted using the same Khaki shade used to make the surface crochet rose vine from the previous instalment. All in all, you’ll need to make 12 rose leaves for this blanket.
Making the Large Roses
You will need to make 12 large roses.
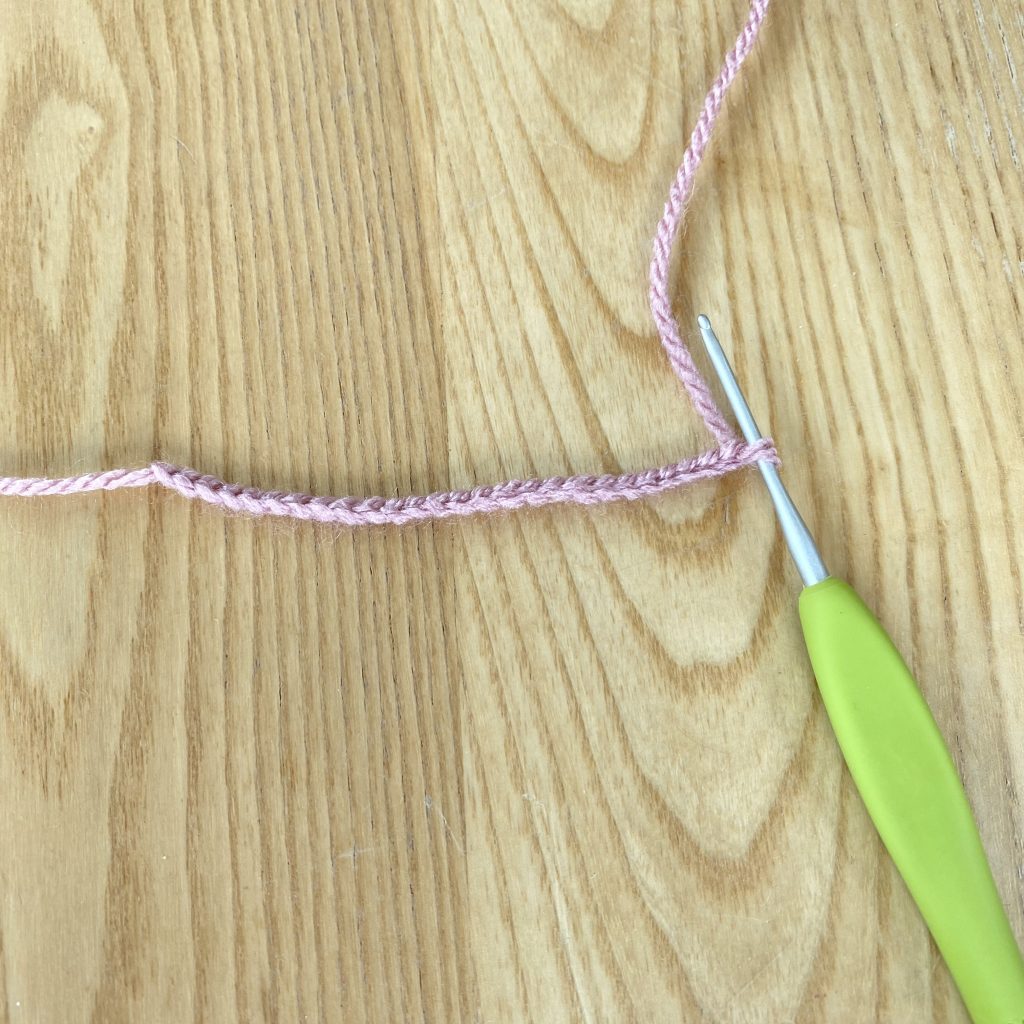
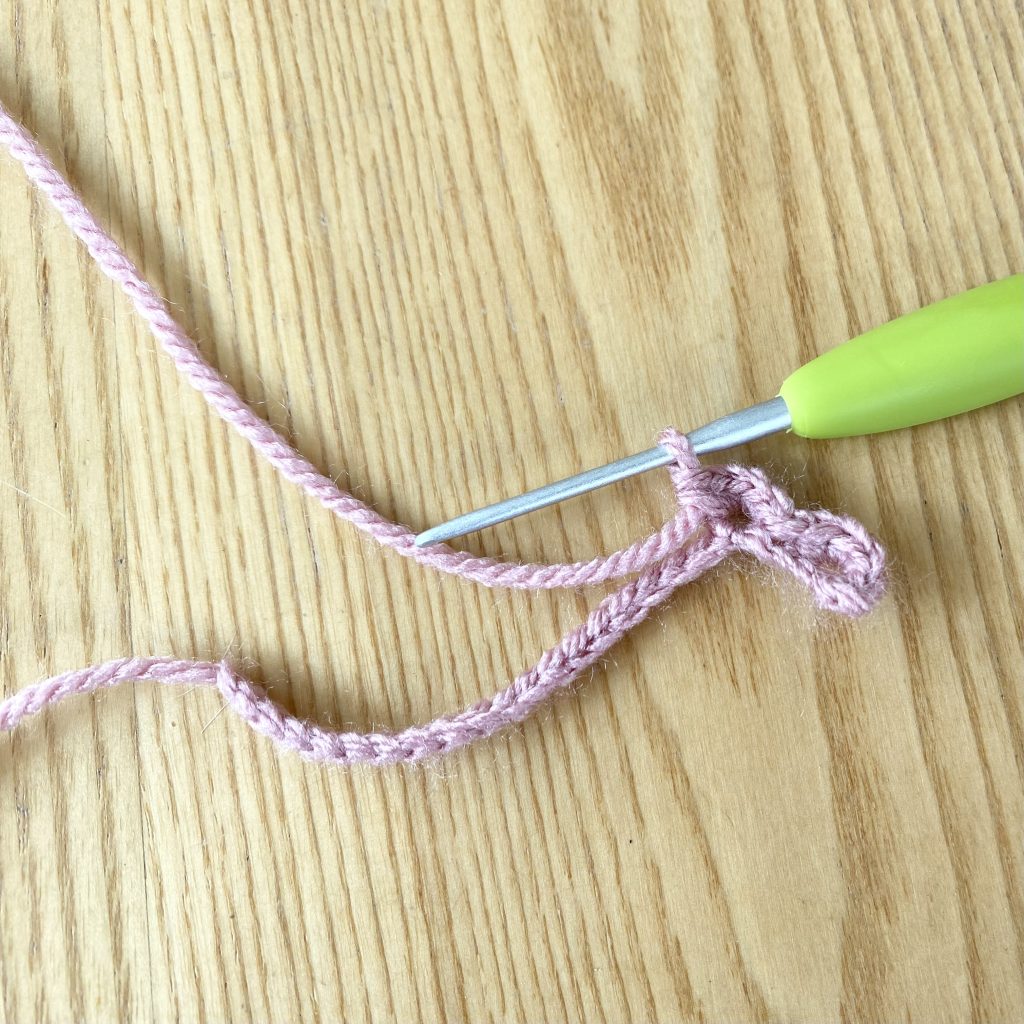
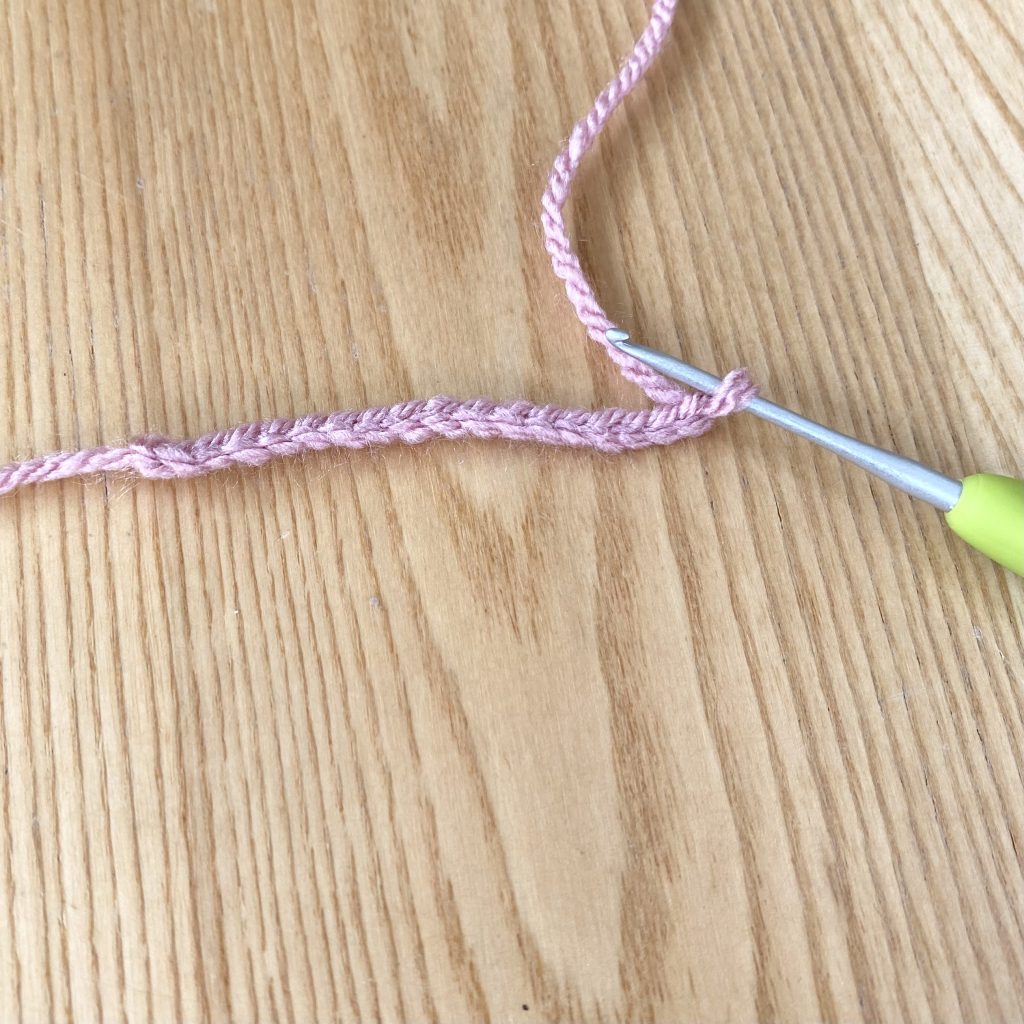
Using a 2mm hook, chain 25. Leave a long end (approx. 30cm) for attaching the rose to the blanket later on.
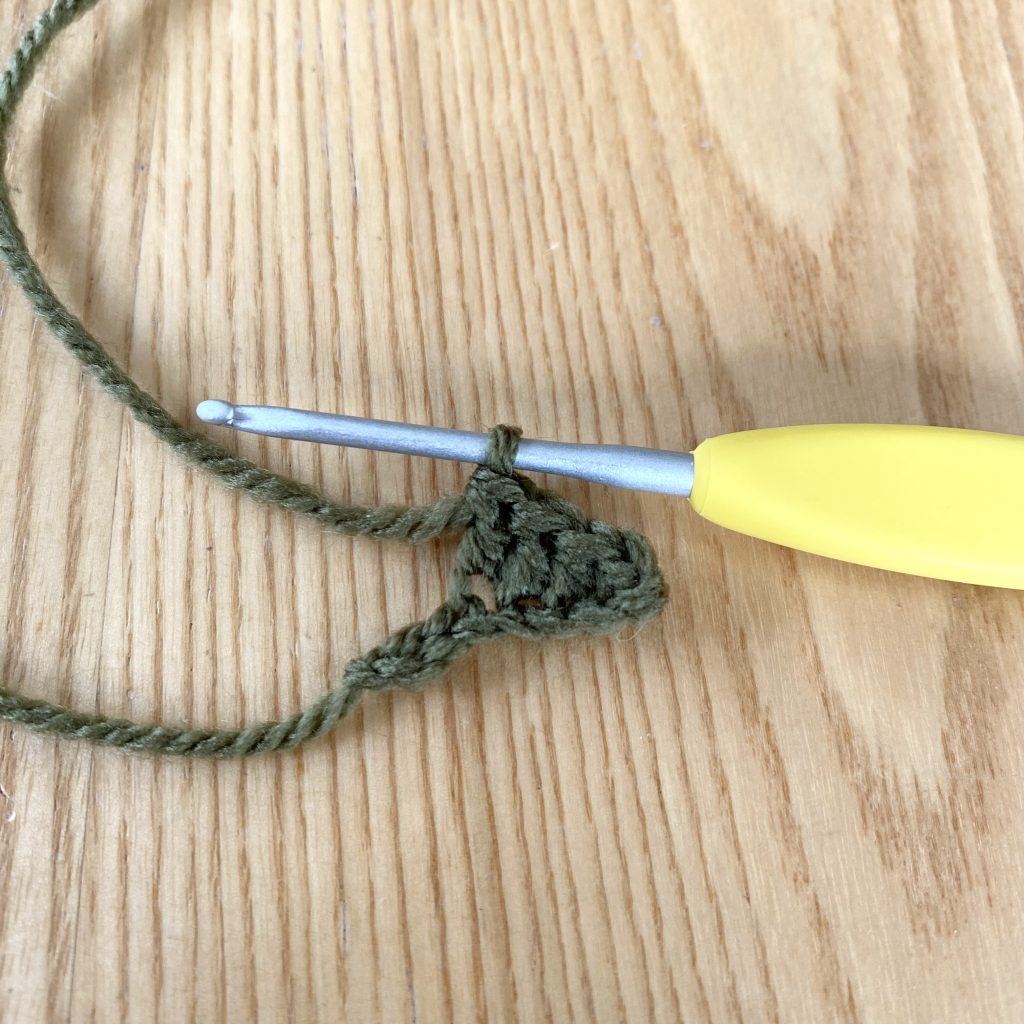
When starting the first row, work into the 3rd chain from the hook.
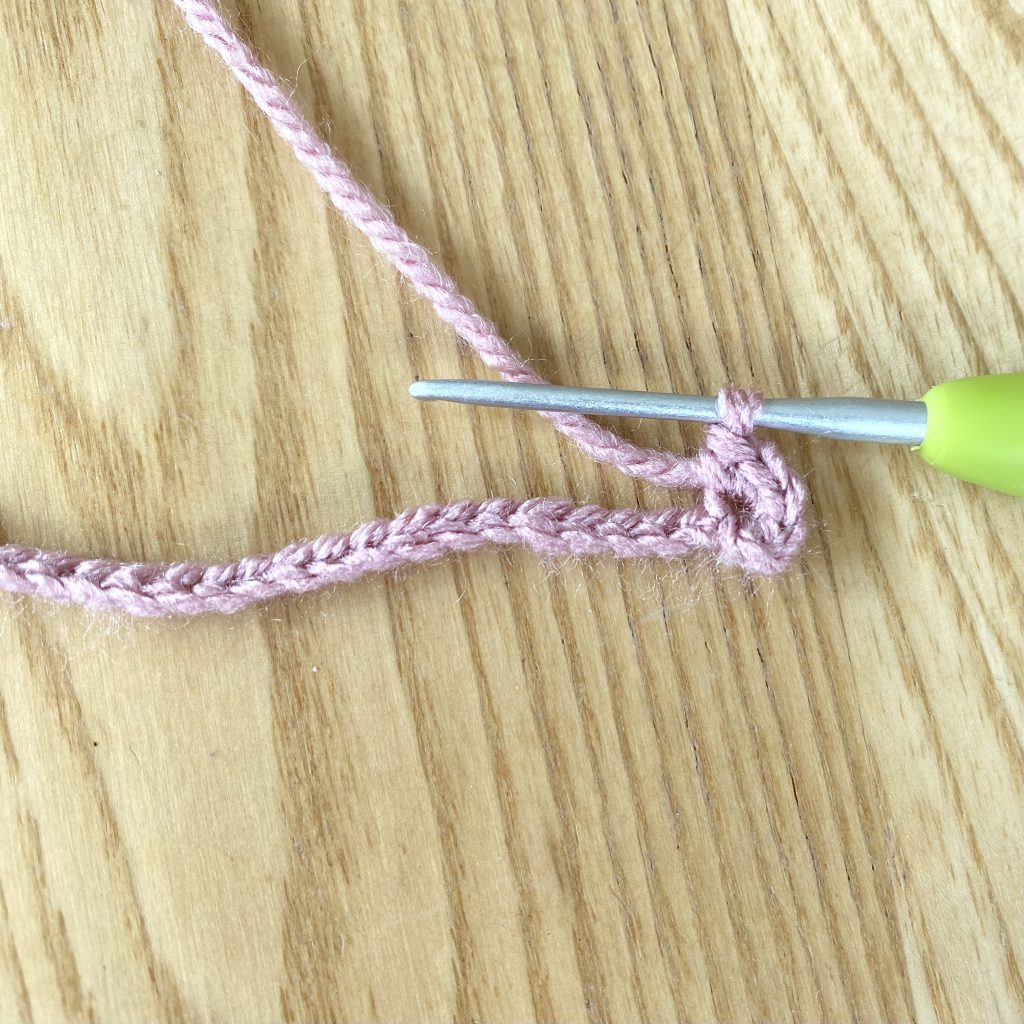
Work 4 dc into this stitch. Consider these 4 stitches, combined with the 2 turning chains, as a cluster of 5 dc, or 1 ‘petal’.
Skip the next stitch, so that you will be working into the second chain from your hook.
Slip stitch into that stitch.
Skip the next stitch, so that, again, you will be working into the second chain from your hook.
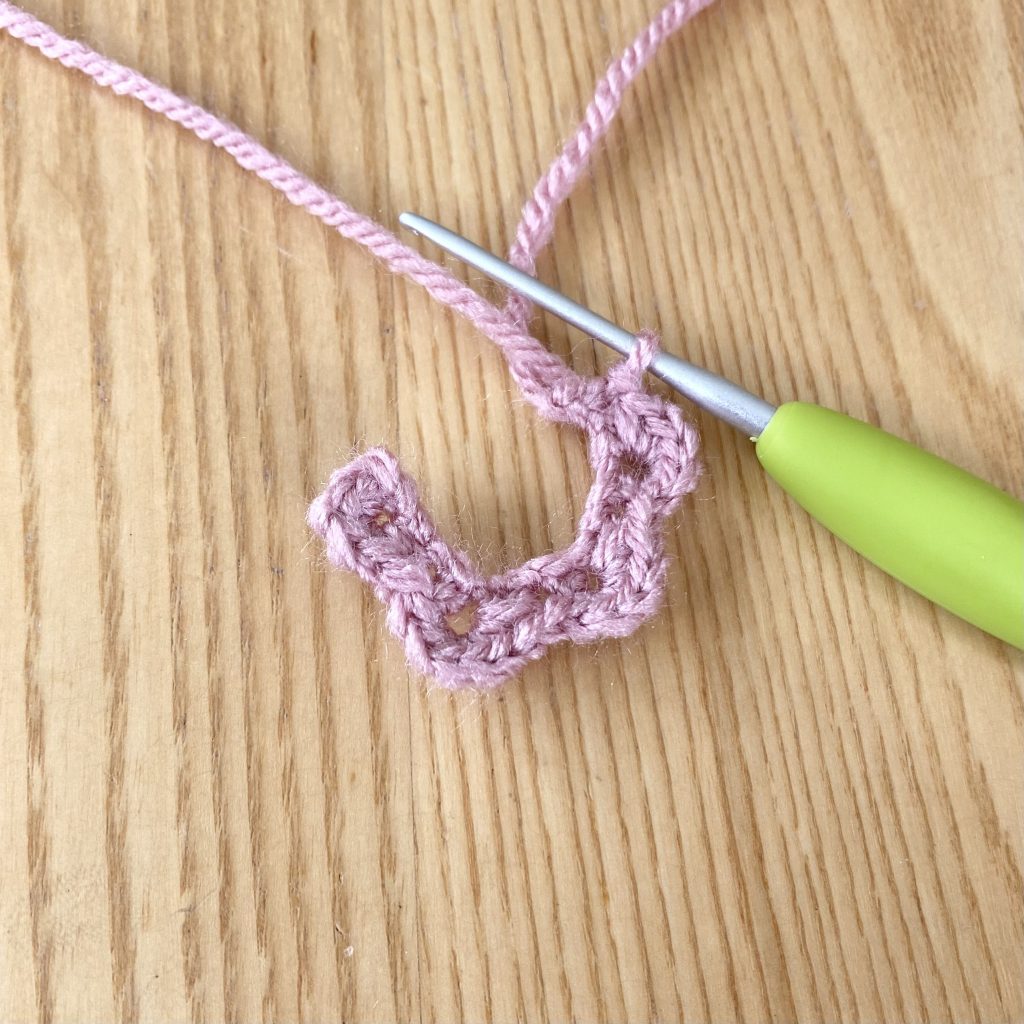
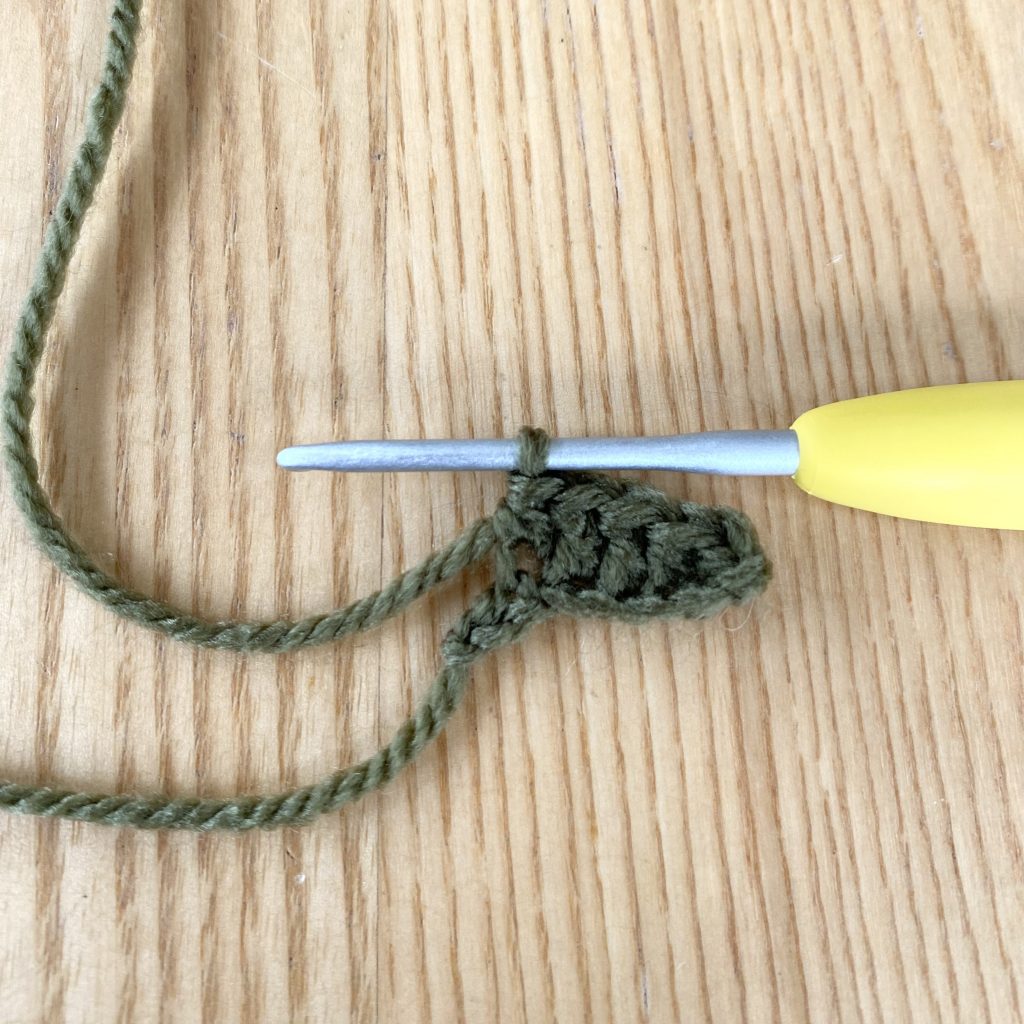
Work 5 dc into that stitch.
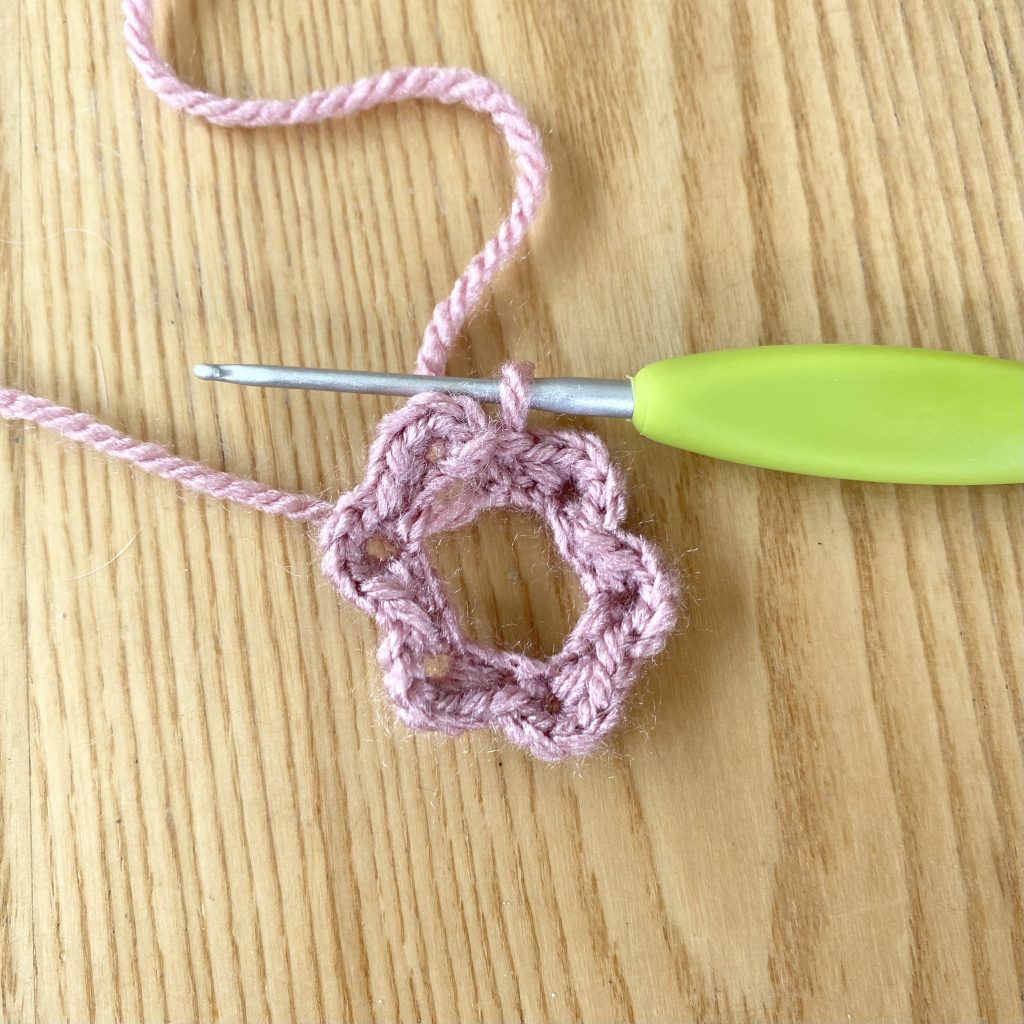
Keep working in this pattern (skip 1 stitch, 5dc in next chain, skip 1 stitch, ss into next) to the end of the row. You should now have 6 x 5 dc clusters (or 6 ‘petals’).
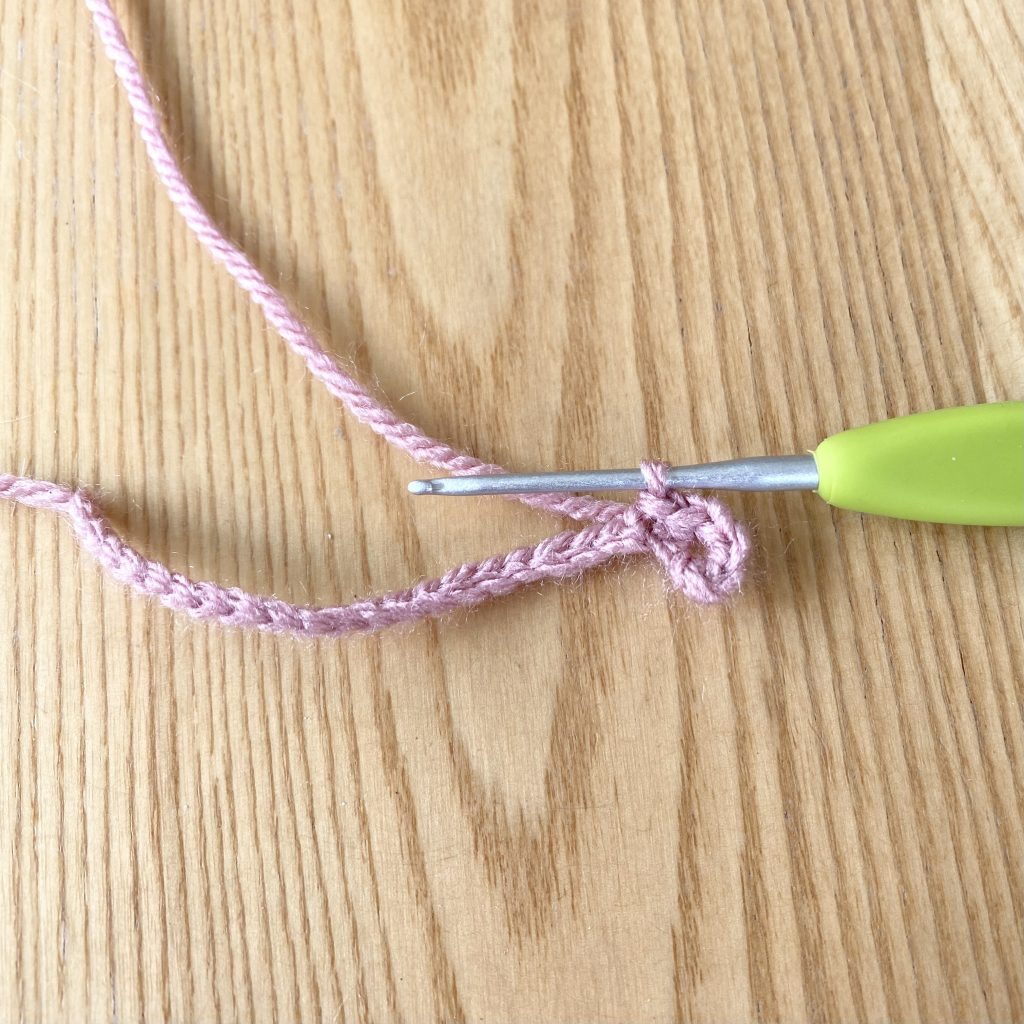
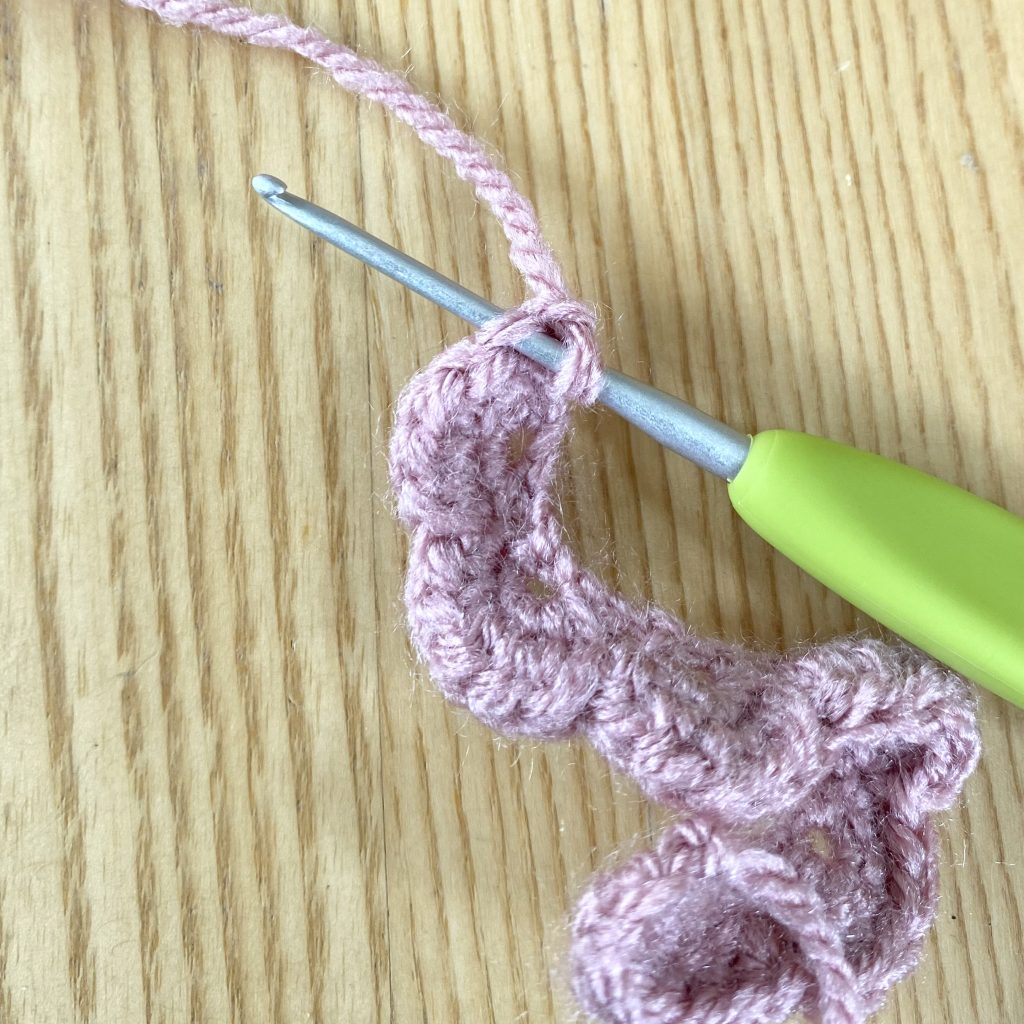
Turn and chain 1 to start the next round.
Skip the first slip stitch, so that you will start by working into the 2nd stitch from your hook (i.e. the first dc stitch).
Htr into each of the next 5 stitches (i.e. into each of the 5 dc from the row below).
Slip stitch into the next stitch (which is also a slip stitch, from the row before).
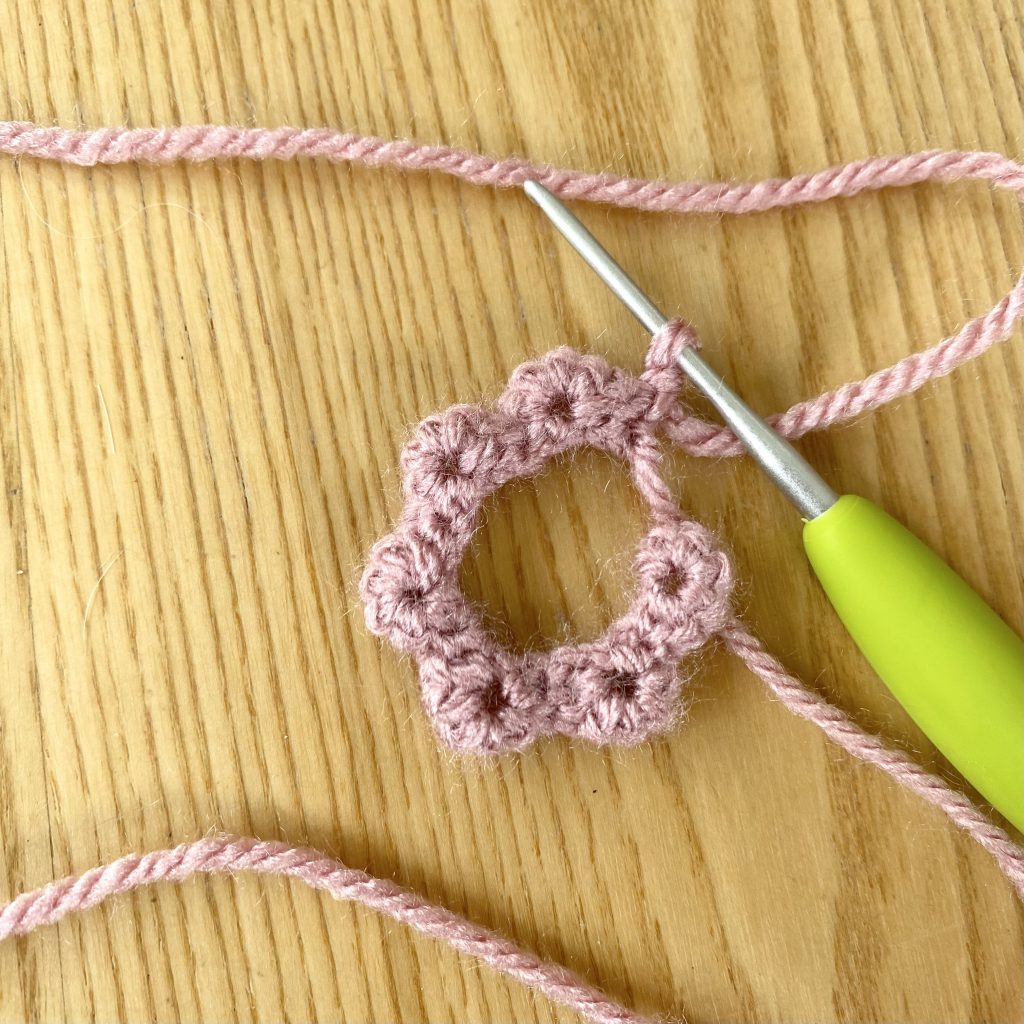
Continue working in this pattern (htr 5, ss) to the last 5 stitches (or the last petal). Work 4 htr into the next 4 stitches (the 4 dc from the row below), then work one final htr into the top of the ch 2 from the previous row.
Turn and chain 1 to start the next row. From now on, you will be working into the front loops only. This helps to give a delicate shape to the petals.
Dc into the first stitch (the last htr from the row below).
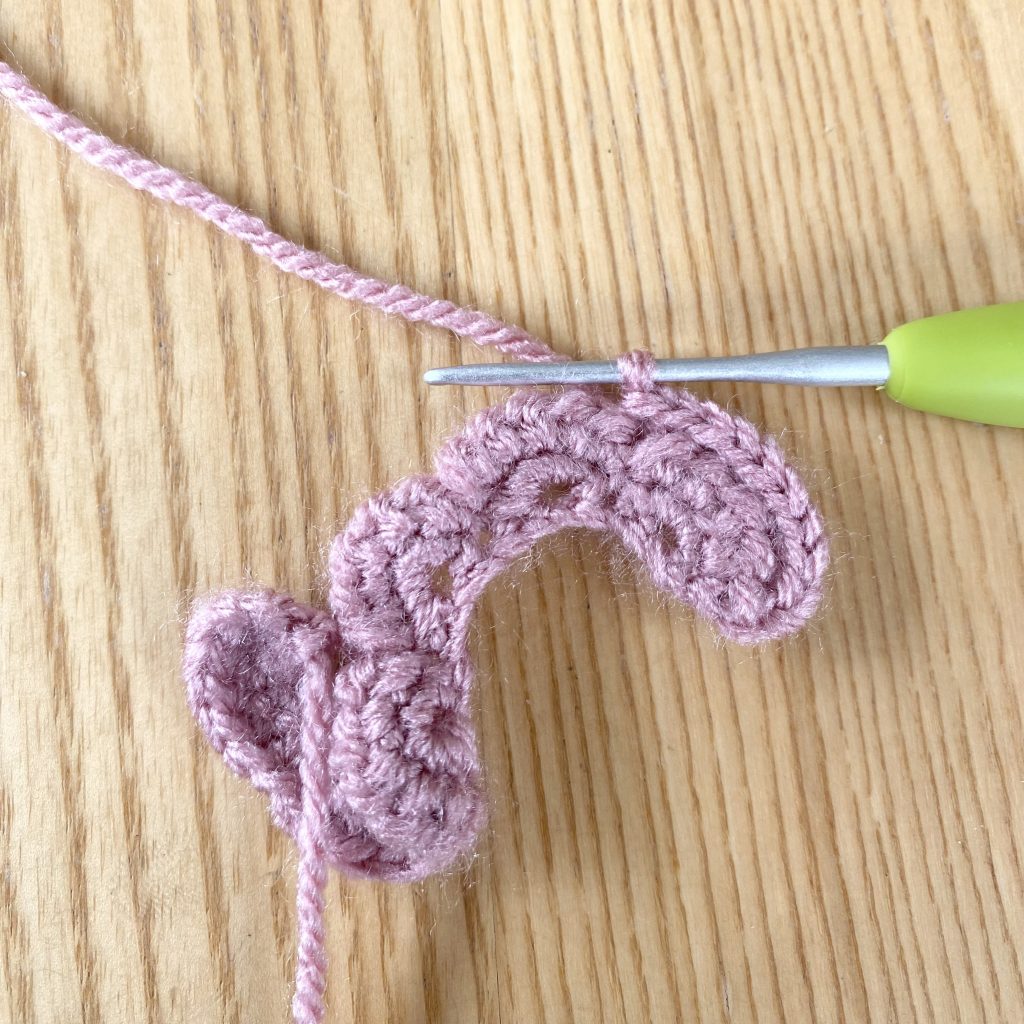
Work 2dc into each of the next 3 stitches, then dc into the next stitch. Finish off this first petal by working a slip stitch into the next stitch.
Work in this pattern (dc, 2 dc in next 3 stitches, dc, ss in next stitch) to the end of the row.
Cut the yarn and sew in this end, leaving the long end from the starting chain to secure the rose after winding/sew the rose onto the blanket.
Making the Small Roses
The smaller roses are made in a very similar manner to the larger roses, except they have fewer petals and are worked up in 2 rows, as opposed to 3.
Using a 2mm hook, chain 17. Leave a long end (approx. 30cm) for attaching the rose to the blanket later on.
Work 4 dc into the 3rd chain from the hook. Like with the larger rose, these 4 stitches, combined with the 2 starting chains, count as a cluster of 5 dc, or 1 ‘petal’.
Skip 1 stitch, then slip stitch into the next. Work in the following pattern: (skip 1 stitch, 5dc in next chain, skip 1 stitch, ss into next) to the end of the row. You should end up with 4 x 5 dc clusters (or 4 ‘petals’).
Turn and chain 1 to start the next row. From now on, you will be working into the front loops only. This helps to shape to the rose petals.
Skip the first slip stitch, then work in the following pattern to the end of the row: (dc, 2dc in next 3 stitches, dc, ss in next stitch) to end.
Cut the yarn and sew in this end, leaving the long end from the starting chain to secure the rose after winding/sew the rose onto the blanket.
Winding the Roses
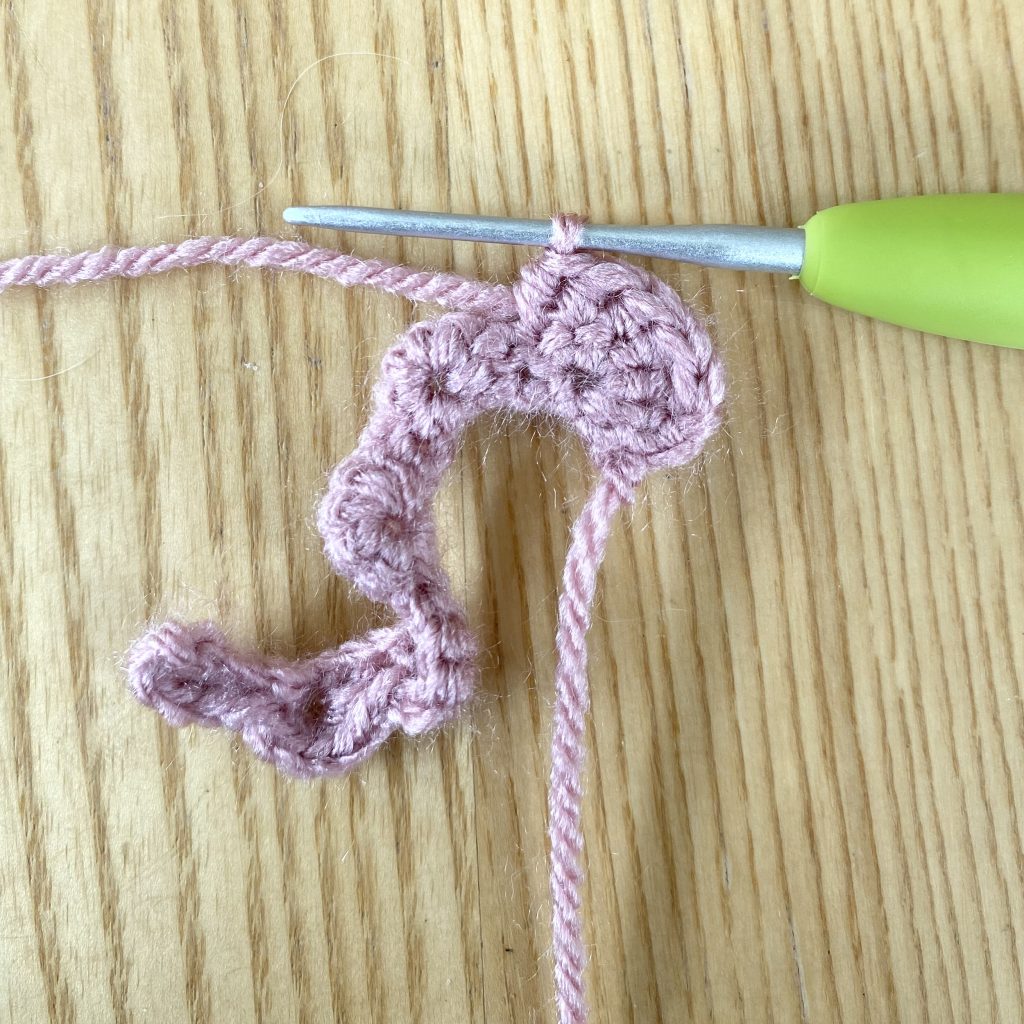
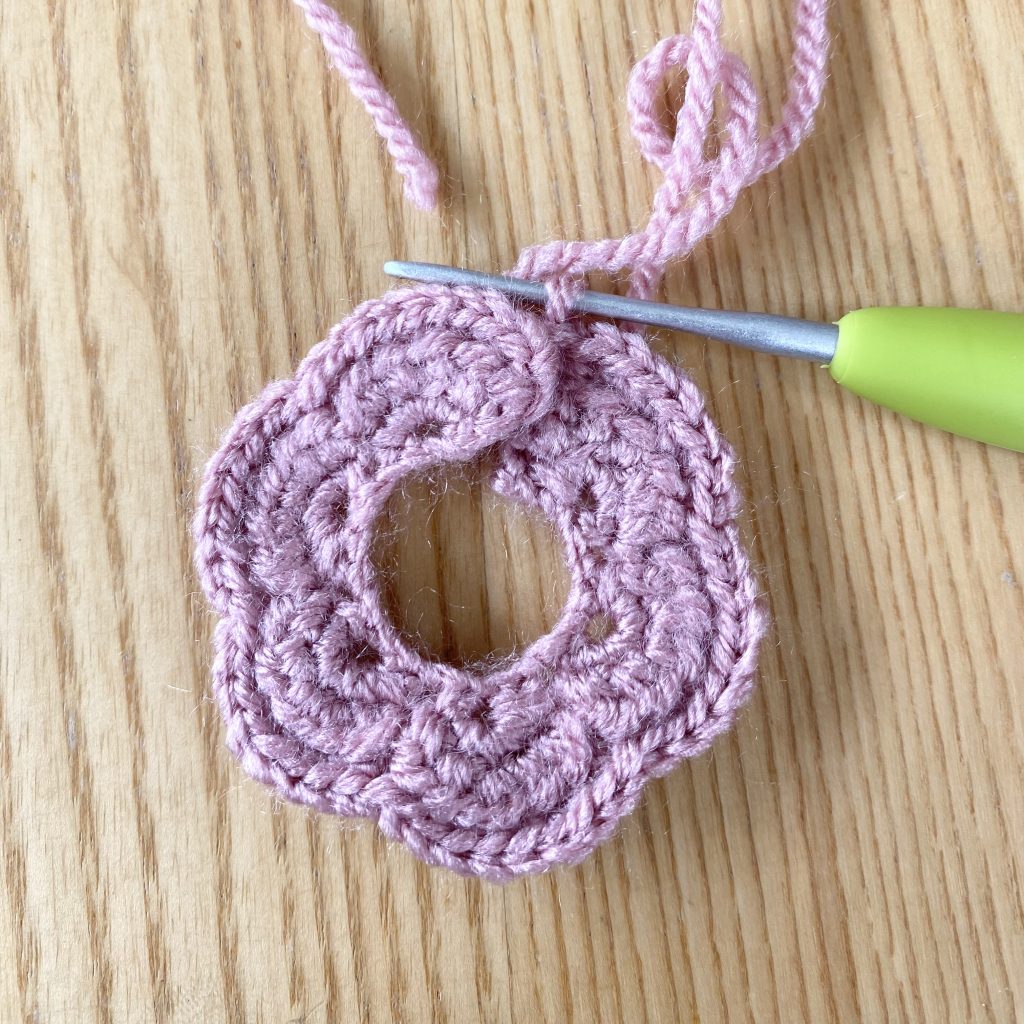
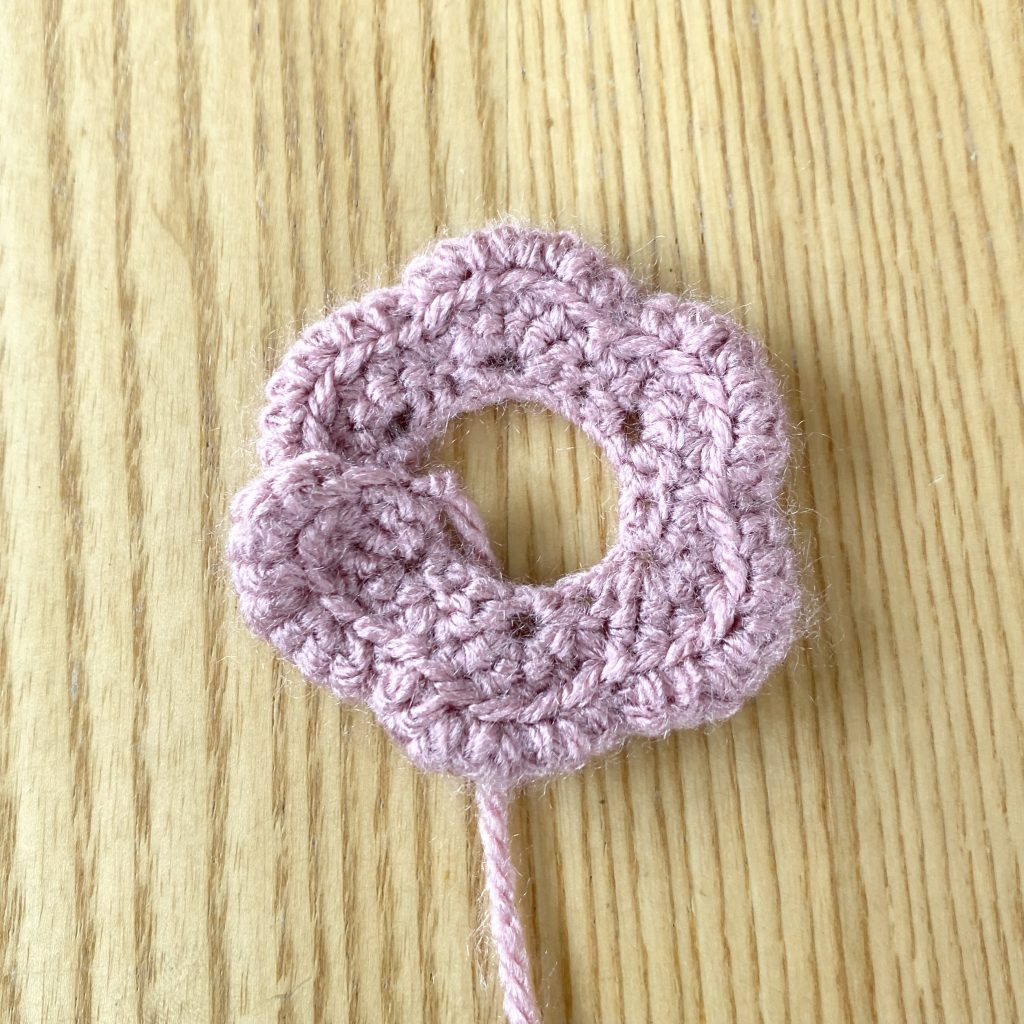
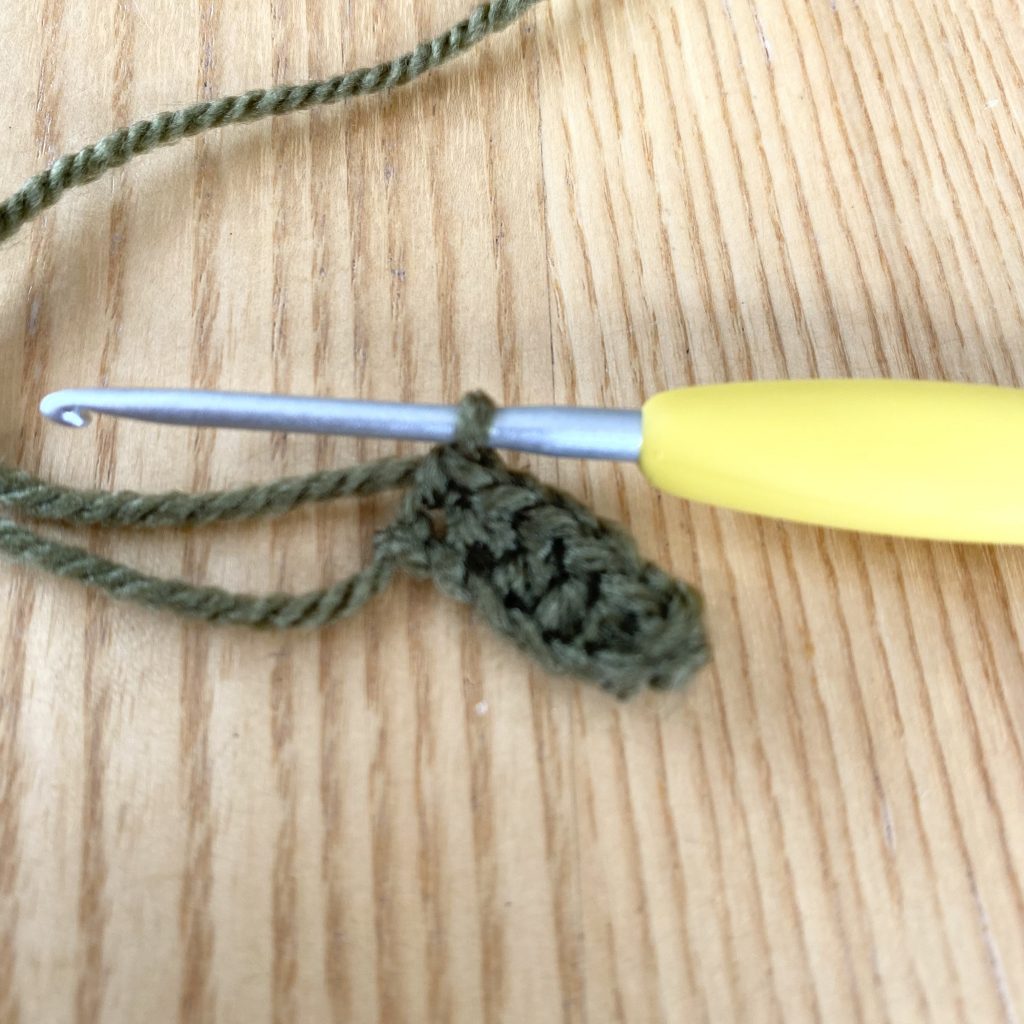
To take the roses from flat, scalloped pieces to 3D flowers, you need to roll up the crocheted piece.
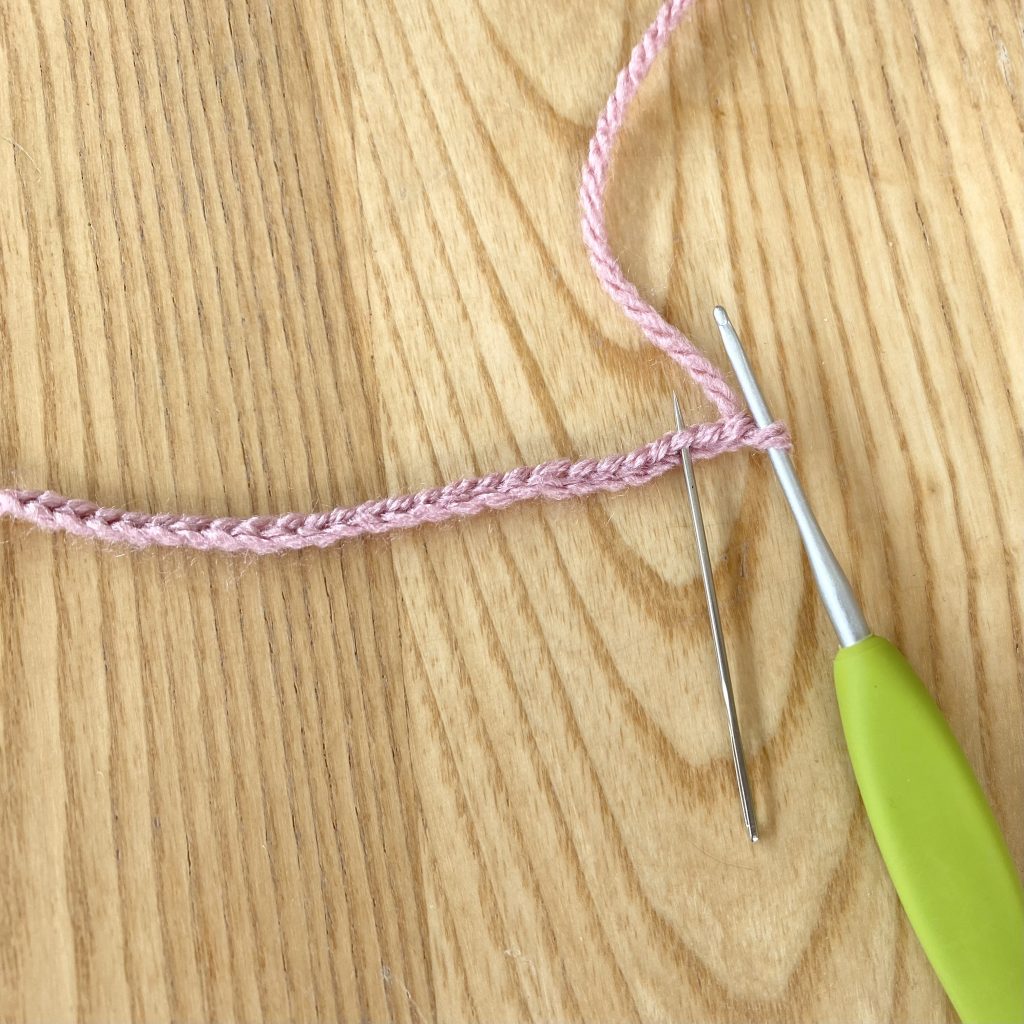
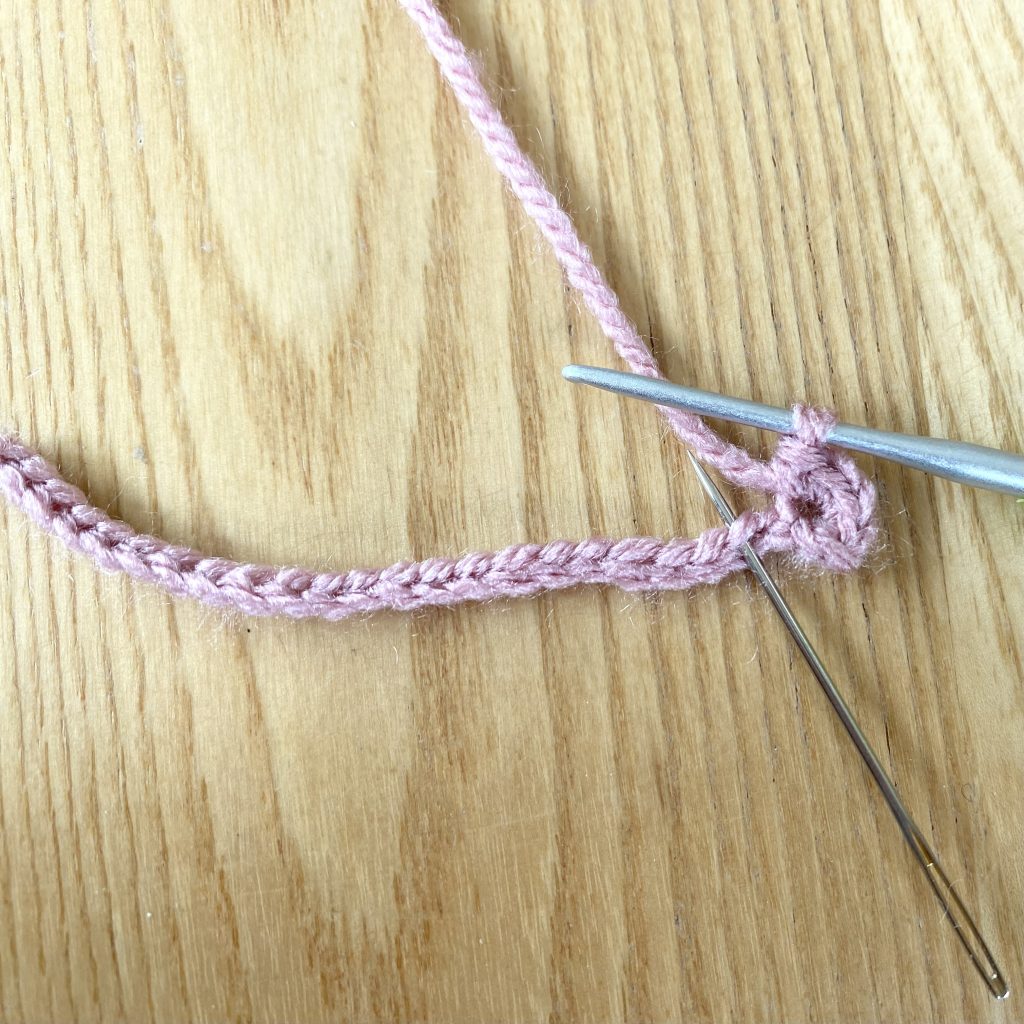
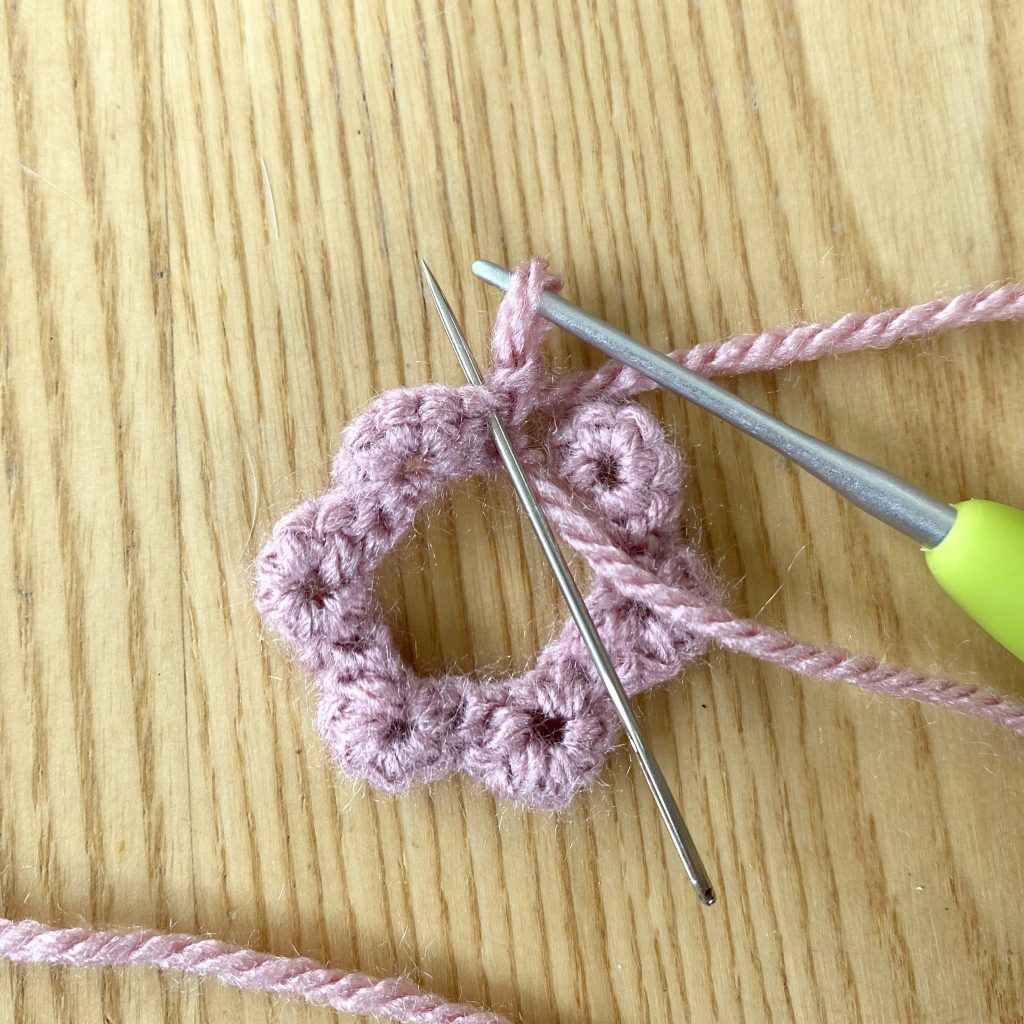
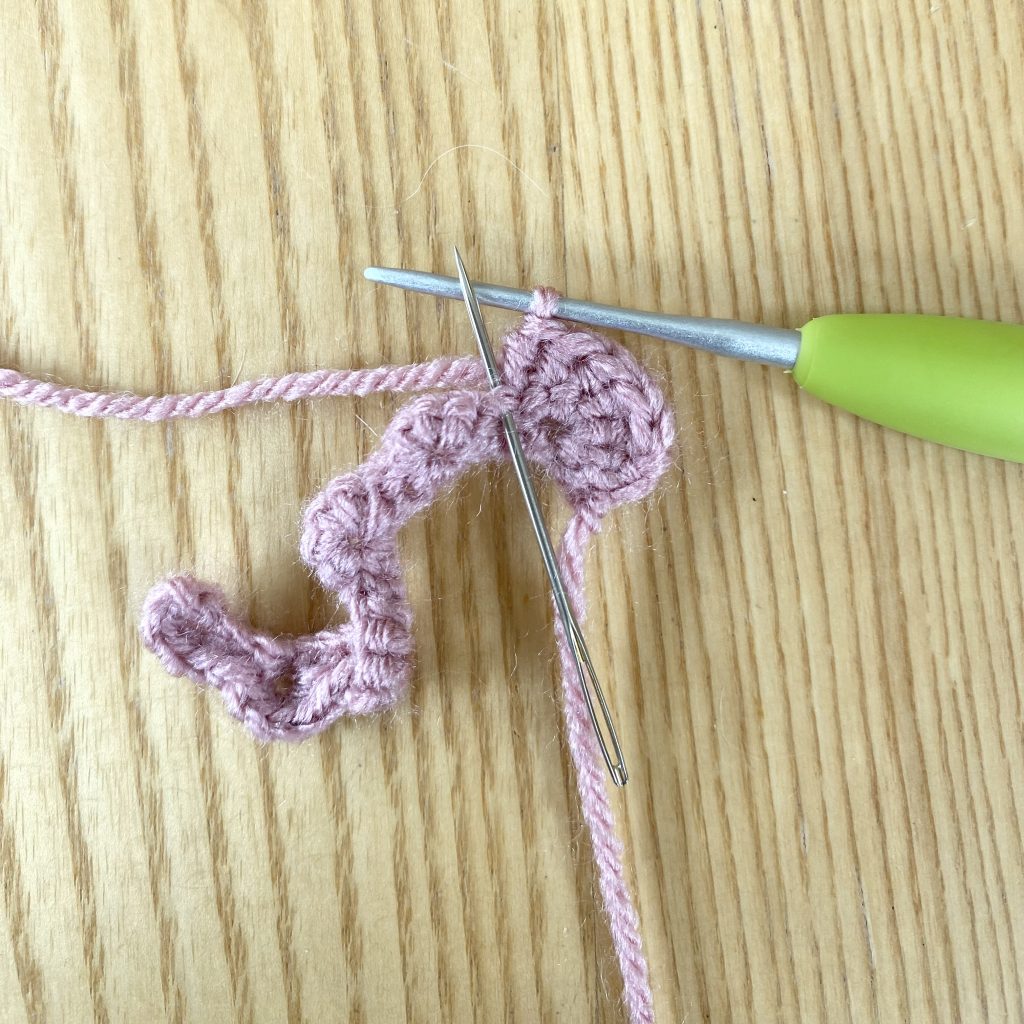
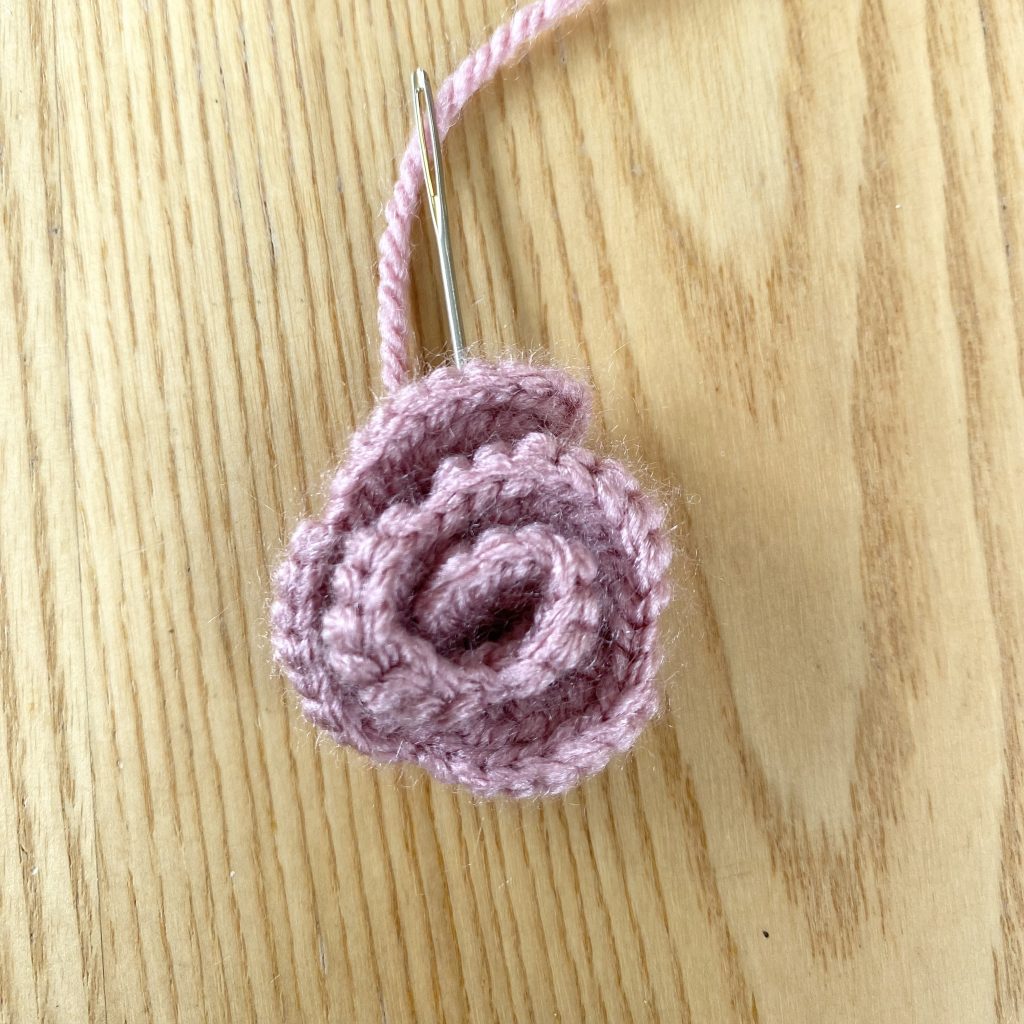
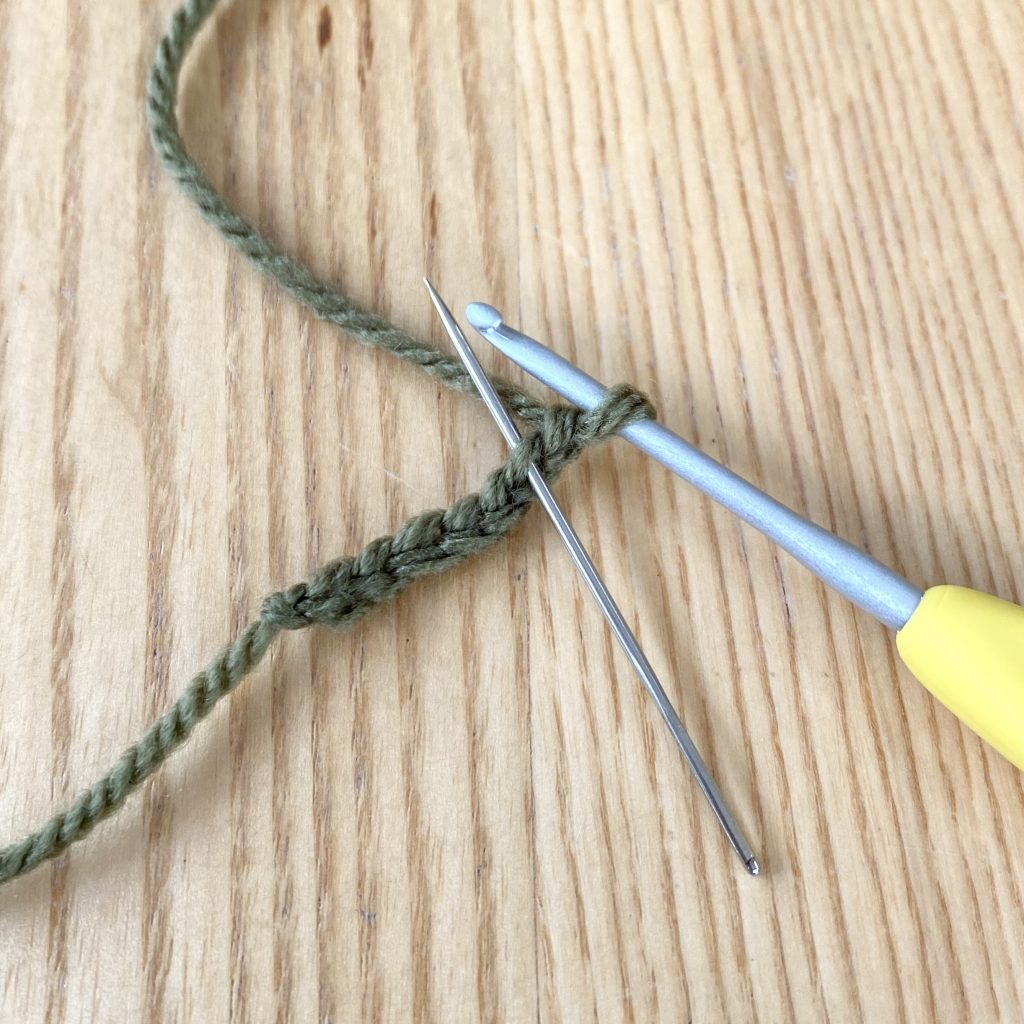
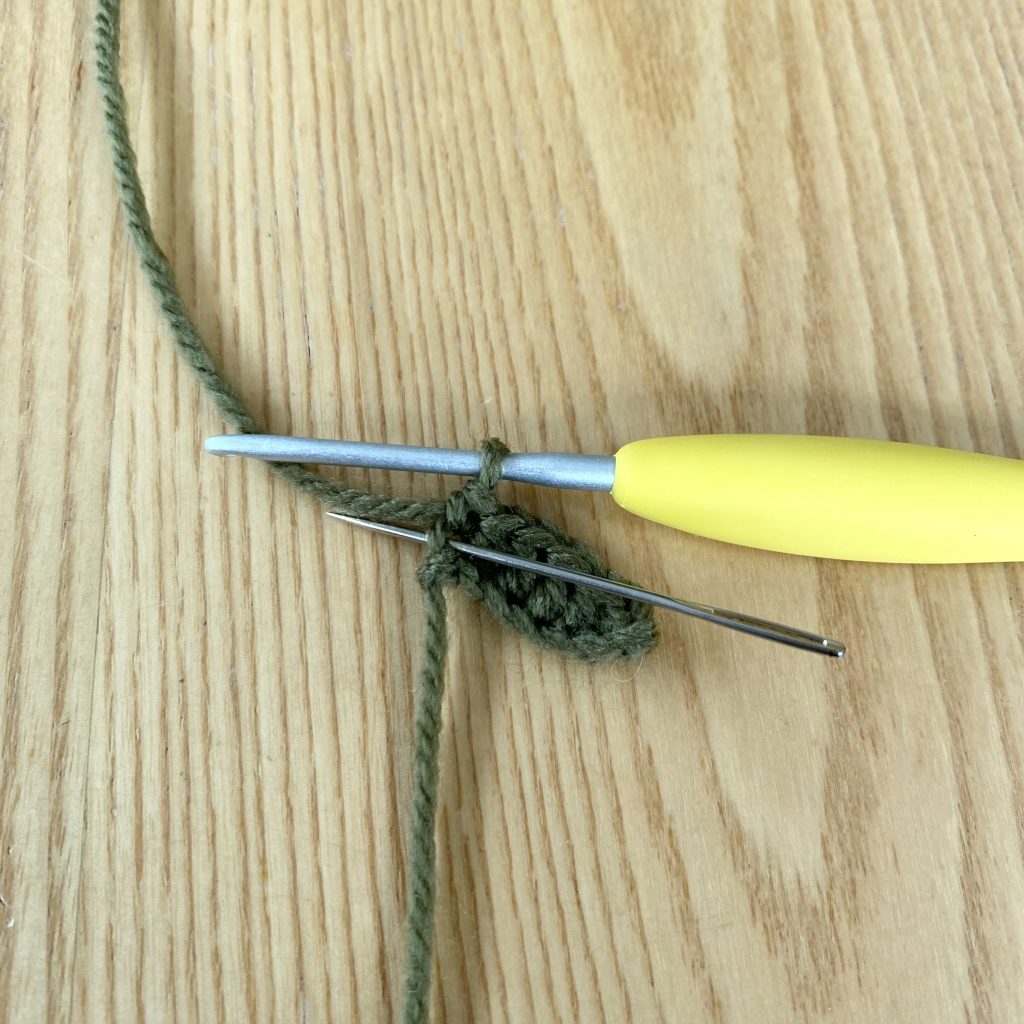
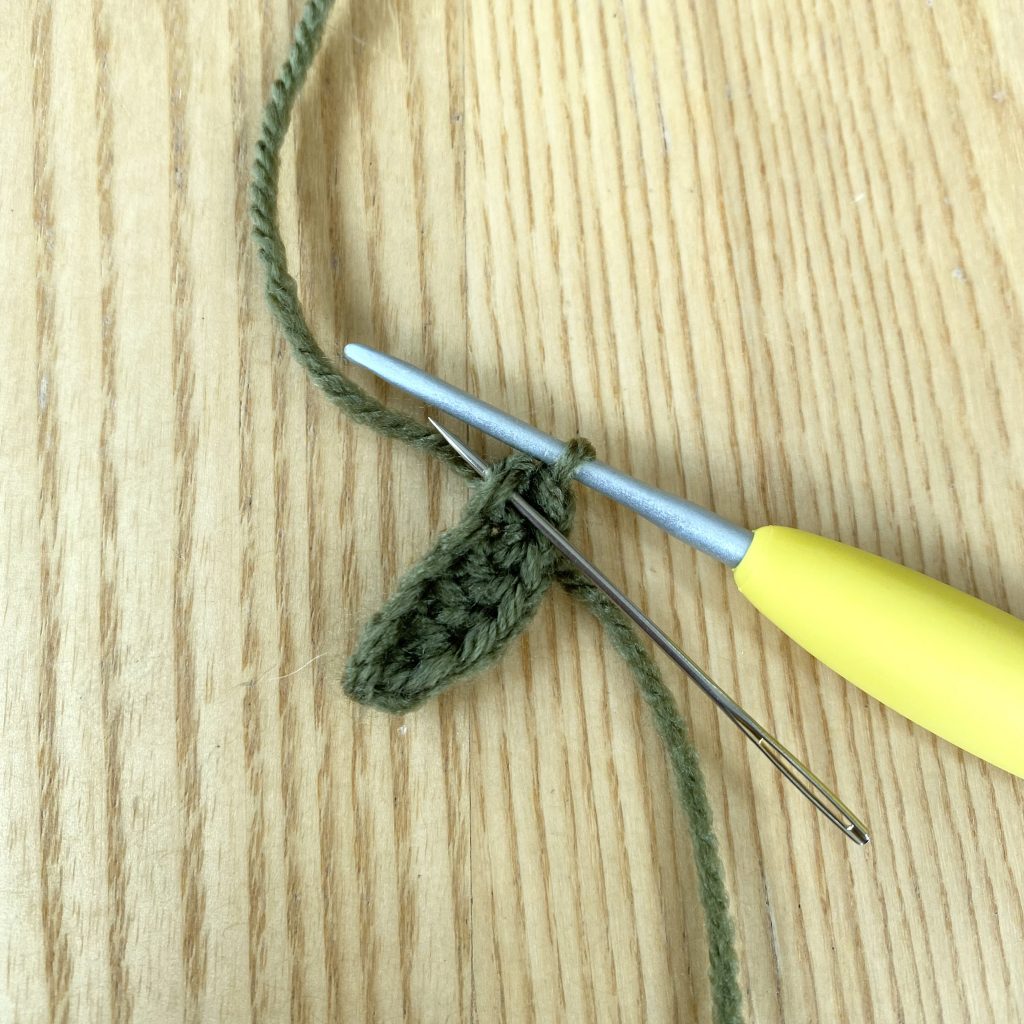
Start by threading the remaining end onto a sewing needle. You will use this end to secure the roll and it’s much easier to thread it before you’ve rolled up the rose!
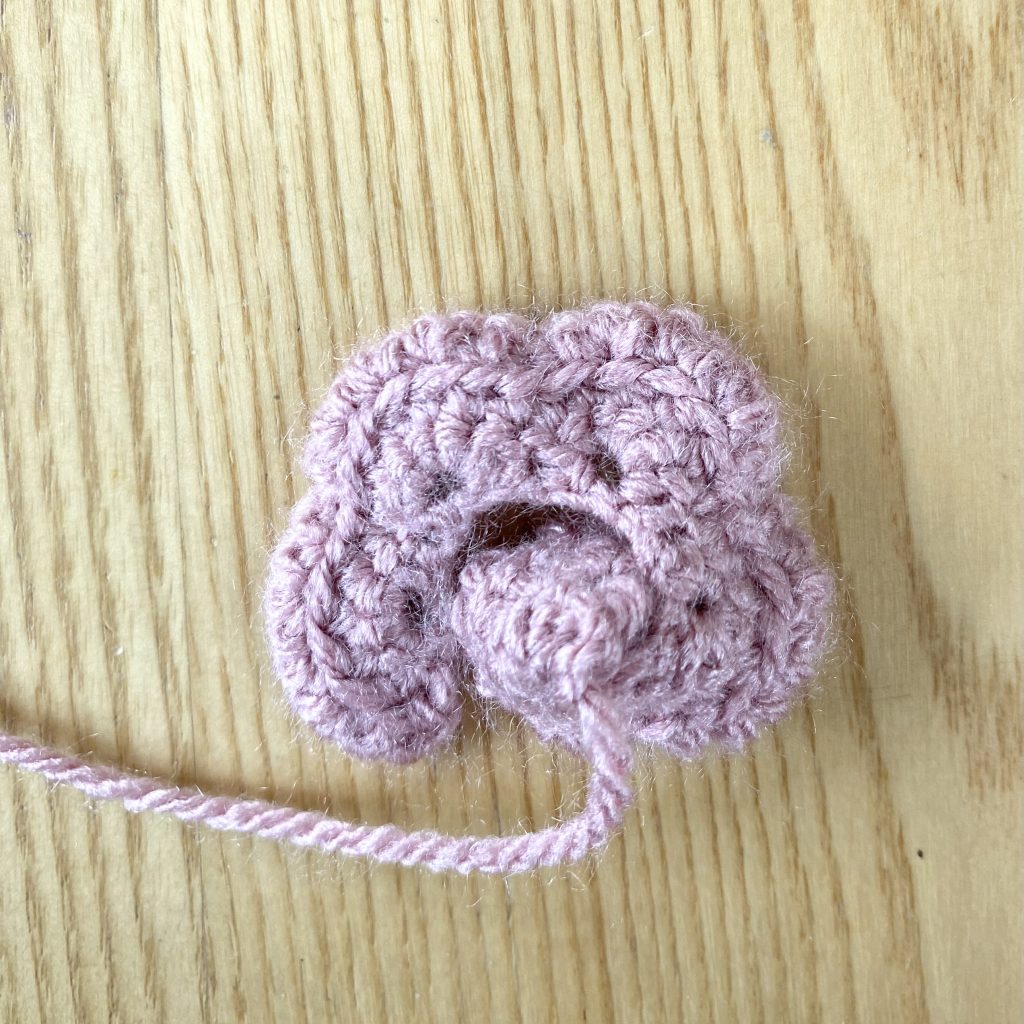
Roll the rose up along the inner edge (i.e. the straight, non-scalloped edge), this will form the bottom of the rose, with the scalloped edge forming the top of the petals. Keep the bottom edge level as you roll and aim to roll it nice and tightly, for the most secure rose.
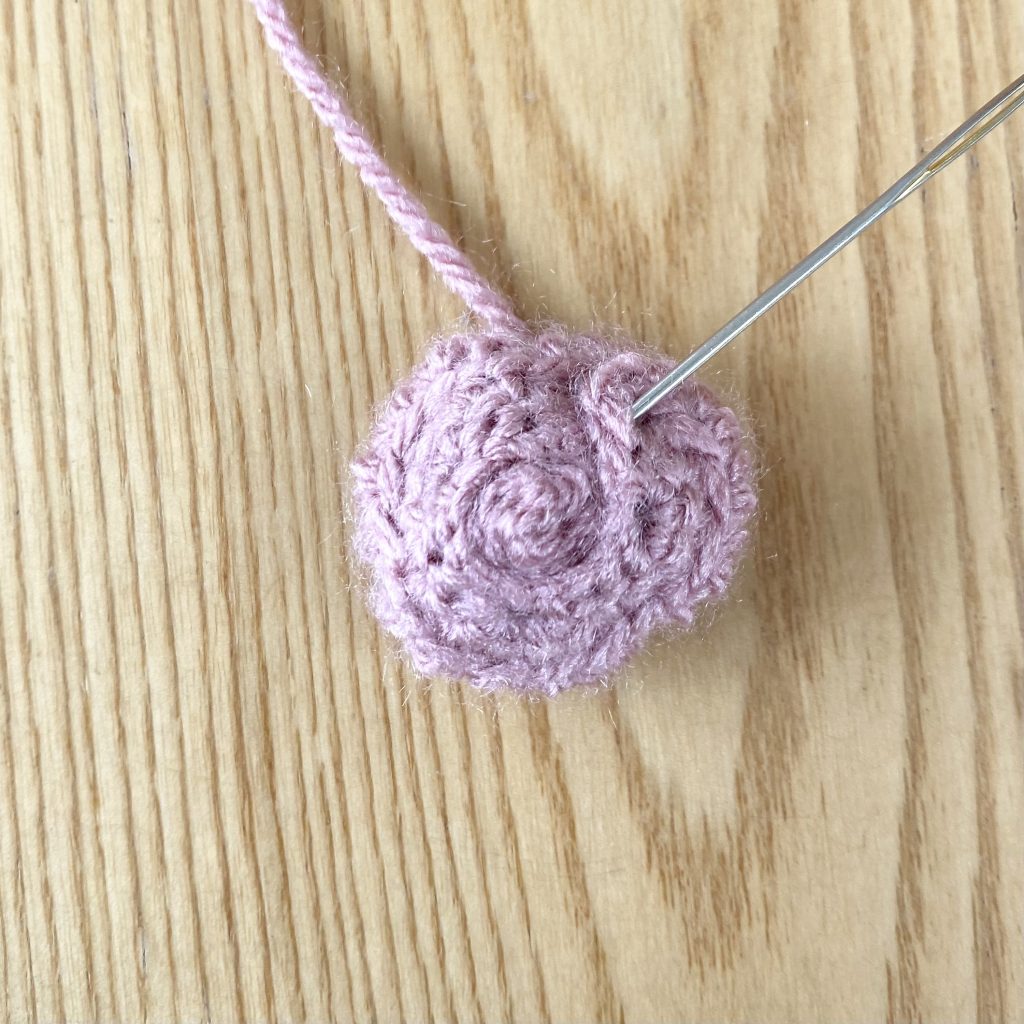
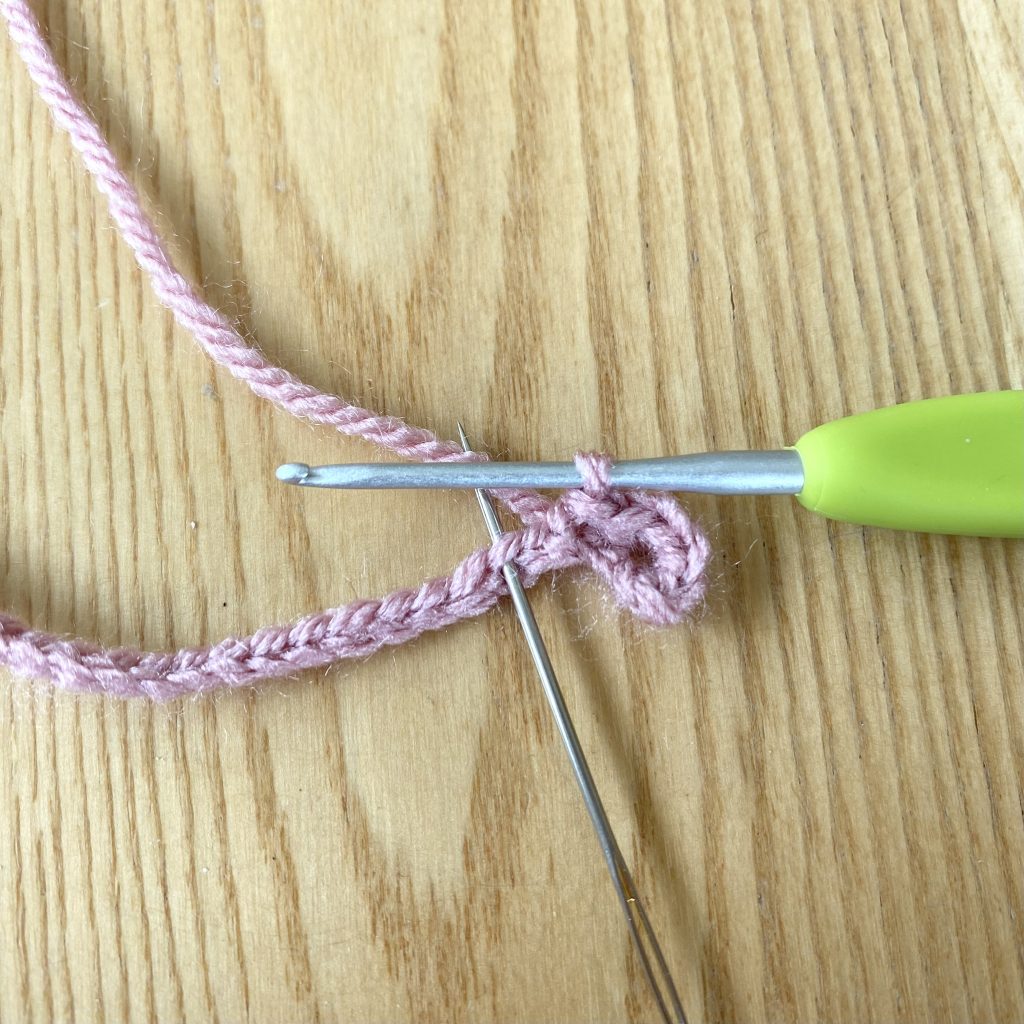
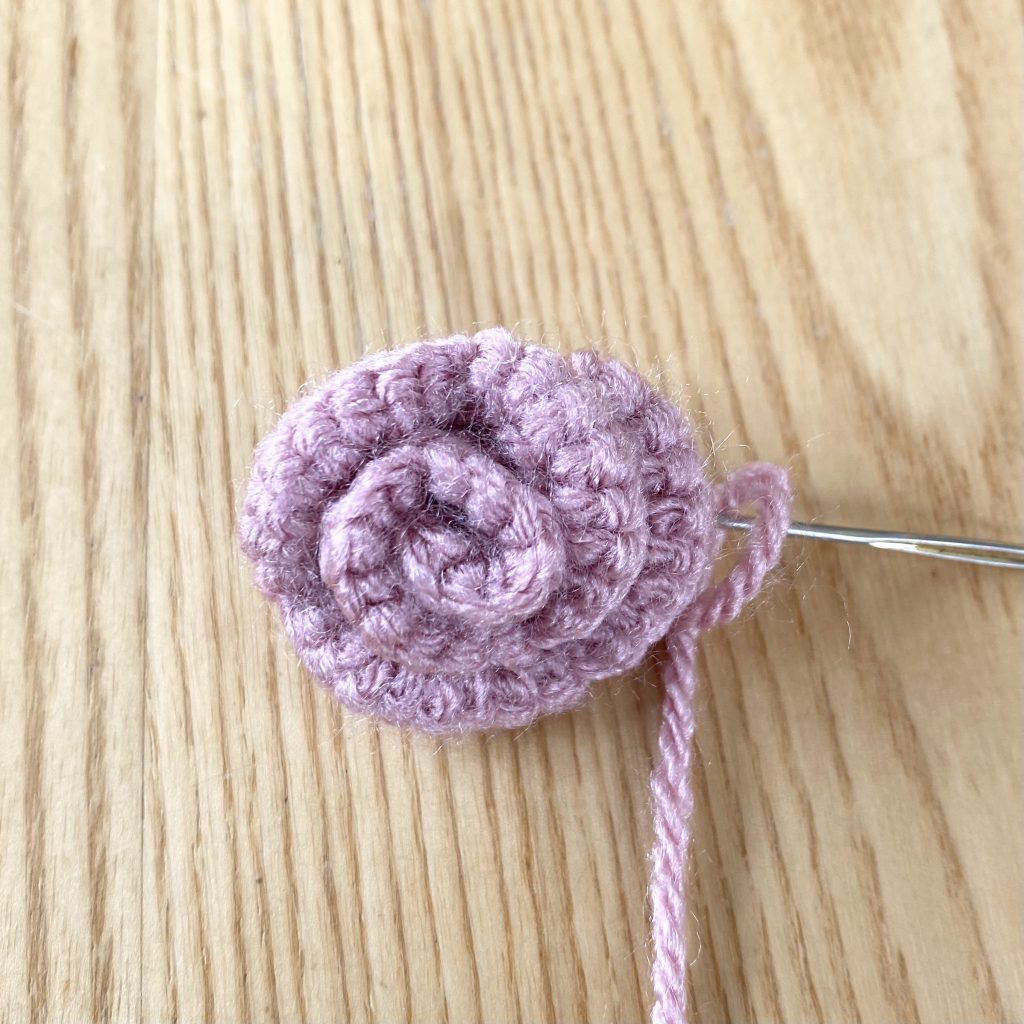
Once you have your roll, you need to secure it. Use the threaded needle and push it through the base of the rose a few times, staying relatively close to that bottom edge and making sure to catch each of layers of the spiral at some point.
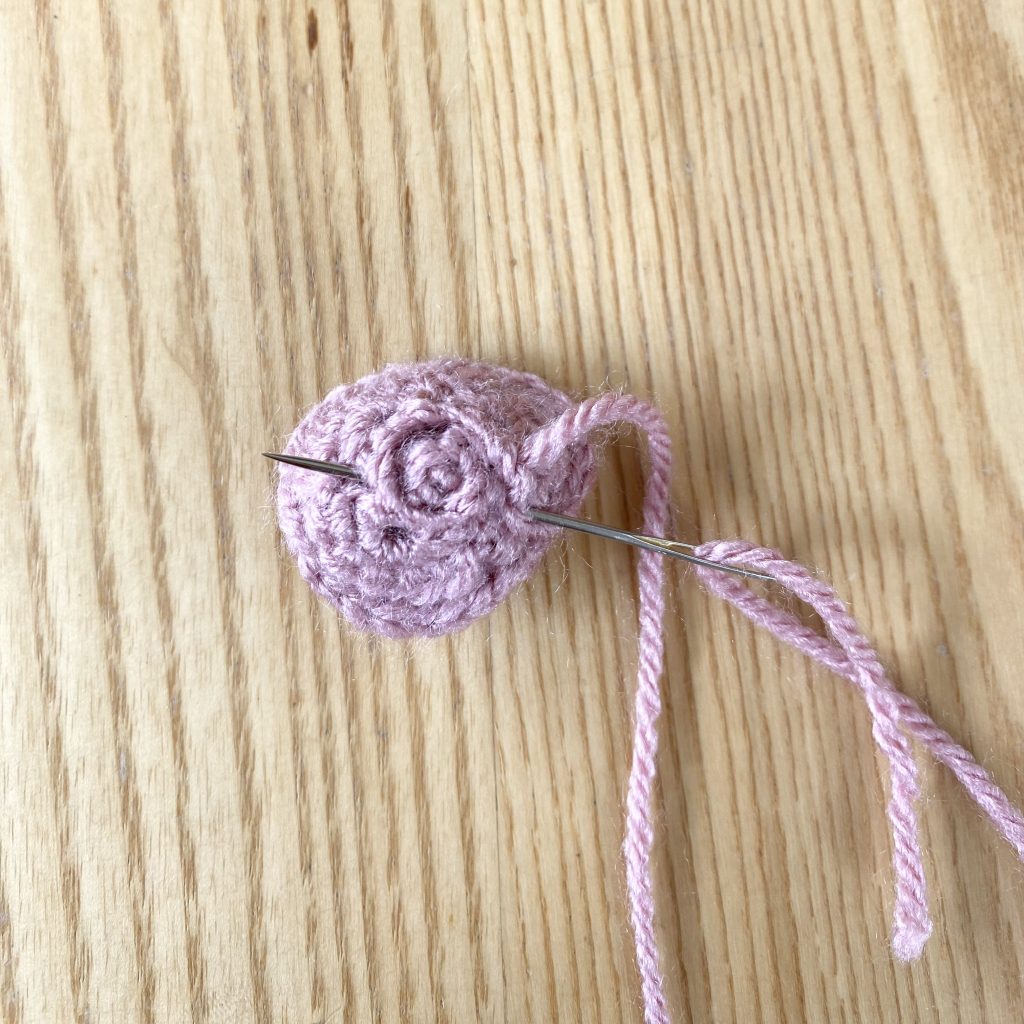
Once your rose ‘roll’ is firmly secured, you can remove the sewing needle. Do NOT cut the yarn at this point- you will still need it to attach the rose to the blanket! Just set the rose aside as it is, ready for when you assemble the blanket.
Not All Rolls Are Made Equal
The direction in which you roll the rose does make a difference! Luckily, it just changes the appearance of the roses ever so slightly- so you can roll whichever way you prefer. I’ve used a combination of the two styles for my blanket, but you can do whatever you like!
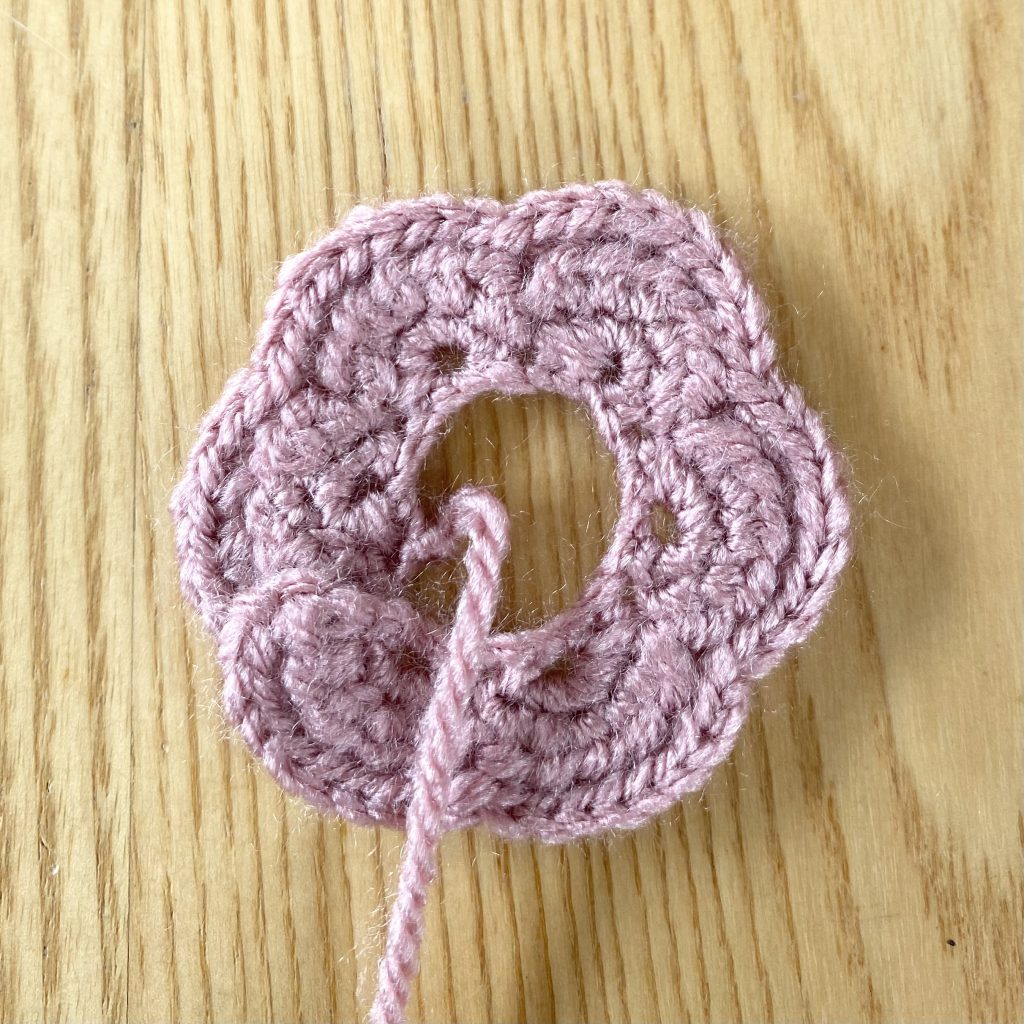
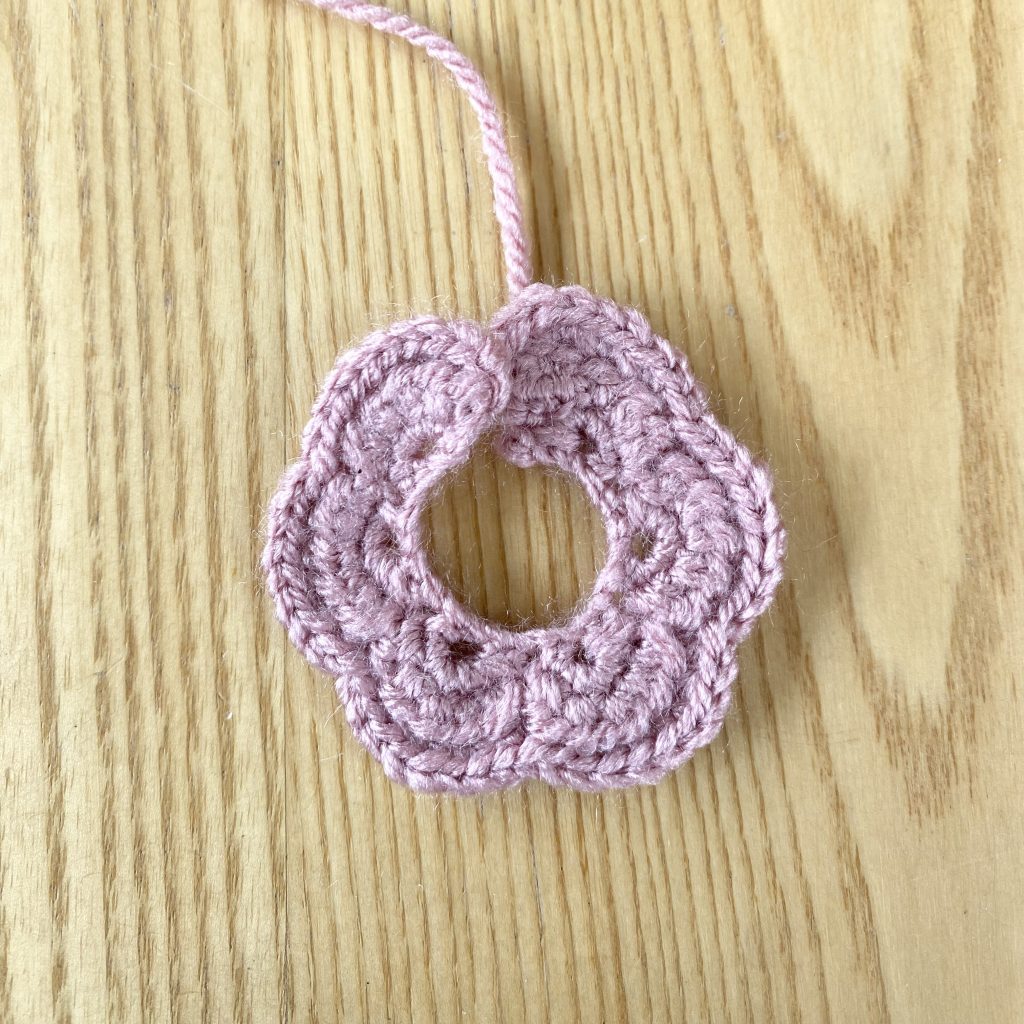
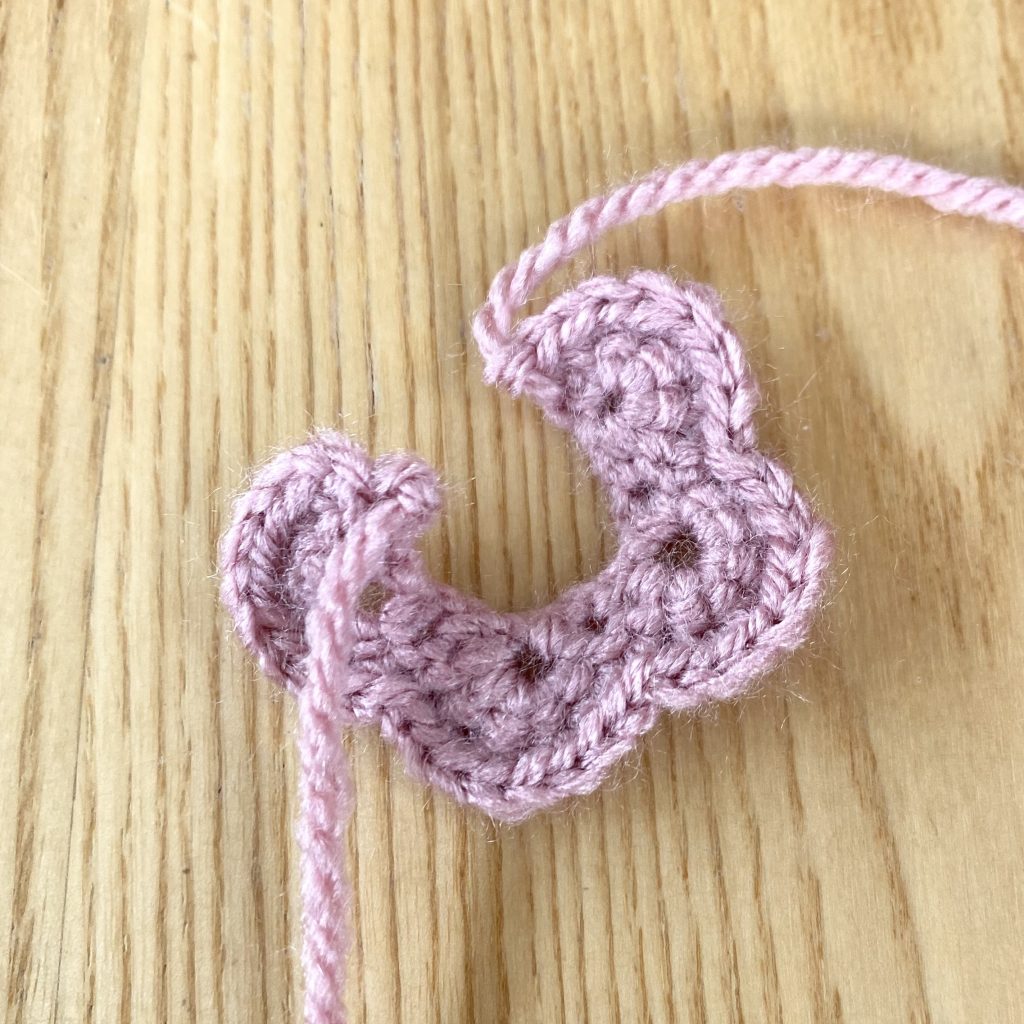
Consider the initial, flat crocheted piece. Because of the way we worked the final round, working into the front loops only, there is a clear distinction between the two sides of the fabric.
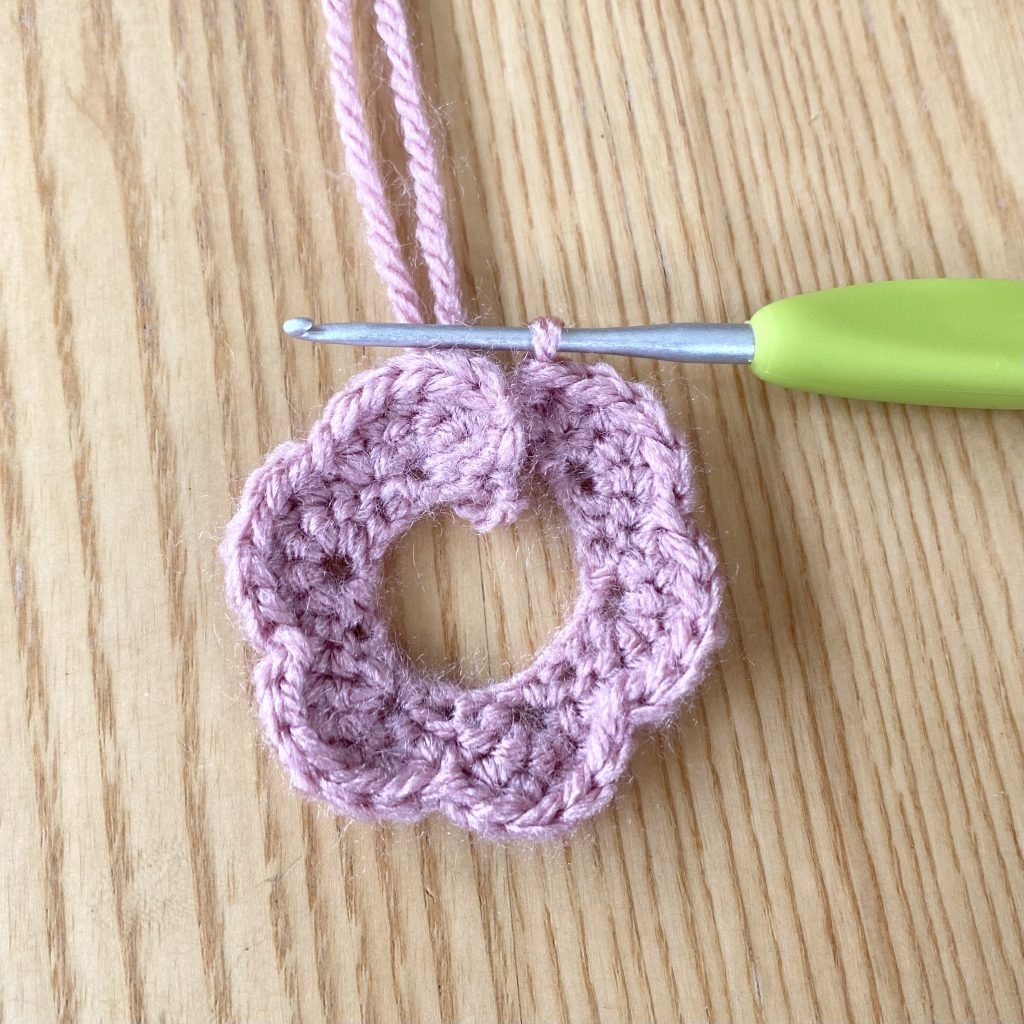
If you roll the rose with the right side facing inwards, you’ll end up with a rose that looks a little like this- it’s got a slightly cupped, bulbous shape, as if the rose hasn’t quite fully opened yet.
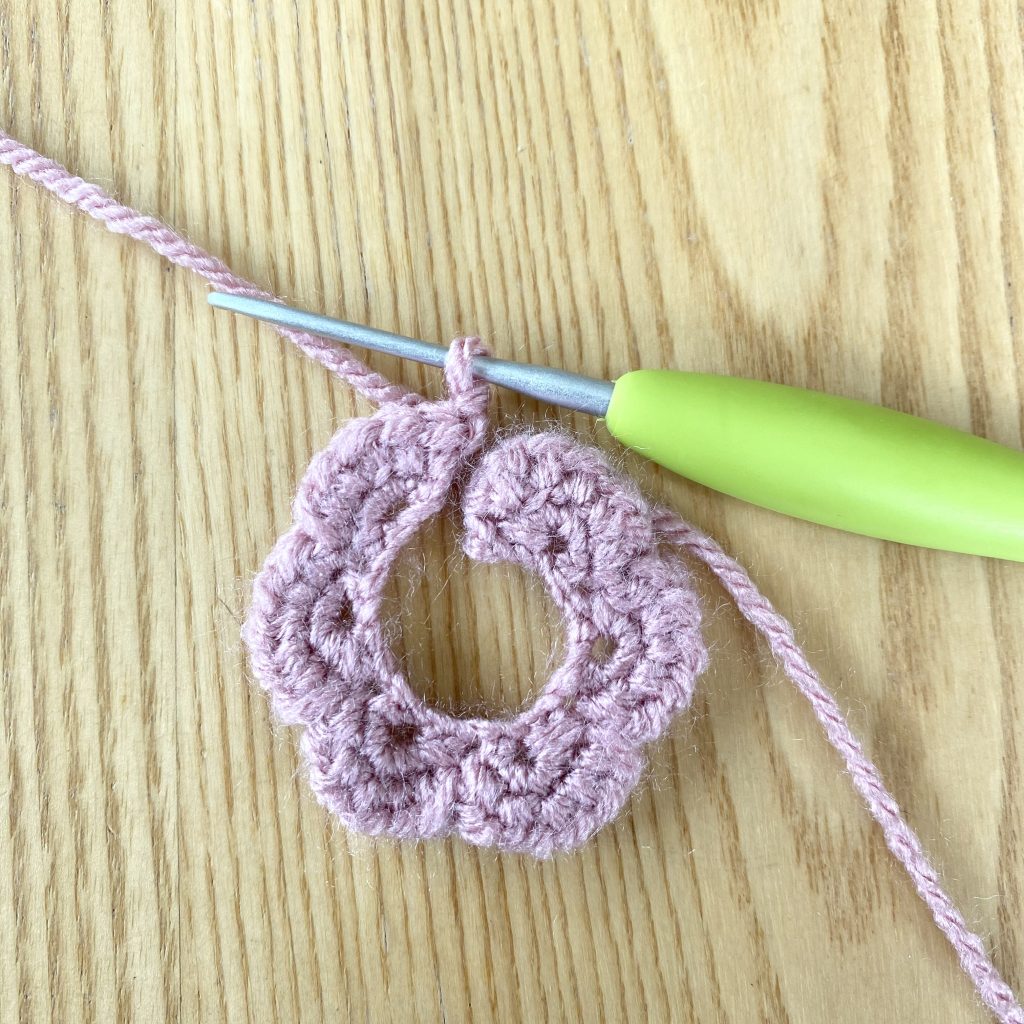
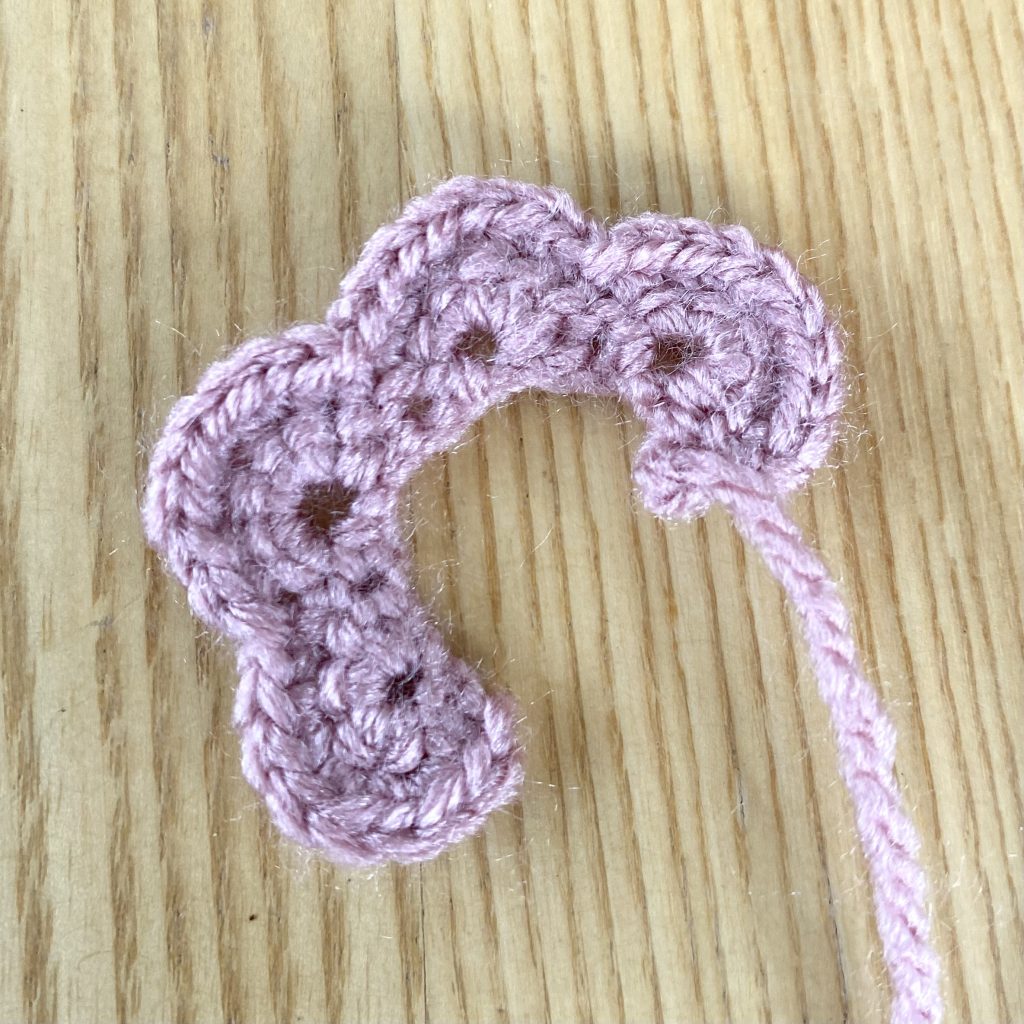
If you roll the rose with the right side facing outwards, you’ll end up with a rose that looks like this- the spiral effect is slightly more prominent and the rose looks like it is a little more ‘open’ and ‘in bloom’.
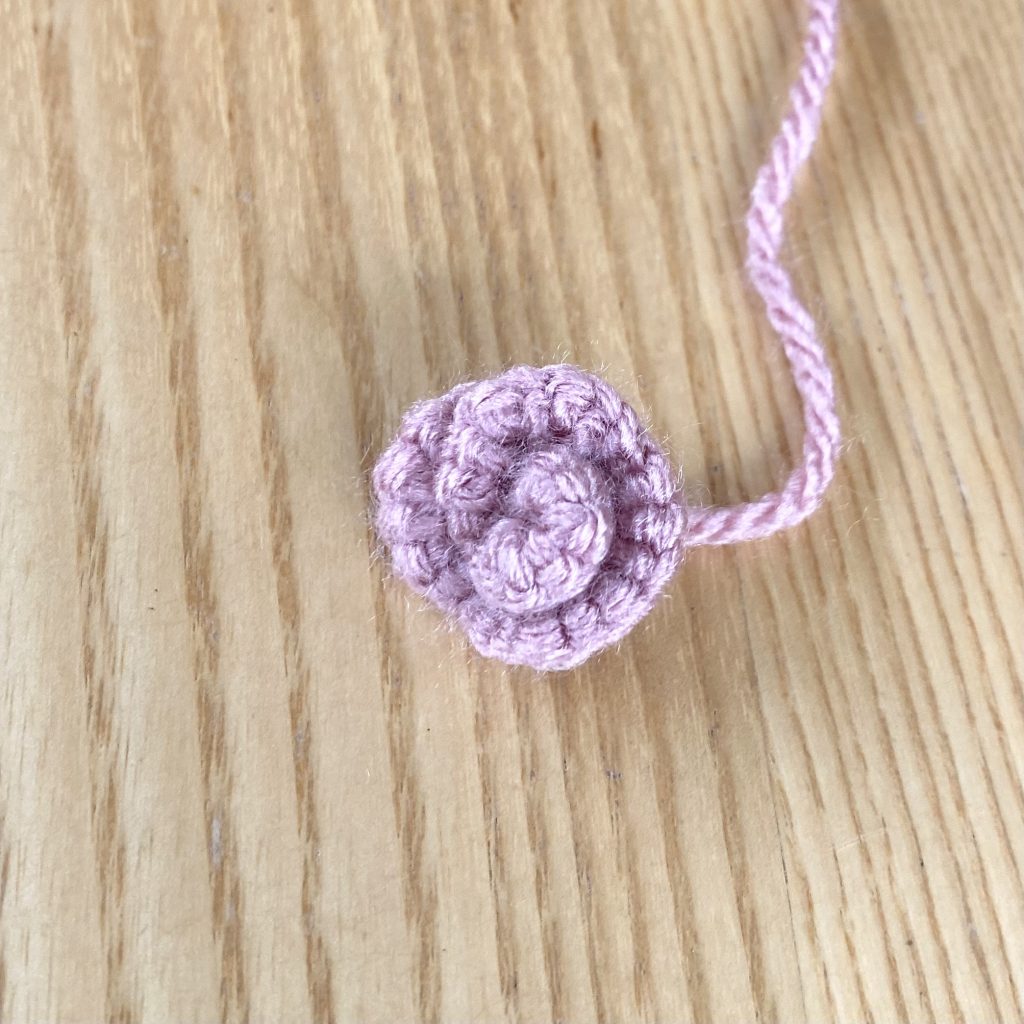
As I mentioned, you can roll your roses whichever way you prefer- or you can be like me and use both! I did choose to roll all of the small roses outward, because they are so tiny I found that, when rolling them inward, they lost a little of their structure and rose-like appearance. Again though, it’s entirely up to you!
Making the Rose Leaves
For the rose leaves, you’ll be glad to hear that it’s very much a one-size-fits-all kind of situation! I used a slightly larger hook for the leaves, compared to the roses, to a) give my fingers a rest and b) allow the leaves to look a little more organic and natural looking (i.e. less stiff). It’s still a pretty small hook (2.5mm), to keep the leaves in proportion to the roses, but it won’t be quite as tight as the roses!
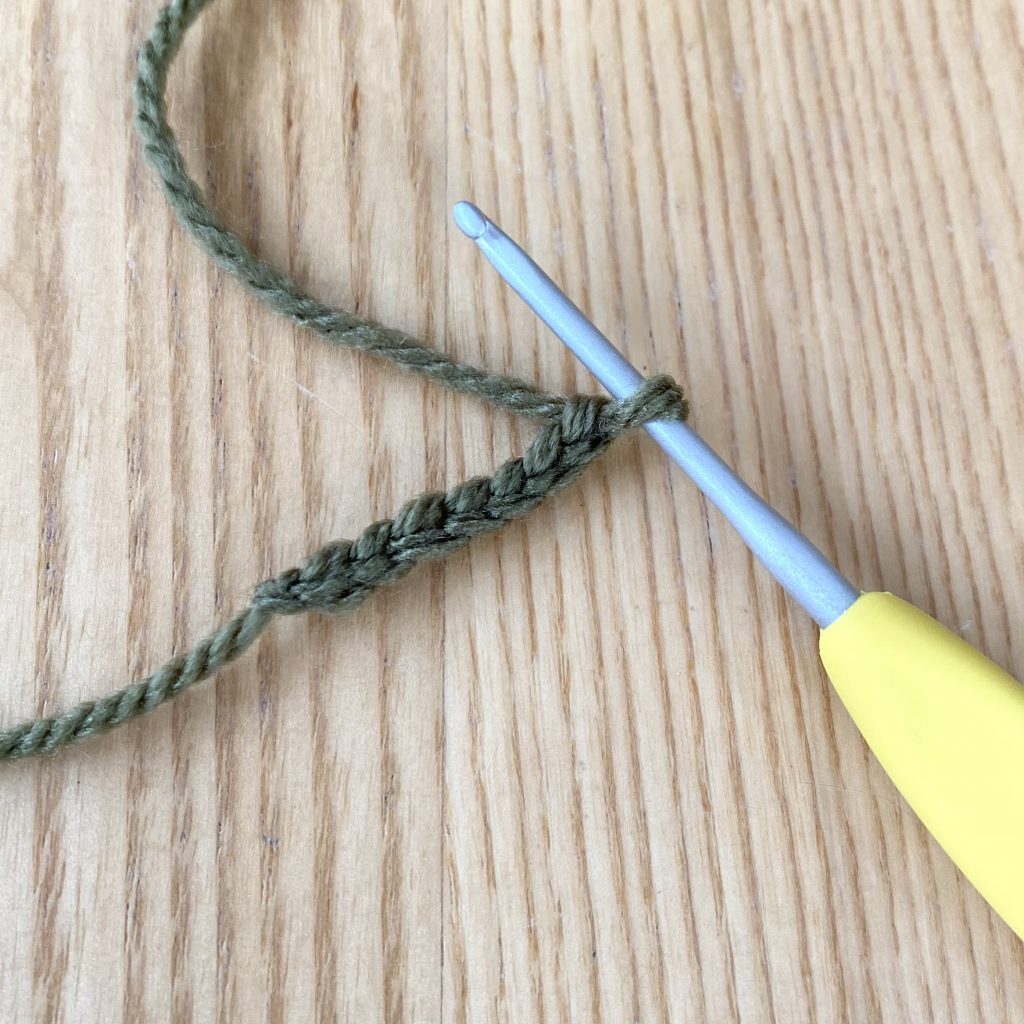
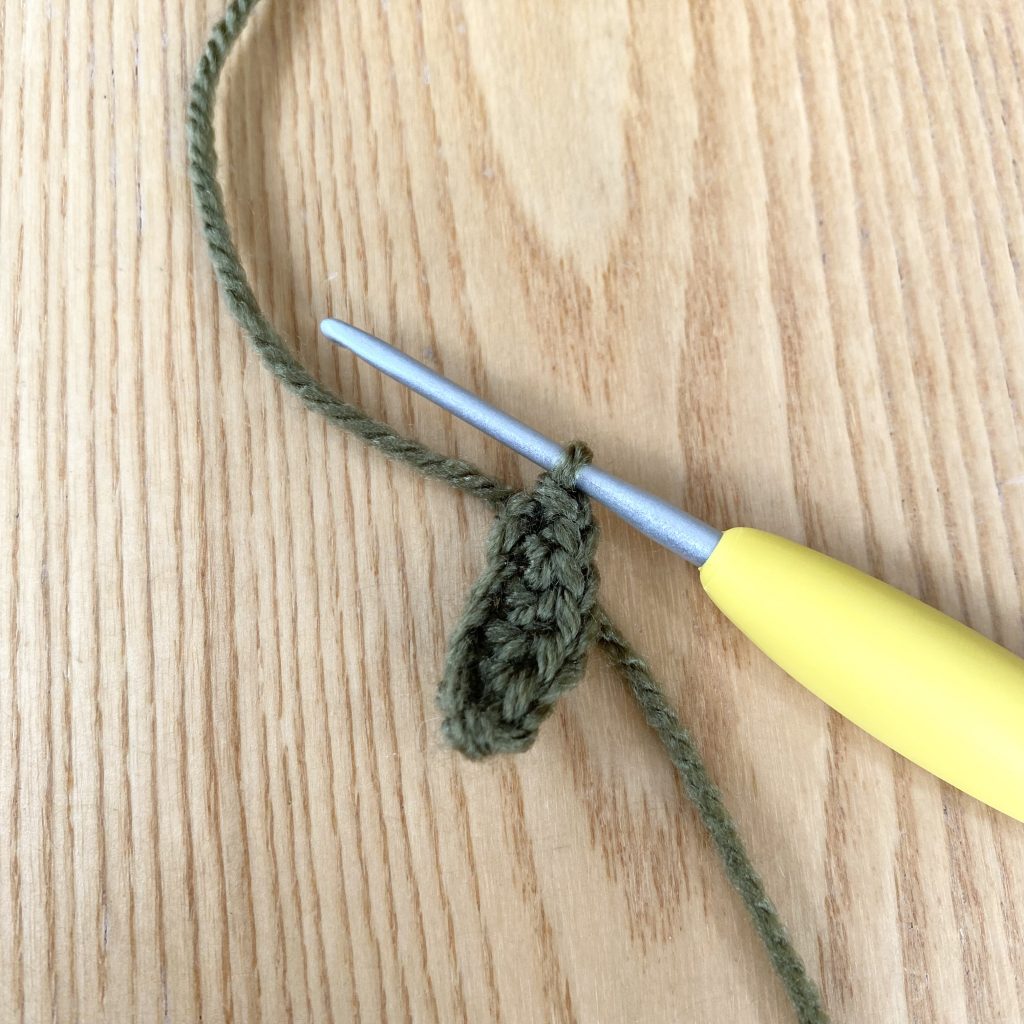
Using a 2.5mm hook and Khaki yarn, start by chaining 7. Leave a long end (approx. 25cm) to attach the leaf to the blanket later on.
Start by working into the 2nd chain from the hook. You’ll only be working into the top loops of the chains for this first part.
Work one dc into the 2nd chain from the hook.
Then, work a htr into the next stitch.
Work a tr into each of the next 2 stitches.
Then work another htr into the next stitch.
Work a dc into the final stitch.
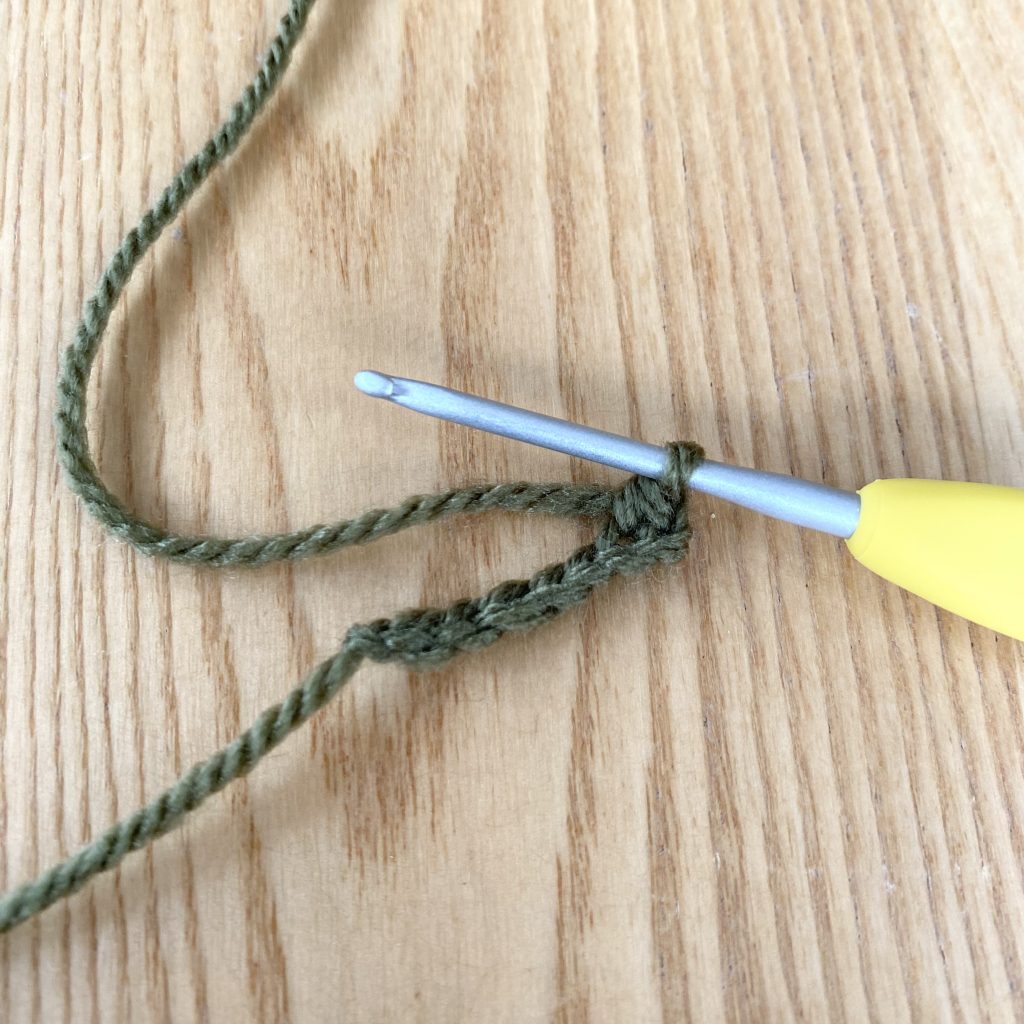
Then, slip stitch into that same stitch.
This will allow you to curve around the base of the leaf, so that you can work back up the other side of your starting chain.
From now on, you’ll be working into the back loops of your starting chain (i.e. into the same stitches as before, just from the other side of the chain!
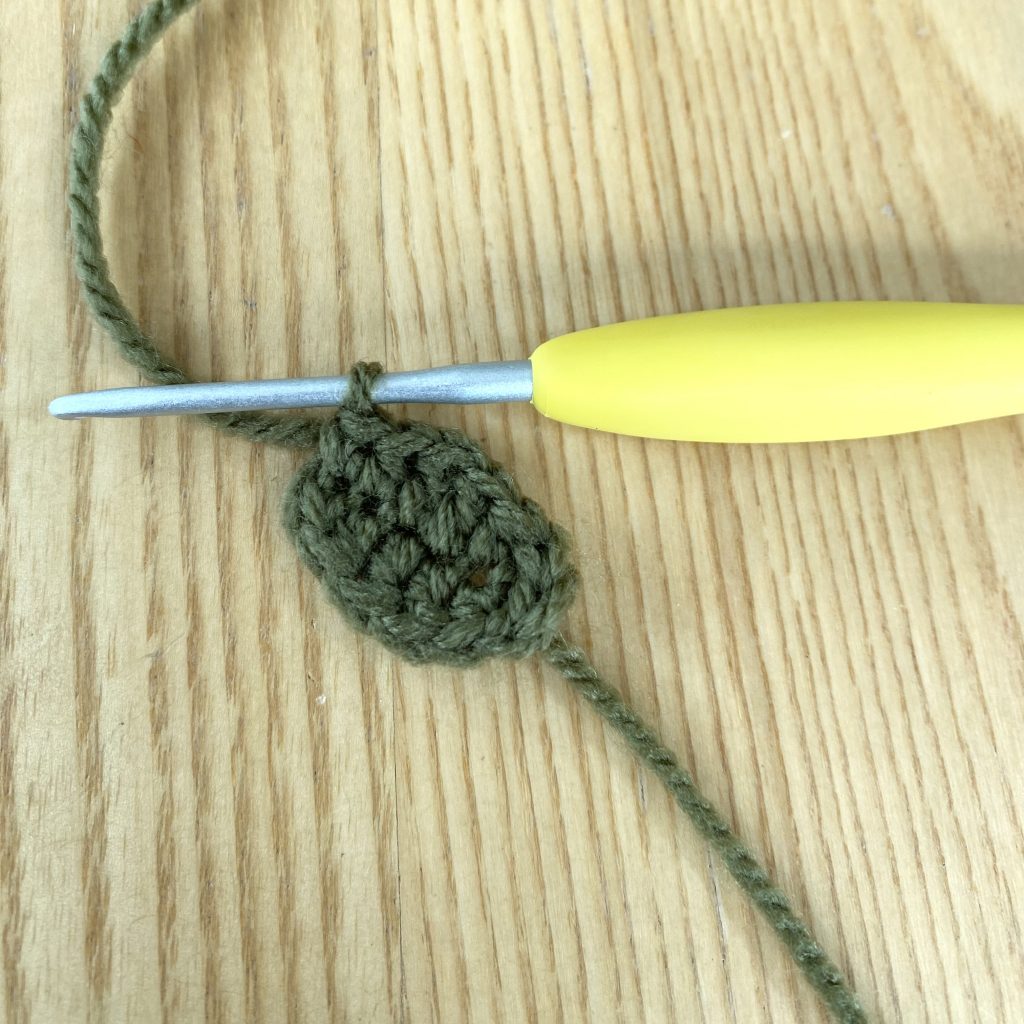
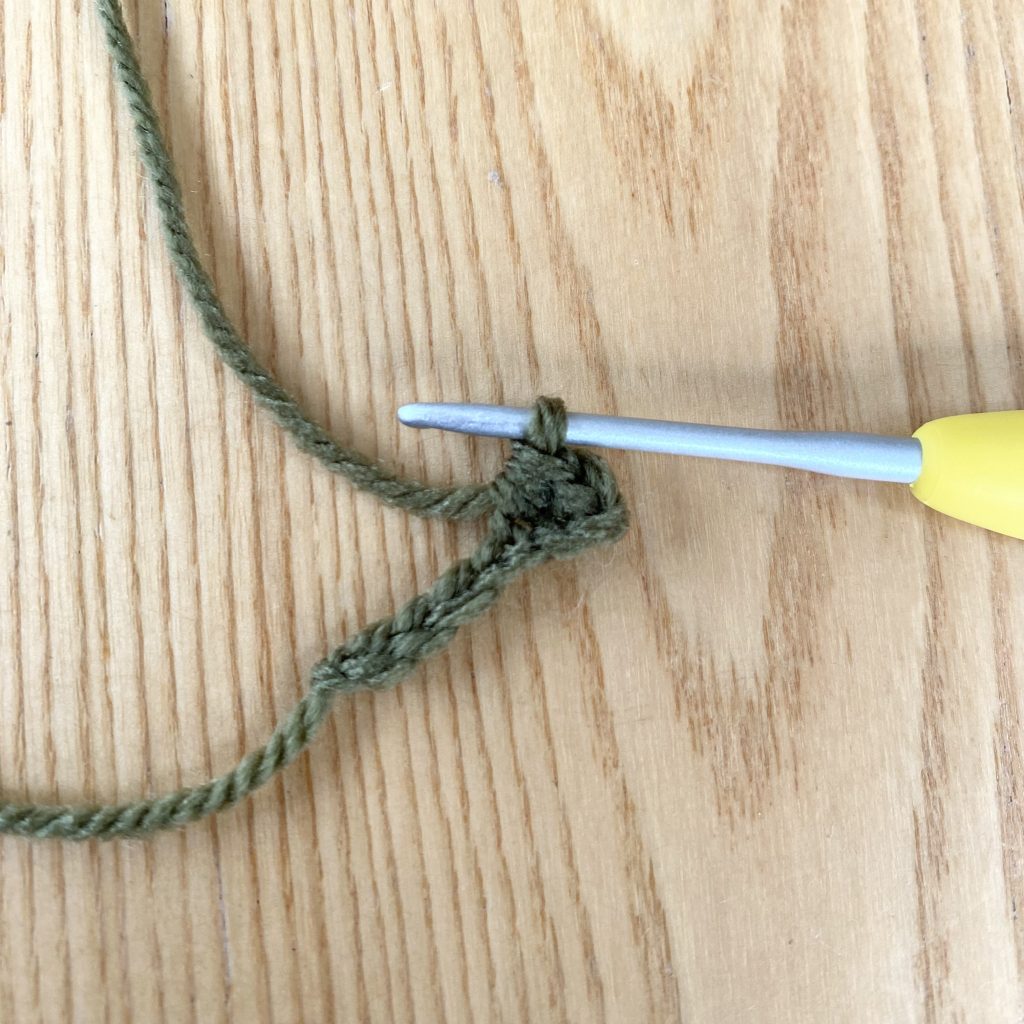
Work in the same pattern as before (dc, htr, tr 2, dc) all the way back up the starting chain.
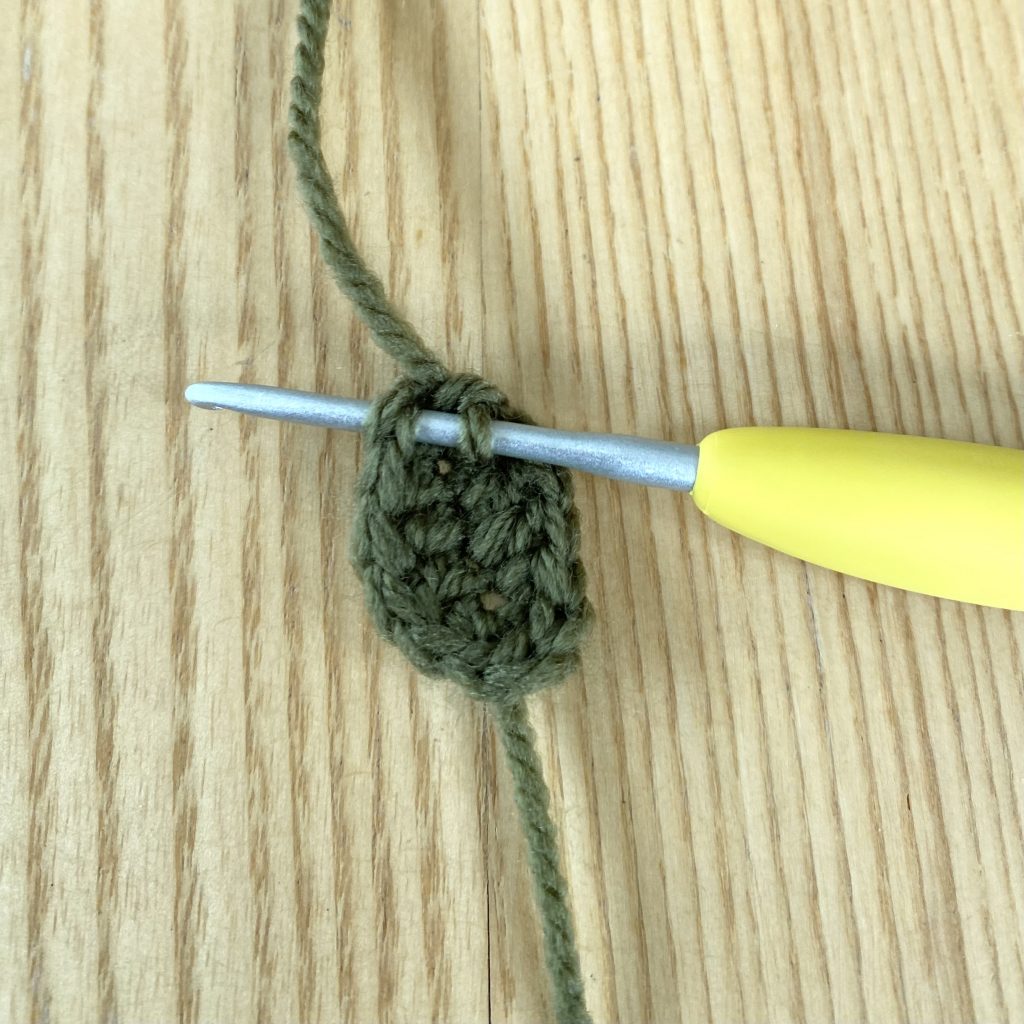
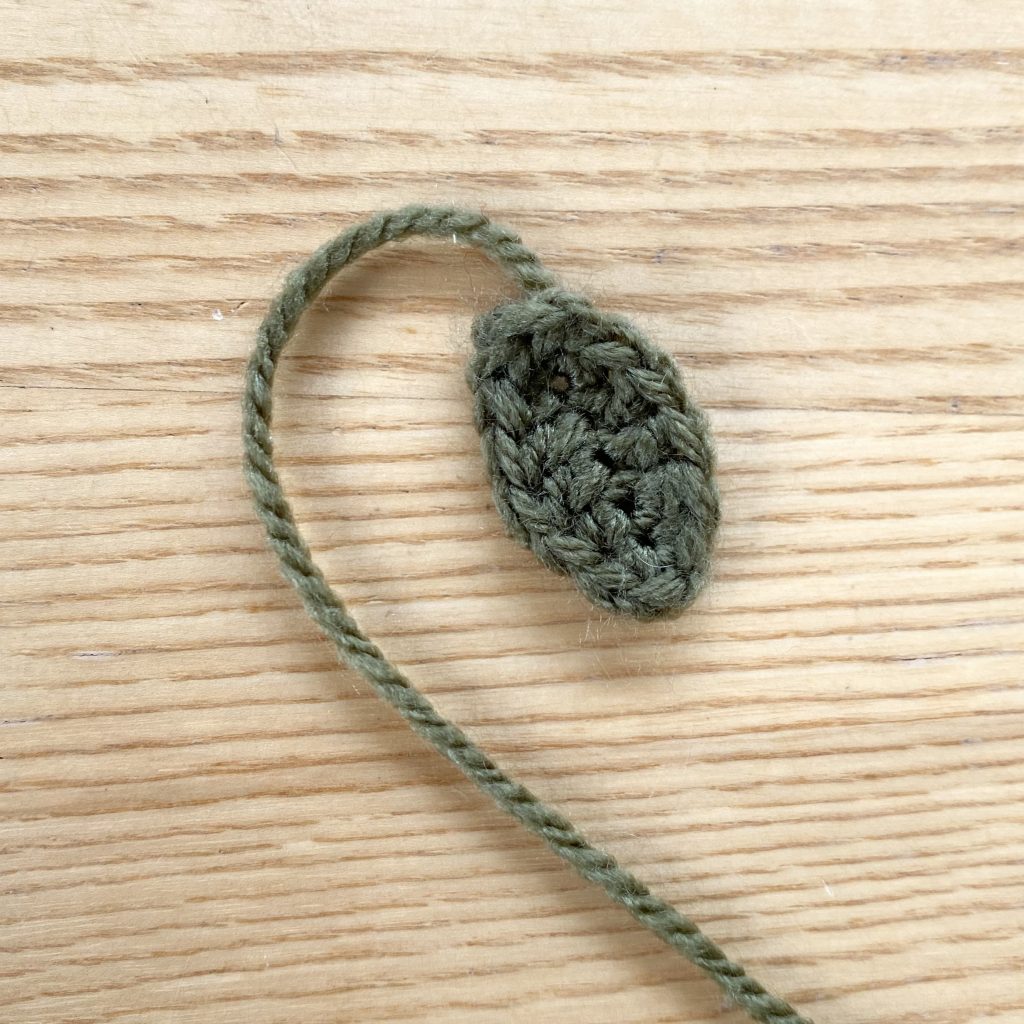
To finish off the leaf and create the ‘pointy’ end, slip stitch to the top of the first dc.
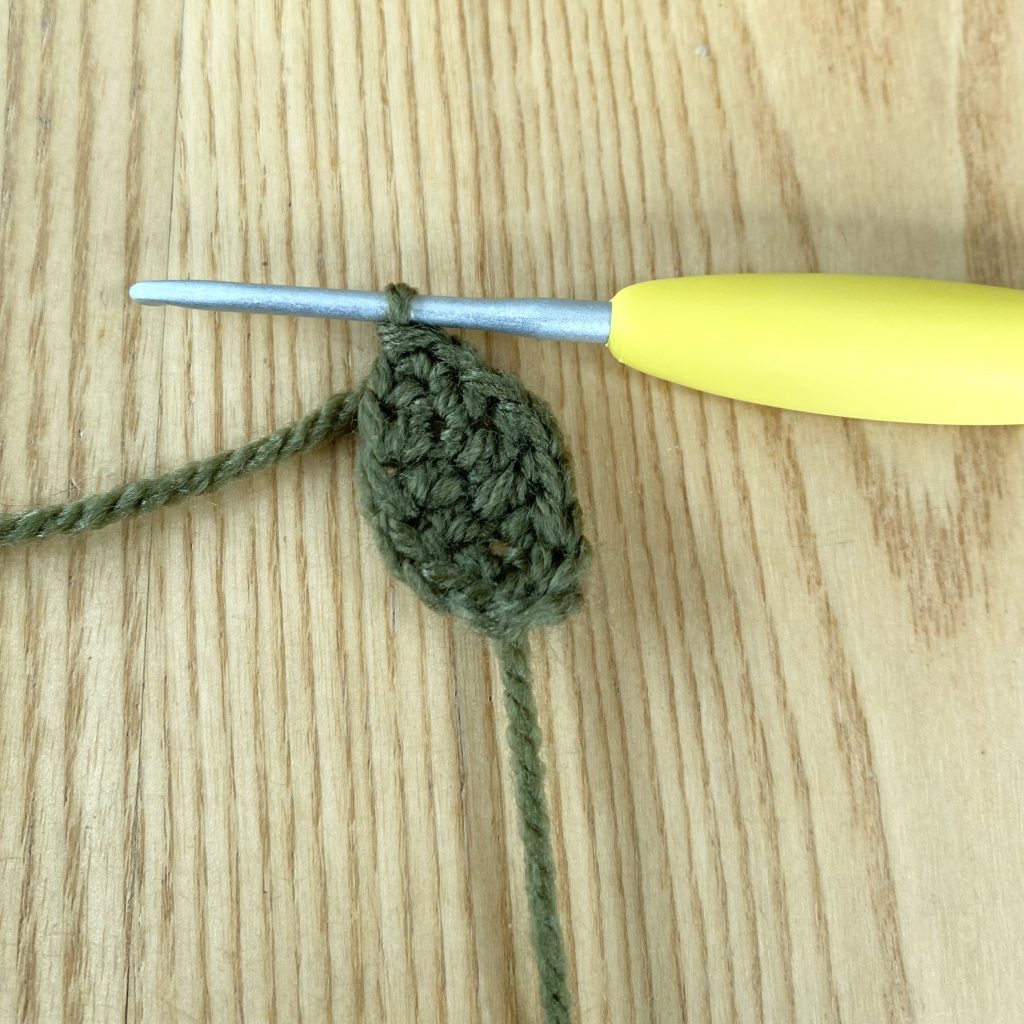
Cut the yarn and weave in this end, leaving the long end from the starting chain for attaching the leaf to the blanket later on.
Written Pattern
Materials & Tools
- Stylecraft Special DK in the shades Powder Pink, Pale Rose and Raspberry (for the roses) and Khaki (for the rose leaves).*
- 2mm crochet hook (for the roses).
- 2.5mm crochet hook (for the rose leaves).
- Scissors
- Darning needle
* You can find the specific quantities for each of the yarn colours on the introductory post for this pattern, under ‘Master Material List’.
Large Rose (make 12):
Ch 25, leaving long end to attach onto blanket (approx. 30cm).
R1: 4dc in 3rd ch from hook (counts as 5dc). Skip 1 stitch, ss into next. (Skip 1 stitch, 5dc in next chain, skip 1 stitch, ss into next) to end (6x 5dc clusters).
R2: Turn and ch1. Skip first ss. (Htr in next 5 stitches, ss into ss from previous round) to last cluster. Htr in next 5 stitches, working the final htr into the top of the ch 2 from the previous round.
R3: Turn and ch1. Working in front loops only, (dc, 2dc in next 3 stitches, dc, ss in next stitch) to end.
Cut yarn and sew in short end. Roll and secure (using long end) to form rose (inward or outward). Leave this end attached to sew rose onto blanket later.
Small Rose (make 10):
Ch 17 leaving long end to attach onto blanket (approx. 30cm).
R1: 4dc in 3rd ch from hook (counts as 5dc). Skip 1 stitch, ss into next. (Skip 1 stitch, 5dc in next chain, skip 1 stitch, ss into next) to end.
R2: R3: Turn and ch1. Skip first ss, then, working in front loops only, (dc, 2dc in next 3 stitches, dc, ss in next stitch) to end.
Cut yarn and darn in short end. Roll outward and secure (using long end) to form rose. Leave this end attached to sew rose onto blanket later.
Rose Leaf (make 12):
Ch 7, leaving long end to attach to blanket (approx. 25cm)
Working in top loops only, dc in 2nd ch from hook. Htr, tr in next 2, htr, dc. Ss into same stitch.
Work back down the chain (working in back loops now). Dc, htr, tr 2, dc. Ss to top of first sc.
Cut yarn and weave in end. Leave the long end attached to sew leaf onto blanket later.
Final Thoughts
Once you’ve made 12 large roses, 10 small roses and 12 rose leaves, you’ll have all of your rose appliqué pieces ready to go! I’ll be providing detailed instructions for attaching all of these elements onto the blanket in a later post, so keep them safe until then.
I really love these roses, because they’re actually pretty straightforward to make, even though they look a little complicated. They’re also super customisable- you can use any colour of yarn you want, you can roll them up in different directions, make as many/as few as you like and vary the sizes as much as you need. I admit, crocheting DK weight yarn on a 2mm hook is a bit of a trial, but it makes for such neat, structural roses that I really do think it’s worth it. If it’s not feasible for you, absolutely just increase the hook size- a slight improvement in structure and appearance is obviously NOT worth any sort of crochet-induced insanity!
I hope you’ve enjoyed this rose embellishment tutorial! As I’ve mentioned before, I’m not super experienced at writing crochet patterns, so please do let me know if you run into any problems with this and I will do my best to help you out! I’ll see you next week for Part 5!
Gemma
xxx