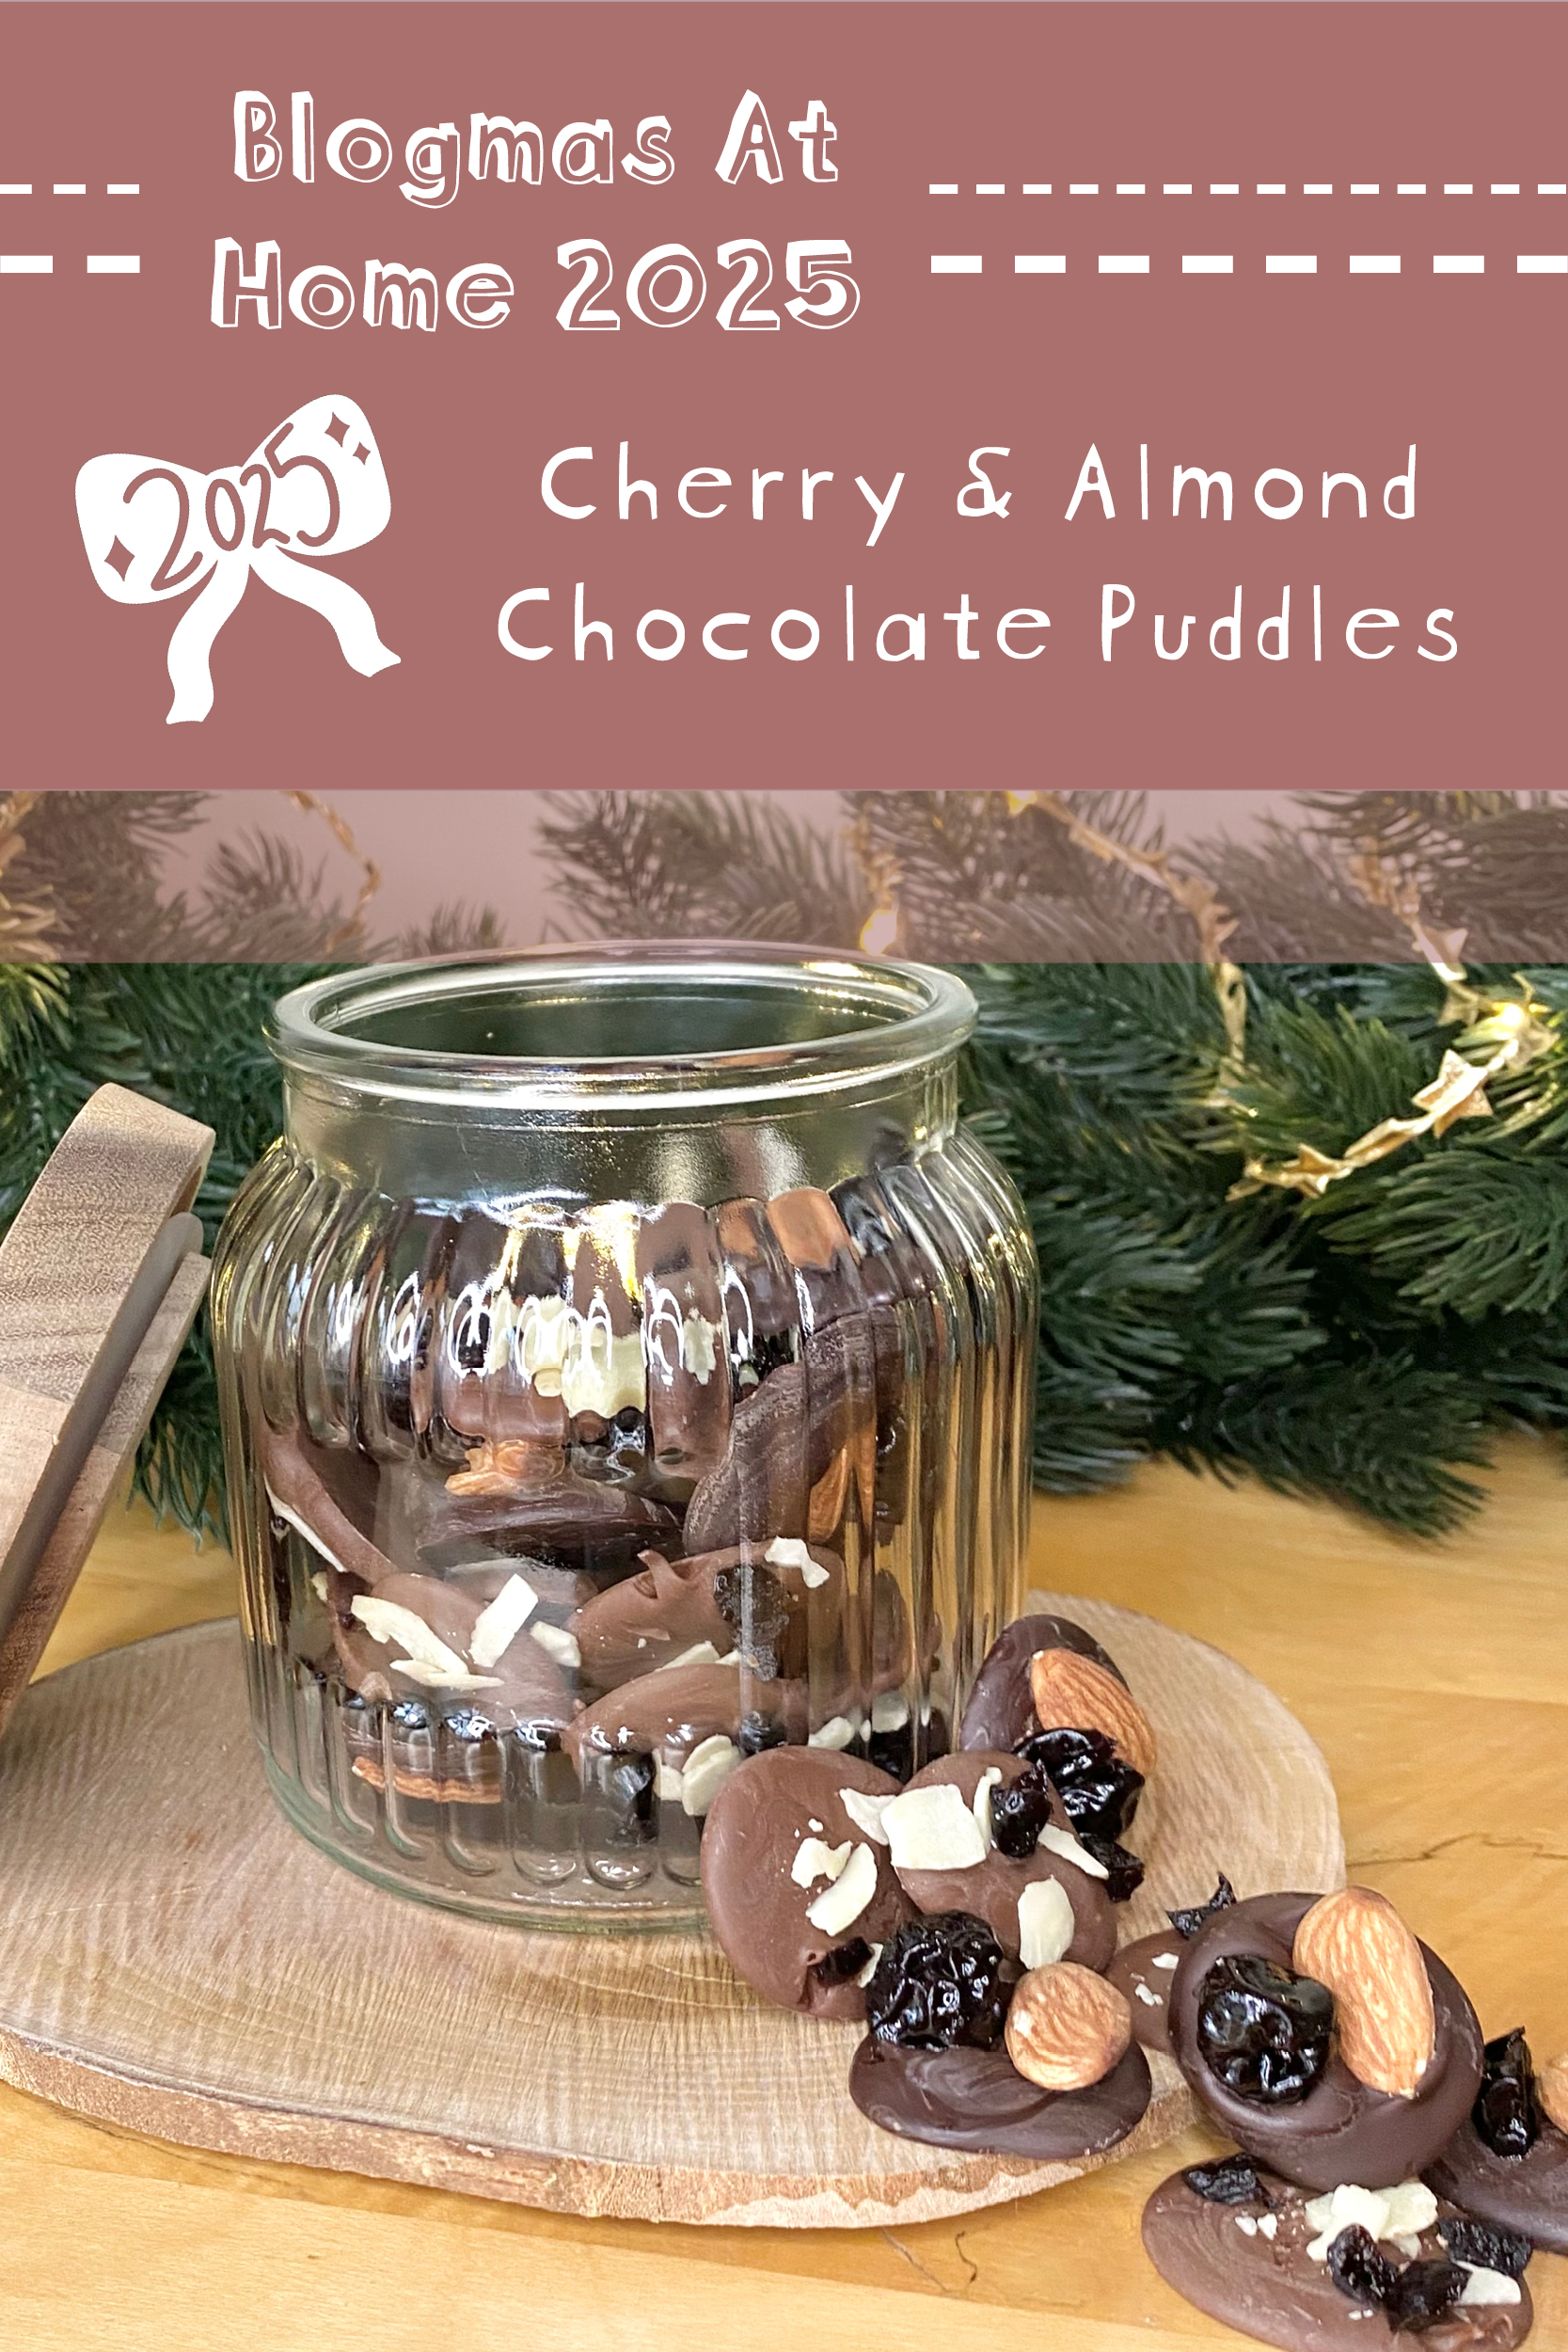
Welcome to Day 8 of Blogmas At Home 2025! 🎄🎀✨
It’s time to introduce you to the delight that is the Chocolate Puddle!
What is a Chocolate Puddle, you ask? It’s exactly what it sounds like: a literal puddle (i.e., bigger than a drop, (much) smaller than a pond) of chocolate, topped with whatever delicious additions your heart desires. Chocolate puddles are one of the easiest candies to make and are super customisable (so they’re particularly good for families that can’t quite agree on the ideal, chocolate-y treat!). You can make them look (and taste) super elegant & fancy, or super fun & frivolous: it all depends on what you choose to top them with!
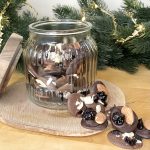
Keep these puddles in a jar for your family to snack on this festive season. Pile them into cellophane bags and give them to your friends as gifts. Host a Puddle Party and make hundreds of them, letting all of your guests sprinkle over their favourite additions and create custom puddles. The puddle possibilities are endless. That is the joy of the Chocolate Puddle!
Today, I’m sharing the recipe for two varieties of Cherry & Almond Chocolate Puddles, which will hopefully provide you with a) a blueprint for a delicious, cherry & almond snack and b) a starting point for any future puddle ventures. Let the puddles begin!
Table of Contents
- The Chocolate Puddle: Explained
- Tempering Chocolate
- Making Chocolate Puddles
- Cherry & Almond Chocolate Puddles Recipe
The Chocolate Puddle: Explained
At its core, the Chocolate Puddle is just a scant teaspoon of tempered chocolate (white, milk, dark etc., the choice is yours!), sprinkled with delicious toppings and left to set at room temperature until it solidifies into a delicious, chocolate-y treat.
You can make puddles by simply melting the chocolate, skipping the tempering stage and leaving them to set in the fridge but a) you’ll have to store them in the fridge and b) they’ll be messier to eat (untempered chocolate is absolutely going to melt the second it hits your fingers, so hello sticky fingerprints all over your Christmas wrapping!).
Tempering the chocolate means that the chocolate will set at room temperature, so you can store the puddles in a jar on the counter (for optimal snacking!). It also makes it easier to give the puddles as gifts and ensures they have the perfect snap and shine (though, admittedly, the shine is the hardest part to get, as you can tell by the unfortunate bloom on my puddles this year… let this be a tempering lesson to you: don’t let your chocolate go above the ‘melting’ temperature range!).
You can use any type of chocolate and any topping you want to make puddles. Pick your favourite ingredients and flavour combinations: mini marshmallows, nuts and dried fruit are all delicious, but the possibilities are endless. Today, I’m making cherry & almond puddles, so I’m using a combination of dried cherries, whole almonds and flaked almonds, along with milk and dark chocolate.
Tempering Chocolate
I do already have a post on the blog where I talk about tempering chocolate (you can find it here), but I thought I’d re-share my method in this post to make it super easy for you guys to follow along! I’ve also updated my tempering technique a little since that first post to make the whole process a little quicker & easier (woohoo!).

Equipment
To temper chocolate, you will need:
- Heatproof bowl
I melt chocolate using the microwave, but you can also do it by placing the chocolate into a bowl set over a pan of barely simmering water. Either way, you’ll need a bowl that can withstand the heat!
- Spatula
I like to use a silicone spatula (particularly one with a flat edge) for stirring the chocolate, because you can really scrape down the sides of the bowl with it: chocolate gets messy and you don’t want to waste any!
- Large knife
You’ll need to finely chop some of the chocolate and a large knife is the best tool for this.
- Chopping board
A large knife requires a sturdy chopping board!
- Digital thermometer
You’ll need to be able to monitor the temperature of your chocolate as you go. There are all sorts of candy thermometers available that will work perfectly well for this, but I like to use an infrared one (like this), because it means the thermometer stays clean and chocolate-free! I do recommend using a digital thermometer of some sort though, because the temperatures that you need to watch out for are very specific!
The Seeding Method
The method that I use for tempering chocolate is called the ‘Seeding Method‘. It involves introducing finely chopped, unmelted chocolate to the melted chocolate to encourage the latter to recrystallise in the correct way. It sounds complicated, but it’s not too crazy (it’s basically just a lot of stirring).
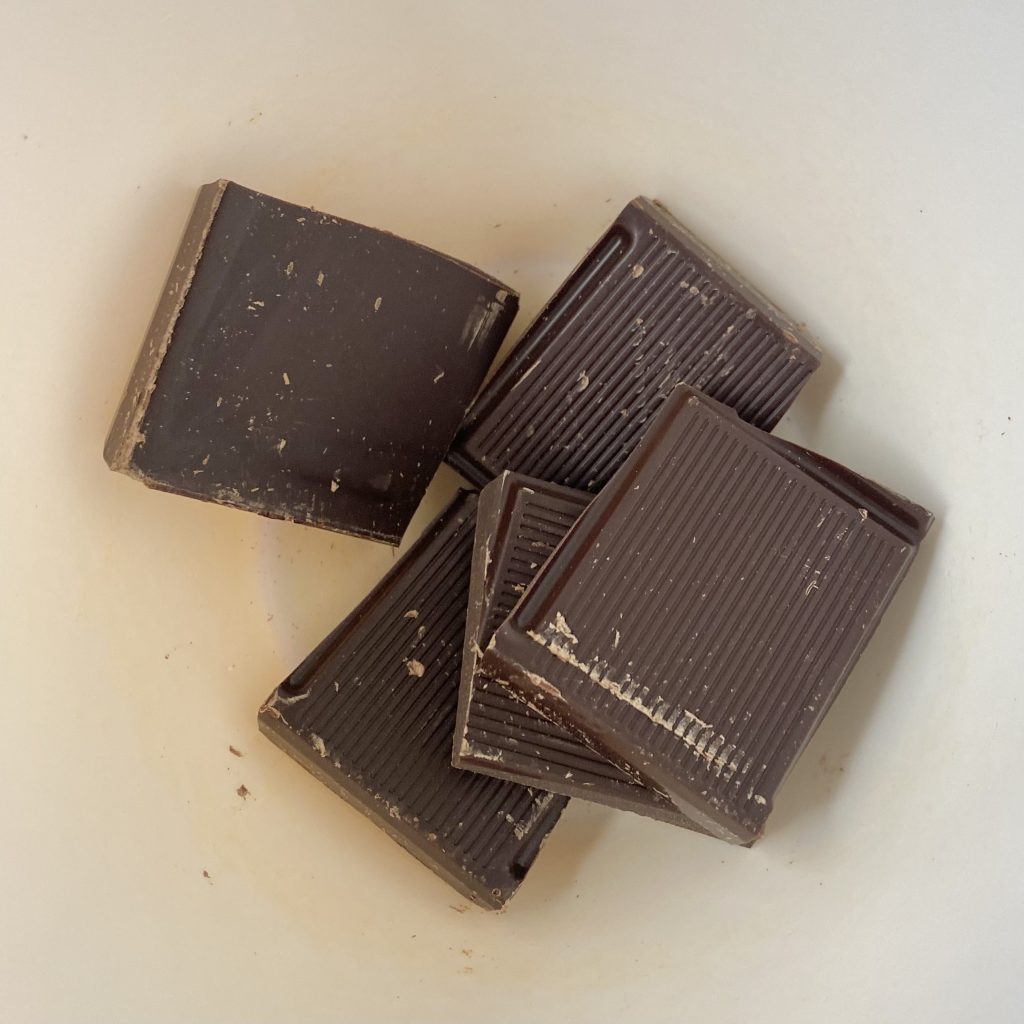
The first step is to prepare the ‘seed’ chocolate. Take about 1/5 of the chocolate you plan to temper and, using a large knife, chop it up very finely. Set this aside for now.
The next step is to melt the chocolate. Place the remaining 4/5 of the chocolate into your heatproof bowl and melt it using your preferred method. For me, this is 30-60 second bursts on the lowest setting in my microwave, stirring in between each burst.
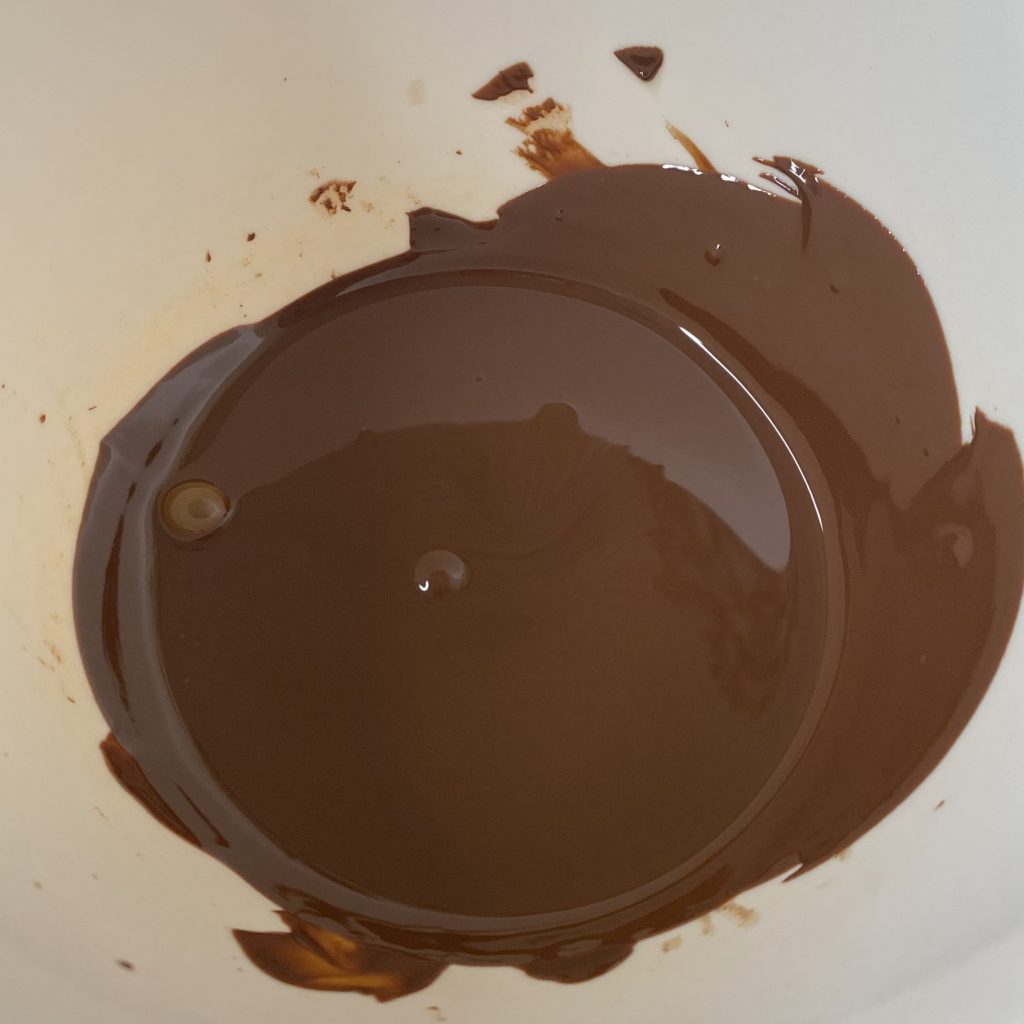
Monitor the temperature of the chocolate as you do this. It’s important that the chocolate reaches a particular temperature (this varies based on the type of chocolate you use: see the ‘melting’ range in the ‘Chocolate Tempering Temperatures‘ table below), but does not go above the upper limit, or it won’t temper properly (see the bloom on my puddles for evidence of this… a definite case of ‘do as I say, not as I do’ here!).
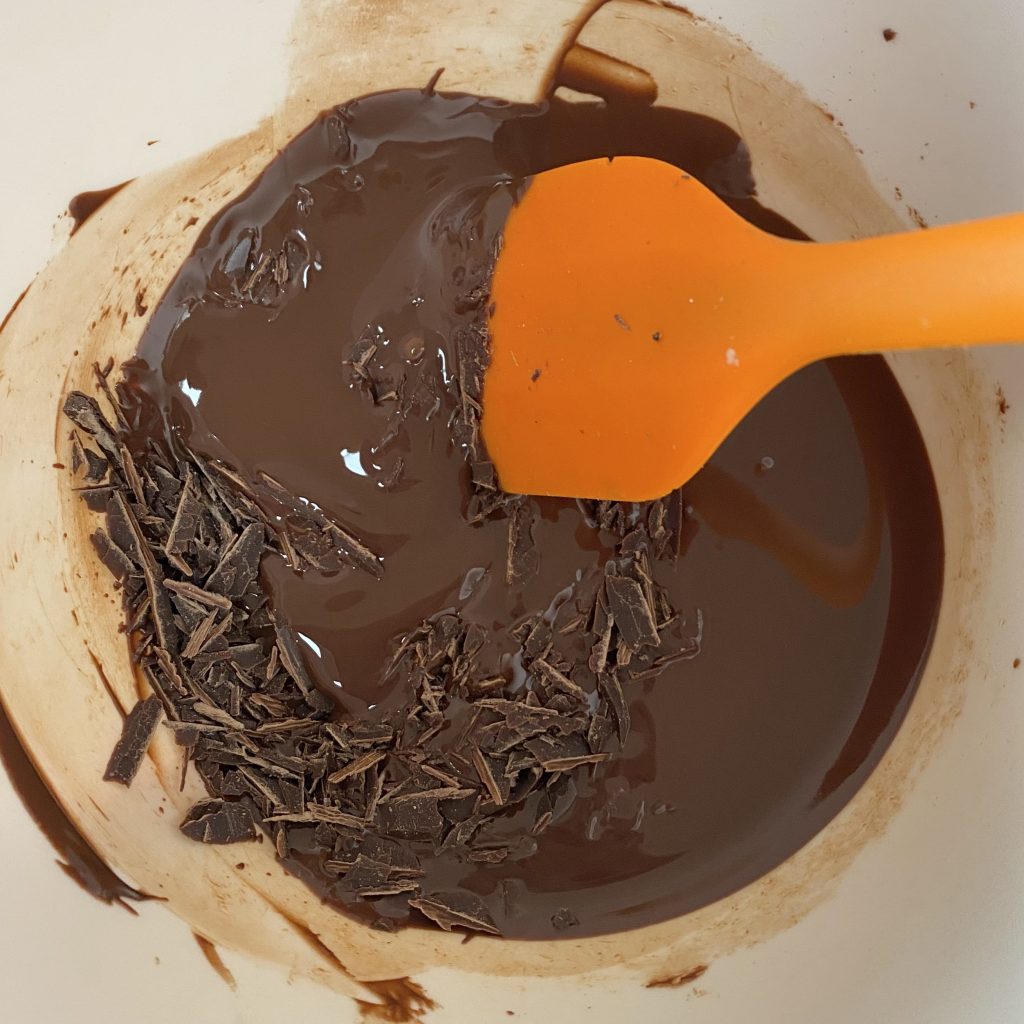
Now, it’s time to add the seed chocolate! Add the finely chopped chocolate to the melted chocolate a little at a time, stirring between each addition until the seed chocolate has completely melted into the rest of the mass.
Monitor the temperature of the chocolate as you go. The aim is to get it down to within the ‘cooling’ range (see table below). If you run out of seed chocolate before the temperature falls within that range, just keep stirring the chocolate, allowing it to cool further, until it does. Conversely, if you reach the correct temperature range before you’ve used all of your seed chocolate, don’t add any more! You can always transfer the leftover seed chocolate to an airtight container for next time you’re tempering.
Next, you need to very carefully warm the chocolate back up a little. The required temperature increase at this stage is only very slight, so you won’t need to heat it for long. Start small (about 10 seconds on the lowest setting in the microwave), then give it additional 3-5 second bursts if needed.
Once your chocolate has reached its final temperature, your chocolate is officially ‘in temper’ and is ready to use to make your Chocolate Puddles! It’s important to work quickly at this stage, because the chocolate will begin to set straightaway at room temperature (that is, after all, the whole point of tempering!).
Chocolate Tempering Temperatures
| Chocolate | Melting | Cooling | Tempered |
| Dark | 45-50°C | 26-27°C | 32°C |
| Milk | 45-47°C | 27°C | 30°C |
| White | 40-45°C | 26°C | 28°C |
Making Chocolate Puddles
Once you have your tempered chocolate, its time to turn it into puddles!

Use a teaspoon to place small dollops of the tempered chocolate onto a tray, lined with baking paper. Aim to make all of the puddles a similar size, but don’t worry too much: any variation just shows they’re homemade!

Give the tray a little wiggle or tap it gently on the work surface. This helps the chocolate to settle out and makes the puddles super smooth.
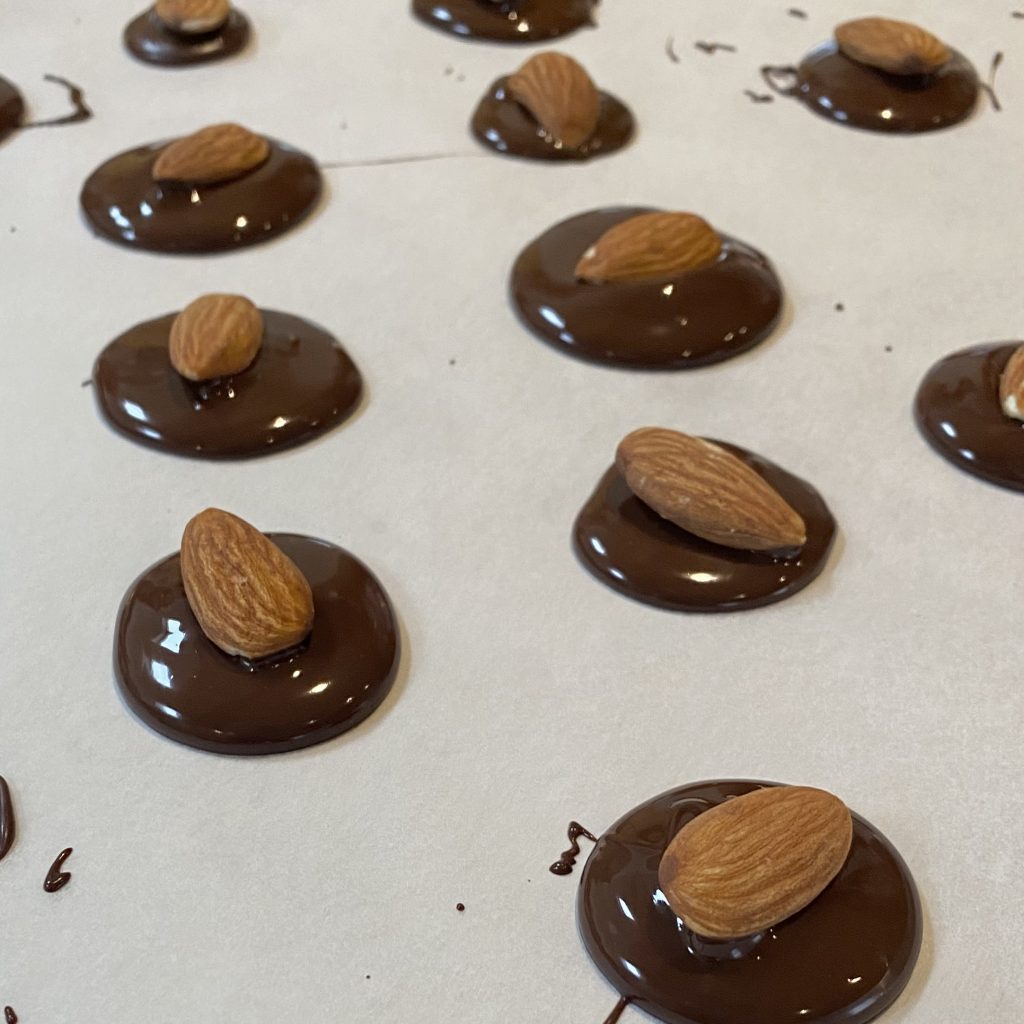
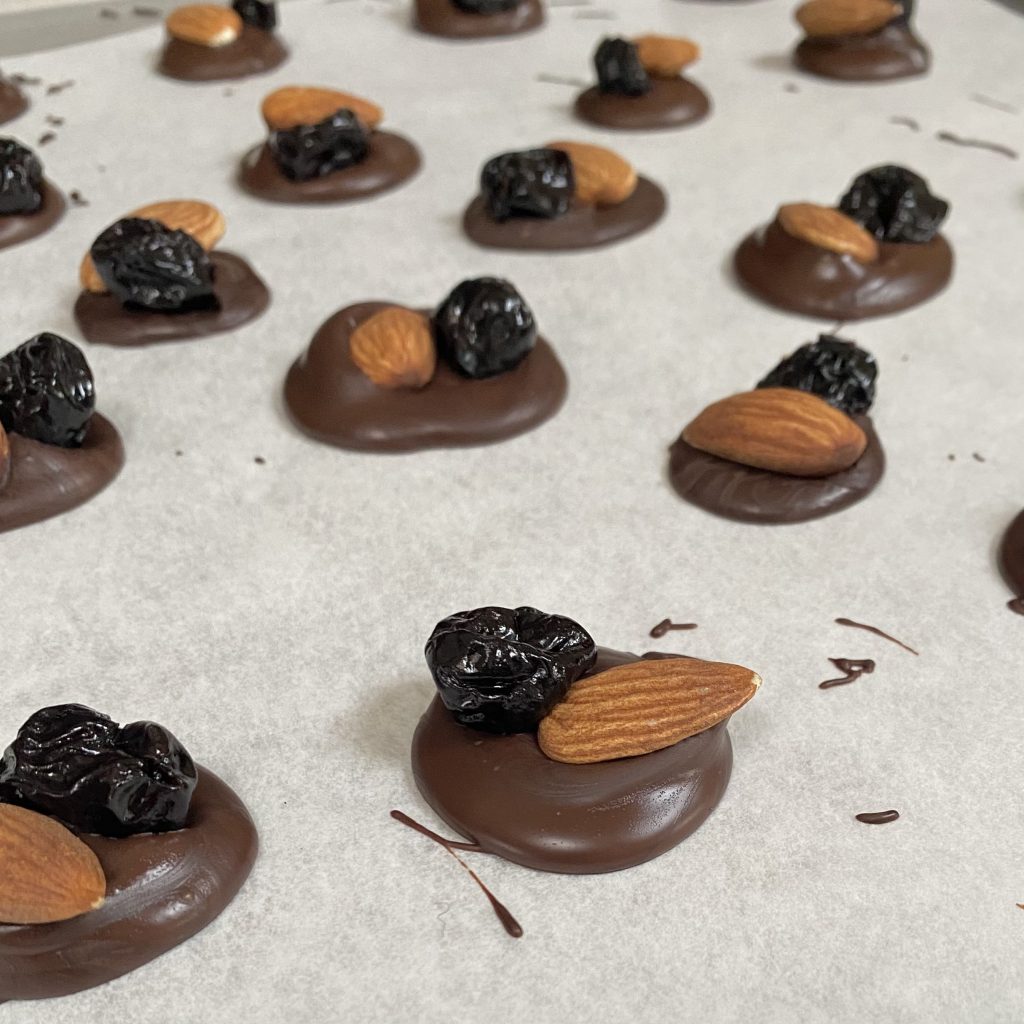
Scatter over your chosen toppings (think nuts, marshmallows, dried fruit— whatever you want!) while the chocolate is still wet (remember to work quickly!). If you have any larger toppings, it might be easier to press them into the chocolate individually instead.
Set the tray aside for about an hour, until the puddles are completely set and you can peel them off the baking paper easily.
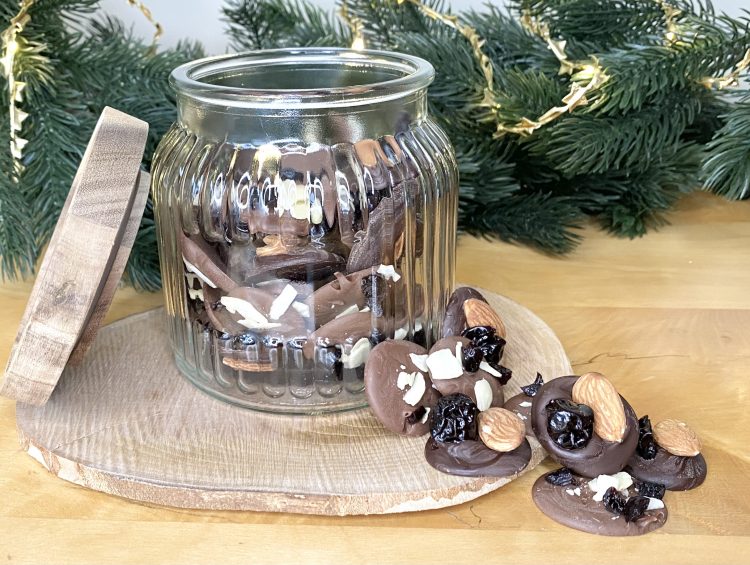
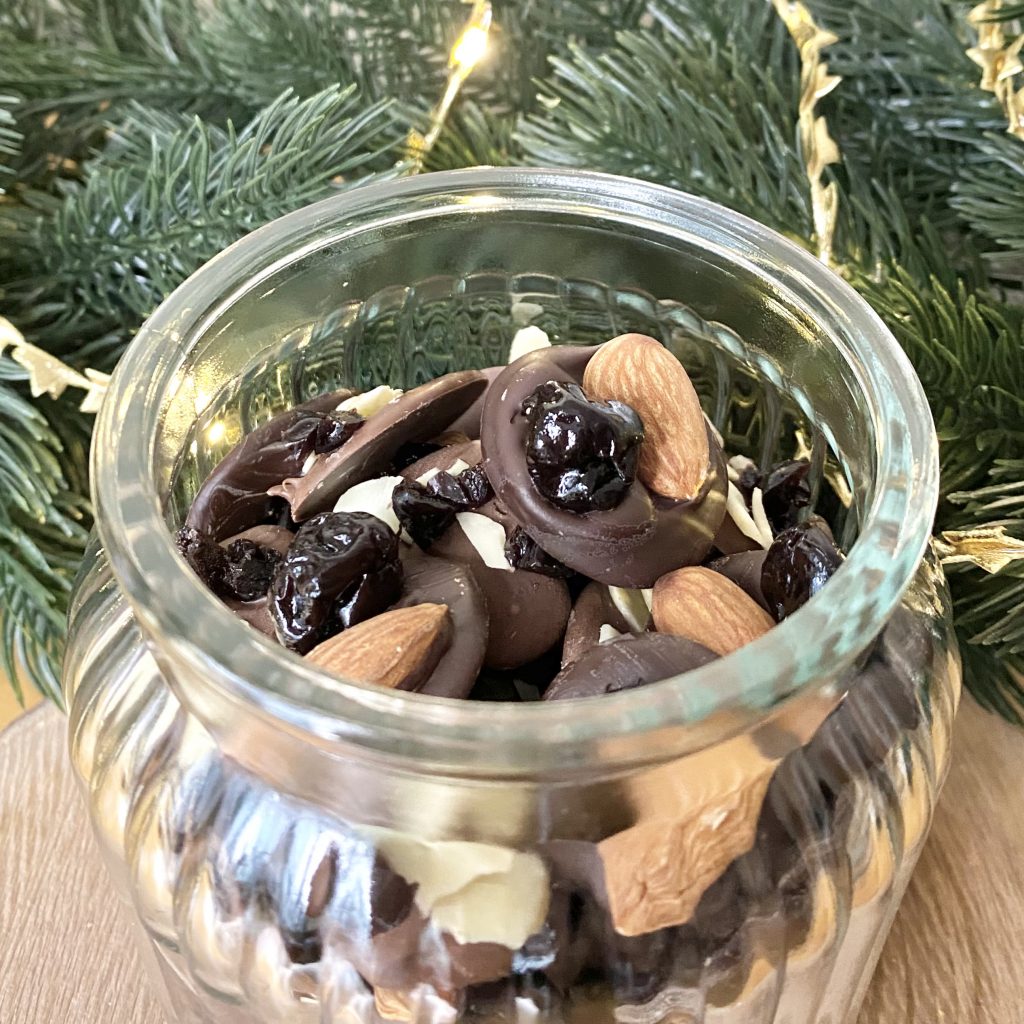
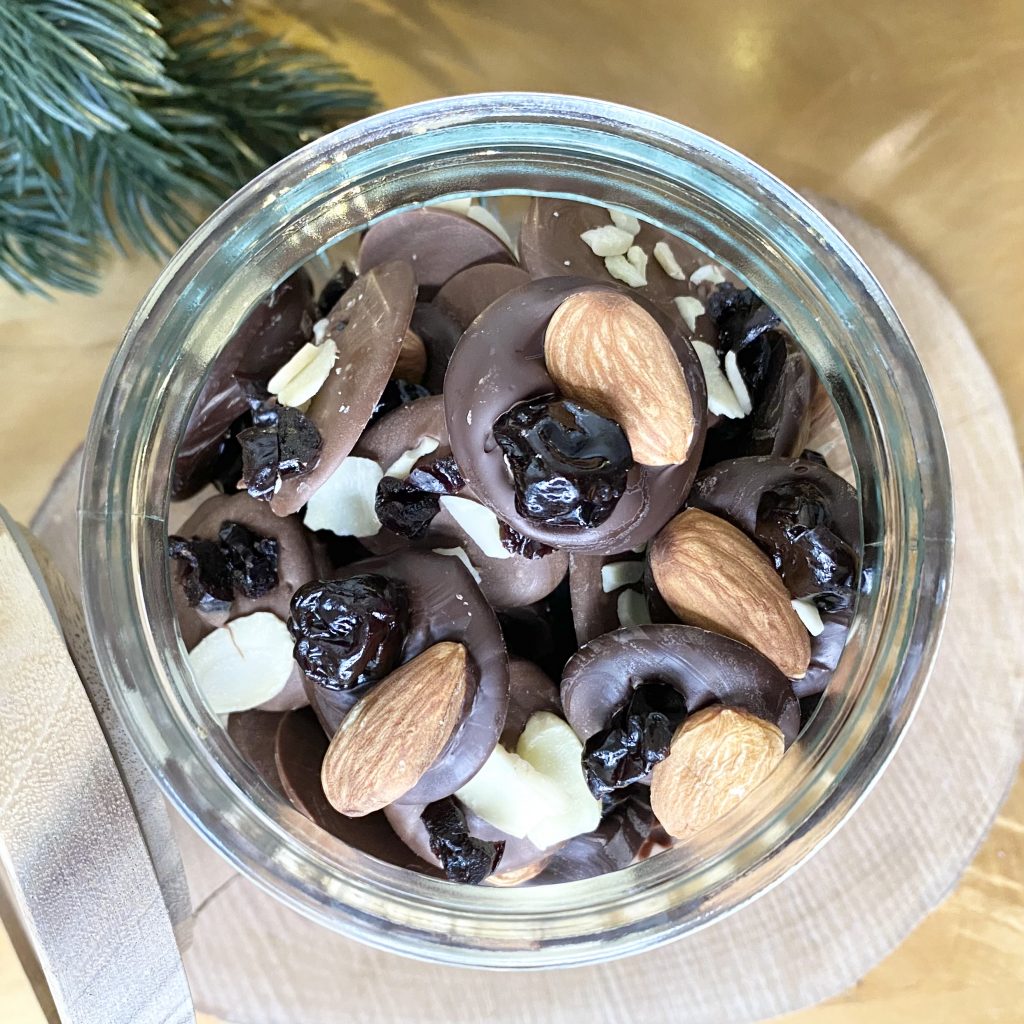
Milk Chocolate, Cherry & Almond Puddles
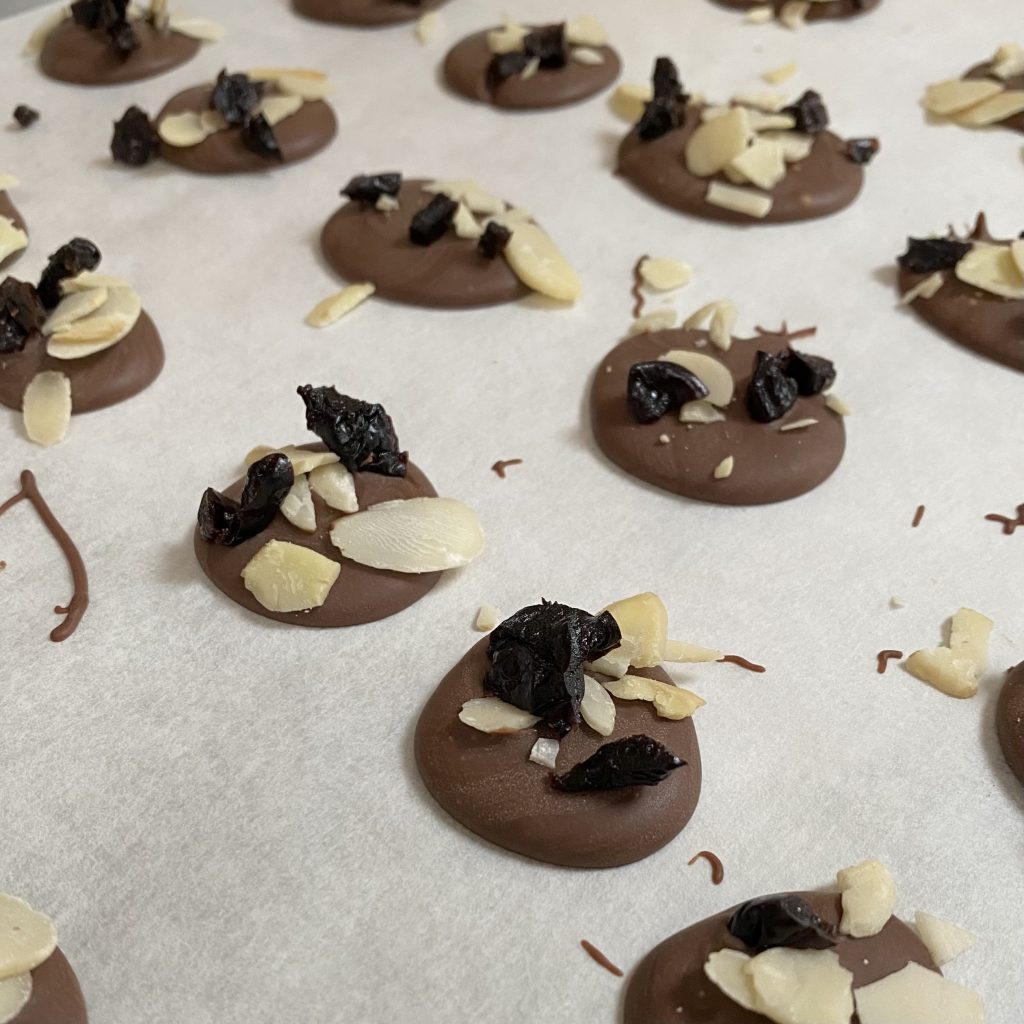
To make these puddles, I used tempered milk chocolate, then scattered over flaked almonds and finely chopped dried cherries.
Dark Chocolate, Cherry & Almond Puddles
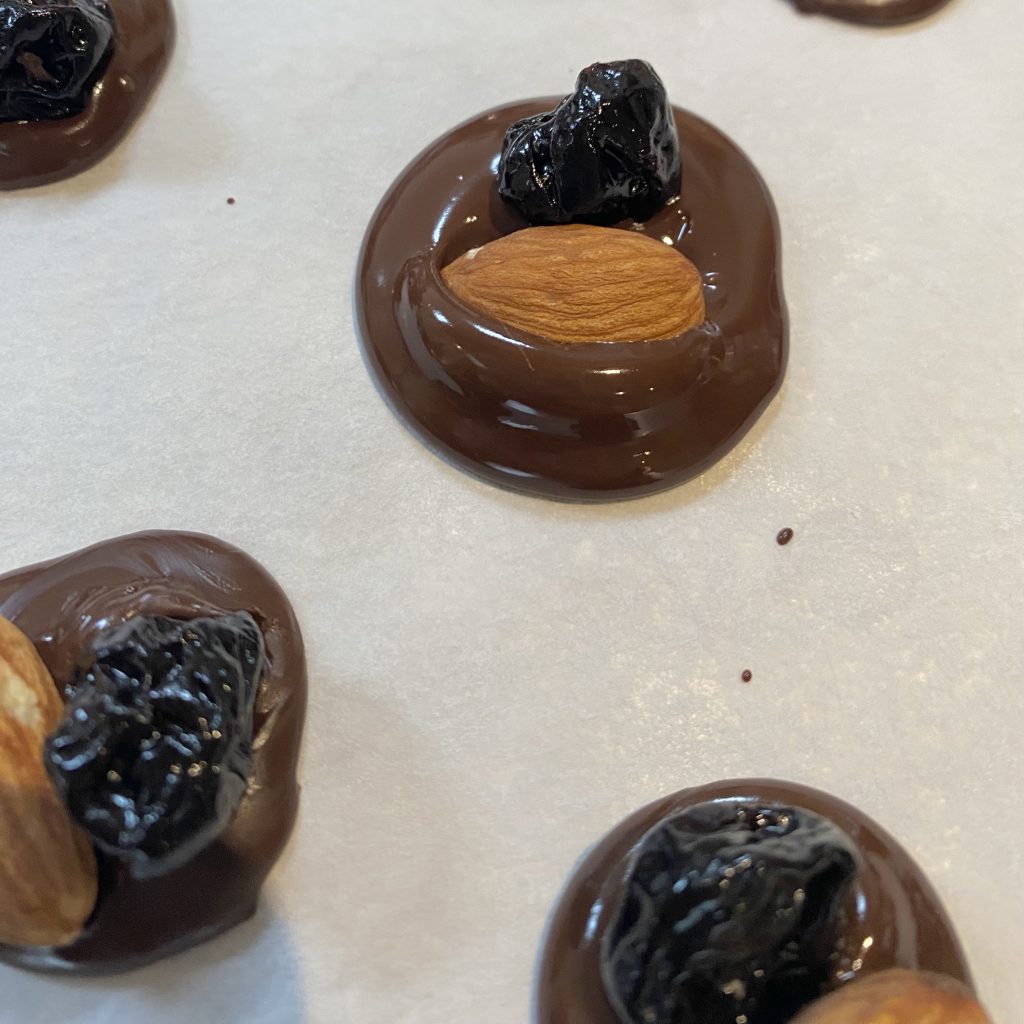
To make these puddles, I used tempered dark chocolate, then pressed one whole almond and one dried cherry into each puddle.
Cherry & Almond Chocolate Puddles Recipe
Cherry & Almond Chocolate Puddles
Equipment
- candy thermometer (see Note 1).
Ingredients
To make the dark chocolate puddles:
- 100 g dark chocolate (I used 54% dark chocolate).
- 30 dried cherries
- 30 whole almonds
To make the milk chocolate puddles:
- 100 g milk chocolate (I used 32% milk chocolate).
- 1 small handful dried cherries, finely chopped.
- 1 small handful flaked almonds
Instructions
To make the dark chocolate puddles:
- Temper the dark chocolate using your favourite method (or the method detailed in the post above).
- Place small spoonfuls of the chocolate onto a tray lined with baking paper, leaving about 2-3cm between each dollop.
- Once you've used up all of the chocolate, give the whole tray a little jiggle, or tap it gently on the work surface to smooth out the surface of the puddles.
- Quickly press one almond and one dried cherry onto each chocolate puddle.
- Set the tray aside at room temperature for about an hour, until the puddles are completely set and you can easily peel them off the baking paper. Enjoy immediately, or transfer to an airtight container and store at room temperature.
To make the milk chocolate puddles:
- Temper the milk chocolate using your favourite method (or the method detailed in the post above).
- Place small spoonfuls of the chocolate onto a tray lined with baking paper, leaving about 2-3cm between each dollop.
- Once you've used up all of the chocolate, give the whole tray a little jiggle, or tap it gently on the work surface, to smooth out the surface of the puddles.
- Working quickly, scatter the chopped, dried cherries and the flaked almonds over the chocolate puddles, making sure each puddle has a bit of cherry and almond.
- Set the tray aside at room temperature for about an hour, until the puddles are completely set and you can easily peel them off the baking paper. Enjoy immediately, or transfer to an airtight container and store at room temperature.
Notes
- I like to use an infrared thermometer for this, because it stays clean and chocolate-free, which makes clean up a lot easier, but you can use your favourite candy thermometer.