
Welcome to Bridgerton Watch Party Week! 7 days, 6 brand new, Bridgerton-inspired recipes & lots of tips, tricks and ideas for creating an afternoon tea-style dessert table worthy of the show. Whether you’re planning to host a Season 3 watch party yourself, or just want to make your own viewing experience extra sweet- I’ve got you covered!
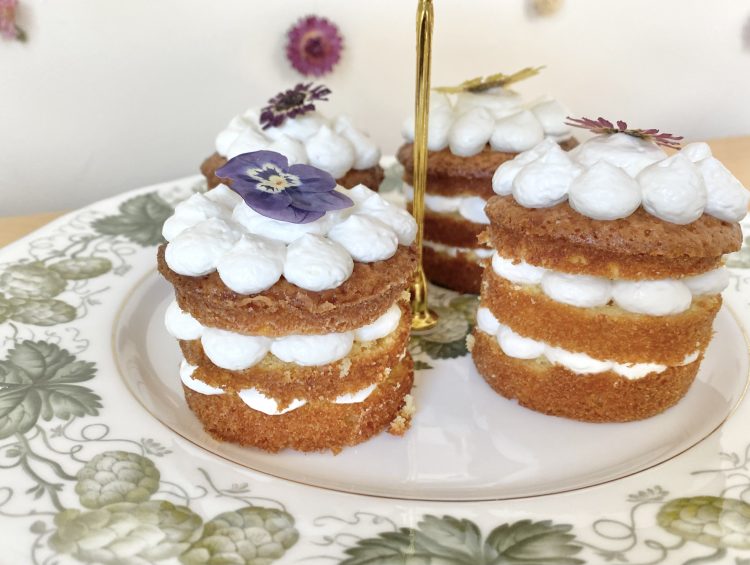
Today’s recipe is for these Mini Orange & Olive Oil Layer Cakes with Greek Yoghurt and Honey Icing! The name may be a bit of a mouthful, but they’re so delicious that I don’t even mind!
Table of Contents
- Inspiration
- Ingredients
- Making the Orange and Olive Oil Cakes
- Making the Greek Yoghurt and Honey Icing
- Assembling the Mini Layer Cakes
- Mini Orange and Olive Oil Layer Cakes with Greek Yoghurt and Honey Icing Recipe
Inspiration
These layer cakes are inspired by the male lead of the upcoming season: Colin Bridgerton. Colin’s love of travelling is a recurring theme throughout the series, and he seems to have a particular fondness for exploring the Mediterranean, so I wanted to create a cake that felt fresh, sunny and incorporated some of the flavours and ingredients that I associate with the region. I ended up with this moist, light orange cake, which is made using olive oil (as a little nod to Colin’s olive joke in Season 2 that makes me giggle every time). I also decided to turn the sponges into these little mini layer cakes, to make them extra special and fit for an afternoon tea-style dessert table. I actually used my Moroccan Meskouta recipe as a starting point for the cake recipe- I just adapted it ever so slightly to use olive oil (instead of regular oil), and for baking in mini sandwich tins (as opposed to a bundt tin). While I don’t think Colin ever mentions going to Morocco, it is technically a Mediterranean country, so I’m rolling with it.
I filled and decorated each cake with a light and tangy Greek yoghurt icing, to really drive home the Mediterranean theming (though my research tells me Greek yoghurt is really just strained yoghurt and not necessarily Greek at all, which is kind of embarrassing for me, but also, what can you do?). Instead of using sugar to sweeten the icing, I opted to use honey, as a nod to one of the most iconic recurring motifs in the show: the bee. The resulting icing is a light, creamy, sweet-but-not-too-sweet topping that marries perfectly with the bright, zesty cake.
Ingredients
To make the orange and olive oil cake batter, you will need:
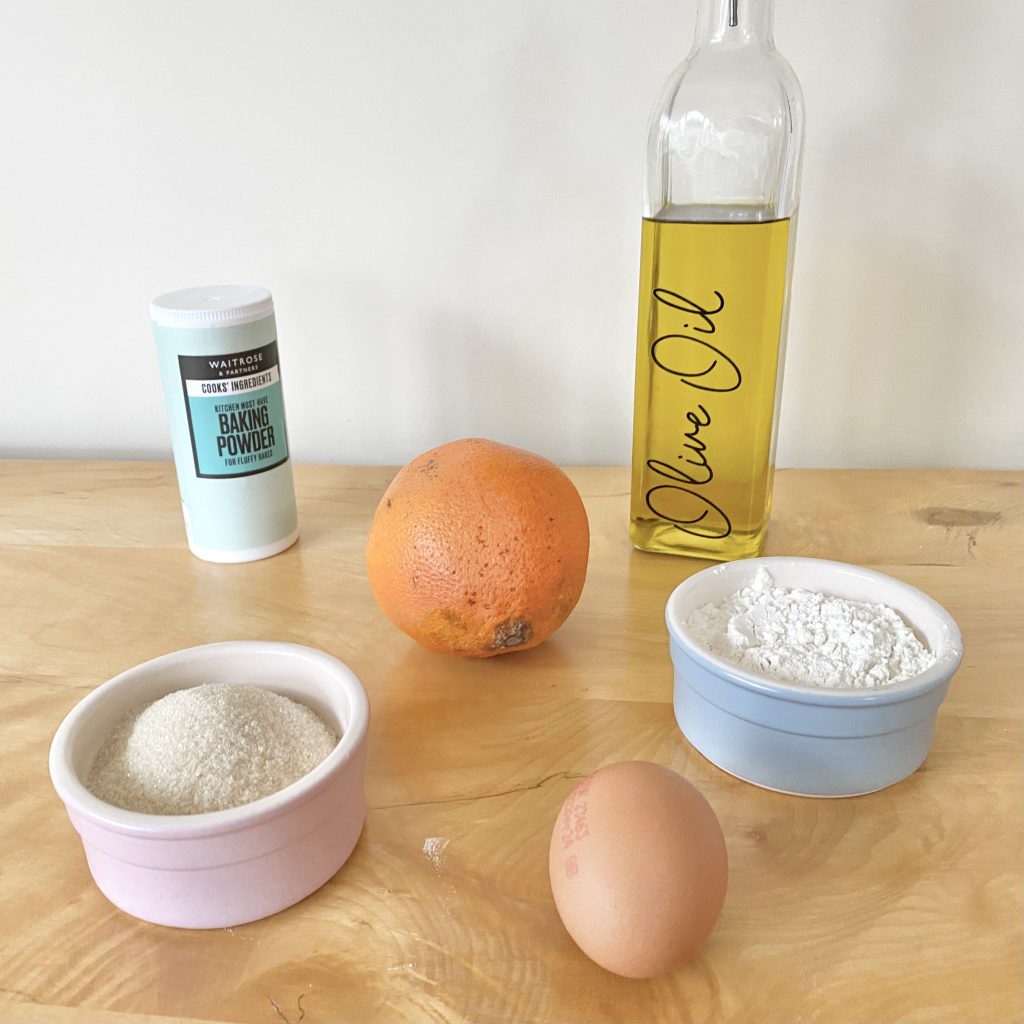
- Caster sugar
It’s best to use caster sugar, as opposed to granulated sugar, because it dissolves more easily as you beat it into the eggs.
- Oranges
For this recipe, you need both the zest and the juice. You’ll need the zest of two large oranges, but only 60ml of freshly squeezed juice, which is about one orange’s worth, so you’ll have some fruit leftover.
- Eggs
As always, I’m using large eggs.
- Extra virgin olive oil
It’s important to use a strong olive oil here, to impart both flavour and colour. The stronger the olive oil, the more noticeable it will be in the finished cake. Whatever you use, though, it will lend a lovely moistness to the cake- so you’ll be happy either way!
- Plain flour
I use plain flour to ensure I have control over the amount of baking powder in the batter. If you only have self-raising flour to hand, I would recommend omitting the baking powder.
- Baking powder
Baking powder helps the cakes to rise and develop a light and fluffy texture.
- Salt
Just a pinch- to help bring out the other flavours.
For the icing, you will need:
- Greek yoghurt
For a Greek yoghurt icing, you obviously need Greek yoghurt! I recommend using full-fat yoghurt for the best results.
- Double cream
This is mixed with the Greek yoghurt to give the icing a lovely, light texture, but also stiffens the icing, so that it can be piped. If you’re in the US, use heavy cream.
- Honey
To sweeten the icing. Use a honey that you like the taste of, because it will also flavour the icing. I recommend using a runny honey for this recipe.
I decorated my mini layer cakes with some edible dried flowers, which you can find here (though this pack contains a variety of sizes and some are a little too big for these mini cakes! You could also try this pack, which contains fewer large flowers!). However, you can obviously decorate these cakes however you like- you could leave them plain, dust them with icing sugar, sprinkle over some more orange zest or even place on a few pieces of candied orange peel on top. It’s completely up to you!
Making the Orange and Olive Oil Cakes
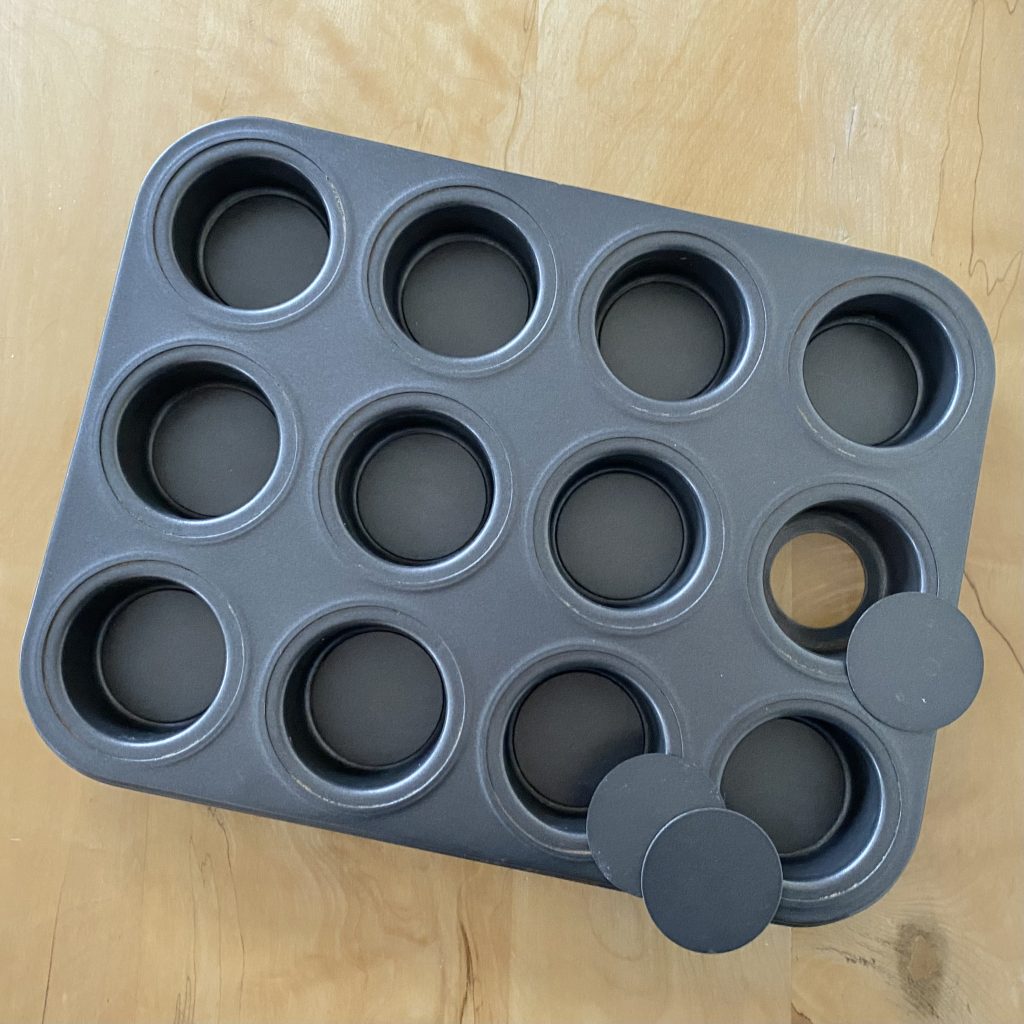
To make these mini layer cakes, you need the right tin. This mini sandwich tin from Lakeland is essentially a 12-hole cupcake tin, except each cavity has straight sides and an individual, removable base. If you don’t want to buy a whole new tin, you can absolutely just make these cakes in cupcake form, or make a big cake and stamp out the circles using a cookie cutter.
Once you have the tin, you need to prepare it. I like to use my DIY Cake Release to grease the tin for this recipe, because this cake batter does have a tendency to stick to the sides of the tin without it. Just use a pastry brush to cover each cavity with a thin layer of cake release, which will help to ensure your cakes come out easily and have a perfectly golden edge all around (which is important, because these mini layer cakes will have naked sides!). I like to cut little circles of greaseproof paper and stick them onto the bottom of each cavity, too, just to make it even easier to get the cakes out, but this is optional.
Now, you can get to baking! Set the prepared tin aside and preheat the oven to 180°C (conventional oven).
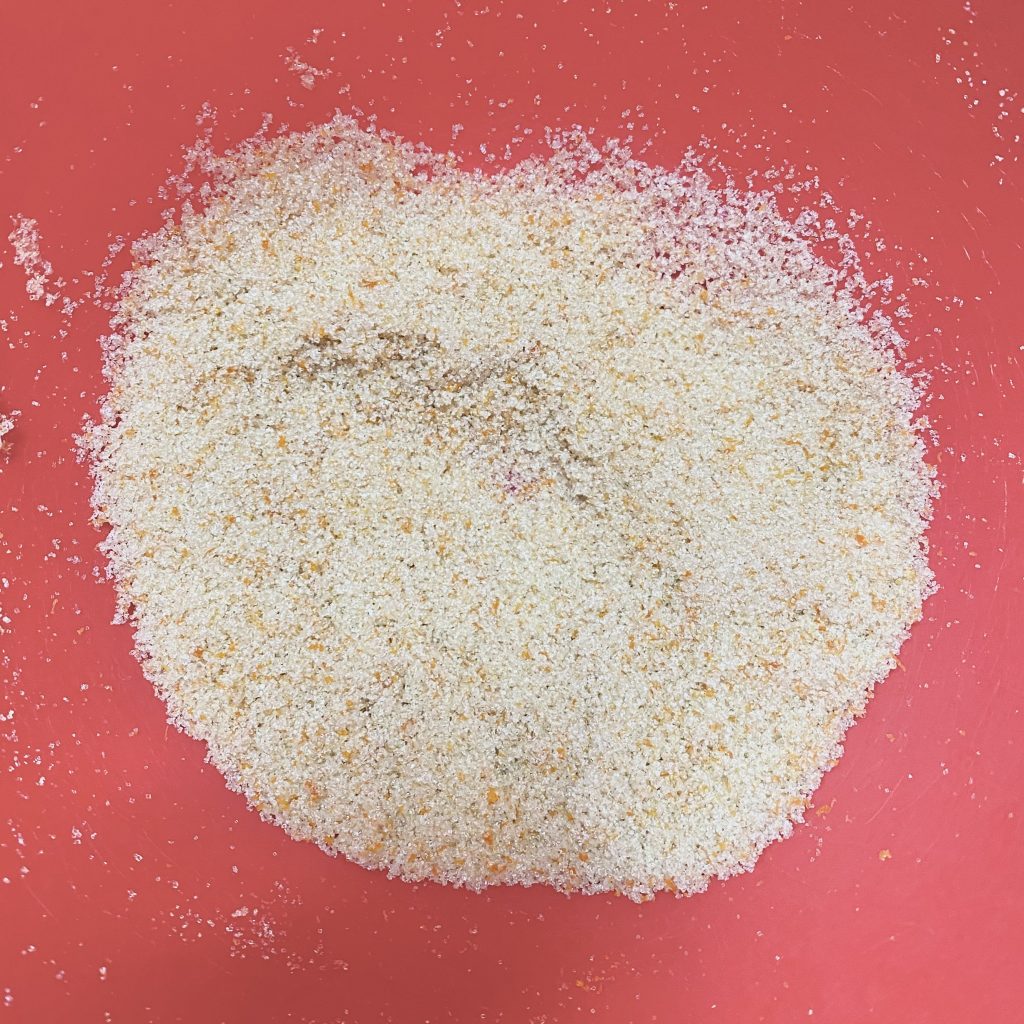
Place the caster sugar and orange zest into a large bowl and mix together, using the back of a spoon to really press the ingredients into each other, until the zest is evenly distributed throughout the sugar. This helps to extract every bit of flavour from the zest.
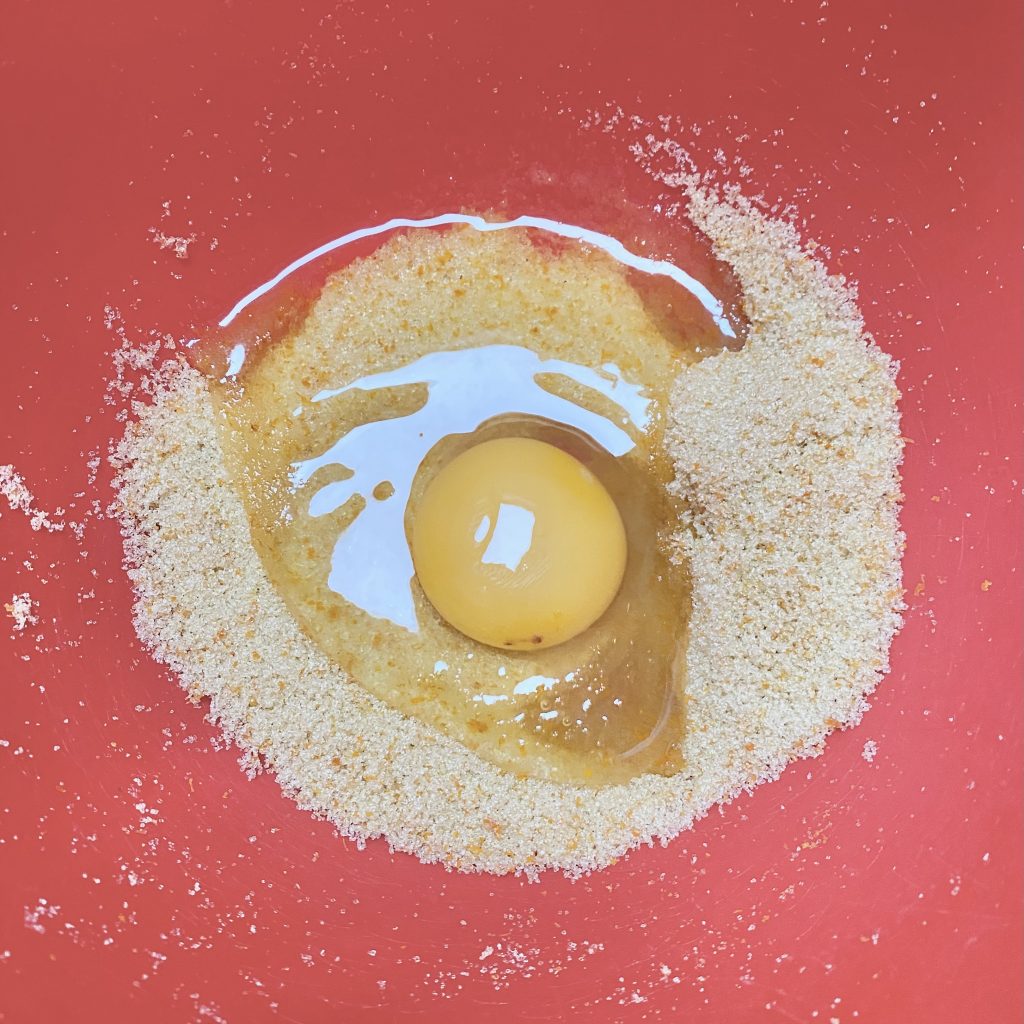
Then, add the eggs and whisk (I like to use a handheld electric whisk for this, but you could use a freestanding mixer, if you prefer) until the ribbon stage is achieved. When the mixture is ready, it should be pale and creamy. The mixture should be falling off the beaters in ‘ribbons’ (hence the ‘ribbon’ stage), with which you should be able to draw a figure of eight before they settle back into the rest of the mixture.
At this point, you can add the olive oil. With the mixer going, add the oil to the mixture in a slow, continuous stream and mix until completely incorporated.
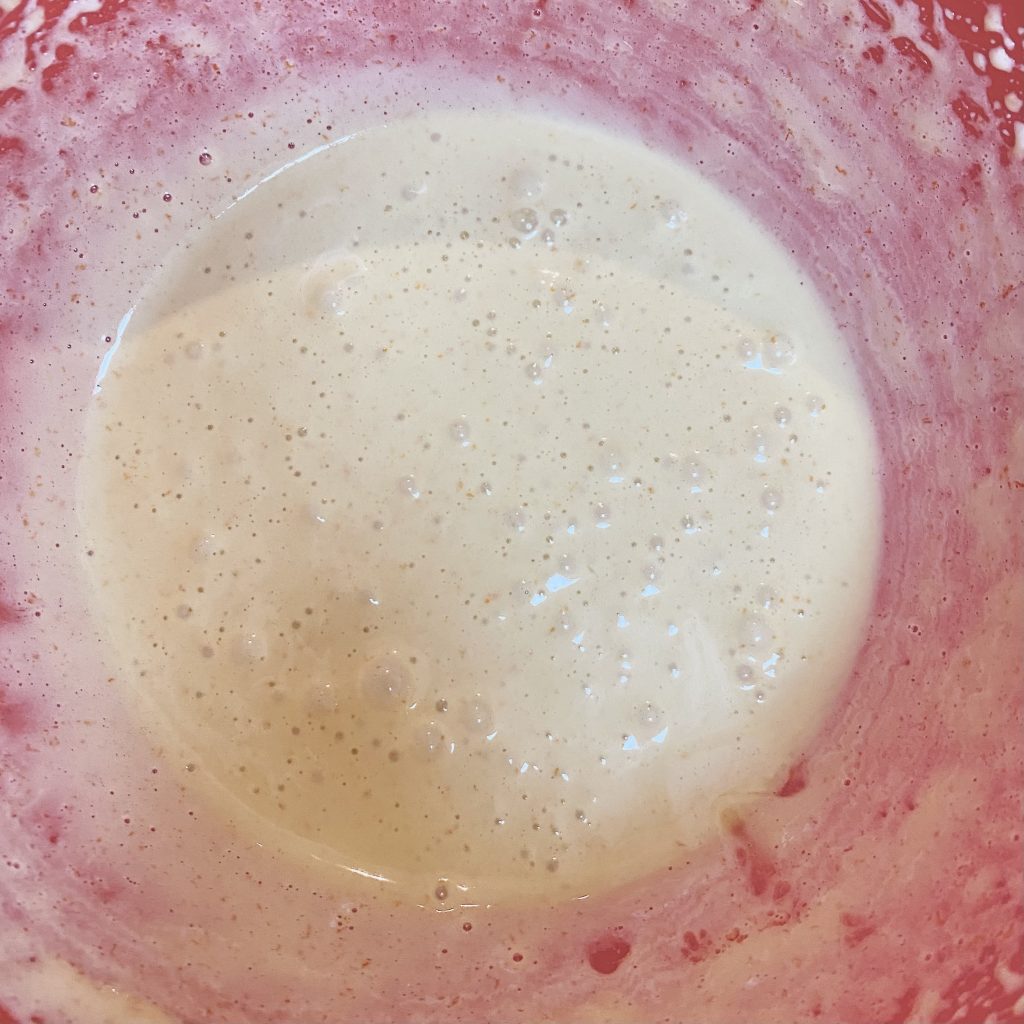
Next, add the freshly squeezed orange juice and mix again, to combine.
Finally, sift in the dry ingredients (the flour, baking powder and salt). Use a large, metal spoon to carefully fold them into the mixture, until no streaks of flour remain.
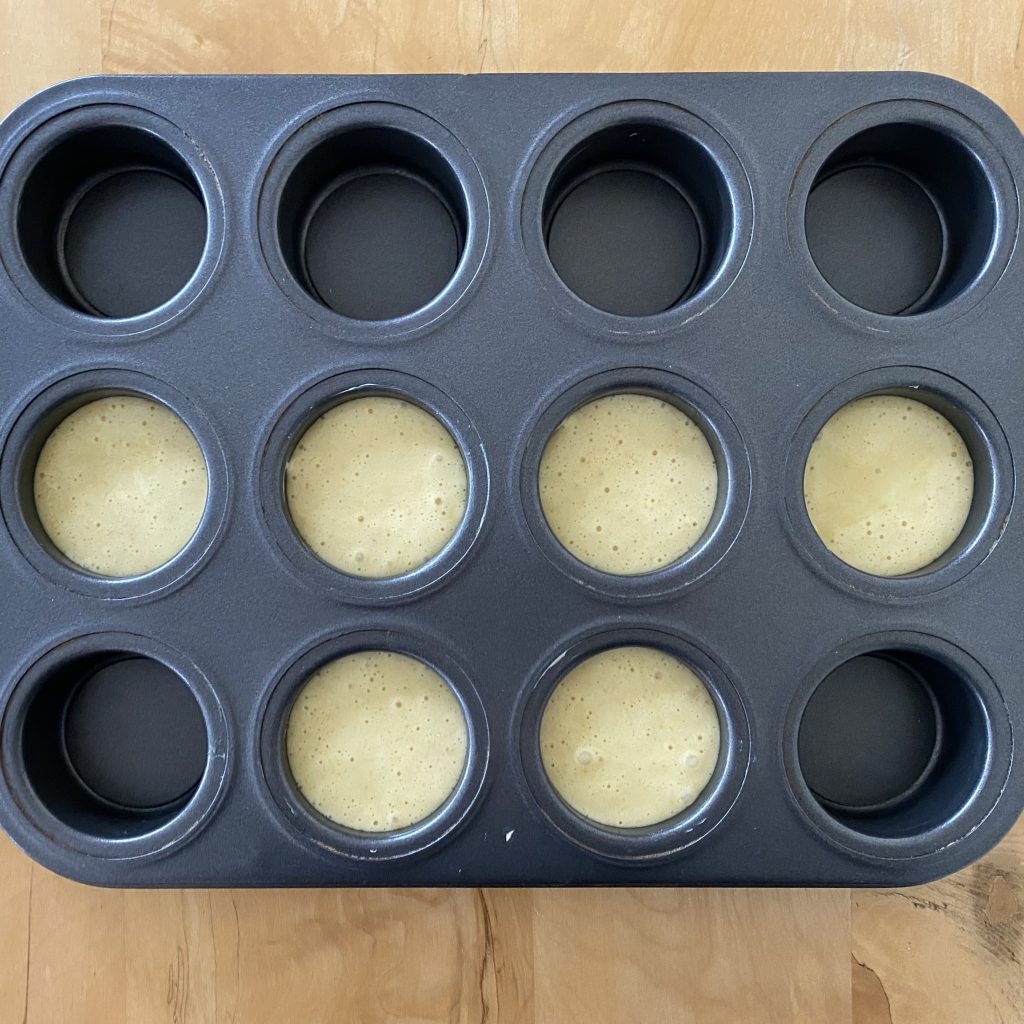
Divide the mixture between the 12 holes of the prepared tin, then bake in the preheated oven for 25-30 minutes, or until the cakes have turned a deep, golden colour and a sharp knife/skewer comes out clean (or with only a few moist crumbs).
Allow the cakes to cool in the tin for about 5 minutes before using your fingers to gently pull the cakes away from the side of the tin. Once the tray is cool enough to handle, push the cakes out from the bottom, using the removable bases of the tin to help you, and transfer the cakes to a wire rack to cool completely before filling and decorating.
Making the Greek Yoghurt and Honey Icing
This icing is super quick and easy to make- you literally put all of the ingredients in a bowl and whisk! Again, I like to use a handheld electric whisk for this, but you can use a freestanding mixer, if you prefer. You can even use a hand whisk, if you’re feeling particularly energetic!

Place the Greek yoghurt, cream and honey into a large bowl.
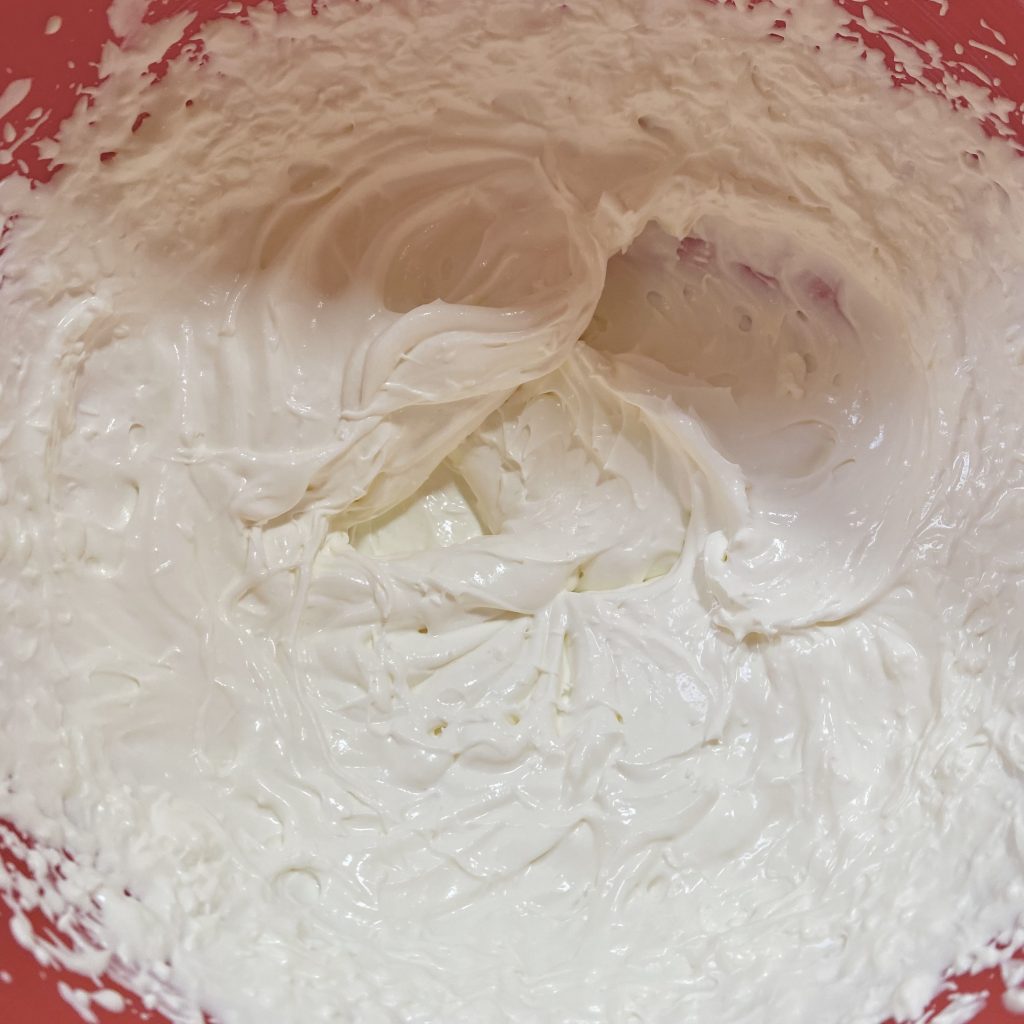
Whip on high speed until the mixture is thick and just about holding a stiff peak- you want it to hold its shape when piped, but not to be over-whipped and turn into a strange, tangy butter hybrid situation. Not the vibe.
And that’s it! You can always add more/less honey if you want to make it more/less sweet, so do whatever works for you. Transfer the icing to a piping bag, fitted with a small(ish), round nozzle and you can get to assembling!
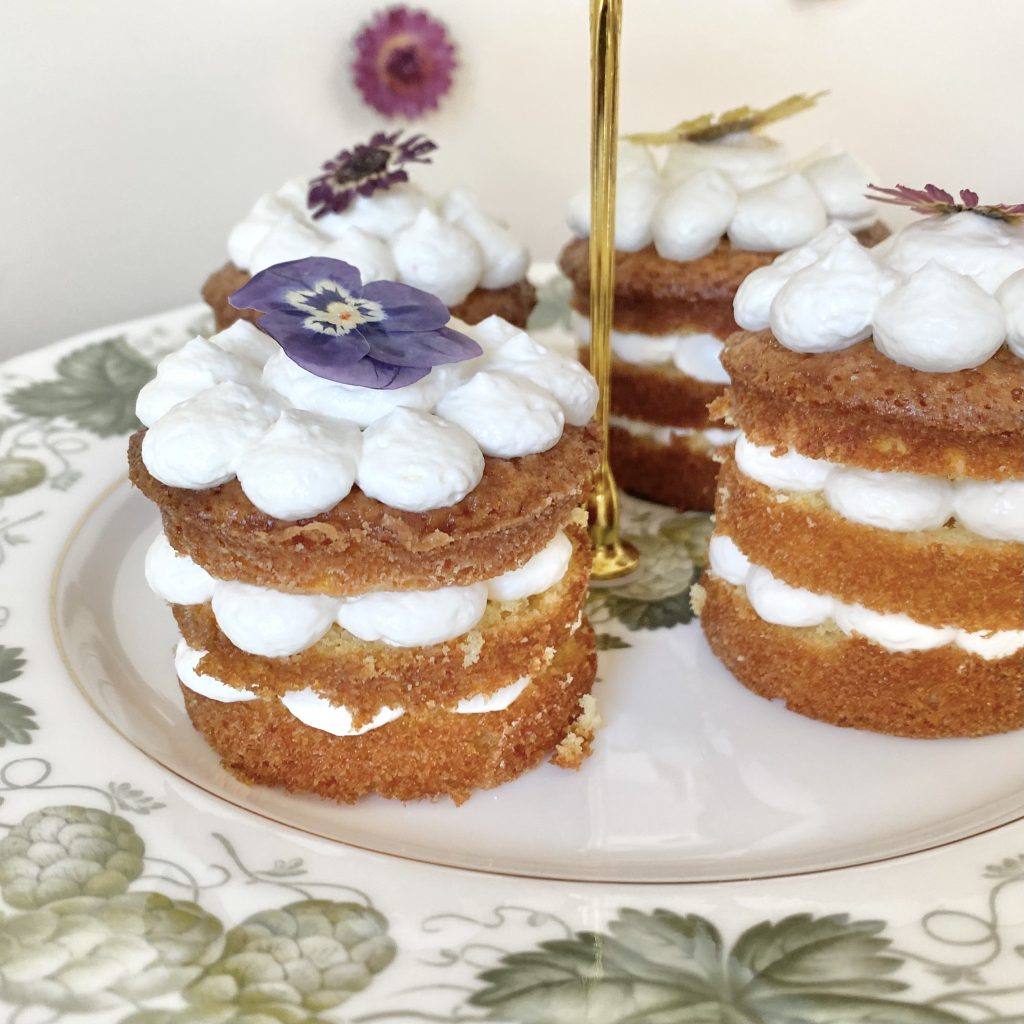
Assembling the Mini Layer Cakes
Once the cakes are completely cool and your icing is whipped and ready to go, you can assemble your cakes.
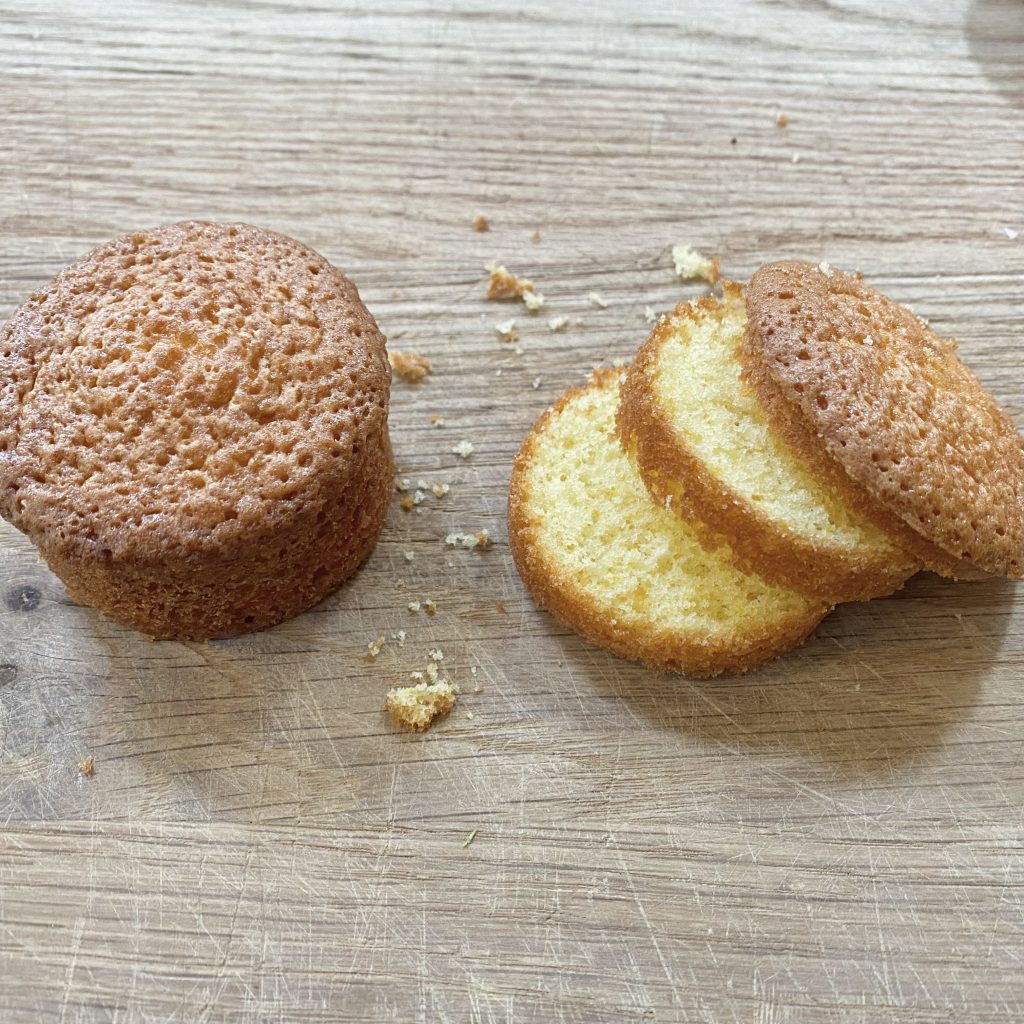
Start by using a small, serrated knife to cut each cake into 3 horizontal layers. The cakes are pretty sturdy, but you still want to use a gentle, sawing motion here to prevent any breakage.
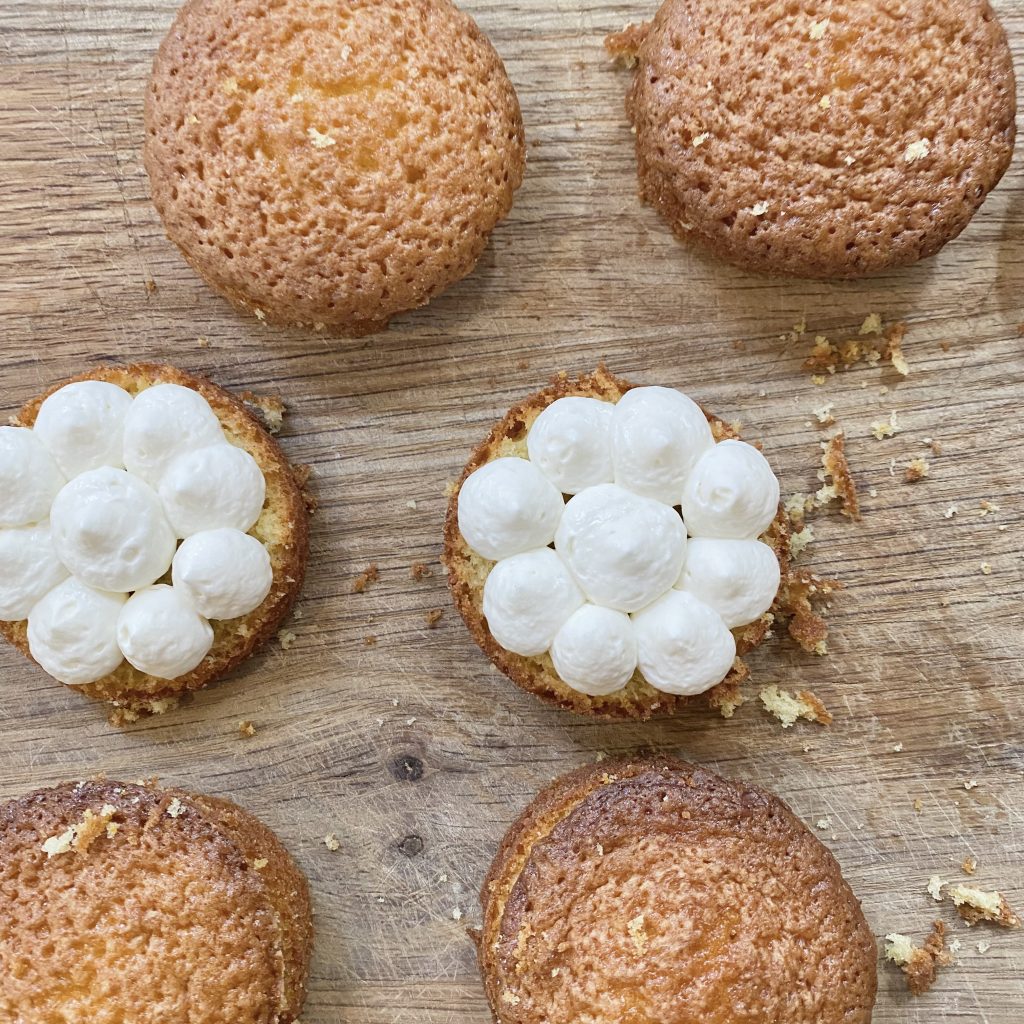
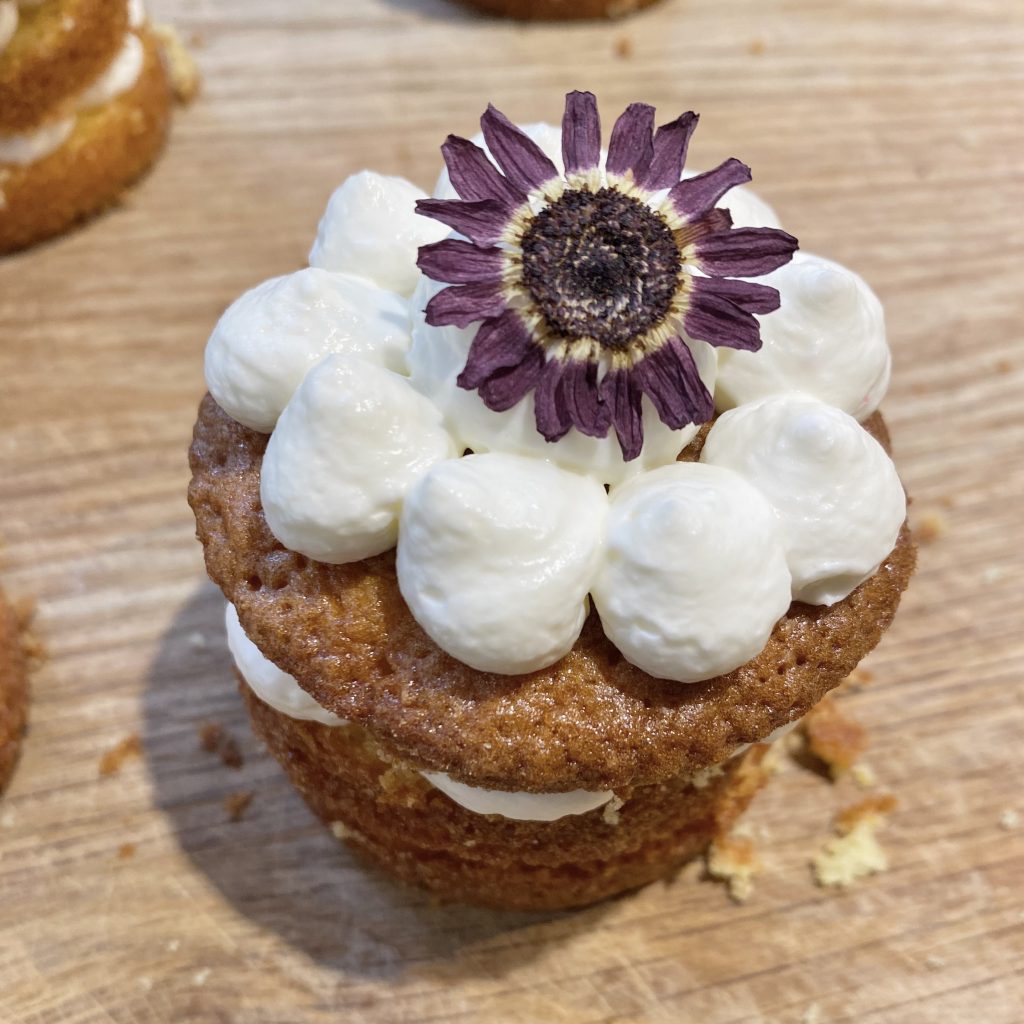
To fill the cakes, I opted to pipe little dollops of icing all around the circumference of the layers, then filled the remaining space in the middle with one, bigger dollop. This gives the cakes are super pretty, professional look once they are stacked up, but you can fill them however you like- if you don’t have a piping bag, you could always just spread the icing on with the back of a spoon! It’s completely up to you.
Pipe the icing onto the bottom layer of each cake, then sandwich the middle layers right on top. Repeat the piping process all over again, before finishing off each cake with their final, domed top layer.
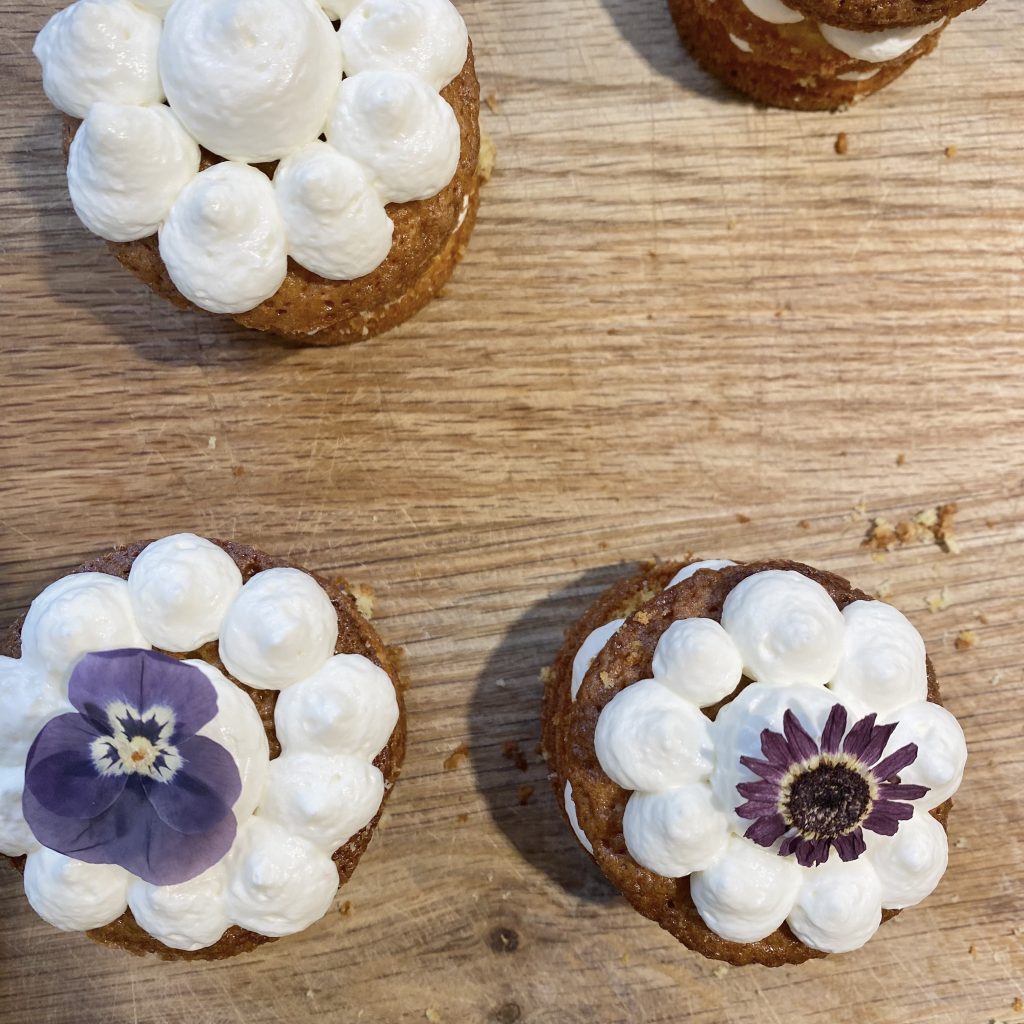
Once the cakes are filled, it’s time to ice the tops. I used the same icing pattern for the top, and pressed one edible dried flower onto the larger, middle dollop on each cake, as decoration.
And that’s it! Your mini layer cakes are ready! Once filled, they are best eaten right away, but will keep in the fridge for 1-2 days (as long as the icing ingredients are still within their use by dates, of course).
Mini Orange and Olive Oil Layer Cakes with Greek Yoghurt and Honey Icing Recipe

Mini Orange and Olive Oil Layer Cakes with Greek Yoghurt and Honey Icing
Equipment
- 1 x 12-hole mini sandwich tin (see Note 1).
Ingredients
For the orange and olive oil cakes:
- 150 g caster sugar
- 2 oranges, zested.
- 2 eggs
- 60 ml extra virgin olive oil
- 60 ml orange juice, freshly squeezed (about 1 orange).
- 125 g plain flour
- 1 tsp baking powder
- Pinch of salt
For the Greek yoghurt and honey icing:
- 340 g full-fat Greek yoghurt
- 170 ml double cream
- 2 tbsp runny honey (or to taste).
Instructions
Make the orange and olive oil cakes:
- Preheat the oven to 180°C. Brush each cavity of the mini sandwich tin with a thin layer of DIY Cake Release (see Note 2) and line the bases with a circle of greaseproof paper. Set aside.
- In a large bowl, mix together the sugar and the orange zest, using the back of a spoon to press the ingredients into each other, until the zest is evenly distributed throughout the sugar.
- Add the eggs to the sugar and zest mixture, then beat, using an electric whisk on high speed, until the mixture reaches the ribbon stage.
- With the mixer running, add the oil to the mixture in a slow and steady stream, whisking until it is completely incorporated.
- Add the orange juice and whisk again to combine.
- Sift in the flour, baking powder and salt, then fold in using a large, metal spoon until no streaks of flour remain.
- Divide the mixture evenly between the 12 cavities of the prepared tin, then bake in the preheated oven for 25-30 minutes, or until the cakes have turned a deep, golden colour and a sharp knife/skewer comes out clean (or with only a few moist crumbs).
- Allow the cakes to cool in the tins for 5 minutes, then use your fingertips to gently pry each one away from the edges of the tin. Once the tin is cool enough to handle, remove the cakes from the tin, using the removable bases to push them out from the bottom, and transfer to a wire rack to cool completely before filling and decorating.
Make the Greek yoghurt and honey icing:
- Place the Greek yoghurt, double cream and honey into a large bowl. Using a handheld electric mixer (or your preferred utensil), whip on high speed until the icing just about holds stiff peaks.
- Transfer the icing to a piping bag, fitted with a small, round nozzle, ready to fill the cakes.
Assemble the mini layer cakes:
- Use a small, serrated knife to cut each of the cooled cakes into 3 horizontal layers.
- Pipe a concentric circle of icing dollops around the circumference of each of the bottom cake layers, then fill the gap in the middle with one larger dollop.
- Sandwich the middle cake layers on top of the bottom layers, then repeat the piping process again and top with the final, domed cake layers.
- Pipe a final layer of icing on top of each cake, then decorate with an edible dried flower, or your choice of decoration, and serve. The cakes are best served on the day they are assembled, but will keep in the fridge for 1-2 days (as long as the icing ingredients are within their use by dates).