
🎄☃️✨ Welcome to Day 17 of Blogmas At Home! It’s 8 days until Christmas and the chestnuts are roasting (on an open fire). ✨☃️🎄
Today’s post is something completely new to the blog: a knitting journal setup for the whole of 2024. This journal is not actually for me, but for my mum, who knits a lot. I first made a knitting journal for my mum last year and she ended up really loving it. She uses the journal alongside Ravelry (a sort of social media/project tracking platform for knitters and crocheters).
She requested another journal for her Christmas present this year, so I have set up a full year’s worth of spreads in a brand new journal for her. Today, I’ll go through the journal so that you can see the spreads she has requested and how I went about actually setting the up. Even if you’re not a knitter, you might find some bullet journalling/design ideas to inspire you!
Also, Mum, if you’re reading this- look away now!
Table of Contents
Concept
Because I knew that I would be setting up a large number of spreads all at once, I wanted to make sure that the decoration and theming for this journal was super simple and quick to set up. Last year, I used a different colour for each month and my mum found it very helpful for navigating her way through the journal- so much so that she requested that again this year. I opted to use an extended rainbow of 11 Crayola SuperTips (+ 1 gold pen) and used one colour for each month, in rainbow order, as you can see above. This was great, because it took out all of the hassle of deciding which month was which colour- I had my order and I stuck to it. For the opening section of the journal, I just used all of the colours, to distinguish those more ‘general’ pages from the month-specific ones. You’ll see what I mean later on!
While the gold pen was technically December’s colour, I did add little sparkle doodles throughout all of the spreads, just to add a touch of cheer and to tie all of the spreads together. My love of sparkle cannot be contained!
Journal
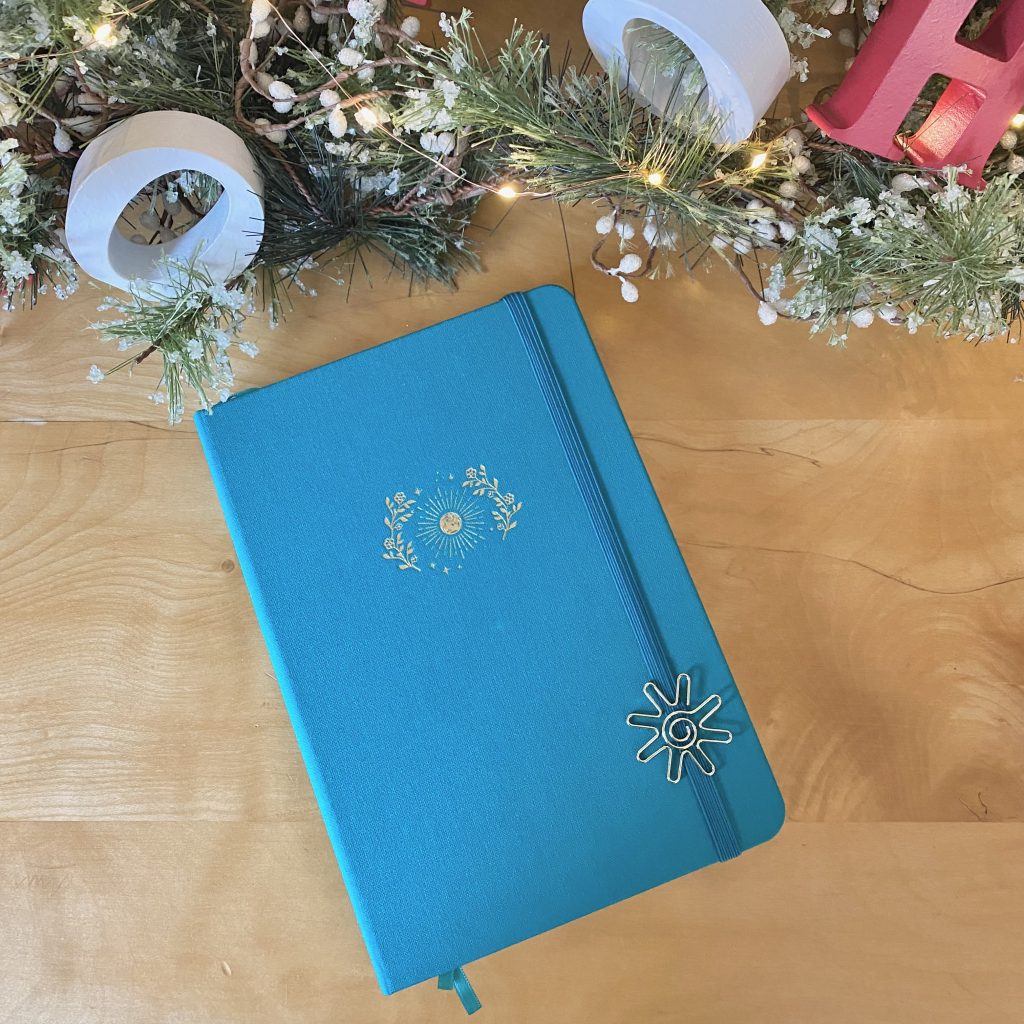
Mum chose this ‘Sun Solstice’ journal from Notebook Therapy for her knitting journal this year. It is a bright teal colour and comes with this gold sun paperclip, which is fun. As always with my journal setups, I’m using the A5 notebook size. This journal is currently sold out, and it was limited edition, so I’m not sure if it will be back, but Notebook Therapy has plenty of other journal options to pick from.
Equipment + Supplies
I tried to keep the different equipment I used to a minimum for this setup. For the whole setup, I only used:
- Muji 0.38mm pen, black.
- 11 rainbow shade of Crayola SuperTips (the exact pens that I used are from a combination of this pastel pack and this assorted pack).
- STAEDTLER metallic marker pen, gold.
- Tombow ABT Dual Brush pens: Warm Grey 1 (N89), Lamp Black (N25) and Light Sand (990).
- Thin washi tape (I used a dark reddy-pink, but you could use any rainbow colour).
- Ruler.
- Scissors.
- Pencil.
- Eraser.
Initial Pages: General Info
Cover Page
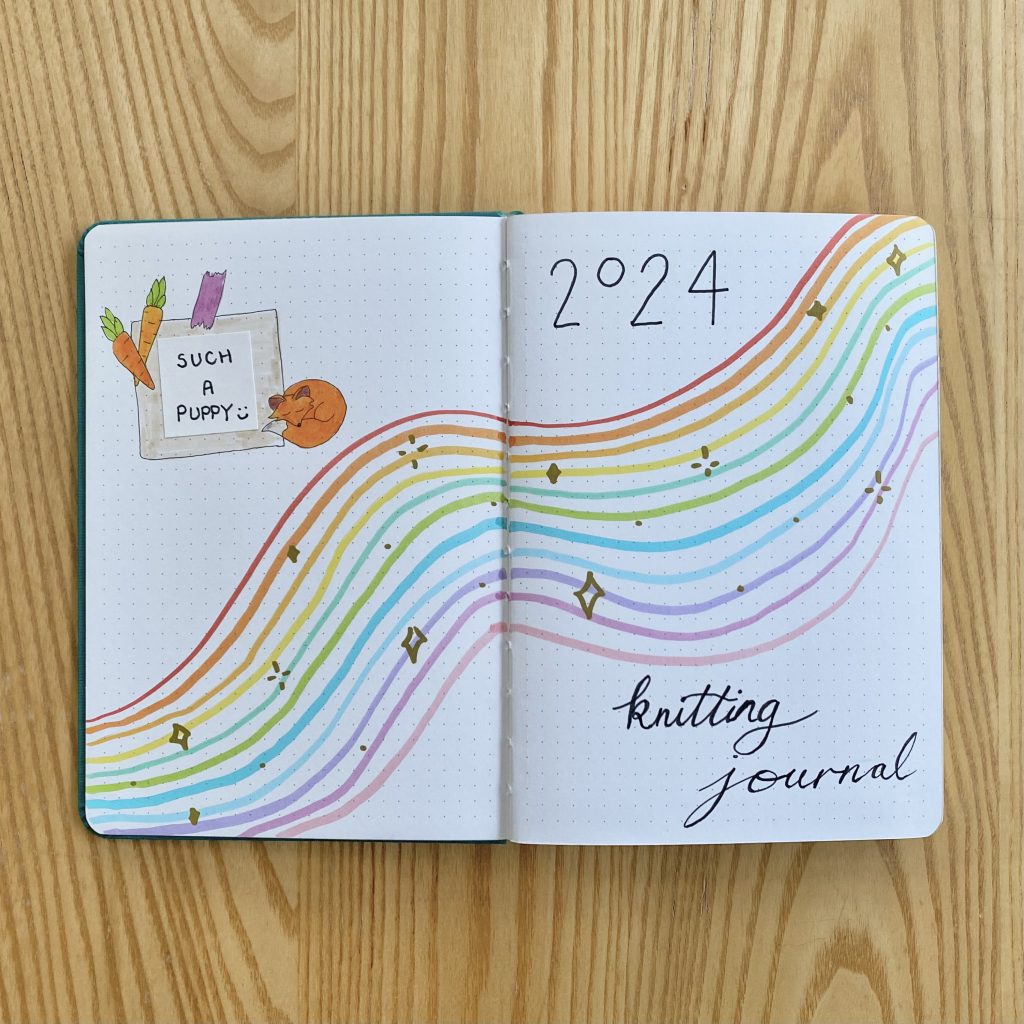
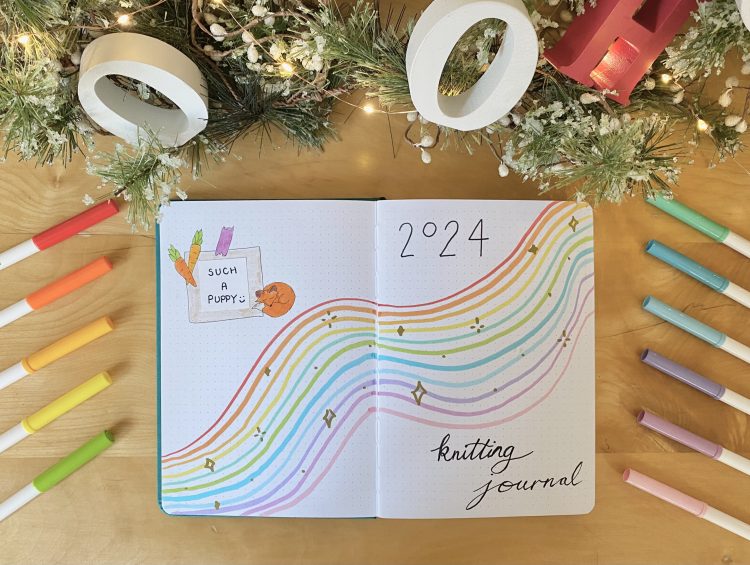
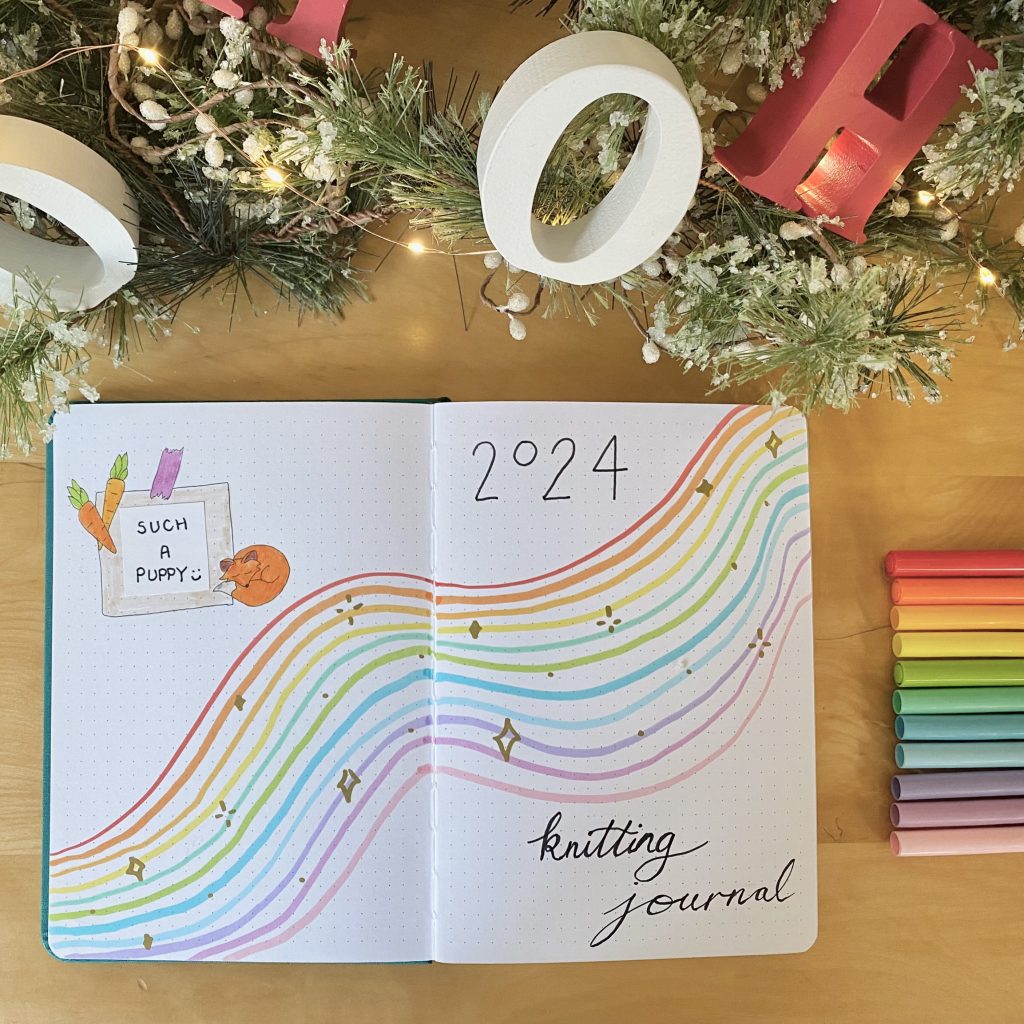
For the Cover Page, I drew wavy lines across the spread in each of my 11 shades of Crayola SuperTips, in rainbow order. Over the top, I drew a variety of golden sparkle doodles, scattering them over the stripes, with my STAEDTLER gold pen.
On the right-hand page, I wrote ‘2024’ above the rainbow stripes in a simple, sans-serif font. I wrote ‘knitting journal’ below the stripes, using a more cursive-style font. For both of these, I used the fine tip of my Tombow N25 pen.
On the left-hand page, I added in a little doodle of an in-joke I have with my mum, just to make her laugh. I’d explain, but, inevitably, it won’t sound nearly as funny and I will look like a fool. You’ll just have to stay confused- sorry!
Future Projects
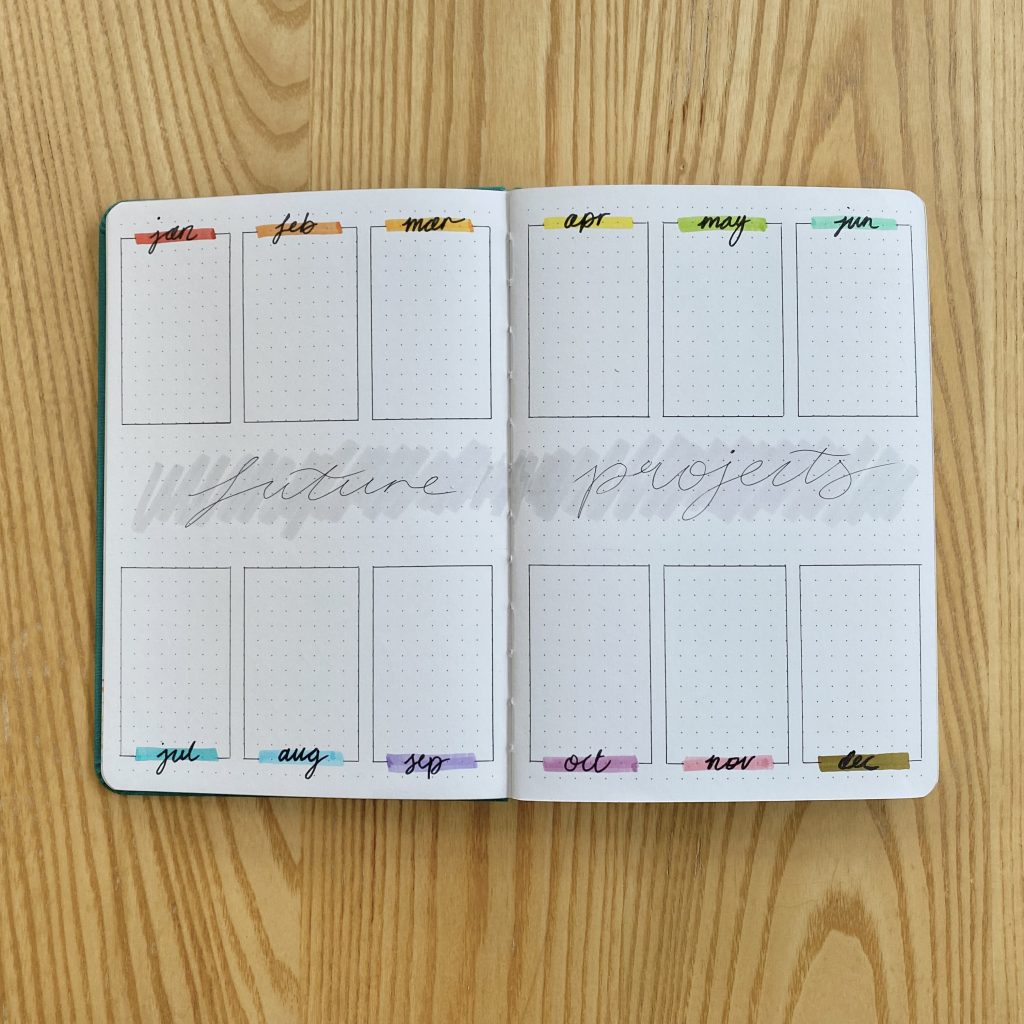
Last year, I made a Future Log (i.e. a yearly calendar) for the knitting journal, but my mum did not end up using that very much. This year, I converted it to a ‘Future Projects’ page- a space for her to map out when she plans to make particular projects throughout the year.
For this spread, I placed the header in the centre and highlighted the area with my Tombow N89. I then wrote on top of that section with my Muji pen (though it doesn’t stand out very well- if I were to do it again, I would probably use my Tombow N25 for this). I then divided both the space above and the space below the header into 6- so there were 12 boxes in total, one for each month of the year. I drew the boxes with my Muji pen, then used a different colour of Crayola SuperTips (in rainbow order) to create a header for each one, over which I wrote the first 3 letters of each month, using my Tombow N25. The colours here correspond to the colour that I used for the individual pages for each month, to keep things cohesive and easy to use.
Project Ideas
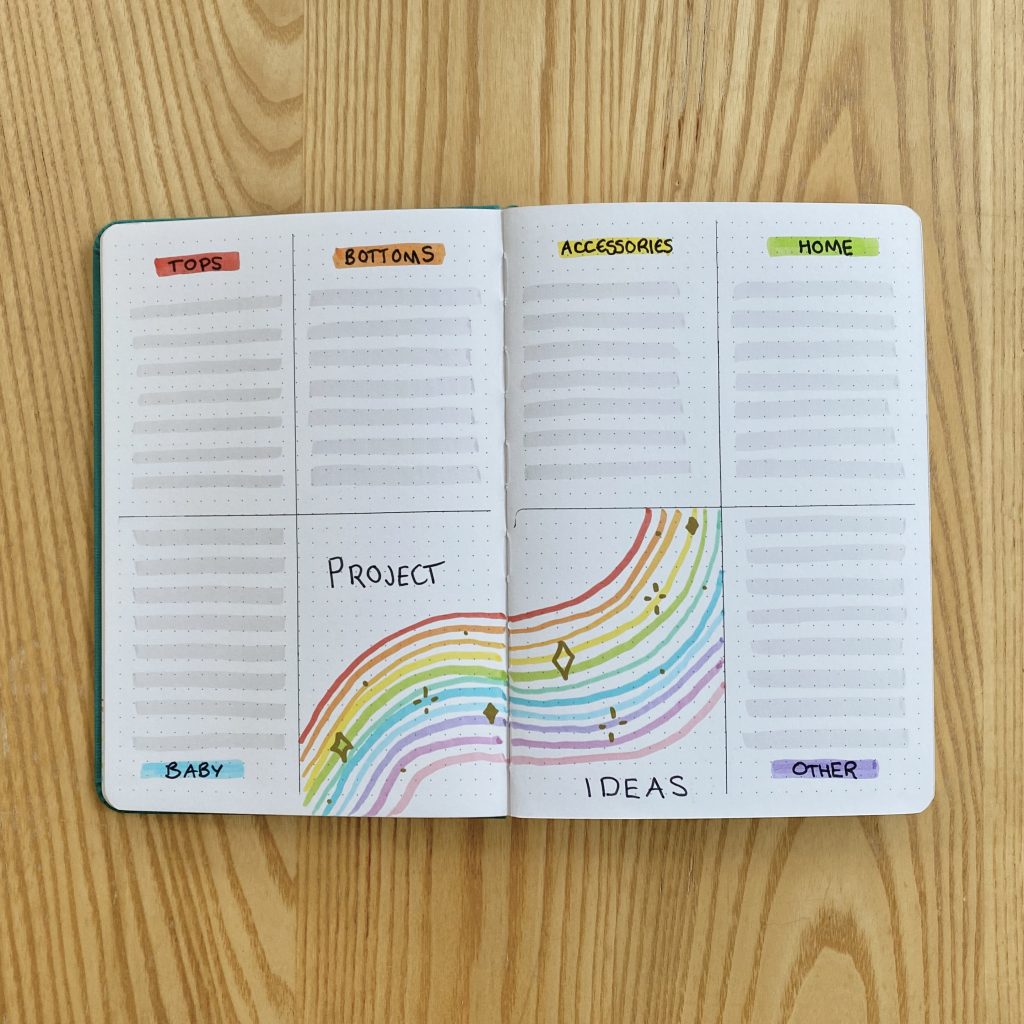
This next spread is a place to store any project ideas or patterns my mum might like to try. I’ve separated them out by category- there’s tops (though I feel I probably should have included a separate section for jumpers…), bottoms, accessories, home, baby and other.
To make this spread, I divided each page into quarters. I assigned 6 of the quarters to a category, then used that remaining two for the heading. For the heading, I essentially replicated the cover page, but wrote ‘Project Ideas’, instead.
Wool Notes
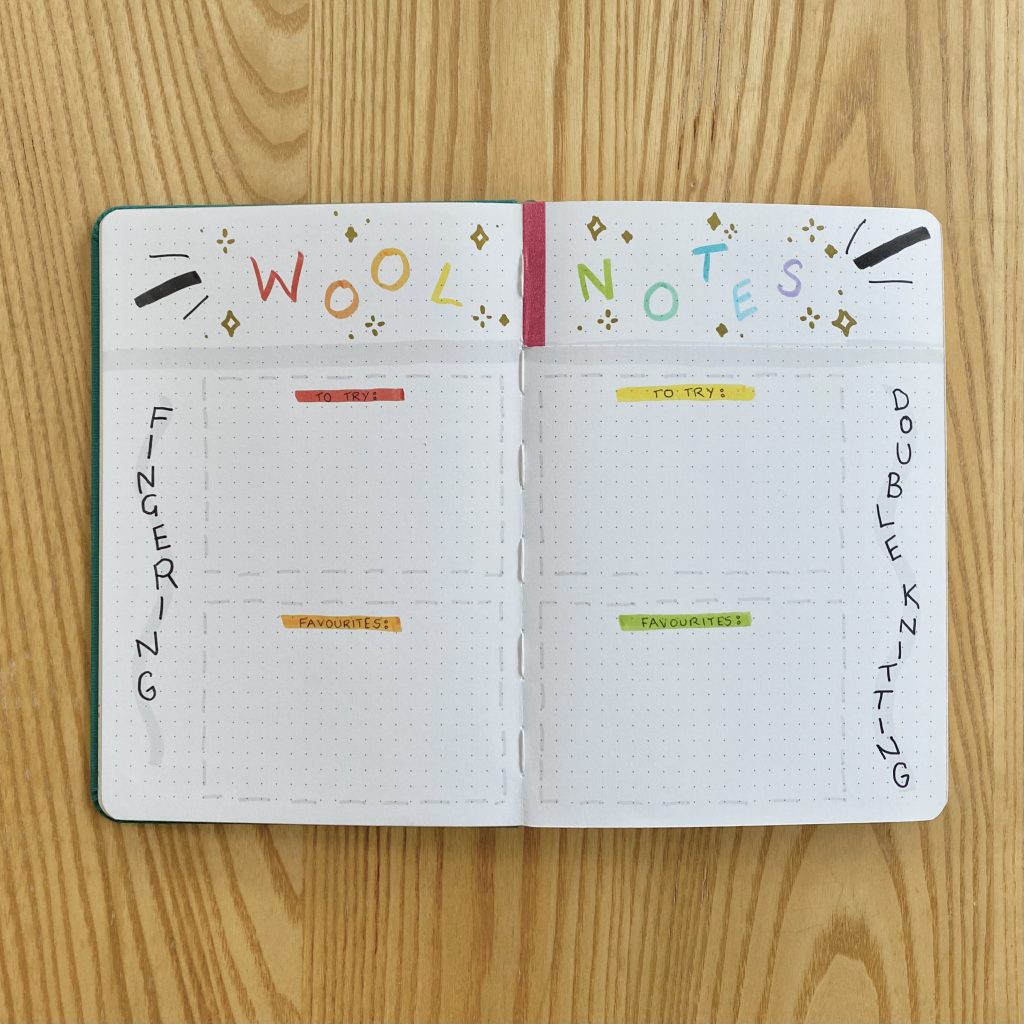
This section is essentially a kind of Wool Wishlist/Rating hybrid. It’s a place for my mum to jot down yarns she would like to try, as well as any notes on her favourites (just realising now that it should probably be called Yarn Notes…? Ah, well.). I have split this section into different weights of yarn- so there’s one for fingering, one for double knitting and one for worsted (which are the yarns my mum tends to use the most). I’ve also included a section for miscellaneous other yarn weights, because last year she did end up making a few notes on lace weight and chunky yarns.
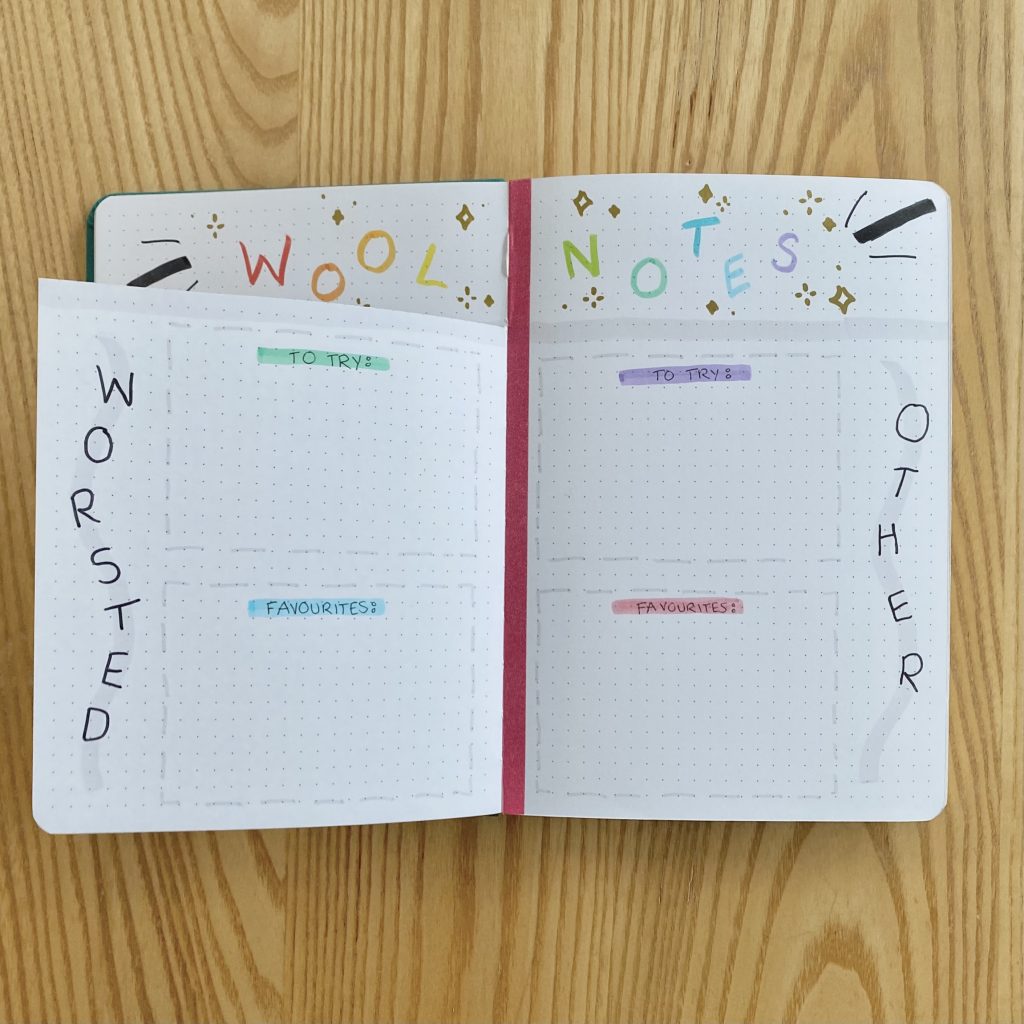
I opted to use a Dutch door for this spread, to make sure that there was plenty of room for all of the sections and to keep everything organised. To make that, I used two double-page spreads and cut away the top of the central page. You have to be a bit careful when you do this, because if you cut too close to the middle of the page, it can affect the binding and make some of your pages fall out! I really don’t like the look of the little paper strip that you have to leave behind for this reason, though. My solution was to stick a piece of thin washi tape over it, to hold it in place and ✨disguise✨ the ugliness. Honestly, I think it looked pretty well- I know it looks a little out of place, but it is definitely the lesser of two evils.
After that, I used my Tombow N89 to draw across the top of each of the 4 pages, at the height of the Dutch door. I then assigned one yarn weight to each of the 4 pages. I used the brush tip of the same Tombow pen to draw a wavy line down the outside edge, on top of which I used my Tombow N25 to write the yarn weight in block capitals. I then used the fine tip of the N89 pen to draw 2 dashed line boxes, each taking up half of the remaining space, on each page. I created the headers for each box using a variety of rainbow Crayola colours. For each yarn weight, the top box is for Yarns To Try and the bottom box is for notes on any Favourites.
I used the blank space at the top for the header. I wrote ‘Wool Notes’ in block capitals, using the Crayola SuperTips, the added some sunburst decorations using the Tombow N25 and some sparkle doodles using the STAEDTLER gold pen.
Measurements
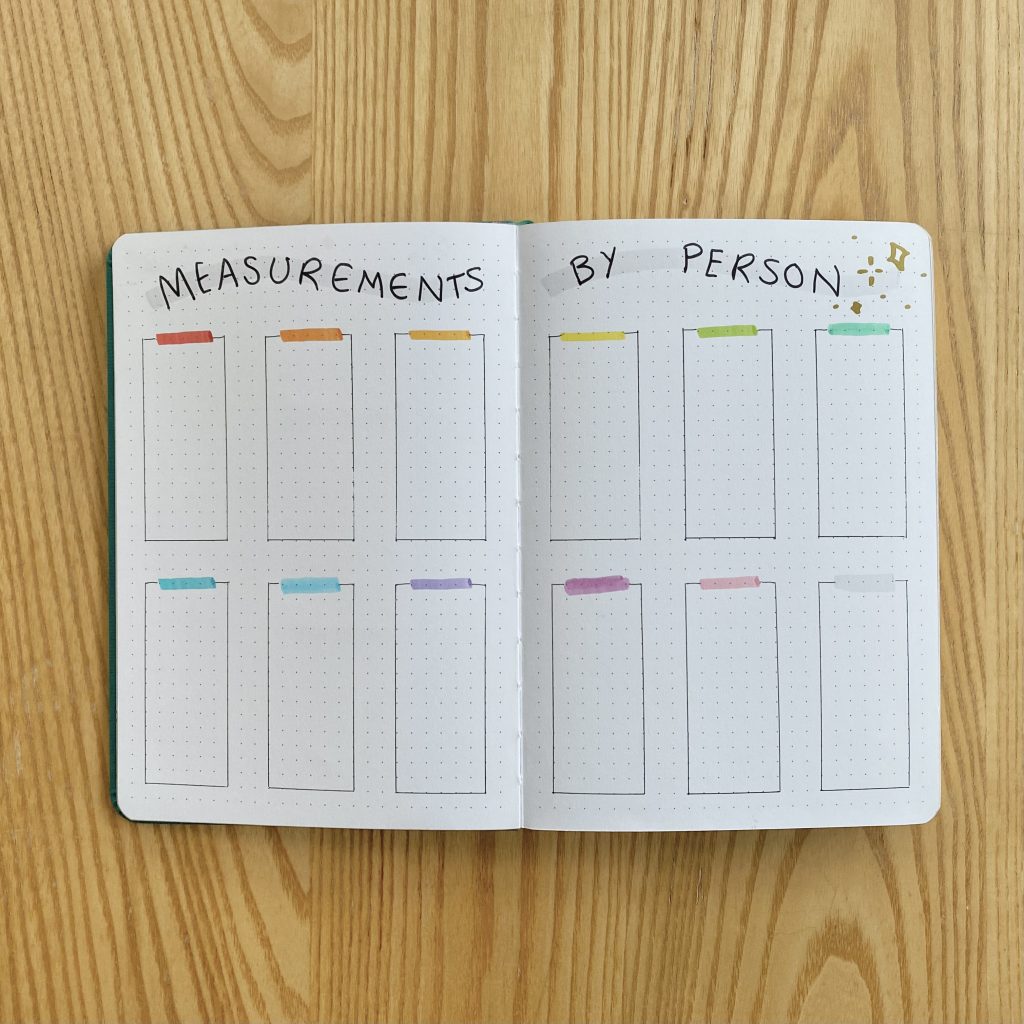
For the Measurements spread, my mum requested that they be organised by person (so, for example, all of my measurements for socks, jumpers etc. would be kept together, rather than all of the sock measurements).
I wrote the header along the top in a style that I ended up using throughout the rest of this setup- I first drew a wavy line in a highlight colour (for this page, that was my Tombow N89), then I wrote over that in block capitals using my Tombow N25. I also added some gold sparkle doodles (for good measure).
For the individual boxes, I divided the remaining space on each page into 6, to give me 12 boxes overall. I drew the same, very simple boxes, using my Muji pen and used a different colour of Crayola SuperTips for the header (where my mum can write the name of a person) of each box.
Scrap-Sorting and Stash-Busting
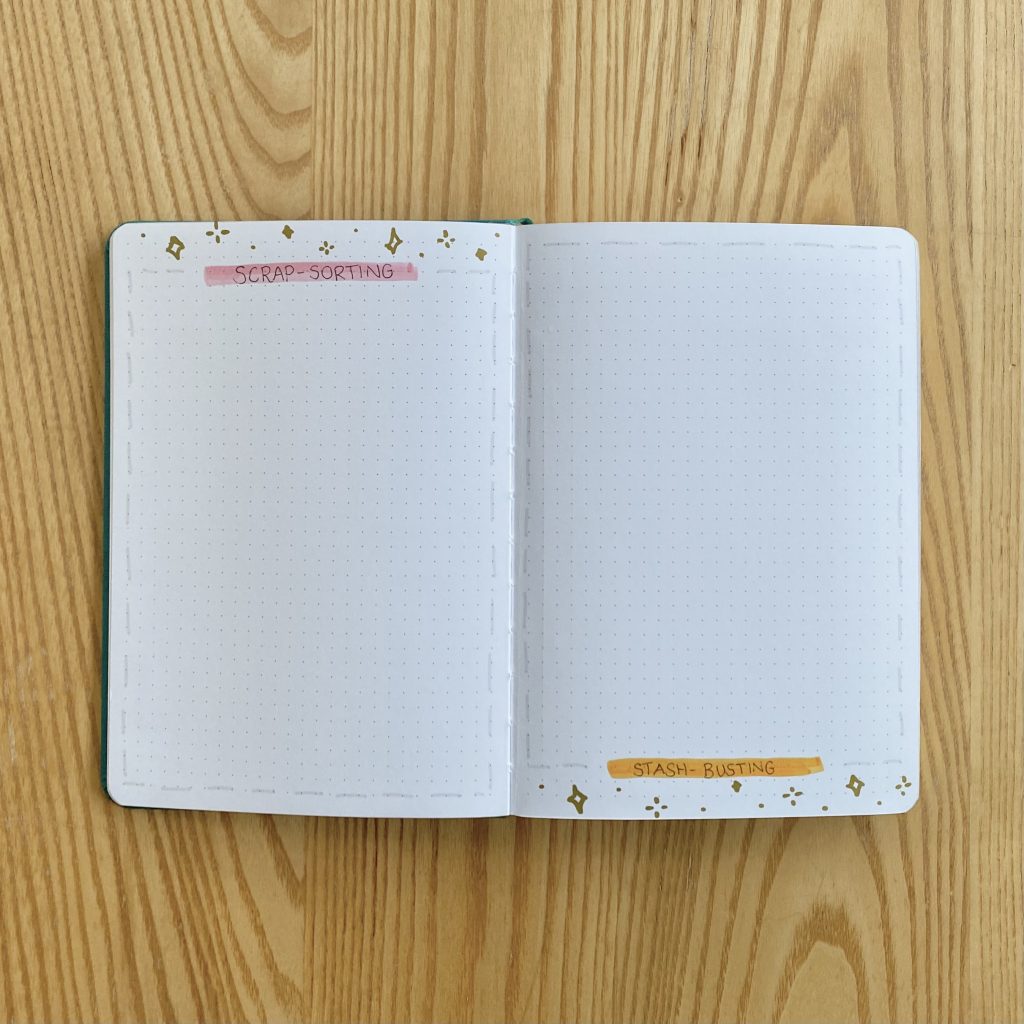
These spreads are super simple, because I left them as close to blank as possible to leave lots of space for notes and planning! I devoted the left-hand page to Scrap-Sorting and the right-hand page to Stash-Busting. Each page is comprised of a dashed outline, made using my Tombow N89, with a different colour header- I went for pink and orange- which I then wrote over the top of with my Muji pen.
Present Ideas + Plans
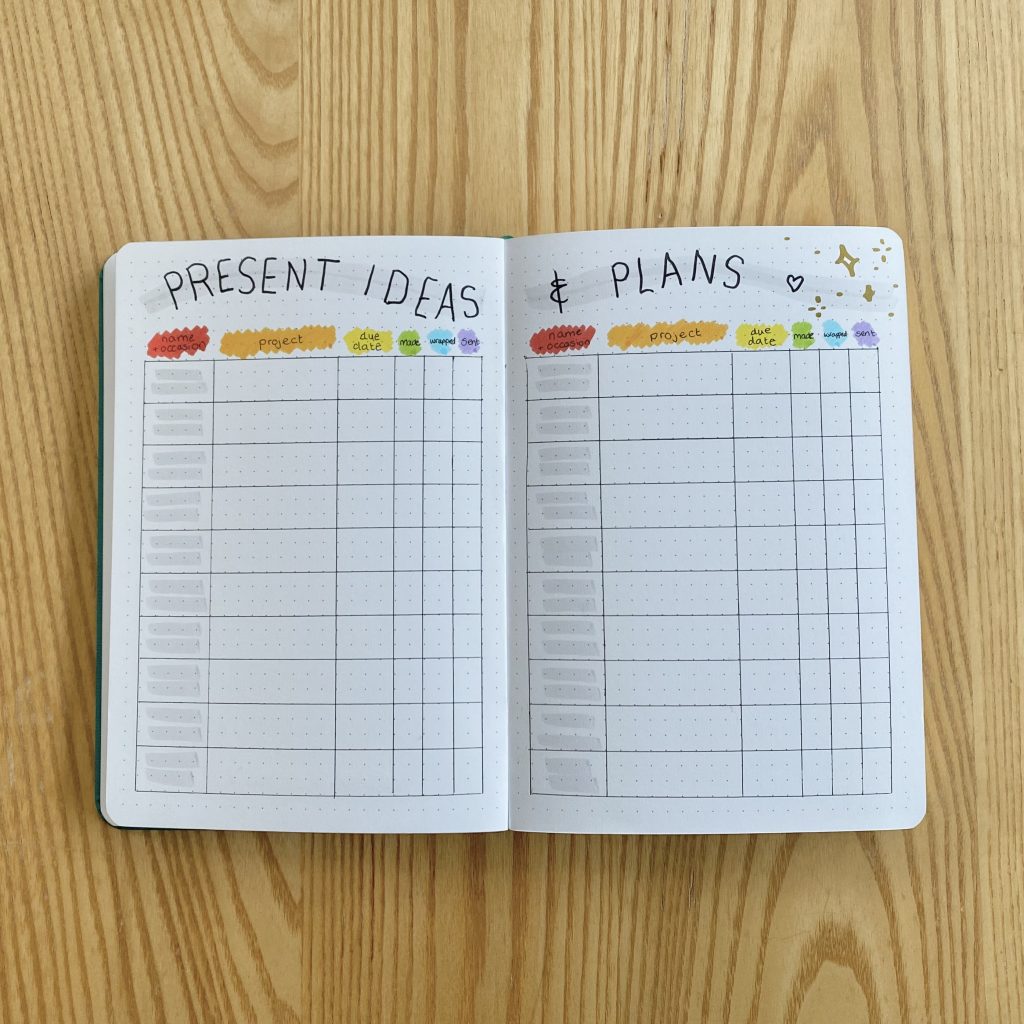
I guess this is essentially a kind of Present Tracker? It’s basically just a table to write in potential presents/keep track of any gifts that my mum might be knitting for others. This spread spans two pages, but both pages are exactly the same- the table just repeats. In the table, the first column is for the recipients name (and the occasion), then there’s a column for the project and a column for when the gift needs to be completed by. The final 3 columns are just tick boxes- there’s one for when the project has been finished, one for when it has been wrapped and one for when it has been sent.
I went for the same header as the Measurements page for this spread. I drew both of the tables with my Muji pen, then scribbled little patches of colour (in rainbow order, of course) above them, for the column headers.
Monthly Spreads
As I mentioned earlier, I allotted a single colour to each month (in rainbow order) to make this journal super easy to use. This was also helpful because each month (bar December) follows the exact same format, so it would have been a bit confusing if there was nothing to distinguish one month from the other! In general, each month has the following pages:
Dashboard + Cover Page
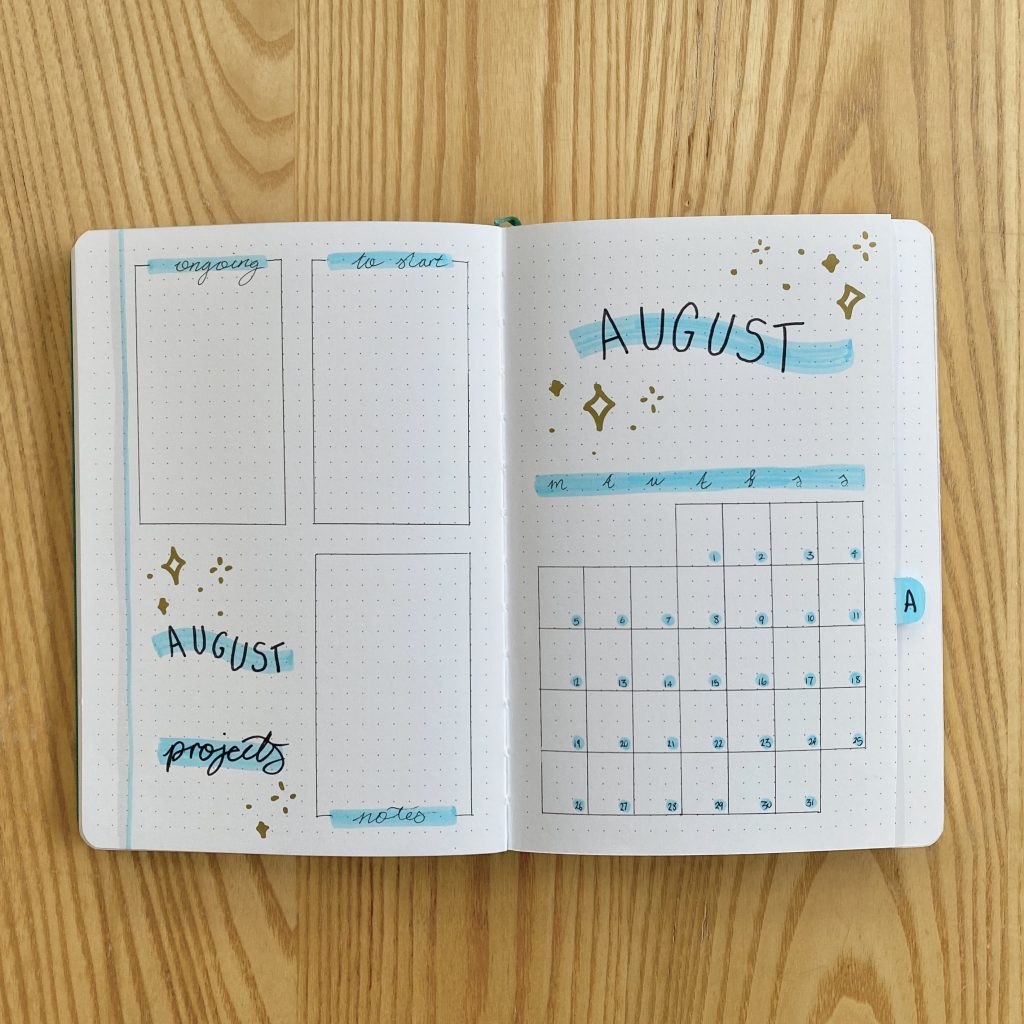
The Dashboard is a space for my mum to organise her knitting projects for the month. I divided this page into 4, with the bottom left quadrant being used for the page title and the other three quadrants for jotting down Ongoing projects, projects To Start and miscellaneous Notes.
I followed the same design style that I used in the initial pages: the wavy/block capital headers, the sparkle doodles and the simple boxes with colour block headers. The only thing a little different here is the border down the left-hand side. I made this by drawing a thick line with the brush tip of my Tombow N89, then a thinner line beside it with that month’s colour. This is so that the tab (which is cut out of the Cover Page) stands out when the page is turned.
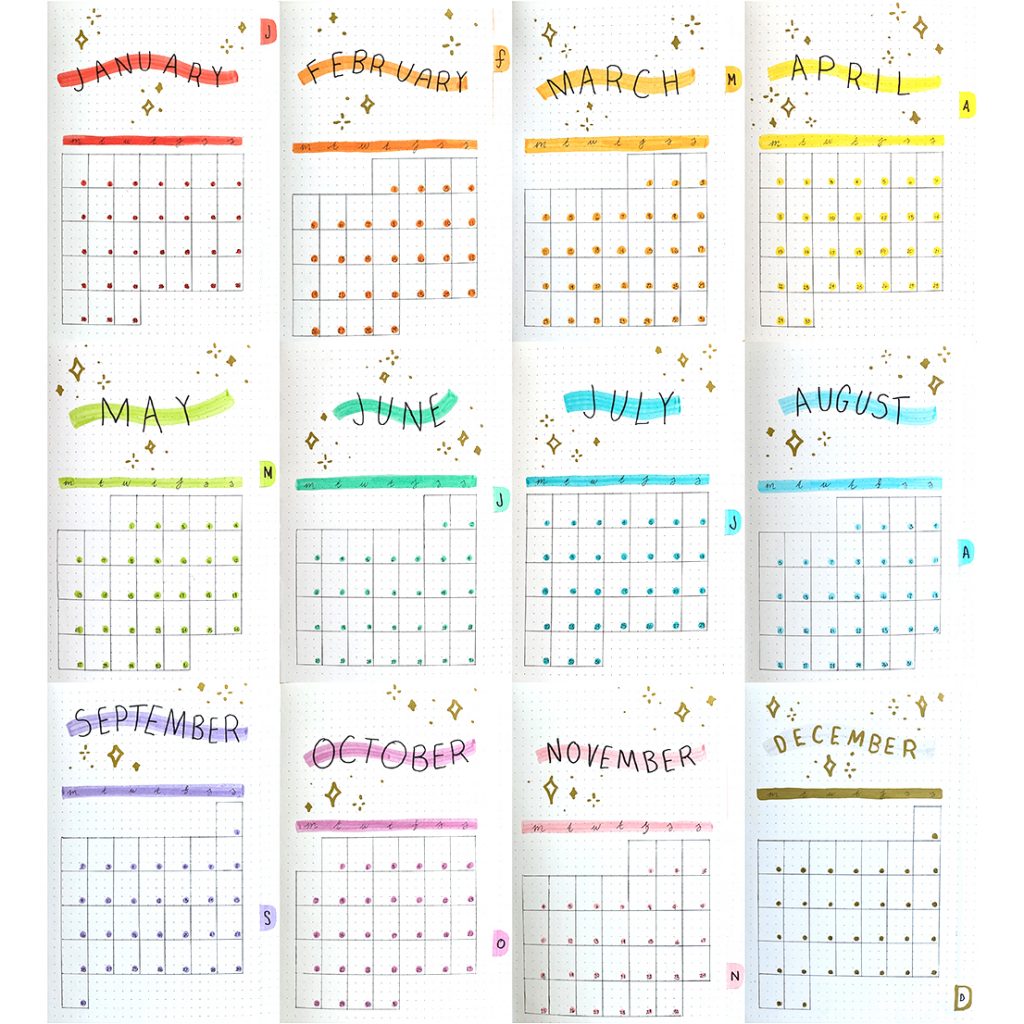
The Cover Page is mainly taken up by a small calendar. I drew the grid with my Muji pen, then added little dots of the month’s colour for the dates. I also used that same colour to draw a bar at the top for the days of the week and a wavy line for the monthly header.
I also cut a small tab out of each Cover Page, to make it even easier for my mum to navigate through this journal. I just used scissors to cut out 3×2 tab, with slightly rounded corners, which I coloured in the corresponding colour, then wrote the initial of the month over the top.
Blank page + Project Pages
I like to include a blank page each month for my mum to store any notes that don’t otherwise fall in to a specific category, or to set up another spread if needed.
I couldn’t help myself from adding a little decoration- I just coloured in the back of the tab in the same colour as the other side, then drew a wavy line across the bottom left-hand corner, which I filled in with golden sparkles.
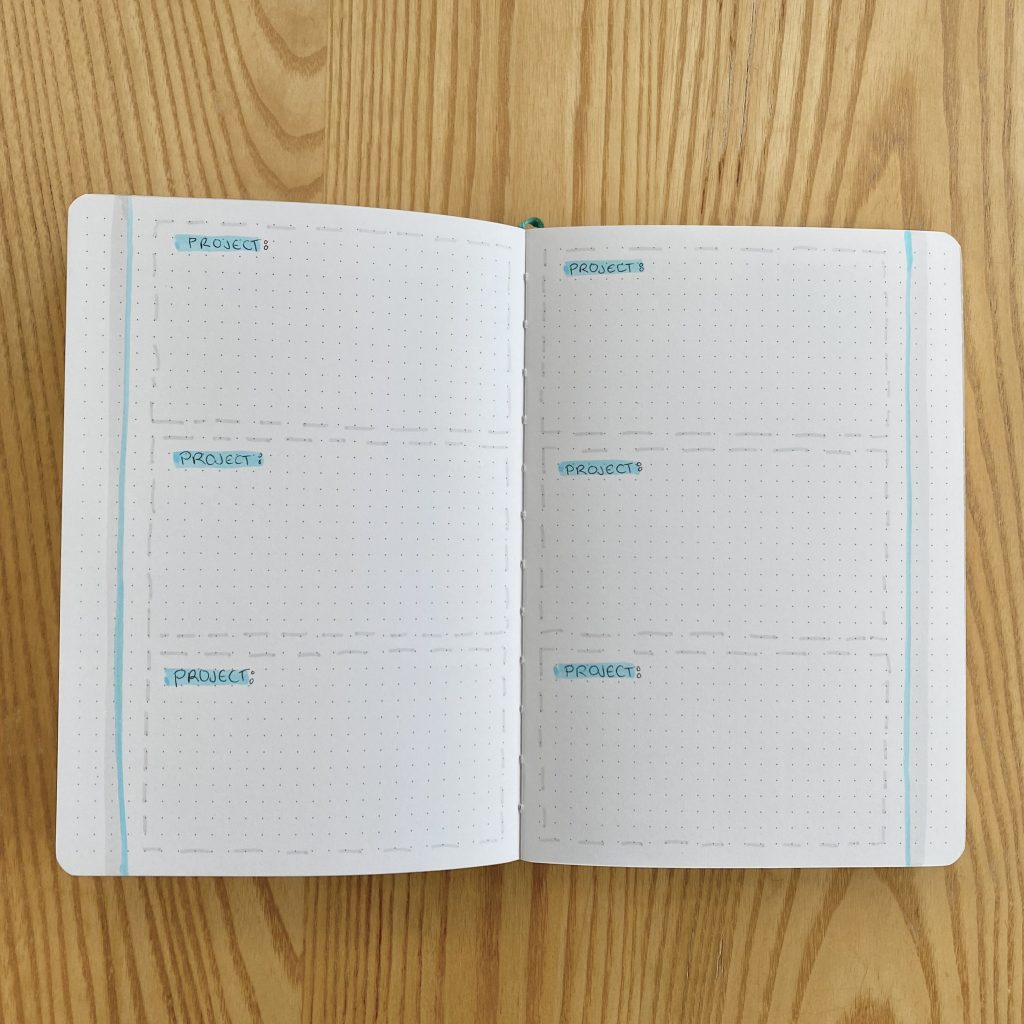
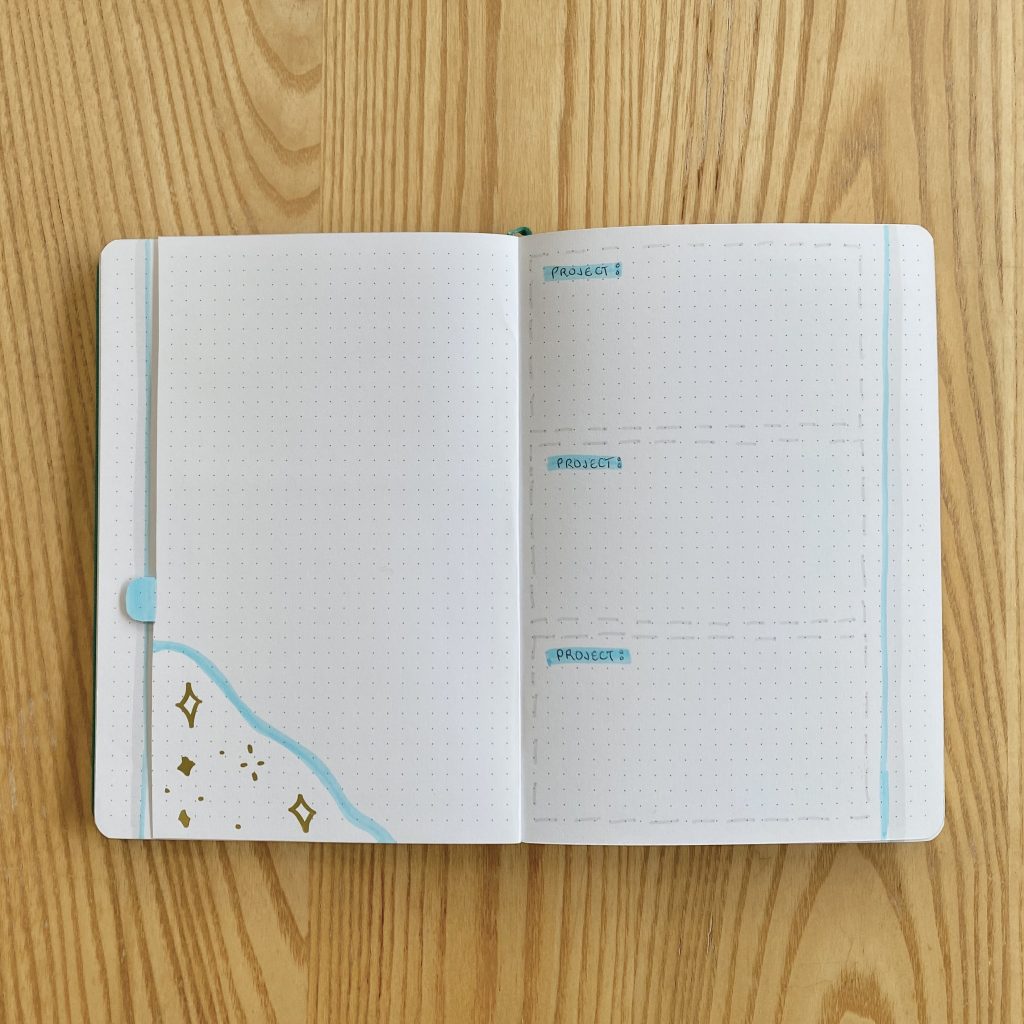
These Project Pages are probably the simplest in this setup, but they are actually the spreads that my mum uses the most. When she’s planning a project, she make lots of notes on yarn ideas, measurements, sizing, yardage- the whole shebang. With these spreads, she can easily keep all the notes for a project together, in one, easily-accessible place. I’ve put 3 boxes on each page and included 3 pages’ worth of this spread in each monthly section, so she will have space for planning 9 projects a month (which is a lot, I realise, but better to have too many than too few!).
To create these pages, I just divided the page into thirds and drew a dashed outline around each third with my Tombow N89. I used the month’s colour to create a little subheading for each box. I did also include the borders on the far-left and right edges.
December-Specific Pages
While the initial pages of the December section are exactly the same as all of the other months (just made using a combination of my STAEDTLER gold pen and Tombow N89, because the gold pen is a little harder to write over than the Crayola SuperTips), I did include a few Christmas spreads. It’s not strictly knitting, but my mum doesn’t have a regular bullet journal, so I like to add this stuff into her knitting one.
Christmas Gift + Card Trackers
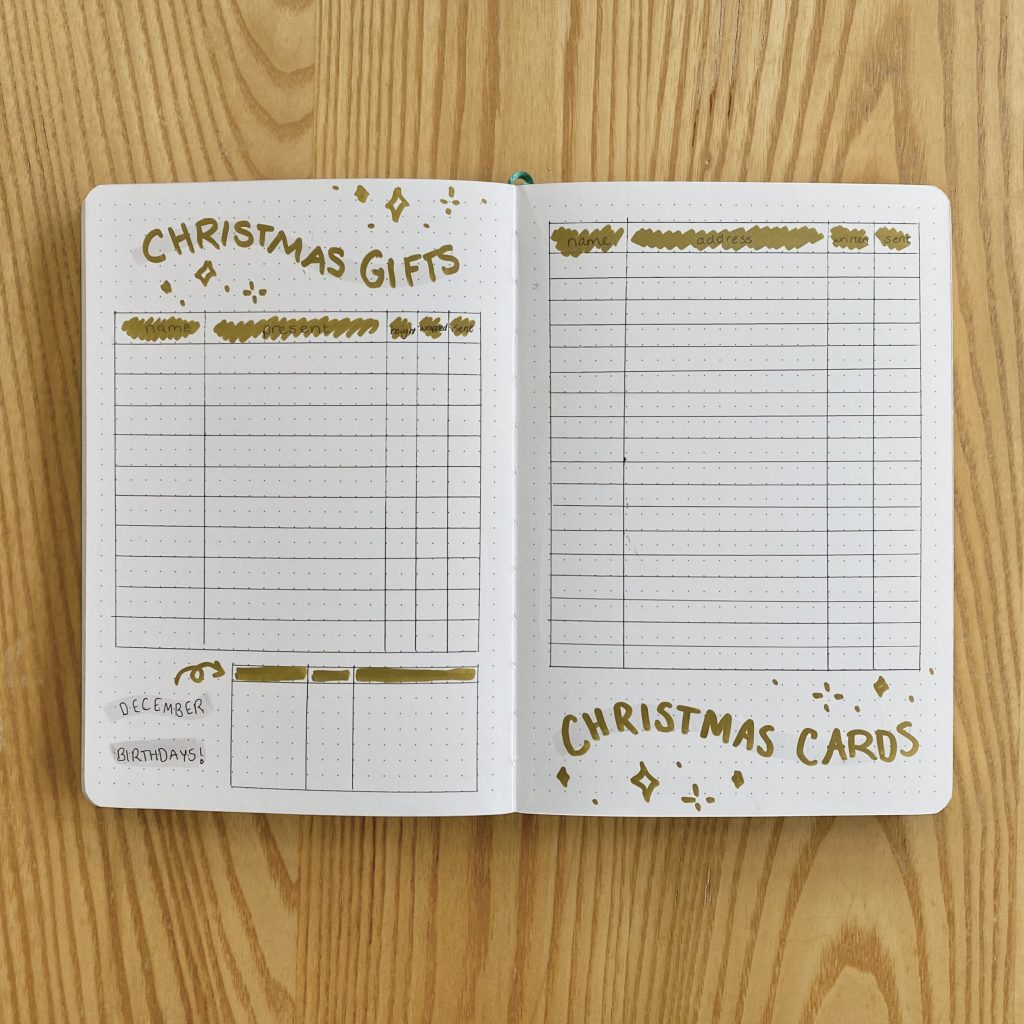
This is very similar to the Present Ideas + Plans spread at the start of the journal. It’s essentially just a table for my mum to keep track of the Christmas presents she is sending to her friends. There are 5 columns: one for the recipient’s name, one for the present and then 3 tick boxes for when the present has been bought (or made), wrapped and sent. At the bottom of this spread, I also added a space for my mum to keep track of any December birthdays (and gifts) that also need to be considered this month.
I stuck with the completely gold colour scheme of the December section for this spread, so I used the gold pen to scribble patches of colour for the headings.
The Christmas Card Tracker is very similar, in that it is just a table made for tracking purposes. The columns this time are for the recipient’s name and address, then the tick boxes are for when the card has been a) written and b) sent.
Christmas Food + 2025 Plans
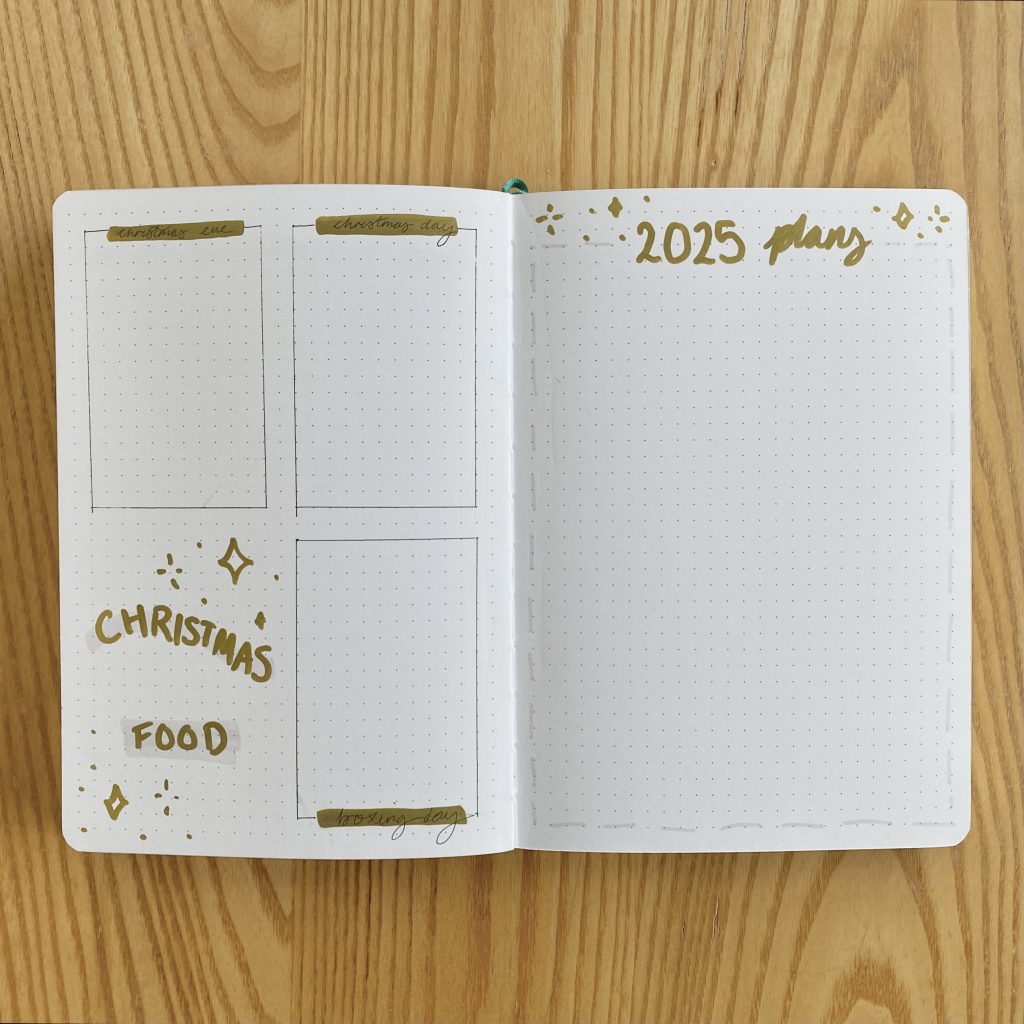
This spread is for any notes on meal-planning for Christmas Eve, Christmas Day and Boxing Day. It’s set out very similarly to the monthly Dashboard pages, but each of the three boxes corresponds to one of the three days, instead of project types/notes.
The 2025 Plans page is the last spread in this setup and is just a space for my mum to write down any projects she might like to try out next year or any ideas that she has. This setup was very simple to create- just another dashed outline made with the Tombow N89 and a heading written in the gold pen (with even more sparkles).
Final Thoughts
Phew! That was a bit of a bumper post- kudos to you if you made it to the end! It was a whole year’s worth of knitting journal content crammed into a single post though, so I guess it’s only to be expected.
Because this setup was much more minimal (in terms of different spreads) than the ones I make in my own journal, I only ended up using about half of the Notebook Therapy journal that I used for this project. That means I should be able to use the second half of the journal for next year’s setup- win!
Anyway, I hope you found this knitting journal setup interesting- it’s a little niche, I know, but I think it’s nice to show how flexible bullet journals can be- they really can be tailored to any hobby, personality or requirement.
Thank you for reading this post- I hope you’re having the merriest and brightest day.
Gemma
xxx

Hi!
Hope my comment find you well 🙂
It was a pleasure reading your post while exploring new things to try on my own knitting journal 🙂
Loved your month dashboard and the measurements by person tracker (so smart!).
Let me give you a suggestion for the 2025 knitting journal setup, that I hope you’re working on currently 😉 : The project notes, in my own experience with my own knitting journal of course, should have 2 whole pages per project. There are lots of notes we need to take and it should be mandatory to add a photo. It’s very pleasant to read the notes later on, but seeing the pictures is magical.
Hope you find this a useful tip 🙂
Wishing you and your family a merry christmas and a happy new (knitting) year!
Hi there! I’m so glad you enjoyed this post and thank you so much for the tip! I bet your knitting journal is absolutely amazing— it sounds like such a lovely record of your projects. Because my mum mainly uses Ravelry to keep track of her projects, this particular journal is really just a place for her to jot down plans & ideas, rather than document her finished projects, so she doesn’t need too much room for each one! I absolutely love your version though— I might have to try making one like that for myself!
P.S. I’ve just finished working on her 2025 knitting journal, so you’ll be able to see that post very soon!