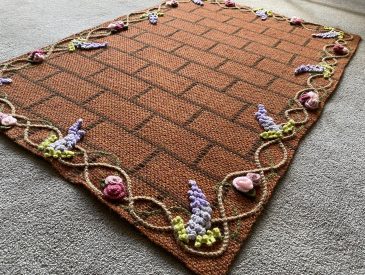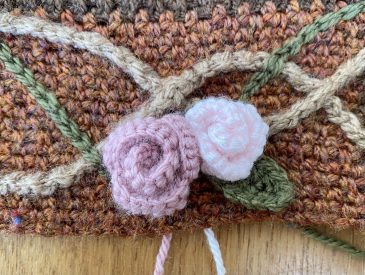
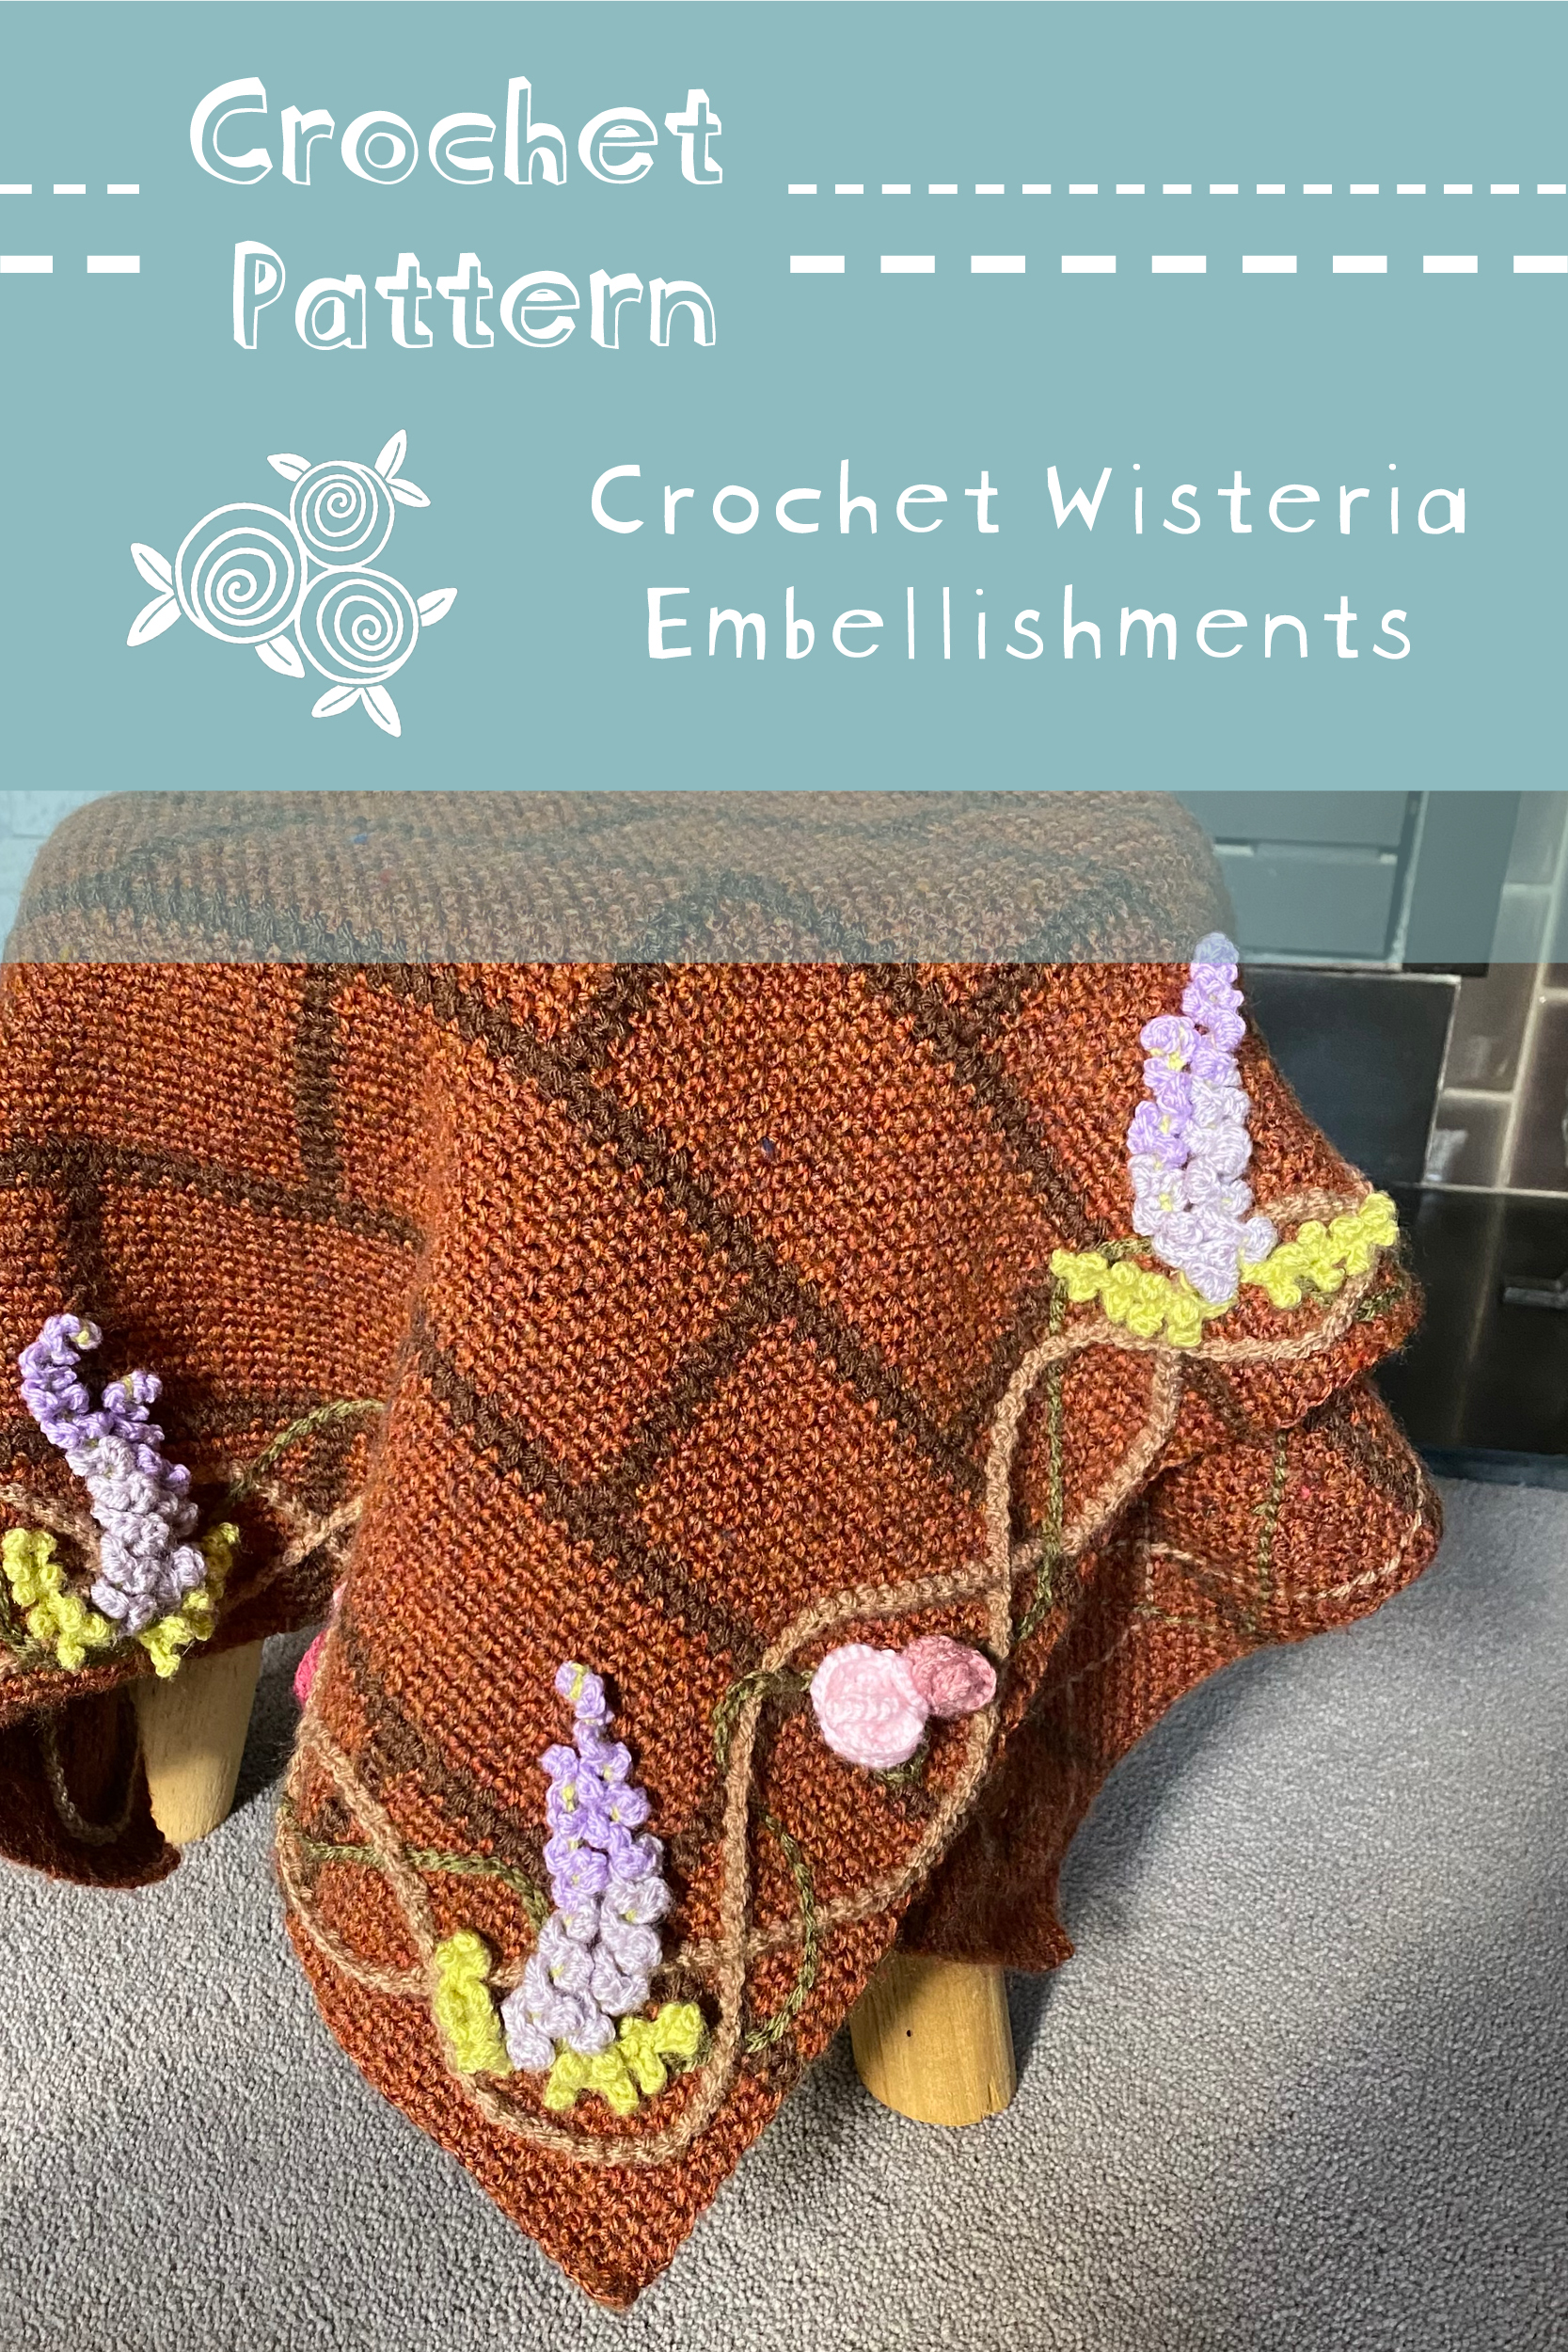
It’s time for the 5th instalment of my Bridgerton House Baby Blanket pattern! This week, I’m showing you how to make the crochet wisteria pieces that will be sewn onto the blanket, alongside the rose pieces from last week’s post. If you missed the first 4 parts of the series, you can find them here:
- Bridgerton House Baby Blanket #1: Introduction
- Bridgerton House Baby Blanket #2: Making the Brick Blanket
- Bridgerton House Baby Blanket #3: Adding the Surface Crochet Vines
- Bridgerton House Baby Blanket #4: Making the Rose Pieces
Table of Contents
- Crochet Wisteria: The Basics
- The Starting Chain (or ‘Stem’)
- Crocheting Integrated Wisteria Leaves
- Crocheting Around a Central Chain
- Written Pattern
- Final Thoughts
Crochet Wisteria: The Basics
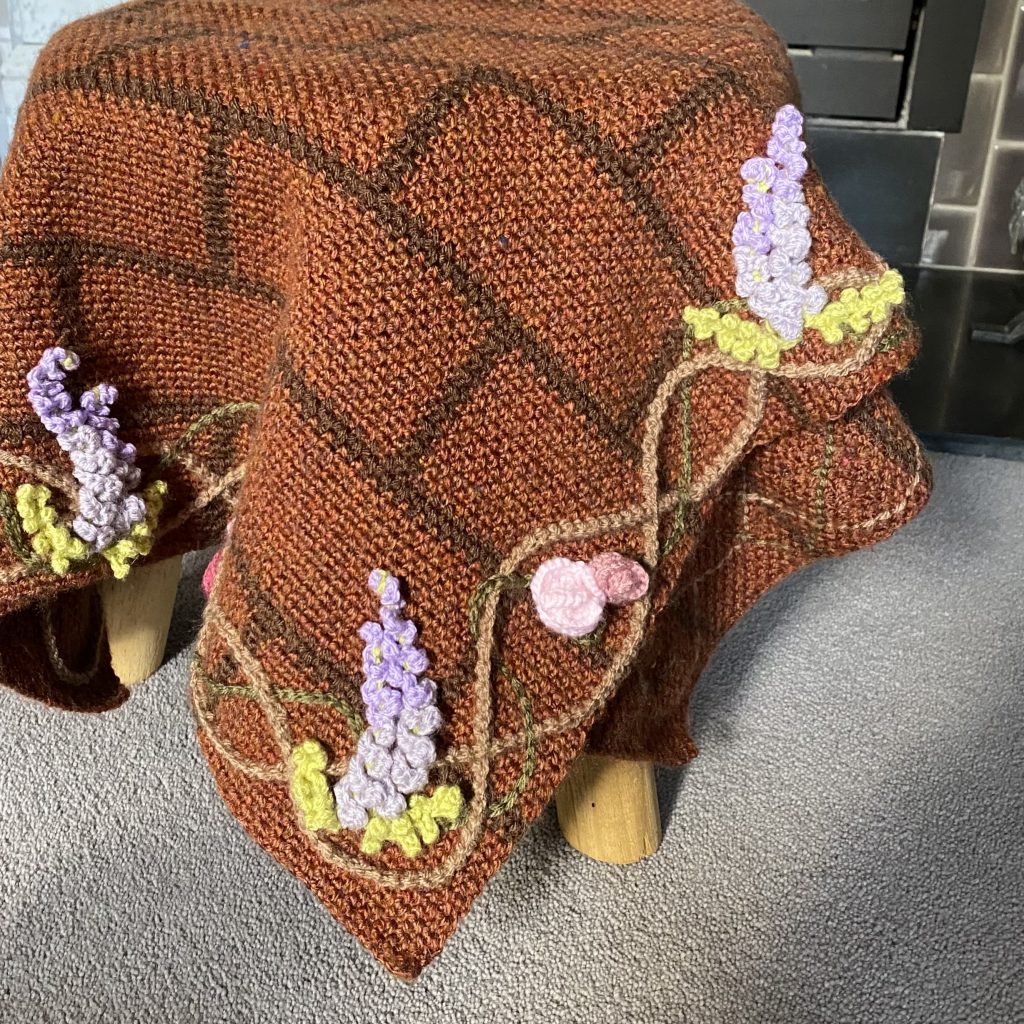
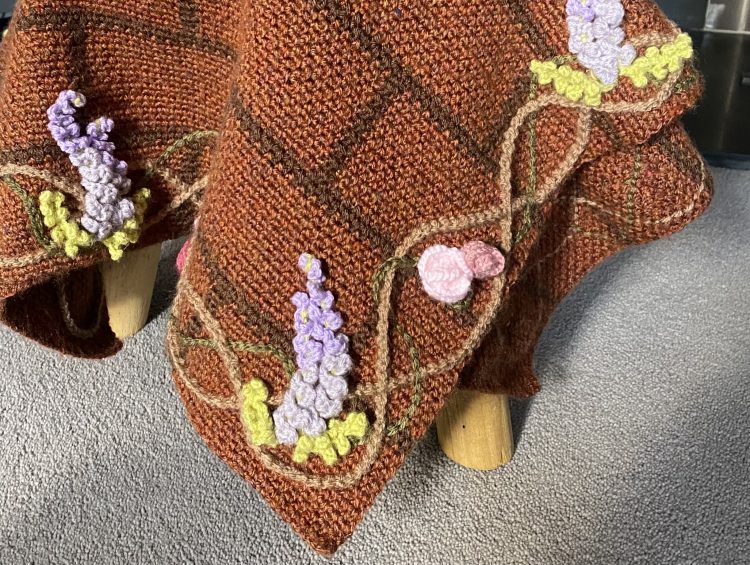
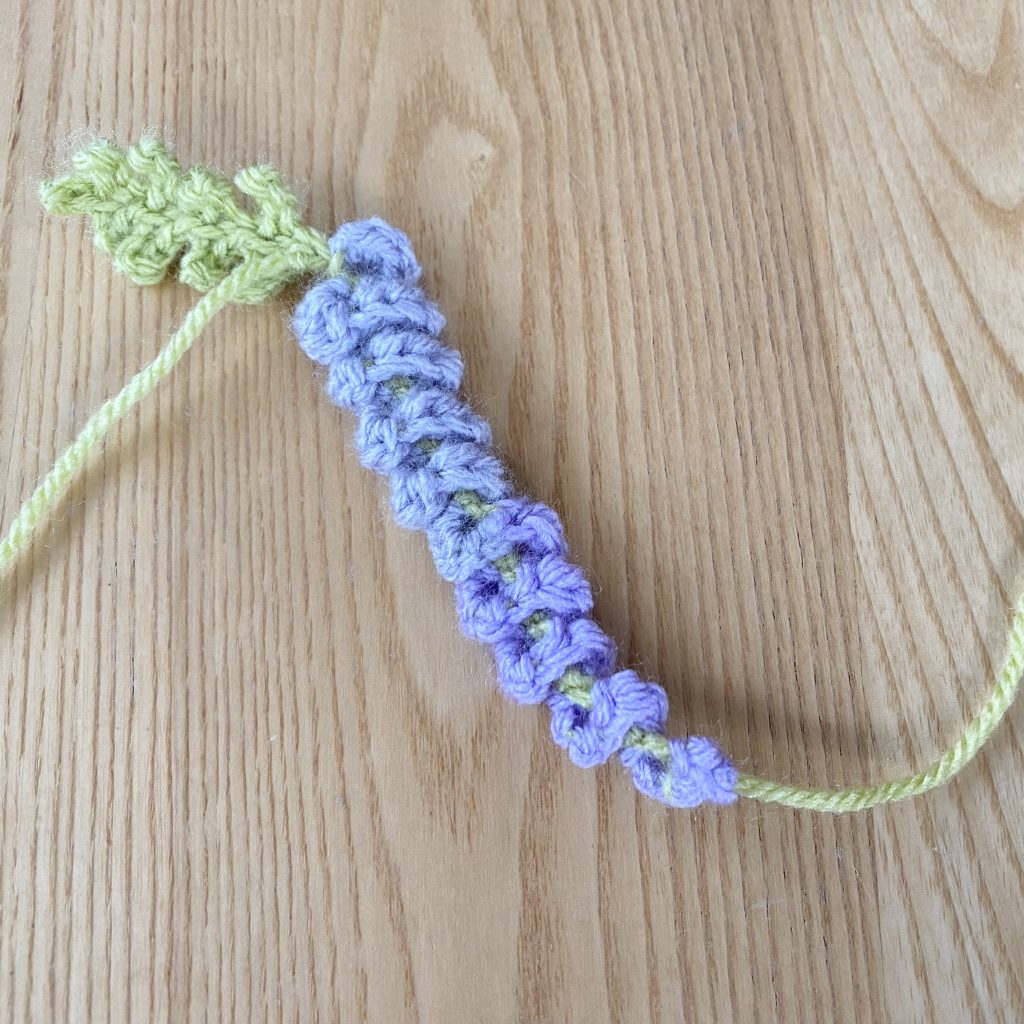
Each wisteria section on the blanket is made up of two individual wisteria pieces, one smaller, one larger, which are attached to the blanket alongside one another to create a tapered, organic shape.
Each individual wisteria piece consists of a central, green stem, two-tone purple petals and a sprig of green wisteria leaves. The leaves are crocheted immediately after working the starting chain, using the same yarn thread, without cutting it in between. This means there are fewer ends to sew in, but also adds an extra layer of safety to the blanket (as there are fewer small, separate embellishments). The petals are crocheted in a continuous spiral around the central stem, switching from the darker purple shade to the paler purple shade about halfway up. The technique is a little unusual, but is relatively simple to work up, once you get the hang of it.
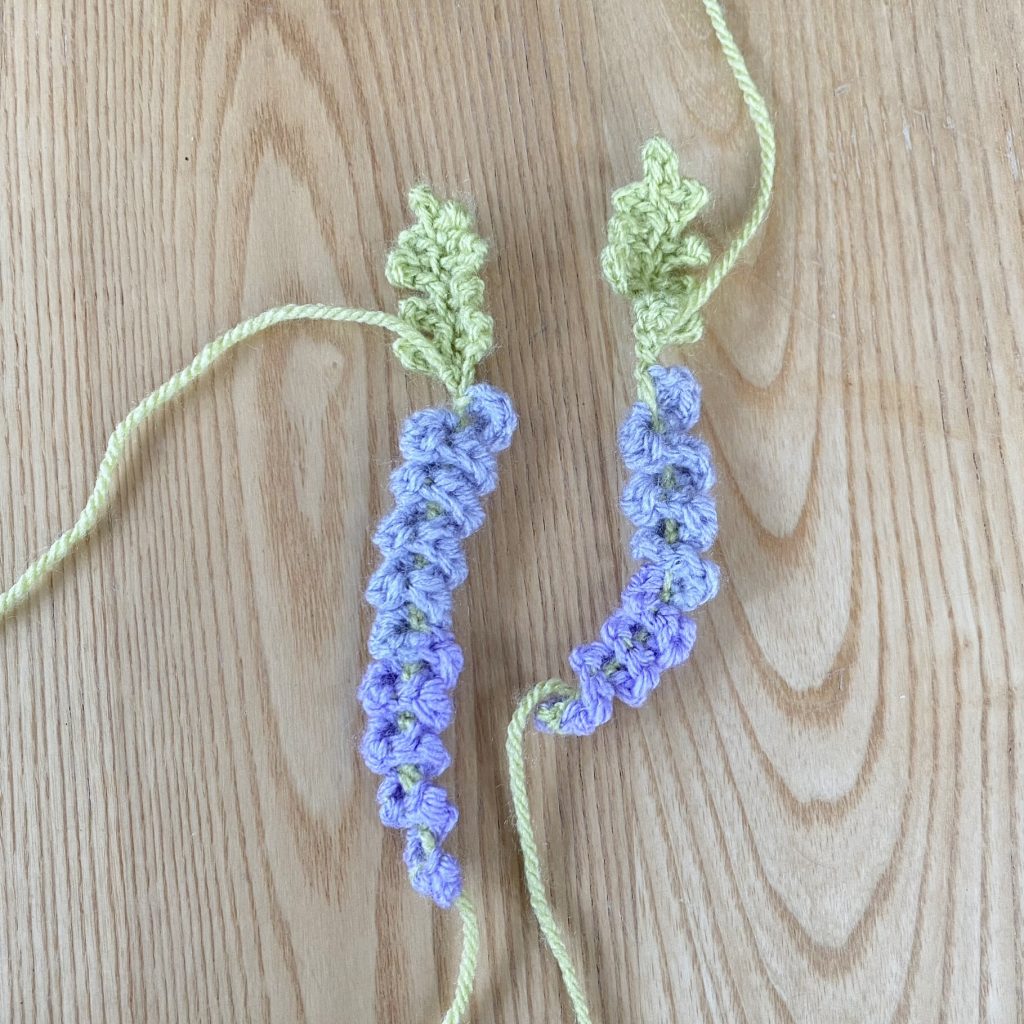
The Starting Chain (or ‘Stem’)
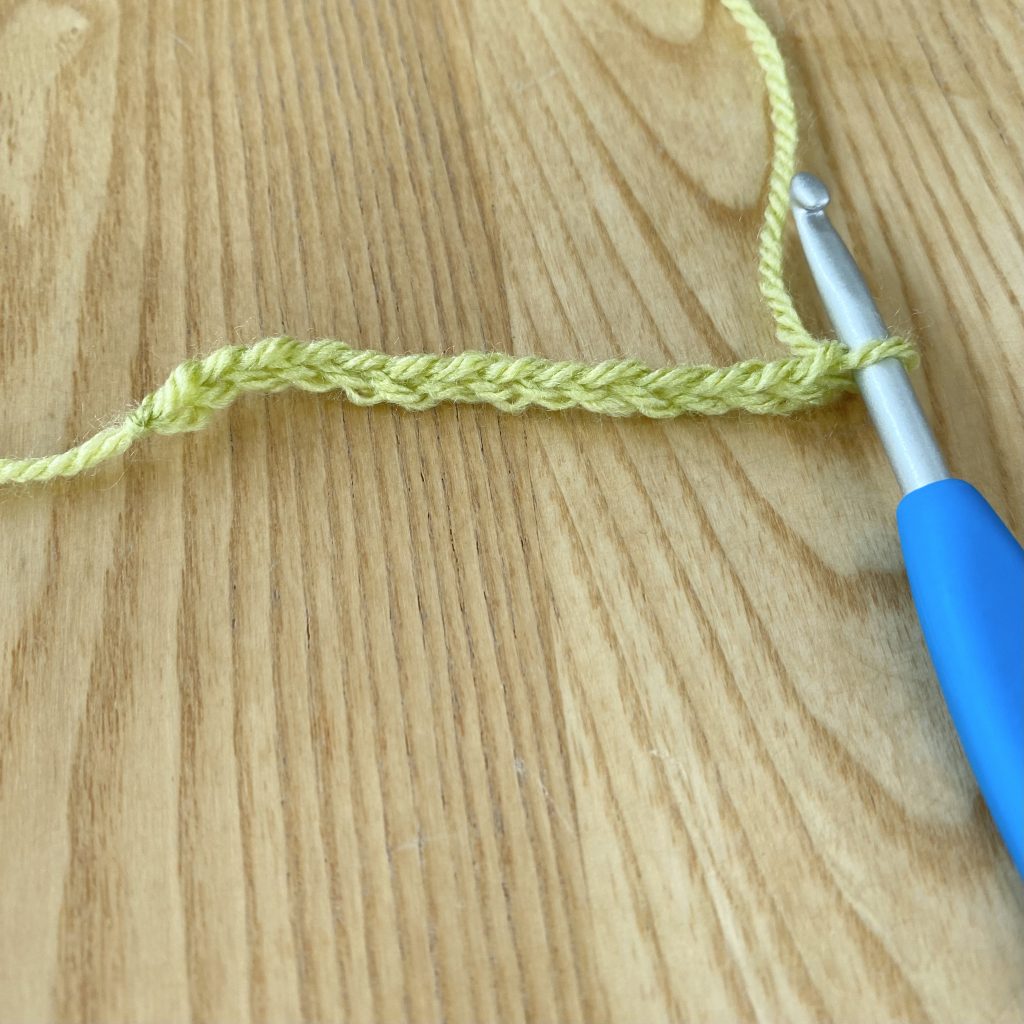
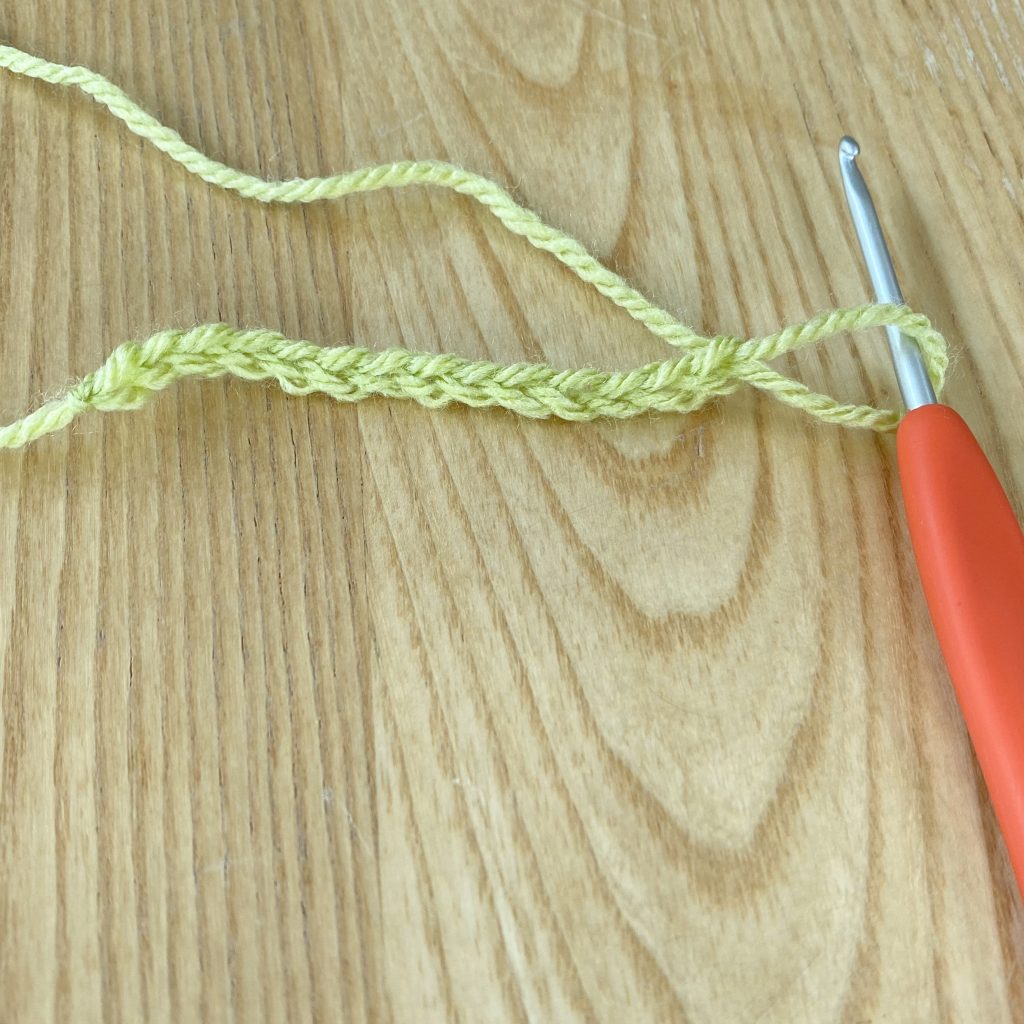
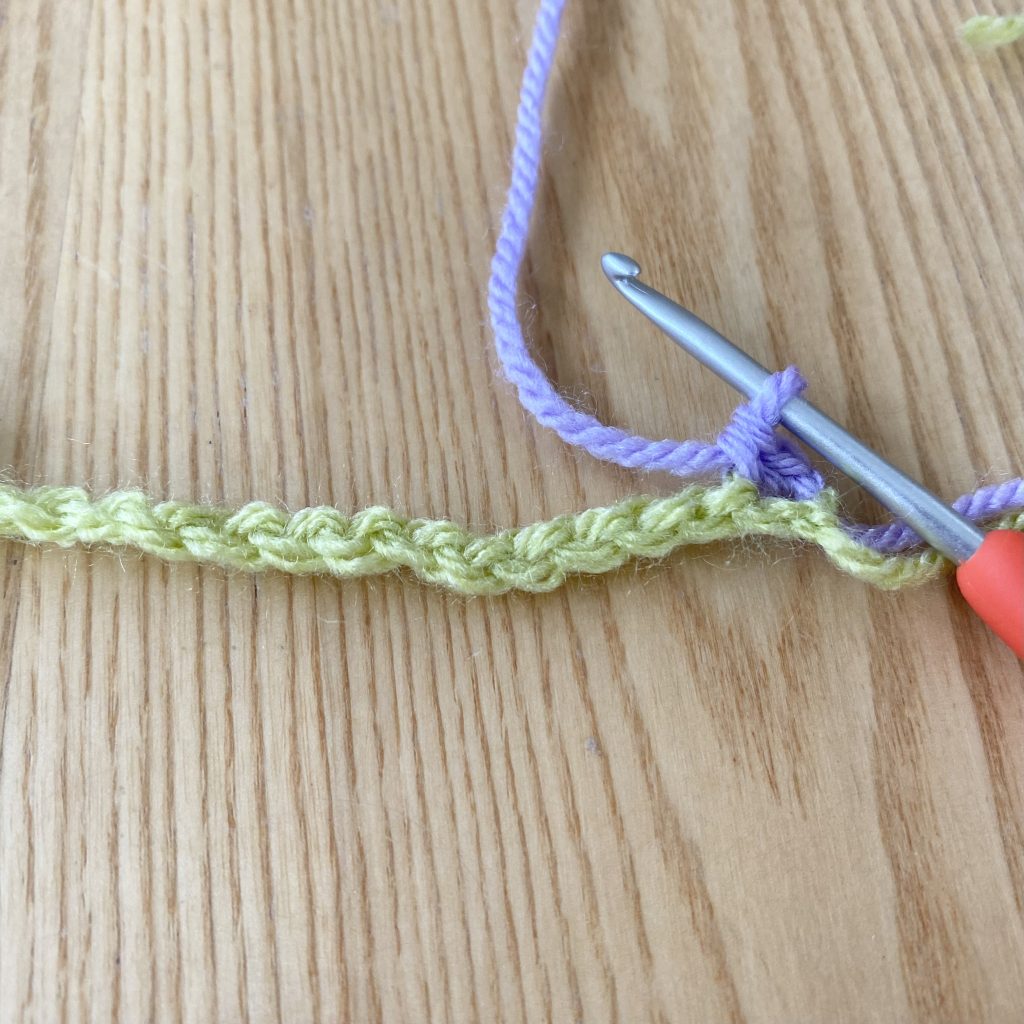
Each wisteria piece begins with a green starting chain, which will form the main ‘stem’ of the wisteria blossoms. The important thing to remember with this starting chain is that you must use a larger hook than you would typically use for DK weight yarn- I typically use a 4mm hook for Stylecraft Special DK, so I have used a 5mm hook for this starting chain. This is because, when you crochet into the starting chain in a spiral for the petals, it pulls the starting chain much tighter than if you were crocheting into it in the usual manner. Using a larger hook helps to keep the starting chain nice and loose, so your wisteria pieces stay flat.
The length of your starting chain determines the length of your finished wisteria piece. For the smaller wisteria pieces, you will start by chaining 14. For the larger wisteria pieces, you will start by chaining 19.
Much like with the rose pieces from the last post, it’s important to leave a long end (approx. 25cm) at the start of your starting chain, for attaching the wisteria pieces to the blanket later on.
Crocheting Integrated Wisteria Leaves

I specifically formulated the pattern for these wisteria pieces to minimise both the amount of ends that needed to be sewn in (because sewing in ends is the WORST) and the amount of separate, small pieces that needed to be individually attached to the blanket (because this is, after all, a baby blanket and needs to be as safe as possible). Because of this, I integrated the wisteria leaves into the same pieces as the wisteria stem/petals. Although this does require a little bit of mid-crochet hook switching, it does mean that there are fewer ends and fewer separate pieces, so it’s really for the best!
The leaves are created using a combination of chains and slip stitches. The same pattern is used for both wisteria pieces, large or small. The size of the leaf piece does not change, irrespective of whether the starting chain consists of 14 or 19 chains.
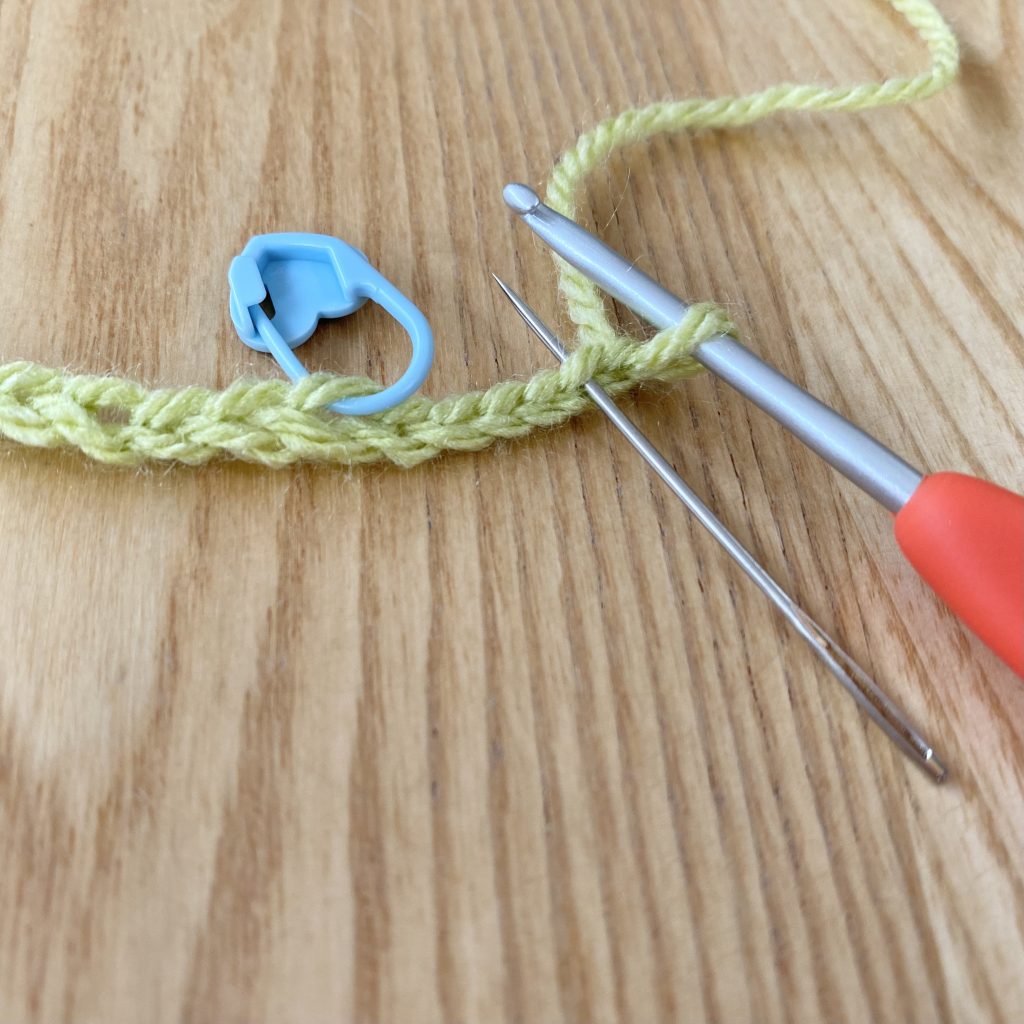
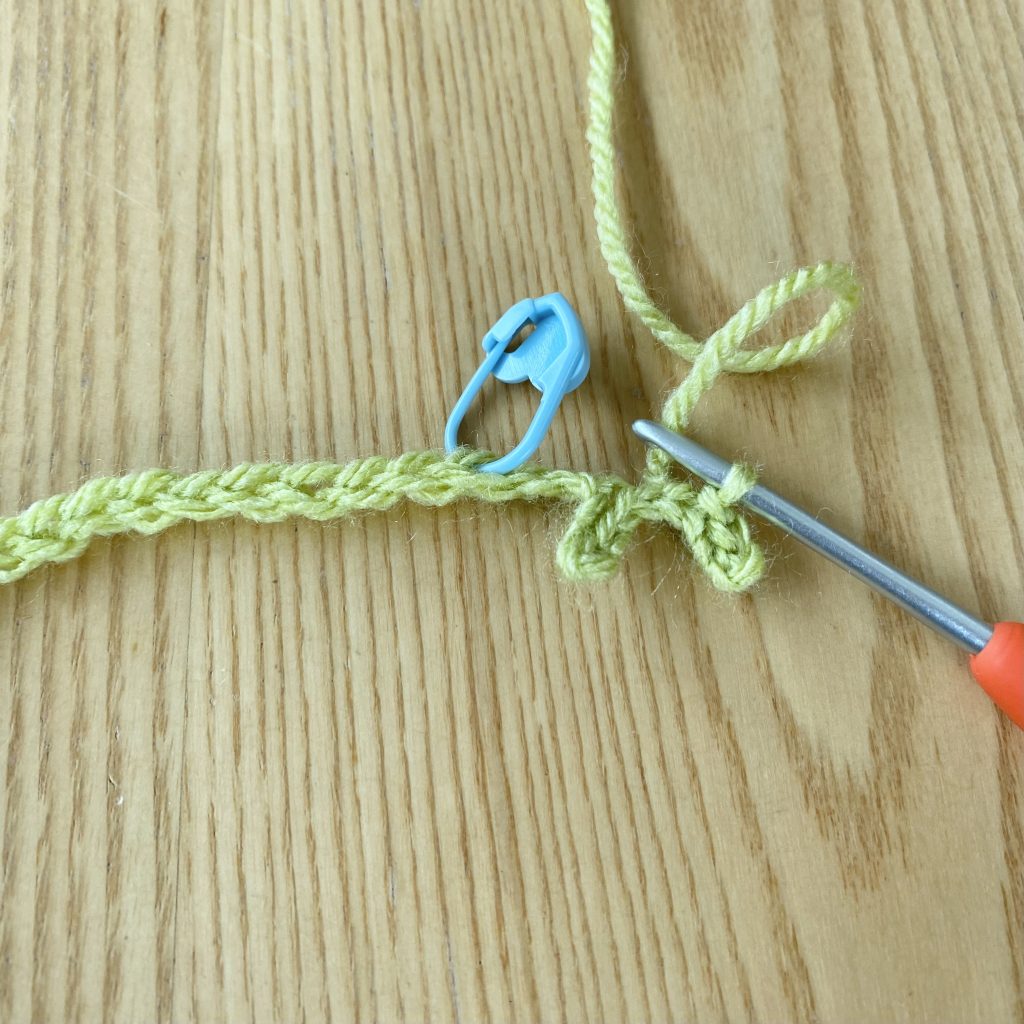
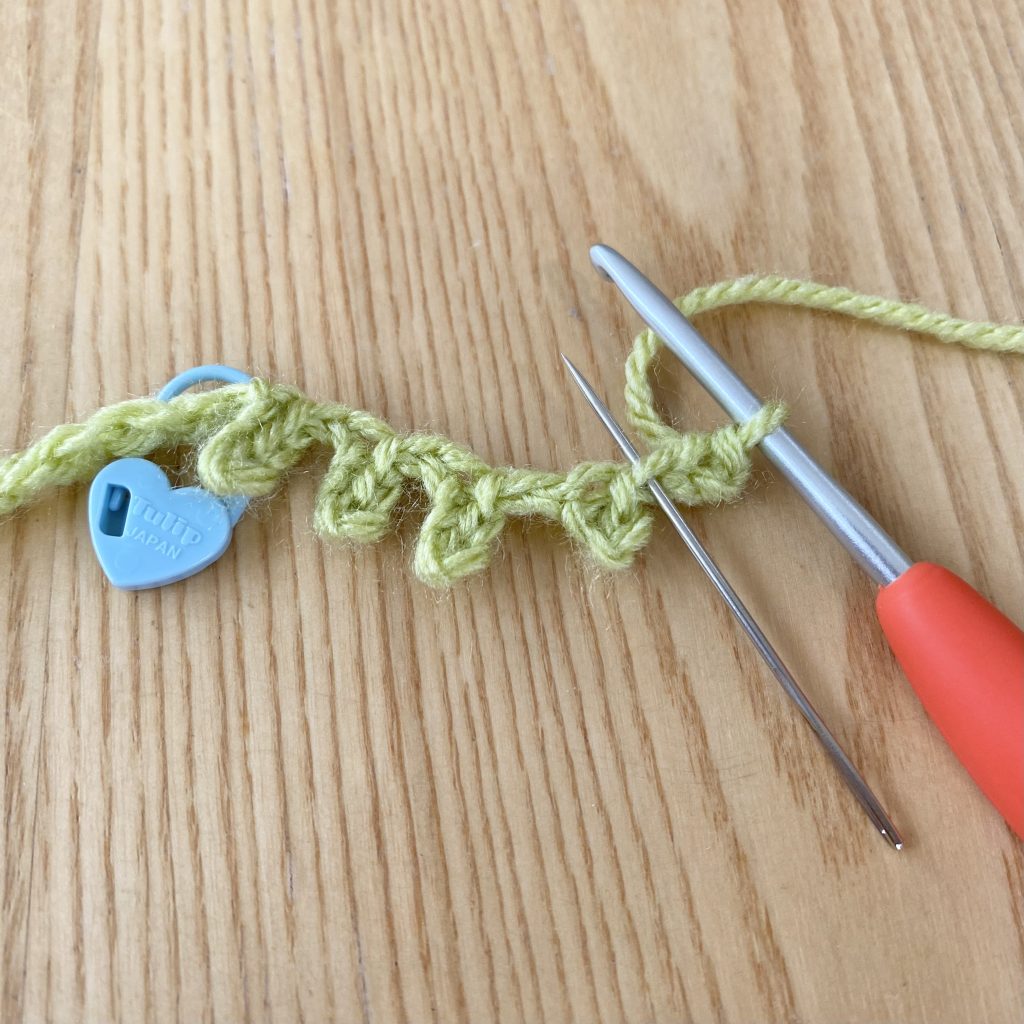
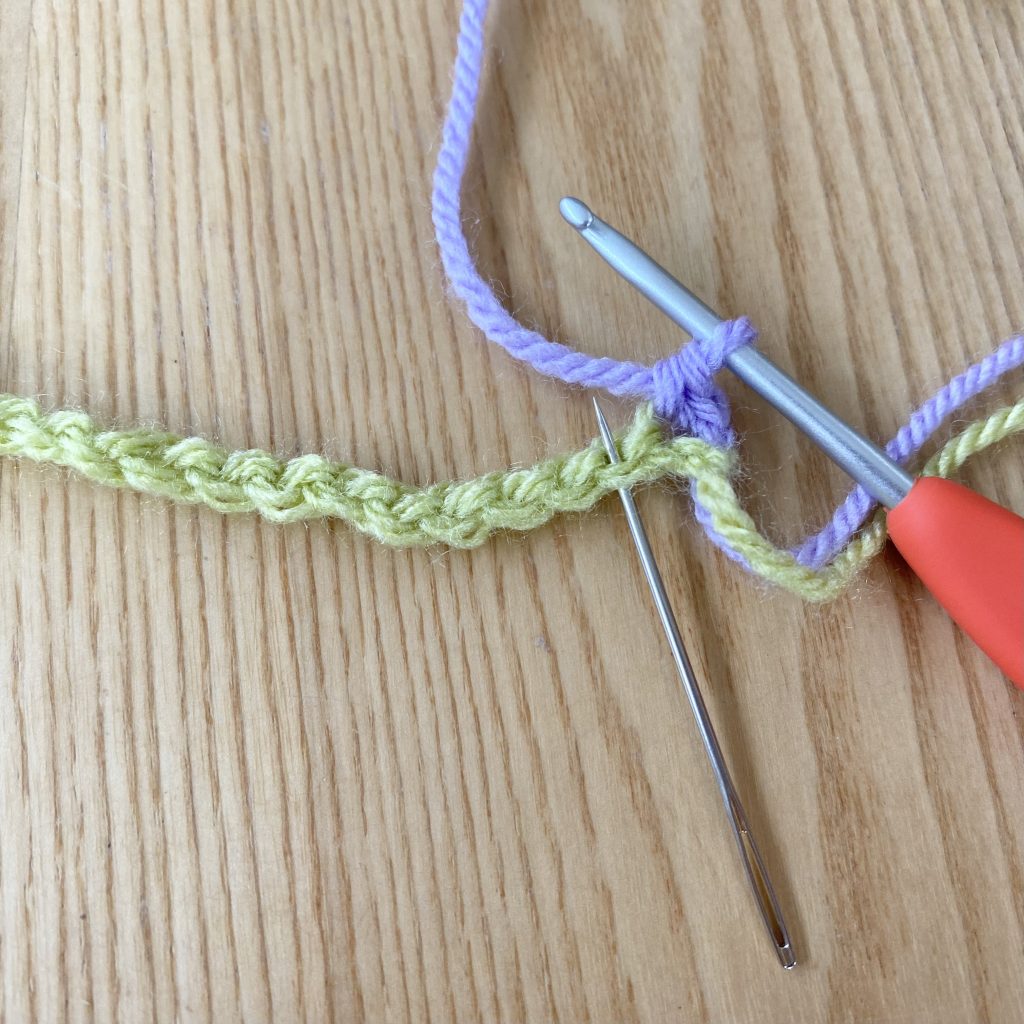
The wisteria leaves are crocheted immediately after the starting chain is worked. Once you have completed the starting chain (on the larger, 5mm hook), don’t cut the working yarn. Pull the loop out a little, so it doesn’t unravel mid-switch, then remove your 5mm hook and replace it with a 3mm hook (as shown above). Using a finer hook for the leaves helps to give them more definition.
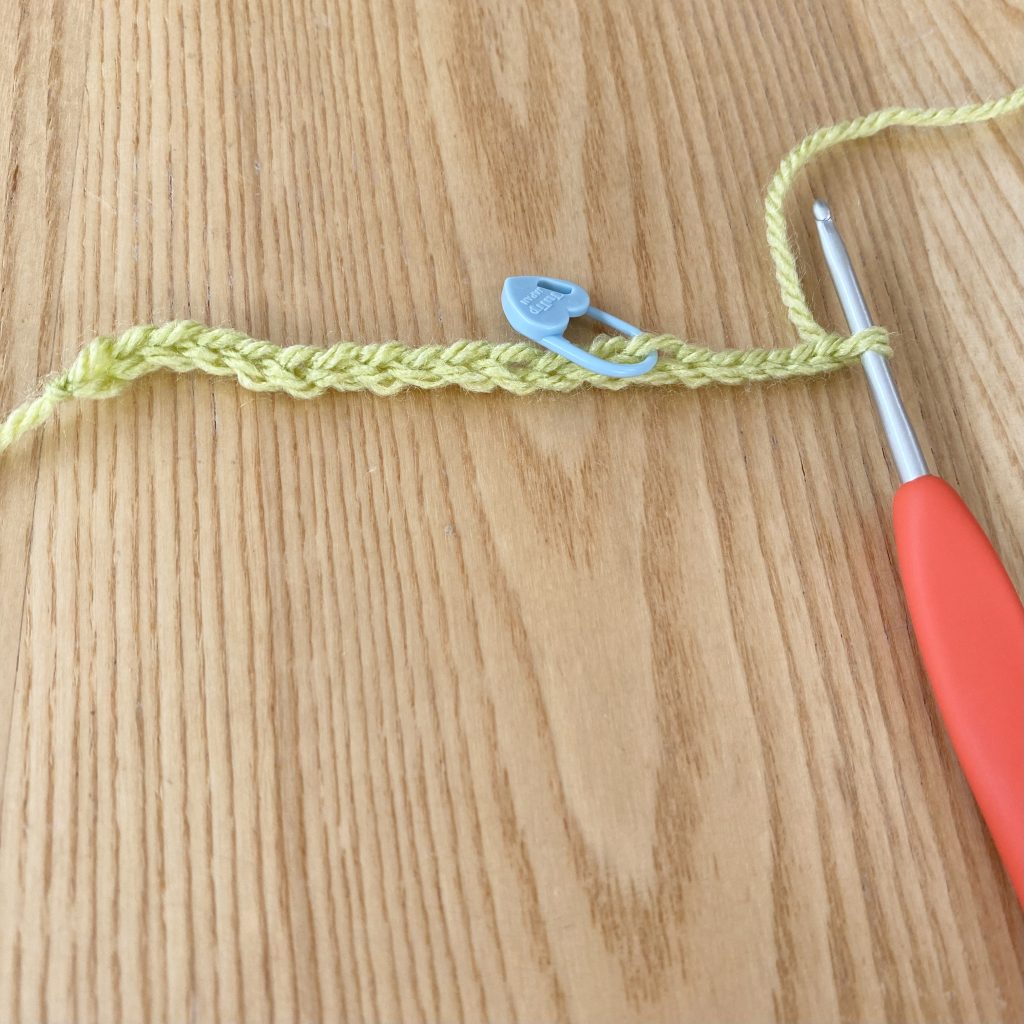
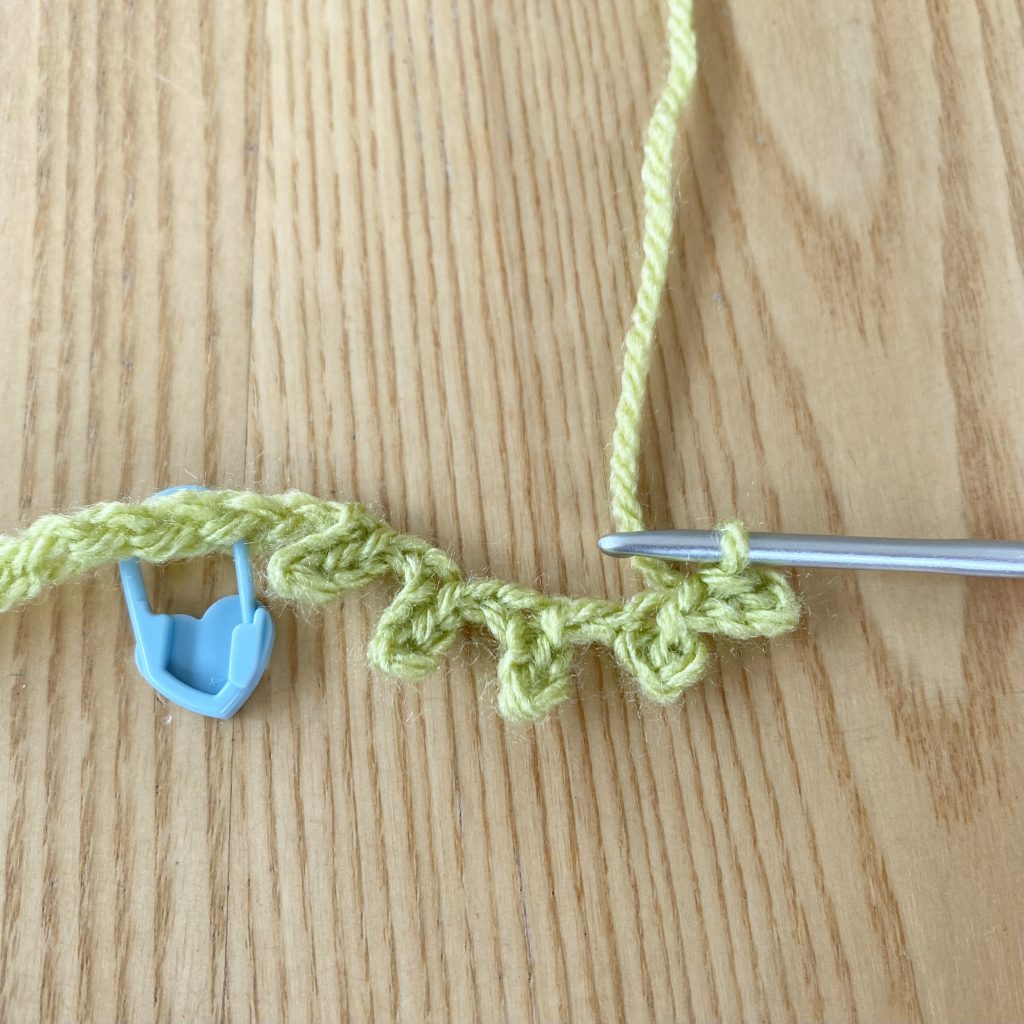
Start by chaining 6 more stitches, using the smaller hook. This will form the start of the leaf section. I’ve marked the end of my starting chain with a stitch marker, to make it easier for you to see what’s going on, but it’s not necessary.
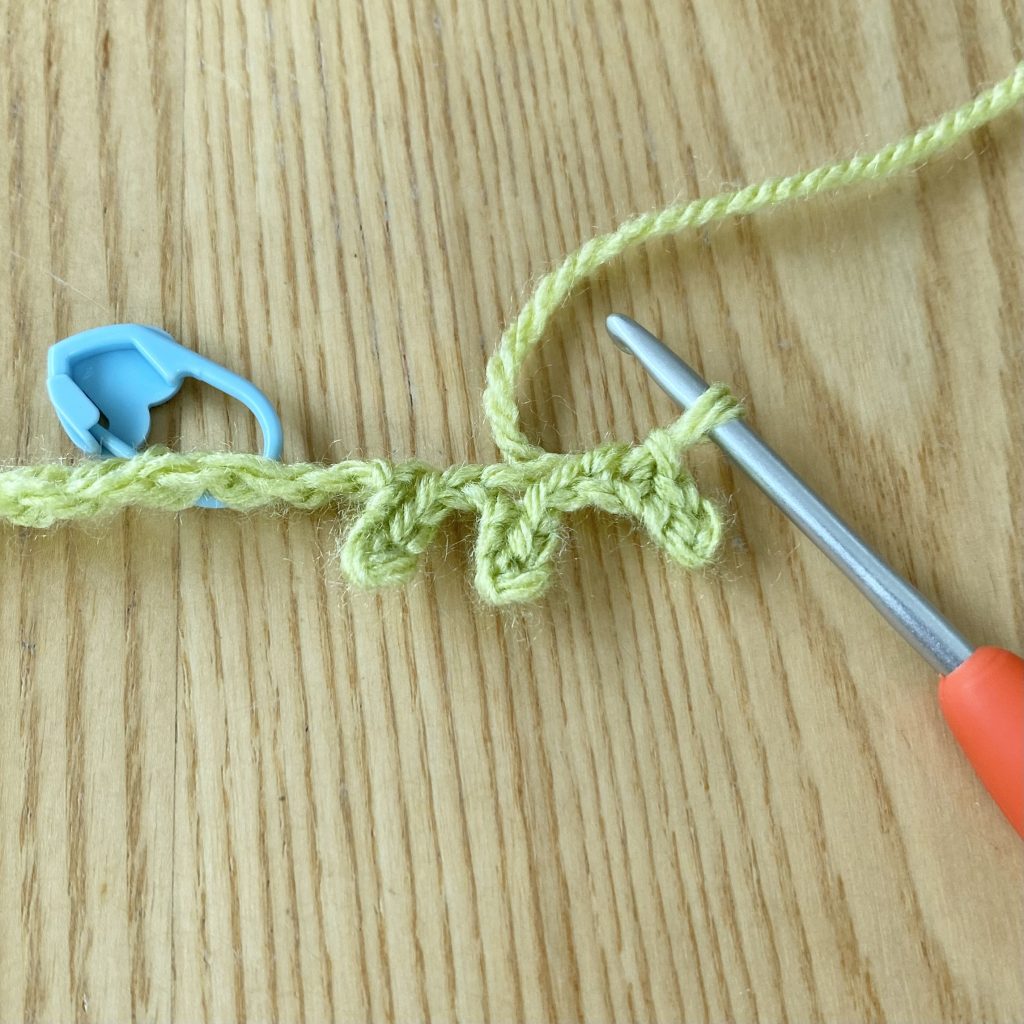
Next, slip stitch into the 2nd chain from the hook.
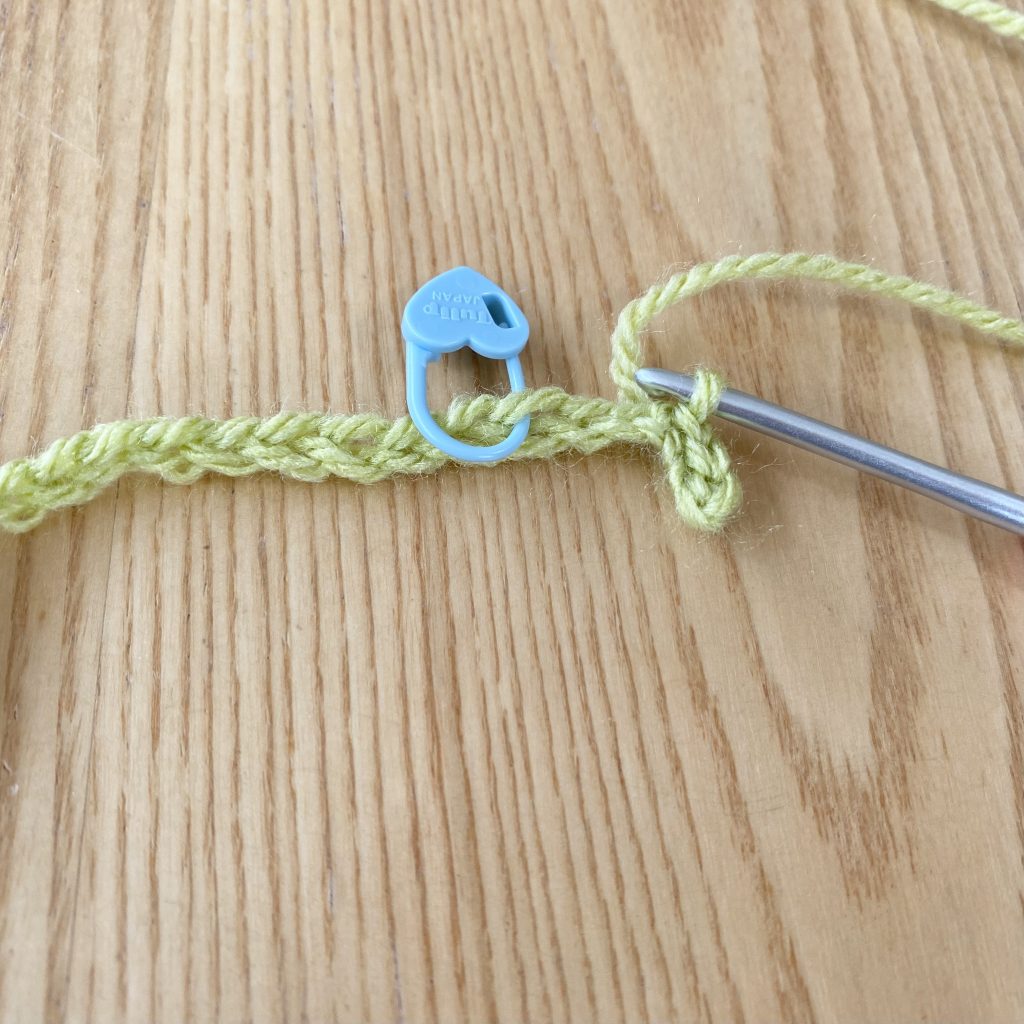
Then slip stitch into the next 2 stitches. This creates one, 3-stitch leaf.
Now, we’ll make the next leaf. Start by chaining 5, then, again, slip stitch into the 2nd chain from the hook. Finally, slip stitch into the next 2 chains. This creates a second 3-stitch leaf.
Now we’ll make a third 3-stitch leaf. Chain 5, slip stitch into the 2nd chain from the hook, then slip stitch into the next 2 chains.
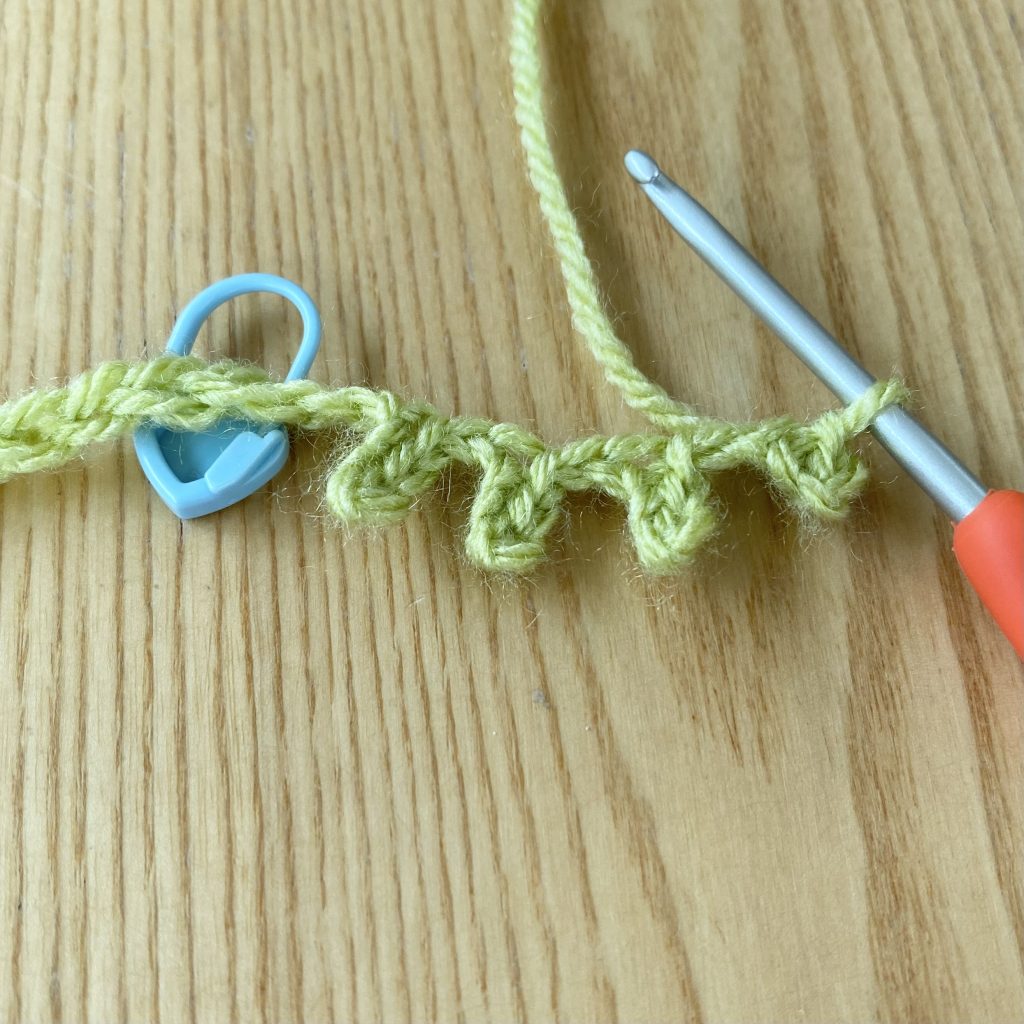
Now we’ll make a smaller, 2-stitch leaf. Chain 4 this time, then slip stitch into the second chain from the hook. Slip stitch into the next chain to finish this leaf. This finishes off the left-hand side of the sprig. As you can see, it consists of three 3-stitch leaves and one 2-stitch leaf.
Now, we’ll make the 1-stitch leaf that will sit at the very bottom of the sprig. Chain 3, then slip stitch into the 2nd chain from the hook. This completes the leaf.
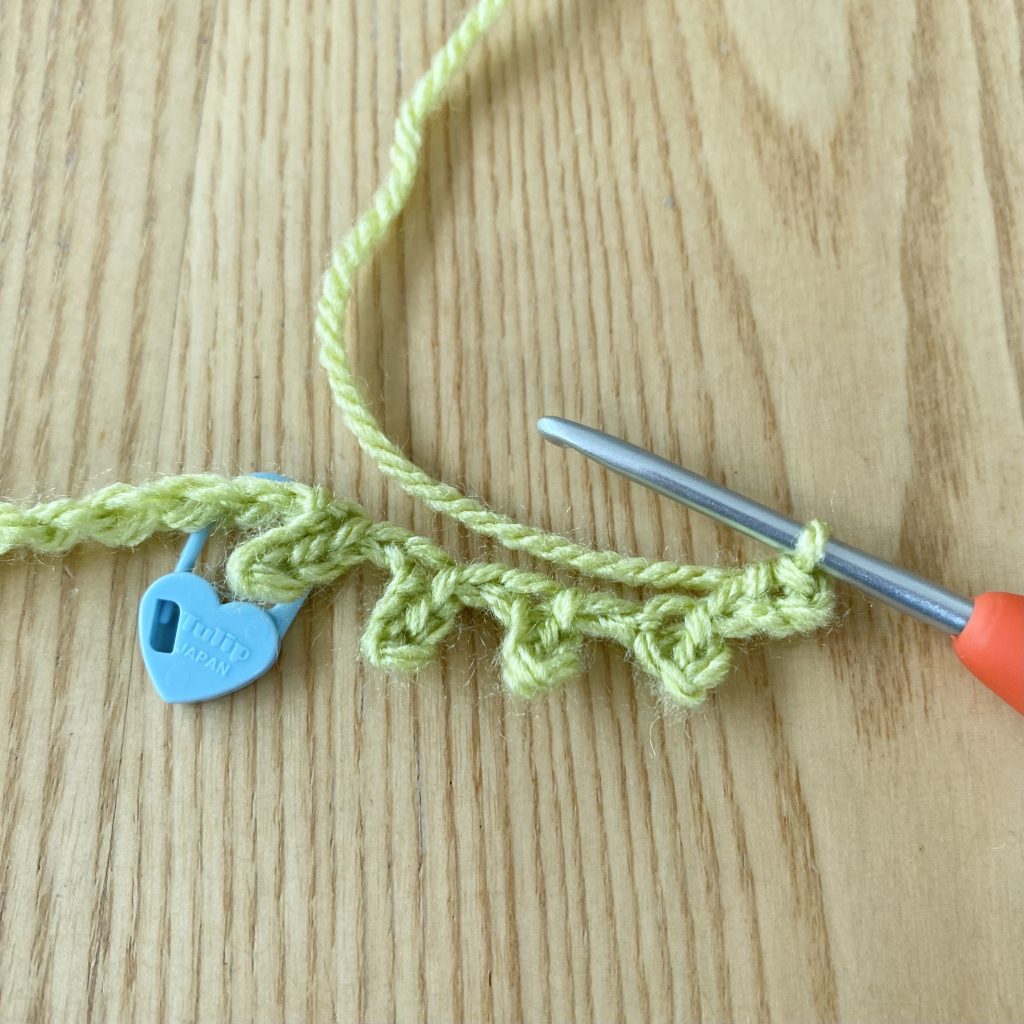
From now on, we’ll be working back up the length of the sprig, creating the leaves on the right-hand side. The leaves on the right-hand side will be a mirror image of the ones on the left.
Start by slip stitching to the next stitch, to get to the right position to form the first leaf.
Ch 3, then slip stitch into 2nd chain from the hook. Slip stitch into the next chain to create another 2-stitch leaf, opposite the 2-stitch leaf on the other side.
Skip the next stitch (i.e. the base of the 2-stitch leaf on the other side).
Then slip stitch to the next chain to secure the leaf to the central train.
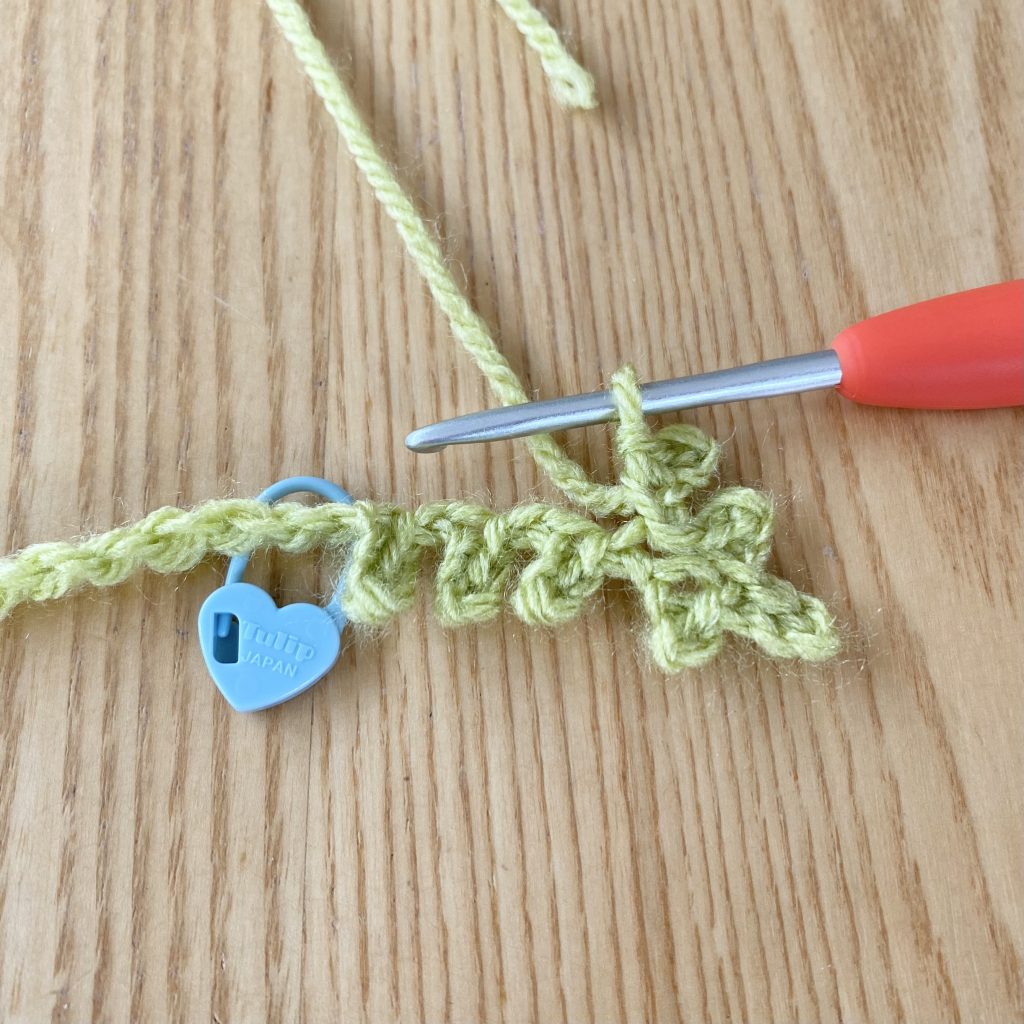
Make a 3-stitch leaf by chaining 4, slip stitching into the second chain from the hook, then slip stitching into the next 2 chains.

Again, to attach the leaf to the central chain, skip the next stitch (the base of the 3-stitch leaf on the other side) and slip stitch to the next chain.
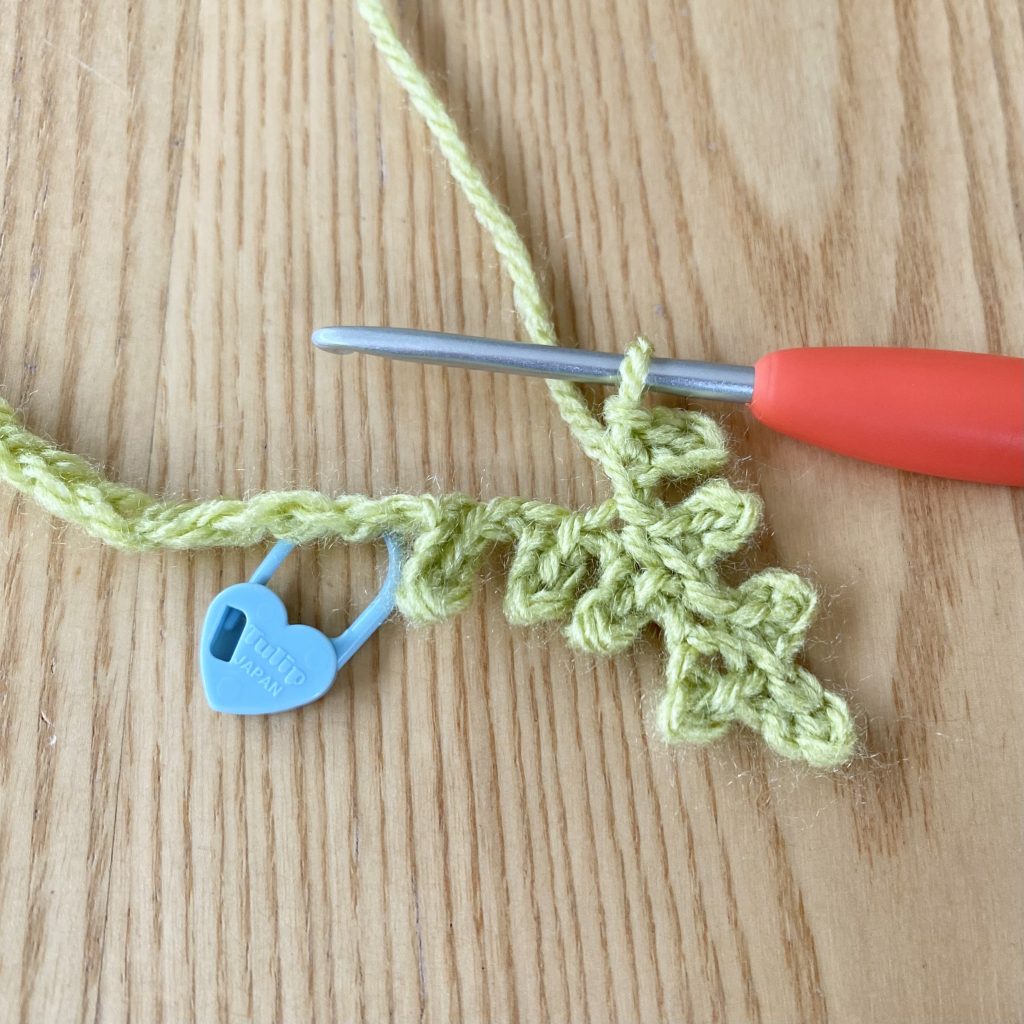
Repeat this process to make another 3-stitch leaf. After, attach the leaf to the central chain by skipping the next stitch (the base of the 3-stitch leaf on the other side) and slip stitching to the next chain.
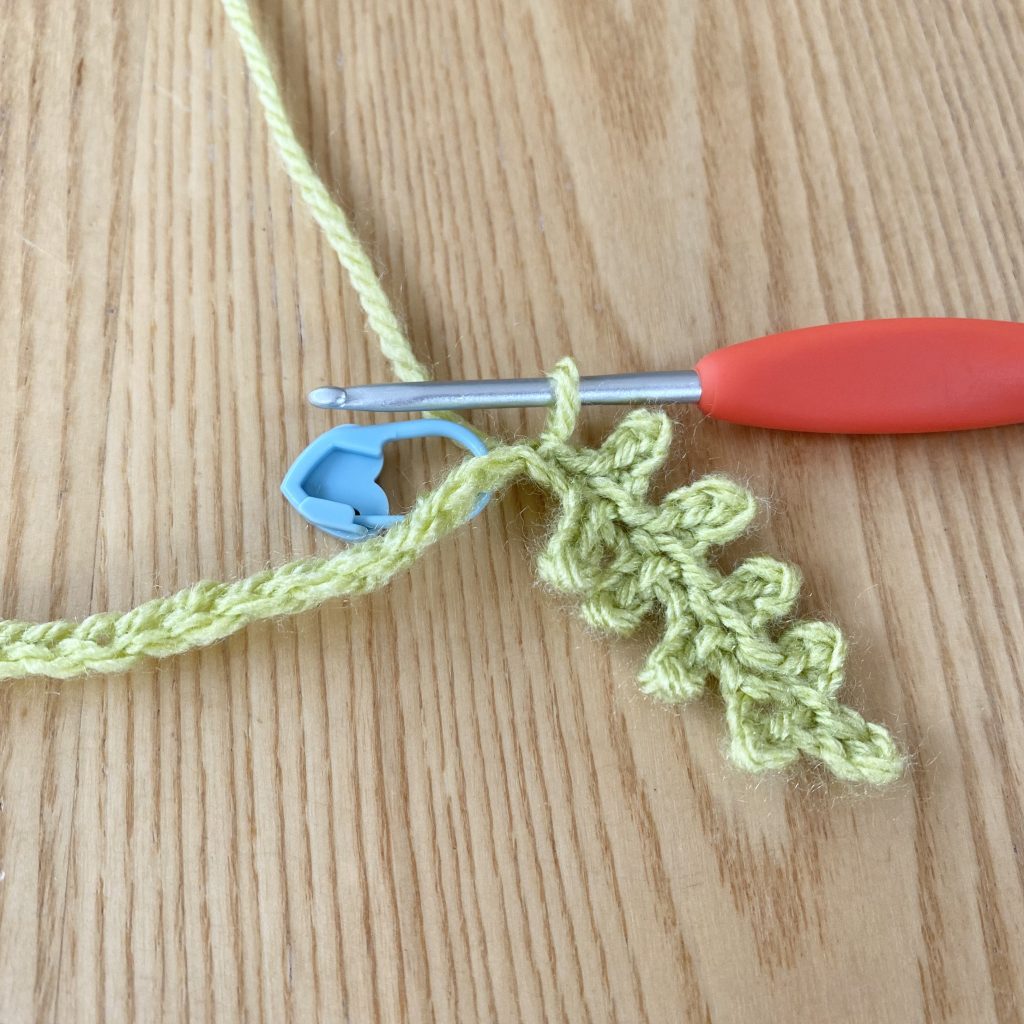
Make a final 3-stitch leaf by chaining 4, slip stitching into the second chain from the hook, then slip stitching into the next 2 chains to finish off the stem
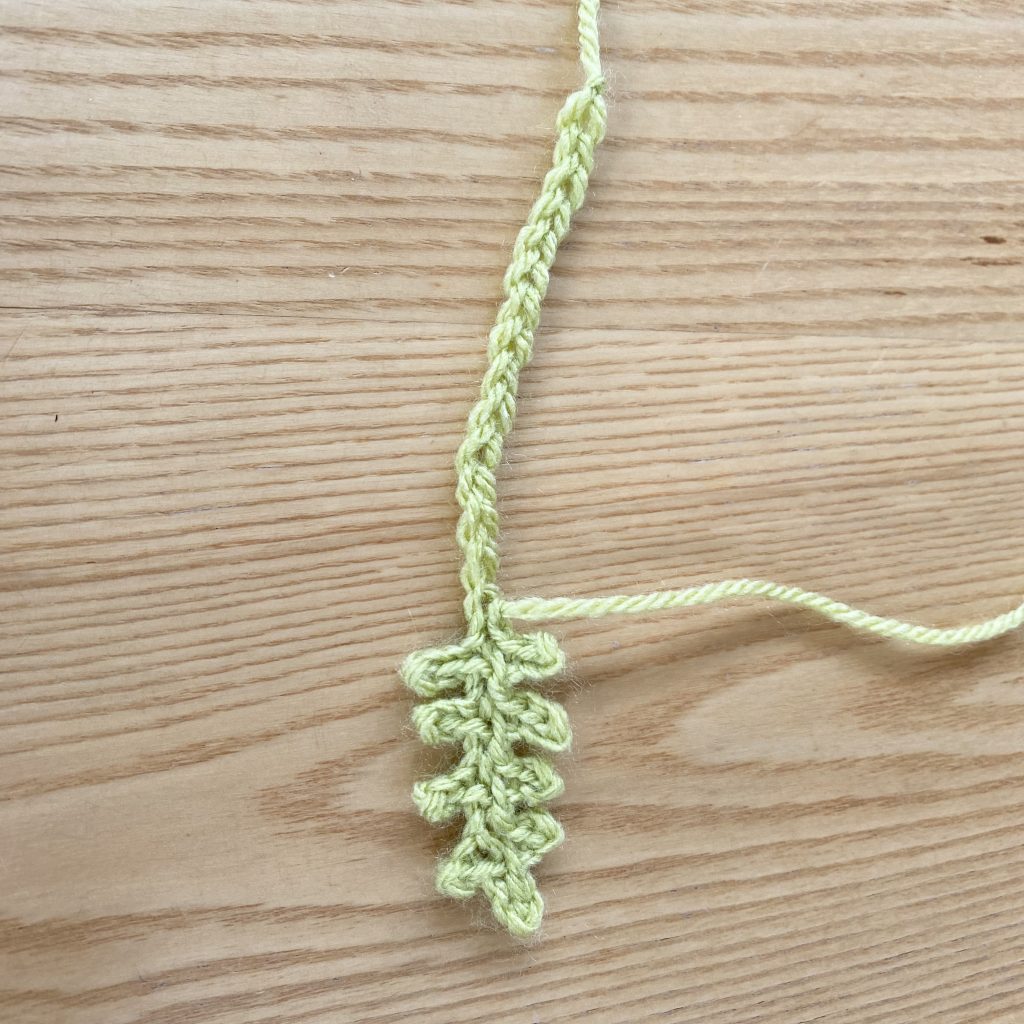
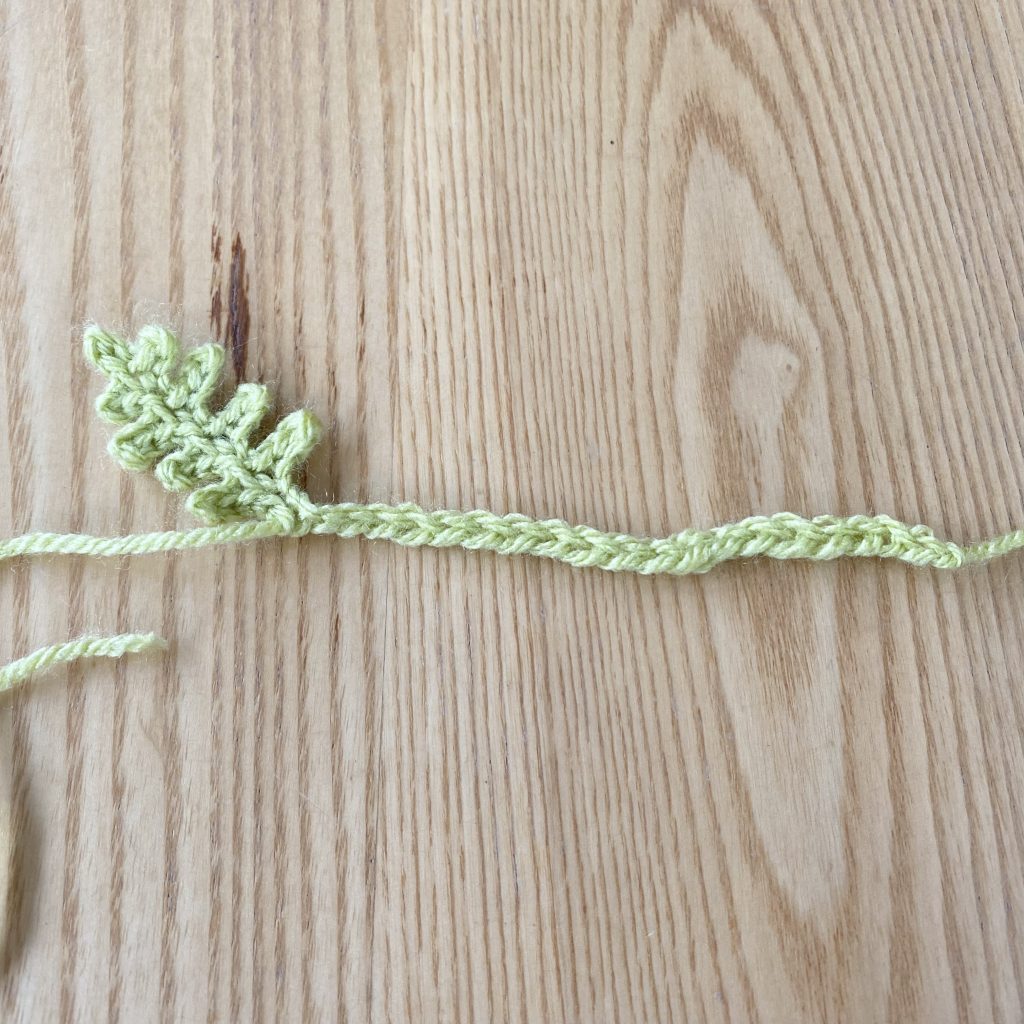
Once you’ve done this, you should have a symmetrical sprig of wisteria leaves that is completely attached to your initial starting chain. Cut the green yarn now, leaving a long end again for sewing up (approx. 15-20cm). We will be using the long end from the start of the starting chain to attach the petal section of the wisteria piece to the blanket, while this end will be used to attach the wisteria leaves to the blanket.
Crocheting Around a Central Chain
Once you have the starting chain ‘stem’ and the integrated sprig of leaves, it’s time to add the petals. This is where things get a little… unusual, so stay with me! Essentially, all you’re doing is crocheting into each chain down the stem, but twisting the stem as you go. By doing this, you’ll end up crocheting a spiral of petals that winds it way around that starting chain ‘stem’, mimicking the conical, 3D shape of a wisteria sprig.

We’re going to start at the bottom of the wisteria sprig (i.e., the opposite end of the stem to the leaf). We’ll start crocheting with the darker purple yarn (I’m using Stylecraft Special DK, in the shade Wisteria) and a 3mm hook.
Small Wisteria Piece

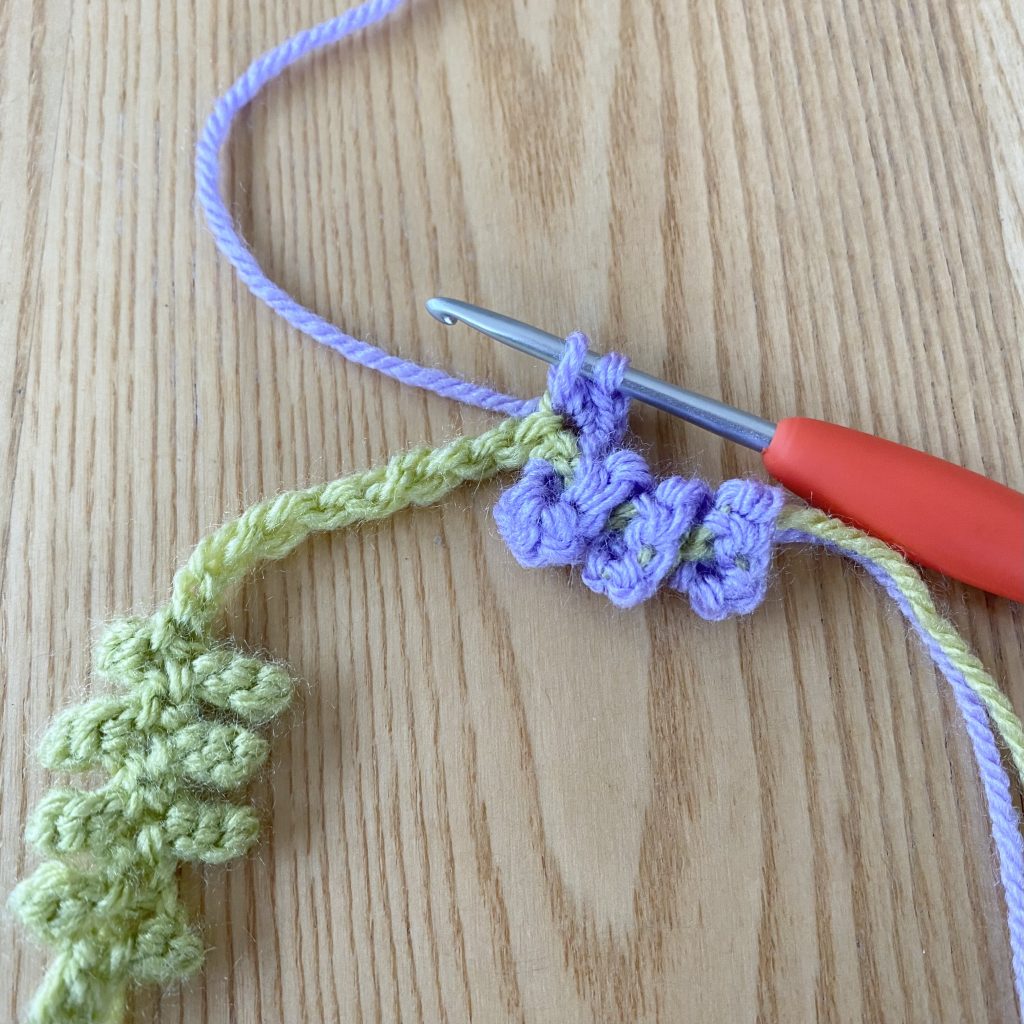
Let’s start with a small wisteria piece. Start by laying out a 14-chain stem piece in front of you, with the leaf on the left-hand side and the ‘v’s of the starting chain facing up at you.
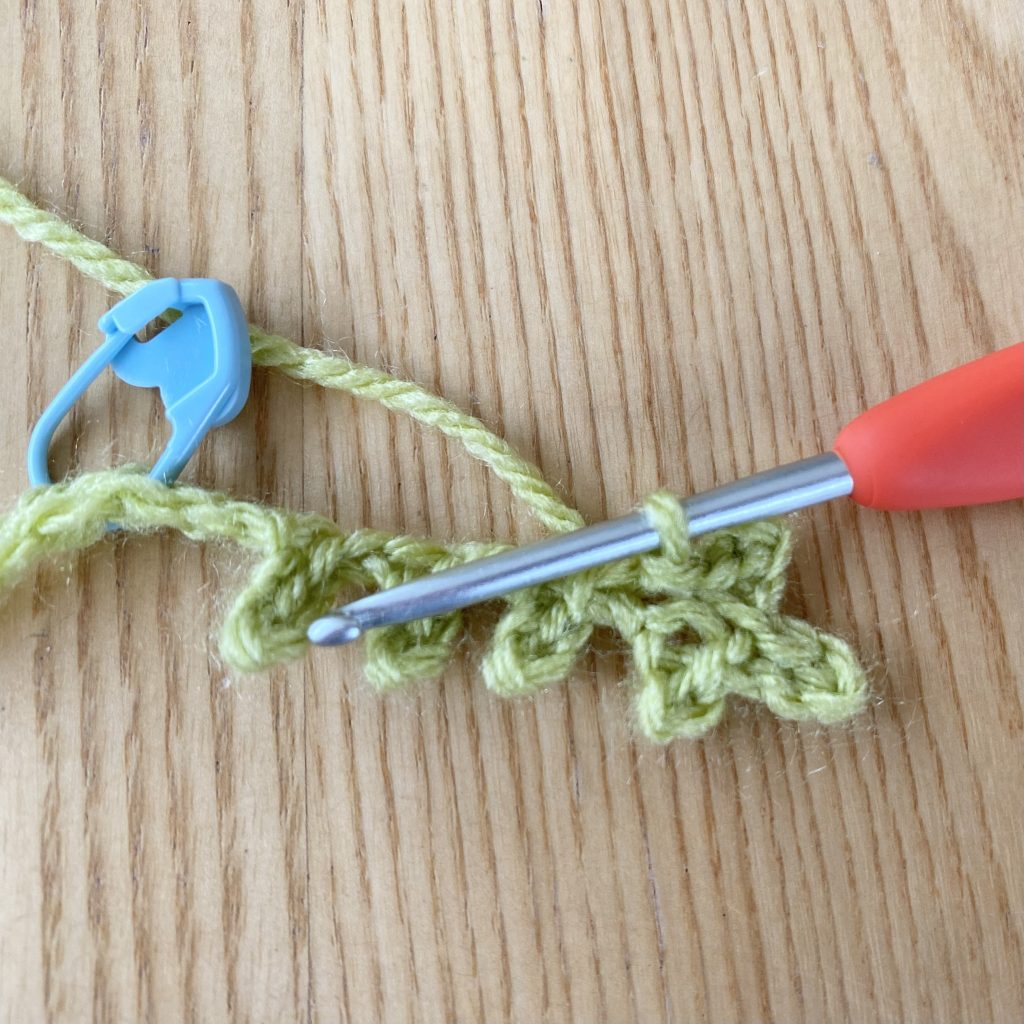
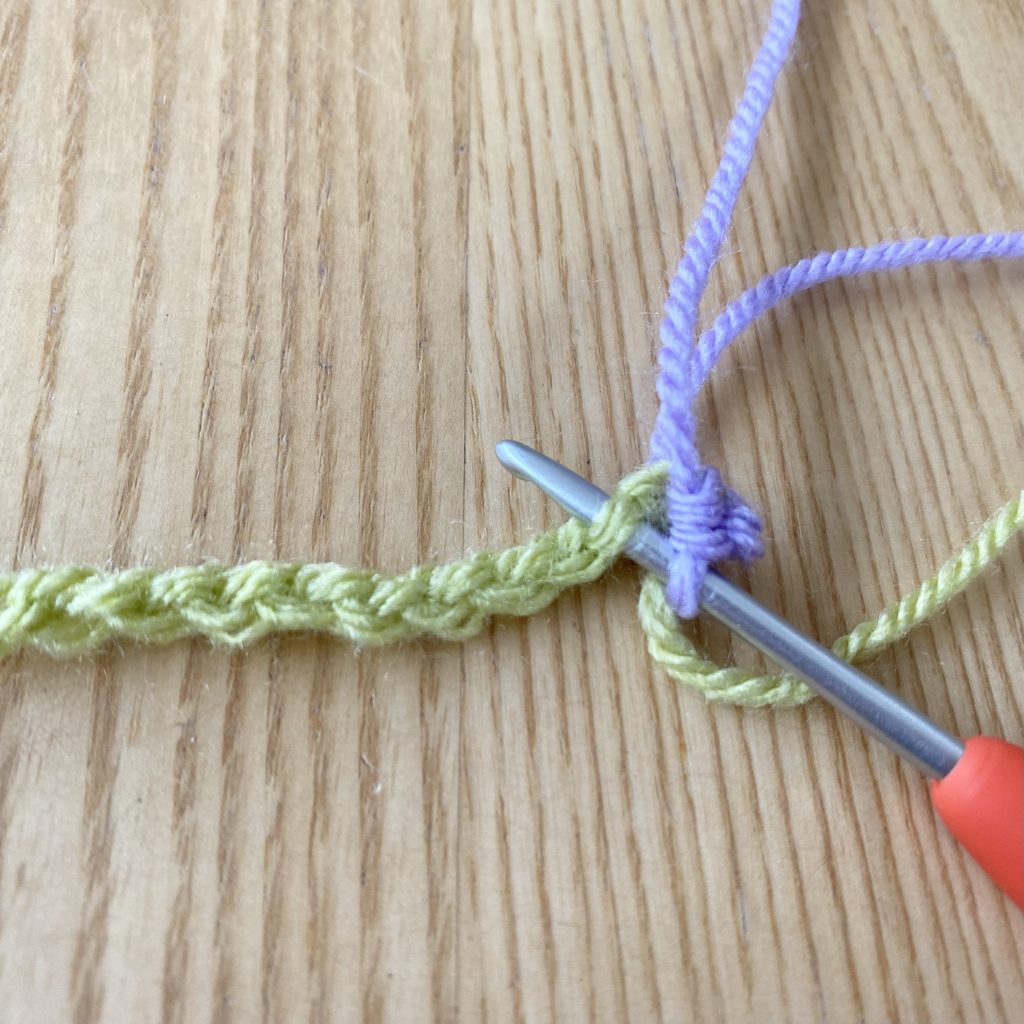
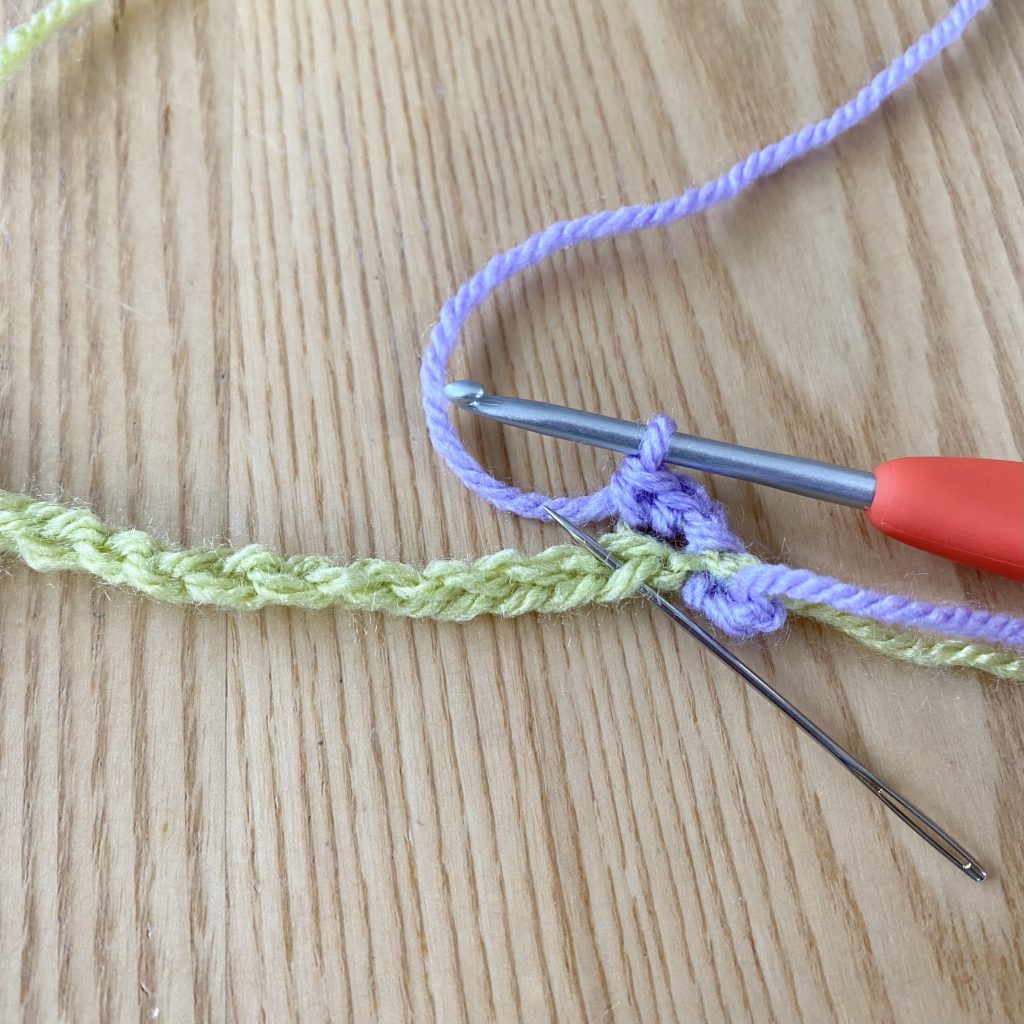
Insert your hook through the middle of the first chain, from back to front, as shown in the photo above.
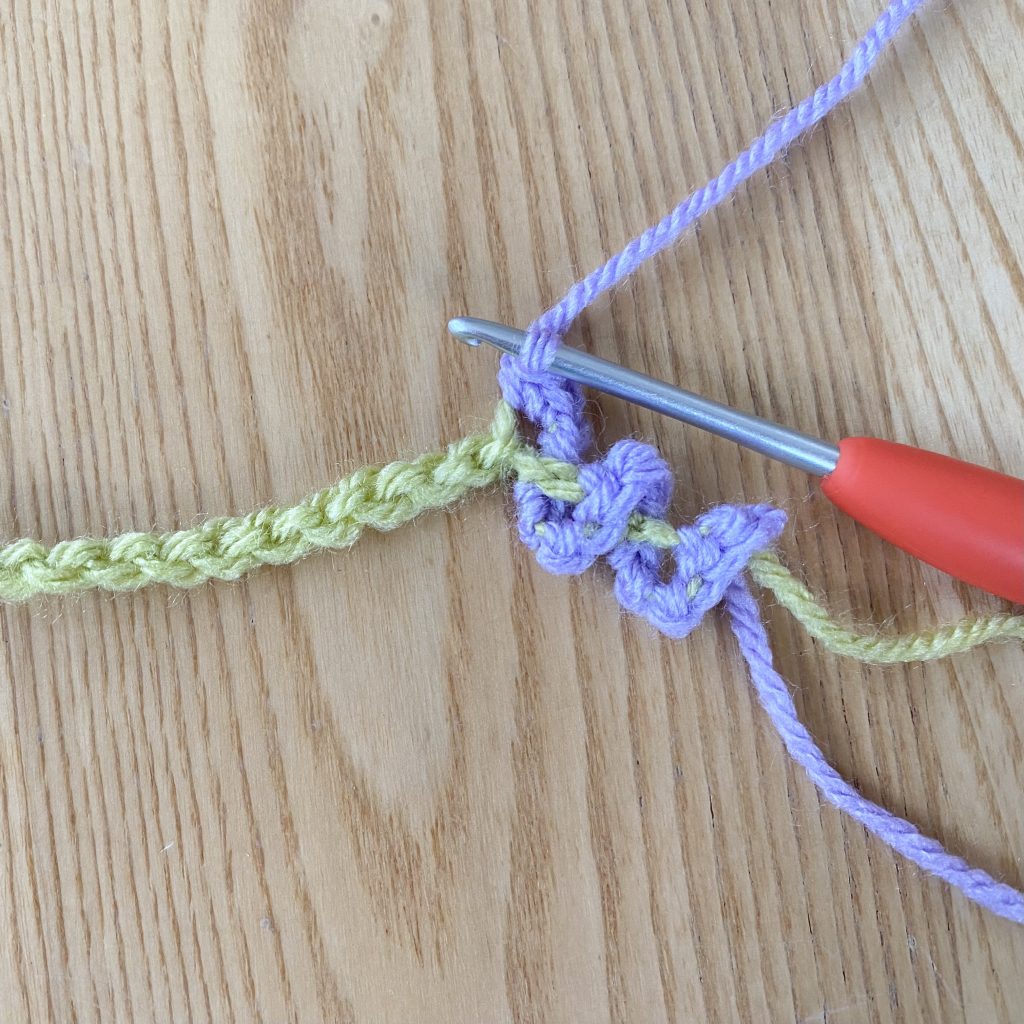
Using the purple yarn, make the first petal in this stitch. Chain 1, then work 2 dc into the same stitch.
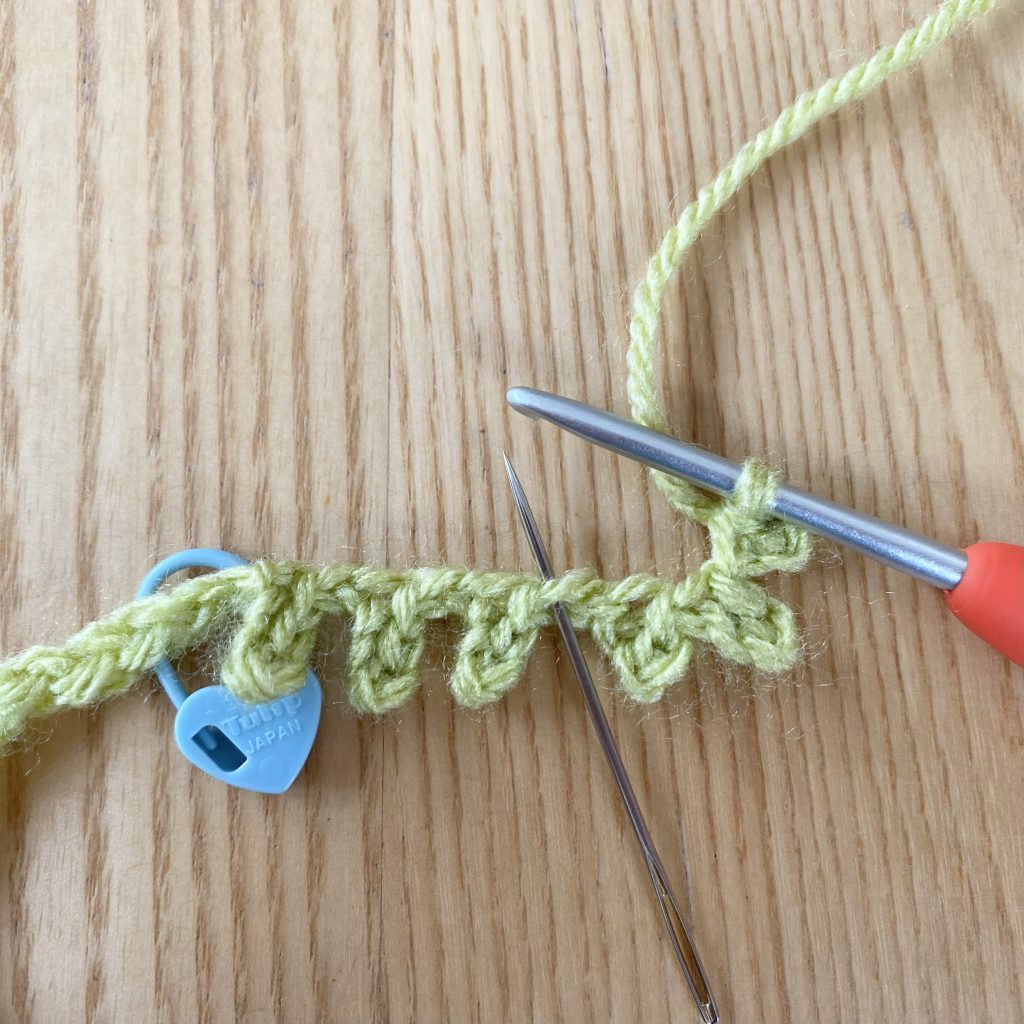
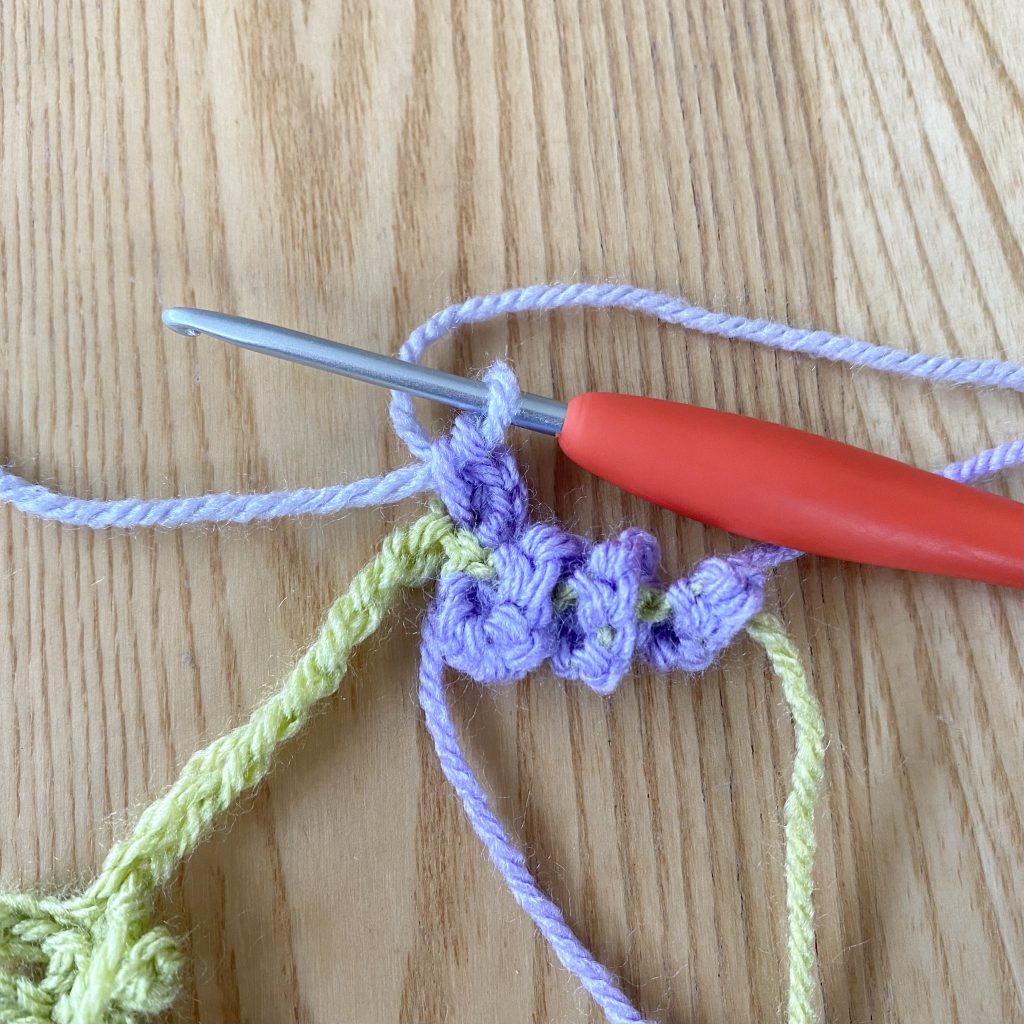
Because of how we inserted our hook into that first stitch, you’ll now be looking at the back of your starting chain. Don’t twist the chain, just insert your hook into the next stitch in exactly the same way as before: through the middle, from back to front (as you see it now), as indicated by the needle here.
Slip stitch into this chain.
Then make another (ch 1, 2dc) petal into it as well.
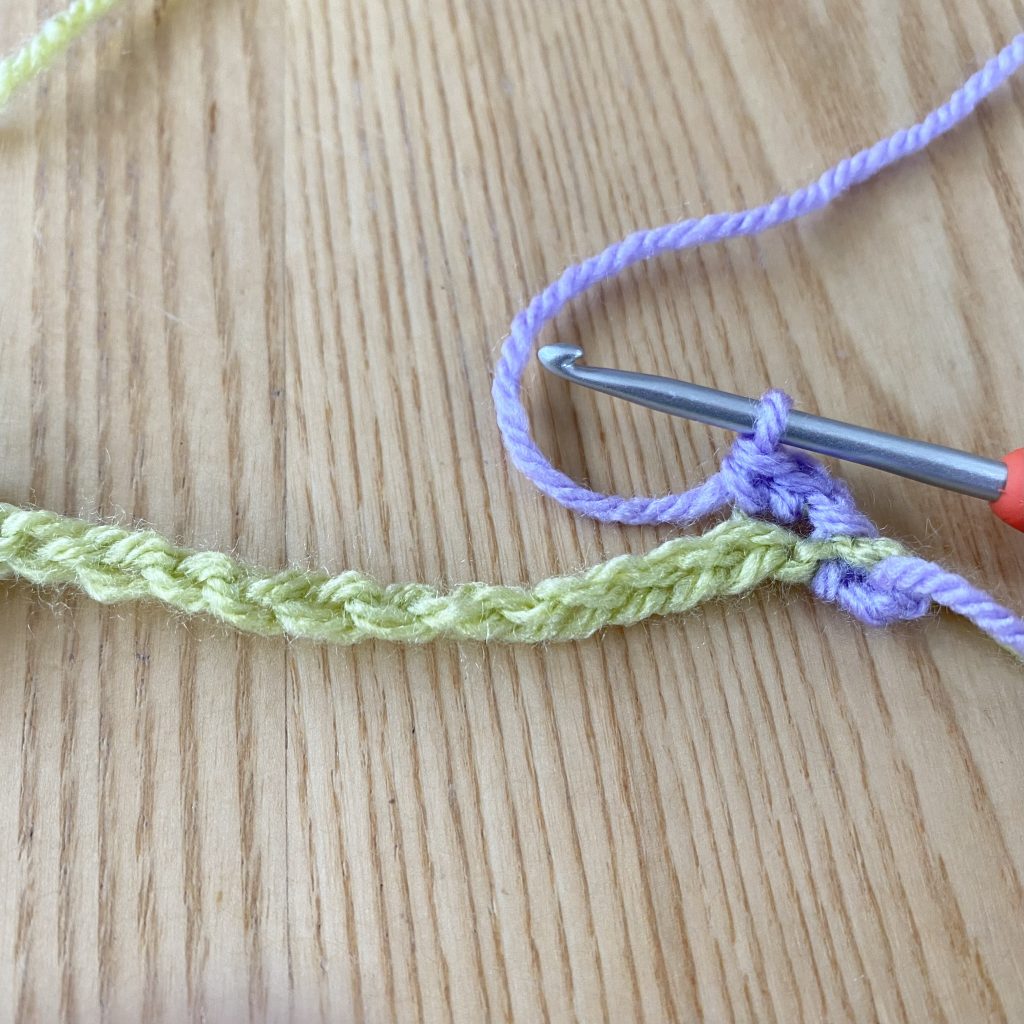
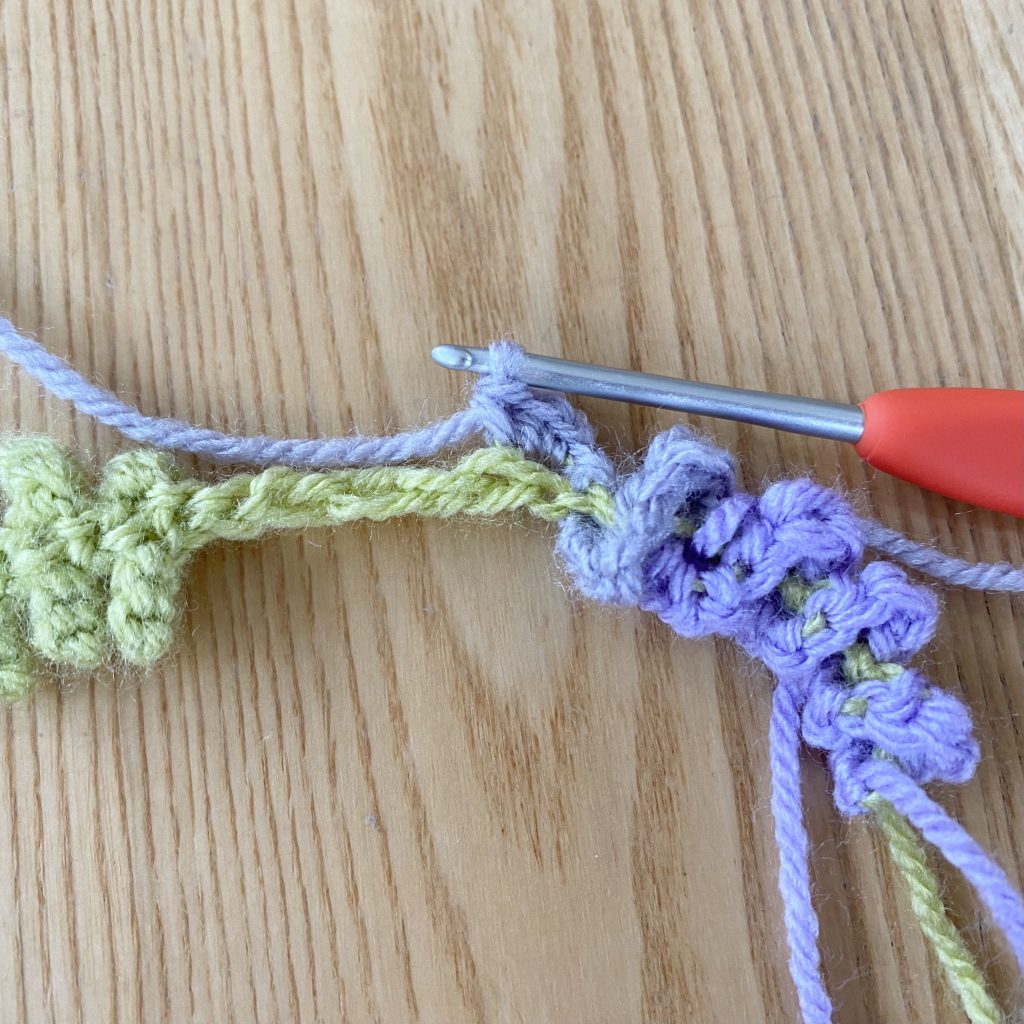
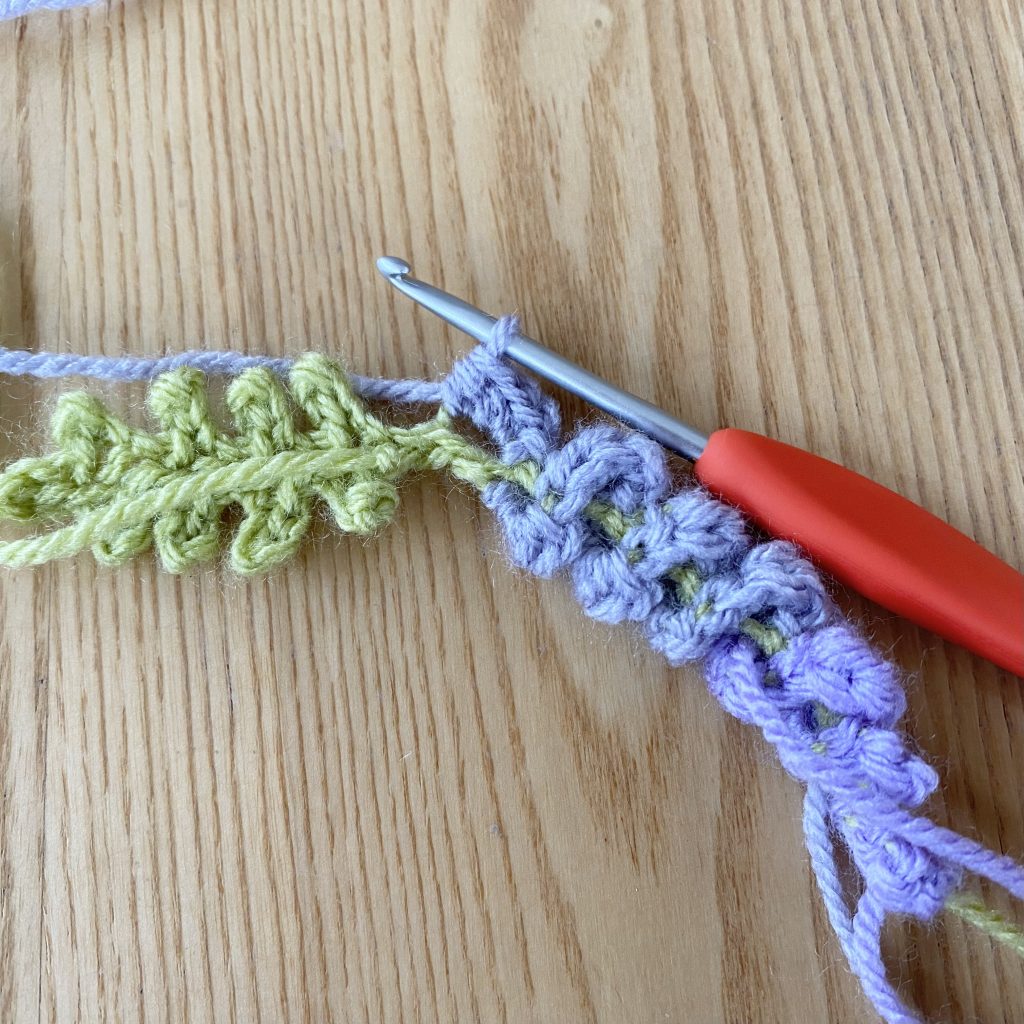
Again, you’ll notice the chain has turned over again, and you’ll now be looking at the front of the starting chain. Again, we’re going to work into the next chain by inserting our hook through the middle of it, from back to front.
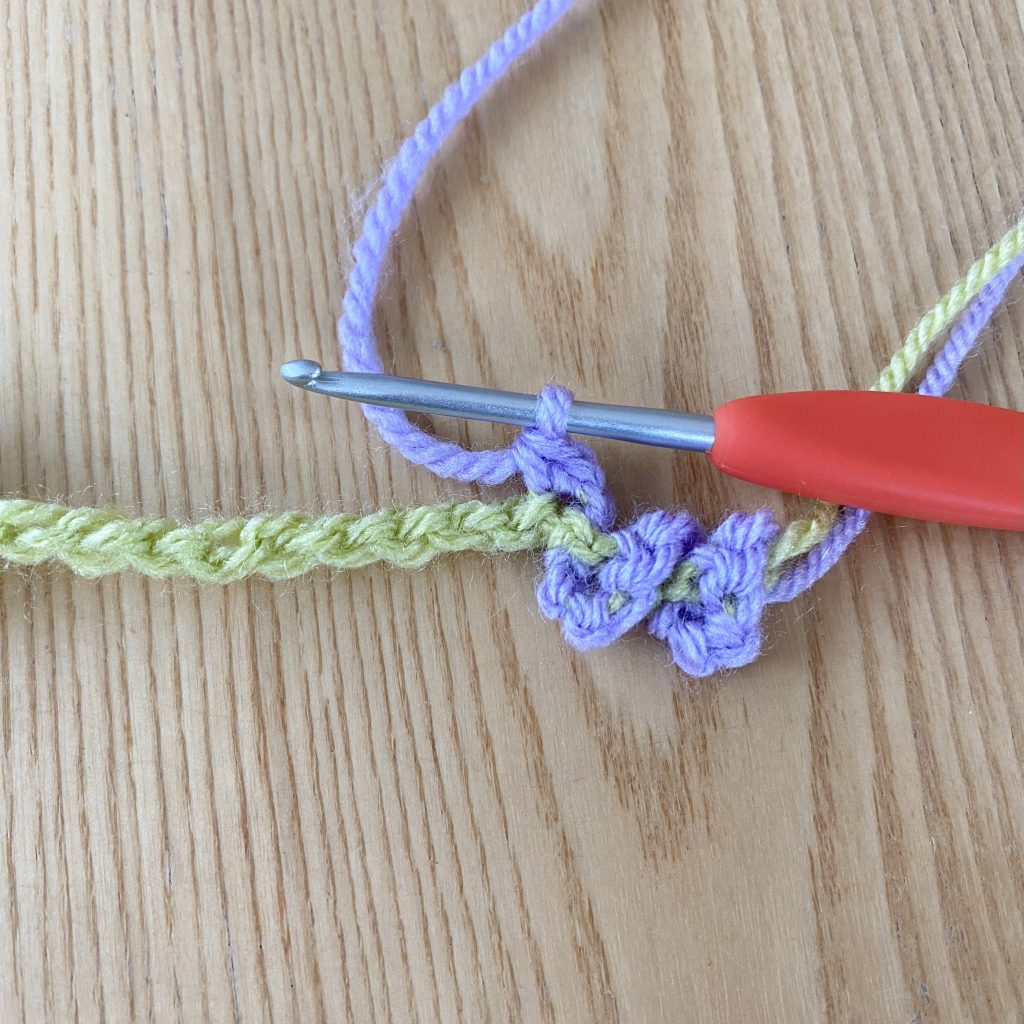
Slip stitch to the chain, then work another (ch 1, 2dc) petal into it. You should now have 3 petals.

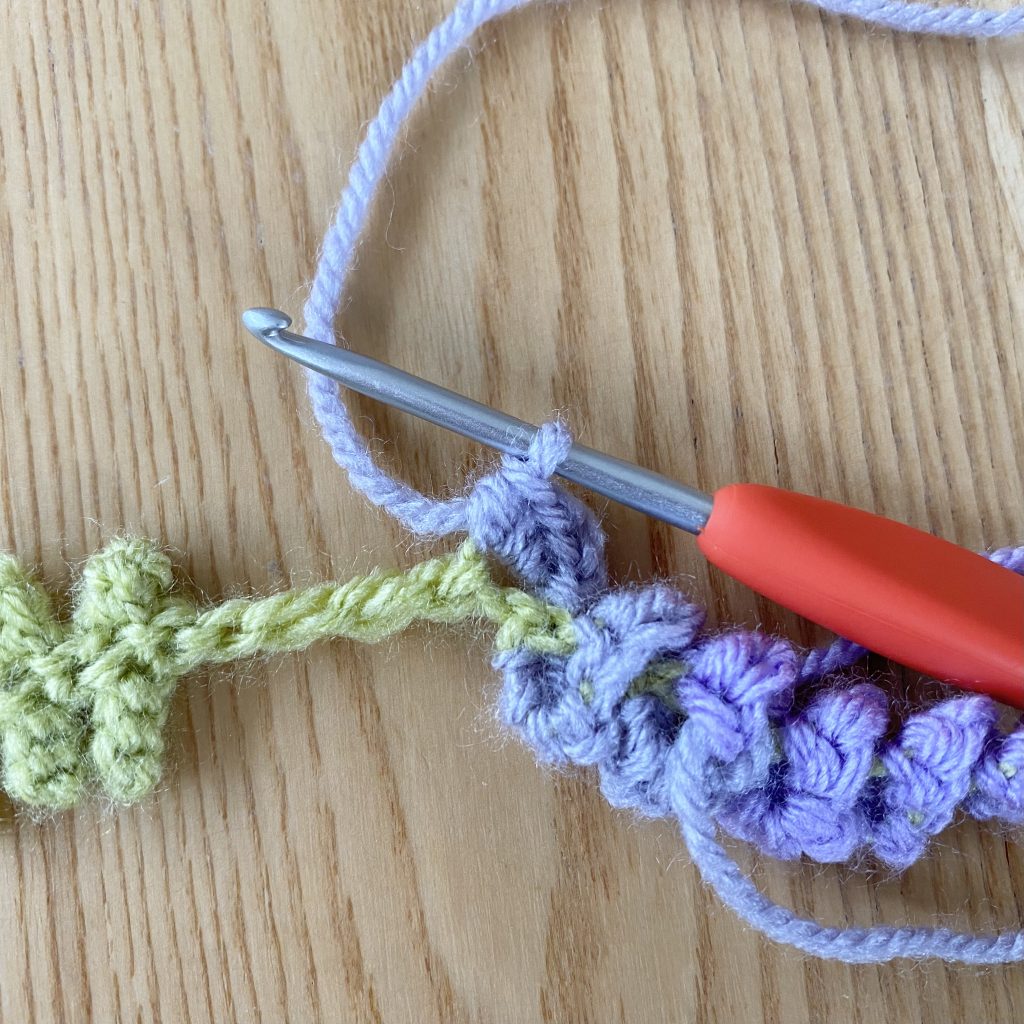
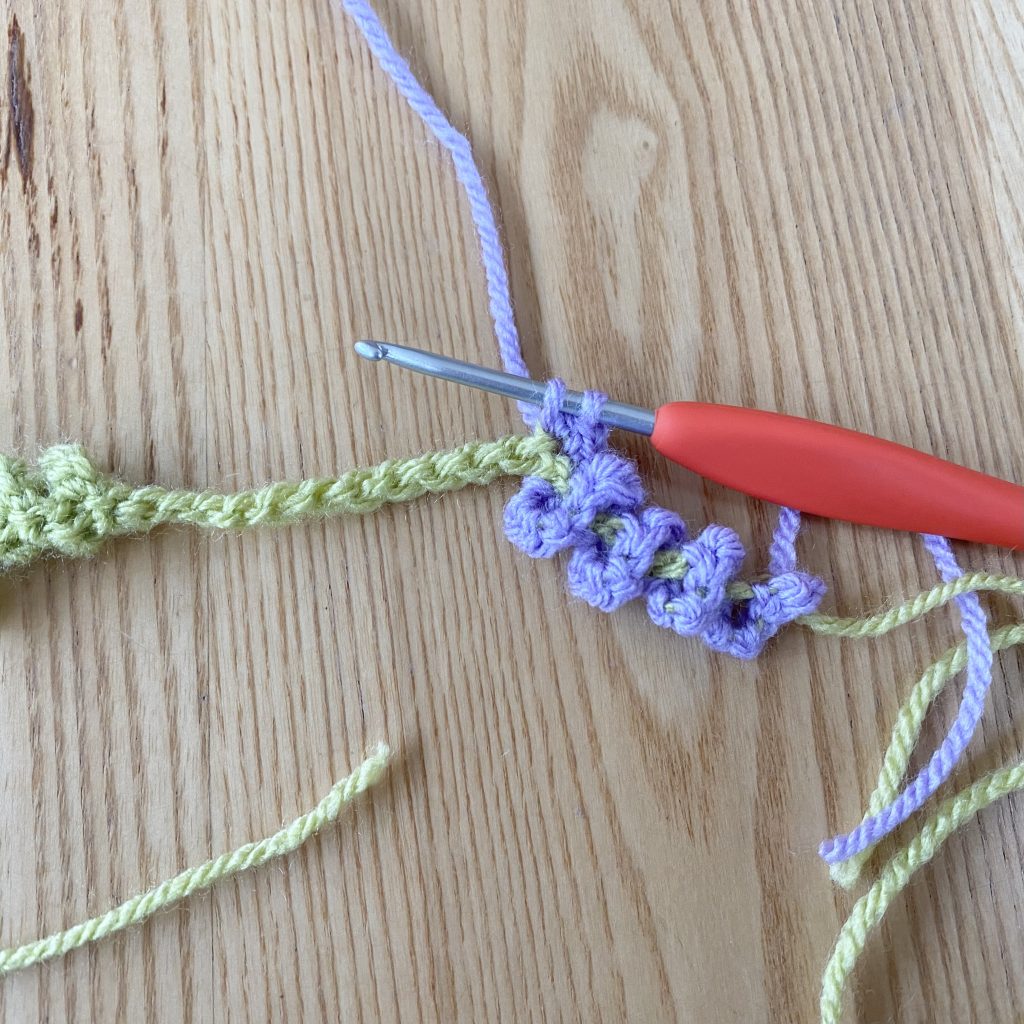
Repeat the whole process, continuing to insert your hook into new chains from back to front, twice more, for a total of 5 petals.
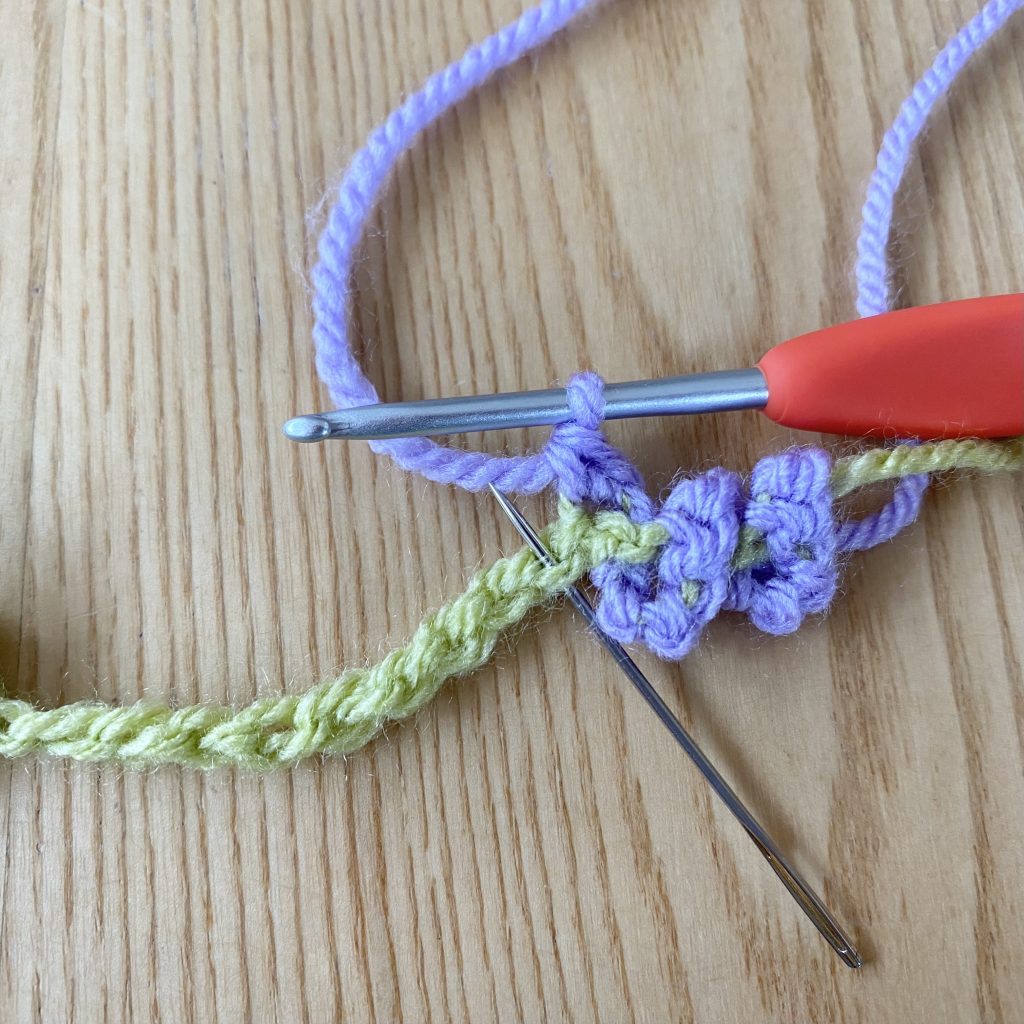
Now we’re going to start increasing the size of the petals, to give that slight conical shape to the sprig. While the petal instructions will change, the hook insertion method stays the same. That is, you should always be inserting your hook through the middle of the chain, from back to front. After working odd-number petals, you should be looking at the back (bumpy side) of the chain. After working even-number petals, you should be looking at the front (v-pattern) side of the chain. This can be a helpful rule to remember to keep you on track, in case your chain gets twisted and you forget where you are!
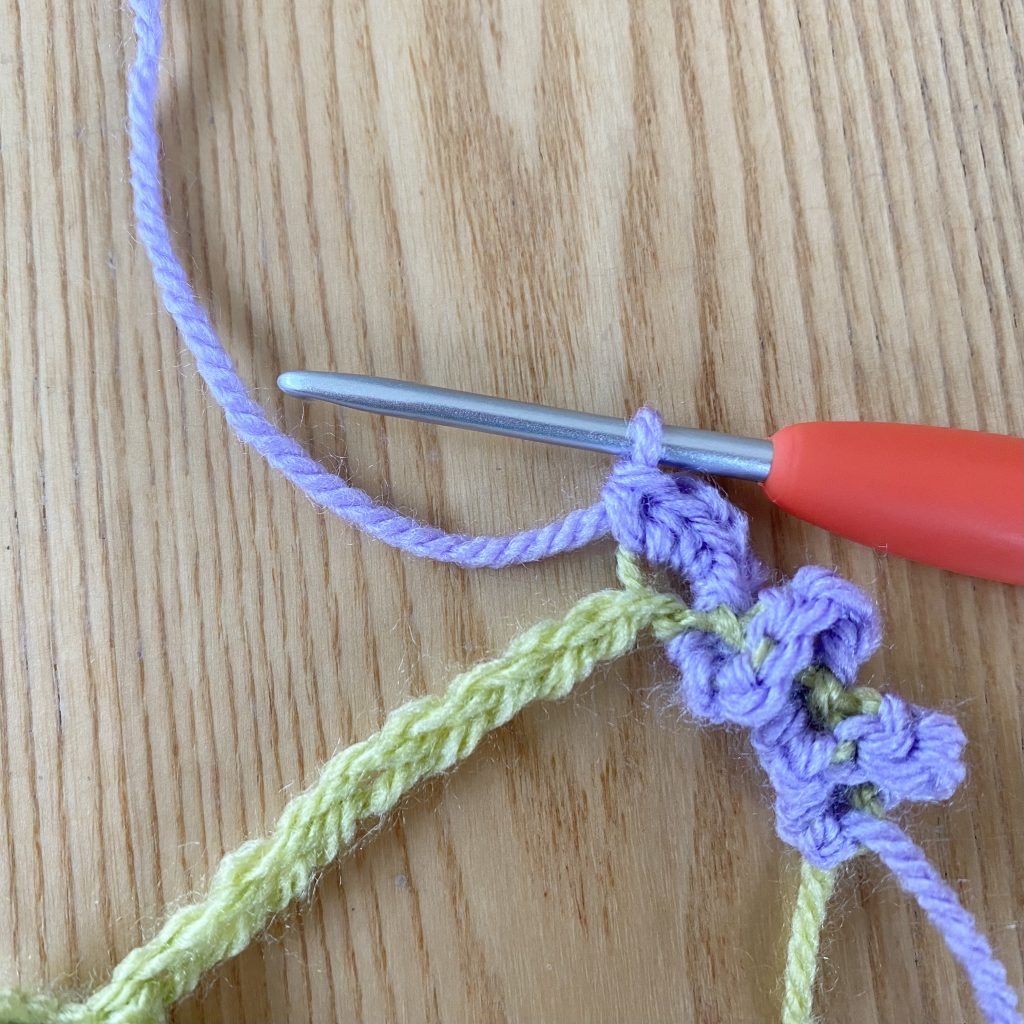
For the sixth petal, work the following pattern into the next chain: (Ch 1, 1dc, 1htr, 1dc).
Slip stitch into the next stitch, then repeat this process once more, for a second medium-sized petal (or petal #7).
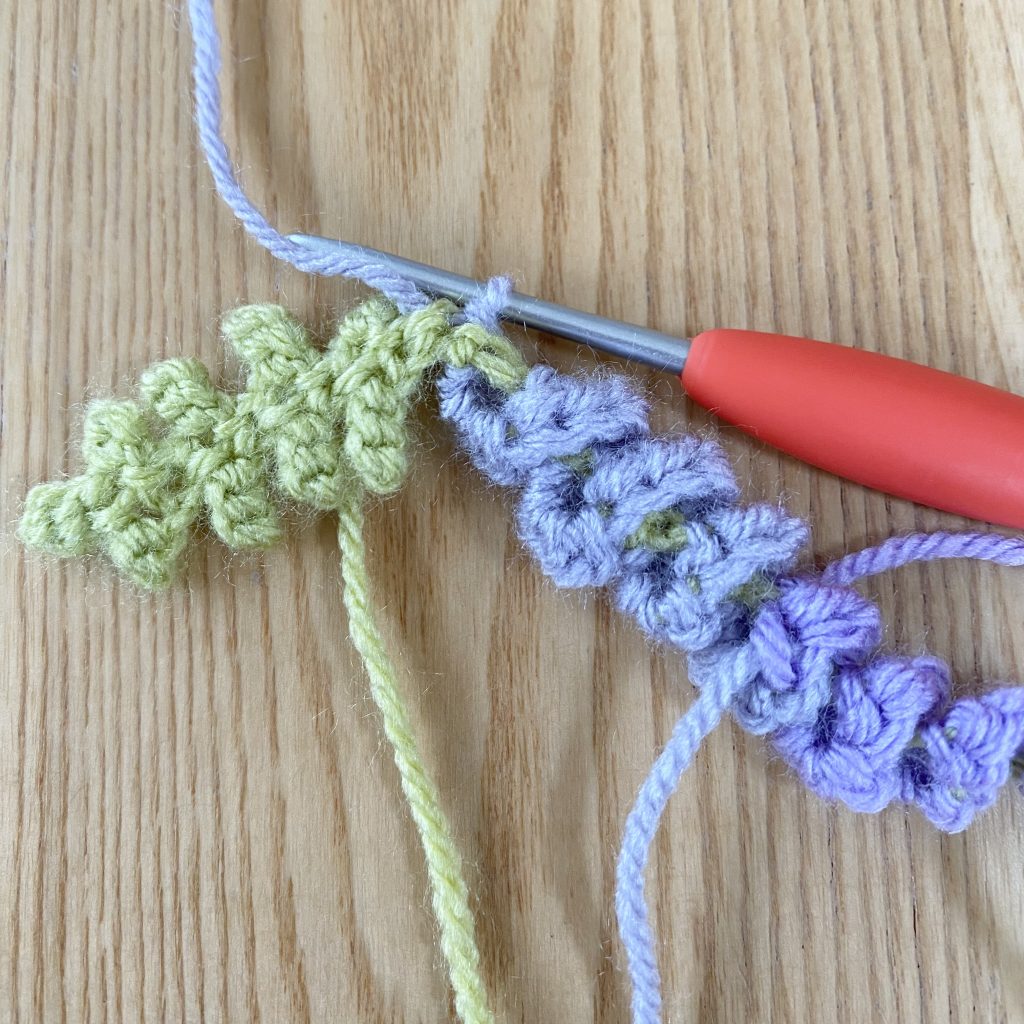
At this point, cut the darker purple yarn and attach the paler purple yarn (I am using Stylecraft Special DK, in the shade Parma Violet). I attach the pale yarn by pulling it through to finish off the dc from the previous petal, which gives a seamless finish.
With the paler purple yarn, work another 3 medium clusters by working in that same (Ch 1, 1dc, 1htr, 1dc) pattern into the next 3 chains, continuing on with the back-to-front hook insertion method and slip stitching into the next chain as you go.
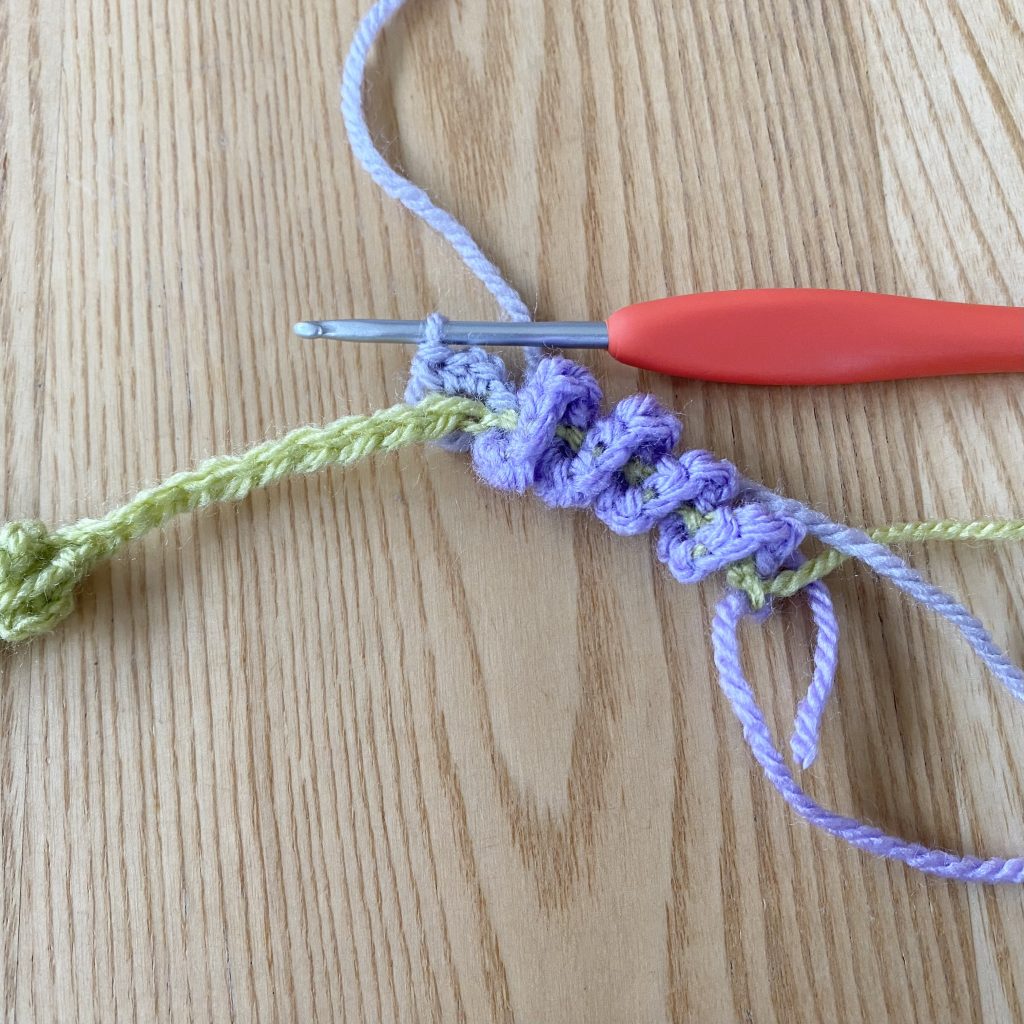
Finally, we’ll make the large petals. Slip stitch into the next chain, inserting the hook from back to front. (Ch 1, 3 htr) into the same stitch.
Repeat this process (slip stitch into the next stitch, then work (ch 1, 3 htr) into the same stitch) 3 more times, for a total of 4 large petals.

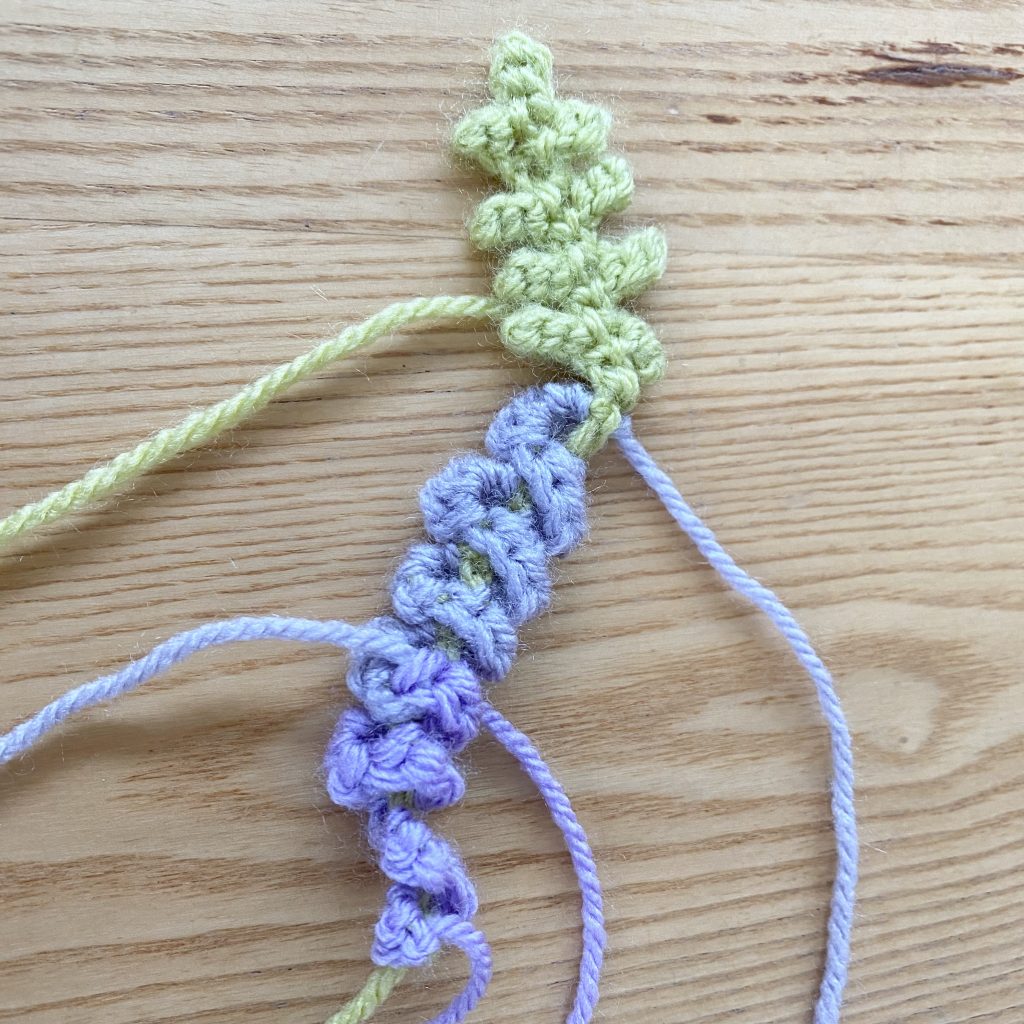
Slip stitch to the final chain, again, inserting the hook from back-to-front, to finish off the final petal.
At this point, you can cut the pale purple yarn and fasten off.
At this point, you can weave in all of the purple ends (both pale and dark). Try to darn them into the petals themselves, matching the end to the petal to keep the colours separate.
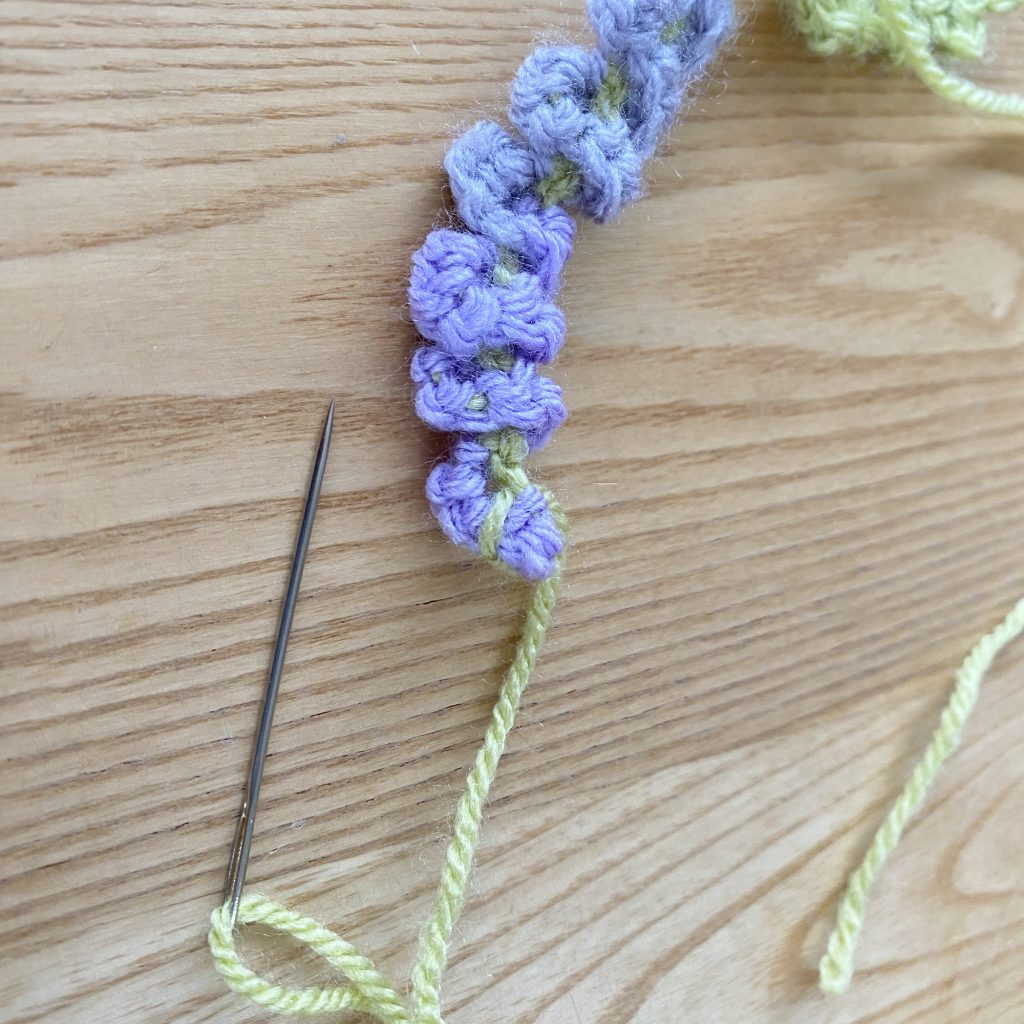
I also used the green end at the bottom of the stem to define the bottom petals ever so slightly- just thread it onto a darning needle and pass it through between the two petals, to create a little green ‘stripe’. Keep this end attached for sewing the wisteria piece to the blanket later.

Large Wisteria Piece
To make the larger wisteria piece, all of the petal patterns and hook-insertion techniques stay exactly the same. All that changes is the number of petals and the point at which you change from the darker purple yarn to the paler purple yarn.
Following the instructions for the smaller wisteria piece, lay one of the 19-chain stem pieces out in front of you.
Work 5 small (ch 1, 2dc) petals in the darker purple yarn.
Then work 4 medium (ch 1, 1dc, 1htr, 1dc) petals in the darker purple yarn.
Switch to the paler purple yarn, then work 1 more medium (ch 1, 1dc, 1htr, 1dc) petal in the paler purple yarn.
Finally, work 9 large (ch 1, 3htr) petals in the paler yarn.
Weave in all the purple yarn ends as for the smaller wisteria piece, and define the bottom two petals using the green yarn end as before.
Written Pattern
Materials & Tools
- Stylecraft Special DK in the shades Pistachio, Wisteria and Parma Violet.*
- 5mm hook (for the starting chain).
- 3mm hook (for the leaves and petals).
- Scissors.
- Darning needle.
You can find the specific quantities for each of the yarn colours on the introductory post for this pattern, under ‘Master Material List’.
Small Wisteria (Make 10):
Using a 5mm hook, ch 14, leaving a long end (approx. 25cm) at the start for attaching to the blanket.
Switch to a 3mm hook to make the leaves.
*Ch 6, ss into 2nd ch from hook. Ss in next 2 chains.
Ch 5, ss into 2nd ch from hook. Ss in next 2 chains.
Ch 5, ss into 2nd ch from hook. Ss in next 2 chains.
Ch 4, ss into 2nd ch from hook. Ss in next chain.
Ch 3, ss into 2nd ch from hook.
Slip to next stitch, ch 3, ss into 2nd ch from hook. Ss in next chain.
Skip next stitch on main stem (at base of opposite leaf), ss to next ch, ch 4, ss into 2nd ch from hook. Ss in next 2 chains.
Skip next stitch on main stem, ss to next ch, ch 4, ss into 2nd ch from hook. Ss in next 2 chains.
Skip next stitch on main stem, ss to next ch, ch 4, ss into 2nd ch from hook. Ss in next 2 chains.
Skip next stitch on main stem, ss to next 2 ch.
Cut the green yarn, leaving a long end (approx. 15-20cm) for attaching to the blanket.**
From now on, when working into the starting chain, always insert hook through the middle of the chain, from back to front. This will twist the chain after every petal is worked. After working odd-number petals, you should be looking at the back (bumpy side) of the chain. After working even-number petals, you should be looking at the front (v-pattern) side of the chain.
Attach Wisteria yarn to first chain of initial starting chain (opposite end to leaf).
(Ch 1, 2dc) into first stitch, then ss into next stitch. Repeat 4 more times, for a total of 5 small petals.
(Ch 1, 1dc, 1htr, 1dc) into next stitch, then ss into next stitch. Repeat 1 more time, for a total of 2 medium petals.
Cut Wisteria yarn and attach Parma Violet yarn.
(Ch 1, 1dc, 1htr, 1dc) into next stitch, then ss into next stitch. Repeat 2 more times, for a total of 3 medium (pale) petals.
(Ch 1, 3htr) into next stitch, then ss into next stitch. Repeat 3 more times, for a total of 4 large petals.
Cut Parma Violet yarn. Weave in all purple ends, leaving both green ends for attaching to the blanket later. Define the bottom two (small) petals by threading the green end at the base of the wisteria onto a darning needle, then working a small stitch over the petals to separate them. Do not cut the green yarn after.
Large Wisteria (Make 10):
Using a 5mm hook, ch 19, leaving a long end (approx. 25cm) at the start for attaching to the blanket.
Switch to a 3mm hook and follow the pattern for the small wisteria piece from * to ** to make the leaves.
From now on, when working into the starting chain, always insert hook through the middle of the chain, from back to front. This will twist the chain after every petal is worked. After working odd-number petals, you should be looking at the back (bumpy side) of the chain. After working even-number petals, you should be looking at the front (v-pattern) side of the chain.
Attach Wisteria yarn to first chain of initial starting chain (opposite end to leaf).
(Ch 1, 2dc) into first stitch, then ss into next stitch. Repeat 4 more times, for a total of 5 small petals.
(Ch 1, 1dc, 1htr, 1dc) into next stitch, then ss into next stitch. Repeat 3 more times, for a total of 4 medium petals.
Cut Wisteria yarn and attach Parma Violet yarn.
(Ch 1, 1dc, 1htr, 1dc) into next stitch, then ss into next stitch, to make 1 more medium petal.
(Ch 1, 3htr) into next stitch, then ss into next stitch. Repeat 8 more times, for a total of 9 large petals.
Cut Parma Violet yarn. Weave in all purple ends, leaving both green ends for attaching to the blanket later. Define the bottom two (small) petals by threading the green end at the base of the wisteria onto a darning needle, then working a small stitch over the petals to separate them. Do not cut the green yarn after.
Final Thoughts
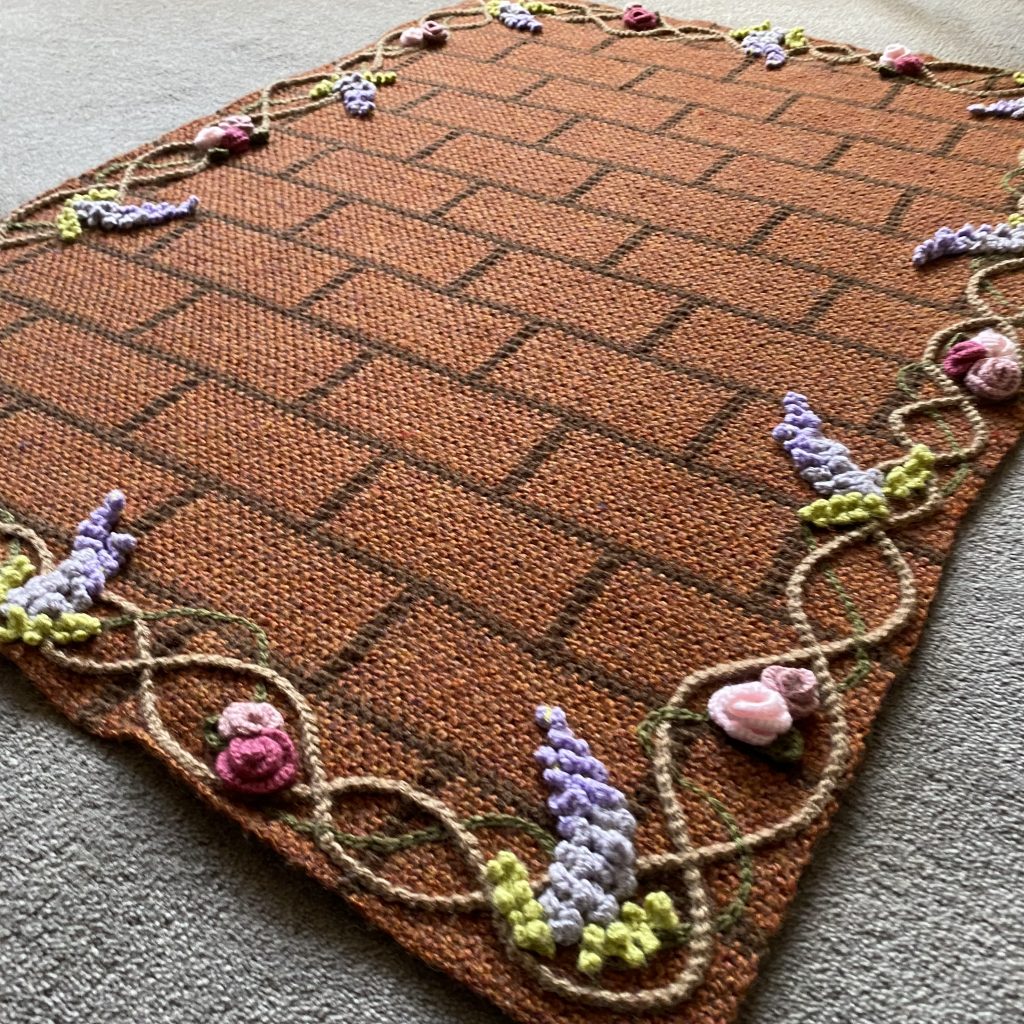
Once you’ve made 10 small wisteria pieces and 10 large wisteria pieces, you will have all of your wisteria appliqué elements ready to go for your Bridgerton House Baby Blanket! The next post in this series will include detailed instructions for attaching these, along with the rose pieces from last week’s post, to your blanket, so keep them somewhere safe until then.
Obviously, these crochet wisteria pieces are nowhere near anatomically correct, but, when attached to the blanket, I think they do a really good job of giving the impression of wisteria, which was the aim! They are a little fiddly to make, but that’s more because the spiral technique is quite different to typical crochet, not because it’s particularly hard or fine work! Just remember that, when you’re working the petals, you should always be inserting the hook through the middle of the next chain, from back to front, and you’ll be absolutely fine.
These wisteria pieces were definitely one of the more complicated elements to design for this blanket pattern, but I’m super happy with how they turned out- particularly the integrated leaf section, which not only reduces the number of ends you have to sew in (yay!) but also makes this blanket that little bit safer for young children (double yay!).
I hope you’ve enjoyed this wisteria embellishment tutorial! As I’ve mentioned before, I’m not super experienced at writing crochet patterns, so please do let me know if you run into any problems with this and I will do my best to help you out! I’ll see you next week for Part 6 (the final part!).
Gemma
xxx