Hello again!
For the first time ever, I have next month’s bullet journal setup all done and ready to go in advance! Wow- what an unusual experience for this habitually last-minute journaller. Is this what Marie Condo feels like when she organises the heck out of a closet? Infinite pride? I can only assume so.
This month, I was craving something light, bright and relatively simple to create. I saw this setup by Shayda Campbell on YouTube and absolutely fell in love with it. I decided to take my inspiration from the thumbnail image, which features drawings of daisies on grey paper ‘boxes’ with rounded edges, and run with that. Even though I really loved the grey colour scheme used in the original, I wanted something a little more colourful for my journal, so I used light blue paper instead, as a nod to the blue skies that I’m hoping will start showing up more and more, now we’re officially into Spring!
So, let’s get into my ‘Daisies and Blue Skies‘ April setup!
Equipment used:
- Pale blue paper
- Artistro acrylic paint pens, yellow and white (I purchased mine in this pack).
- Tombow ABT dual brush pens, N65 and N89 (I purchased mine in this pack).
- Zebra mildliner, fluorescent blue (the blue shade from this pack).
- Crayola supertip, yellow (I purchased mine in this pack).
- Sakura gelly roll, white.
- Muji 0.38 pen, black.
- Pencil, scissors, glue, craft knife and cutting board
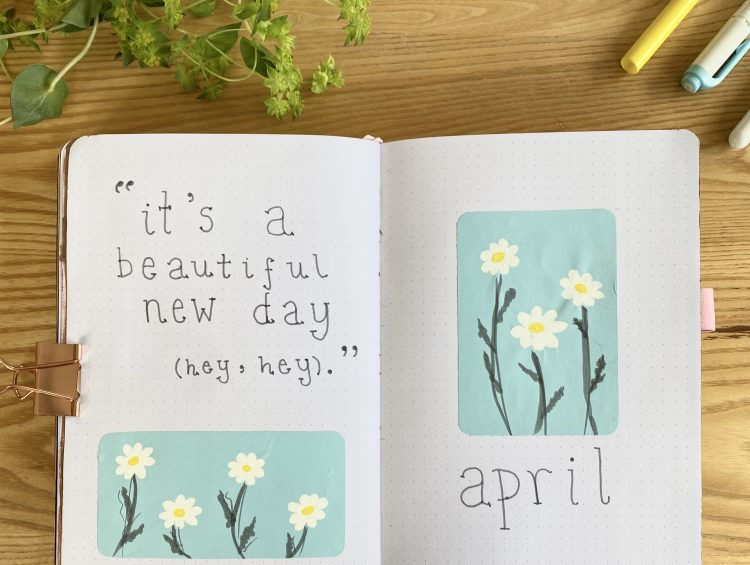
Cover and Quote Page
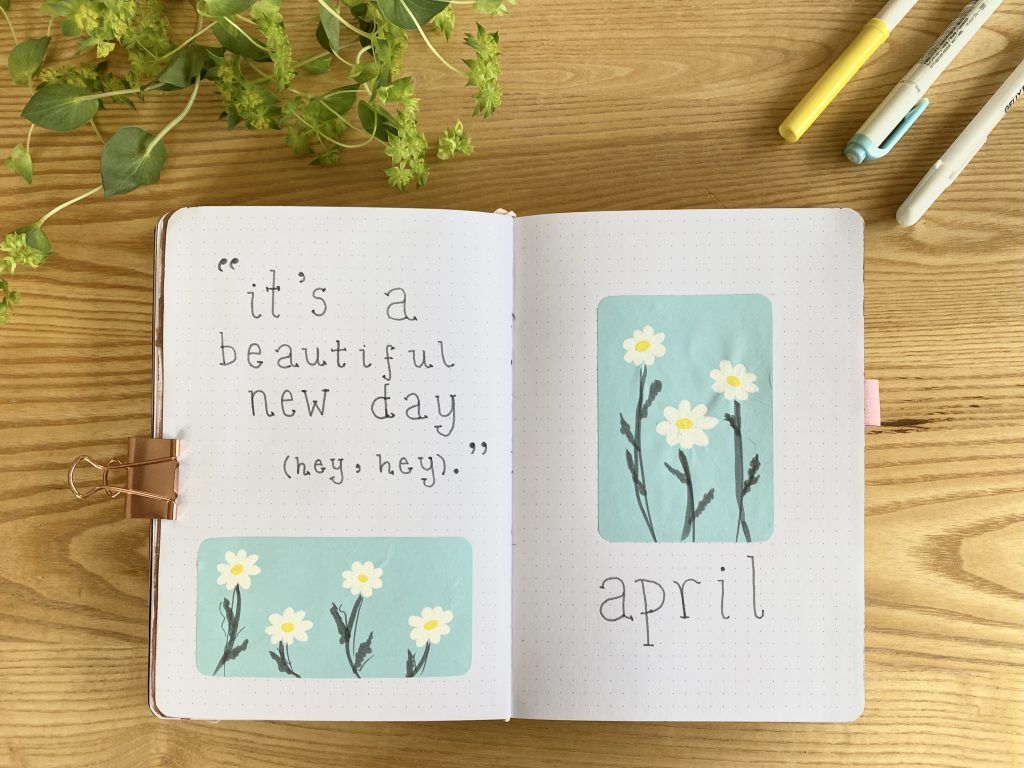
My cover page this month is very simple- a rectangle of blue paper with rounded corners, decorated with a few daisies, with a simple, lowercase header (but below the decorative element, so… a footer?). For the daisies, I first used my white Sakura gelly roll to draw a rough outline, then filled it in with my Artistro paint pens. I’ve never used paint pens before, and they did have a bit of a learning curve- I learned along the way to shake the pens very well before each use and to try out the pen on a scrap piece of paper after shaking (make sure there’s no watery ring around the pigment- this means you need to shake it more!). I also found that I got a better opacity (without saturating the paper too much) if I did a thin layer initially, allowed that layer to dry (this will protect the paper a little from the wateriness of the next layer), then did a second, much thicker, layer. Another thing to note: my blue paper was very thin, so it did saturate quite easily and crumpled up a little as the paint dried. I couldn’t find a way to avoid this crumpling- you can probably see in the photo above and, indeed, in the rest of my spreads, that I did get a few creases and bubbles, even after sticking the paper into my journal- I wonder if flattening the decorated paper boxes between a couple of heavy books before sticking them in would have helped? For the stems, I used both ends of my Tombow N65 pen and purposefully embraced a messy, slightly abstract, approach (yes, this was because I could not draw attractive, realistic looking stems for the life of me).
For my quote page, I opted for a quote from the song Mr Blue Sky by the Electric Light Orchestra: ‘It’s a beautiful new day (hey, hey)’, which I feel is very apt, both for this particular setup and for my state of mind at the moment! I decorated the space at the bottom with another rounded rectangle of blue paper, decorated with more daisies.
Monthly Calendar Page
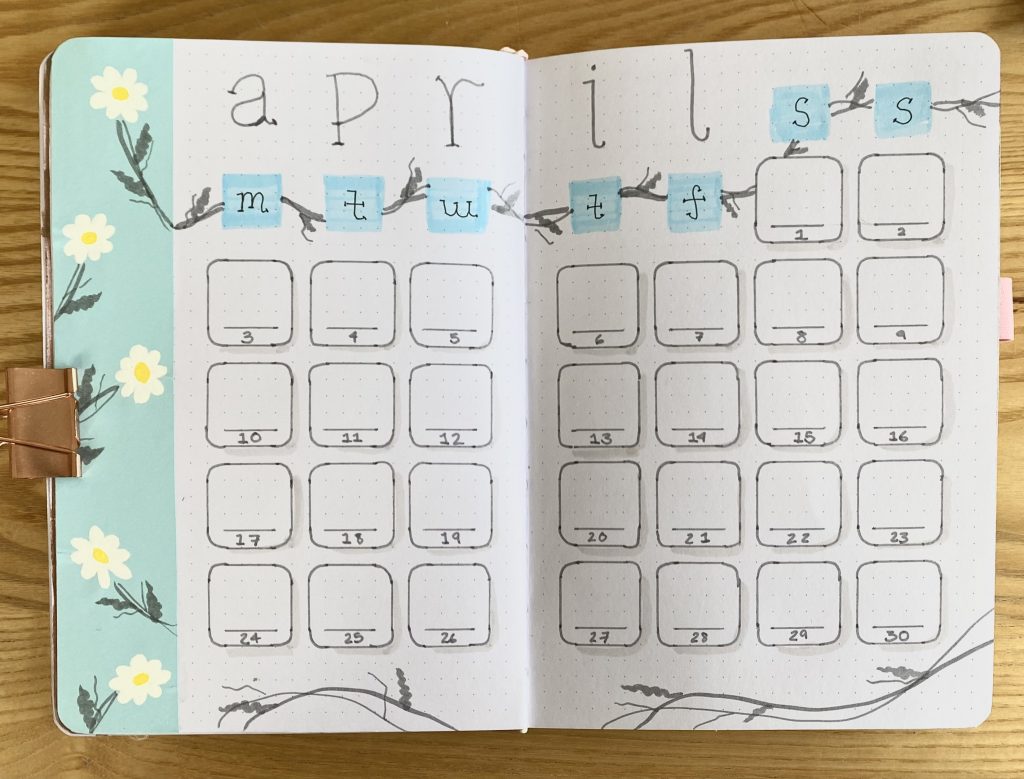
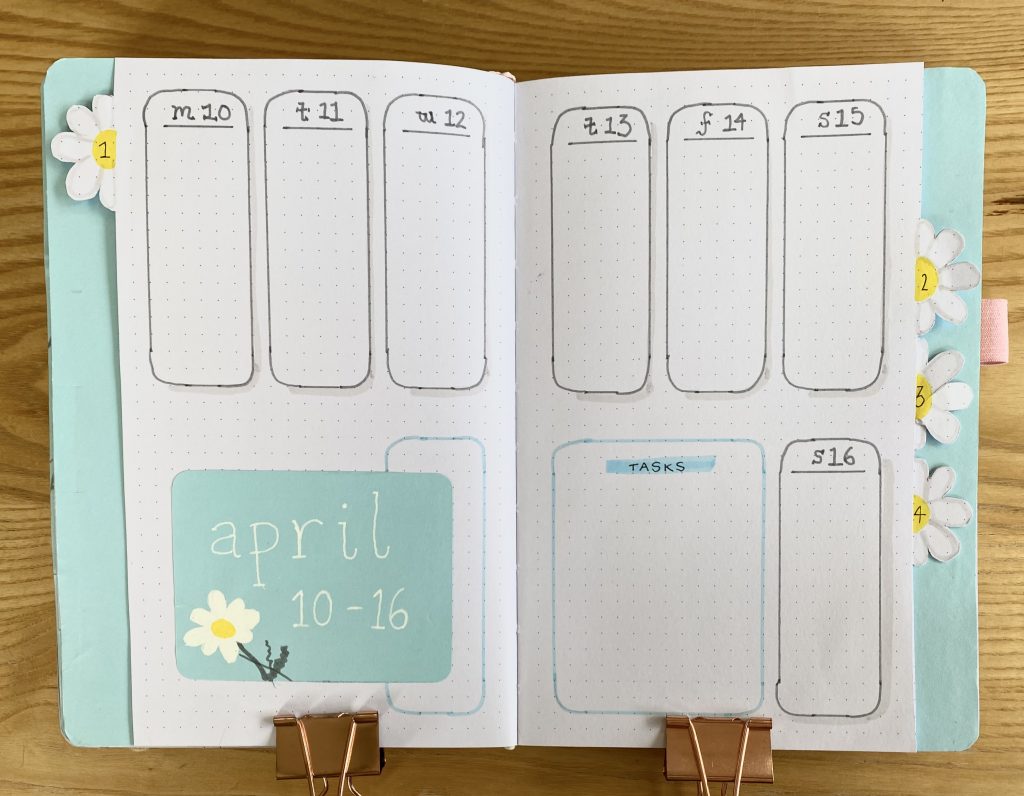
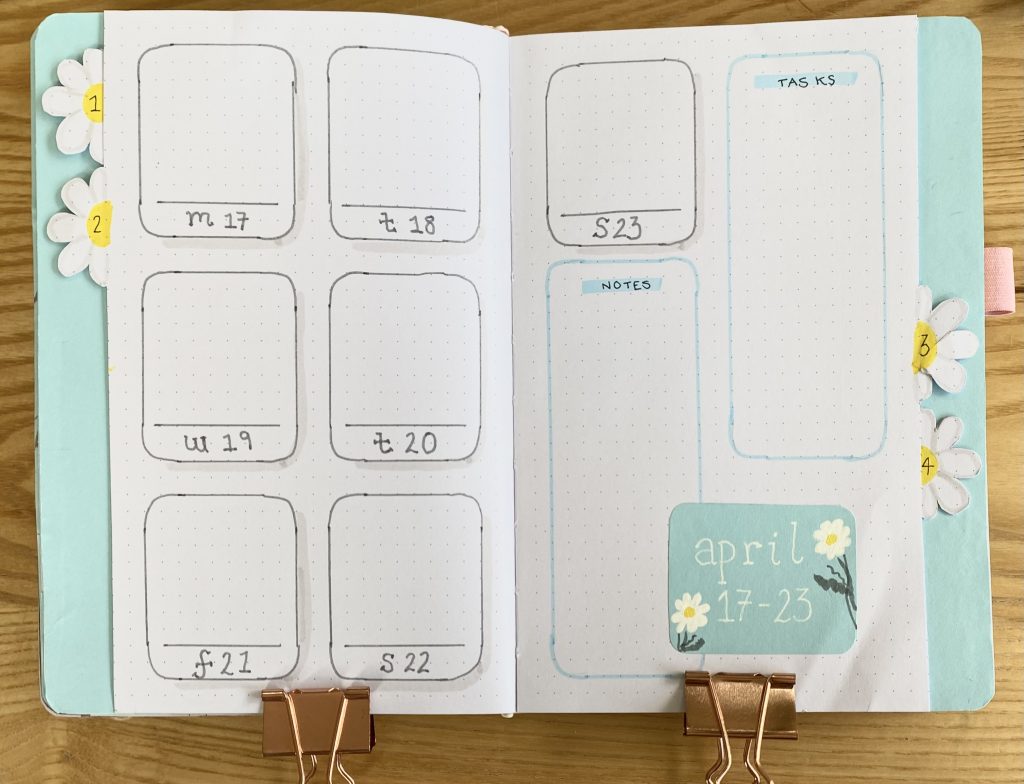
This spread is probably my least favourite- mainly because I think it diverged a little from my intended cheery daisy chains into a slightly thorny situation? Kind of Miss Havisham-esque. Sigh. I used my Tombow N65 pen to draw rounded boxes for my calendar- each box is 5×5 squares with a 1 square gap between each. I added a drop shadow to each calendar box using my N89 Tombow and filled the space on the left-hand side with a strip of blue paper, again, decorated with daisies.
Project Planning Page
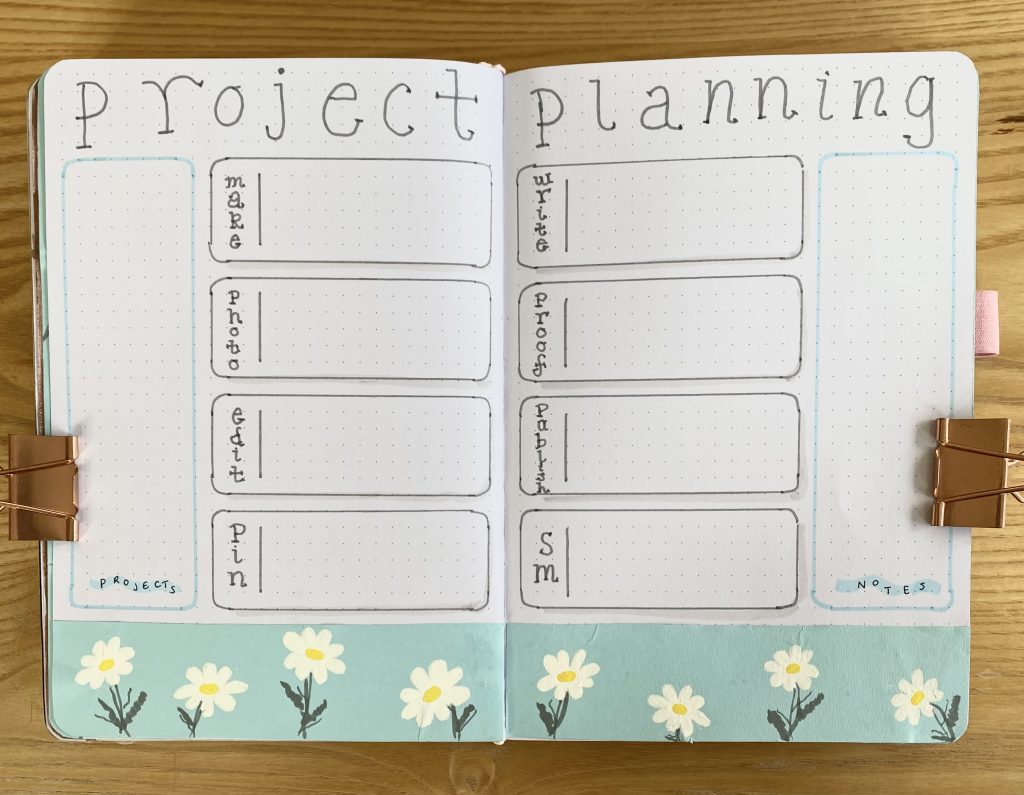
This spread is a new one for me! I have been feeling a bit overwhelmed by having multiple projects going on at once and finding it hard to keep track of all of the different elements of each one, so I am trialling a ‘project planning’ page this month. I decorated the bottom of the spread with a strip of daisy-patterned paper and put the heading for the spread across the top. The 8 grey boxes in the middle of the spread are my ‘Kanban Board’ for blog posts, made in the same way as the calendar boxes with the Tombow pens. I learned about this technique from Plant Based Bride on YouTube and I’m going to trial it this month to see if it will be helpful for keeping me on track! Each box represents one stage of making a complete blog post: 1) making, 2) taking photos, 3) editing photos, 4) making a pin for the post (I have a Pinterest up and running now! You can find it here, or you can click on the Pinterest logo in the ‘Follow me!’ section at the bottom of this site), 5) writing the post, 6) proof-reading the post, 7) publishing the post and 8) posting to social media to promote the blog post. The idea is that I’ll write each post on a small sticky note, then move it through the stages as I complete each one. This way, I can keep track of multiple posts at once! On the left-hand side of the spread, I used my blue Zebra mildliner to draw a vertical box which will house a master project list. I then replicated this box on the right-hand side to house any additional notes on my projects. I actually made this spread last, but I wish I had used the wavy line header in all of my blue boxes! On my other spreads, you’ll see that I just used a straight line made with my Zebra mildliner and used my Muji 0.38 pen to write in the header in block capitals (I obviously forgot my whole vibe in this spread was lowercase lettering), but I think using a wavy line and following that line with my lettering created a much more dynamic and interesting header.
Weekly Setups
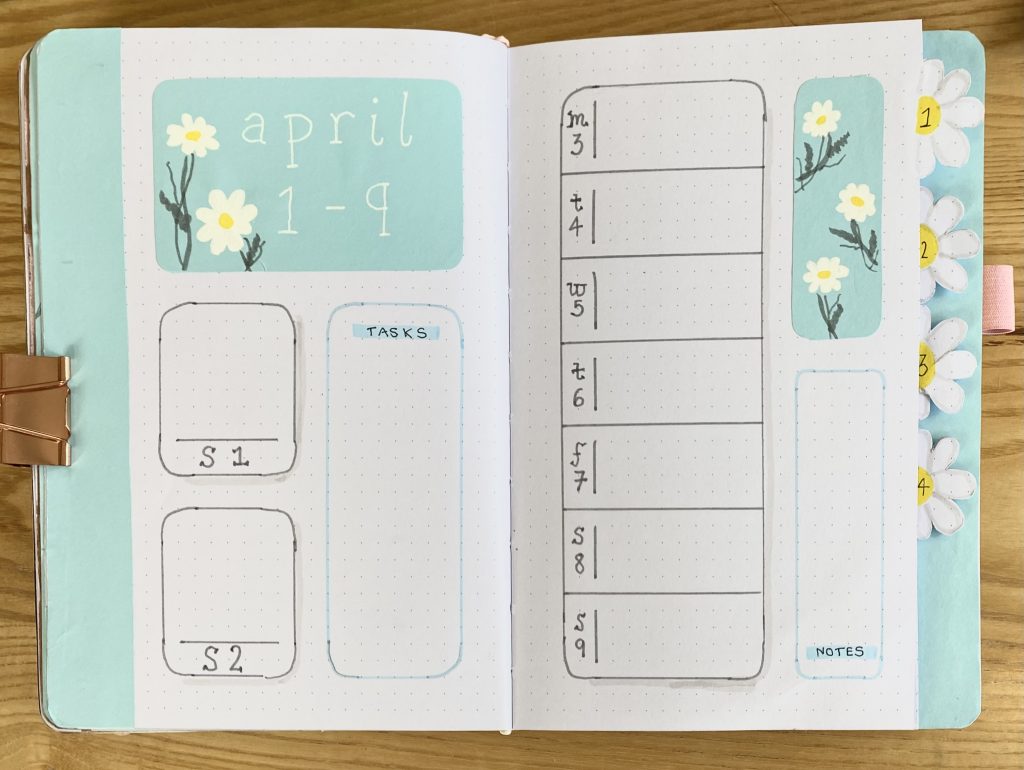
For my weekly tabs this month, I used a craft knife and cutting board to cut out half-daisy shapes, instead of my usual trapezium-shaped tabs. For the centres, I used my yellow Crayola supertip to draw a semicircle, then outlined the petals themselves with my Tombow N89, just to define them a little. As always, I like to stick contrasting pieces of paper on the left-hand side of the first page and the right-hand side of my review page to help the tabs stand out. This month, I used the same blue paper that I have been using throughout this setup.
My first weekly spread uses quite a simple setup. The first two days of April fall on a Saturday and Sunday, so I grouped them together with the first full week of the month. My daily task boxes are grey with drop shadows, while the sections for my master task list and notes are blue. For the header, I used my white Sakura gelly roll and the same lowercase font on blue paper, decorated with a couple more daisies. I also threw in a little ‘feature’ block of daisy-patterned paper to fill in the extra space on the right-hand side.
For my second weekly, I used vertical boxes for each daily section.
For the third weekly, I split the left-hand page into 6 for my daily task lists (with an added box for Sunday on the right-hand page). The rest of the space is taken up with the notes and tasks sections.
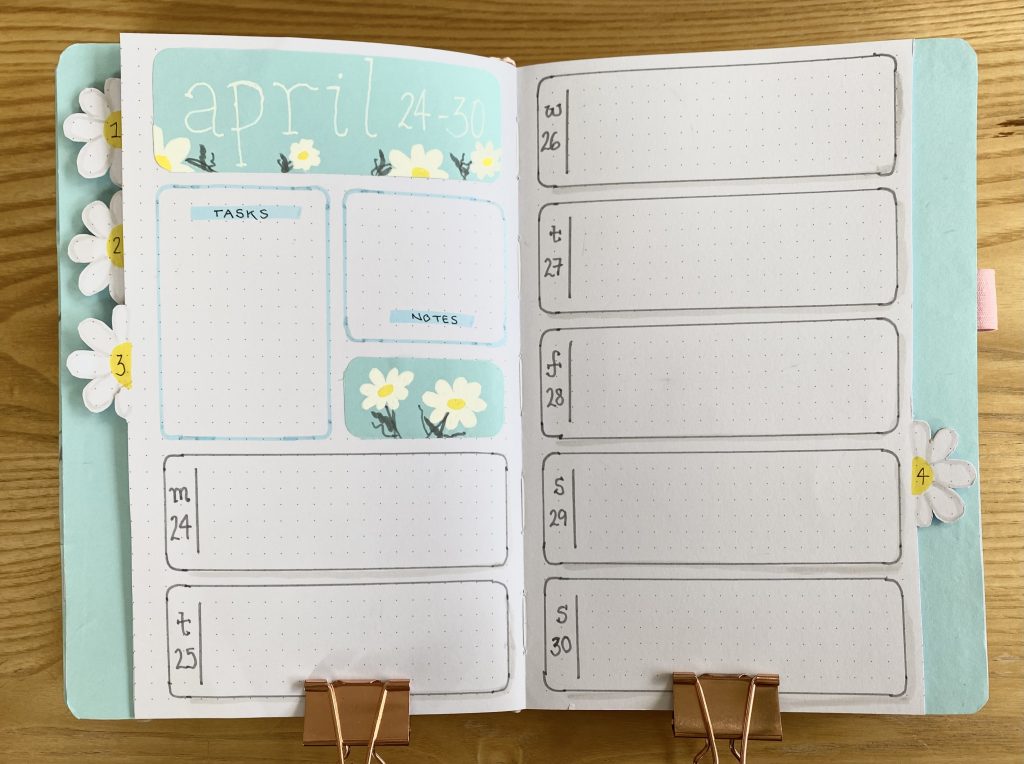
For the final weekly, I made 7 horizontal boxes for my daily task lists. The header is the same shape and size as my daily task lists, but, as with the other weekly spreads, it is made using blue paper, decorated with more daisies.
April Review
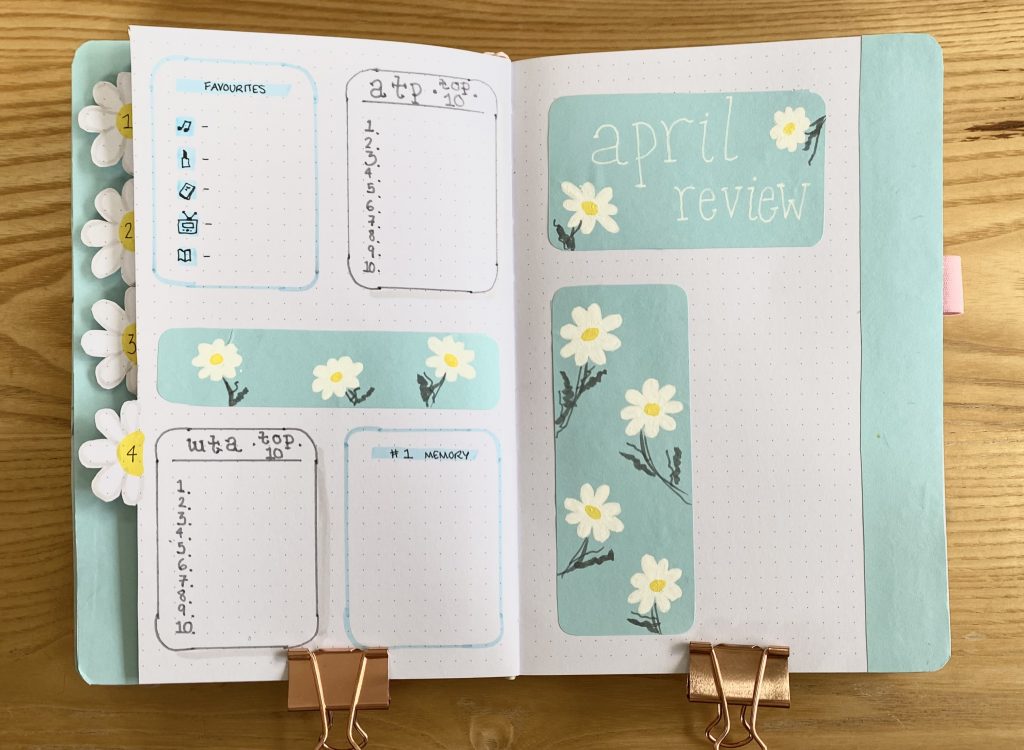
Finally, we have my April Review spread. The right-hand side is the same layout as my other monthly review pages, with the header at the top and the space for a polaroid picture at the bottom. Instead of a frame for the photo, I decided to just use a rectangle of daisy-patterned paper, which will lie underneath the left half of the polaroid when I stick that in.
On the left-hand side, as always, I have my monthly round-up sections. As with the previous months, I have a space to record my monthly favourites, the ATP top 10 and my #1 memory. Because I already have a whole spread dedicated to my projects, it felt a bit unnecessary to have another space to list out my projects for the month on this page, as I have done previously. As a result, I had space to include the WTA top 10 as well, which I am very happy about!
So, there we have it, my Daisies and Blue Skies April bullet journal setup. I’m really looking forward to using this pretty and cheery setup (I’m also hoping that by using it, I will encourage the blue skies to come…speedily)!
Gemma
xxx