Welcome to Day 1 of Blogmas At Home 2025! 🎄🎀✨
If you’re new here, Blogmas At Home is my annual festive series here on the blog, where I share daily posts full of festive fun & creativity throughout Advent! Christmas is my all-time favourite holiday, so I’m always practically overflowing with seasonal ideas to share with you guys. This is the third year of Blogmas At Home (big wow!) and I’m so excited to celebrate the season with you!
A little note before we get into today’s post: if you want to make sure you don’t miss a single DAY of Blogmas At Home this year, you can sign up to my newsletter! You’ll receive an email notification every time I release a new post, so you won’t miss a thing. The sign up link is in the side bar, right over there (—->)!
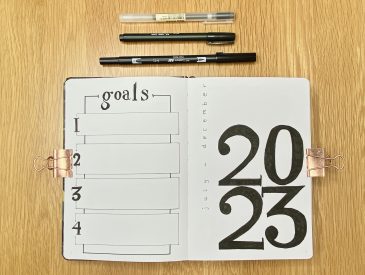
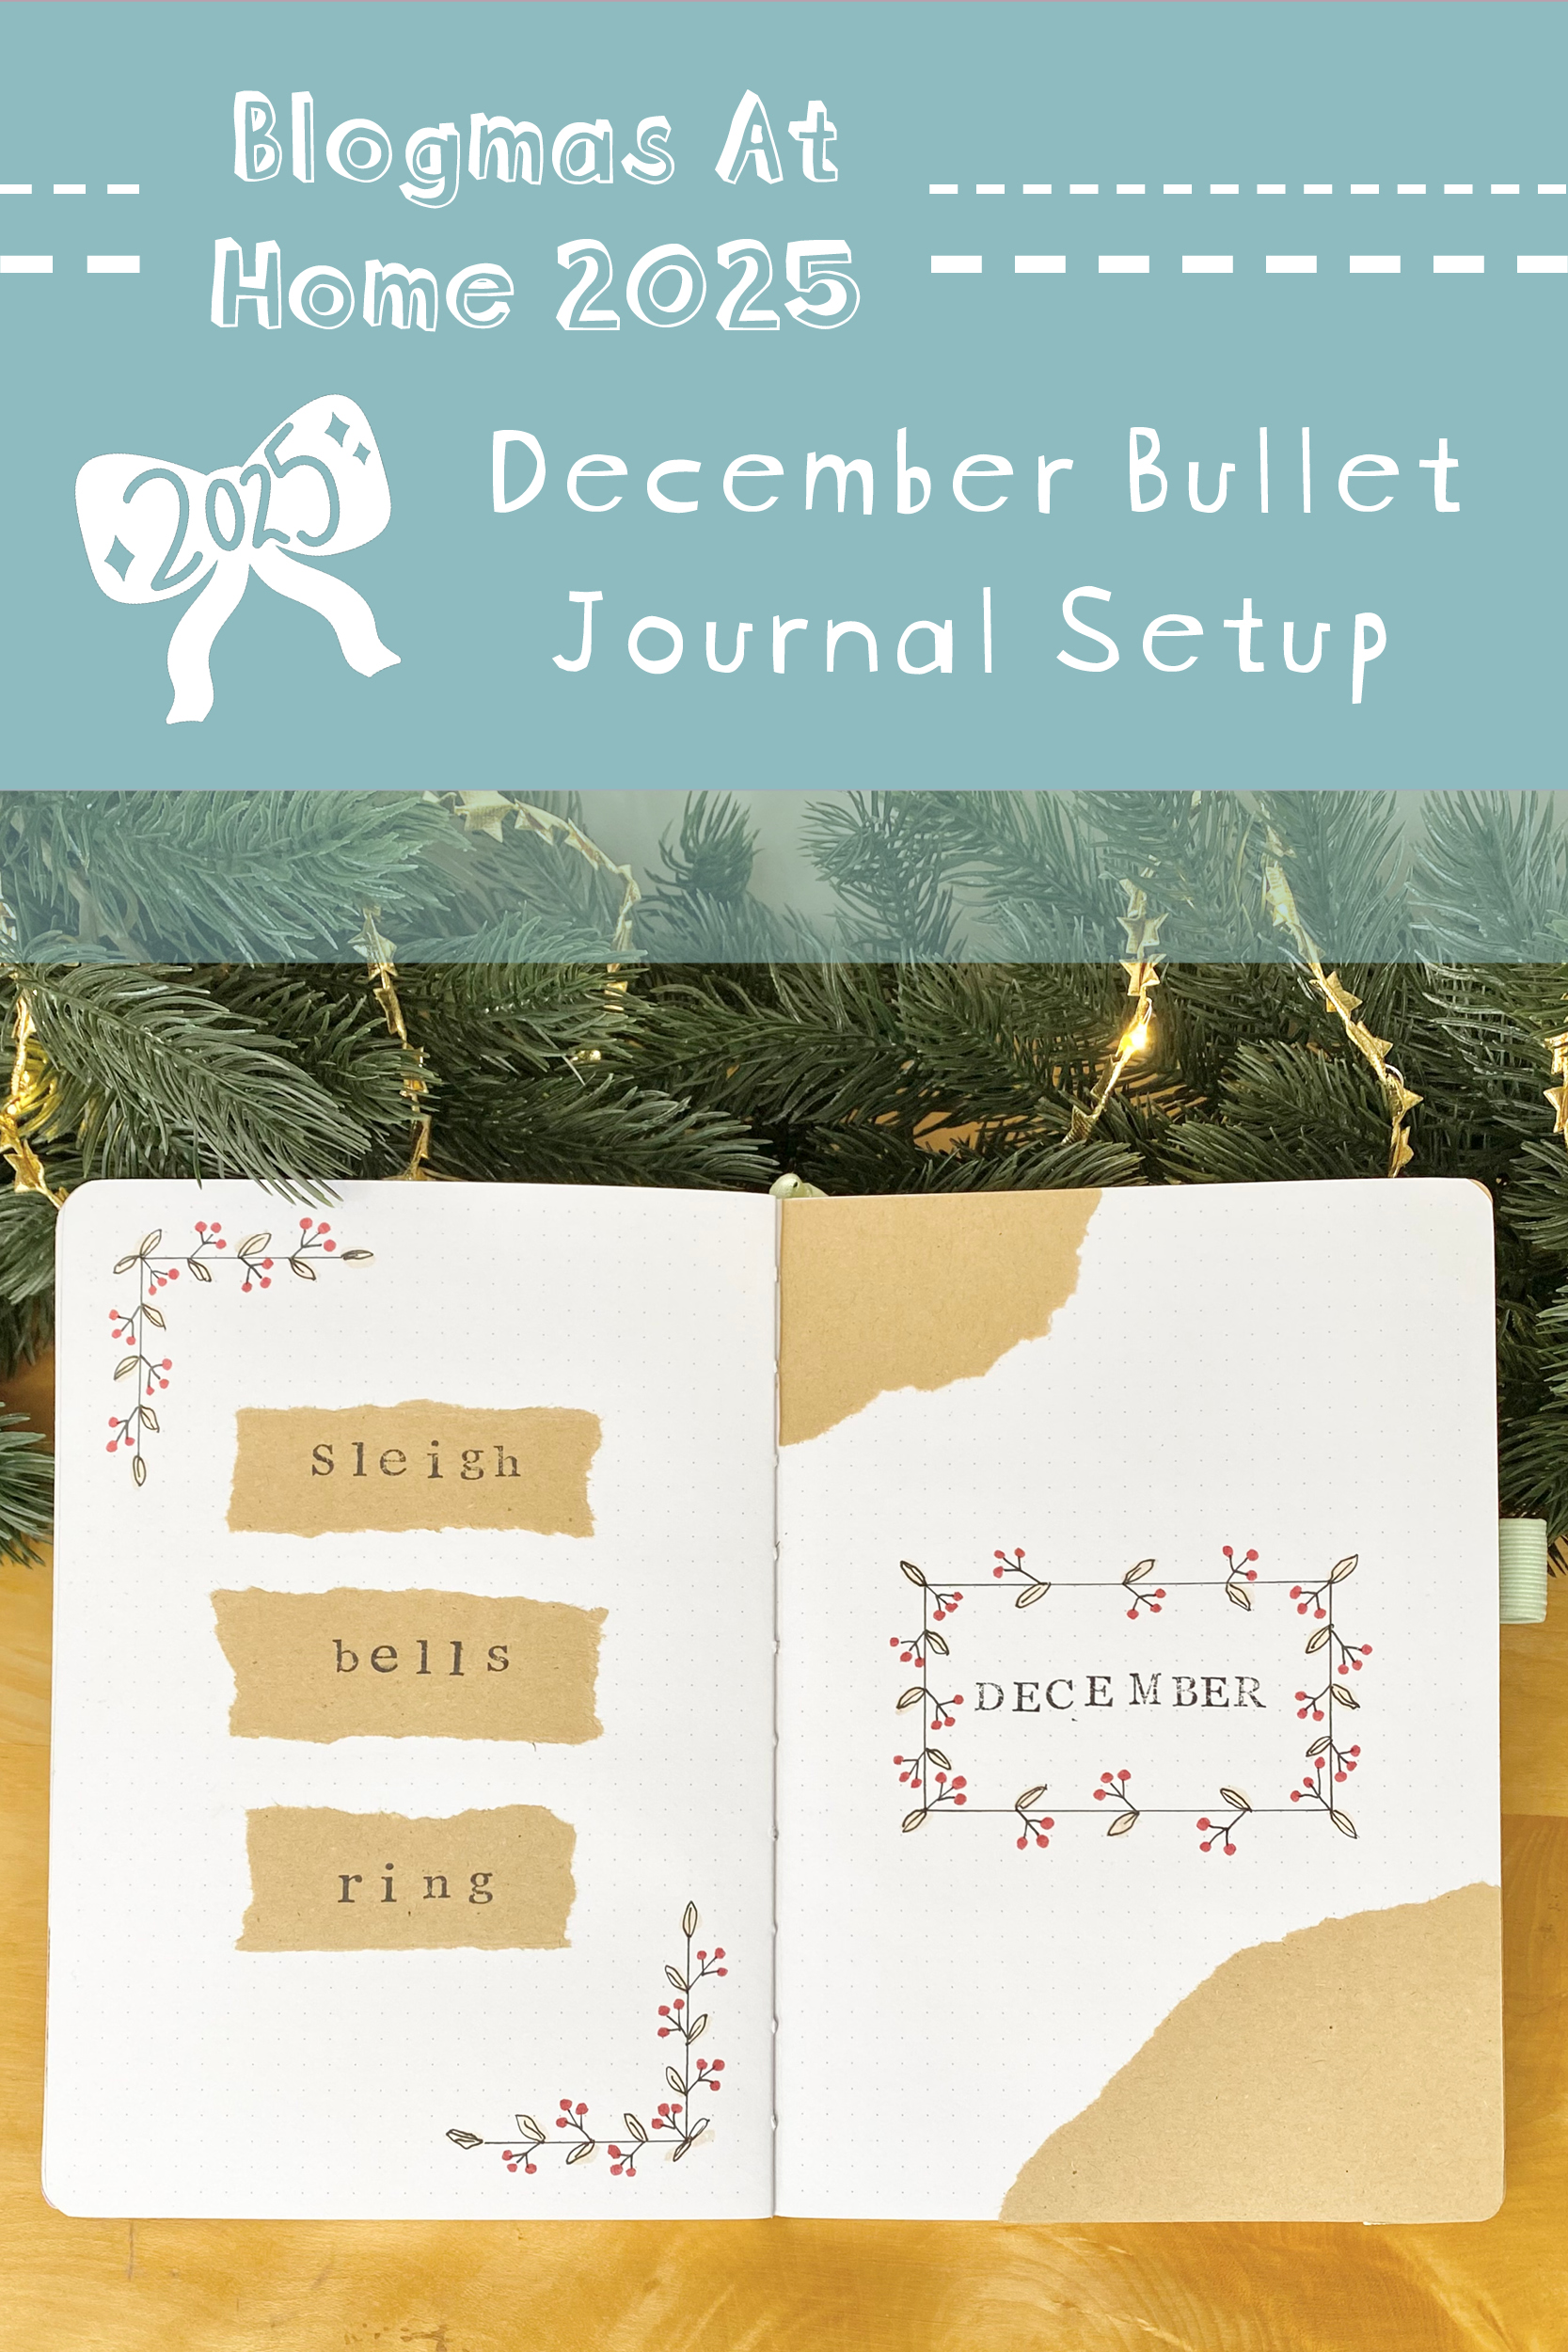
It’s become a bit of a tradition that my first Blogmas post of the year is my December bullet journal setup and this year is no different! Today’s post is all about my final, monthly bullet journal setup of 2025 (can you BELIEVE it’s the end of the year already?!).
Naturally, when deciding on a theme for my December setup, I headed straight to Pinterest (you can find my account here!). I saw this pin, which depicted a bunch of festive border design ideas and the one with the red berries really caught my eyes: it just feels so fun and Christmassy, but still very elegant and pretty! I decided to base my setup this month on that border, so I’ve used it copiously throughout, along with lots of torn kraft paper (my FAVE) and my beloved alphabet stamps.
Because it’s the festive season, I’ve included a few special spreads this month: the basic setup follows the same format as my typical monthly setups, there’s just a little extra, Christmas whimsy!
Table of Contents
- Equipment
- Cover + Quote Page
- Monthly Calendar
- Advent(ish) Calendar
- Weekly Spreads
- Christmas Day + New Year’s Eve
- December Review
- Final Thoughts
Equipment
To make this setup, I used the following equipment:
- Sakura Pigma Micron: 05 Black.
- Tombow ABT Dual Brush Pen: 990 Light Sand.
- Crayola SuperTips: Dark Red.
- Alphabet stamps and black ink pad.
- Glue stick.
- Scissors.
- Corner rounder.
- Ruler.
Cover + Quote Page

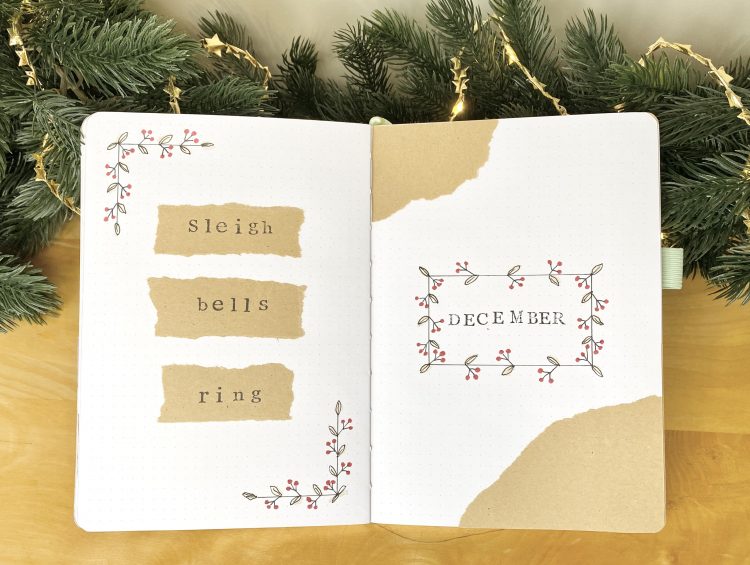
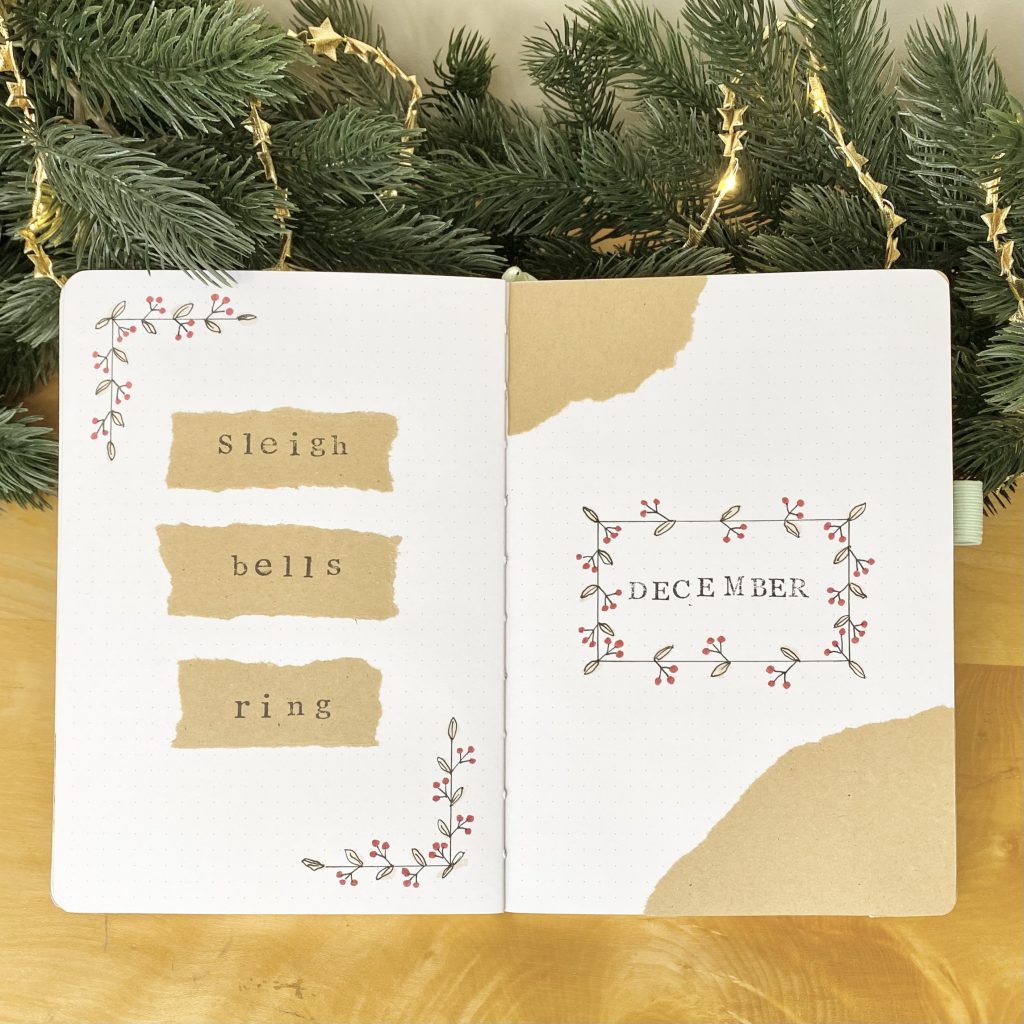
Recently, I’ve been moving away from quote pages in favour of slightly more ‘useful’ spreads (specifically, my ‘Things to Look Forward to‘ pages!). However, as I’m sure you know by now (or at least, can tell!), Christmas is my favourite time of year, so, honestly, I don’t really need reminders of how exciting life can be: it’s just a universal truth that once the Christmas lights go up, fun is to be had! Because of this, I did opt to include a Quote Page this time around: nothing fancy, just a little ‘Sleigh bells ring’ moment!
Honestly, this first spread was super easy to create (as was most of the setup, really)! I drew the borders with my Sakura pen, added the berries with the red Crayola and the leaves with the beige Tombow, then stuck in some torn up brown paper. I stamped in the lettering and that was it!
Monthly Calendar
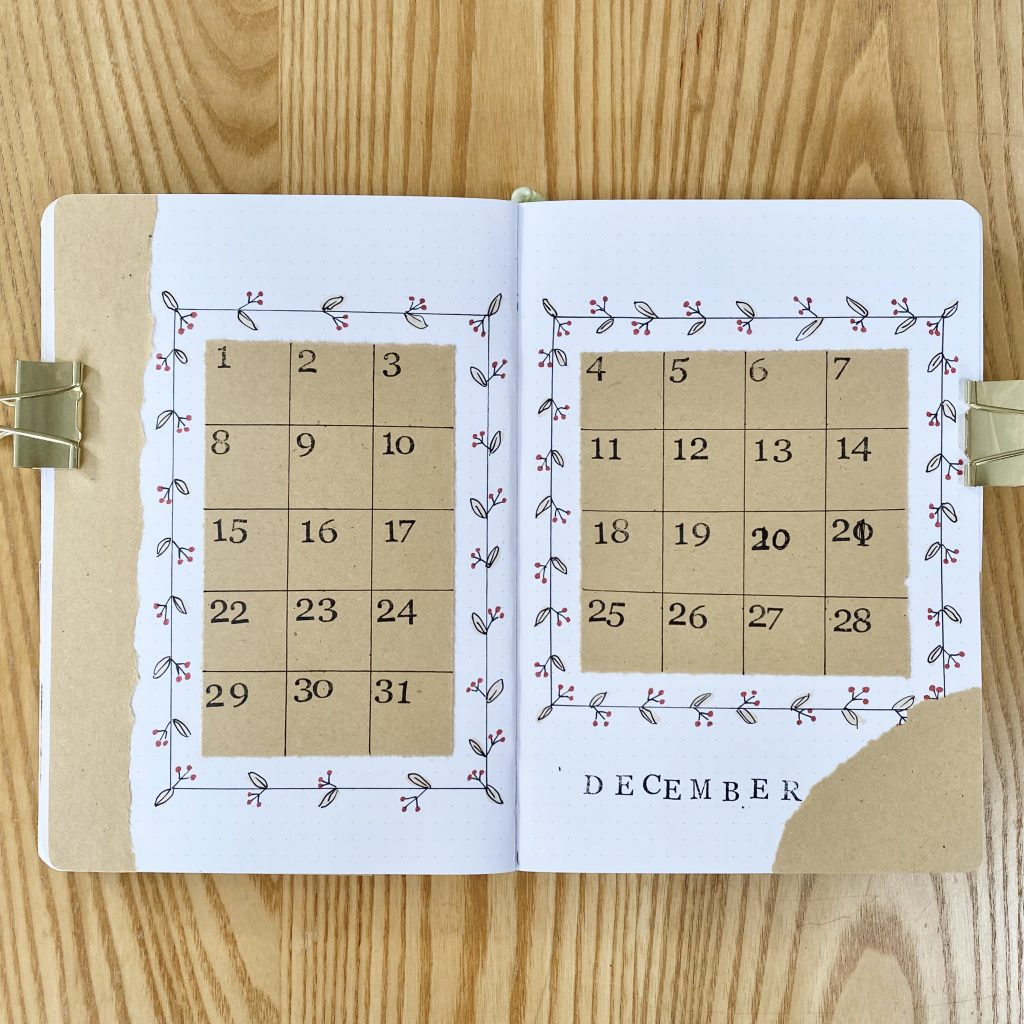
I had a lot of fun making this Monthly Calendar, even though stamping in all of the dates was… a little labour-intensive (and the dates actually take up most of the calendar boxes)! Also, if you’ve noticed where I messed them up… no you haven’t.
To get the torn edges on the calendar section itself, I folded along the lines I wanted to tear, smoothed the creases down really well, then repeated that process, folding the paper back the other way and smoothing it again, so the crease was really well-defined. This meant that when I gently tore the paper, the the paper naturally tore along the crease I had made, which kept the section really uniform (which is useful, for this style of calendar!).
Advent(ish) Calendar
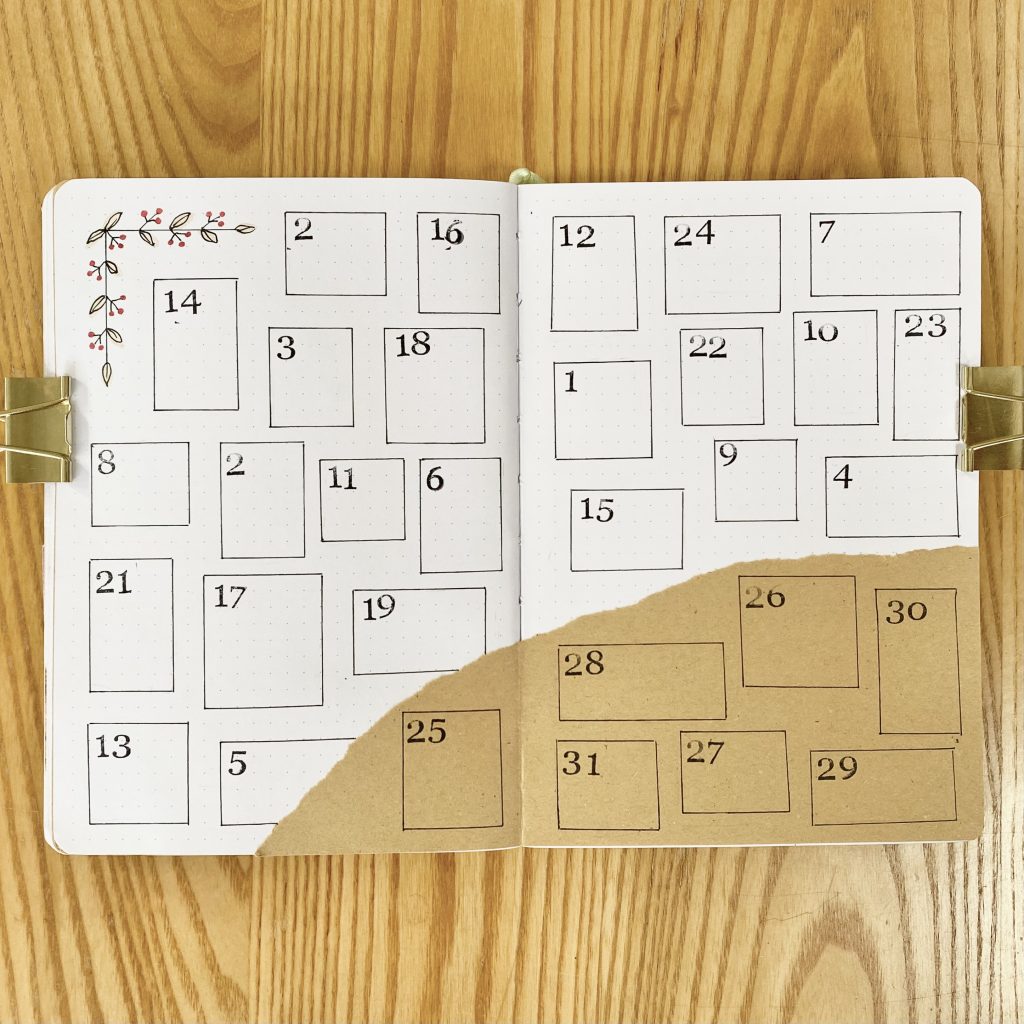
I completely forgot to add a heading to this spread, but it is my Advent(ish) Calendar spread! I’m calling it an Advent(ish) calendar because it includes the days after Christmas too. I plan to use this in pretty much the same way as my beloved Daily Sunshine page from my previous setups: each day, I’ll write one fun, (likely festive) thing that happened. This time around, though, there’s the added fun (read: effort) of having to locate the right date first!
Weekly Spreads
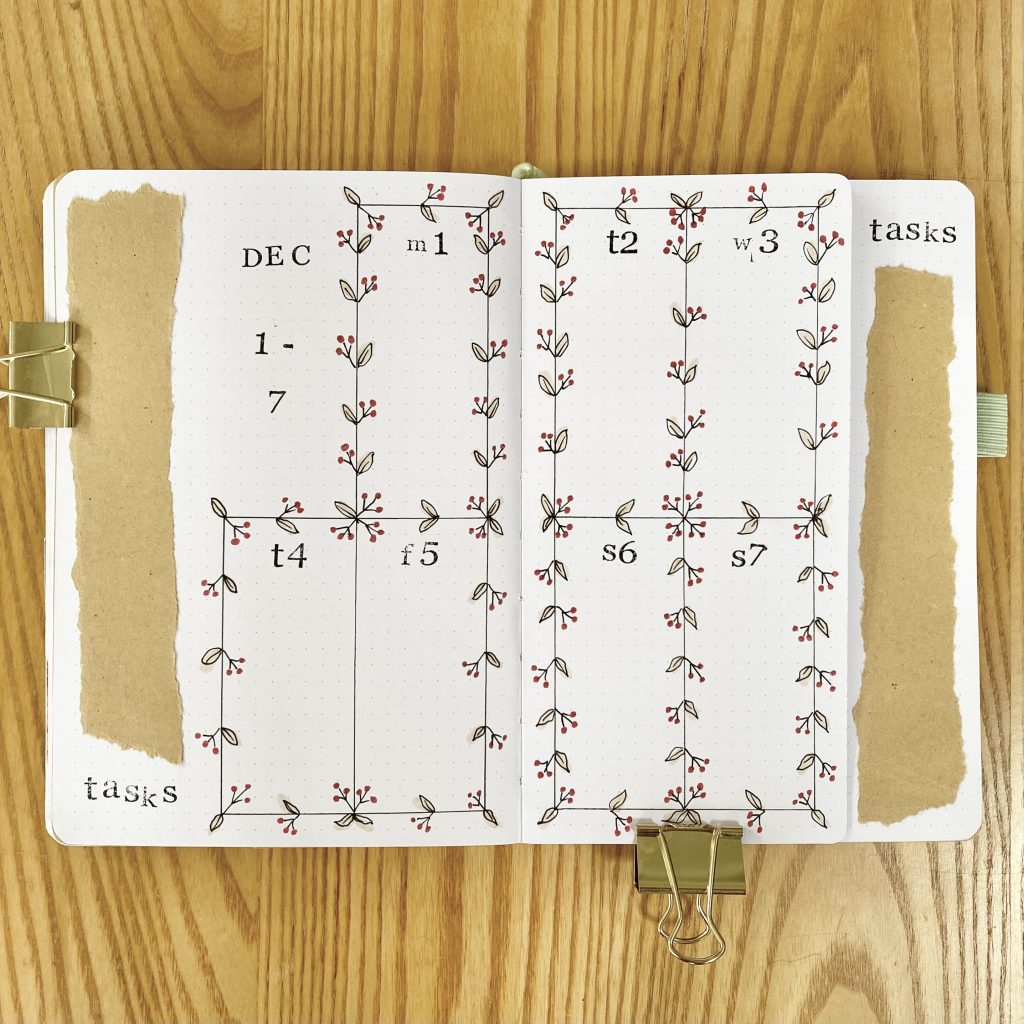
Into the Weekly Spreads now and I’ve kept the layout the same as the previous months— it’s just been working so well for me! I’ve trimmed down the central pages in this section so that, no matter which week you’re on, you can always see the task lists on the far left and right.
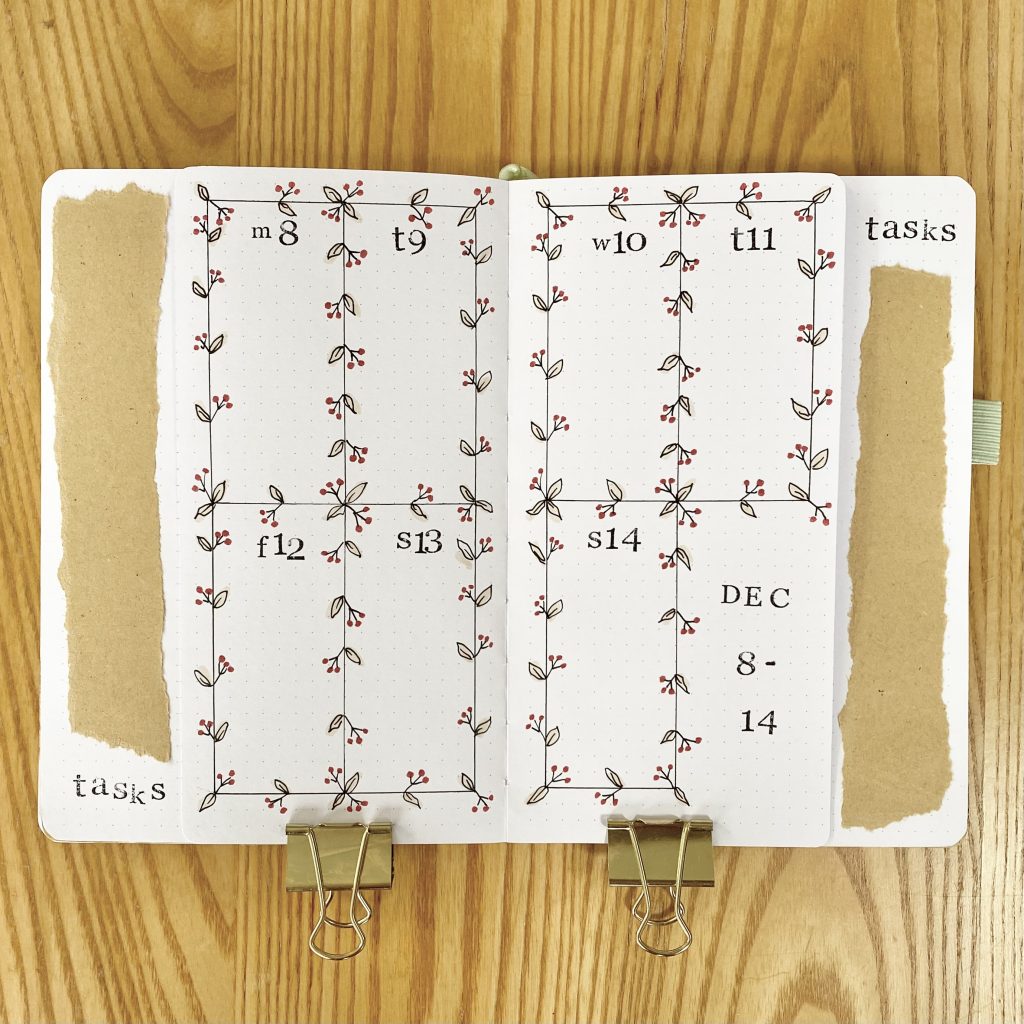
I used my corner rounder to soften up the edges of the cut pages: they can be pretty sharp, so I am hoping to minimise the risk of injury as much as possible!
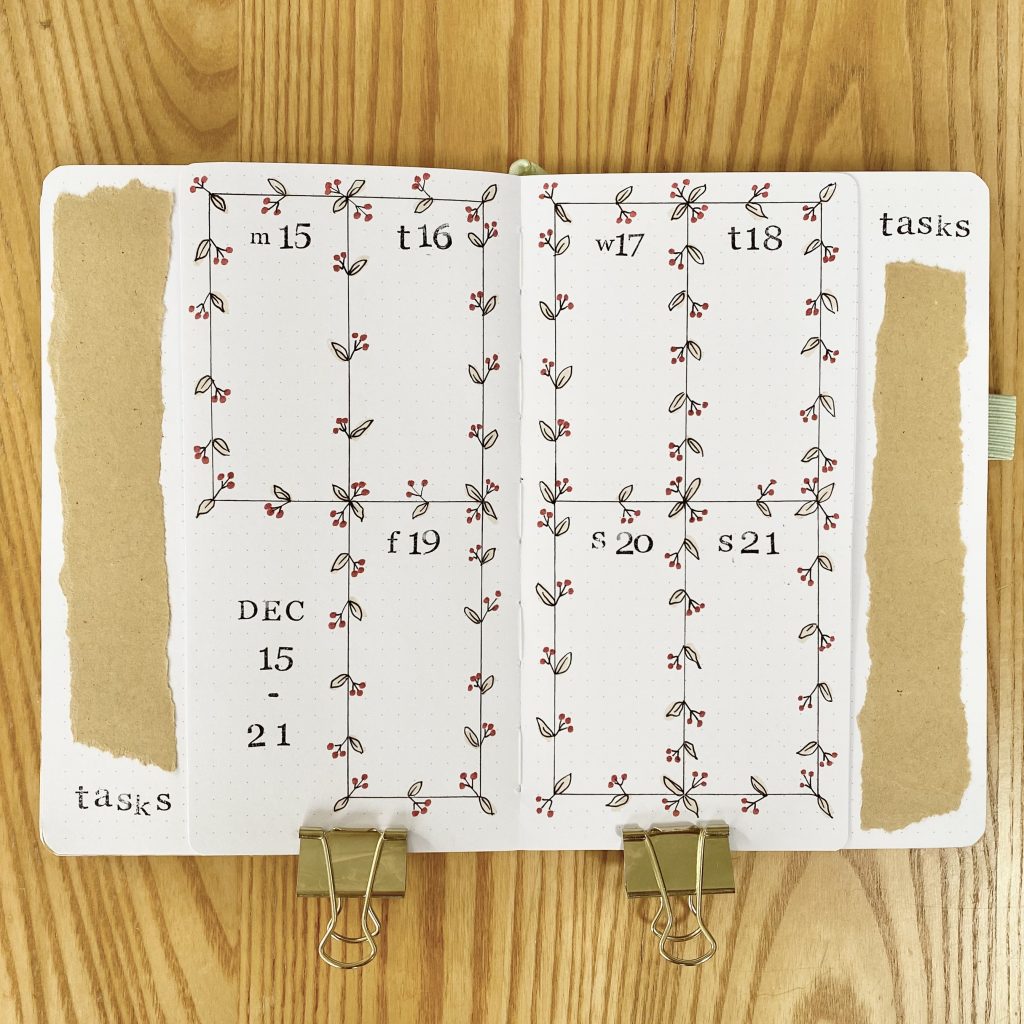
Each internal spread is dedicated to a single week. I’ve split each one into 8 sections (2 down, 4 across) and used the spare section for the weekly subheading (which helps me to navigate through the setup and know which week I’m actually on).

To separate out the other 7 sections, I used that same berry border I’ve been using throughout the setup. It’s a bit more full on here, but I just love how pretty it is!
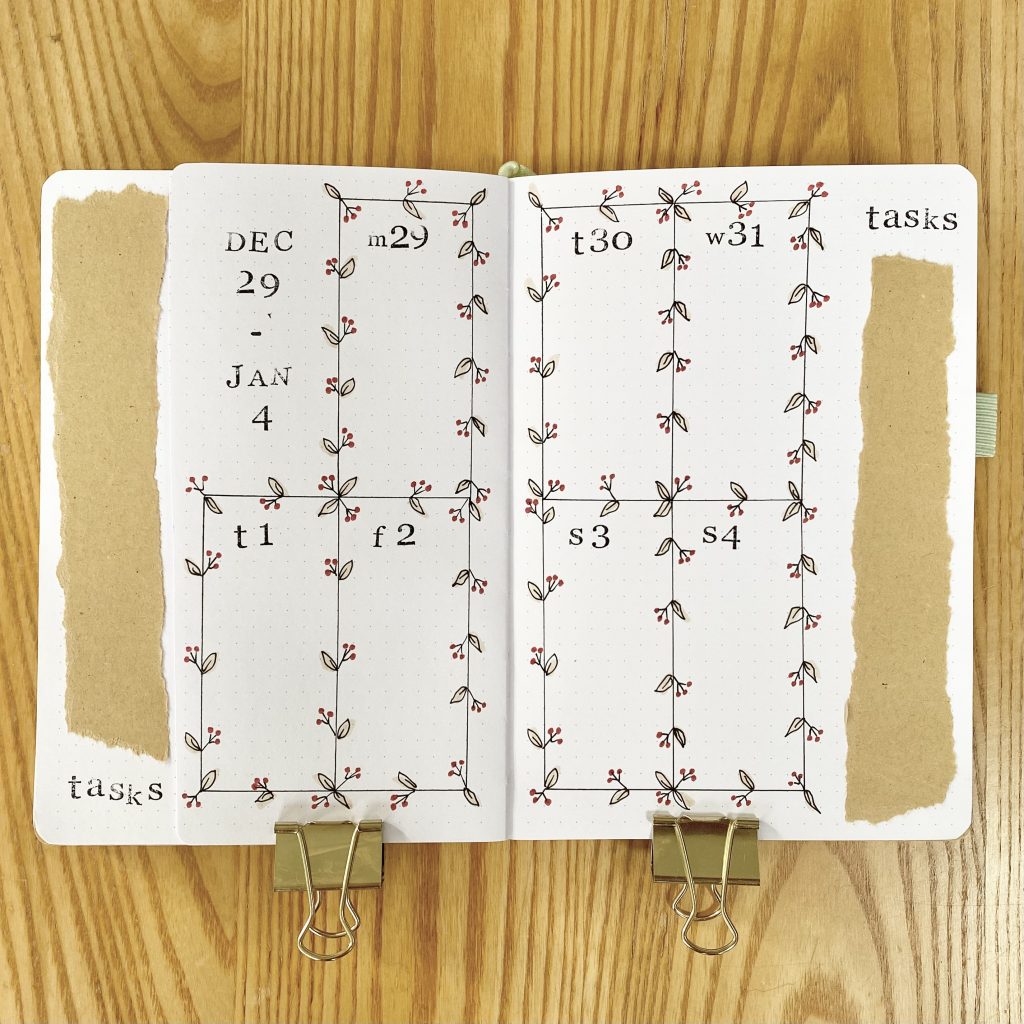
At the top of each daily box, I stamped in the first letter of the day of the week and the date itself.
Christmas Day + New Year’s Eve
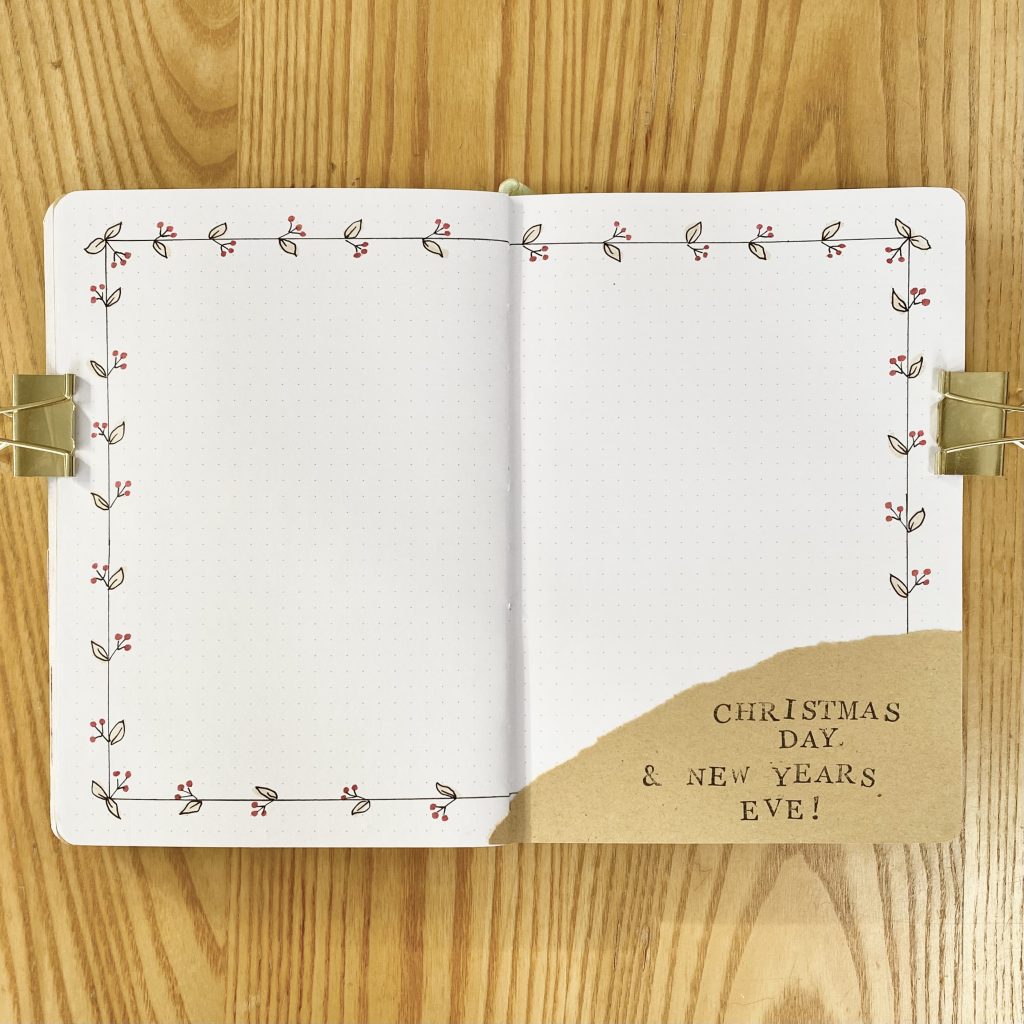
This Christmas Day & New Year’s Eve spread is fairly minimal: just that same, berry border all the way around and a piece of kraft paper stuck in for the heading (or here, I guess, the footing!). I want this spread to have a scrapbook-y feel: I’ll fill it in after the respective days with photos and notes and little mementos, so that I can look back on all of the festive fun!
December Review
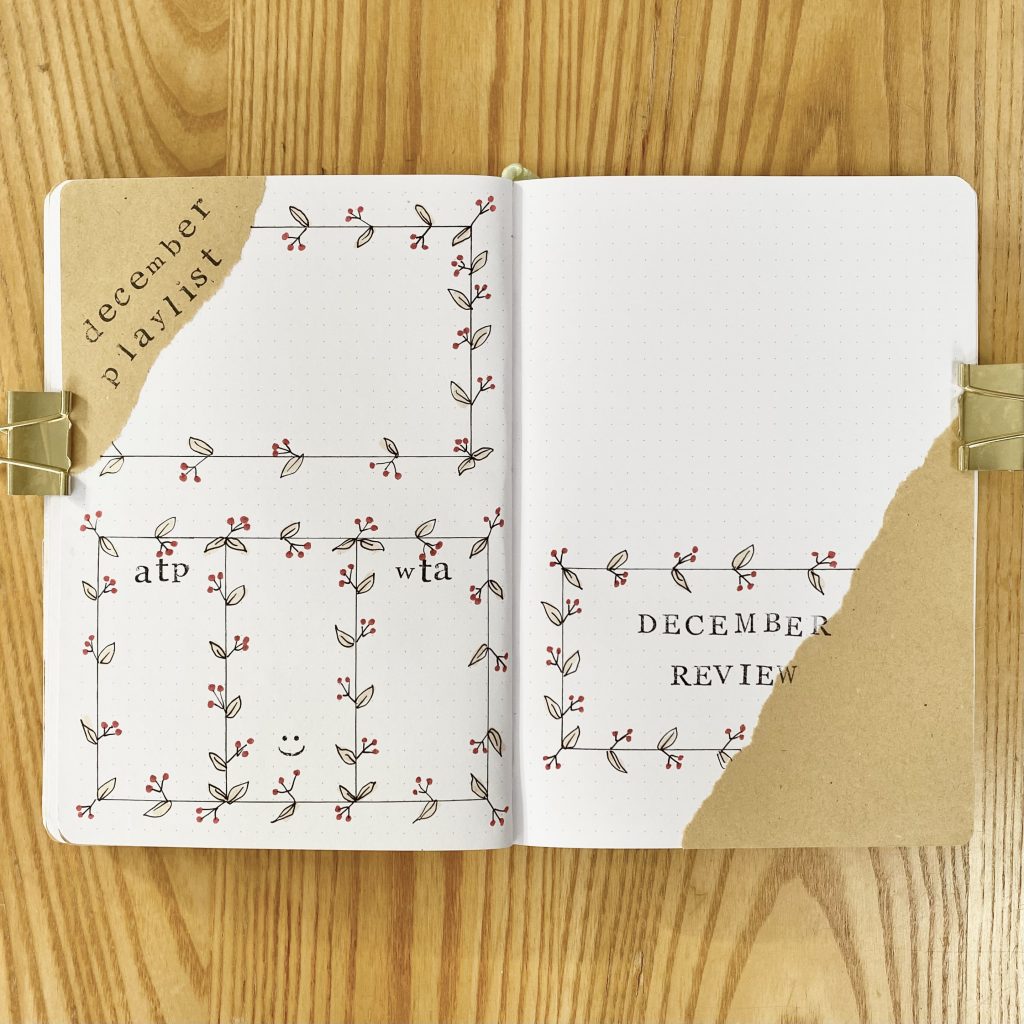
Finally, we have my December Review page! This includes all the same content as usual, but with the same berry border and torn kraft paper vibe as the rest of the setup. I’m particularly fond of how the ‘December Playlist’ subheading follows the shape of the torn edge in that top left-hand corner!
As always, I have spaces to note down my favourite songs from the month gone by (here’s betting they’re all Christmas songs), the year-end ATP & WTA (tennis!) rankings and my favourite memory from the month (here, indicated by a smiley face, because how on earth was I supposed to fit all of those stamped letters in that tiny space!). The blank space on the right-hand side is left blank, so that I can stick in a fun polaroid from December later on.
Final Thoughts
I’m so thrilled with how this setup turned out: it feels super festive, but also really soft and elegant (plus, it uses torn kraft paper, which is one of my favourite things to include in my journal!). It was surprisingly quick to set up: I didn’t worry too much about being perfect but it still looks really neat and precise, which is magical!
I do wish my number stamps were slightly smaller, because they do rather take over the monthly calendar boxes, but I can’t quite justify buying more stamps: guess I’ll just have to make do!
I hope you’ve enjoyed reading about my December bullet journal setup for this year and that you’ve enjoyed the first day of Blogmas at Home 2025! I can’t wait to celebrate this festive season with you. See you back here tomorrow?
Gemma
xxx