The second half of Bridgerton: Season 4 came out this morning and, to celebrate, I wanted to kick off a new series here on the blog: Bridgerton Bakes. If you’ve been here for a while, you might remember my Bridgerton Watch Party series, where I shared a series of recipes inspired by Season 3 of the show. I loved doing that series (one of the recipes I developed for it even ended up as a wedding cake for a family friend!), so I wanted to create some more recipes in honour of, and inspired by, the fourth season. Unlike with the Watch Party series, where I released all of the recipes in one wonderful, Bridgerton-y week, I’ll be releasing these ones gradually (both for my own sanity and to extend the Bridgerton magic, while we all (im)patiently wait for Season 5!).
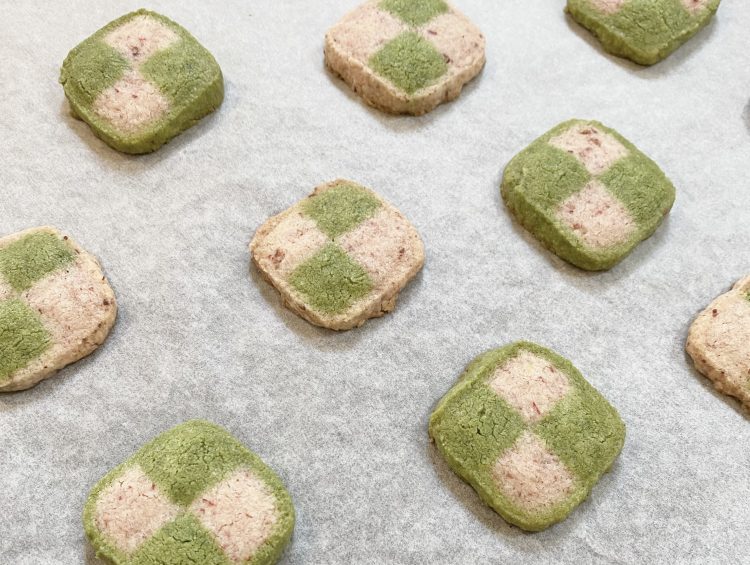
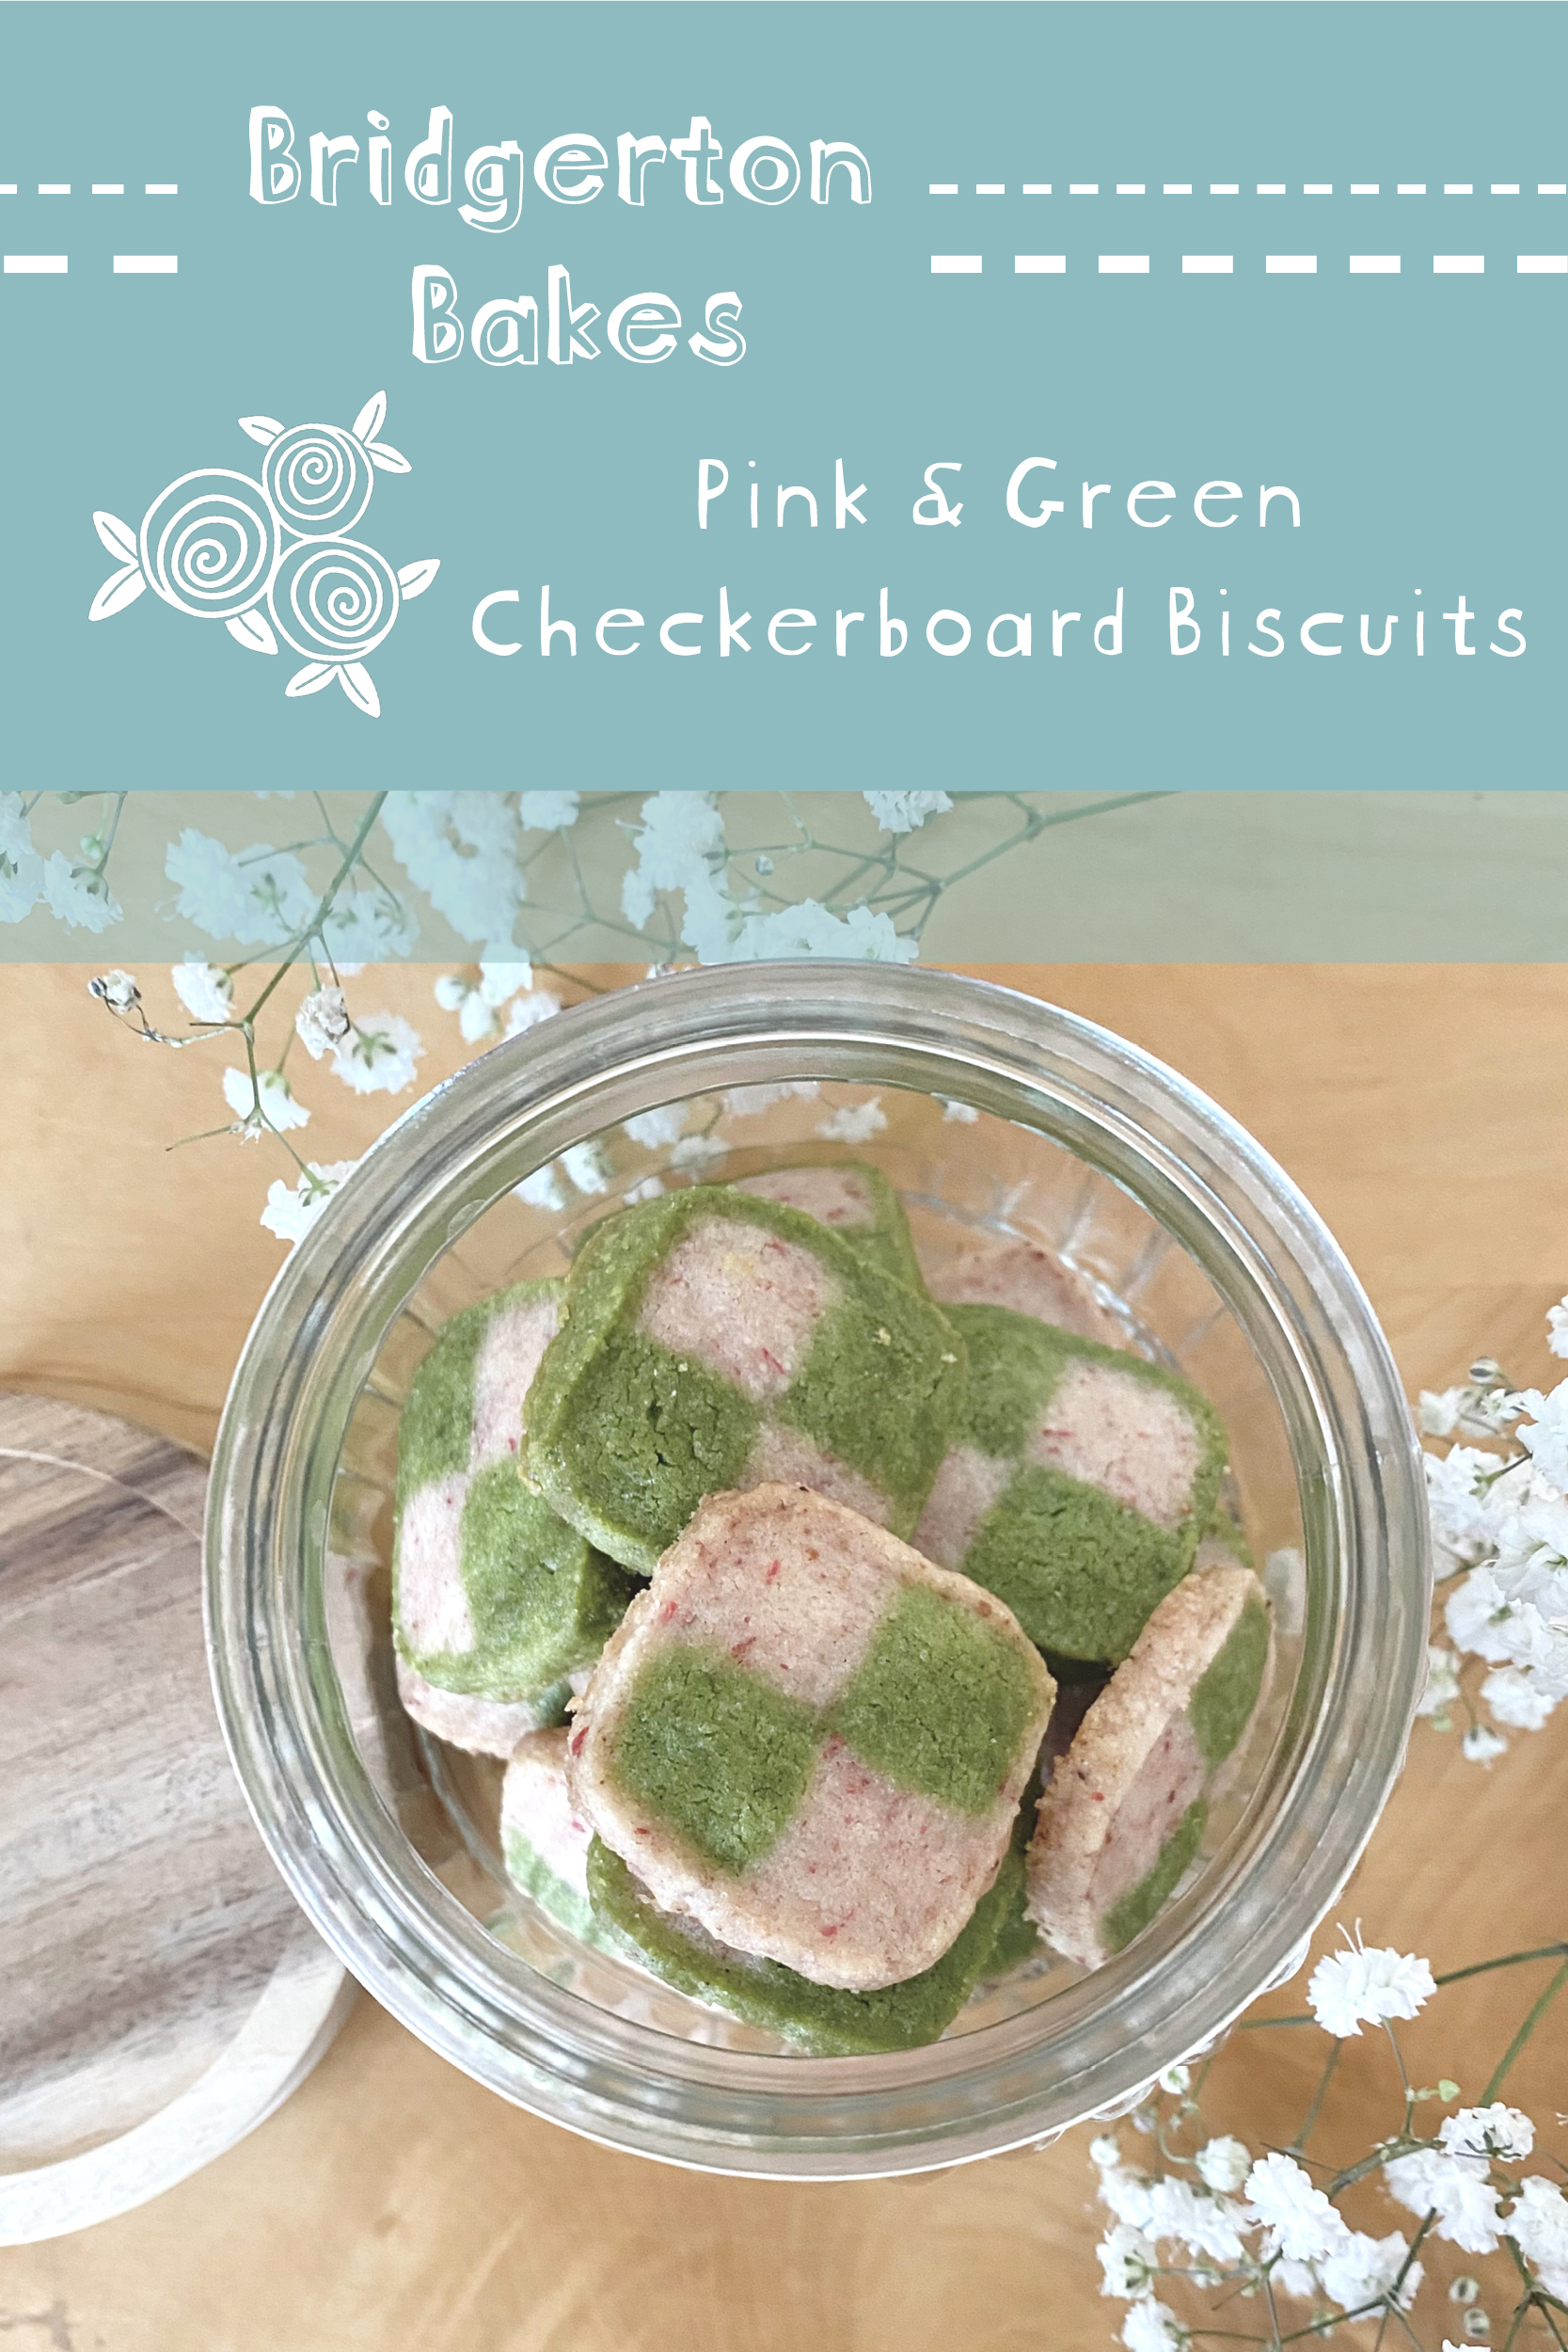
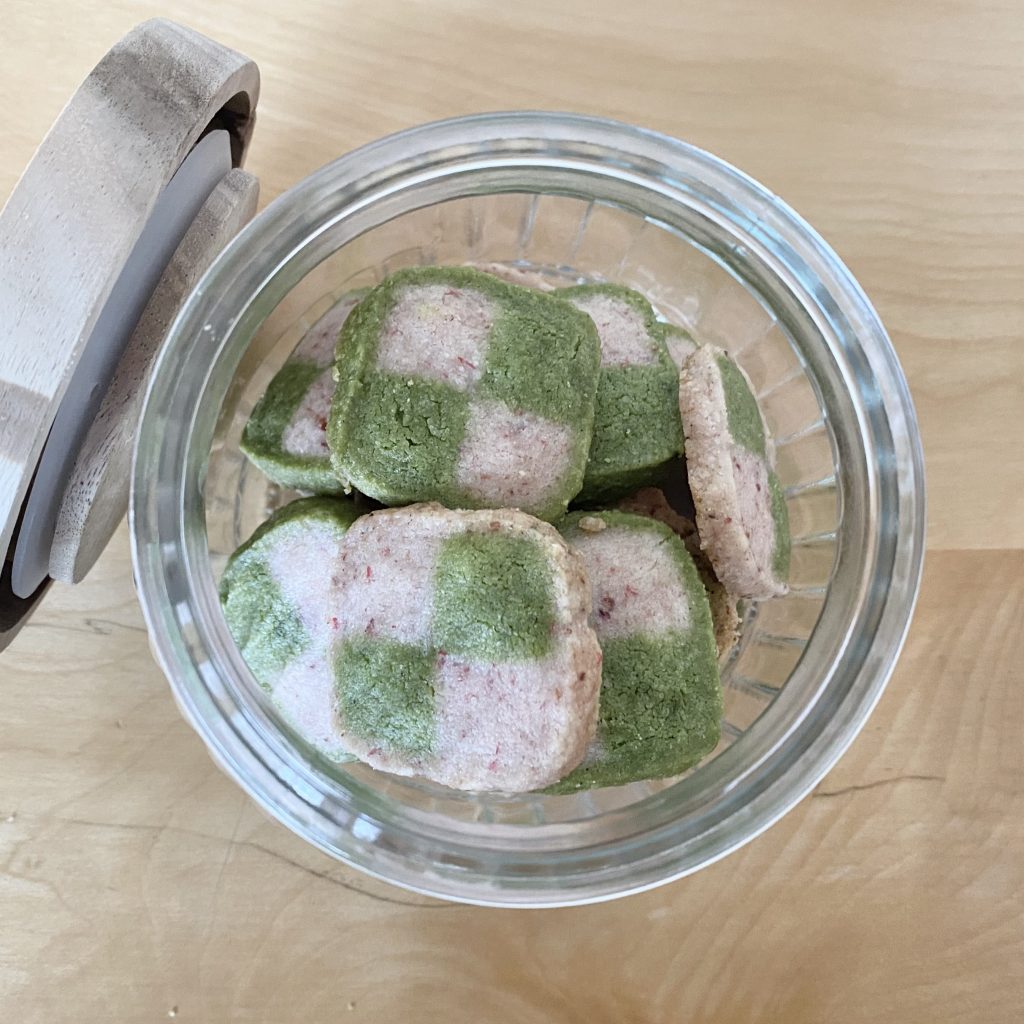
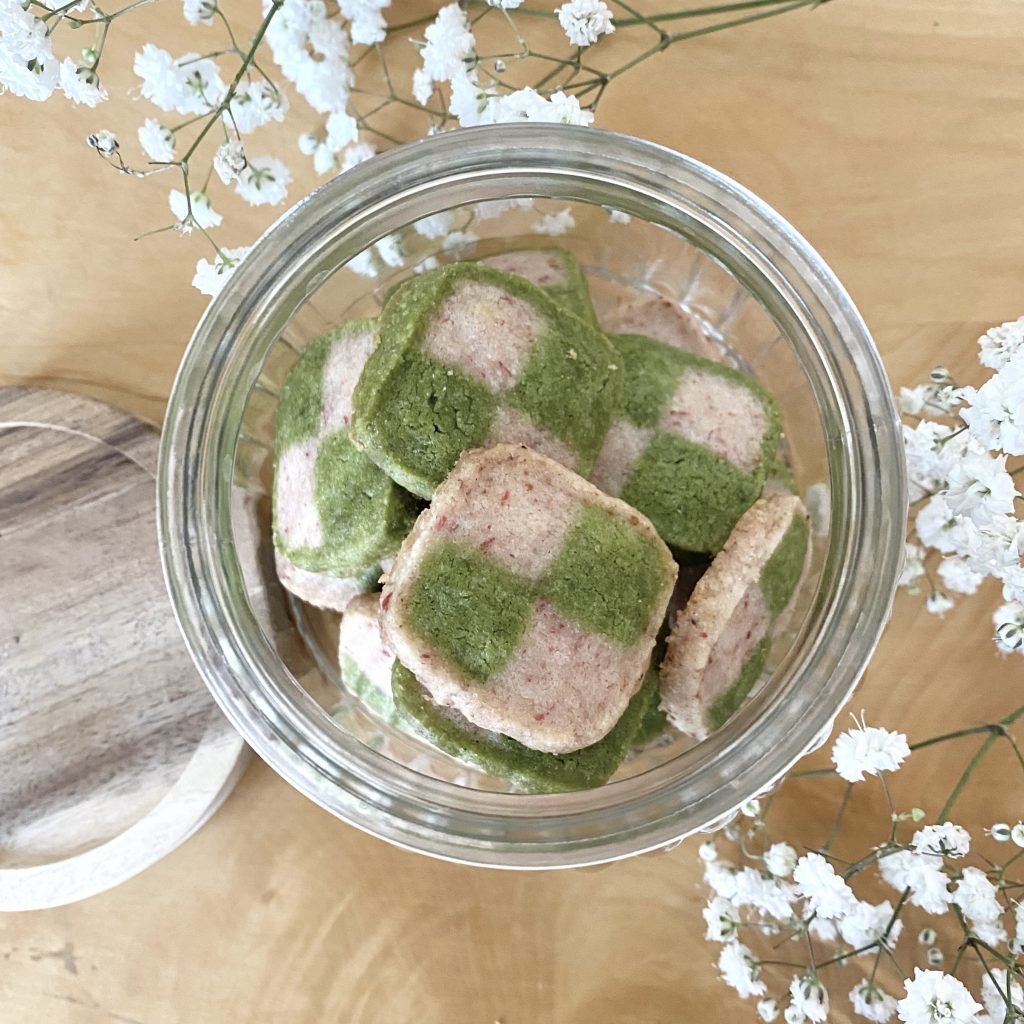
The first recipe in this series is for these Pink & Green Checkerboard Biscuits: my tribute to the Li Sisters, Rosamund and Posy, who made their debuts in Season 4.
Table of Contents
The Inspiration
Season 4 of Bridgerton is, at its heart, a Cinderella story. As part of that, it follows the oft-used approach of having one of ‘Cinderella’s’ stepsisters be, well, nicer than the other: in this case, Posy is an absolute sweetheart and Rosamund is… I guess, whatever the opposite of that is.

Do you guys remember that old nursery rhyme that says something about girls being made of “sugar, spice and everything nice”? These two characters really remind me of it: Rosamund feels very spice and Posy feels very sugar. The official Bridgerton Instagram account ALSO referenced sugar and spice with regard to these characters (you can see the post here!), which made me feel extremely validated, so I figured that the whole sugar & spice thing would be a great concept for this recipe.
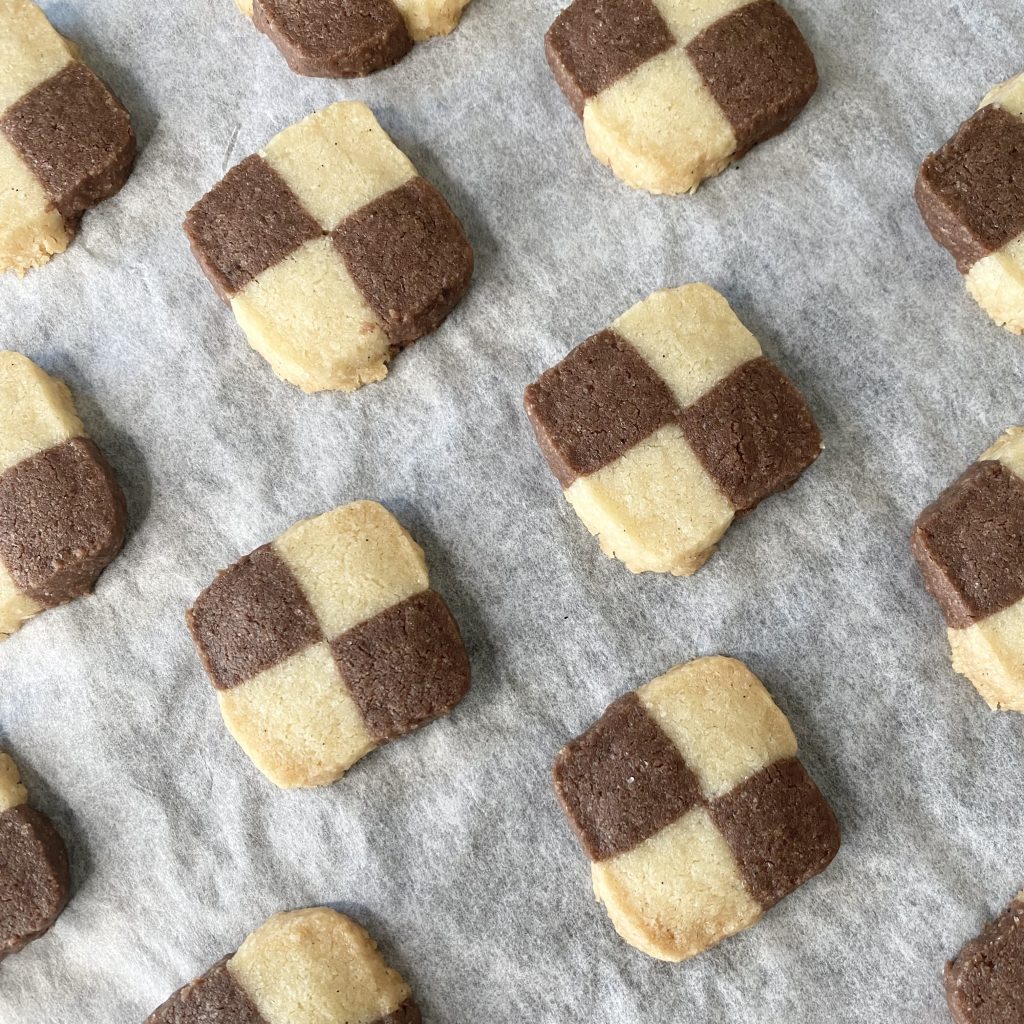
Last Christmas, I made Swedish Schackrutor for the first time as part of my Baking Around the World series. These tiny shortbread biscuits have a 2×2 checkerboard pattern, made with a combination of vanilla and chocolate dough. I thought these checkerboard biscuits would be a perfect base for this recipe: two sisters, two completely difference personalities and two doughs, all coming together to make one (delicious) biscuit!

© Netflix / Shondaland
When it came to deciding on the flavours, I was partially influenced by the whole sugar-and-spice vibe, but also partly by colour. In much of the promotional media for Season 4, Rosamund and Posy are seen wearing pink and green floral-print dresses: both fabrics feature the same pattern, but the colours are inverted. This fit so well with the checkerboard biscuit idea, I just had to make these biscuits pink and green, which heavily inspired the resulting flavours. I also love that these biscuits feel super Bridgerton: they’re colourful and fun, but they’re also fancy and delicate.

I’m not opposed to using food colouring, but, if I can, I prefer to use more natural alternatives. These biscuits are food-colouring free, tinted pink and green by the freeze-dried strawberry powder and matcha powder, respectively. Strawberry and matcha not only fit the pink-and-green colour palette perfectly, but they’re also a really delicious pairing, as evidenced by the strawberry matcha lattes that went viral over the past year (or two years? Or five years? I’m not even sure…)! I really liked the idea of these biscuits referencing the time period in which Bridgerton: Season 4 was released, as well as being inspired by the Regency setting of the show, so I ran with the flavour combo.
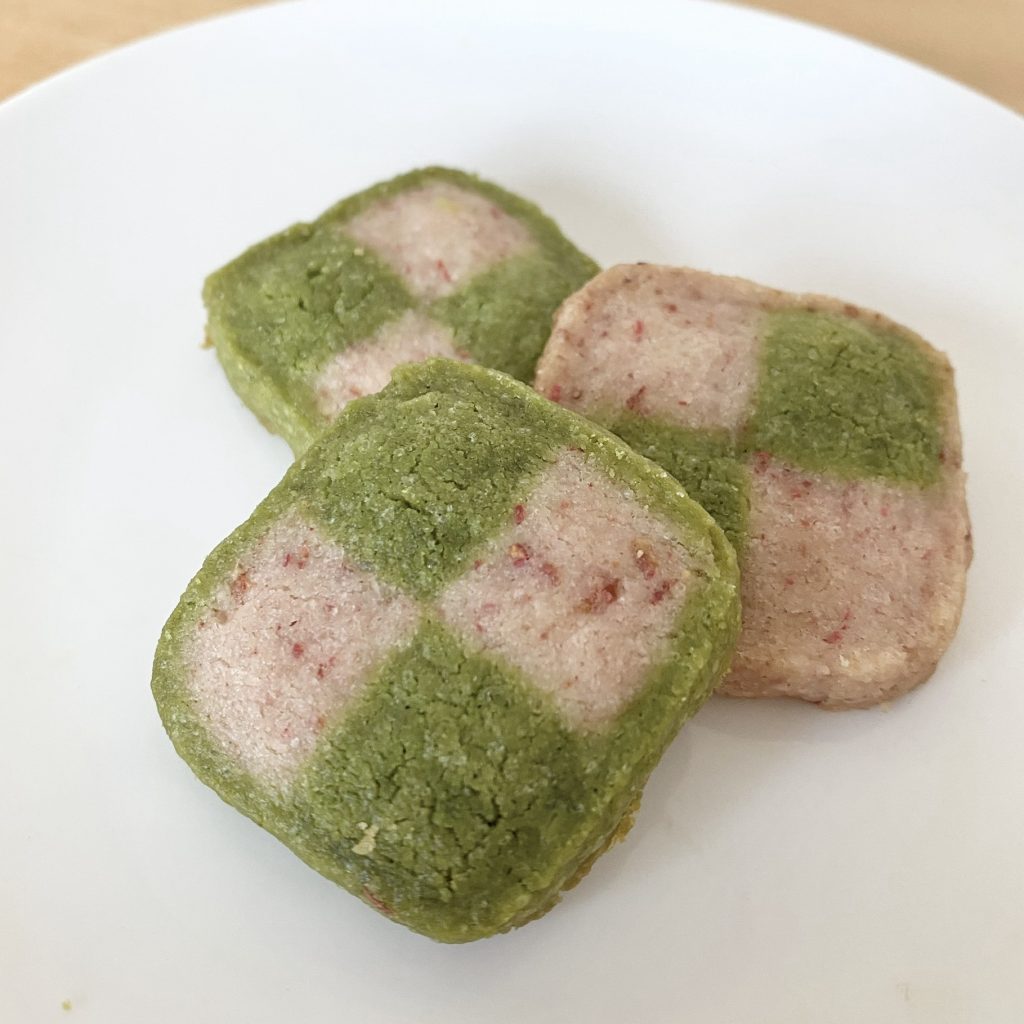
I did, however, want to incorporate a spicy element into the biscuits, so I opted to pair the strawberry flavour with pink peppercorns. I’ve actually heard of people pairing strawberries with black pepper before, so I figured pink peppercorns weren’t too much of a stretch: they’re milder (though they still bring a little bit of warmth to the dough), with a slight citrus-y note, and fit the pink colour palette perfectly, so I figured they’d be a great option here!
Honestly, I’m not usually the biggest fan of matcha (sometimes I just find it a little too earthy?), but I had a matcha panna cotta once that I absolutely loved and I think the difference was the presence of vanilla in the recipe: it really brings out the sweetness of the matcha without overpowering its flavour. Therefore, I opted to include a small amount of vanilla bean paste in the matcha dough, to make it a little more sweet and a little more delicious (for me, at least!).
Ingredients
The basic biscuit dough is a simple shortbread, using the classic 1-2-3 ratio of caster sugar-butter-plain flour (the same base that I used for my Schackrutor recipe). I’ve used unsalted butter here, but you can use salted butter if you prefer.
This recipe doesn’t make a huge batch of biscuits (they’re pretty tiny!), but you can easily scale it up to make more if you want.
To flavour the doughs, I used the following 4 ingredients:
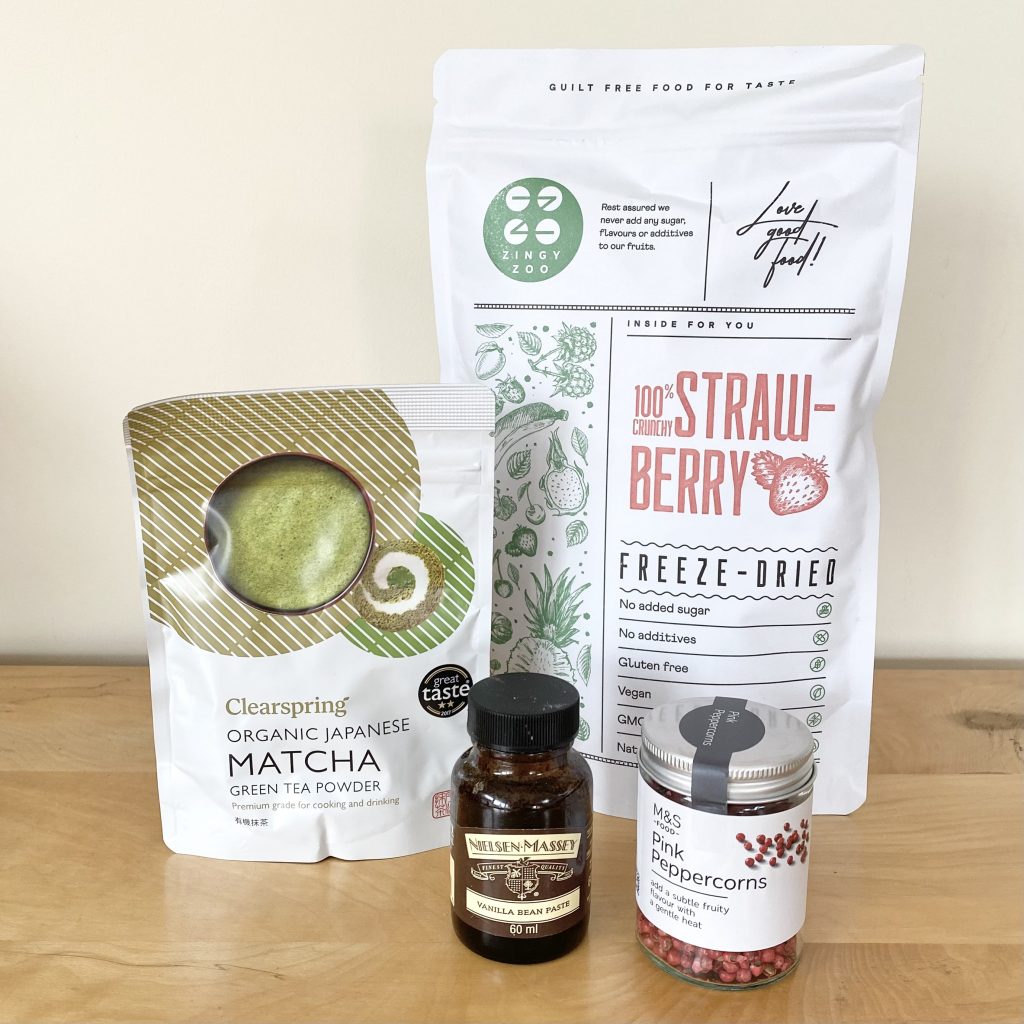
- Freeze dried strawberries
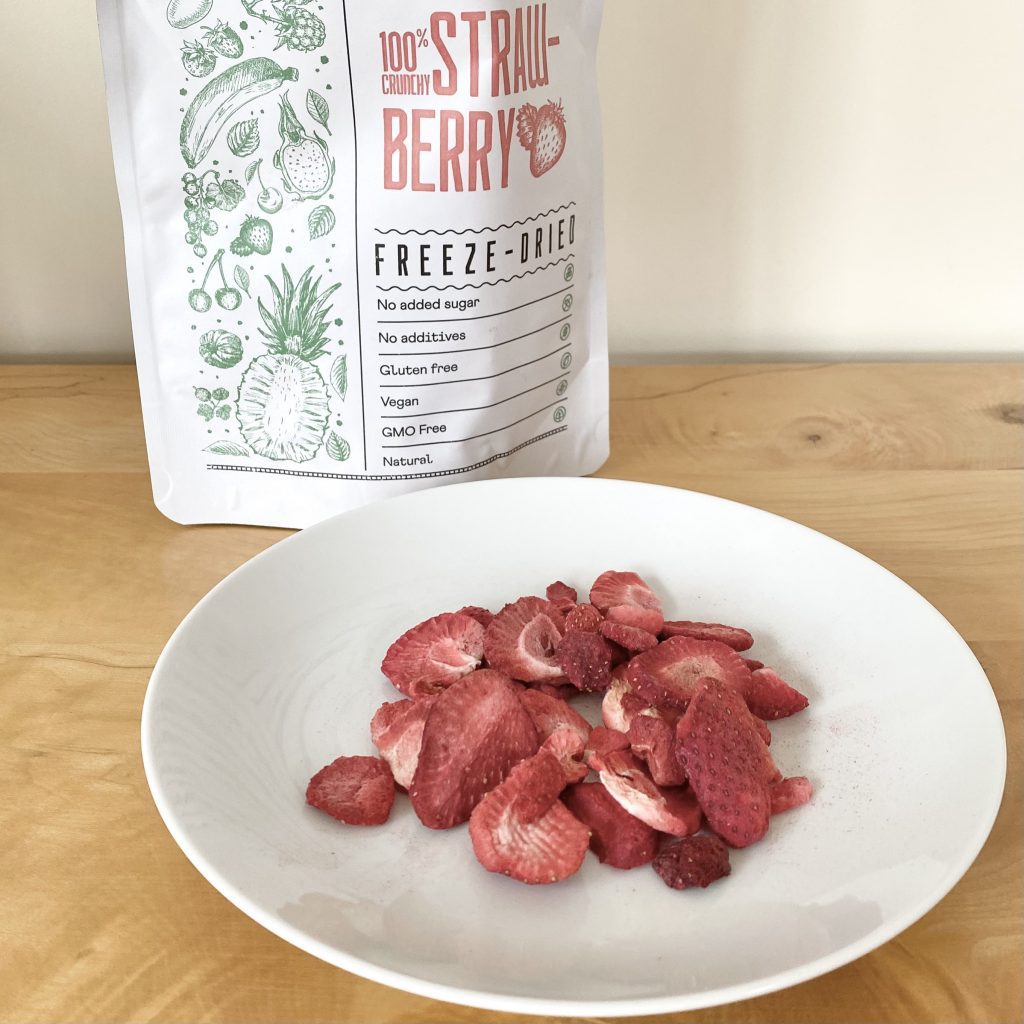
It turns out that freeze dried strawberries aren’t as readily available as freeze dried raspberries in the supermarkets near me (who knew?), so I purchased mine on Amazon. They’re a great way of getting loads of strawberry flavour into bakes, particularly ones like shortbread that can’t handle too much additional liquid.
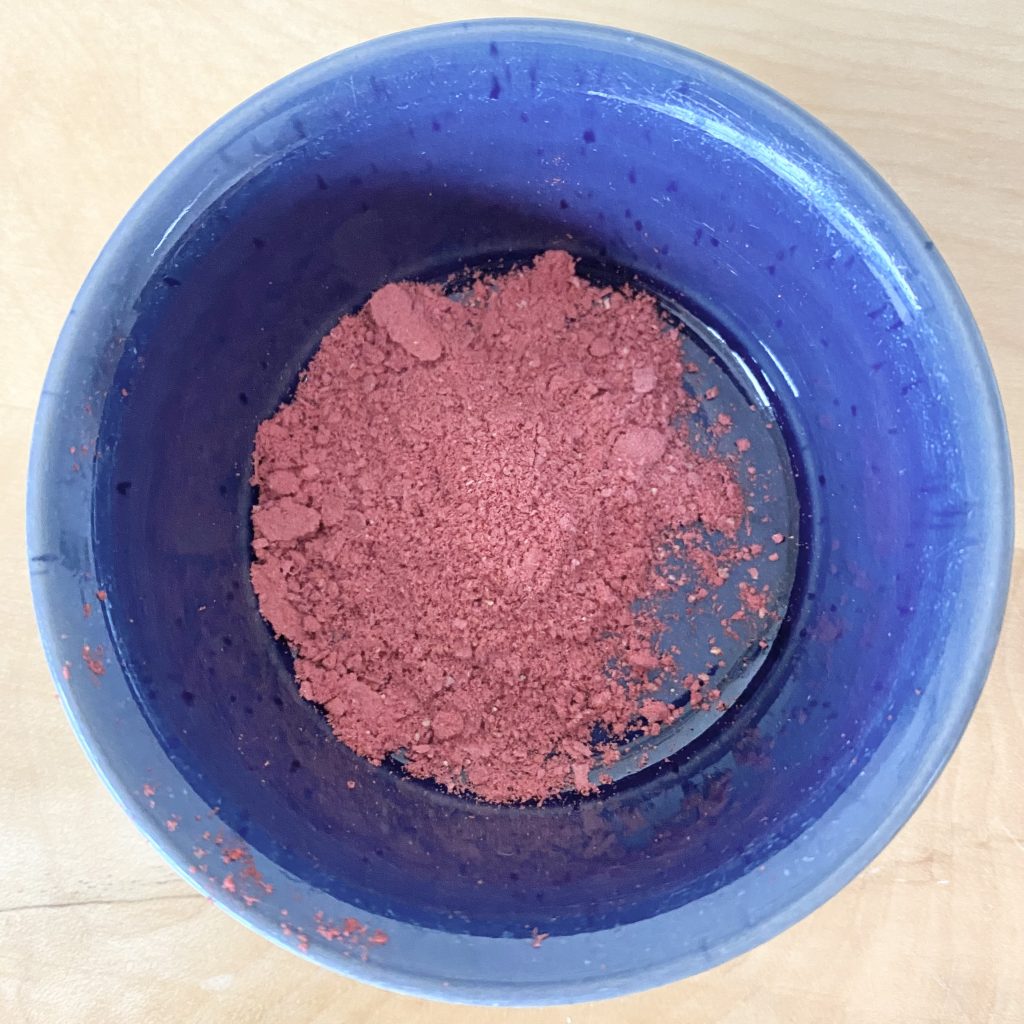
I bought freeze dried strawberries slices and ground them into a fine powder myself, using a mortar and pestle. If you can find them in powder form, you can absolutely buy them like that instead.
- Pink peppercorns
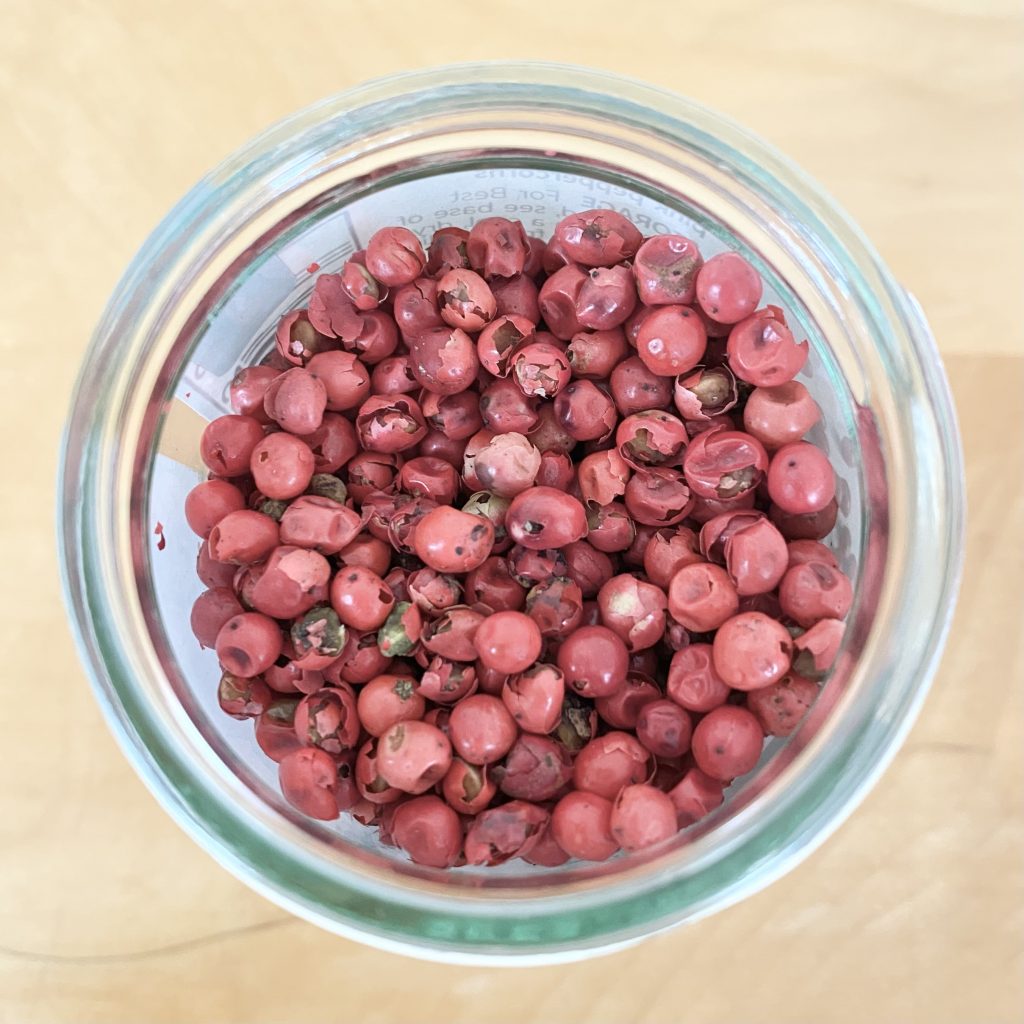
Surprisingly, pink peppercorns are not related to the classic black peppercorns we know and love (I’m lying, black pepper and I do not see eye to eye). Pink peppercorns are actually a dried berry! However, because they have a pepper-y flavour, they’re often grouped together with the other peppers of the world. Along with their relatively mild, but still warming, pepperiness, they have an almost citrus-y flavour, which works really well with the fruitiness of the strawberries and the earthiness of the matcha powder.
You can of course leave the pink peppercorns out to make these into Strawberry Matcha biscuits. I’d probably still keep the vanilla in if you do this, just to really highlight the matcha flavour.
- Matcha powder
Make sure you get a high quality, pure matcha powder (not one of the flavoured alternatives) for this recipe. It can be quite expensive, but you don’t need much at all for this recipe.
- Vanilla bean paste
I like to use vanilla bean paste in these biscuits because it adds plenty of vanilla flavour without adding as much liquid as regular vanilla extract would (and without the faff of dealing with a vanilla bean). As I mentioned earlier, I find that adding vanilla to matcha desserts really brings out the sweetness of the matcha, so I definitely think it’s a worthwhile addition to this recipe!
How to Make Pink & Green Checkerboard Biscuits
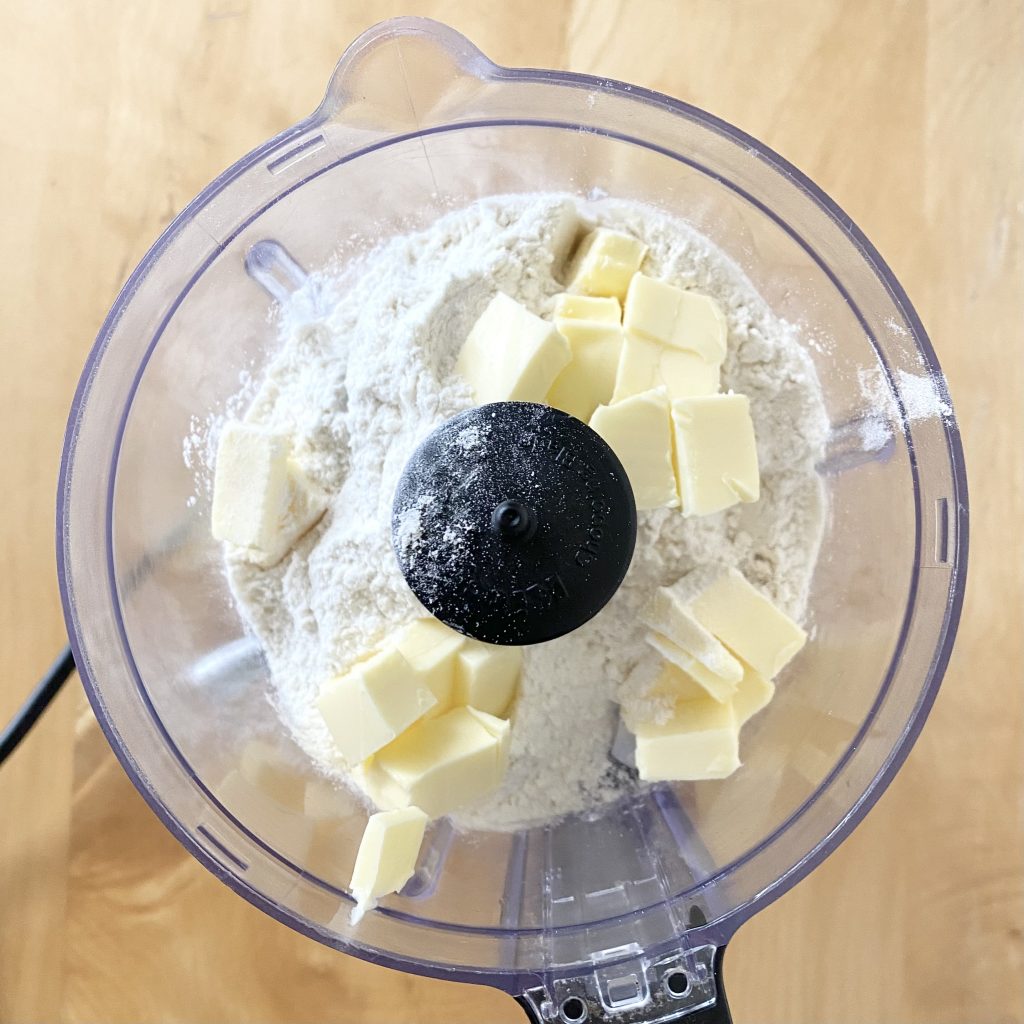
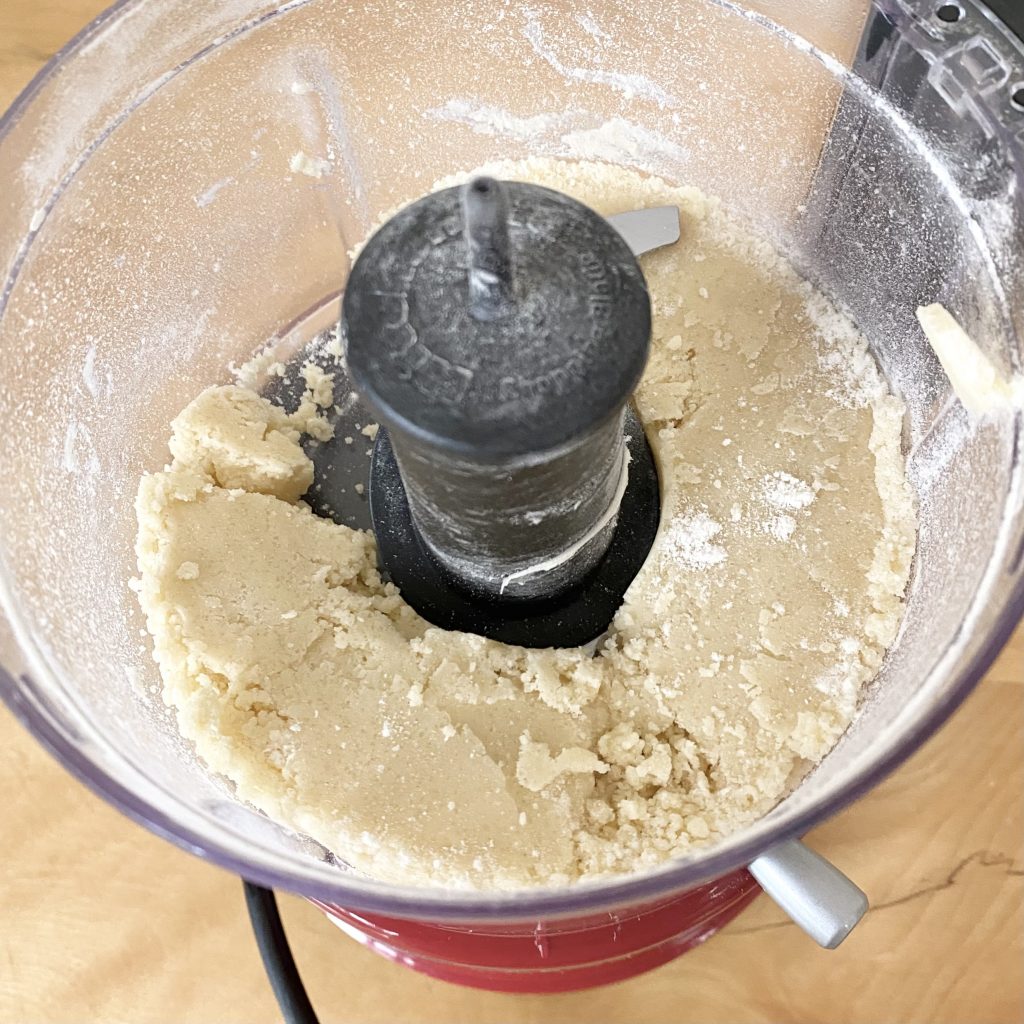
Making the base dough for these checkerboard biscuits is super easy: you just put the ingredients (sugar, butter and flour) into a food processor (I use a mini one) and pulse/process until everything comes together. That’s it!
Things get a little more complex when it comes to flavouring and shaping the biscuits, but it’s still pretty straightforward once you know what you’re doing.
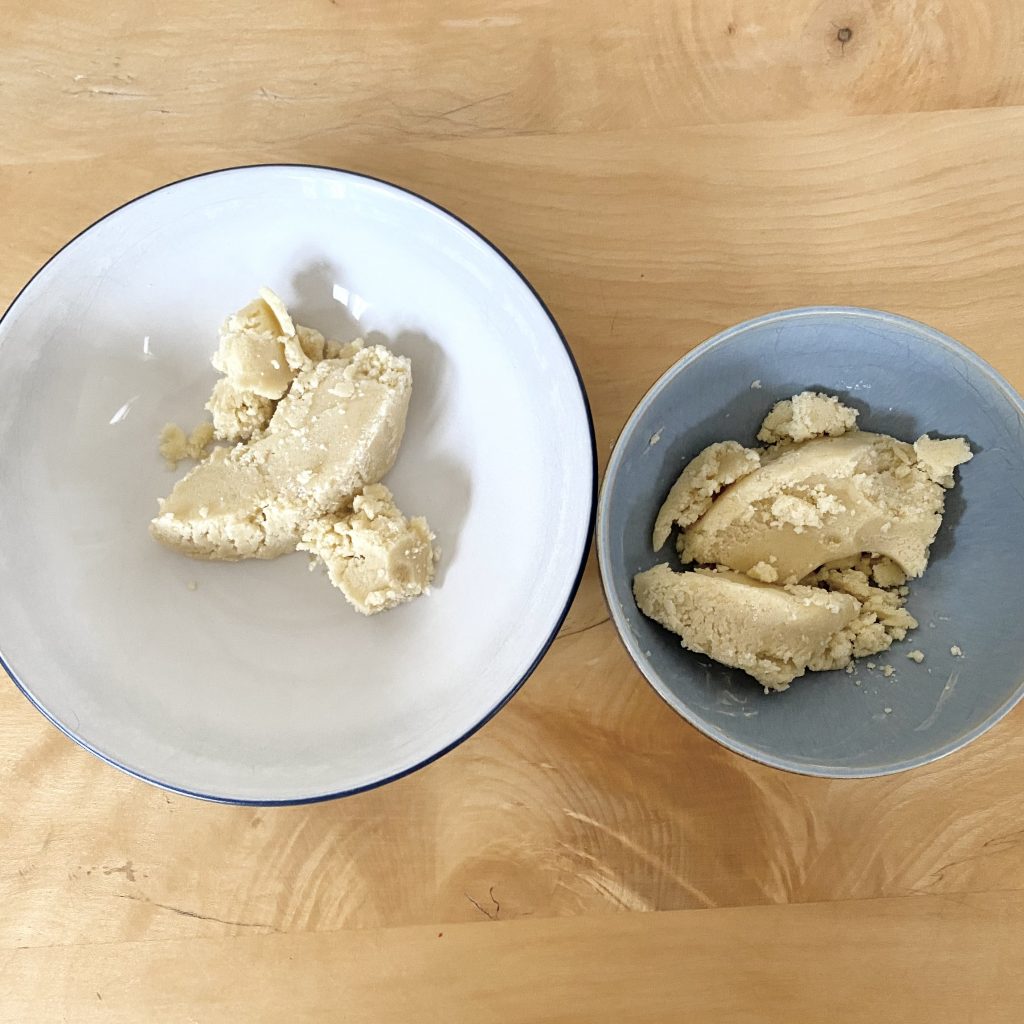
First things first, split the dough into two equal portions. I like to use a weighing scale for this to make sure that both halves of the dough are exactly the same size.
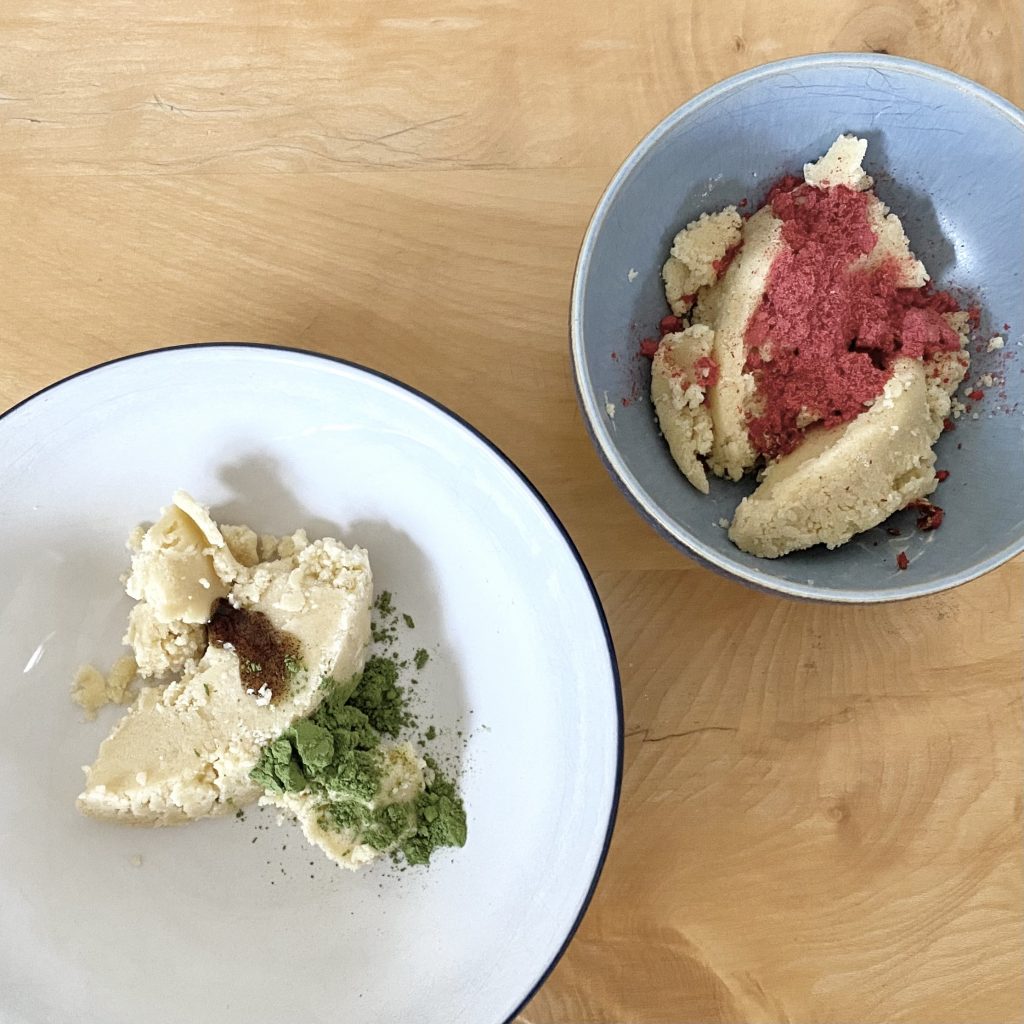
Add the matcha powder and the vanilla bean paste to one half of the dough. To the other half, add the freeze-dried strawberry powder and the ground pink peppercorns.
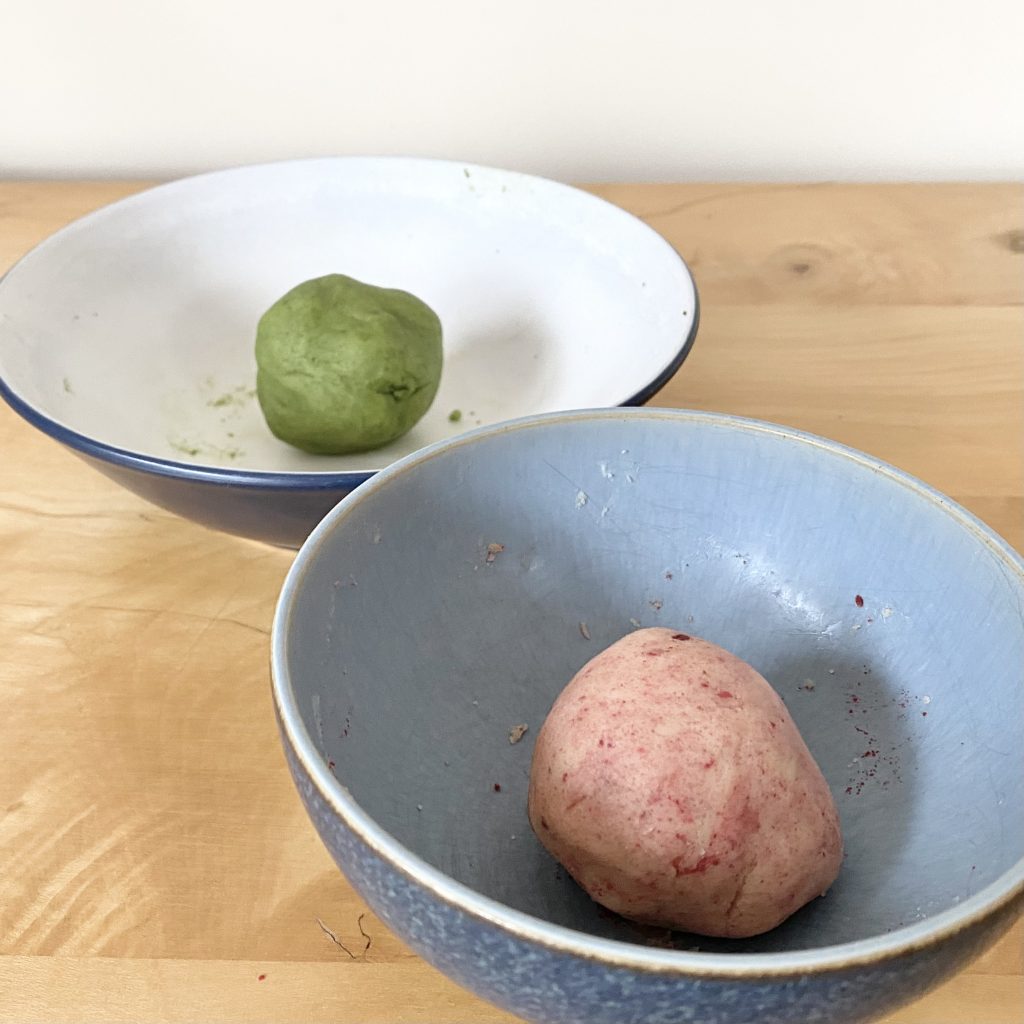
Working with one dough at a time, knead in the flavourings until they are evenly distributed throughout the dough and the colour is even.
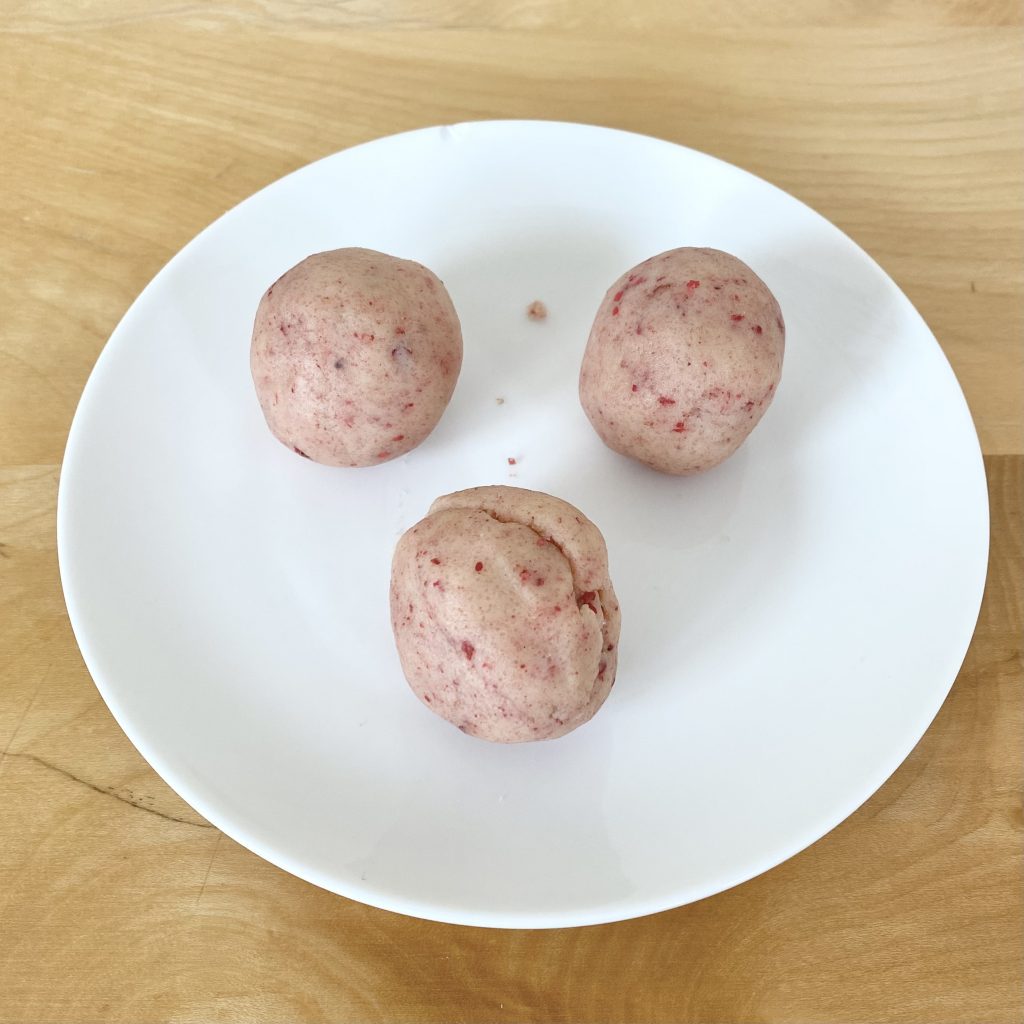
Once you have both doughs ready to go, you need to split both of them up into smaller portions. Again, I like to use a weighing scale for this to ensure the portions are all the same. Start by dividing each ball of dough into 3 equal portions.
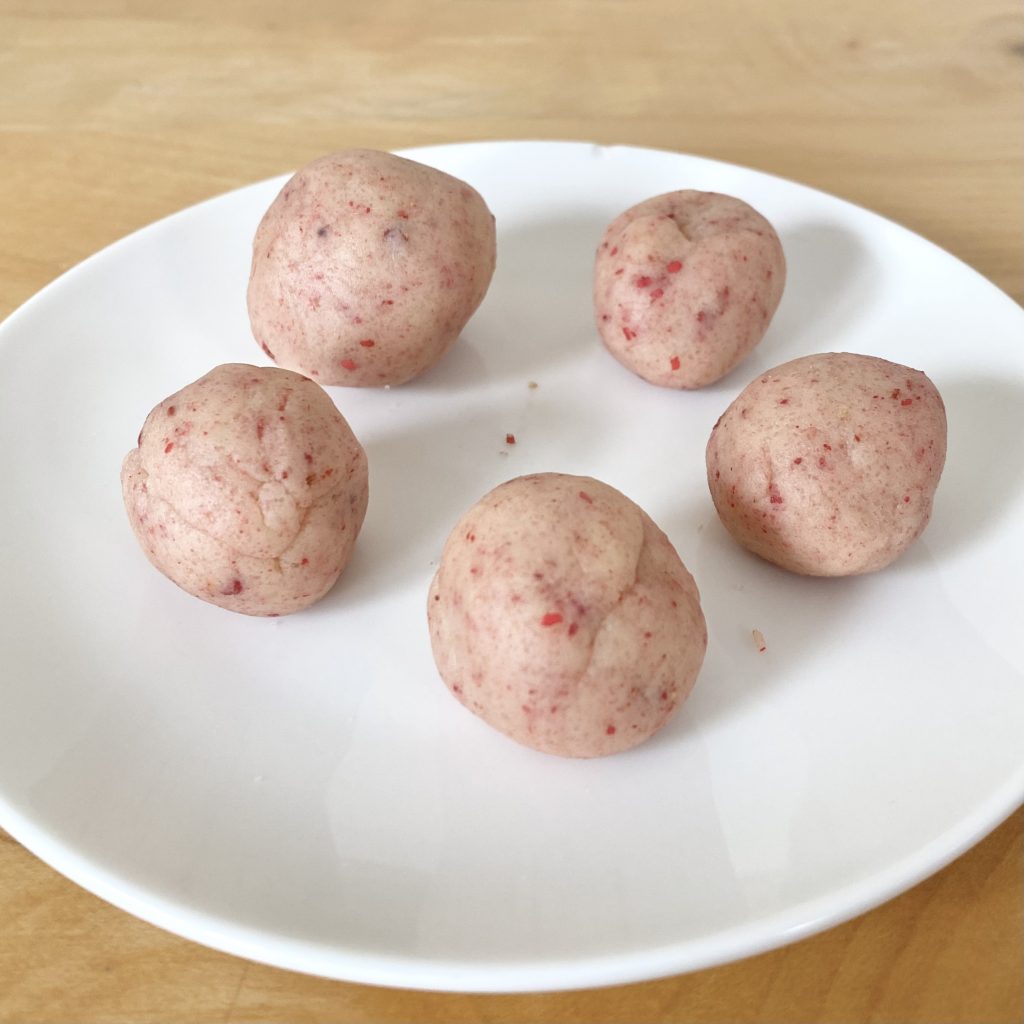
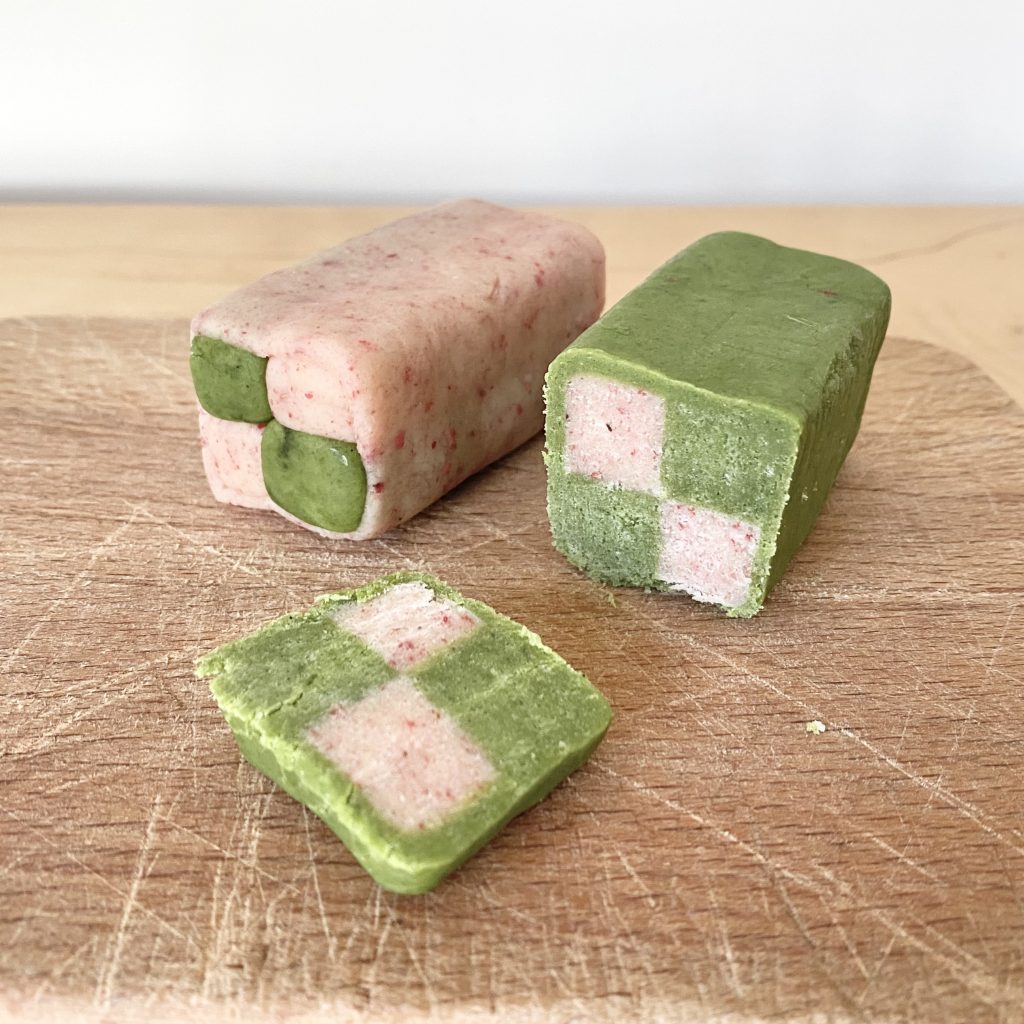
Then, divide 2 of each of those 3 portions in half again. You should be left with 1 large ball and 4 small balls of each dough flavour. The smaller balls will form the checkerboard body of the biscuits, while the larger ball will be rolled out and wrapped around the biscuits to form the border.
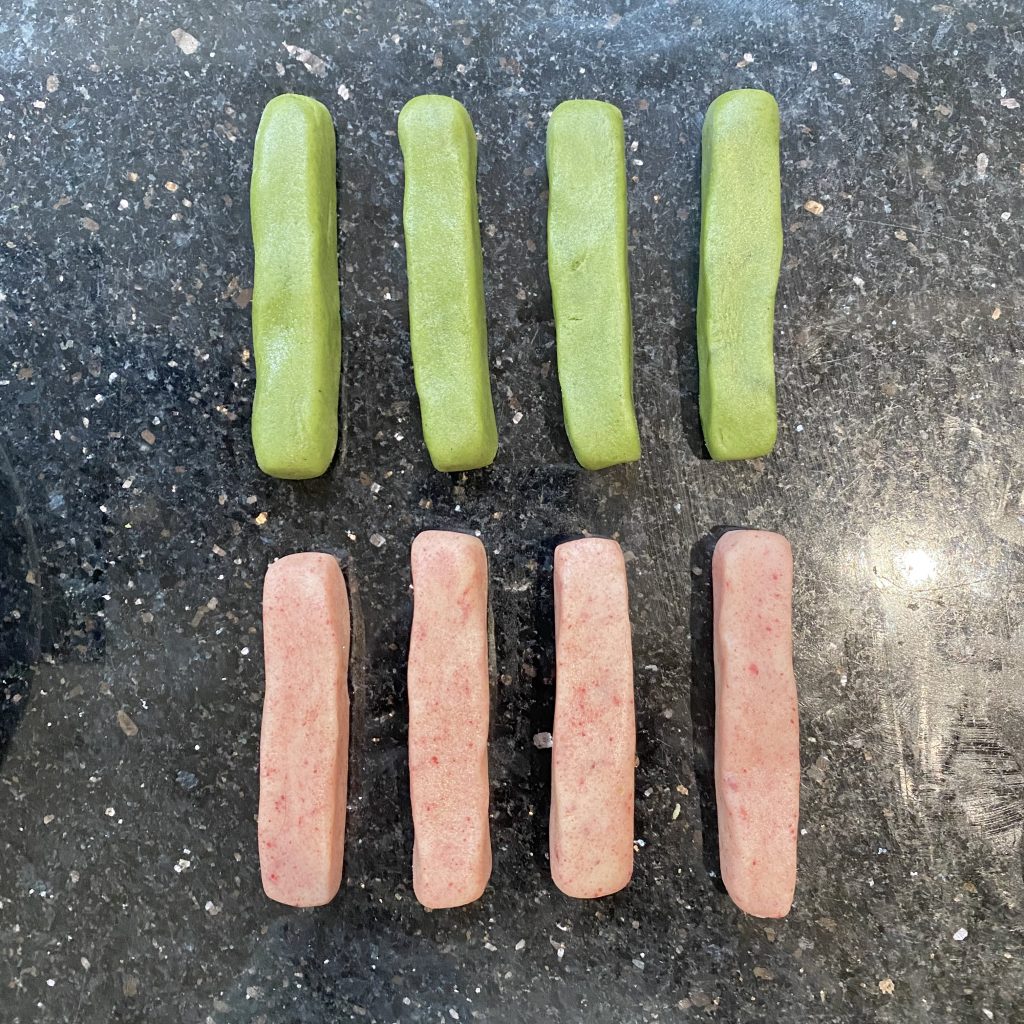
Use your hands and a bench scraper (or a clean, metal ruler: anything that will help you to really square off the edges of the dough) to shape each of the smaller balls into rectangular logs (you want the cross section of each log to be approximately 1 cm x 1 cm), making sure the logs are as equal as possible in length. You should end up with four green logs and four pink logs.
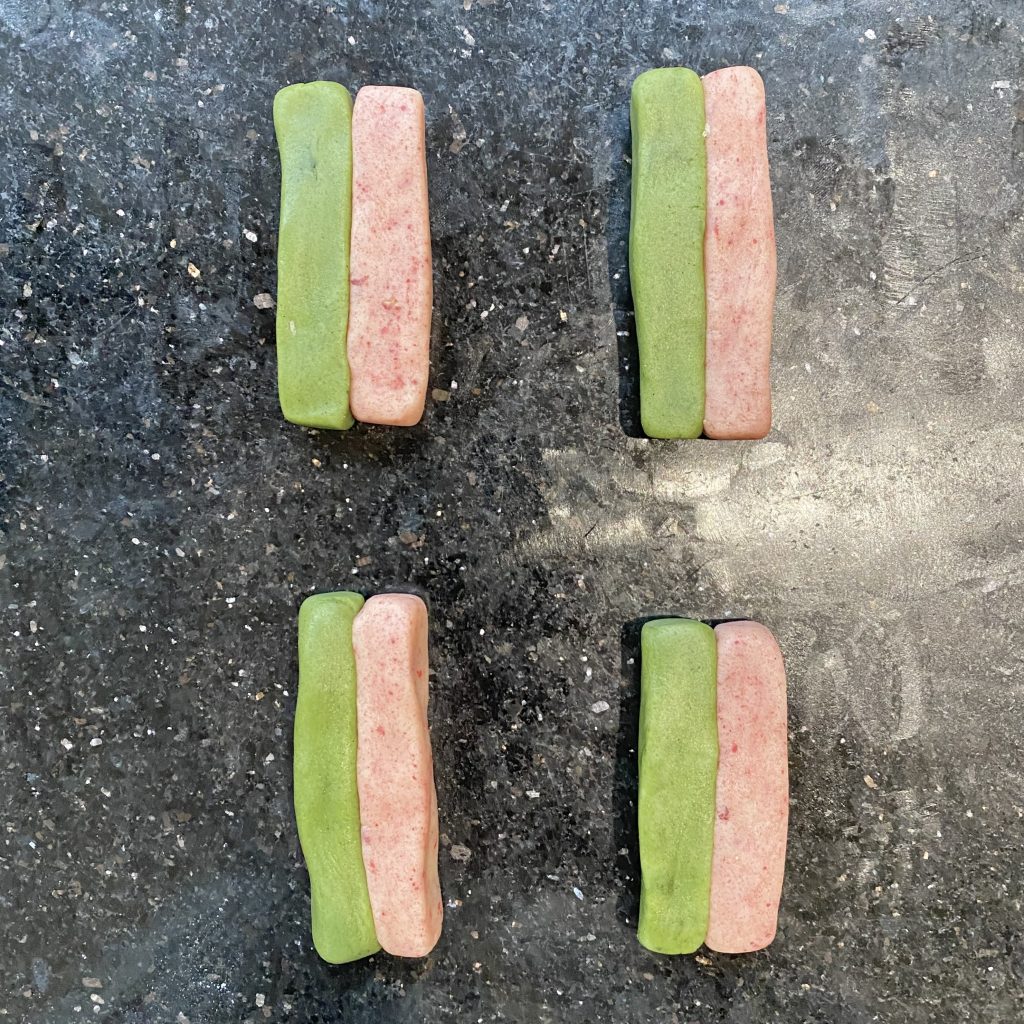
Carefully press each green log up against one of the pink logs, making sure they are stuck together, but being careful not to squish the dough out of shape too much.
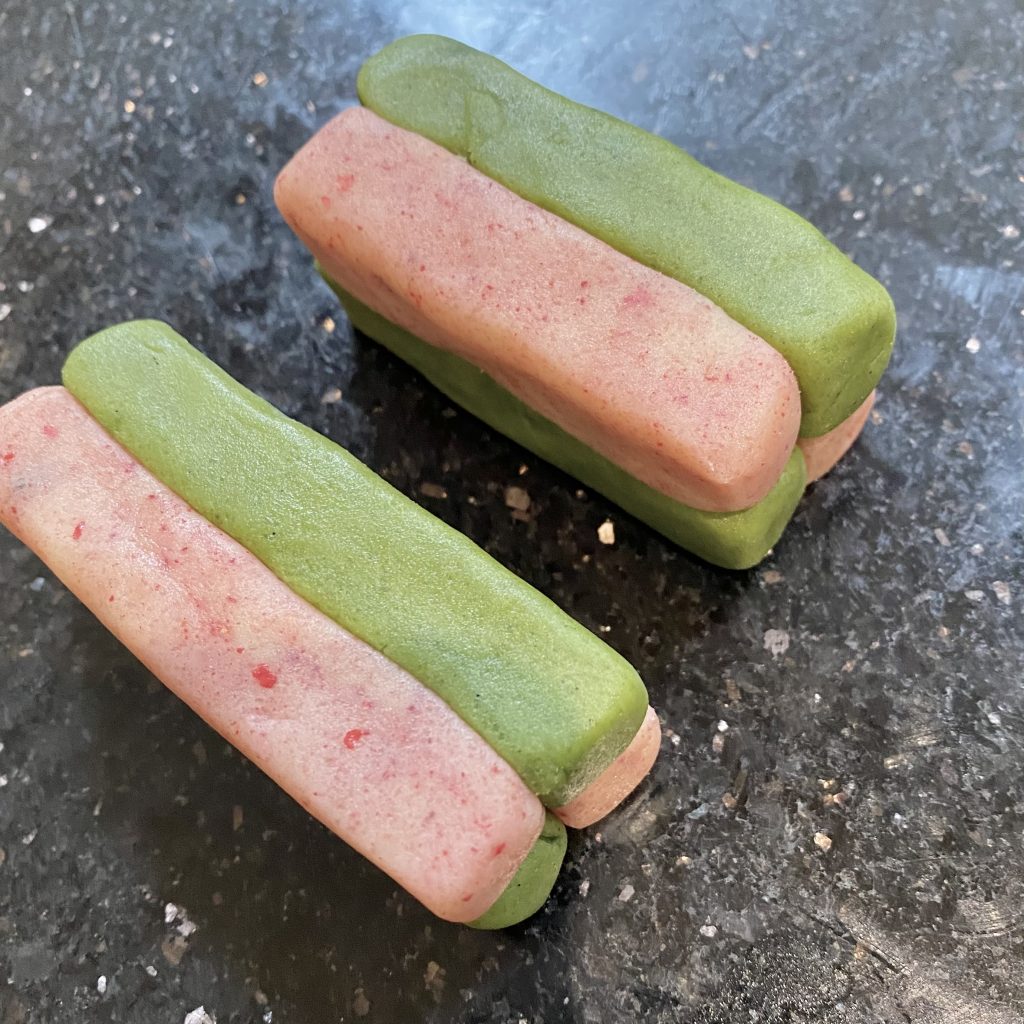
Place one pair of logs on top of another pair of logs, positioning it so the top green section sits on top of the bottom pink section and vice versa. This creates the checkerboard pattern. Again, press them together, but try not to distort the shape too much. Repeat this process for the second pair of logs, so that you have two short cuboids featuring a 2×2 checkerboard pattern.
Now, it’s time to wrap the biscuits in their final dough layer! This gives the biscuits a really pretty border and makes them feel that little bit fancier (if you’d prefer to make the biscuits sans border, follow the instructions on my Swedish Schackrutor post instead— the dividing of the dough is a little less complicated if you do it that way too!).
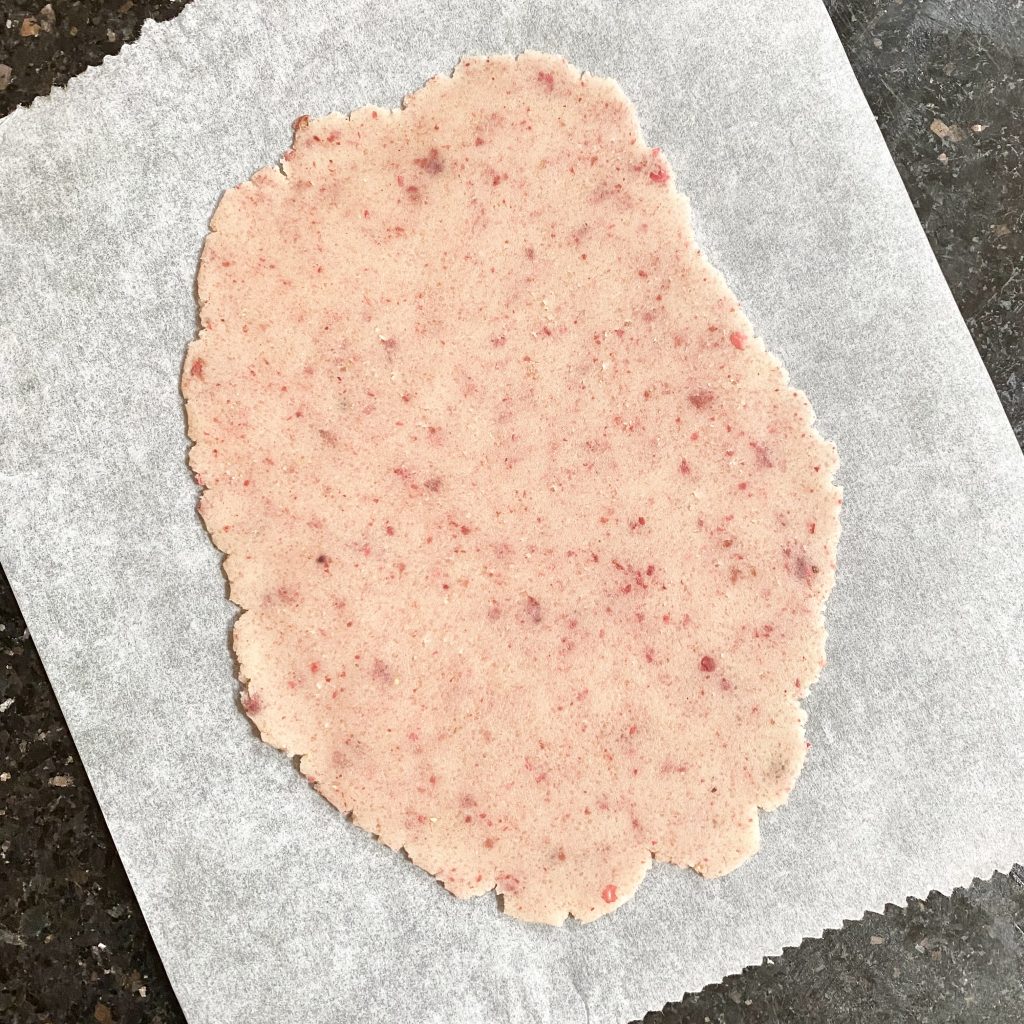
Take one of the large dough balls and roll it out between two pieces of baking paper (you don’t want to use flour at this stage, because it will prevent the dough from sticking to the biscuit logs, so the baking paper is there to stop it from sticking to your work surface/rolling pin!). Aim for a rectangle the slightly wider than the length of one of your checkerboard logs, and long enough to wrap around the whole thing (approx. 8cm). Try to keep the thickness as even as possible, so that the border looks super neat.
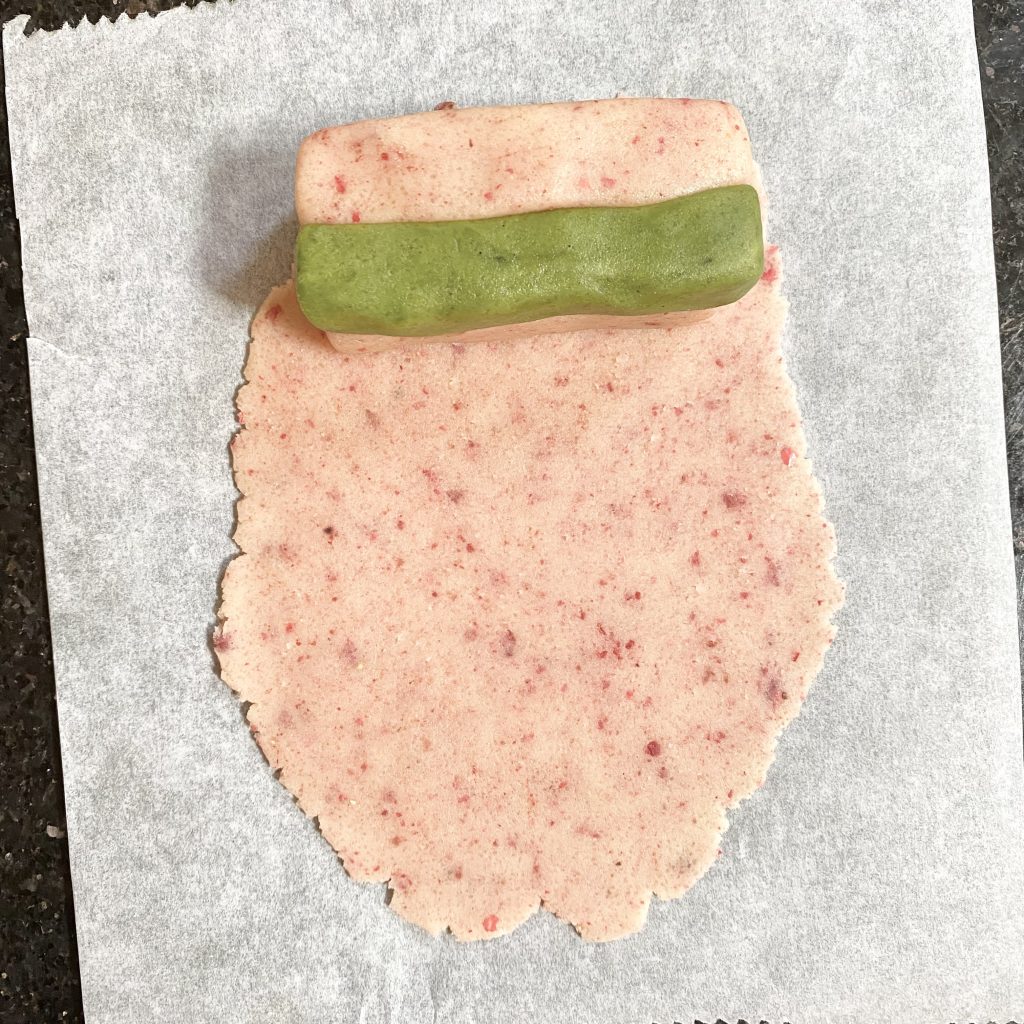
Peel off the top layer of baking paper, then place one of the logs onto the dough, positioning it at one end.
Use a sharp knife to trim along the back of the log, as well as down both sides, flush with the edges of the log. This will make the final dough layer really neat.
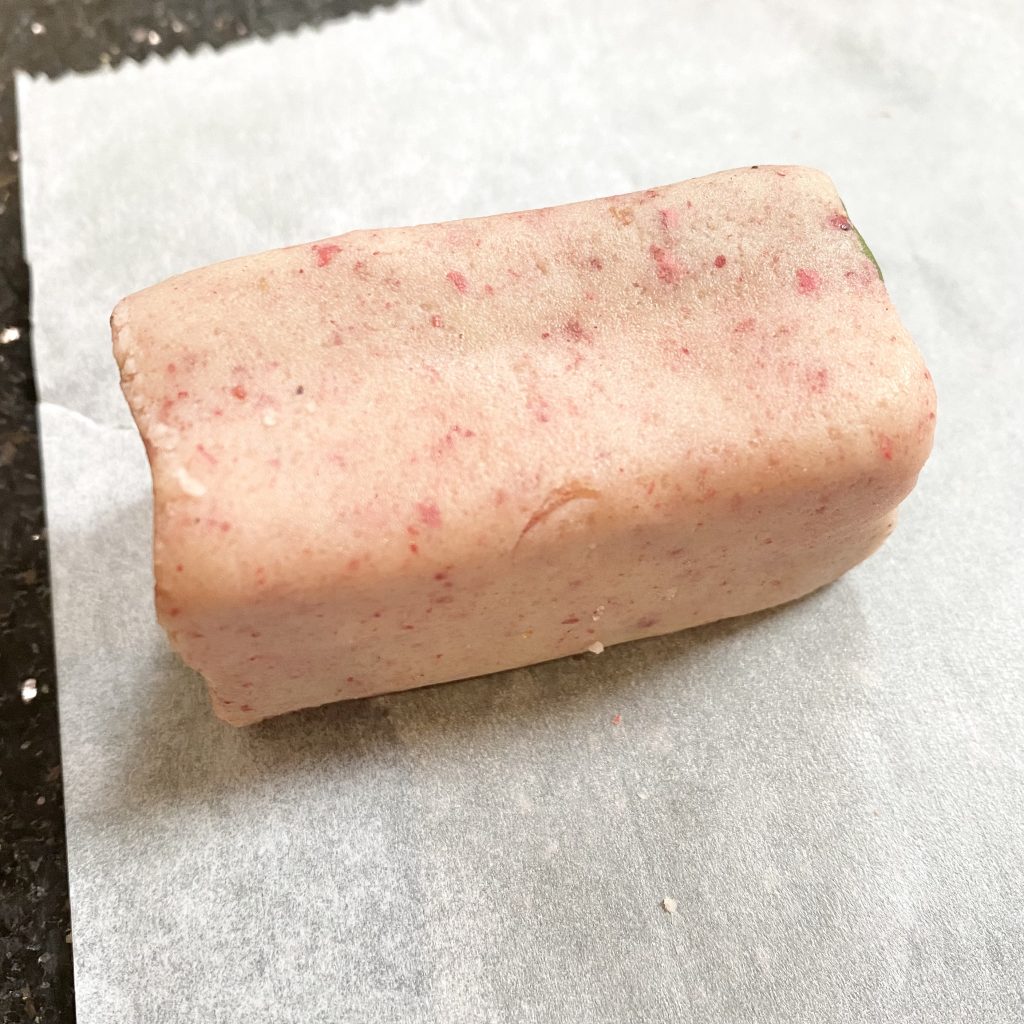
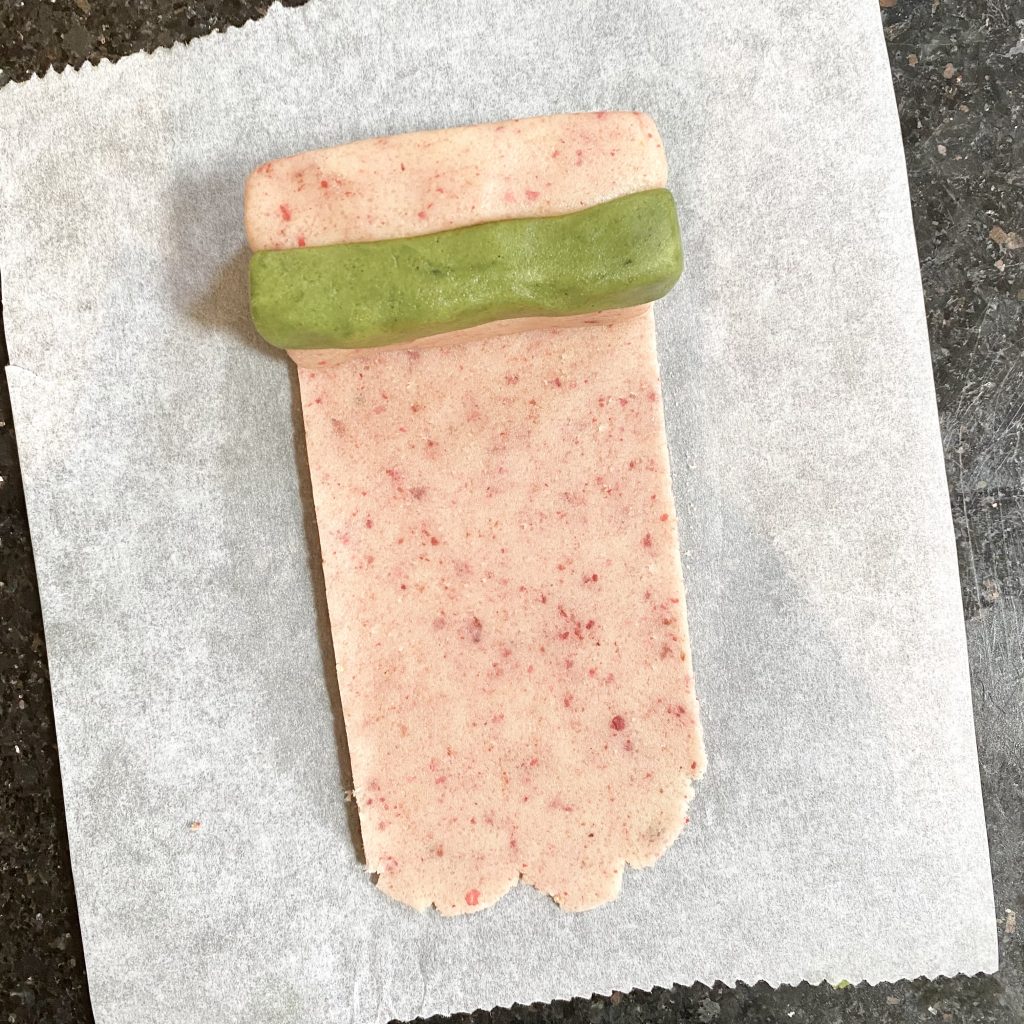
Use the baking paper to help you roll the log down the length of the dough, wrapping it up in the dough as you go and pressing the edges gently to ensure the dough sticks to itself, until you’ve covered the whole thing like a little Battenberg. Trim off any excess dough at the end.
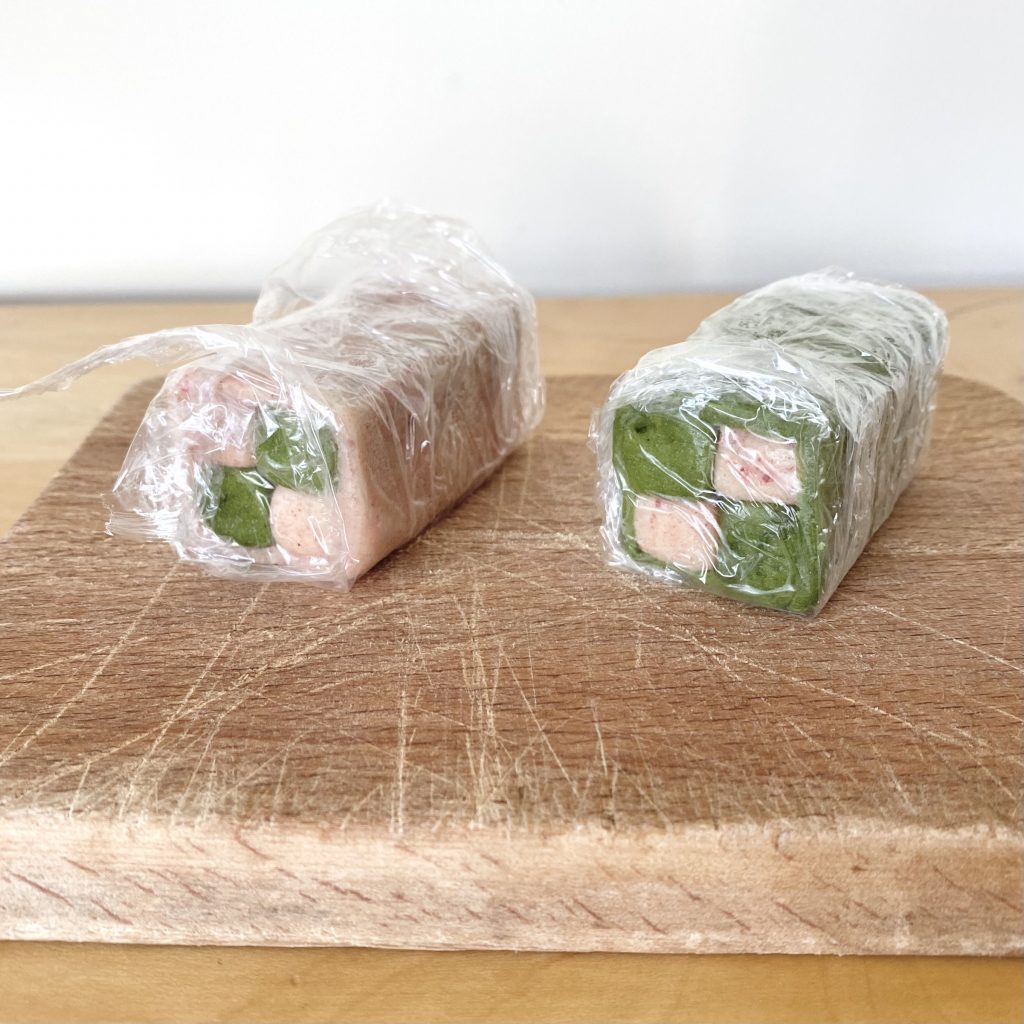
Repeat this process for the second log, using the other dough flavour (the final ball!) to cover it. Wrap both of the biscuit logs tightly in clingfilm, then place into the fridge to chill for 2 hours. This will firm the dough up, so that you can slice the logs without distorting your hard-earned checkerboard pattern.
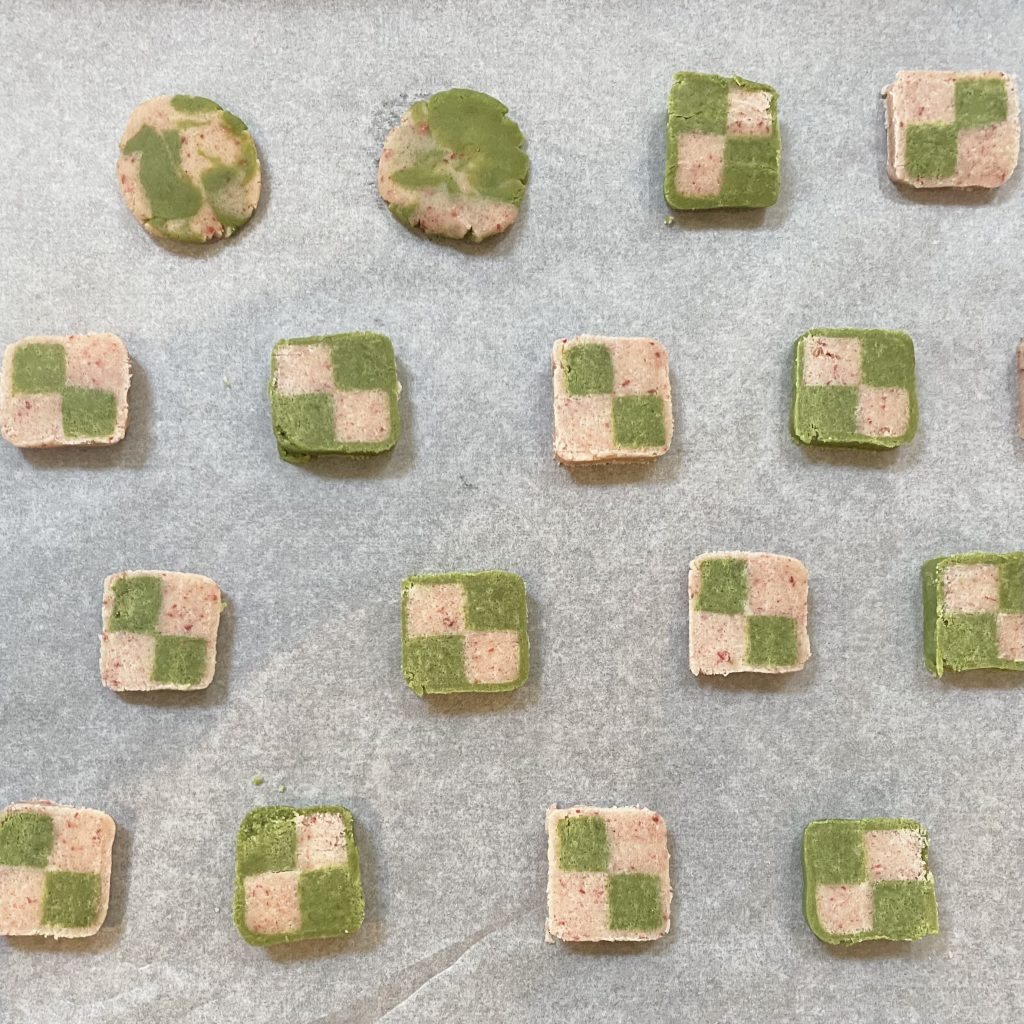
There’s no need to throw away the dough offcuts— roll them all together and form them into a couple of round biscuits (top left in the photo above!). Aim to make these biscuits a similar size to the cross section of your biscuit logs (approx. 3-4cm in diameter). You can bake them alongside the ‘official’ biscuits as little chef’s treats later!
Once the logs have chilled, unwrap them and use a sharp knife to cut them into slices, approx. 5-7mm thick.
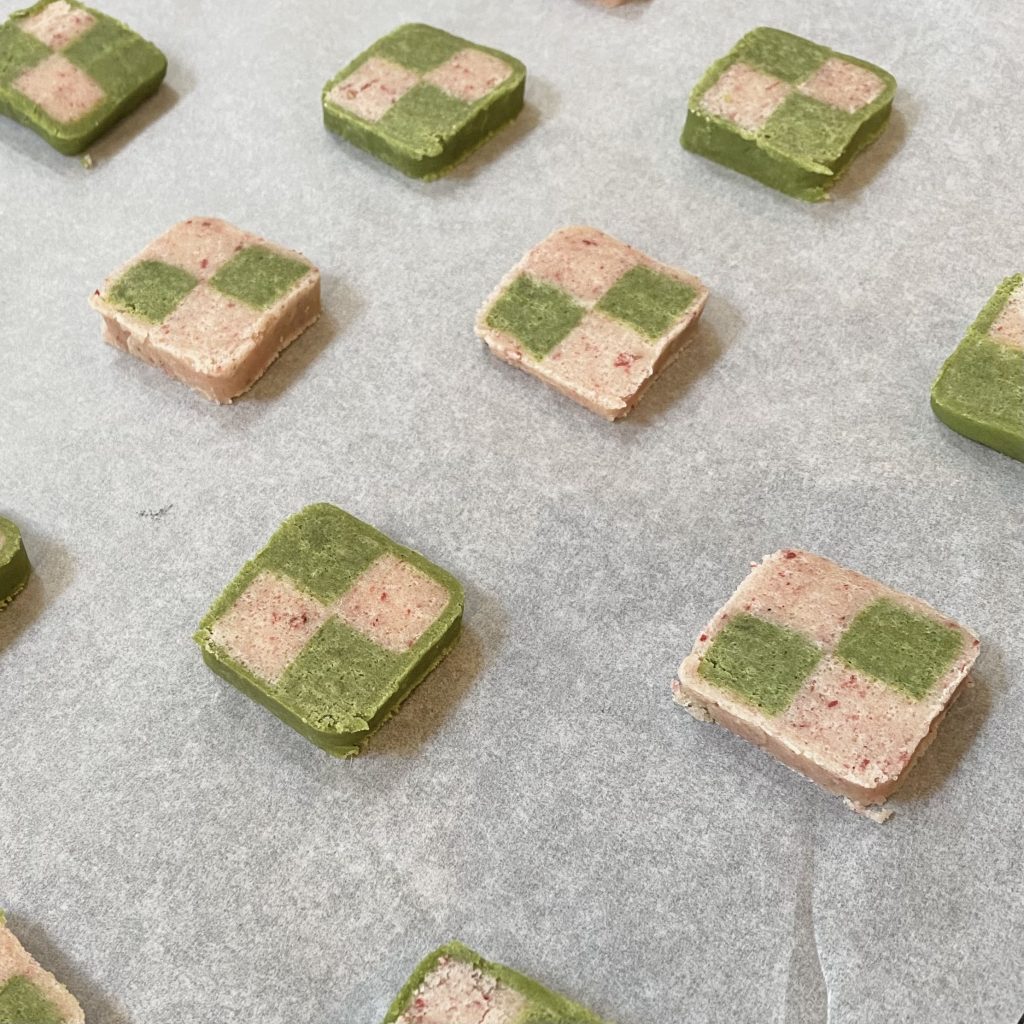
Space the biscuits out on a baking tray, lined with baking paper (they won’t spread too much, so just leave a little gap between them). Bake them at 180°C (conventional oven, not fan) for 6-8 minutes, until they’re just turning golden around the edges (this is usually easier to see in the strawberry-flavoured sections than the matcha ones!).
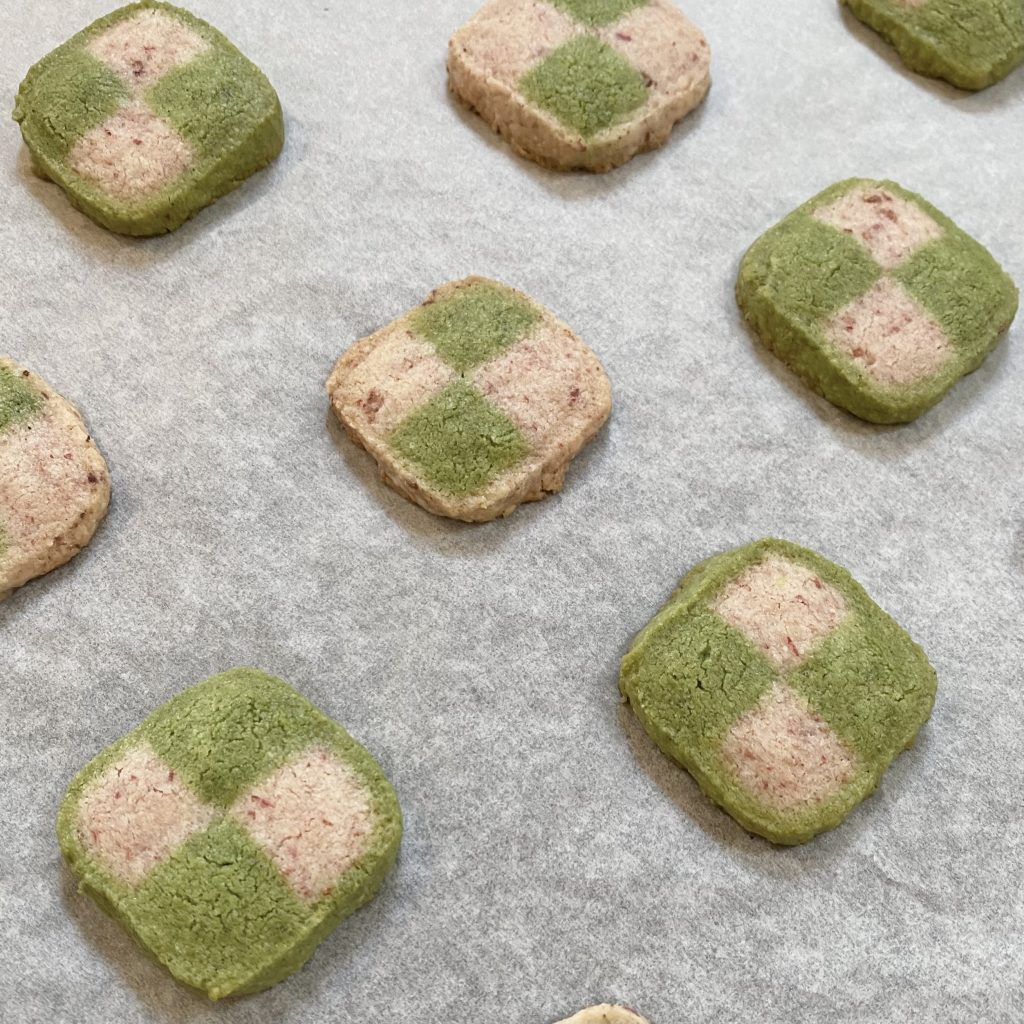
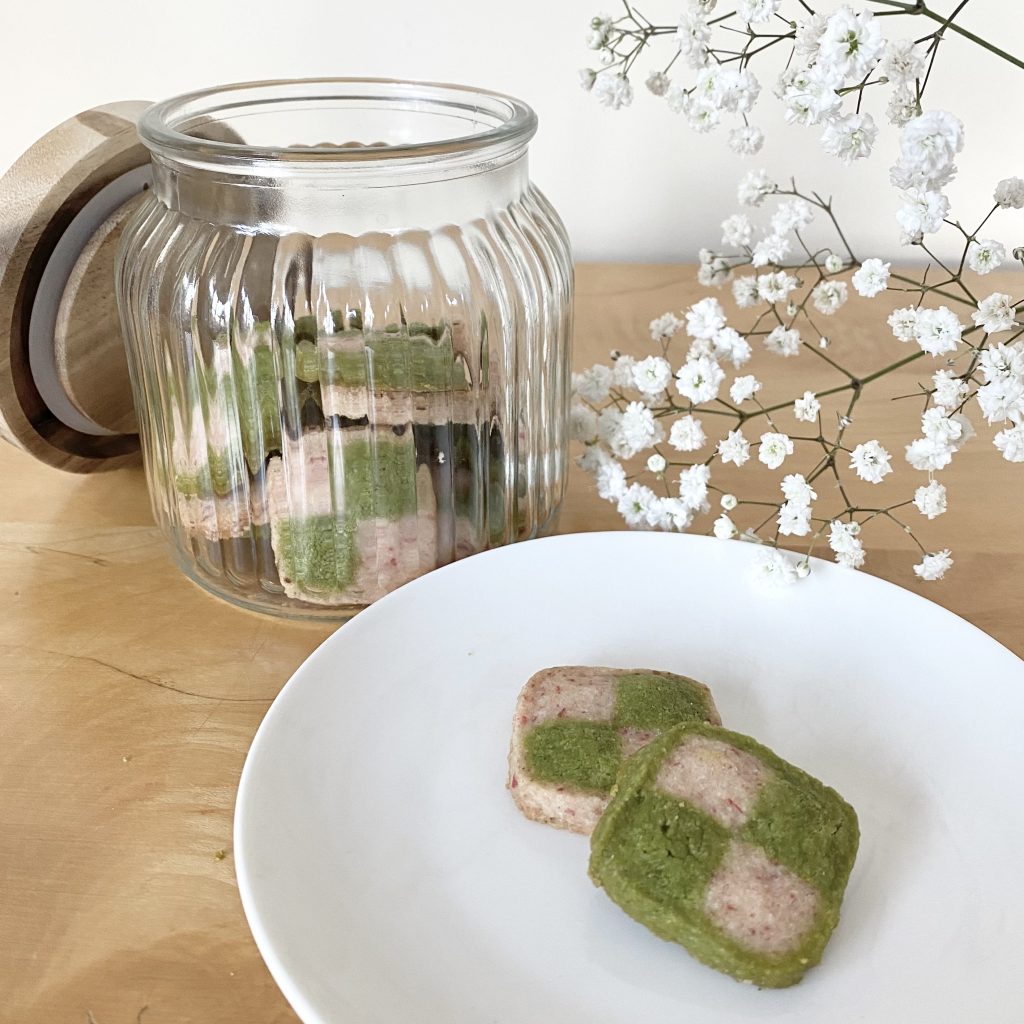
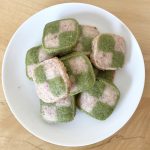
Allow the biscuits to cool on the tray for 5-10 minutes, then transfer them to a wire rack to cool completely before enjoying.
Leftover biscuits can be stored in an airtight container at room temperature for about 3 days before they start going a little soft.
Recipe
Pink & Green Checkerboard Biscuits
Ingredients
- 25 g caster sugar
- 50 g unsalted butter, diced and softened.
- 75 g plain flour
- 1/2 tbsp freeze dried strawberry powder (see Note 1).
- 1/2 tsp pink peppercorns, finely ground.
- 1/2 tsp matcha powder
- 1/8 tsp vanilla bean paste
Instructions
- Place the sugar, butter and flour into the bowl of a food processor (I use a mini one). Pulse/process until a dough forms.
- Use a weighing scale to divide the dough in half, then place each half into a separate bowl. Knead the freeze dried strawberry powder and ground pink peppercorns into one of the dough halves, then knead the matcha powder and vanilla bean paste into the other.
- Divide each ball of dough into 3 equal pieces. Then, divide 2 of the 3 balls in half, so that you are left with 1 large ball and 4 smaller, equal balls of each colour.
- Use your hands and a bench scraper (or a clean metal ruler/anything that can be used to square off the edges of the dough) to form each of the smaller balls into short, rectangular logs (the cross section should be about 1 cm x 1 cm) of the same length. You should end up with 4 green logs and 4 pink logs.
- Press one pink log alongside one green log. Make sure they are stuck together, but try not to distort the shape too much. Repeat this for the remaining logs.
- Press one pair of logs on top of another, positioning them so that the top green section sits on the bottom pink section and vice versa. Repeat this for the second pair of logs, so that you end up with two larger, rectangular logs with a 2×2 checkerboard pattern.
- Roll out one of the larger dough balls between two sheets of baking paper. Don't add any flour at this stage. Aim to roll the dough into a rough rectangle, slightly wider than the length of one log and a little over 8cm long, so that it can be used to wrap all the way around one of the logs.
- Peel off the top sheet of baking paper, then place one of the logs on top of the rolled out dough, at one end. Use a sharp knife to trim off the excess dough along the back of the log and down both sides, flush with the edges of the log.
- Using the baking paper to help you, roll the log down the length of the rolled out dough, pressing gently to help the dough stick to itself, until it is completely covered, like a Battenberg. Trim off any excess dough, then repeat the process for the second log with the final, large ball of dough (in the other colour).
- Any offcuts can be rolled together and pressed into little round biscuits to be baked alongside the checkerboard biscuits later.
- Wrap both biscuit logs tightly in clingfilm, then place them into the fridge to chill for 2 hours. This will firm them up, so that you can slice them without distorting the checkerboard pattern.
- After 2 hours, preheat the oven to 180°C (conventional oven, not fan). Slice each log into biscuits about 5-7mm thick, then space them out on a baking tray lined with baking paper. The biscuits won't spread very much, so you don't need to leave heaps of room between them.
- Bake the biscuits for 6-8 minutes, until just starting to turn golden around the edges. Allow them to cool on the tray for 5-10 minutes, then carefully transfer to a wire rack to finish cooling before serving. The biscuits can be stored in an airtight container at room temperature for up to 3 days before they start going a little soft.
Notes
- If you buy the slices of freeze dried strawberries, this works out at approximately 2g (or 5ish slices). Grind the slices into a fine powder using either a mortar and pestle or a spice grinder.