Welcome to Day 15 of Blogmas At Home 2024! 🎄🎅🏻✨
Setting up the initial pages of my bullet journal can feel like such an overwhelming task, because a) I’m not known for my moderation, so there’s always SO MANY pages to create and b) it has to be done alongside a monthly setup. I wanted to keep the design for this setup really simple and easy to create, both to make the task feel a little less overwhelming and to allow me to focus on the function of the spreads themselves, to ensure that these pages are super helpful and useless to me.
I opted to use my pastel Kuretake dot pens to decorate all of the spreads in this setup, using them to create boxes, borders and even headings. I went for a simple, block capital font and used only one, black fineliner for all of the writing. I tried to keep the setups looking clean and minimal, but also colourful and happy, which I think will be just what I need going into the new year.
Table of Contents
- Journal
- Equipment
- Nameplate
- Cover + Quote Page
- 2025 Goals
- Future Log
- Tennis Schedule + Results
- Year in Dots
- Appointments + Prescriptions
- Blog Planning
- Ideas
- Bullet Journal Planning + Wishlist
- Finance + Knit & Crochet
- TV + Reading Trackers
- Final Thoughts
Journal

For the next 6 months, I’ll be using the Snowflake Polaroid A5 Dot Grid Journal from Coral and Ink (I purchased a B Grade version, for a discounted price).
This journal is a lovely blue colour— almost a cross between a cloud blue and a periwinkle. The pages have gilded edges and the front cover features a gold foil design of a polaroid and some snowflakes. The journal also has an elastic closure, pen loop, two ribbon bookmarks and a back pocket, for storing any journalling essentials.
Equipment
To create this setup, I used the following equipment:
- Sakura Pigma Micron fineliner, black 01 (0.25mm).
- Kuretake clean colour dot pens, mild colours.
- Tombow ABT dual brush pen, N89 (I got mine in this multipack).
- Scissors.
- Corner rounder.
Nameplate

I wanted to keep my nameplate for this journal in line with the theme of the other spreads, so I used my Kuretake pens to add 5 little dots of colour, before writing my name over the top (one letter per dot).
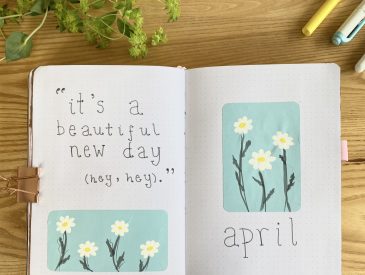
Cover + Quote Page

Like every spread in this setup, I wanted to keep the Cover Page super simple. I used a repeating sequence of the Kuretake pen colours to make a border around the page, then applied slightly more pressure to make 4 bigger dots in the centre of the page, on top of which I wrote ‘2025’.
For my Quote Page, I chose a quote from a poem I saw recently on Instagram, that really struck a cord with me. The poem was written by Josie Balka, and you can find it here.
2025 Goals

I have an on-off relationship with ‘goals’, because I’m not particularly good at following through with them and I always end up being either too ambitious or not ambitious enough with them. However, this time of year, as New Year’s Eve draws closer, I always find myself craving a little life reset and enjoying the prospect of making small, manageable changes that help me to feel happier and more aligned, so I’ve opted to include a Goals Page in this setup.
I have space in this setup for 6 separate goals and I made sure to give each one plenty of space, so that I can write down some actionable steps for each one, in the hopes that, for once, I might actually work towards them!
Future Log

Onto one of the most important spreads in my biannual setups now: my Future Log. This is essentially a yearly calendar, where I can see all of my appointments (of which there are usually very many), events (of which there are usually very few) and just a general outline of the year ahead. I set up two Future Log spreads in this journal: one for the months this journal covers (January to June) and one for the remaining 6 months of the year, so that I don’t feel completely overwhelmed and unprepared when June comes to an end.

I like to have a really clear, visual representation of the year ahead, so I use multiple calendar layouts within my Future Log spreads: there’s a mini calendar at the top of each month, so I can see the structure of each one easily, then I have a vertical calendar beneath to write in any important dates. On that vertical calendar, I like to highlight the weekend dates, just to help me visualise each week. In this particular edition of my Future Log, I used a different colour for each month, to help separate them out.
Tennis Schedule + Results

Now, onto my beloved Tennis Schedule/Results spread, for which I use 3 whole double-page spreads in my journal (worth it). I trimmed down the centre pages and rounded out the corners using a corner rounder (much easier than trying to use scissors!). I then wrote the heading for the whole spread across those two trimmed down pages, as pictured above.

I used the same layout for my tennis spread as always: ATP tournaments are on the left-hand side, while WTA tournaments are on the right. The numbers down the middle represent the weeks of the schedule, then I write the specific start dates of the respective tournaments in the columns on either side. I write the location/name of the tournament in the next column out, then the final column on each side is left empty for the surname of the respective winners.

Because there are so many tournaments in a year, I spread this table out over both remaining pages of the spread: so January-March is on the left-hand spread, while April-June is on the right-hand spread.
I also added in my code for what level of tournament each one is (plus a little added colour, to match in with the rest of the spread): 1/4 circle = a 250 tournament, 1/2 circle = a 500 tournament, 3/4 circle = a Masters 100 and a full circle = a Grand Slam. A star represents a different format of tournament, such as the United, Davis or Billie Jean King cups.
Year in Dots

I didn’t set up a Year in Pixels spread in my last journal, because I just wasn’t keeping up with it, but it is something I enjoy doing and I like having it there for reference, particularly in terms of my physical/mental health, so I’ve decided to give it another go this time around.
I’ve changed up the layout slightly by using these mini calendars, rather than one big grid— a bit like a habit tracker. I feel like I’ll be able to fill in the spread more efficiently this way, but we’ll see how it works out. Because I’ll be using my Kuretake pens to fill this out, each ‘pixel’ will be more of a ‘dot’, so I’ve opted to call this spread my ‘Year in Dots‘ instead.
One of the problems I found with the Year in Pixels spread was that when I’d have longer periods of ill health, I’d have to keep the context surrounding that period in my head, as I had nowhere to note it down. For example, I might have had 7 ‘ill’ days in a row, but it would be because I had a virus or because I had had a particularly busy day the week before. I decided to use the right-hand page of this spread to write down any of this information, so I can keep everything in perspective.
Appointments + Prescriptions

Next up, we have a page for keeping track of my Appointments. In this table, I can write down the date of the appointment, the type of appointment and any notes on what was discussed, management plans and the like.
Next to that, I have my standard Prescriptions page. It can be hard to keep track of prescription medications: when you’ll run out of them and when you need to reorder them from the pharmacy, so this spread helps me do that. On the coloured dots on the far left, I’ll write in the date that I am filling out the table. After that, each medicine is assigned to a column, in which I fill out the number of tablets I have left, the number of days that corresponds to and the date that I will run out of my supply.
This takes a little while to setup, and a little while every now and then to fill out, but I just do it whenever I get a new set of prescriptions, so I can always feel confident that I’m not about to run out without realising! It really does make a huge difference.
Blog Planning

Next, we have my Blog Planning spreads. On the left-hand page, I keep track of some general, blog-related info. I like to keep a note of my Instagram growth every month, so there’s a section for that on the left, and the HEX codes of my blog colours, so they’re always accessible if I need to make any graphics (the section for that is on the right). Beneath that, I have a space for any general notes.
On the right-hand page, I have my master list of blog posts. In the first column, I’ll write in the post date, then, in the second column, I’ll write in the title of the post.
Ideas

I don’t like too much structure when it comes to my Ideas spread, so I’ve kept this one super simple: just a simple border, with the title written on it. I use this as a kind of ‘brain dump’ style spread, so I can just jot down any ideas I may have, at any point, without worrying about making it looking neat or orderly.
Bullet Journal Planning + Wishlist

Now we come to my Bullet Journal Planning page, where I can note down any potential theme ideas for the year ahead. I sometimes find it hard to pick a theme, so having a list that I can create/add to throughout the year makes it much easier. A lot of my theme ideas are month-specific, so I laid this spread out as a table, with one box for each month of the year. However, I also have a space for ‘miscellaneous’ spread ideas at the top, in case I have any ideas that don’t necessarily have to be used for a particular month.
Next to that page is my Wishlist spread. Unlike my Ideas spread, I do like to separate my Wishlist out into categories, so I’ve separated this spread into 6 boxes: one each for stationery items, entertainment products, hair/skin products, clothing, homeware and other, miscellaneous products.
Finance + Knit & Crochet

I like to keep a general record of my Finances, so, on this next page, I have one table to keep track of my savings and one to keep track of my income streams. In the savings table (top), each row corresponds to a month, then there are columns for income, expenses, the amount I have saved that month and the total sum of my savings since January. In the income stream table (bottom), I just have 6 spaces (one for each month of the year), to note down where my money came from each month.
Alongside my Finance page, I have a space to keep track of my Knit & Crochet Projects. While I do use Ravelry to keep detailed notes of each project, I do also like to keep a general record in my bullet journal as well, so that I can easily look back over all of the projects I have completed/started in each 6-month period.
TV + Reading Trackers

Finally, I have my Entertainment trackers. On the left-hand page, I have my TV Tracker, where I keep track of the TV series that I’m watching and how far along in them I am. For each series, I’ll write down the title of the show, then use my Kuretake pens to add a corresponding number of dots to the number of seasons it has. As I watch each season, I tick it off.
Then, I have my Reading Tracker. I mainly use Storygraph to keep track of my reading habits, but I do like to have a record in my planner too. I’ve set this one out in a table format, so the first column is for the number of the book (I record this starting in January, so the first book I read in the new year will be #1, the second #2 and so on), the second column is for the title, the third for the date I started reading it and the fourth for the date I finished it.
Final Thoughts

Overall, I’m so, incredibly happy with how this setup turned out. It feels like the perfect balance of colourful and minimal, fun and useful, so I’m really excited to see how it works for me over the next 6 months. While it did take a little while to stamp all the little dots, I actually found the process quite therapeutic— I just put the TV on and stamped away in a little repeating sequence of the colours and, once I’d done that, each spread was super quick and easy to finish off.
I hope you’ve enjoyed reading about my 2025 setup! Let me know if it gave you any ideas for spreads in your own bullet journal!
Gemma
xxx