Welcome to the final day of Wedding Cake Week!
Today, I want to do a general overview of the process of making a wedding cake as a whole: this was my first time making a cake for any big event (let alone a wedding!) and I definitely learned a lot!
If you’re planning to make a wedding cake, I hope this post helps you out!
Table of Contents
- Minimising Stress
- Timings/Schedule Planning
- Ideal Wedding Cake Recipes
- Fillings
- Transport Boxes
- Cake Boards
- Cake Dowels
- Smooth Sides
- Essential Tools
- Final Takeaways
Minimising Stress
Look, making a wedding cake is never going to be a stress-free experience (is anything to do with weddings ever stress-free?), but the aim should always be to minimise the stress as much as possible!

Whether you’re making a cake for a friend/family member like me and thus need to keep things lowkey enough that you actually have the mental capacity to enjoy the wedding, or if you’re making it for a wedding you aren’t actually attending and just need to keep yourself from going completely insane, it’s definitely an important factor!
With than in mind, here are a few little crumbs (see what I did there?) of advice:
- Don’t take on too much
I’m so guilty of this: wanting to do way more than I actually have the mental space/physical capacity to do! Everyone has limits, even in baking: know yours (and honour those limits!).
- Practise
Taking the cake from an unknown concept in your head to an actual, physical bake in front of you will help take some of the pressure off you as the day draws closer. Pretend you’re on Bake Off and do a full run-through of the cake in advance: this will give you time to iron out any problems, troubleshoot certain things and remind yourself that you are capable of this!
A wedding cake is, after all, just a cake: it feels very different from a regular cake, but if you can make a cake, you can make a wedding cake.
- Get as much done in advance as possible
The last thing you want to be doing is panic-baking at 2am on the day of the wedding. Don’t do that to yourself! Admittedly, sometimes things happen: accidents occur, things don’t go to plan etc., but having a clear schedule that allows plenty of time for each stage of the process will help you avoid this.
Which brings me on to…
Timings/Schedule Planning
Speaking of getting as much done in advance as possible, something that will really help with this is having a clear schedule, planned out ahead of time. When you’re making that schedule, there are a couple of things you might want to consider:
- Other commitments
Particularly if you’re attending the wedding, it’s likely you’ll have a bunch of other commitments that need attention in the lead up to the event. Make sure you’re aware of those commitments and schedule in plenty of time for them as well as the cake (and time/space to look after yourself, too!).
- Order of bake
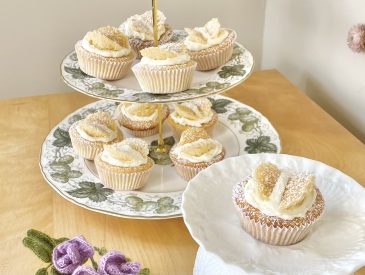
You can streamline your process by placing the tasks in a specific order. For example, the lemon cake I made had three separate components: the curd filling, the lemon buttercream and the cake itself. I knew the curd filling would have to chill for a while before I could use it, but I also knew I could make it advance and keep it in the fridge until I needed it. On the other hand, I knew that, to preserve the moistness of the lemon cake, I needed to bake it as close to the day as possible, then assemble AND decorate it as soon as it was cool. All of these little things will play an important role in how you allocate your time.
- Making cake layers ahead of time
Lots of people swear by freezing cake layers, but I have to admit, I’ve never actually tried it! For this particular cake, I found that making super moist cakes and aiming to fill and frost them the same day they were baked worked really well, because the icing acted as a barrier, protecting the sponge from the air and stopping it from drying out. However, if you want to make your cake layers one day, then ice them the next, I did find that tightly wrapping each individual layer in cling film and leaving them at room temperature was a pretty good substitute.
Ideal Wedding Cake Recipes

My main takeaway from this process is that the recipe you use matters. Obviously, the most important thing is that it tastes good, but there are a couple of other things you might want to take into consideration to make your life easier:
- Cuts well
For starters, the way wedding cakes are cut is different from a regular cake: instead of slices, they tend to be cut in ‘slabs’, which are then cut into fingers, which can then be cut down into single portions. For the best results, you want a cake that cuts well, because a neat slice will make your cake feel extra professional (and cause less drama on the day!).
- Moist sponge with moderately dense crumb
Additionally, a moist cake with a moderately dense crumb will make your life SO much easier. A moister cake can be made further in advance, because it won’t dry out as quickly, which means less stress for you! A moderately dense crumb will make for a cake that is more stable: it’s not going to collapse on itself or crumble (and, as a bonus, it fulfils the aforementioned clean-cutting criteria!). I say moderately dense because a ‘dense’ cake isn’t necessarily a good thing: if you can, find a recipe that is still fluffy and light, but has more of an American-style texture, that is, not too airy or crumby, but tight and soft.
Fillings

I only filled one of these cakes (the lemon tier, which I filled with a lemon curd), but it definitely added an extra layer of complexity to that tier. Not only does it add an extra couple of stages to the process, filling a cake does have an effect on its structural integrity. On the other hand, it also contributes massively to the flavour, so there are pros and cons!
If you do want to add fillings to your wedding cake, here’s what I’d recommend:
- Practise
That word again, but it’s important. I hadn’t used fillings in cakes many times before this, so I didn’t have much experience in that area. The more you practise, the more you’ll understand how to reduce the likelihood of encountering problems (Leaning Lemon Cake of Pisa, I’m looking at YOU).
- Don’t make the filling too liquid
I added an extra egg yolk to my lemon curd, to make it thicker and less runny. Steps like this will help your cake stay structurally sound. Try not to use any fillings that are too thin, liquid or runny, as this will just cause chaos.
- Use a buttercream ‘dam’
I did this and I may not have done it perfectly but I know things could have been 100x worse if I hadn’t! By piping a layer of buttercream around the circumference of the cake before adding the filling, you create a barrier that (theoretically) keeps the filling inside the cake, which allows the cake to keep its structure and prevents the filling from seeping out and potentially ruining the frosting on the sides.
- Keep the buttercream quite stiff for the filling stage
Speaking of buttercream, when it needs to act as a barrier to keep the filling in, you need it to be quite stiff and firm: if it’s too runny, it won’t form a strong enough barrier and your filling might still spill out (I know this, because that is exactly what happened to me). I’d recommend not adding all of the liquid ingredients at first, assembling the cake and THEN adding the remaining liquid and thinning out the buttercream before applying the crumb coat and the final icing layer.
- Chill filled cakes more frequently during the assembly process
I didn’t do this, but I should have! Filled cakes need a little bit of extra love, so I’d recommend chilling the cake throughout the assembly process: after the first two cake layers AND after the third layer. This will keep the cake nice and firm, helping to prevent any slipping and sliding.
Transport Boxes
Inevitably, you’ll need to get your cakes from your home to the venue and having a good, strong box to transport them in will save you a whole load of problems and stress. For my cakes, I used these boxes and I would really recommend them: they’re strong and durable, they have a handle (though I would always recommend carrying them with BOTH the handle and a hand underneath the base for added support) and they open out for easy removal.
If you’re picking a different cake box, though, here are some things to consider:
- Strength
Wedding cakes, particularly the bigger ones (and particularly if they’re stacked) can get heavy, so you need a box that is strong enough to hold that wait without tearing. Look for words like ‘heavy duty’, ‘extra strong’, ‘corrugated’ and ‘cardboard’ in the description.
- Size
For these cakes, I picked boxes that were 2 inches large in size than the diameter of the respective cake tins. Don’t get a box that is the same size as your cake, because, although it sounds like it will be good for stopping the cake from slipping around, the icing on the cake will add a fair amount of width and your cake probably won’t fit in the box once its decorated
Cake Boards

Speaking of the cakes slipping around inside the boxes, I used a (slightly unorthodox, I suppose) method to minimise this. I assembled each cake directly on a cake ‘drum’ (a thick version of a cake board) that was exactly the same size/shape as the cake layers. This meant the cakes would be really easy to manoeuvre at the venue and transfer to their stands. When I iced the cakes, I covered the edges of the cake drums too, so they still looked clean and crisp— as if there were no drum at all.
Before I started assembling the cake on the drum, though, I actually attached the drum to a larger, thinner cake board, the exact size and shape of the transport box for that cake. I just used some paper adhesive stickers (folded over on themselves, so that they could act like double-sided tape) to stick the two boards together. This meant that I could slide the cake super easily into the transport box and it wouldn’t slip around in that box, despite the extra space.
When it was time to separate the two boards, it was really easy to just slide a cake lifter/palette knife between them and, in the process, slice through those paper adhesives. Then, I could use the cake lifter to pick up the cake on the cake drum and transfer it to its stand.
As I said, this is kind of a weird method, but it worked so perfectly: I’d definitely do it like this again!
Cake Dowels

Ah cake dowels, my frenemy. I’ve never actually used cake dowels before and they aren’t strictly necessary for these cakes, seeing as they weren’t stacked on top of one another, but I just felt that the extra level of stability and security would give me a little more piece of mind.
And it did! Until it… didn’t.
To add the cake dowels, I just assembled the whole cake, then positioned four dowels evenly around the cake, about halfway in from the sides. I pushed them in, marked where they came up to, then pulled them up a little, trimmed them down with some kitchen shears and pushed them back down, so they sat flush with the top of the cake. I then chilled the cake before adding the crumb coat, chilling it again and adding the final layer of icing.
HOWEVER, I did encounter a slightly dramatic problem on the morning of the wedding, when, as a result (I guess?) of the heat in the AirBnB where we were staying, and the motion of the car on the ride down, the hardened icing on top of each dowel visibly bulged up (so sorry, what an awful word) on the surface of the cake. I’m not sure if this was a result of the cake sinking down around the dowels, the air inside the dowels (they’re hollow) causing chaos, or the dowels themselves rising up, but it was NOT the vibe at 9am on the morning of the wedding.
Luckily, it was relatively easily fixed: just in case it was an air problem, I used a pin to pierce the icing, then pressed down on the bump gently with the flat edge of a palette knife to level the icing back out. For the most part, this worked pretty well, but in some places I did have to add a bit more icing to the top to conceal the mess. Overall, if I could avoid that, I definitely would, so if I ever find out exactly what happened, I’ll be sure to let you know!
In the meantime, though, it did teach me a couple of dowel-related lessons:
- Always keep a pin in your emergency baking kit
Whether this was an air bubble problem or not, air bubbles are often a problem with cakes, so it’s good to have a pin handy to burst them without too much of a noticeable impact!
- Always bring extra buttercream
I brought a (sealed) piping bag filled with each of the three buttercreams I used for the cake with me to the venue, just in case of an emergency like this (and boy, was I glad I did!).
- Potential workaround: add the dowels after the first chill
If this situation was a result of the cake sinking down slightly around the dowels, I wonder if adding the dowels later, once the cake has had more of a chance to settle under its own weight, would help? Admittedly, I wouldn’t want to leave it too long (because I want to get the final icing layer on as soon as possible, to lock in the moisture!), but after the first chill (just before the crumb coat) could work? I’ve suggested this in the recipes, because I think it seems like the best course of action.
- Keep the cake as cool as possible
Our AirBnB was quite warm and none of us thought about the impact on the cake, but we definitely would next time! The cakes are fine at room temperature, as long as that room temperature isn’t warm warm, so keep the temperature of your house/accommodation in mind.
Smooth Sides

Confession: I’ve never successfully iced a cake with smooth sides before, so I was a little intimidated by this process. The finished cakes are by no means perfectly smooth, but they’re close enough (and much better than anything I’ve managed in the past), so I’m happy!
There are a few things to remember when aiming for smooth sides:
- You need the right equipment
If you want smooth sides, you really do need an icing smoother (or a similar, thick ruler with at least two, perpendicular, square sides). I used this one from Wilton and it really was a game changer. You also definitely need a turntable!
- Turn the turntable, NOT the scraper
Keep the scraper steady, holding it still with the bottom edge held flush to the table/bottom cake board and the side edge held upright against the cake, at a slight acute angle. Turning the turntable, not moving the scraper, will give you a cleaner, smoother finish because it allows you to hold the smoother in the right position, with the same amount of pressure all the way around. Additionally, if you can find a friend to turn the turntable for you (thanks, Dad), you’ll get an even smoother finish!
- Repeat as many times as necessary
Inevitably, after the first pass around with the smoother, you’ll end up with some uneven sections, where there wasn’t enough icing in the first place to create a smooth layer. No worries: just apply more icing to those areas and go around with the smoother again. You can repeat this process as many times as you need until you’re happy with the results, so just take it step by step and repeat until it’s how you want it!
Essential Tools
Especially for a pretty simple cake like the one I made, you don’t need a ridiculous number of specialist tools. However, there are some specific tools that I would definitely classify as essential if you’re embarking on your own wedding cake journey:
- Offset palette knife
This is my staple baking utensil: it’s great for spreading icing and fillings (also tempered chocolate, but that’s not particularly relevant for this cake). I’ve had my 4-inch one for YEARS and I bought an 8-inch one especially for this project (that chocolate tier was big!).
- Icing smoother
As I mentioned above: if you want smooth sides to your cake, you really do need to invest in a good icing smoother. I’ve tried using a regular palette knife, but it just doesn’t have the stiffness and perfect angle that a smoother has.
- Turntable
Turntables are invaluable tools for all manner of baking undertakings: particularly wedding cakes (and especially if you want smooth sides!). While I do have a specific baking turntable, more often than not I just use a regular Lazy Susan (is that a thing for everyone out there? It’s like a wide turntable that you use to serve things on at the dinner table?!). This was particularly helpful for the big chocolate tier, which, I fear, was actually bigger than my cake turntable.
- Non-slip fabric
If you’re using a turntable, I would also recommend getting/finding some non-slip fabric, because you don’t want your cake to slip off the surface if you spin it too fast (been there)! I just use some knitted dishcloths, so you might already have something in the house that would work for this.
- Piping bag + nozzles
Obviously, if you plan to add piped detail to your cake, you’ll need a piping bag and a suitable piping nozzle, but even if you aren’t planning that, a piping bag and a large, round nozzle (I used a #1A tip), is a really handy tool to ensure your buttercream layers are even and consistent. Just pipe a spiral of icing right over the surface of the cake, then smooth it out with an offset palette knife and you’ll have perfectly level, even layers every time.
- Cake lifter
Wedding cakes can be heavy and the last thing you want to do is ruin your beautifully smooth buttercream sides with fingerprints, so a cake lifter is your friend. You can slide it right under the cake and lift it from there to transfer it to the serving plate, but it’s also really handy for moving cake layers around before you assemble the cake.
Final Takeaways

So, I think even I can’t ramble on any longer: that is, quite literally, everything I learned while making my first ever wedding cake. In case you got bored and gave up halfway through (I wouldn’t blame you), here are the main takeaways:
- Practise lots (for peace of mind).
- Use the right recipe.
- Make a schedule.
- Get as much done in advance as possible.
- Take extra care when adding fillings.
- Invest in good cake boxes for transporting.
- Stack cake boards/drums for extra security.
- Use cake dowels, but be wary of them.
- Always bring a pin, palette knife, skewer and extra icing to the venue.
- Ice the cake as soon as possible to seal in the moisture.
- Keep the finished cake cool.
- Turn the turntable, not the icing smoother.
- Use a piping bag for even buttercream layers.
Anddddd I think that about covers it.

I hope this post has been helpful and I hope that you’ve enjoyed Wedding Cake Week! We’ll be returning to regular, non-wedding cake related content from now on!
I’ll see you then!
Gemma
xxx