
Can you believe we’re almost halfway through 2023 already? I definitely can’t but, then again, I still feel like it’s 2020… Anyway, July is fast approaching and, for me, that means many things: sun, Wimbledon and, most significantly in the context of this post, a new bullet journal. Typically, I can fit about 6 months into each of my journals, so, like many bullet journallers, I have to migrate into a new journal every July. This process always takes me quite a bit of time, but it is so worthwhile! Today, I’m walking you through all the spreads that I’ve set up in my new bullet journal for July-December 2023.
Table of Contents
- Basics
- Equipment
- Initial Pages
- Health Section
- Blog Section
- Finance Section
- Books & TV Section
- Final Thoughts
Basics
New Journal for July-December
For the last 6 months, I’ve been using the Sakura Polaroid A5 Dot Grid Journal from Coral & Ink, a small business that specialises in kawaii stationery, which is based here in the UK. You can read more about that journal in my 2023 Bullet Journal Setup post, but, in short, I really loved it! The gilded edges are so pretty and the paper is really high quality- I used watercolour paint, markers and pens in my setups over the last 6 months and didn’t experience any bleeding through the pages (which is a big win in my books!). I also had a lovely customer experience with the company. My only slight problem with the journal was that I had to stop using the ribbon bookmarks, because they started to unravel after just a little while of use.
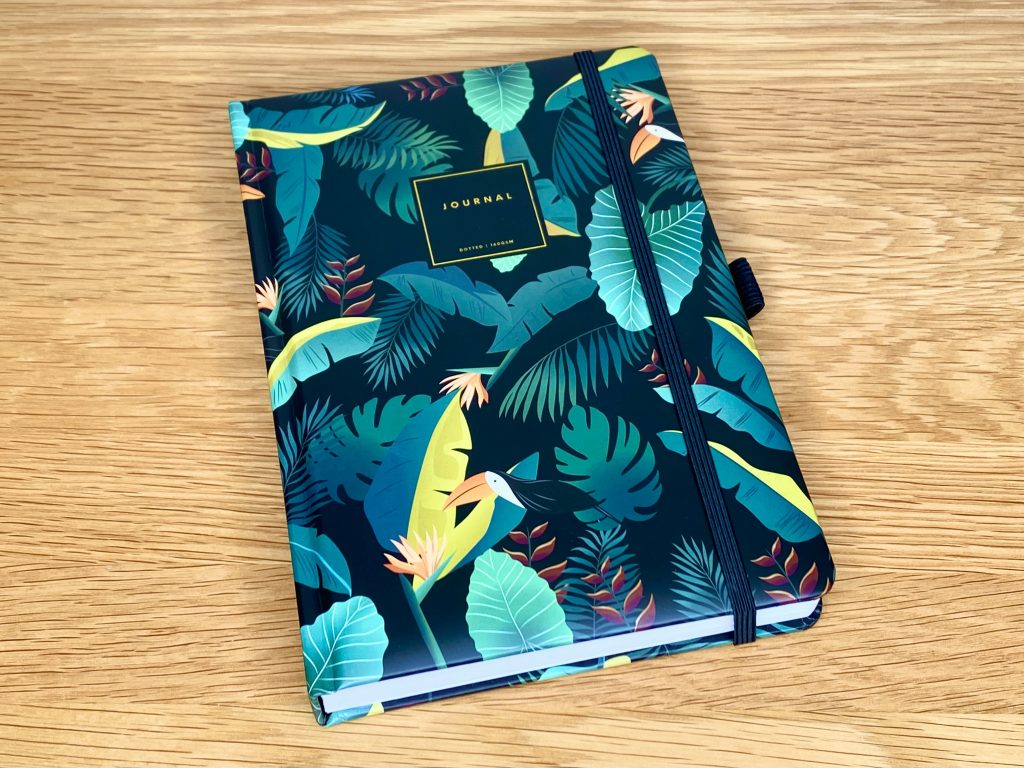
For the next 6 months, I’ll be using the Jungle at Night Journal, from Scribble and Dot. I’m a big fan of the Scribble and Dot journals- in fact, the majority of the journals I have used in my time bullet journalling have been from the brand! One thing to note about the Scribble and Dot journals though- I have noticed a discrepancy in the paper among the journals. The paper in my first journal (the pale blue dachshund journal– which I think may have been discontinued from their website? So sad- it was so cute!) had a much more off-white tone, whereas the Jungle at Night Journal (and indeed the yellow honey bee journal, which I have used twice!) have bright white paper. This isn’t a major problem, but it is definitely something to bear in mind. Nevertheless, this new journal is so pretty. It’s a different style to the journals I usually prefer, but it’s cheery in a subtle, sophisticated kind of way and I’m very excited to start using it!
Inspiration + Concept
If you saw my 2023 Bullet Journal Setup, you’ll know that I like to include a large number of spreads at the start of each of my bullet journals. There are two main reasons for this: firstly, I use my bullet journal to keep track of multiple different areas of my life. As a result, I need lots of different, targeted spreads to make my bullet journal fit my specific needs. Secondly, I prefer to keep the contents of my monthly setups as limited as possible. When I have a large number of varied spreads at the start of each journal, I need fewer spreads in my individual monthlies. My energy levels throughout the year are super inconsistent, so having more flexibility with my monthly setups helps to alleviate some of the pressure that comes with setting up a bullet journal. If my energy levels are particularly low one month, I can create a super simple, limited setup that preserves the functionality of my journal, without wearing me out. If my energy levels are higher, I can channel that extra energy into the theme for the month and unleash my creativity, instead of using it up on the contents.
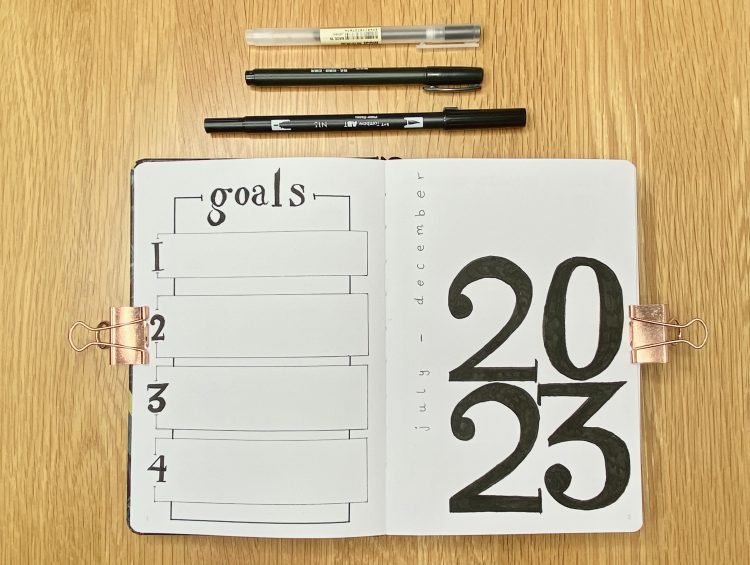
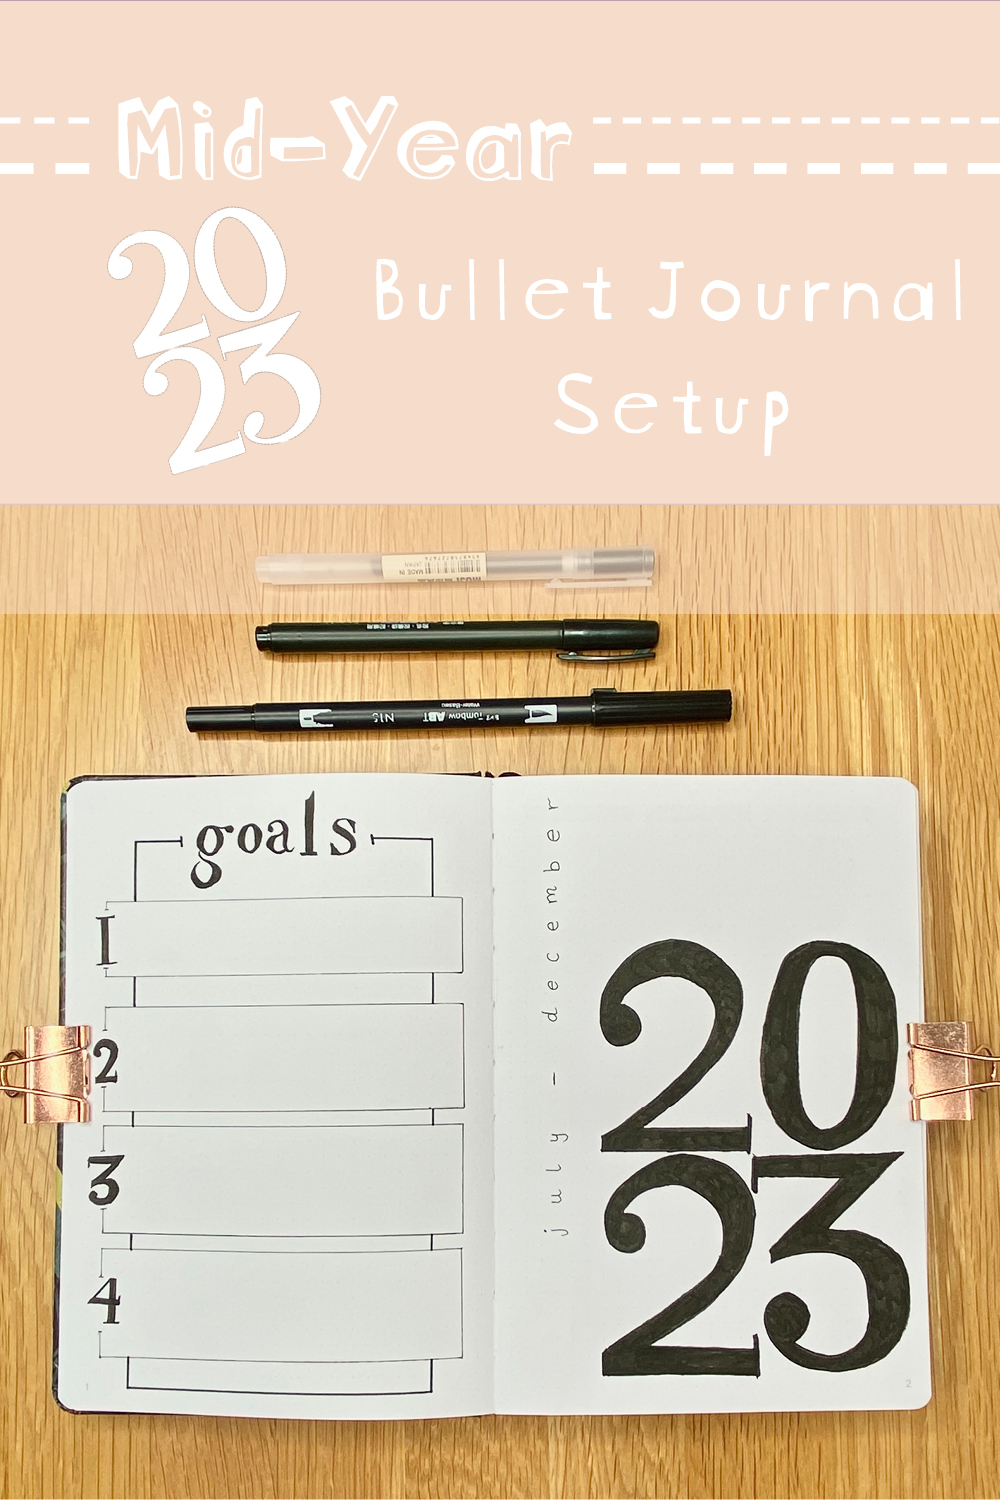
Because my mid-year bullet journal setup is so extensive, then, I decided to utilise a much more minimal design for my new journal. I was particularly inspired by this setup by @journalspiration on Instagram, as well as the exclusively black & white spreads by @supermassiveblackink on Instagram. For my design, I used a bold, traditional font (which I loosely based on Didot– if you’re interested in that kind of thing), using only the lowercase letters for a softer feel. Throughout the setup, as you’ll see, the headings serve as the main decorative element. For non-header text, I used a simple lowercase print, either using my Muji 0.38mm or my white Sakura Gelly Roll on top of my black Tombow Fudenosuke. The white Gelly Roll won’t write super well on top of all pens (including the Tombow Dual Brush pens, as I found out), but I found that I could write on top of the Fudenosuke with it perfectly- the white ink was still opaque and defined.
Layout
Because I have so many spreads within my new bullet journal setups, I like to split them into sections. At the start of the journal, I have a number of general spreads: mainly calendars, for keeping track of dates, appointments and tennis (obviously), with a couple of goals/master to-do lists as well. I then split the rest of the spreads into 4 sections: Health (both mental and physical), Blog (where I plan/organise my content for this blog!), Finance and, finally, Books & TV. Each section has a mini ‘cover page’ and the pages within each section are split up by tabs. I like to use tabs in my setups to divide up the pages and make it more easy to access certain spreads. This time around, I used my standard tab shape and coloured each tab black, using my Tombow Fudenosuke Pen.
Now we’ve covered all the basics, we can get into the setup itself, starting with the equipment I used…
Equipment
- Muji 0.38mm pen, black.
- Tombow Fudenosuke Brush Pen, Hard Tip, black.
- Tombow Dual Brush Pen, black (N15).
- Sakura Gelly Roll, 10 Bold, white.
- Pencil
- Ruler
- Eraser
- Scissors
Initial Pages
As I mentioned previously, my initial pages are mainly a selection of calendars, which I use to track upcoming dates, appointments and, most importantly, tennis matches (more on that later). I also have a cover page (this is not only for aesthetic reasons- it also makes it easier for me to reference previous events in my old journals if I can quickly see which dates each journal contains. Finally, I have a Master To-Do List and a space to write out some goals for the next 6 months.
Inside Cover: Master To-Do List + Name Plate
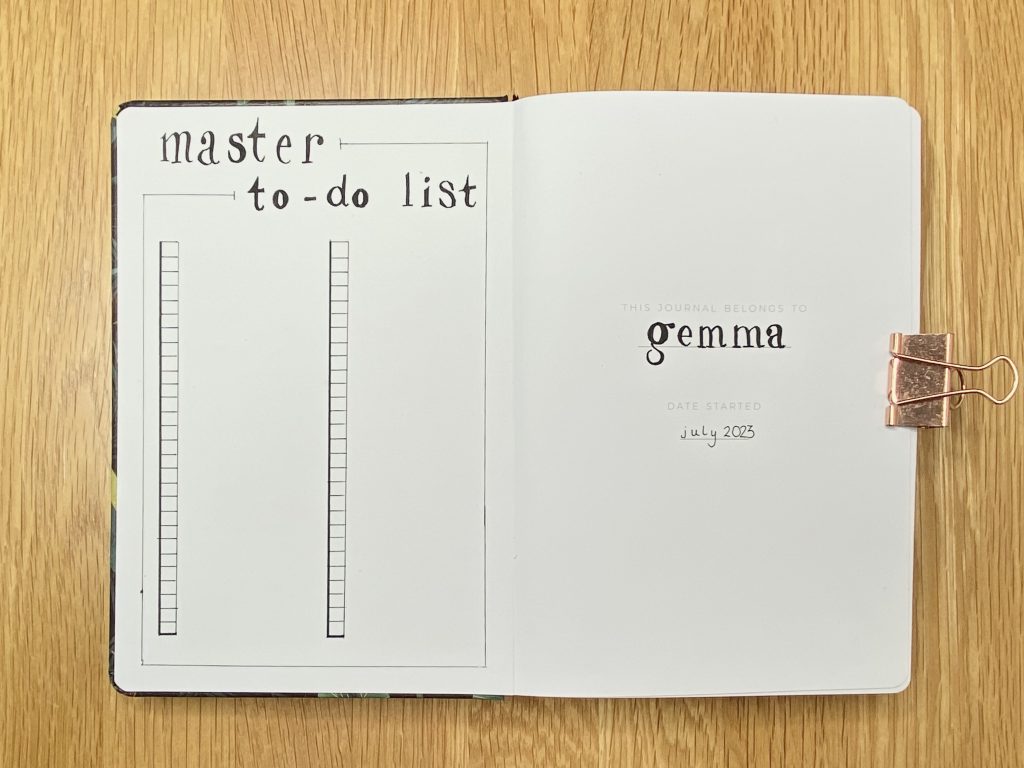
Most journals come with a space to write your name on the very first page, and this one from Scribble and Dot is no different- I wrote my name in the font that I use throughout the setup.
I didn’t want to waste the space on the inside cover, so I decided to put my Master To-Do List there. This is a new spread for me- I intend to use it to jot down bigger tasks that don’t necessarily need to be done immediately, but that I would like to do at some point (things like sorting through my wardrobe or organising my bookshelves).
Goals + Cover Page
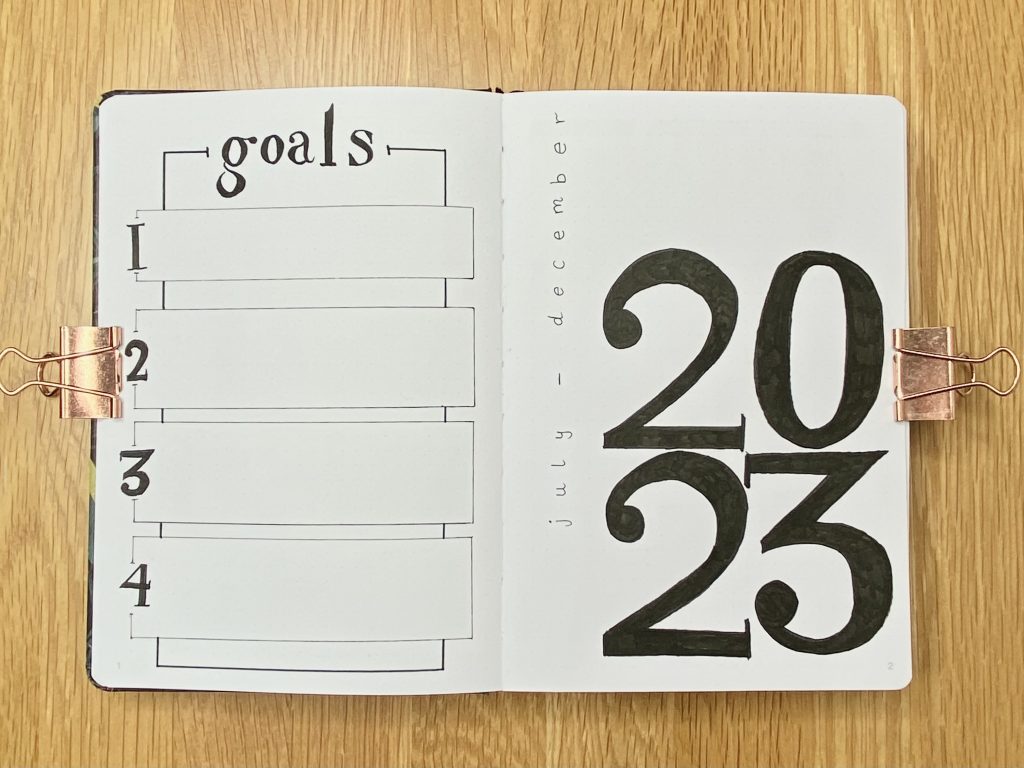
For my Cover Page, I tried to mimic the layout of the cover page in my previous bullet journal, just using the more minimal design of this setup. Doing this ties the two journals together, so, even though a new journal always signifies a fresh start to me, it still feels like the journals form two halves of one year.
Opposite my Cover Page, I put a space for Goals. I like to include this spread in my journals to keep me on track and feeling motivated, but I often find that my goals end up being unhelpfully vague. This time around, I’ve made 4 defined sections, which I will fill with 4 defined, attainable goals. I’m hoping that limiting myself in this way will make me more productive in my attempts to achieve those goals.
Future Log
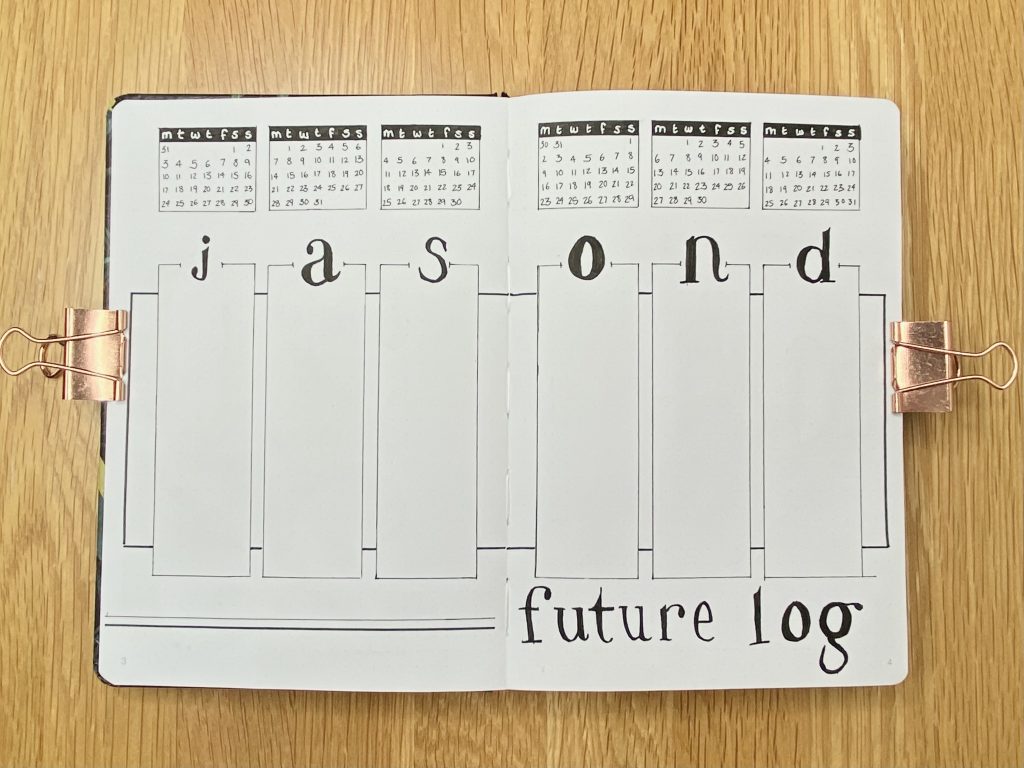
The next double-page spread is my Future Log– essentially a detailed calendar for the next 6 months. The mini calendars at the top allow me to visualise each month and the vertical columns underneath provide me with space to write down important dates/appointments. When it comes to filling in my larger, monthly calendars in my monthly setups, this spread is my first point of reference. I also find that this spread is particularly helpful for booking doctor’s appointments in advance, because I can see all my dates for the next 6 months super easily.
2024 at a Glance
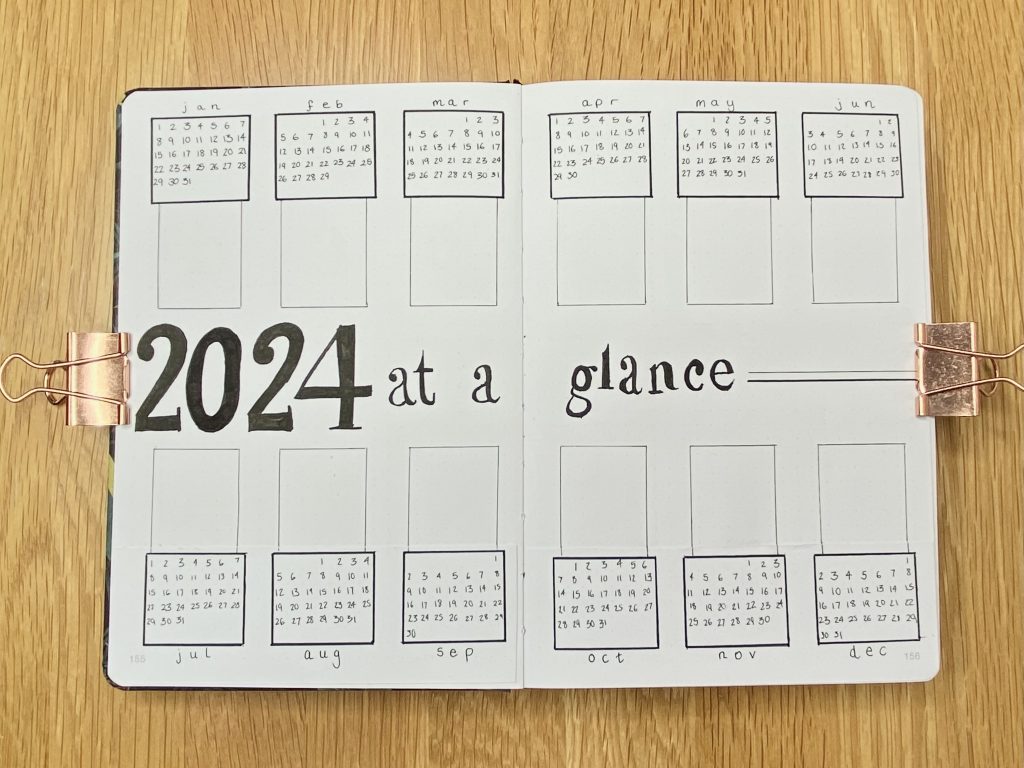
As we enter the final months of the year, appointments and bookings inevitably start to drift into the new year. It’s important for me to have a space to note these down so that I don’t feel completely lost by the time January comes around and, god forbid, accidentally miss an appointment. Enter: my 2024 at a Glance spread. Again, this spread includes mini calendars for each month, so that I can visualise the months at a glance, as well as small spaces for important events. I don’t need a lot of space per month here, because I only need to note down a couple of appointments every now and then.
If the bottom of this spread looks a bit funny to you- it’s because it is a bit funny. I have this thing where I always seem to miss out September when I am writing out the months of the year (???) and that happened on this spread. To fix it, I just removed a page from the back of the journal, cut off the bottom part and stuck it over the top using double-sided tape. No bullet journal is perfect- but it’s all about finding ways of fixing (or embracing!) your mistakes!
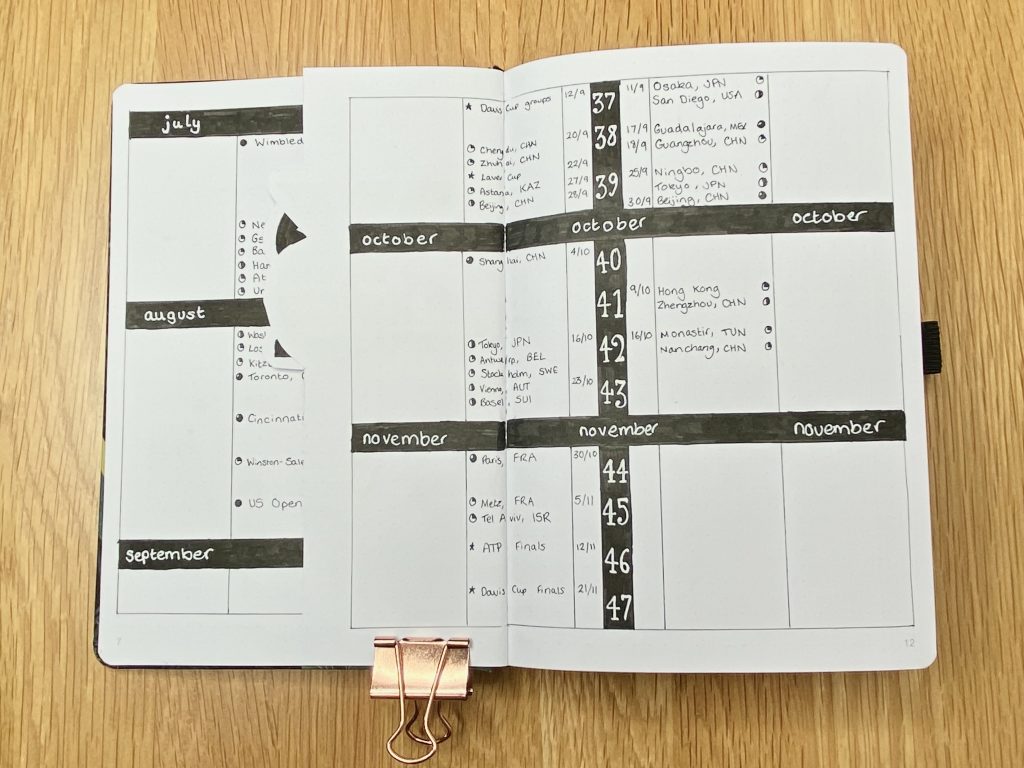
Tennis Schedule

Now we come to the part of my bullet journal that outs me as the obsessive fangirl that I really am… my Tennis Schedule. This is a spread I introduced into my last bullet journal and I LOVED IT. I like to be able to whip my schedule out when my brother asks me what tournaments are on next week, to see at a glance who has won what tournament and to be able to count down the weeks until the next Grand Slam. It brings me joy, so, naturally, I dedicate 4 pages of my bullet journal to it. #noregrets.
Also, no, I do not play tennis (I’m not even sure I could get the ball over the net), but yes, I am always watching it. I use this spread more often than any sane person could possibly imagine.
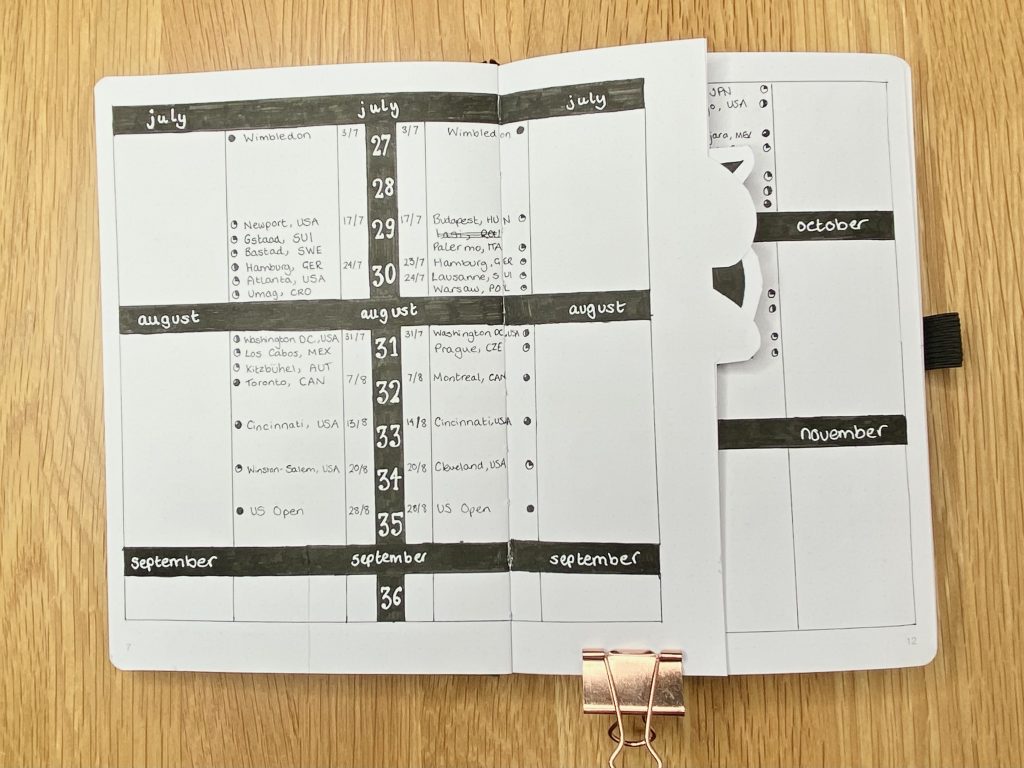
In a similar setup to my last bullet journal, I used two Dutch Doors to give myself more space. Essentially, this spread uses a table format to record all the information: the numbers down the middle represent the weeks, then the right-hand side contains information about the ATP tour (men’s tennis), while the left-hand side contains information about the WTA tour (women’s tennis). Each side contains 3 columns: one for the winner of the tournament (to be filled in after each tournament concludes), one for the location/name of the tournament and one for the date on which it starts. Last year, I used a colour-coding system to indicate the level of each tournament, but I wanted to keep this setup black and white, so I had to get a bit creative with my code: 250 tournaments are represented by a circle with 1/4 filled in black, 500 tournaments are represented by a circle with 1/2 filled in with black, 1000 tournaments are represented by a circle 3/4 filled in with black and Grand Slams are represented by an entirely black circle. Group tournaments and tour finals are represented by a star.
Health Section
Now we come to the first separate section in my bullet journal setup: Health. As someone with a chronic illness, this section is particularly important for me- it allows me to keep track of my appointments, my wellbeing and my medication.
Year in Pixels + Health Cover Page
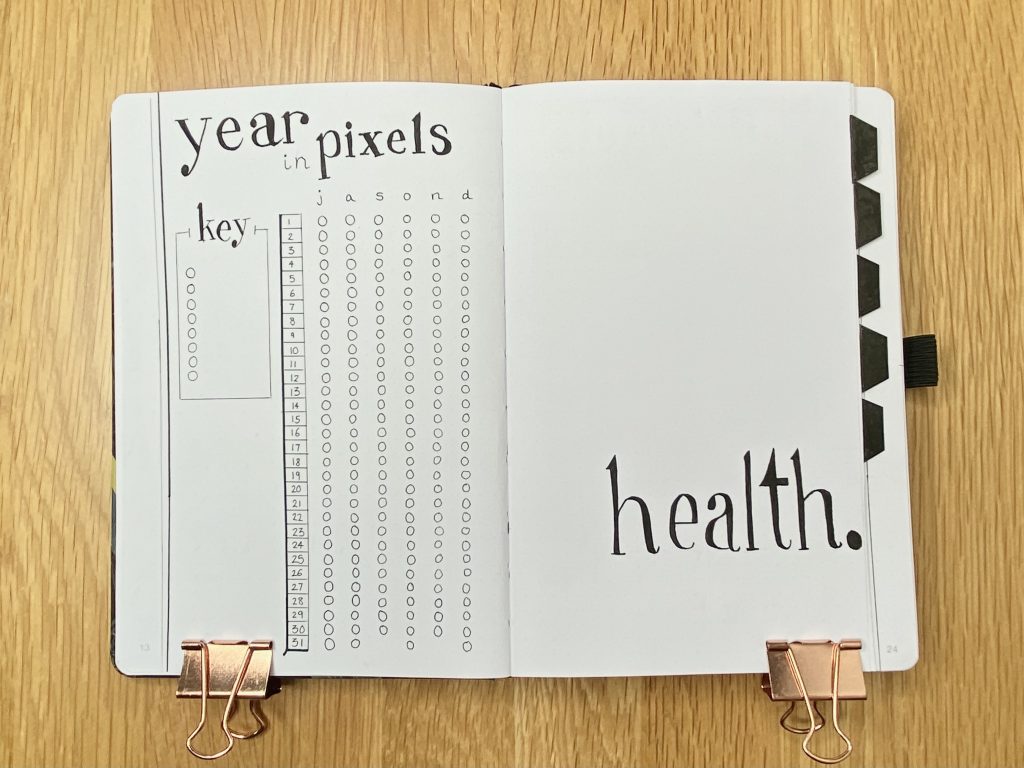
My cover page for this section (and, indeed, all of the others too) is super minimal- just the title of the section, written in the font I use throughout the setup. The cover page (and subsequent pages- until the last subsection) is cut into a slight Dutch Door to make room for the tabs.
I decided to place my Year in Pixels page opposite my cover page. This is a spread that I love to include in my bullet journals, as it allows me to keep an eye on how I’m feeling, both mentally and physically. I find this is particularly helpful for tracking things like periods of low mood/anxiety and fatigue (I often reference this spread when evaluating my medications with my doctors), but it can also be encouraging to see the more positive periods, when they come. I have always used a colour-coded system with this spread, and, even though it pains me to mar the black and white minimalism of this setup, I think I will have to continue with that in this journal. The best thing about this spread is that you can see patterns at a quick glance- without the colours, not only would my recordings have to be less specific/varied, but it would be much harder to see those all-important trends.
Exercise + Prescription Trackers
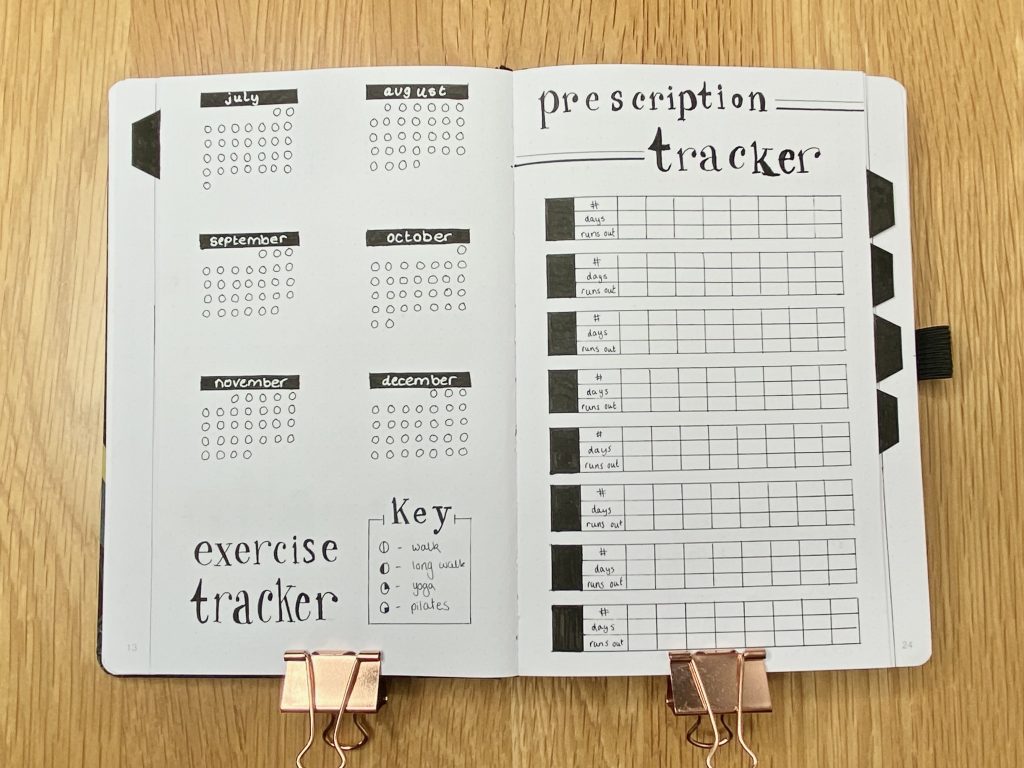
The Exercise Tracker is not a new addition to my bullet journal, but I have adapted it slightly to make it more fit for purpose. I have replaced the weekly sections I used in my last journal with more mini calendars- I am hoping this will make it easier to spot days when I have forgotten to fill it in! I have also introduced a more specific key, so that I can track my exercise in more detail.
My Prescription Tracker is exactly the same as its previous iteration. The black column on the left is for the date, then I have space to track the number of tablets that I have (on that date) of 8 different medicines (one per column), along with how many days that equates to and, finally, when that means my medication supply will run out. I fill this in whenever I receive a new lot of medicine from my chemist and, once I know when it will run out, I put a note in my Future Log, 2 weeks before that date, to order more. I tend to count all of my medications anytime I receive a new prescription- that way, if I have miscounted or misplaced a packet/tablet, I can sort the problem as soon as possible. A top tip if you decide to try this method: you can search online for ’60 days from today’ (or even ’60 days from [a specific date]) and the magic of the internet will tell you when your medicine runs out. This is much quicker and more accurate than counting the days yourself (like I did for a good long while, until I realised I am a modern woman who lives in the digital age…).
Medical Timeline + Appointment Notes
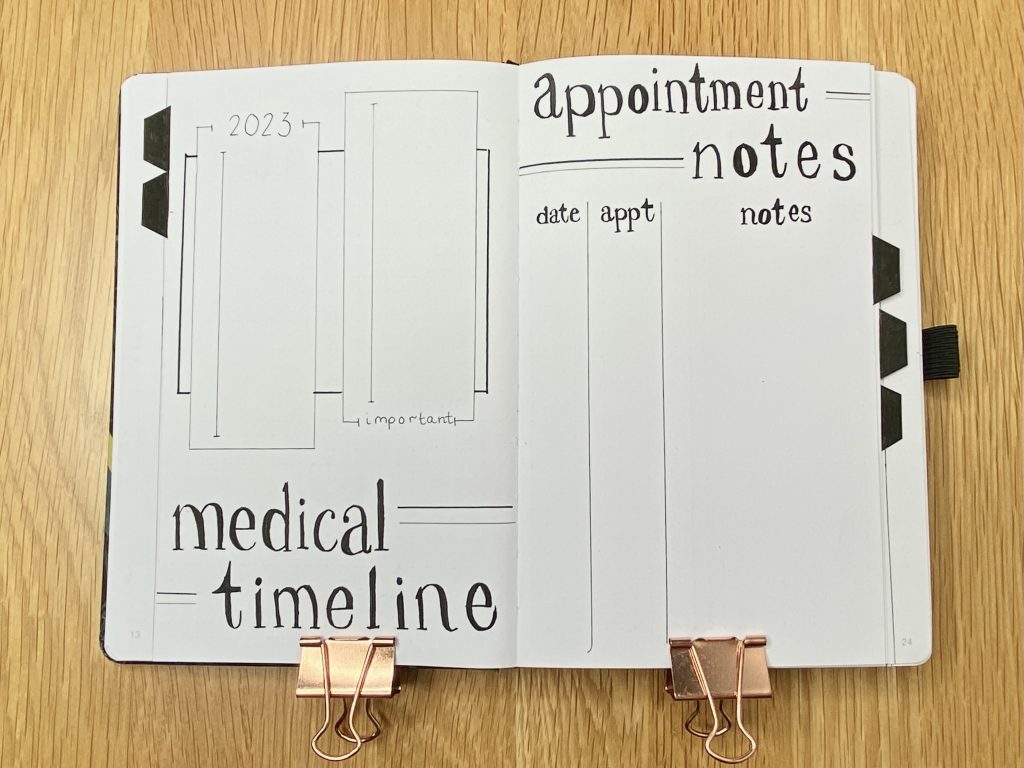
Often when you talk to doctors, they will ask you when you had a certain procedure, infusion or appointment. It can often feel a bit like a pop quiz- one you are pretty much doomed to fail because, hello, who remembers the exact dates of appointments from a year ago? Definitely NOT me. Enter my Medical Timeline spread. I have 2 sections: 2023 and Important. In the 2023 section, I will write down significant events that have happened this year. In the Important section, I will write down the particularly important events that have happened prior to this year. That way, when a doctor springs a request for some spurious date on me, I’ll be ready.
Opposite my medical timeline, I have a space for Appointment Notes. I often find that I forget what has been said in my appointments after a month or so, so I have created a space here to note down when the appointment was and the key points that were discussed during it. Hopefully, this will minimise the stress of trying to remember specific instructions/discussions later on.
Challenges
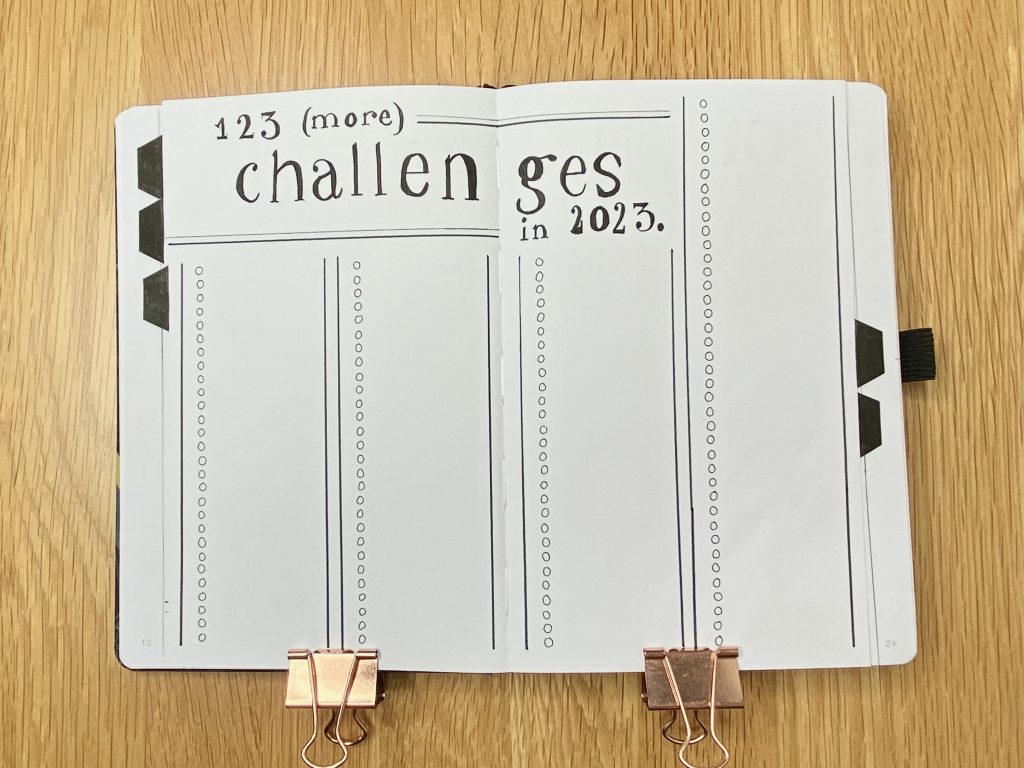
Something I struggle with a lot is feeling very anxious and letting that worry stop me from doing scary things. In my last journal, I included a 123 Challenges in 2023 spread, in which I recorded the things I did even though they scared me. Initially, I set this up to encourage myself to do more scary things, but it became a lot more than that. It was great for encouraging myself, but it was also great for giving myself a sense of pride after doing the thing. I even added in some challenges after I did them, so I could look back and see all the scary things I ended up doing. Anyway, I ended up racing through my 123 challenges, so I decided to set the spread up again in this journal, with 123 more challenges. When I complete each challenge, I will colour the bullet point next to it black.
Routine
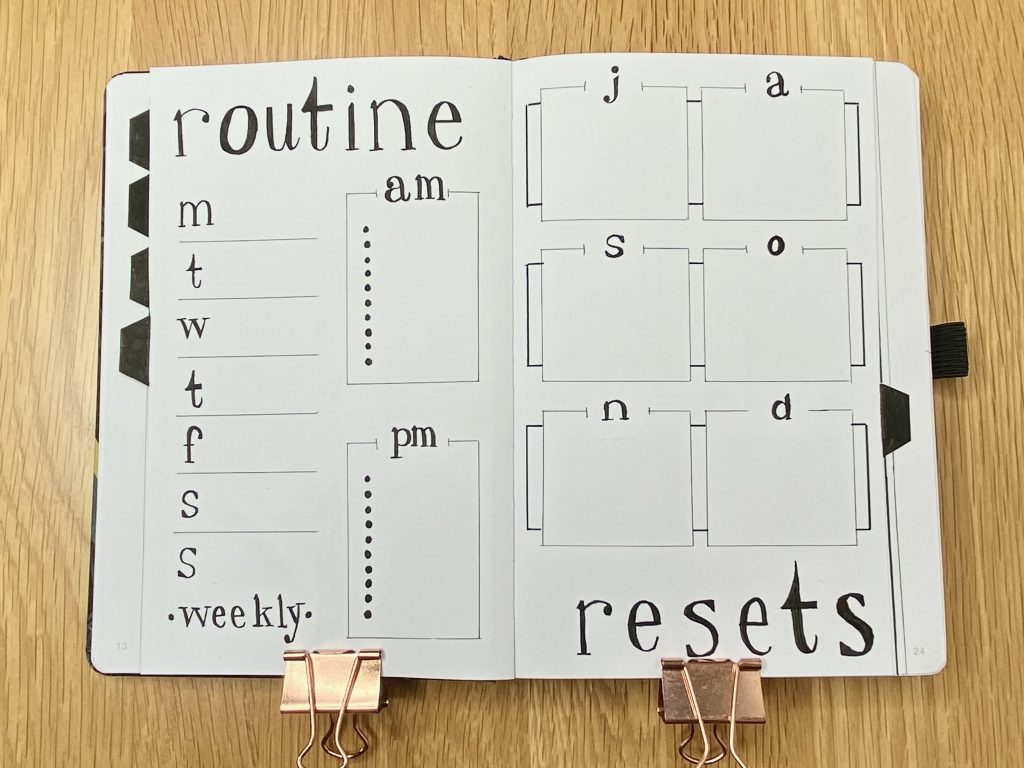
Maintaining a good routine is something that is so important for both my physical and mental health, but it is something I personally struggle with a great deal. I have introduced this Routine spread in my bullet journal to try and encourage and support myself as I try to incorporate a healthy level of routine into my life. On the left-hand page, I have a space for listing tasks that I would like to do on a weekly basis, on a set day. Beside that, I have a space for routine tasks I would ideally like to do in the morning and tasks I would like to do in the evening.
Knowing that I struggle with routine as I do, I knew that if I set a super-ambitious routine for myself, I would inevitably let it slip and struggle to get back into it, rendering this spread useless pretty quickly. Because of this, I decided to use the right-hand page as a place to re-evaluate and reset my expectations of my routine each month. This way, if I decide that one element of my routine isn’t working, I can use this space to adapt it, trial that new approach for a month and, as the months go on, I will hopefully get closer and closer to a sustainable, achievable routine that works for me.
Self-Reflection
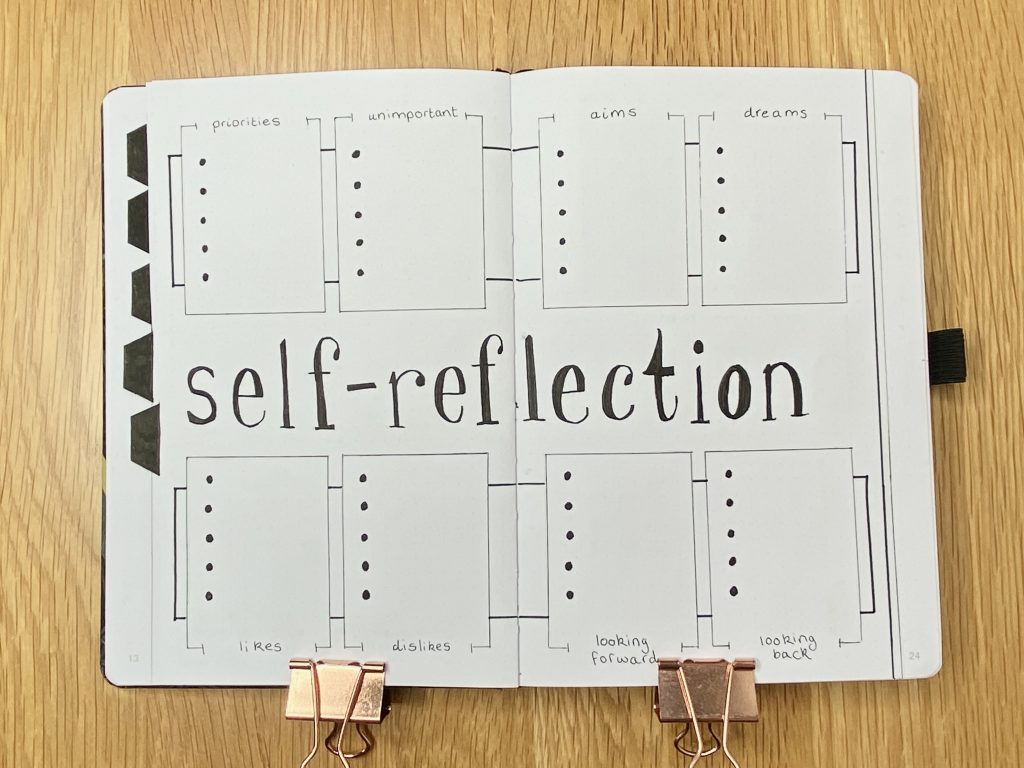
This spread is another new addition to my bullet journal this time around. So much has gone on over the past few years, both globally, what with the pandemic and the lockdowns, and personally, for me, that I sometimes feel a little bit lost. This spread, which I’m calling my Self-Reflection spread, is my attempt to re-evaluate what matters most to me. I’m hoping that listing out a few core principles will help me to understand myself better. Primarily, this spread is an exercise in getting to know myself, but, once I have filled it out, it will become a reference page that I can use to remind myself of who I am when things get a little bit too chaotic.
Blog Section
The second section in my setup is for planning the content for this blog. Having these spreads helps me to keep on top of the content I am creating and to organise any ideas I have.
Hub + Blog Cover Page
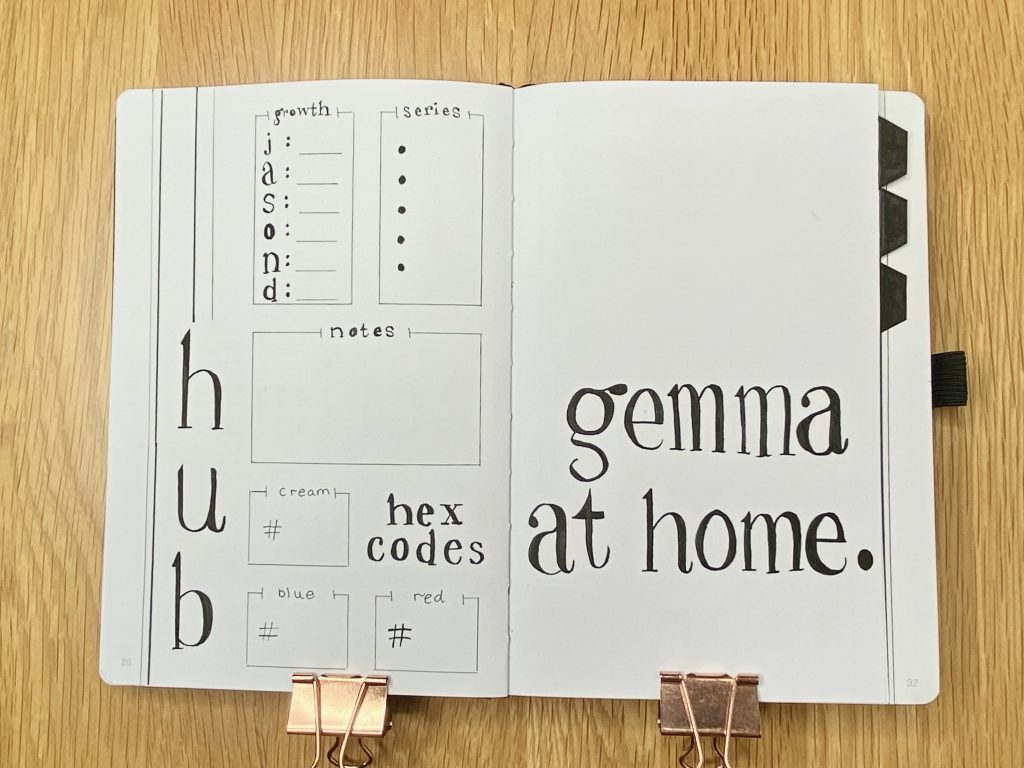
The cover page for this section uses the same layout as the previous section’s cover page.
Opposite the cover page is my Hub. There is a space for the Hex codes of the colours I use in my branding- I often need to refer to these when making the pins for my posts! I also have spaces to keep track of both ongoing post series (like my Taylor Swift Cupcakes series!) and my Instagram growth (you can check out my Instagram here!).
Post Tracker + Schedule
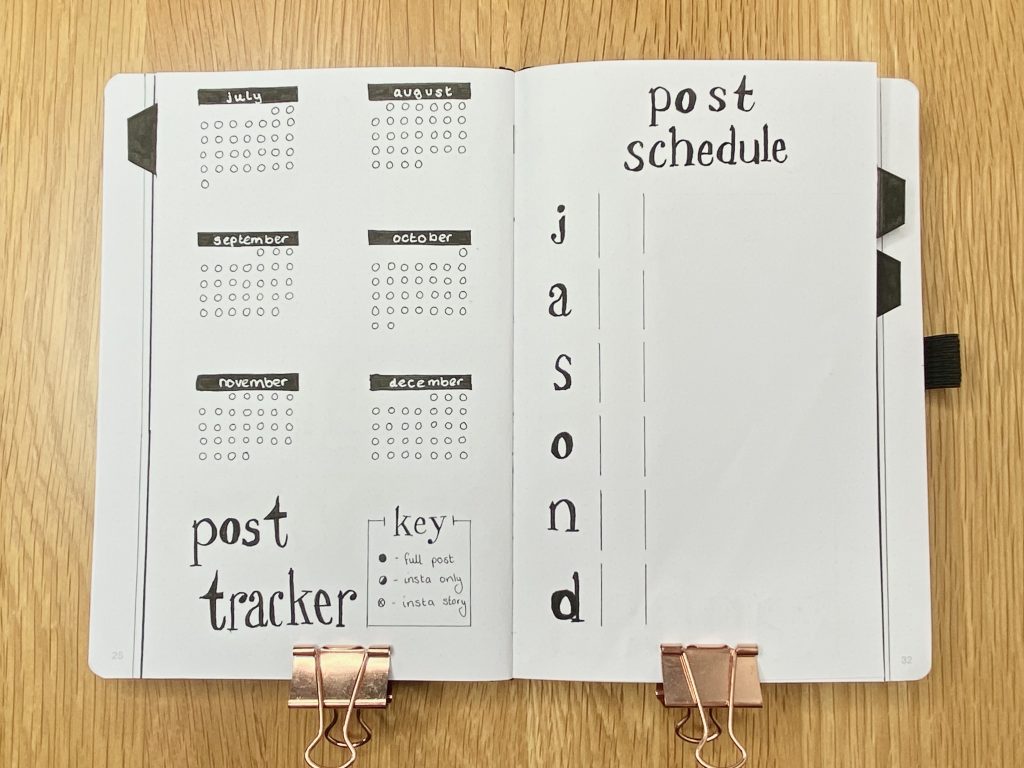
Next up, I have a space to keep track of my posts. The Post Tracker on the left-hand page follows the same format as my Exercise Tracker but, instead of exercise, I will be tracking when/on which platform I post.
My Post Schedule, on the right-hand page, is where I will note down my upcoming posts for each month, so I can look ahead to them and get started early. The first column indicates the month, the second will be used for the intended publication date and the final column will be where I write the name of the post.
Kanban Board
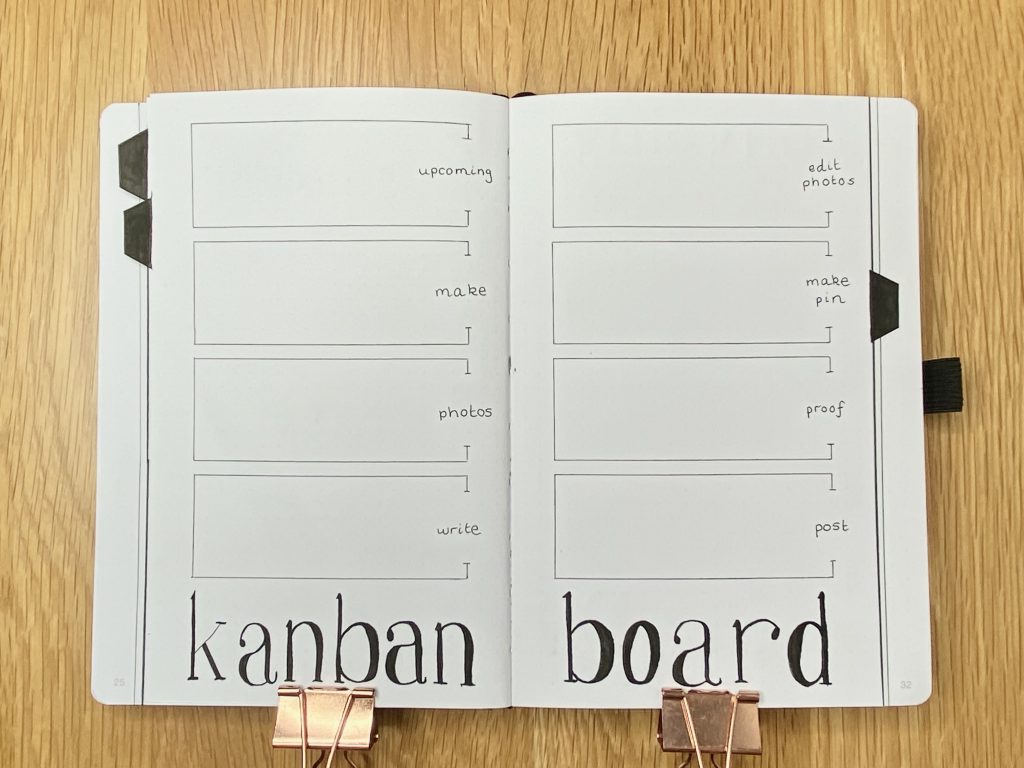
For the past few months, I have included a Kanban Board in each of my monthly setups (I talk more about Kanban boards in this post– if you’re interested in finding out more about the technique). Instead of making a brand new board every month, I decided to make a master spread at the start of the journal to save time. Because the Kanban Board relies on sticky tabs to function, I can just reuse this same board and introduce new tabs (for new posts!) as needed.
Projects
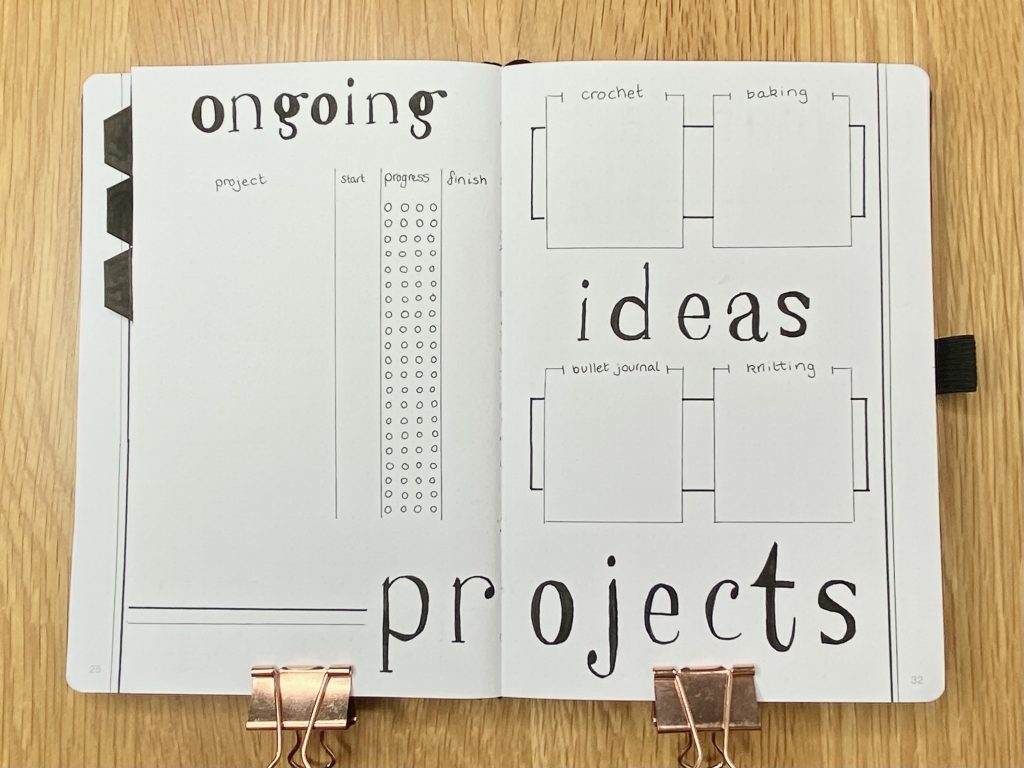
The final spread in this section is my Projects spread. Because I typically have a lot of creative projects on the go, I thought it would be good to have a master list of them. That list is on the left-hand page, and includes space to write the name of the project, as well as the start & end dates, and to track my progress. On the right-hand page, I have space for any ideas I may have for new projects.
Finance Section
The next section is for keeping track of my finances. Not the most glamorous of sections, but necessary for keeping on top of things!
Financial Plan + Finance Cover Page
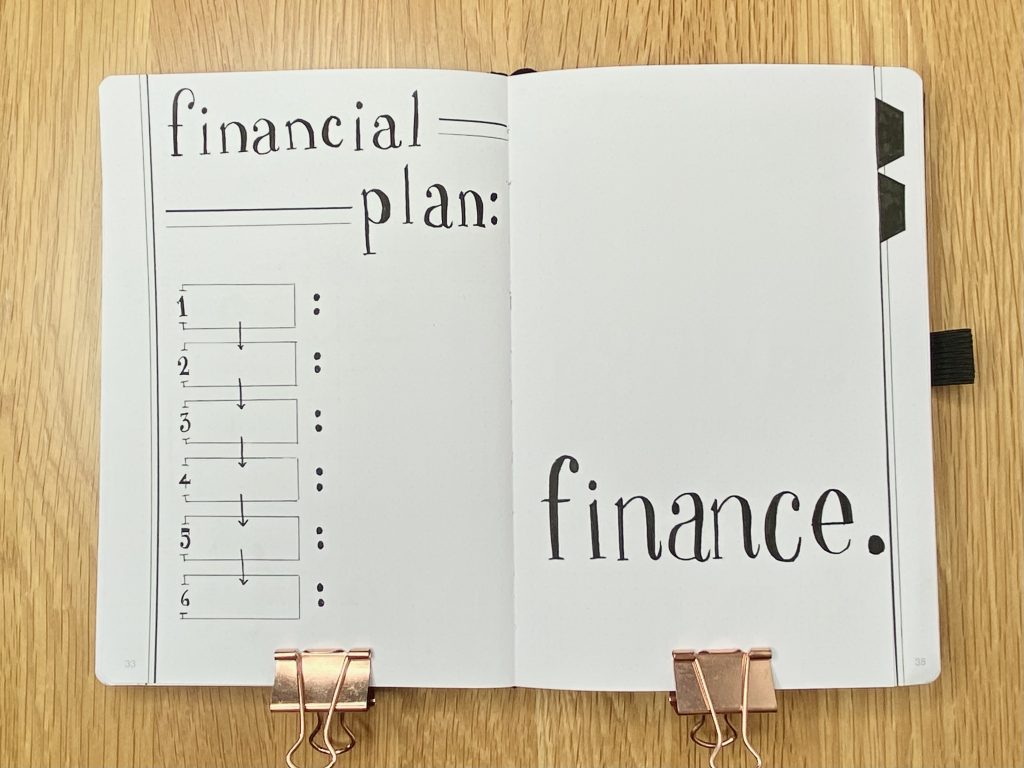
Again, this cover page uses the same layout as the previous two sections.
The left-hand page is for my Financial Plan. I have spaces for actionable steps down the left-hand side of the page and for notes on each step down the right-hand side.
Savings + Income Streams

In my last bullet journal setup, I included a table to track my income against my outcome. I really enjoyed this spread- it really helped me to stay accountable and keep a closer eye on my finances, so I’ve included it in this bullet journal setup too. For each month, I will track my income, my outcome and how much I have saved. I have introduced a new column to my Savings table this year: cumulative savings. In this column, starting in August, I will combine my monthly savings to see how much I have saved in total. I am including this because I actually found myself noting this down on my last table anyway, so it will be nice to have a set space for it!
On the right-hand page, I have spaces to note down my Income Streams each month. This way, I will be able to see, at a glance, where my money is coming from.
Wish List

Continuing my efforts to hold myself accountable for my purchases, I decided to move my Wish List spread into my Finance section. Just like before, I’ve split my wish list into categories to help streamline it. Similarly to my Challenges spread, I will colour in the bullet next to any items that I end up buying.
Books & TV Section
The final section of my 2023 Mid-Year Bullet Journal is for Books & TV. I like to track both of these for fun, because it’s super interesting to look back and see what you were watching/reading at a particular time! I also have a more specific ‘wish list’ for my watching/reading habits in this section, which frees up a lot of space on the previous page!
2023 Reading Stats + Books & TV Cover Page
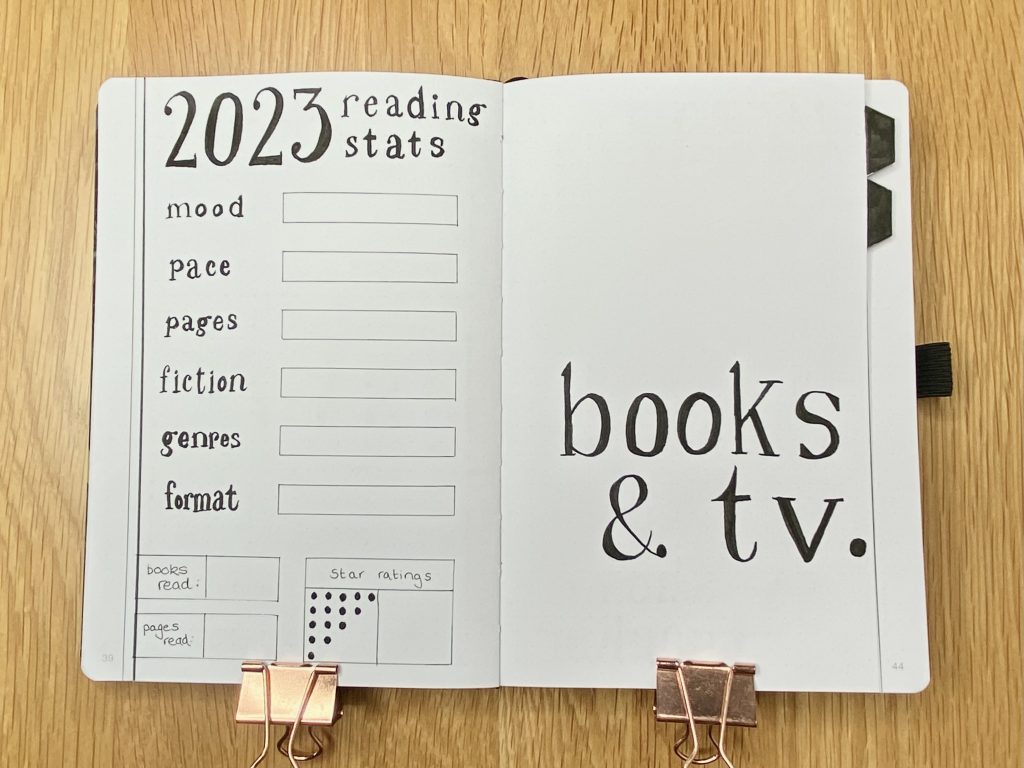
Next to my cover page (which, you guessed it, follows the same layout as the other 3 cover pages!), I have a space to put my 2023 Reading Stats. Obviously, I won’t be able to fill this in until the end of the year, but I’m really excited to fill this spread out. I use an app called StoryGraph to keep track of my reading (big thank you to my friend, Kyla, for the recommendation!), and the app provides you with LOADS of different statistics on your reading preferences/behaviour, all of which I have included in this spread. The horizontal bars will end up forming individual stacked bar graphs, while the two boxes in the bottom left will record how many books/pages I read in 2023. For the star ratings table, I will record how many books I gave 1 star, 2 stars, etc. Admittedly, I will have to round down for some of my ratings, because I am so indecisive- I am ALWAYS making use of StoryGraph’s 0.25 star function instead of giving whole ratings!
TV Show + Reading Trackers

As I said, I like to track the TV shows that I watch. I do this for 2 reasons: firstly, because it’s fun to look back and see what I was watching at any given time. Secondly, though, it’s nice to see how far I am through each show as I go. For each TV show that I watch, I will write the name of the show, then, beside the title, I will draw a circle for each season of the show. When I finish a season, I will colour in the circle. In the two left-hand columns I will record the date I started watching the show and the date I finished watching the show.
My Reading Tracker is similar, in that I like to record the title of the books I read, the date I started reading them and the date I finished them. In this table, that information will go in the first 3 columns. The fourth column is filled with circles, 5 per line, to represent the star rating I give each book. I will colour the circles in accordingly to reflect this.
To Watch, Read + Buy

The final spread in this section (and, indeed, this setup!) is my Book and TV ‘wish list’. Here, I have spaces to record the TV shows and films that I want to watch, the books I want to read and the books I would like to buy for my collection. As with my other Wish List page, if I end up watching/reading/buying an item I list here, I will colour the circle in to reflect that.
Final Thoughts
So that’s everything in my 2023 Mid-Year Bullet Journal Setup. As I said at the start of this post, I always put a lot of time and effort into setting up these spreads because I know it will save me even more time and effort in the long run. If you’re new to bullet journalling, just take things at your own pace! I have a lot of spreads in this section because it suits me, but there are lots of bullet journallers who have very few, if any, spreads in their journals, outside of their monthly setups. Bullet journalling is about doing what works best for you!
I hoped you enjoyed this setup- I’d love to hear about your mid-year setup process, if you have a bullet journal & I’ll be back soon with my July 2023 setup!
Gemma
xxx


