 Gemma
Happy WIP Wednesday!
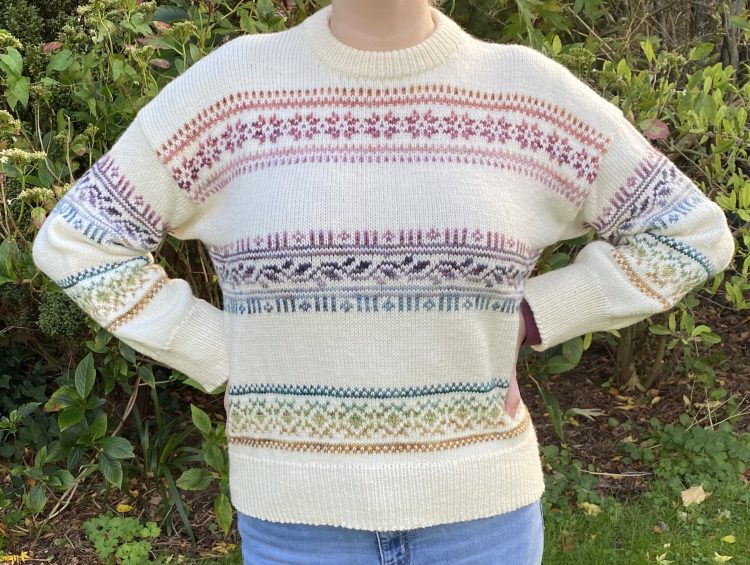
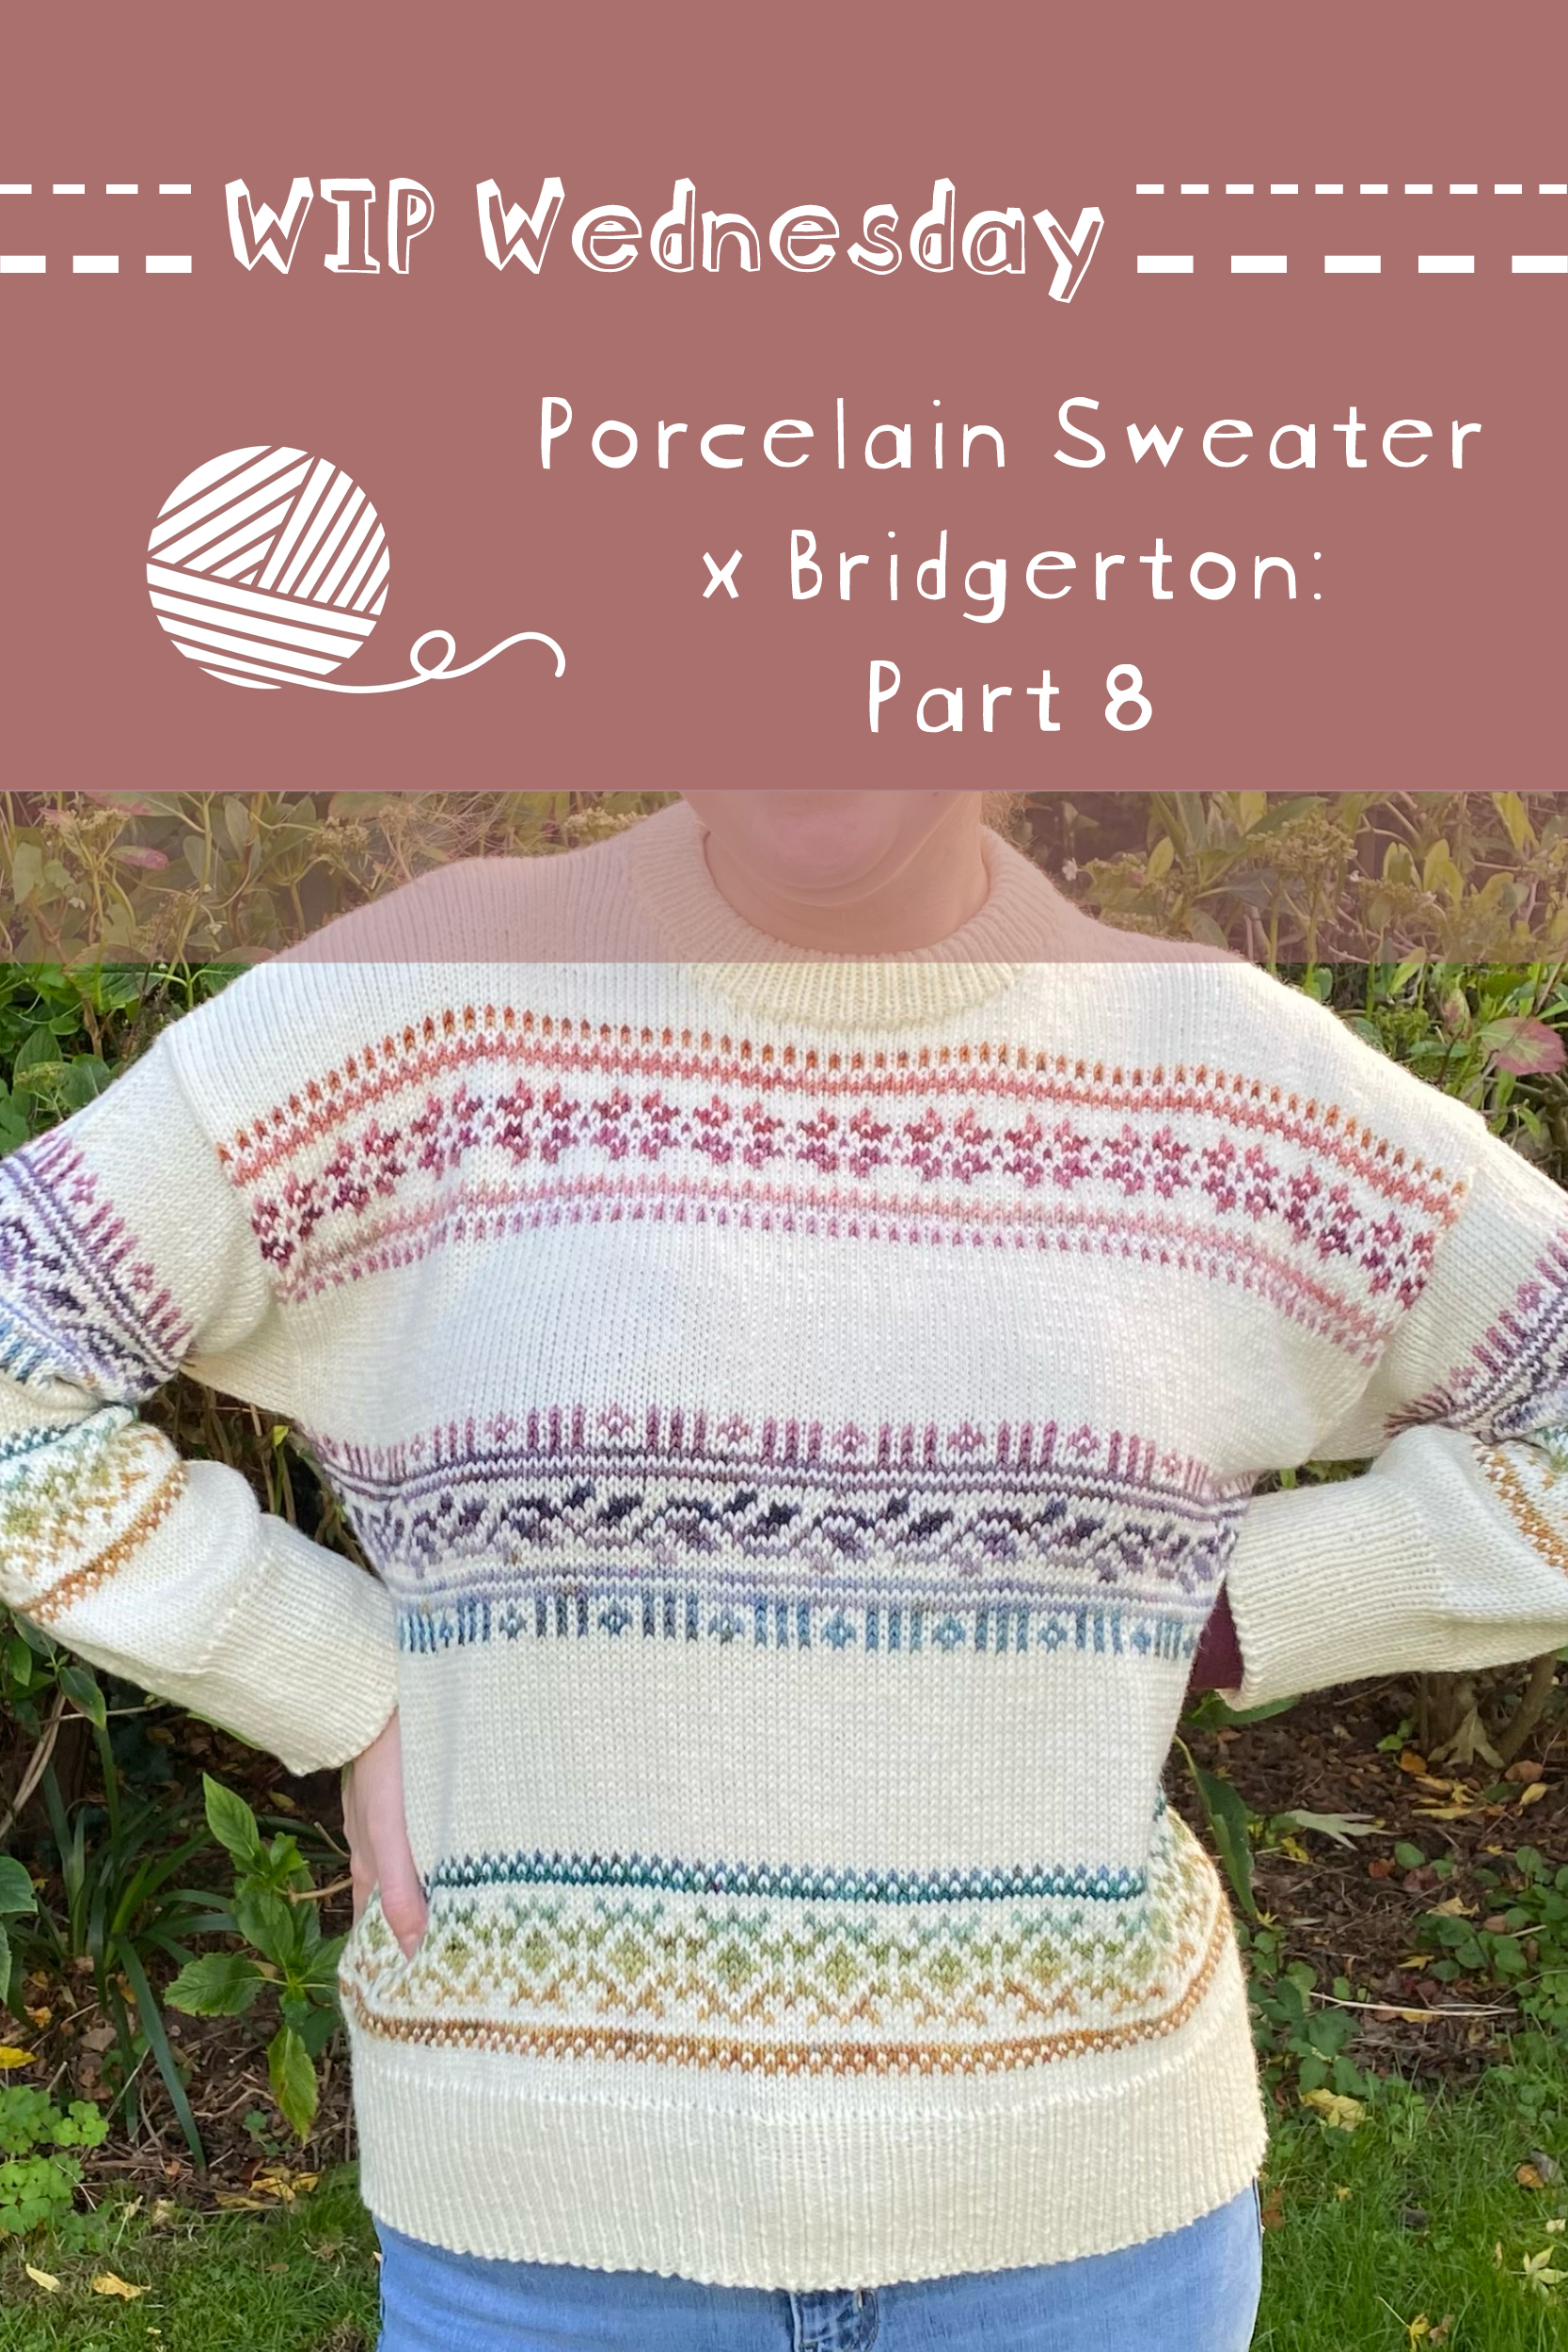
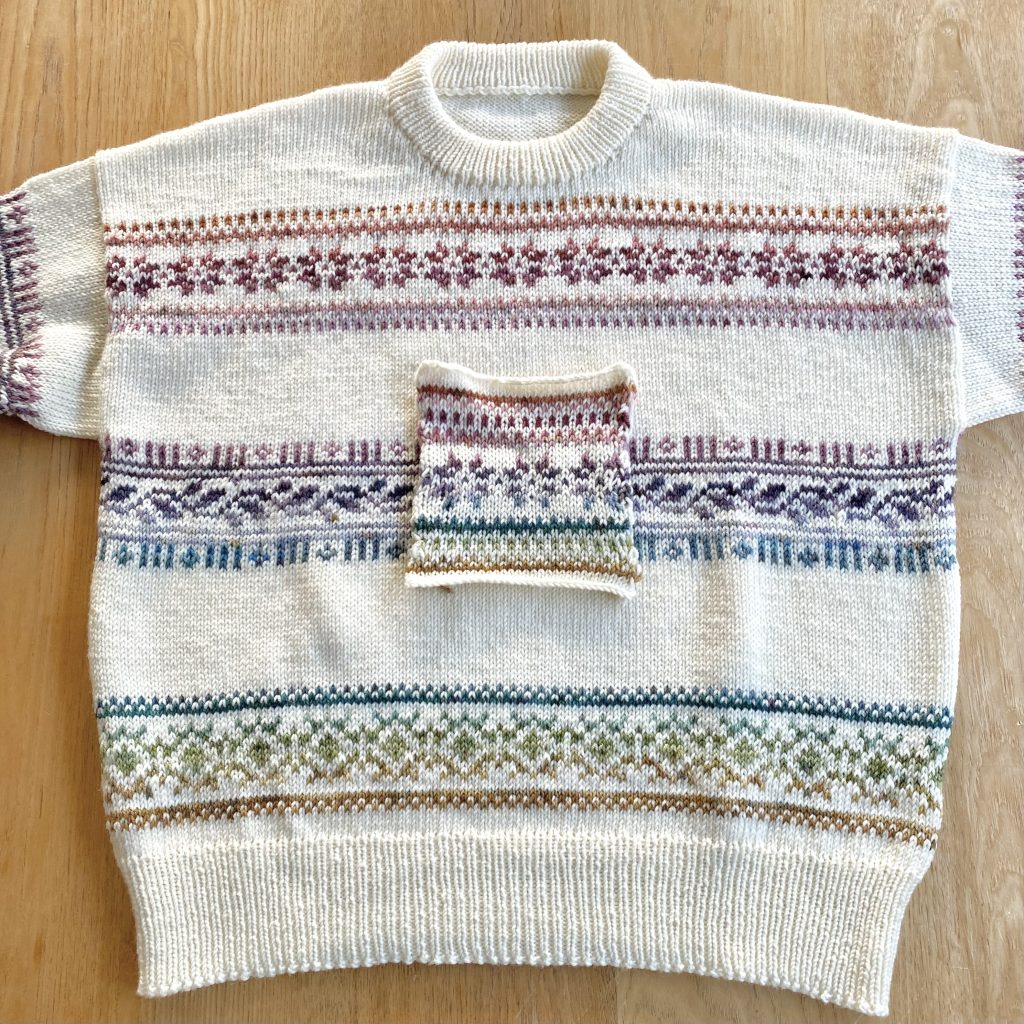
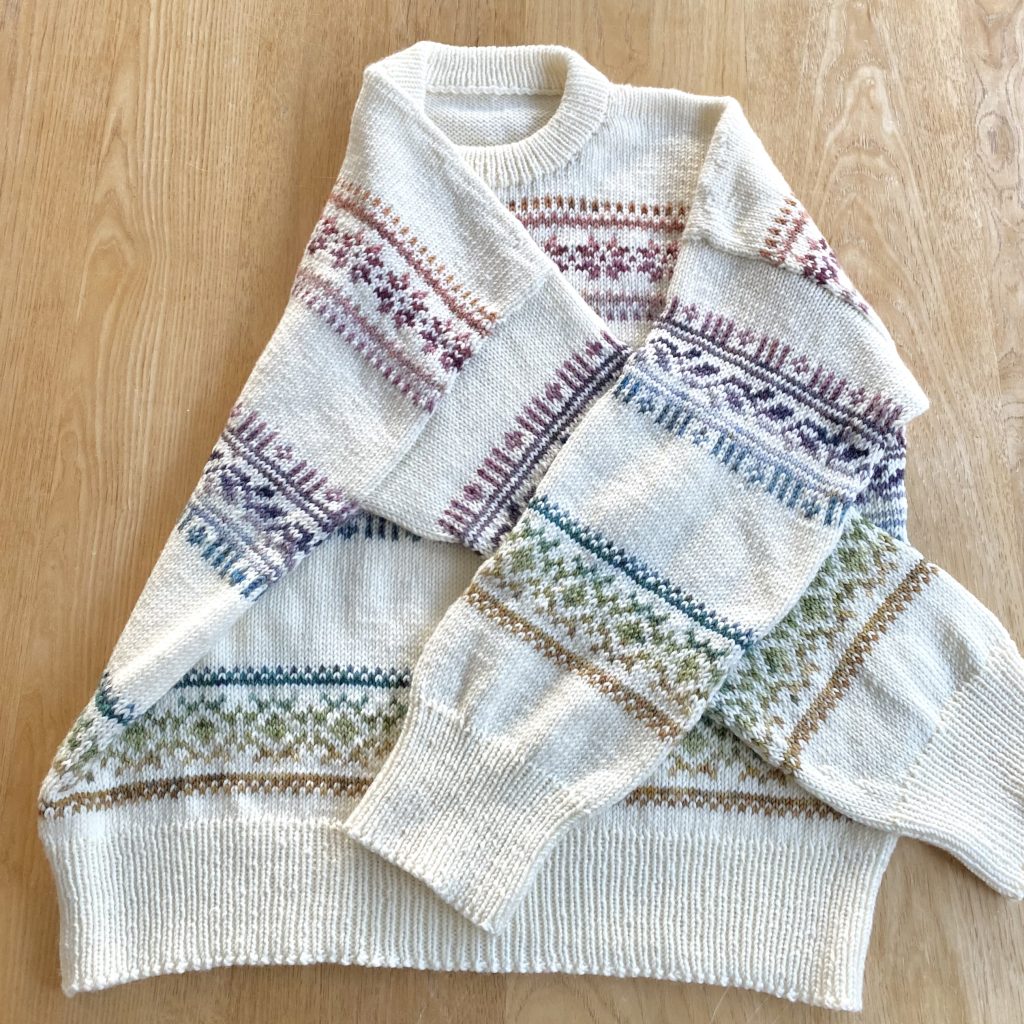
This is an extra special edition of WIP Wednesday, because, after 8 weeks of knitting, I have officially finished my Porcelain Sweater x Bridgerton Advent project! For this project, I made a Porcelain Sweater (pattern by LE KNIT by Lene Holme Samsøe), using the 2025 Bridgerton Advent from Castle View Yarns as the contrast colour(s).
In today’s post, I’ll be chatting about the final stages of making the jumper, as well as sharing some photos of the finished product! I’ll also be taking a look back at all of the things I’ve learned while working on this project.
Progress
I have finished my Porcelain Sweater! Woohoo!
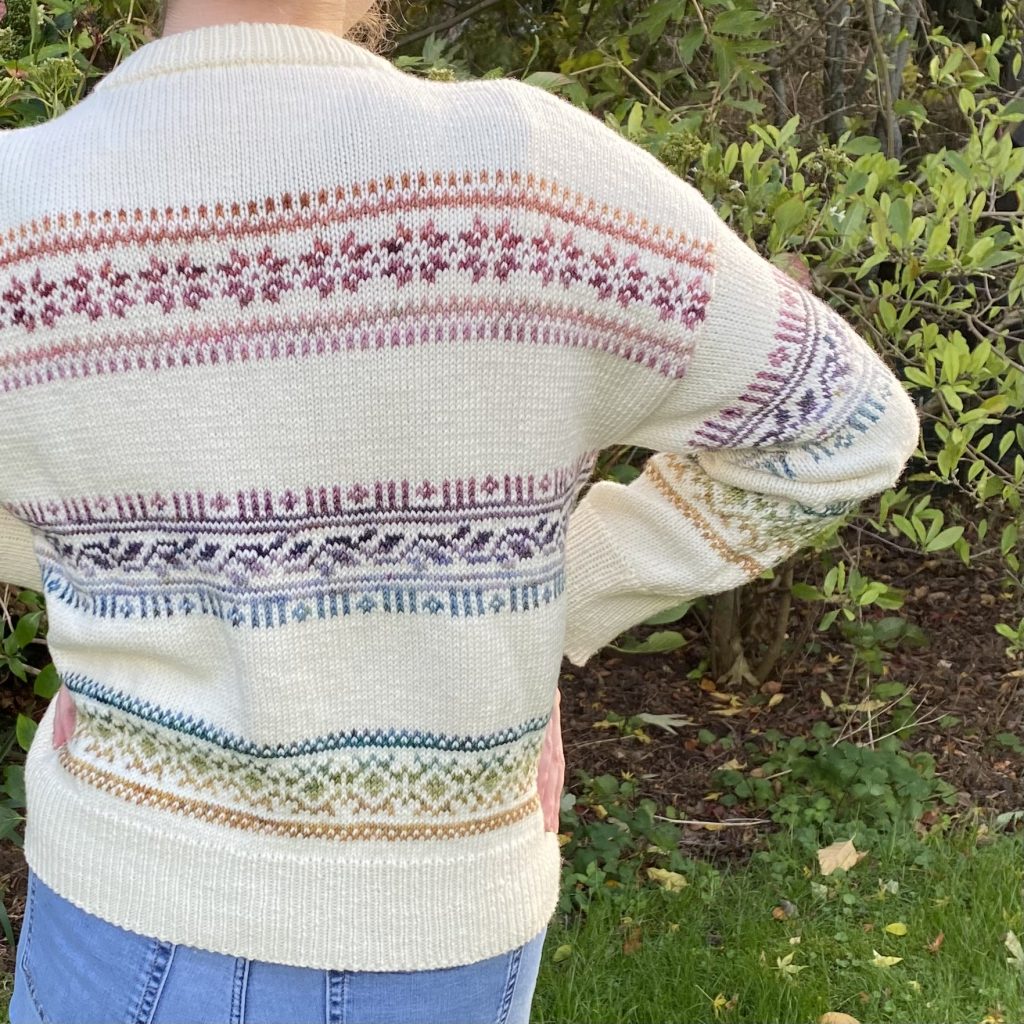
In the eighth week of working on this project, I finished off the second sleeve (including the second band of colourwork and the ribbed cuff). I weaved in all of the ends (which was definitely the most time-consuming job of the week) and blocked the sweater, so it’s completely ready to be worn!
Yarn Usage
With the sweater finished, I was able to work out how much of each of the yarns I used.
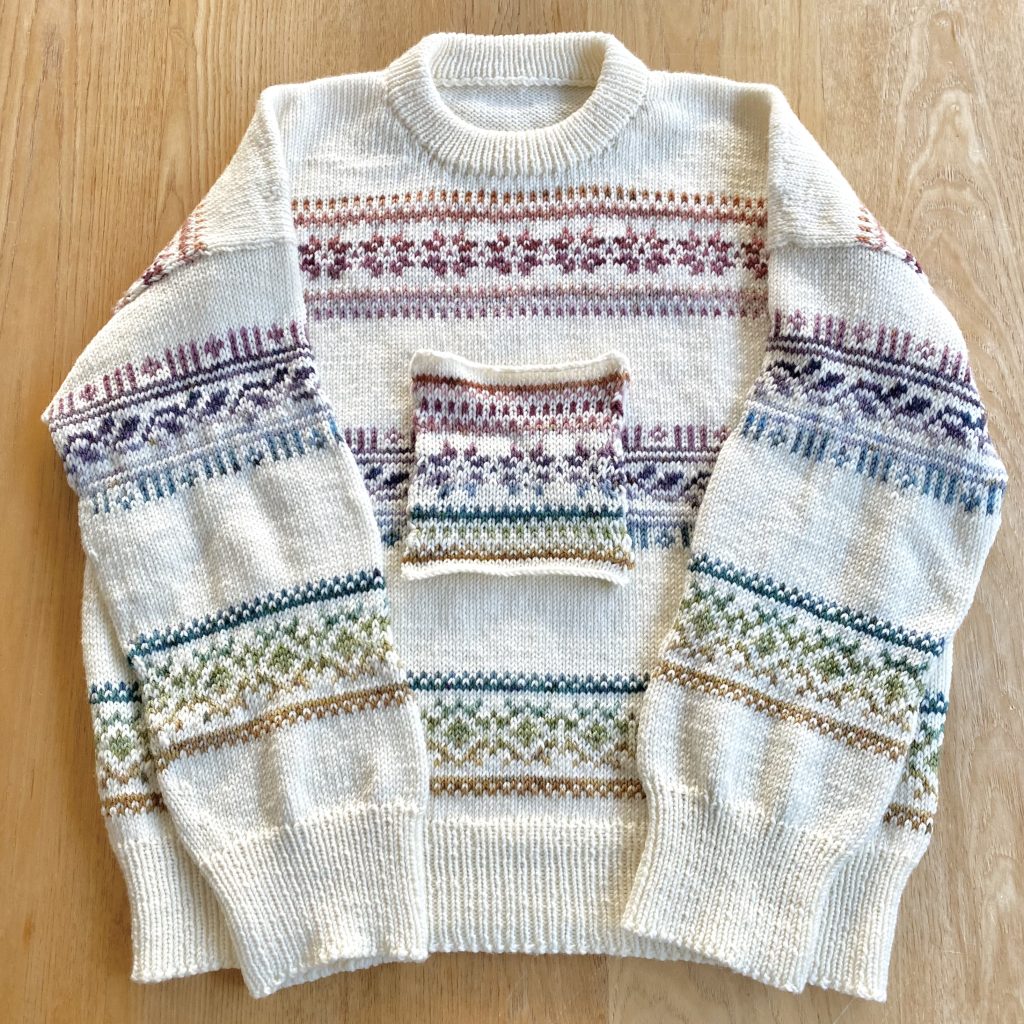
Overall…
I used approx. 505g (i.e. 10 balls + a very very small amount of the 11th) of the main colour (DROPS Merino Extra Fine, Off White 01).
I used an average of 2.9g per colour (range: 1.8g – 4.6g) of the Advent mini skeins I used in the first colourwork band (i.e. not on the sleeves).
I used an average of 5.3g per colour (range: 3.7g – 7.4g) of the Advent mini skeins I used in the second and third colourwork bands (i.e. on body AND sleeves).
There is quite a large variation in the usage of each of the mini skeins, which I suppose is based on what the colourwork design involves on each row: rows with more stitches worked in the contrast colour will inevitably use more than the rows with more minimal usage.
In general, the first colourwork band uses less of each colour because it is only worked on the body, not the sleeves.
Post-Knit Thoughts & Musings
With the jumper now completely finished, I thought I’d share some of my final thoughts about the finished product and the project as a whole.
Finishing the Knitting
The second sleeve worked up even faster than the first sleeve, because I’d done all of the mental effort (figuring out where best to work the decreases, when to change colours, how many rows to work etc.) already. This meant I could just follow my notes and do exactly what I’d done before!
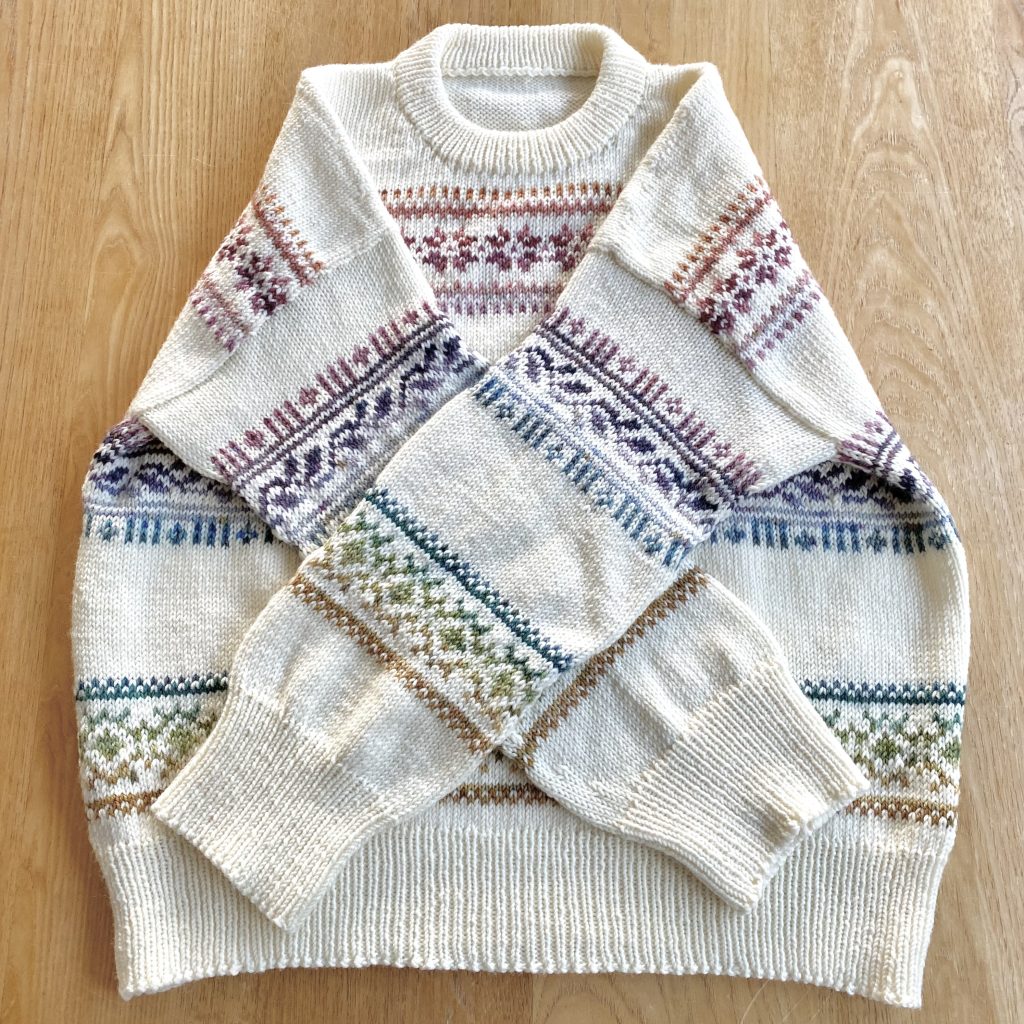
Once the sleeve was finished, I’d officially finished all of the knitting for this project, because I worked the neckband beforehand.
Weaving in the Ends
With the knitting all finished, it was time to weave in all those ends. And boy, were there a lot of ends…
I’ll be honest— I didn’t enjoy this stage of the process, but I knew I wouldn’t. Weaving in ends isn’t my favourite job at the best of times and there were soooooo many to weave in here. However, it was a necessary step in the process— the penultimate task left on my to-do list before I could actually wear this thing!
I decided to be strict and not let myself procrastinate, which I may or may not have been known to do in the past with this particular job. I have to say, one thing that helped me shove my procrastinating tendencies aside was my desire to finish this jumper within that 8 week/2 month mark, just because it feels like such a nice, round timeframe. I know it sounds a bit silly as motivations go, but it worked for me (and I’ll accept any help I can get when it comes to my predisposition to putting things off)!
The simplest ends to weave in were definitely the ones in the ribbing, because it’s super easy to hide them in amongst the textured fabric.
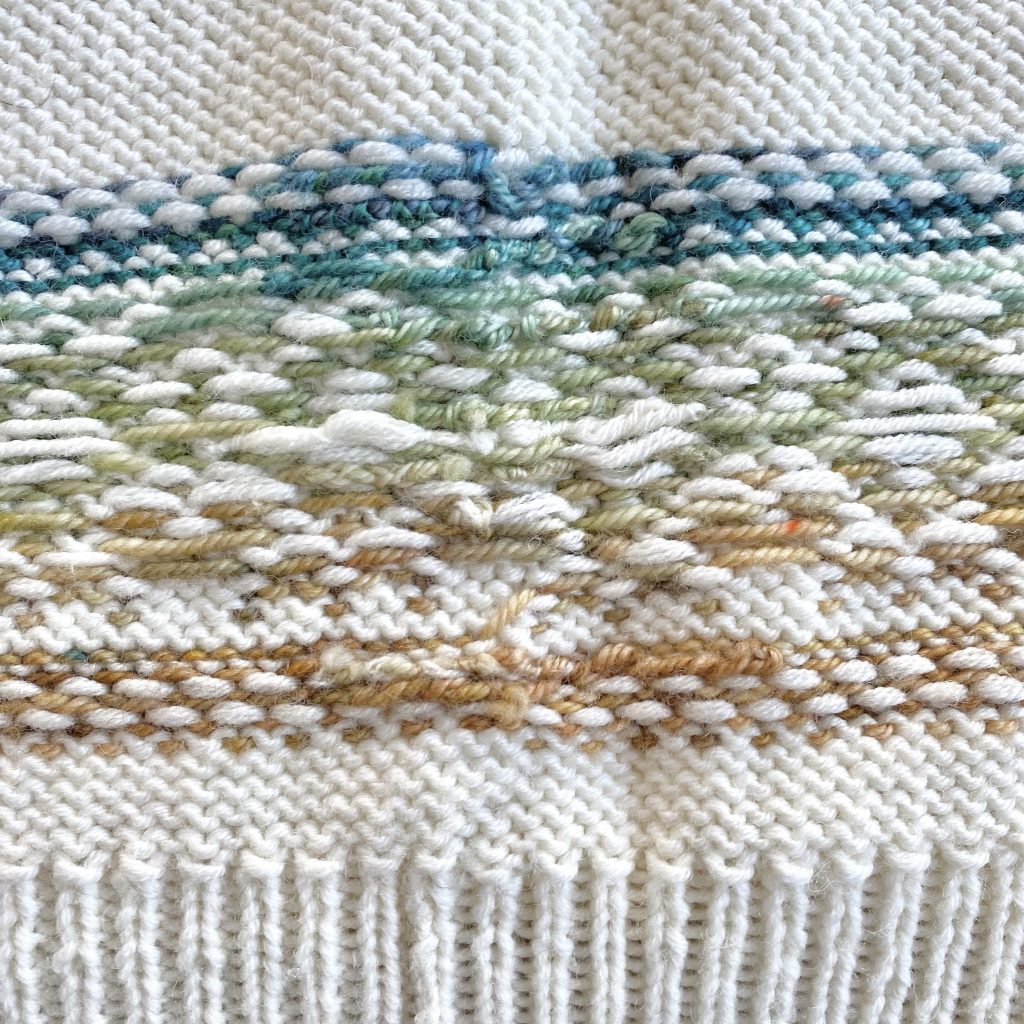
The sheer number of colourwork ends made this part of the job a long one, but it wasn’t too tricky to hide them in amongst all of the floats. I would have loved to get a slightly neater finish overall on the inside of the sweater, but I think there’s a limit to how invisible you can make the darned ends without compromising how securely they are woven in. At least, that’s what I’m telling myself… Either way, the outside of the sweater looks super neat, so it doesn’t really matter, because I’m the only one who will see the inside!
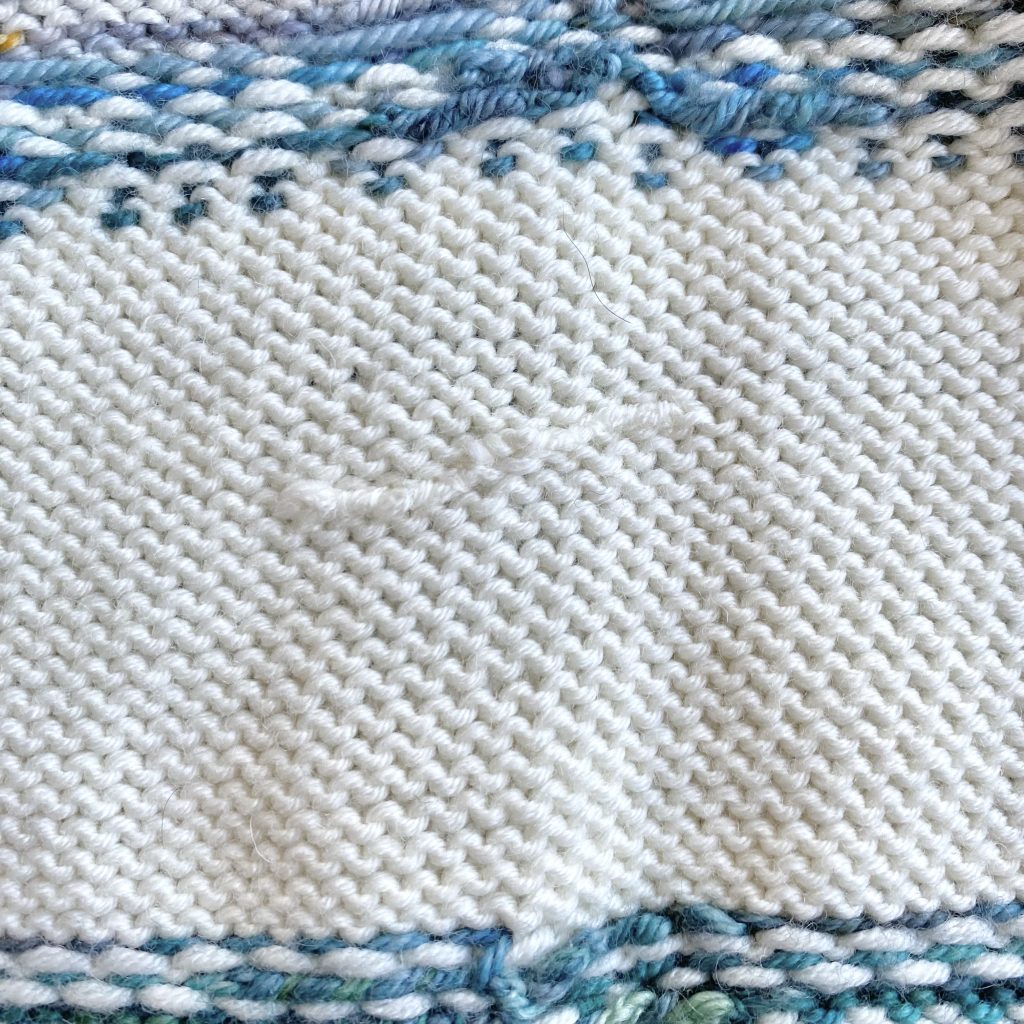
Oddly enough, the ends I found the trickiest to weave in were the ends of the DROPS yarn (the main colour) that didn’t sit within any of the colourwork bands. It was really hard to make them look seamless because there was absolutely nowhere to hide: just a blank canvas of purl bumps! I did my best, but they still make me cringe a little when I see them… Oh, well.
Weaving in the ends definitely helped to even out the colourwork jogs that I had been a little worried about. Just tightening up those first/last stitches and securing them into the fabric made everything much neater, so, in the end, the much-dreaded, darning-in process was both a structural necessity and a visual luxury, which is a bit of a silver lining.
Blocking the Sweater
To block the sweater, I used this laundry soap from SOAK. It’s quite expensive (so I use it very sparingly), but it’s a really good, no-rinse formula that works super well for hand-washing knits. It’s stocked by lots of small, yarn-based businesses here in the UK.
Along with the SOAK soap, I also added a colour catcher into the water when I blocked the sweater. I don’t really think this was necessary, because the colours didn’t run at all when I did my swatch, but I didn’t want to risk it!
Once the sweater had soaked for a bit, I took it out of the water and squeezed out as much as I could, being careful to support the weight of the sweater as much as possible, to prevent it from stretching out. I popped it into my mum’s spin dryer to get as much water out as possible, then I spread it flat on a blocking frame to dry.
I didn’t pin it out, because I didn’t want it to crease (and because it didn’t seem super necessary). When I measured the gauge after I’d spread it out, it was perfect, so I figured it was okay to just let it do its own thing.
After a day or so, the sweater was completely dry and ready to try on!
Fit & Gauge Issues
If I’m being 100%, completely, truly honest, I’m a little disappointed with the fit of my jumper.
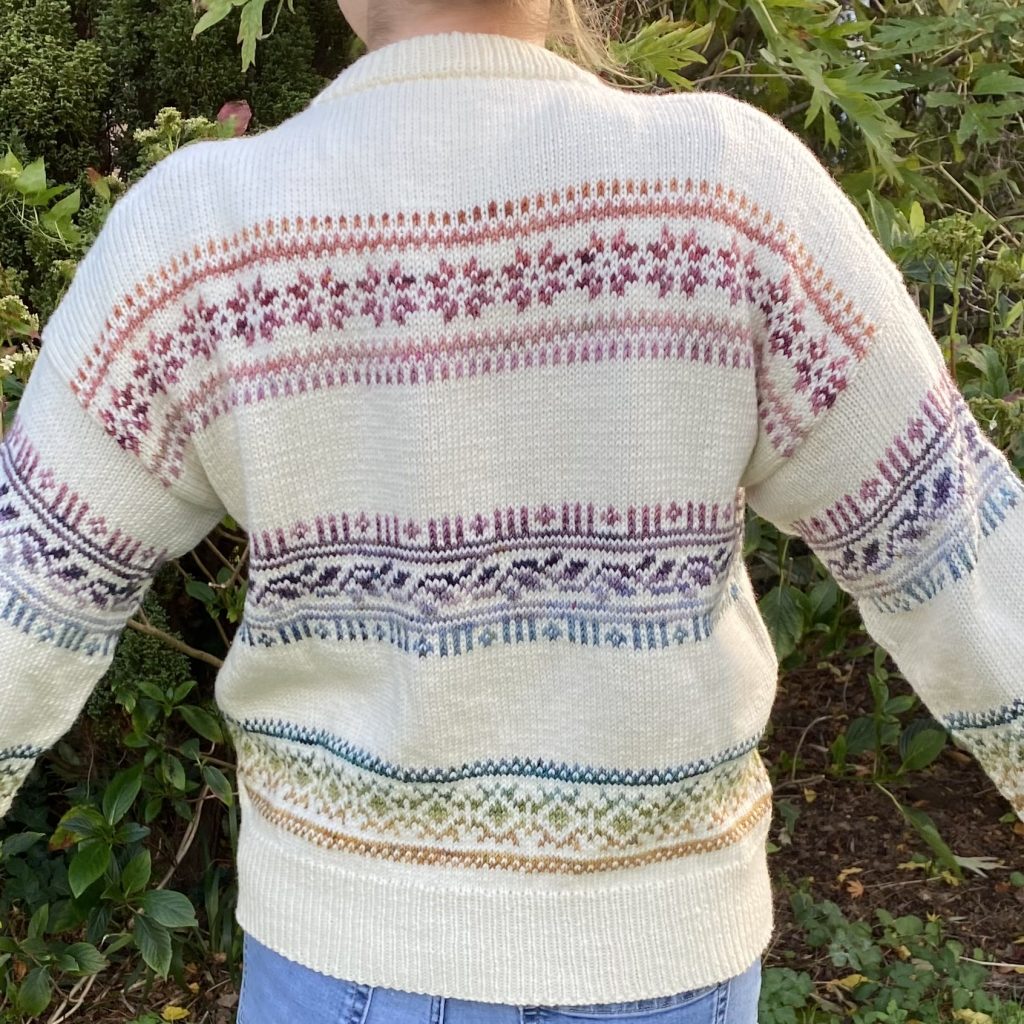
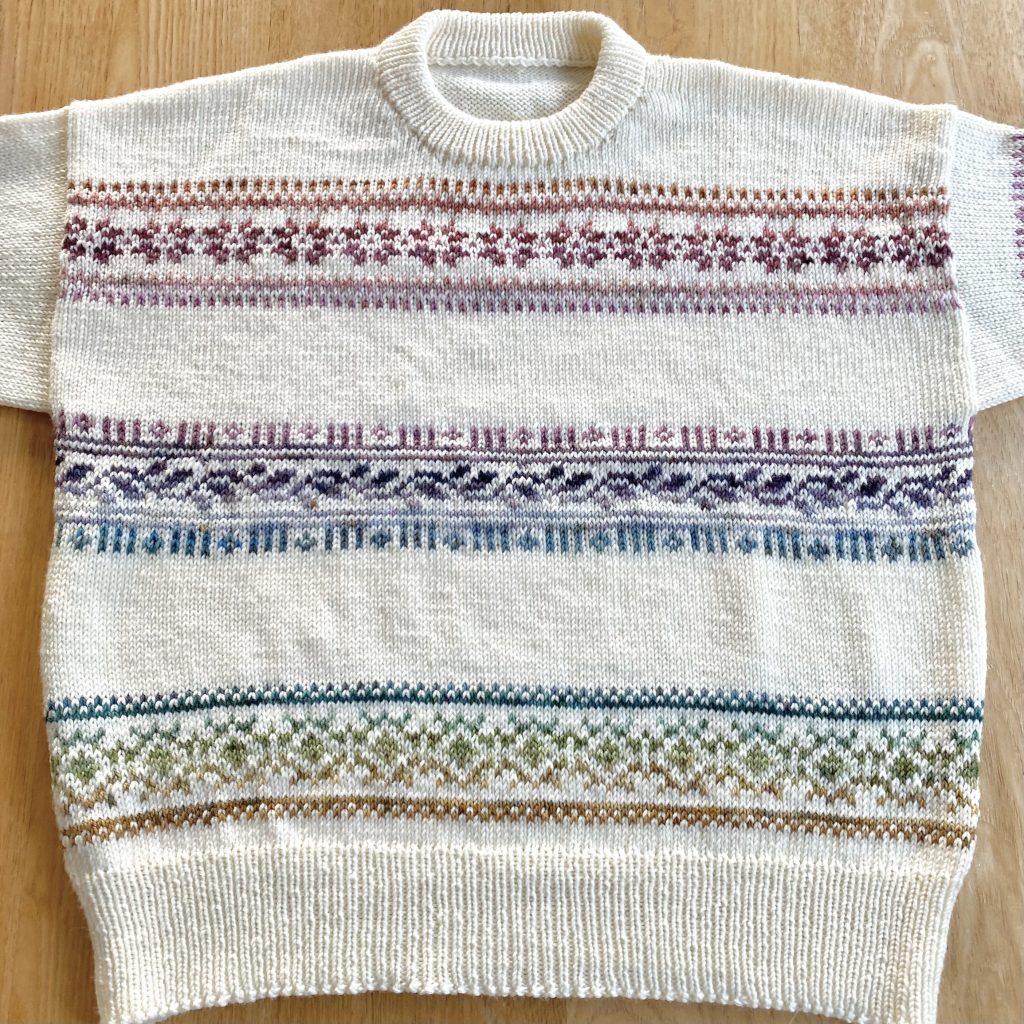
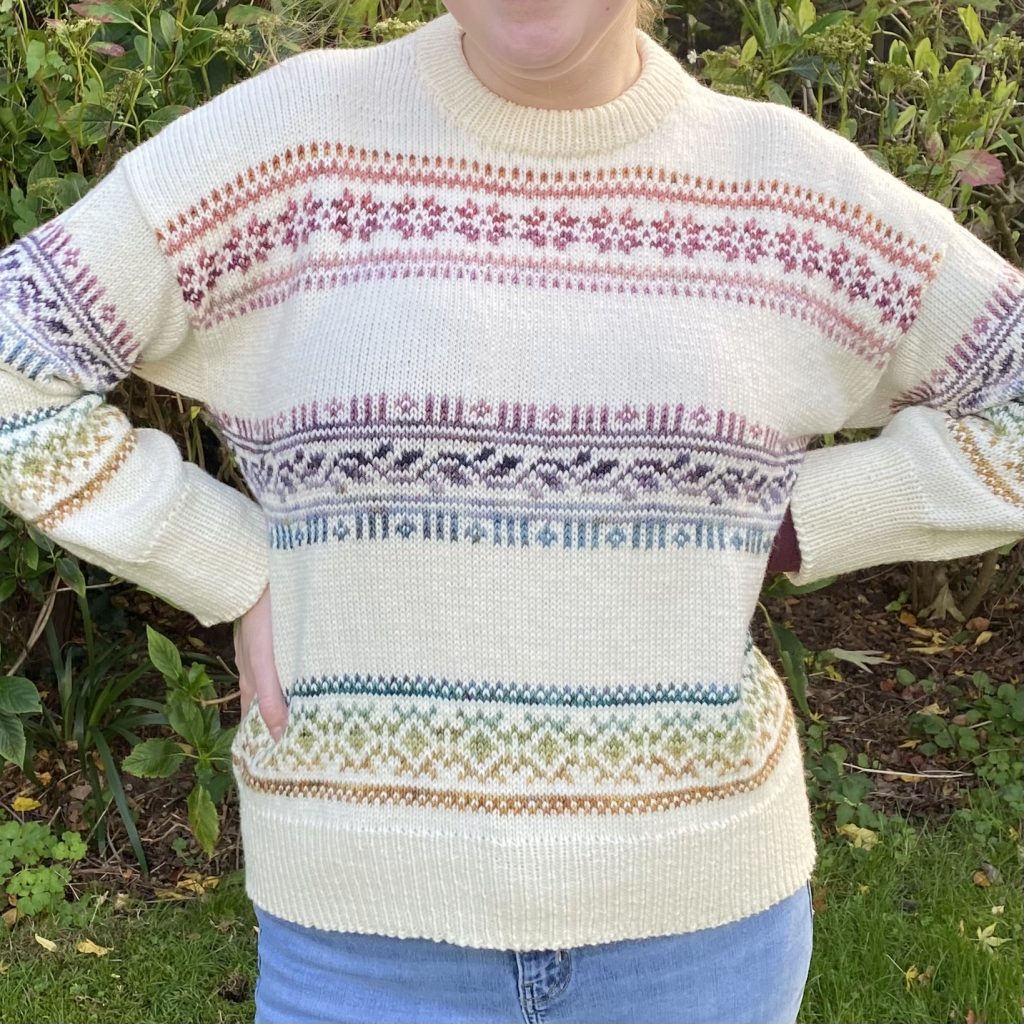
That’s not to say I don’t love it— I do! I’m really pleased with how the design turned out and I’m really proud of it. It’s one of the prettiest things I think I’ve ever made, and I think the gradient of colours looks really beautiful. It still looks lovely on and it does fit me, it’s just that that fit isn’t quite what I was expecting/intending.
As it turns out, it’s all because of my gauge!
I really, honestly do not know how this happened, but the horizontal (stitch) gauge on my finished jumper was out by 3! Whole! Stitches!
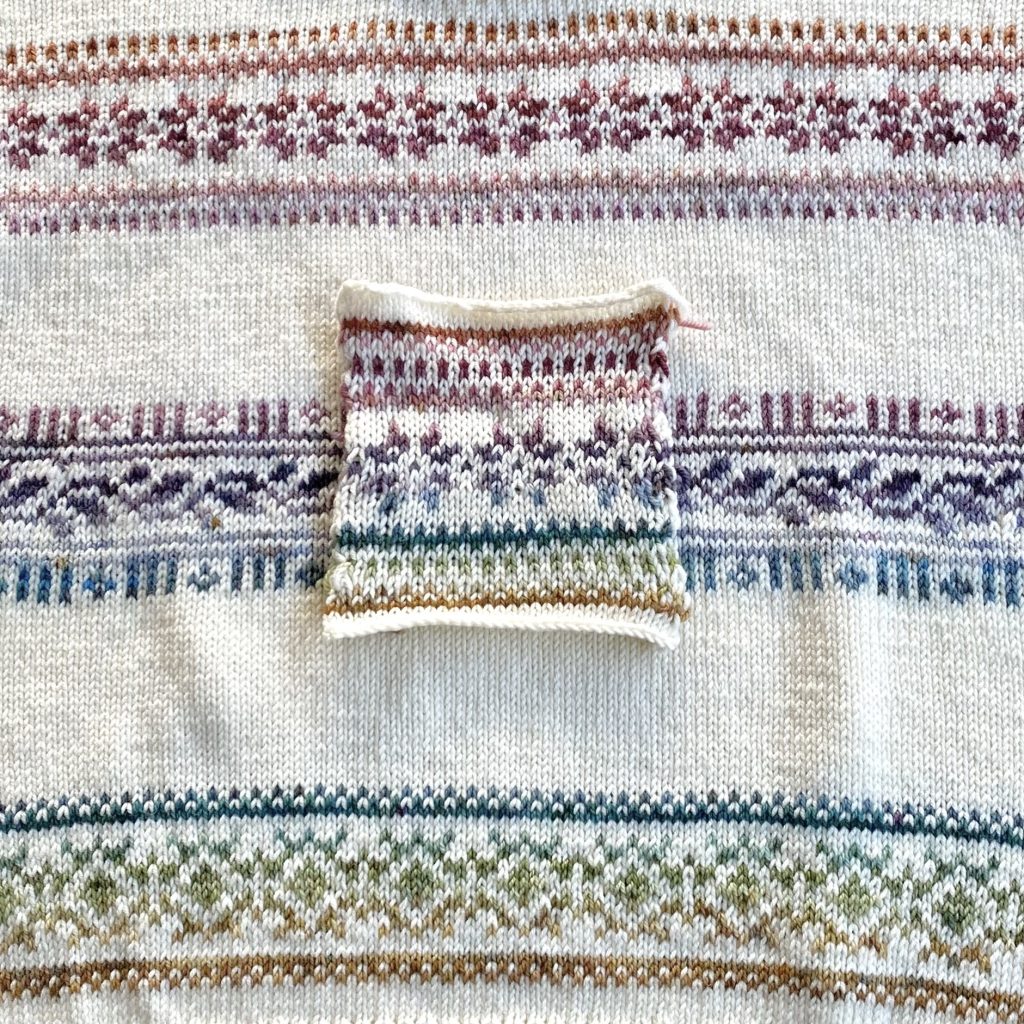
I swear that I measured my gauge multiple times on both my swatch and my sweater (while it was spread out on the blocking mat, post-soak but pre-dry) and the horizontal gauge was perfect (or even if it was ever so slightly off, it definitely wasn’t 3 stitches off, because… there’s no way I would have started knitting knowing that?!). However, when I measure my horizontal stitch gauge now, on my blocked and dried sweater AND my blocked and dried swatch from way back when, my horizontal gauge is off on both.
I must have made a mistake somewhere along the line, whether I measured my gauge incorrectly, or stretched the knitting as I blocked it, or misread the pattern— something must have gone on, but I have no idea what!
I admit, my vertical row gauge was off from the start, but I knew that and factored it into the pattern as I knitted. The proof is in these WIP Wednesday posts— I’ve talked about having to knit extra rows to compensate for this and how worried I was that I would run out of yarn because of that multiple times (though, on the bright side, I didn’t run out of yarn!).
I know that a 3-stitch difference doesn’t sound like a lot, but, in knitting gauges, that’s an enormous difference to the fit. The result of that 3-stitch difference is that the fit of the jumper is quite different to how I expected it. It’s not tight, but it’s more fitted than the sample shown in the pattern. I guess this isn’t necessarily a bad thing— it’s still very wearable and it will be easier to wear a jacket over it, but I am a little disappointed.
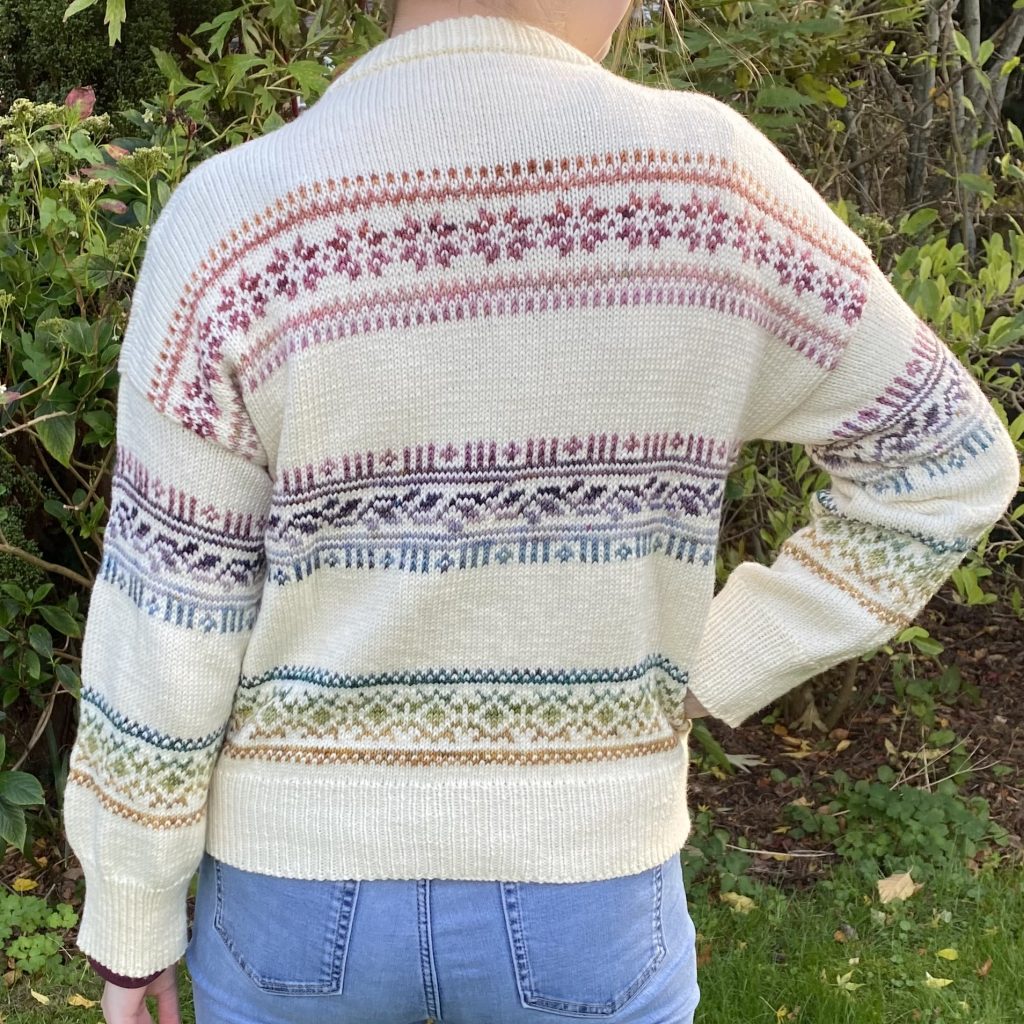
I am very pleased, then, that I decided to make the larger of the two sizes I was choosing between, because my Porcelain Sweater has about 10-15cm less positive ease than I was aiming for. In the pattern, there’s a note on choosing sizes, which states that the jumper has an intended positive ease of 15-20cm (though it does also state that the Porcelain Sweater in the pattern photos has a positive ease of 25cm). For me, it was a choice between a Medium (18cm of positive ease, with my measurements) and a Large (28cm of positive ease, with my measurements). Because I wanted my sweater to look more like the pattern picture, and I knew that my row gauge was a little tight, I opted to make the Large size and boy, am I glad of that now!
If I made the jumper again (with this particular yarn), I would definitely size up the needles or make a larger size overall. It’s ironic really, because I was super paranoid about the jumper stretching out loads after blocking (I read some crazy horror stories about this online!). I mean, I did use superwash yarn, so maybe I could “accidentally” stretch it out… just a little? Or is that dangerous territory?
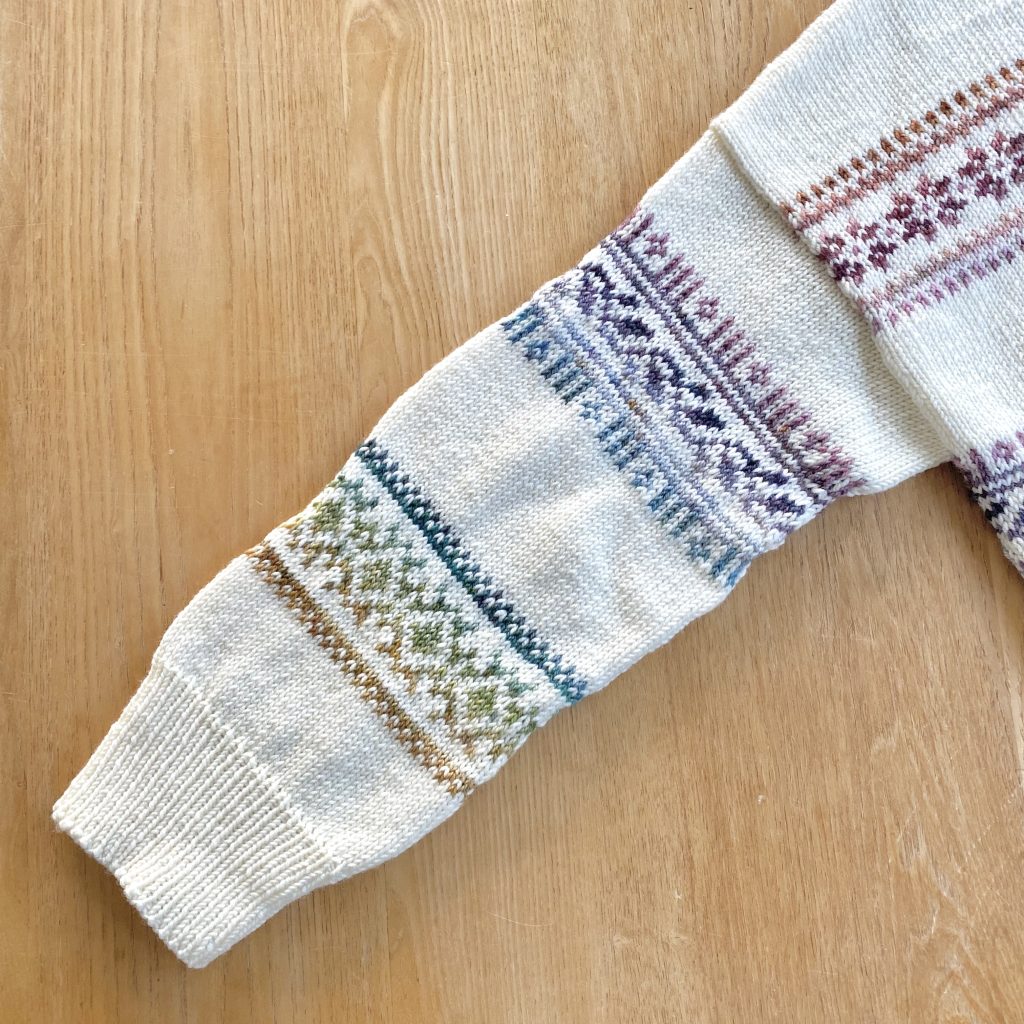
I also think that, particularly on the sleeves, I should maybe have sized up my needles for the colourwork panels, because they do pull in slightly (again… maybe I could stretch this?).
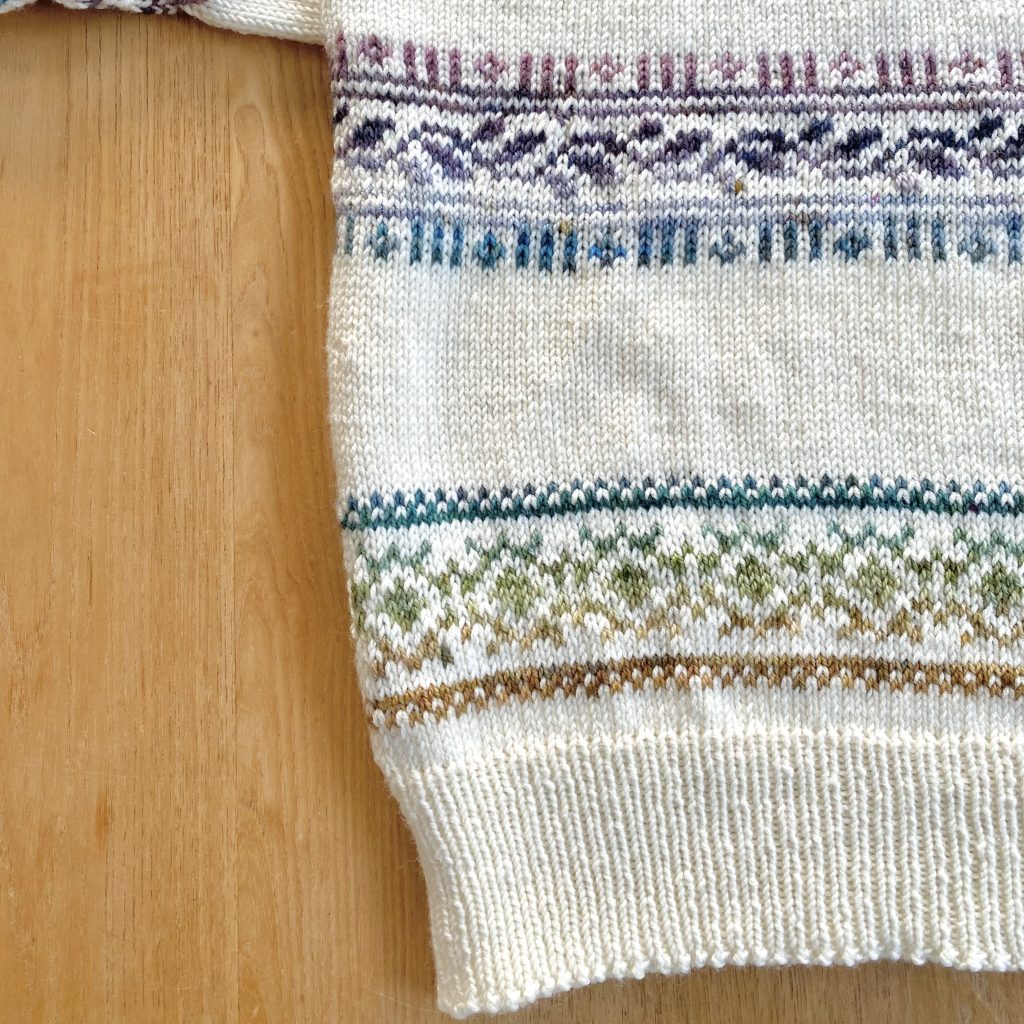
However, I do think that the sleeve decreases are emphasising the problem, because the colourwork bands on the body are much less ‘pulled in’. Perhaps it was something to with how I wove in all those ends on the smaller circumference of the sleeves…?
To end on a positive note, though, one thing that I really do love about the fit of this jumper is that it sits very evenly on my body. I sometimes struggle with the hemline of jumpers looking a bit uneven, because my chest pulls the hemline up at the front, while the back stays low. I don’t have that problem with this jumper, which I’m so pleased about! I had considered this problem before I started, but I couldn’t think of a way to work around that (with short rows, bust shaping etc.) without getting in the way of all of the colourwork elements, so I opted to just make it as instructed and hope for the best, which is what I got in the end!
Lessons Learned
Time to look back over the last 8 weeks of knitting and pull out the biggest lessons I’ve learned! Even if I’m not 100% happy with how a project turns out, I always learn something and I know I’m becoming a better knitter with every project (and mistake) I make. I try to remind myself of this often, because I am someone who really hates making mistakes!
Obviously, this time around, the most important lesson I’ve learned is to be extra careful when gauge swatching. Measure multiple times! Ask for second opinions! Make clear notes and write them down for future reference, so you have a better foundation for figuring out problems later on! Don’t stretch your swatches! Read the right pattern! Periodically check your gauge as you go! Then, cross your fingers and send a prayer to the knitting gods!
Gauge has a huge impact on fit (as we’ve all learned today), so mastering gauge swatching feels like it will be a really important step for me on my knitting journey. In all honesty, I’ve always struggled a little with getting my knits to fit really well, so that’s definitely something I’d love to get better at.
On a more technical level, while making this sweater, I learned a lot about making folded neckbands (which I think are very cool)! I also expanded my knowledge of colourwork charts a bit, because the ones in the Porcelain Sweater pattern did contain some notation that I had never seen before. Of course, I also furthered my knowledge of how to construct a knitted sweater! I haven’t made a huge number of jumpers in the past, so this is still relatively new ground for me, but I’m getting more and more confident with each one I make.
Final Thoughts
And with that, my Porcelain Sweater x Bridgerton Advent project comes to an end!
I’ve really enjoyed working on this project (even if I didn’t enjoy every step of the process quite as much…). I loved knitting the colourwork bands, watching the gradient of colours develop and using my treasured Advent yarns for such a special, exciting project!
I also really enjoyed sharing this project with you in a longer format— it’s a bit different to how I’ve done things in the past, but I think it’s a good way of keeping my slow, mindful hobbies… well, slow and mindful! It’s also nice to share all of the ups and downs that come with creating something— I’m not a super advanced knitter and I’m still learning, so I am forever making mistakes (much to my chagrin), and I think it’s nice to show the reality of that online.
For the next month or so, I’ll be working on smaller, festive projects— ones that I cannot wait to share with you in December(!), so there won’t be any WIP Wednesday posts in November.
However, if all goes according to plan, WIP Wednesday will be back in December, because my next ‘big’ knit is going to be a festive jumper that I want to knit in the build up to Christmas, during Advent. This will be my first time working on a designated ‘Advent‘ project and I’m really excited about it! I probably won’t get the whole sweater done before Christmas (I mean, this one took me 8 weeks!), but it’ll be fun to see how far I can get! The next jumper is much less experimental than this one, but I’m really excited about the finished product (and I promise that I’ll triple check my gauge swatch this time around…).
I can’t wait to share the moodboard, pattern and yarn with you!
If you're interested...

You can purchase the Porcelain Sweater pattern by LE KNIT by Lene Holme Samsøe on Ravelry here.

You can find the Ravelry project page for my Porcelain Sweater here.

You can check out Castle View Yarns here.
Gemma
xxx