It’s Day 5 of Wedding Cake Week and, with all three cake tiers made and assembled, we’re onto the decorations now!
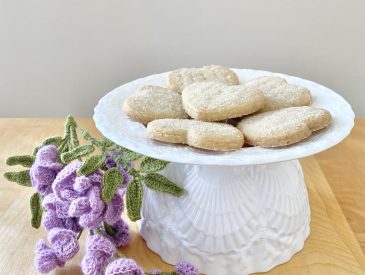
As I mentioned in the other Wedding Cake Week posts, the decoration on these cakes was really clean and minimal: just a handful of pressed, edible violas on the top of each cake and two gingerbread bride & groom toppers on the middle, coffee tier.

In today’s post, I’ll be sharing how I made these gingerbread toppers, including the full gingerbread recipe that I used (which is a great recipe for a purpose like this, because it lasts for so long: no stale gingerbread here!).
A little gender-related disclaimer at this point: throughout this post, I have referred to the gingerbread figure with trousers as the ‘gingerbread man’ and the gingerbread figure with a skirt as the ‘gingerbread woman’: this is just for clarity, because, at the wedding that this cake was for, that is an accurate representation of the bride and groom and what they wore! Obviously, you can make a bride wearing trousers, a groom wearing a dress, two grooms, two brides, or just two gingerbread people wearing whatever you’re capable of recreating in icing!
Table of Contents
- The Idea & Design
- Making the Gingerbread Dough
- Baking the Gingerbread People
- Decorating the Gingerbread Toppers
- Assembling the Toppers
- Attaching the Toppers to the Cake
- Recipe
The Idea & Design
Though not particularly in vogue these days, traditional wedding cakes often feature a little pair of bride & groom figurines sat on top (though I believe this is more of an American tradition than a British one?). I guess this was just to remind guests that they were, in fact, at a wedding.
When I first started sketching out some designs for this cake, I had the random idea to replicate this tradition using edible figurines made of gingerbread, instead. Lucky for me, the bride & groom in question (my brother and new sister-in-law) loved the idea, so I got to run with it!

I really wanted to lean into the gingerbread man aesthetic, rather than the bride-and-groom aesthetic, with these toppers, so, while both have a little nod to the occasion in their individual decoration, I knew I wanted to keep the icing pretty minimal and gingerbread-esque. In the end, I gave them both basic little faces (two eyes and a mouth, standard stuff), then gave the groom a little bow tie and some buttons, and the bride a bouquet of flower paste daisies (the easiest of the flowers to make out of sugar paste).
I was also aware that, at the venue, the cake could be viewed from all around, so I didn’t want the back of the gingerbread people to look ugly. In the end, I opted to sandwich two identical gingerbread bride/grooms together (much like an Oreo), so that the cake looked the same from the front and the back.
Making the Gingerbread Dough
I decided to use the ‘gingerbread’ dough recipe that my family has used every year for our gingerbread house, because I know that it holds up really well over time and can sit out at room temperature for as long as needed without going stale. I say ‘gingerbread’ in inverted commas because the recipe we use isn’t actually gingerbread, but this Finnish Spiced Biscuit recipe. I did want the biscuits to have more of a classic, ‘gingerbread’ flavour though, so I adapted the base biscuit recipe to use a different combination of spices, so that we could have the best of both worlds.

I actually made a lot of gingerbread dough, because I was making loads of gingerbread people as the wedding favours, as well as the cake toppers! (If I’m being completely honest, I currently still have a double batch of dough in the freezer after a little… quantity miscalculation… so, if anyone fancies some gingerbread men, hit me up, I guess?). For the toppers themselves, you actually need very little dough: just enough to cut out 4 people (2 brides and 2 grooms), though I recommend making extra to practise your decoration on!
Baking the Gingerbread People

For the gingerbread grooms, I just used a regular, gingerbread man cookie cutter and baked them as they were.
For the gingerbread brides, I had to get a little creative. I went back and forth over how to decorate the gingerbread brides, because I knew I didn’t want anything too fussy or elaborate and I also knew that, every year, when I decorate the gingerbread people for our Christmas gingerbread house, it’s decorating the gingerbread women that causes me the most grief! I guess it’s just very hard to make a gingerbread dress look good. Eventually, I decided to skip the dress and give the gingerbread bride a bouquet of flowers, instead, which felt much more achievable!
I did, however, quickly realise that the gingerbread bride’s arms would be in the wrong position for holding a bouquet of flowers. After a successful trial, I found that I could gently bend the arms of the cut out gingerbread cookies inwards before baking them. They come apart slightly when baked, so you can afford to press them quite close together in the middle, but they do bake in that position, which was exactly what I needed.
The only thing you have to be slightly mindful of is that, if the gingerbread dough is a bit dry at this stage, it can break/crack as you bend it inwards. This isn’t the end of the world: the cookies will still keep the shape, they’ll just have slightly messier edges. I recommend doing the gingerbread women first, while the dough is still at its most pliable, and bending the arms of each one immediately after cutting them out, to minimise the likelihood of this happening.
Decorating the Gingerbread Toppers
Making the Bouquet
Making the daisies for the bouquet was super easy: I just rolled out some sugar florist paste super thinly, then used a small, flower-shaped cutter to stamp out some little flower shapes. I used these plunge cutters for this (specifically, the second smallest one), because it makes getting the tiny flowers out super easy and the little pointed plunger helps to give the flowers some definition.

I then tinted a small amount of royal icing yellow using Colour Mill’s Aqua Blend formula in the shade Yellow (if I’m being honest, I was aiming for a slightly more subtle shade of yellow, but we live and learn), put it into a piping bag, fitted with a very fine, round tip, and piped little dots of colour into the centre of each daisy. Royal icing doesn’t contain oil, so I find that the Aqua Blend formula gives the best, most even colour.
I let the flowers dry out and harden up overnight at room temperature, then I was ready to use them in my decoration!
Piping on the Decorations
I used royal icing to decorate (and assemble) these gingerbread toppers, because it hardens up completely once set, so there was less likelihood of any unwanted smushing in transit. Royal icing is deceptively easy to make: you literally put the icing sugar, egg white and lemon juice in a bowl and whisk (using an electric mixer, if you value your arms), until its smooth and thick. That’s it!
Once the icing was made, I put it into a piping bag fitted with a small, round piping tip, ready to pipe on the little gingerbread faces and accessories.
If you have a piping tip coupler, I’d recommend using it for the white icing here. You’ll need to use two different tips for the white icing on these cookies: a fine round tip and a slightly wider round tip, so a coupler makes things much easier! If you don’t have one, you can just use two piping bags instead.

I definitely recommend having a few gingerbread people to hand to practise on, so that you can make sure you’re happy with the technique and your designs before you get to work on the real ones.

For the gingerbread grooms, I piped a simple face (as I said, just two dots for eyes and a curved line for the smile), then added a little bow tie (though my brother didn’t wear a bow tie, so I suppose this was just artistic license) and three dots for buttons.
For the gingerbread brides, I piped the same face, then added a generous splodge of icing to the space between the two bent arms and carefully pressed three of the little sugarpaste daisies into that, to make the bouquet. That was it! Simple, but I think it was very effective.
I let the gingerbread people sit out overnight, so that the icing had a chance to harden before I attempted to stick the two halves together (again, to limit the risk of any unwanted smushing). I sealed the piping bag up using some food clips and placed it into a resealable bag (with the extra air removed before sealing), so that it wouldn’t dry out overnight and I could use it again the next day.
Assembling the Toppers
To ensure the toppers stayed upright on the cake, I decided to sandwich a cake pop stick between the two cookie halves, which I could push into the cake at the venue to keep everything secure. Ironically, this time around, the process was super easy for the gingerbread bride and… less straightforward for the gingerbread groom!

For the bride, I just placed a single cake pop stick down the centre of her body, because her skirt conceals it at the bottom. For the groom, I had to place two separate cake pop sticks, one down each leg. It’s important that the cake pop sticks are parallel, to distribute the pressure evenly, so I lined them up from the bottom point of each foot to the corresponding shoulder. With the cookie cutter I used, there was just enough space for this, so it worked out well.
To assemble the toppers, I started by piping a (pretty) thick outline of icing just inside the perimeter of one half of the gingerbread bride/groom (on the undecorated underside, of course), being careful not to go too close to the edge, as the icing does squish outwards a little as you sandwich the cookies.
To protect the icing decorations on the other side, I set the gingerbread cookies face down on some gently crumpled kitchen paper while I worked.
I then filled in the outline with more icing, before inserting the cake pop stick(s), swivelling them gently to ensure they were completely coated in icing and sandwiching the other gingerbread half on top, making sure they were nicely aligned. Again, I set them aside overnight (still sitting on the crumpled kitchen paper), to give the icing a chance to harden up and set.
Attaching the Toppers to the Cake
As I mentioned, I placed the toppers on the cake at the venue, just so that it was one less thing to worry about on the journey down.
I transported the toppers in sealed plastic food containers (leftover from the copious takeaways I needed to get me through the past few months). I lined each container with the gently crumpled kitchen paper, then placed the toppers inside, followed by another layer of kitchen paper, making sure that no pressure was placed on the toppers when the lid was shut. The kitchen paper protected the decorated surfaces and also prevented the toppers from moving around too much during transit.

At the venue, after I had transferred the coffee cake to its stand, I lined the toppers up on the surface, pressing down gently so that the cake pop sticks made slight indentations in the crusted buttercream beneath them. I then used a wooden skewer to poke holes where the cake pop sticks would go, before gently pushing the gingerbread toppers in.
The reason I used the skewer first was to minimise the force I needed to apply on the gingerbread toppers: they’re pretty sturdy, so I don’t think they’d break, but I wasn’t about to risk it!
I pushed the gingerbread toppers right in, so that you couldn’t see any cake pop stick (or, at least, this was the intention— the photos beg to differ!) and so that it looked like the gingerbread bride and groom were just stood right on top of the cake, then I exhaled forcefully and thanked the gingerbread gods that everything had gone successfully.
And that, everybody, is the story of how I made the bride and groom gingerbread toppers for this wedding cake (and ended up with a ridiculous amount of gingerbread dough in my freezer). Hope you enjoyed it!
Recipe

Gingerbread Wedding Cake Toppers
Equipment
- 1 gingerbread woman cookie cutter
- 1 gingerbread man cookie cutter
- 2 baking trays lined with greaseproof paper.
- 1 plunger flower cutter (see Note 1).
- 2-3 piping bags (see Note 2).
- 1 very fine, round piping tip (see Note 2).
- 1 small, round piping tip (see Note 2).
- 1 medium round piping tip (see Note 2).
- Cake pop sticks
Ingredients
For the gingerbread dough:
- 140 g unsalted butter, softened.
- 100 g golden caster sugar
- 1 egg
- 1 tsp bicarbonate of soda
- 100 ml golden syrup
- 4 tsp ground ginger
- 2 tsp ground cinnamon
- 1/2 tsp ground nutmeg
- 1/4 tsp ground cloves
- 1 pinch fine sea salt
- 1 lemon, zest only.
- 450 g plain flour, sifted.
For the royal icing:
- 200 g icing sugar, sifted.
- 1 egg white
- 1 tsp lemon juice
For the sugar daisies:
- 10 g white sugar florist paste (see Note 3).
- Yellow food colouring (see Note 4).
Instructions
- Cream the butter and 50g of the sugar together until pale and fluffy.
- In a separate bowl, whisk the egg with the remaining 50g of sugar until thick and pale (the ribbon stage).
- Mix the bicarbonate of soda into the golden syrup, then pour into the butter mixture and mix well. Add the egg mixture to the butter mixture and mix again.
- Add the spices, salt, lemon zest and flour and mix thoroughly to form a dough.
- Wrap the dough in clingfilm and place into the fridge to chill for 30 minutes.
Cut out and bake the gingerbread people:
- Preheat the oven to 190°C (conventional oven, not fan).
- Cut the chilled dough in half. On a lightly floured surface, roll half of the dough out to the thickness of a £1 coin.
- Start by cutting out the women. Stamp out the shapes using the cookie cutter, then gently bend the arms inward, pressing down gently where they meet the centre of the cookie to secure them. Carefully transfer to a baking tray, lined with greaseproof paper.
- Bake the gingerbread brides in the preheated oven for 6-8 minutes, until golden. Allow to cool on the tray for 10 minutes before transferring to a wire rack to cool completely before decorating.
- Roll out the remaining half of the dough and use to cut out the men, leaving the arms as is this time around. Bake and cool in exactly the same way as the brides.
- Gingerbread people can be made in advance. Store in airtight container until ready to decorate.
Make the royal icing (see Note 5):
- Place the icing sugar, egg white and lemon juice in a large bowl. Whisk with an electric mixer until thick and smooth.
Make the sugar daisies:
- Dust a clean work surface with icing sugar. Roll out the florist paste as thinly as you can, then use the plunge flower cutter to cut out lots of little flowers.
- Tint a small amount of the royal icing using the yellow food colouring, then transfer to a piping bag, fitted with the smallest round tip.
- Pipe a small dot of yellow icing into the centre of each flower, then set aside to dry and harden overnight.
Decorate the gingerbread toppers:
- Place the white royal icing in a piping bag fitted with a piping tip coupler (see Note 2) and a small, round tip.
- Pipe smiley faces on all of the cookies, then a bow tie and three buttons on the grooms. On the brides, add a generous amount of icing to the space between the hands, then gently press three of the dried sugar daisies onto the icing, to form a bouquet.
- Set the gingerbread people aside at room temperature to harden before assembling.
Assemble the gingerbread toppers:
- Place half of the gingerbread people, decorated side down, on some lightly crumpled kitchen paper (this will help to protect the decorated surface).
- Switch out the piping tip on the bag of white royal icing to a slightly larger round tip (see Note 2), then use to pipe a neat outline just inside the perimeter of the shape (don't go too close to the edge, as the icing will squish out a little when you sandwich the cookies).
- Fill inside the outline with more icing, then add one cake pop stick down the centre of the brides and two down each leg (making sure the two sticks are parallel to each other) of the grooms. Gently rotate the sticks to cover them in the icing.
- Gently press another cookie, decorated side up this time, on top of the icing, to make a gingerbread sandwich. Leave the cookies on the kitchen paper overnight (at room temperature) so that the icing sets and hardens.
Attach the toppers to the cake:
- When you're ready to attach the toppers to the cake, line them up on top of the cake and press down just enough to make indents of the cake pop sticks in the buttercream.
- Use a skewer to pierce the cake, using the indents as a guide, then gently push the toppers into the cake, until the gingerbread people are sitting flush with the top of the cake and you can't see the cake pop sticks.
Notes
- I used the second smallest size from this pack.
- If you have a piping tip coupler, I would recommend using it here for the white royal icing. You’ll need to pipe the white icing using two sizes of round tips, so a coupler makes it really easy to switch out the tips. If you don’t have a coupler, just use two separate piping bags: I would suggest putting about 1/3 of the icing in the bag with the smaller tip and 2/3 in the bag with the larger tip.
- Sugar florist paste works really well for delicate flowers like this, because it’s extra stretchy and dries extra hard. I used this brand.
- I used Colour Mill Aqua Blend in the shade Yellow. Water-based food colourings give the best results when working with royal icing.
- You’ll need this batch of royal icing over the course of a few days (the decorations need to set in between stages!). You can keep the icing from drying out by sealing it inside the piping bag and/or a resealable food bag. Just make sure to clip the ends of the piping bag, using a food clip and remove any excess air from the food bag.