
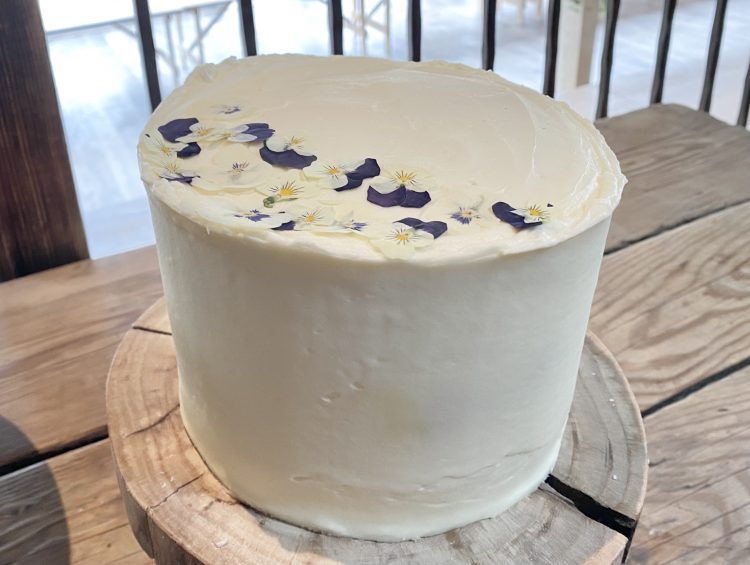

It’s time to talk about the final tier of the wedding cake I made for my brother’s wedding: the Lemon Tier!
The smallest tier of the wedding cake is a fluffy, lemon sponge, filled with lemon, American-style buttercream and homemade lemon curd, then iced with more buttercream and decorated, just like the other two tiers, with some pressed edible violas.
As delicious as this cake is, I do feel like I could make an even more wedding-friendly lemon cake recipe, just because this was the tier that gave me the most stress! It is the fluffiest of the cakes, so it does dry out more quickly than the other two tiers, and it wasn’t quite as stable as I would have liked (a result of poor assembly technique + the addition of lemon curd, I believe), so, for a wedding cake (not necessarily for a regular ol’ lemon cake, for which this is excellent!), I do think there’s definite room for improvement!
Table of Contents
- A Bit of Recipe Backstory
- Making the Lemon Curd
- Making the Cake Layers
- Making the Lemon Buttercream
- Assembling the Lemon Cake
- Decorating the Lemon Cake
- Recipe
A Bit of Recipe Backstory
As you’ll have seen in the intro post to this series, I will be doing a whole post on how I went about developing these recipes, but, just like I did with the other two tiers, I wanted to share a little bit of lemon-specific backstory here too!

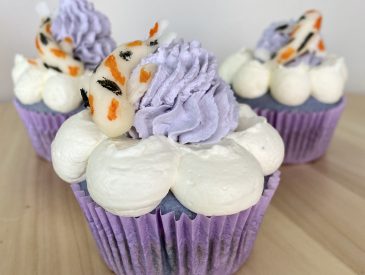
Last year, I embarked on a Fondant Fancy-making journey (which, unfortunately, is yet to come to fruition: my struggles with pouring fondant persist). During that process, I accidentally made the most delicious, fluffy and light lemon cake (an adaptation of this recipe from My Baking Madness), so I figured that recipe would be a good place to start!
Naturally, I had documented the wrong recipe in my research, so the first few trials of this cake were completely different to what I remembered (and also vaguely unpleasant— it was not a good time). Luckily, in a frustrated haze, I suddenly realised that the recipe I was using was not, in fact, the recipe that I thought I was using, so I was able to switch back and save countless lemons from being juiced in vain.
With the right recipe, things started going much more smoothly! I was happy with this cake, but, as I mentioned in the intro, while it’s a delicious lemon cake, I do think I could make a moister lemon cake with a tighter crumb that would be more fit for a wedding/event cake. However, time was ticking (and I was already getting a little sick of lemons by this point), so I decided to go with it.
Luckily, I have my lemon curd recipe pretty much down, so that didn’t need too much fiddling with. The only thing I did do was make it a little thicker and less runny by using 1 egg + 1 egg yolk (as opposed to using all whole eggs, which is my usual method), just for structural purposes.
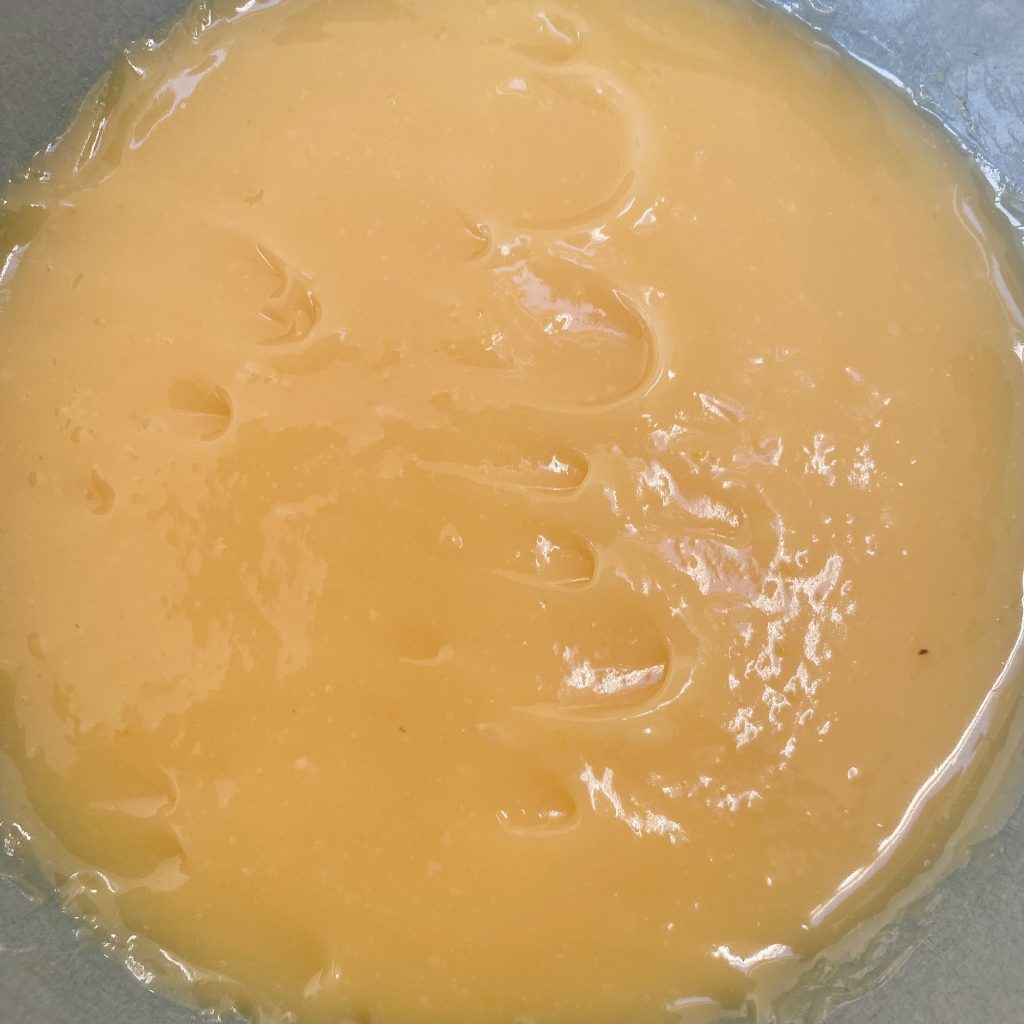
Making the Lemon Curd
I’ve shared a recipe for lemon curd here on the blog before, as part of my Lemon and Elderflower Butterfly Cakes recipe. The process for this curd is exactly the same, but I omitted the elderflower, doubled the recipe quantities and replaced one of the whole eggs with an egg yolk, to make the curd a little thicker, in an attempt to help make the cake more stable.
You don’t actually need a doubled recipe quantity for this cake: a single batch would’ve been plenty, but I think curds made with just yolks can taste quite eggy, so I wanted to use 1 whole egg + 1 yolk (thus, needed to make a double batch). Luckily, lemon curd will keep in the fridge for a little while and is very delicious on toast, so it didn’t need to go to waste!
The lemon curd was the first thing I made for this cake, because it does keep well in the fridge, I was able to make it in advance and save myself a job closer to the date.
Making the Cake Layers
Next, it was time to make the cake layers! For this sponge, I used the reverse creaming method, which is great for lemon cakes because it can take a greater volume of liquid, so you can get a good amount of lemon juice into the batter, as well as the zest, for extra flavour. This method does also give a slightly denser crumb than your typical sponge, which was just what I wanted (even if I now feel that I could have taken this further!).
The only thing I did find with this cake recipe is that it does have a tendency to stick to the sides of the tin. To combat this, I used my DIY Cake Release, brushing it all over the base and sides of the tin before lining the bottom with a circle of greaseproof paper. While this definitely helped, it still wasn’t perfect, so you do need to be very careful when taking these cakes out of the tin.
Also, very joyously (particularly after the last 2 tiers), as long as you have 3, separate, 6-inch round tins, you can bake all 3 layers at the same time in a regular oven (which is actually extra helpful, because this recipe does not scale down very easily!).
Photo Tutorial: Lemon Cake Layers
To make the lemon cake layers, start by preparing 3 x 6-inch tins, brushing them all over with DIY cake release and adding circles of greaseproof paper to the bottoms. Preheat the oven to 160°C (conventional setting, not fan-assisted).
I also recommend weighing your empty mixer bowl at this stage: that way, you can weigh the batter super easily later on, so that you can divide it evenly between the three tins.

Place the flour, cornflour, caster sugar, baking powder, baking soda and lemon zest into the bowl of an electric mixer, fitted with the paddle attachment.

Mix the dry ingredients on low speed until combined (check that the lemon zest is pretty evenly distributed, then you’re good to go).

Add the softened butter to the bowl and continue to mix on low speed until the mixture resembles fine breadcrumbs (there should be no large lumps of butter remaining).

This coats the flour in the butter, protecting it so that, when you need to beat the mixture later, the gluten in the flour won’t develop as much, so you can get a super fluffy cake without that tough, over-mixed texture.

While the butter is incorporating into the dry ingredients, whisk together the milk, sunflower oil, eggs and lemon juice in a large jug until evenly combined.

Pour the milk mixture into the bowl of the mixer, still running on low, in a slow, steady stream until it has all been added.

Turn the mixer speed up to medium and beat the batter until it is light, fluffy and smooth: about 30-60 seconds.

Divide the batter between the prepared tins. To do this evenly, weigh the batter as a whole (making sure to subtract the weight of the mixing bowl that you measured earlier!), divide that value by 3, then fill each tin with that amount of batter (it should be roughly 375g per tin, but it’s best to weigh the batter yourself to ensure perfectly even layers!).
Smooth the tops of the cakes, then bake them, all on the middle shelf, in the preheated oven for 45-50 minutes, or until the tops are golden brown and a skewer inserted into the centre of each cake comes out clean.
Allow the cakes to cool completely in their tins before (carefully) running a palette knife around the edge of the tin, levelling the cakes (using a large, serrated palette knife) and turning out onto wire racks.
I like to level the cakes in the tins, using the top edge of the tin as a guide, to ensure that all of the cakes are the same height. To do this, hold the palette knife horizontally, flush against the top of the tins. Use a gentle sawing motion to score right around the circumference of the cake, then gently saw back and forth across the whole surface of the cake. This ensures that you get an even, precise cut.
Making the Lemon Buttercream
The final component to make is the lemon buttercream. This is a super basic American-style buttercream, flavoured with lemon juice for a sharp, lemon-y flavour. I wanted this icing to be really smooth and even in appearance, so I opted not to include lemon zest in the buttercream, but, don’t worry, it’s still super lemon-y!
Unlike the previous two cakes, this amount of buttercream is small and manageable enough that you can make it in a single batch (thank goodness!).
Tutorial: Lemon Buttercream
Again, just like with the coffee buttercream, I completely forgot to photograph this stage— I’m so sorry! It is exactly the same process as the chocolate buttercream from the largest tier of the cake though, just minus the cocoa powder and with lemon juice as the primary liquid ingredient, so you can follow along with that tutorial if you would like!
To make the lemon buttercream, place the softened, unsalted butter in the bowl of a stand mixer, fitted with a paddle attachment.

Beat the butter on medium-high speed, pausing every now and then to scrape down the sides of the bowl, until it is smooth, fluffy and significantly paler in colour: this will take about 3-5 minutes.
While the butter is being whipped, you can sift the icing sugar into a large bowl (you might need to do this part in two batches, if you don’t have a bowl big enough, because icing sugar fluffs up a lot when it is sifted).
When the butter is ready, turn the mixer speed down to low, then add half of the icing sugar, a spoonful at a time. This may sound tedious, but it prevents icing sugar from getting all over you/your kitchen and ensures that the icing mixes evenly, so it is important!
Once you’ve added half of the icing sugar, you can add the lemon juice. With the mixer still running on low, pour in the juice in slow, steady stream, until it has all been added.
Now, you can add the remaining half of the icing sugar, still working a spoonful at a time, until it is all incorporated.
If the icing is looking very stiff at this point, don’t worry. It will be important later that the buttercream has a good amount of structure and hold to it!
Turn the speed up to high and beat the icing until it is light and fluffy.
Transfer a spoonful of the icing to a microwave-safe bowl and heat on the high setting for about 10-15 seconds, until melted. Give this a quick mix, then stir it back into the rest of the icing by hand. This will smooth out the icing and, if the icing has split slightly after the addition of the lemon juice, will bring it back to an even consistency.
Assembling the Lemon Cake
With the lemon curd filling, cake layers and buttercream made and ready, it’s time to assemble! I’ll be sharing a detailed tutorial for how I assembled these layer cakes tomorrow, so be sure to check that out.

To assemble this, particular cake, I used the following equipment:
- 6-inch, circular cake drum.
- 8-inch, square cake board.
- Adhesive paper stickers (I used these, folded in half to make them ‘double-sided’ and easy to cut through with a cake lifter, but any thin, temporary adhesives will work).
- Cake lifter.
- Cake turntable.
- Piping bag and large round piping tip (I used a #1A tip).
- Offset palette knives (I used a 4-inch one for this tier).
- Cake dowels (I used these ones).
- Icing smoother (I used this one by Wilton).
- 8-inch, heavy duty cake box.
Just like the other two tiers, I assembled the lemon cake directly onto a cake drum that was the exact same diameter/shape as the cake itself (and which I had temporarily adhered to a thinner, square cake board, the same size as the cake box I would be transporting the cakes in, to prevent it slipping in transit). I layered up the cakes with buttercream and lemon curd filling, added 4 cake dowels, applied a crumb coat then added a thick, smooth layer of icing all over the cake.

The lemon curd filling does make this cake much less stable than the other two tiers, so do be particularly careful when assembling it, making sure to give it plenty of time to chill in between stages. There’ll be more detailed instructions for this in tomorrow’s post!
Then, the cake was done! I set the cake aside at a cool room temperature until it was time to transport it.
Decorating the Lemon Cake
Just like with the other two cakes, the lemon tier was decorated with a simple arc of pressed, edible violas. On all of the tiers, I used a combination of the ‘Cream‘ and ‘Midnight Blue and Cream‘ colourways from Nurtured in Norfolk.

I added the flowers at the venue, on the morning of the wedding, to ensure they didn’t rehydrate too much and go limp (and so that there was one less thing that could get damaged on the way there!). I just laid the flowers out on top of the cake, in a nice arrangement. Because the buttercream was set and had formed a crust, it was easier to rearrange the flowers until I was completely happy with the layout, before I used a small amount of leftover lemon icing on the blunt end of a skewer to stick each flower down individually.
Recipe

The Lemon Tier (Wedding Cake Week #3)
Equipment
- 3 6-inch, circular cake tins (see Note 1).
- 6-inch, circular cake drum
- 8-inch, square cake board (See Note 2).
- Temporary adhesives (I used paper adhesive stickers)(see Note 2).
- Cake lifter
- 1 piping bag
- #1A piping tip (or similar, large, round nozzle)
- Offset palette knife
- 4 cake dowels
- Icing smoother (see Note 3).
Ingredients
For the lemon curd:
- 1 whole egg + 1 egg yolk
- 150 g white caster sugar (see Note 4).
- 2 lemons, zest and juice.
- 110 g unsalted butter, diced.
For the lemon cake layers:
- 2 batches DIY Cake Release (see Note 5).
- 260 g plain flour
- 20 g cornflour (see Note 6).
- 280 g caster sugar (see Note 7).
- 2 tsp baking powder
- 1/4 tsp bicarbonate of soda
- 170 g unsalted butter, diced and softened.
- 180 ml whole milk
- 70 g sunflower oil
- 2 eggs
- 2 lemons (zest of both, juice of 1).
Lemon buttercream:
- 300 g unsalted butter, softened.
- 600 g icing sugar, sifted.
- 2 lemons, juice only.
- Splash of milk, if necessary.
To decorate
- Edible, pressed violas (see Note 8).
Instructions
Make the lemon curd:
- In a small saucepan, whisk together the whole egg, egg yolk, sugar, lemon zest and juice until thoroughly combined.
- Add the butter and place over a medium-low heat. Stir constantly with a heatproof spatula while the butter melts.
- Once the butter has melted, keep the pan over the heat and continue stirring until the curd becomes thick and smooth.
- Remove the curd from the heat, pass through a heatproof, fine mesh sieve then cover the surface of the curd directly with cling film and allow to cool to room temperature before placing into the fridge to chill and thicken up even more (at least 1-2 hours, but can be made a few days in advance).
- This recipe makes more lemon curd than you will need. Any leftovers can be stored in the fridge for 4-5 days.
Make the lemon cake layers:
- Preheat the oven to 160°C (conventional oven, not fan-assisted). Brush each cake tin with a layer of DIY Cake Release and line the base of each with a circle of greaseproof paper. Set aside.
- Place flour, cornflour, caster sugar, baking powder, baking soda and lemon zest into bowl of electric mixer, fitted with paddle attachment. Mix on low speed to combine.
- Add butter and continue to mix on low speed until mixture resembles breadcrumbs and no large pieces of butter remain.
- In the meantime, whisk together the milk, sunflower oil, eggs and lemon juice in a jug.
- With the mixer on low, pour the milk mixture into the batter in a slow, steady stream until it has all been added.
- Turn the mixer speed up to medium and beat the batter until it is light, fluffy and smooth: this will take about 30-60 seconds.
- Divide the batter evenly between the three prepared tins and smooth out the tops, then bake in the preheated oven for 45-50 minutes, or until the tops are golden brown and a skewer inserted into the centre of each cake comes out clean.
- Allow the cakes to cool in the tins completely, then carefully run a palette knife around the edges to loosen them. Level the cakes, then turn them out onto wire racks.
Make the lemon buttercream:
- Fit mixer with paddle attachment. Beat butter until smooth, pale and creamy (about 3-5 mins), scraping down the sides when necessary.
- With mixer on low, add half of the icing sugar to the butter, a spoonful at a time, pausing to scrape down the sides of the bowl as you go.
- With mixer still on low, pour lemon juice into buttercream in a slow, steady stream.
- Add the rest of the icing sugar with the mixer still running, a spoonful at a time.
- Once everything has been added, turn the mixer up to high and beat until fluffy and fully mixed (about 1 minute). Don't worry if the icing is quite stiff at this stage— it needs to be.
- Remove a spoonful of icing and microwave on high for 10-15 seconds to melt. Stir to ensure evenly melted, then mix into the rest of the icing by hand to smooth it out and return the icing to an even consistency if it has split a little from the lemon juice.
Assemble the cake:
- Secure the 6-inch cake drum to the 8-inch cake board (if using), using paper adhesive stickers (or other similar, temporary adhesive). Set on a turntable, with a layer of non-slip fabric in-between the turntable and the boards.
- Spread a dollop of icing onto the cake drum, then set the first, cooled cake layer on top, making sure it is level and centred on the drum. It should line up with the sides of the drum.
- Pipe an even layer of lemon buttercream all over the surface of the cake layer, making sure to go right to the edges. Use an offset palette knife to spread the icing out evenly, ensuring there is some overhanging icing at the edges.
- Pipe another circle of buttercream on top of that layer, just around the circumference of the circle. This will act as a buttercream 'dam' to keep the lemon curd filling contained.
- Spread a thin layer of lemon curd on top of the buttercream, making sure not to go over the edges of the buttercream 'dam'.
- Place the next layer of cake on top, making sure it is centred and level, then smooth off the excess icing around the sides and place the cake into the fridge to chill for 15 minutes before repeating the process all over again with the buttercream, curd and final cake layer. Place the whole cake back into the fridge for a further 15 minutes.
- Add 4 cake dowels, if using. Add a splash of milk to the buttercream to thin it out slightly, then use to apply a thin crumb coat all over the top and sides of the cake. Place back into the fridge to chill for a final 15 minutes.
- Apply a generous layer of icing all over the top and sides of the cake. At this stage, cover the sides of the cake drum with icing too. Smooth out the top, making sure to leave some overhanging icing all around the top edge, then use the icing smoother to smooth out the sides, moving the turntable, rather than the smoother for best results. The overhanging icing should be pushed upwards and inwards during this process, forming a nice 'lip' around the top of the cake.
- If needed, apply more icing to any uneven sections and smooth again.
- Once happy with the finished cake, set aside at cool room temperature to firm up, until ready to eat/transport.
Decorating the cake with pressed flowers:
- As close to serving as possible, lay the pressed flowers onto the surface of the cake (on which the buttercream is now hardened), making sure you are happy with the arrangement before sticking them down. Use a small amount of icing on the end of skewer to stick down each flower individually.
Notes
- I use the 6-inch sandwich tins from Silverwood.
- You can skip the extra board/adhesive if you don’t need to transport the cake— these just make it easier to manoeuvre the cake without worrying about it slipping/sliding.
- If you want smooth sides on a cake, you really do need to invest in an icing smoother. I use this one by Wilton.
- I like to use white caster sugar (not golden caster sugar) for this lemon curd, to ensure that it has a really bright, yellow colour, but either will work.
- This cake does tend to stick to the sides of the tin a little, so I recommend using my DIY Cake Release recipe to help it release cleanly.
- Cornflour gives this cake a slightly more tender, soft crumb. If you don’t have cornflour, feel free to use an additional 20g of flour instead.
- For the cake, I do use golden caster sugar, but white caster sugar would work too.
- I purchased the violas from Nurtured in Norfolk. On this cake, I used the colourways ‘Cream’ and ‘Midnight Blue & Cream‘.


I made this cake as a last minute wedding cake for my brother in law after trying out the chocolate cake. A perfect texture and flavour – I would recommend to anyone. I also made this as a vanilla cake by omitting the lemon!
Thank you so much, Annie! I’m so pleased you loved this cake and I hope the wedding went well. I’ll definitely have to try out the vanilla version!